


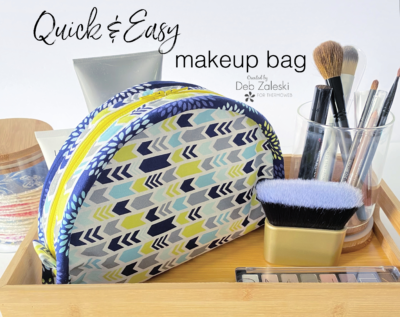
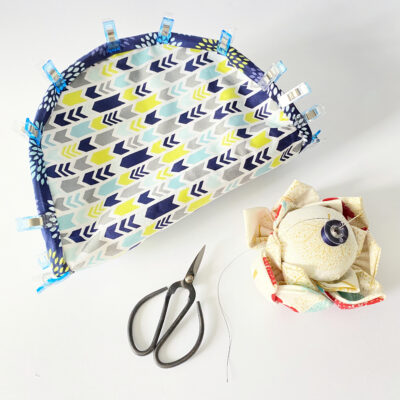
Before leaving on that summer vacation, take the time to make yourself a new cosmetic bag. When I designed this one I decided I wanted to use what I had at home like the zipper. The zipper actually dictated what fabric I should use. I wanted cheery yellow for a splash of color!
It’s time to get creative so gather your supplies and tools!
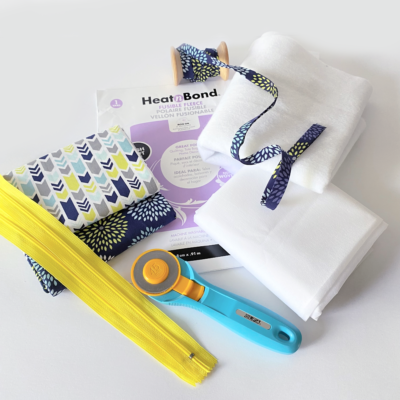
SUPPLIES:
- 2 fat quarters
- 1/2 yard HeatNbond Medium non-woven fusible interfacing
- 1/2 yard HeatNbond Fusible Fleece
- 16″ zipper or (2) 12″ zippers
- Coordinating thread
- Premade wide bias tape (or you can make you own like I did)
- PDF template Pouch for TermOweb
TOOLS:
- Iron & ironing board
- Rotaty cutter
- Self-healing mat
- Quilting ruler
- Sewing machine
- Scissors
GETTING STARTED:
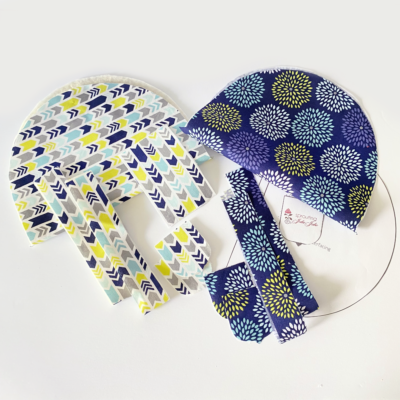
1. Print out the PDF template and cut out all the layers required in making this bag, including HeatNbond Fusible Fleece and HeatNbond non-woven interfacing. All the cutting requirements are available in the downloadable PDF Pouch for TermOweb. Be sure to transfer markings from the template to the pattern using a soluble fabric marker.
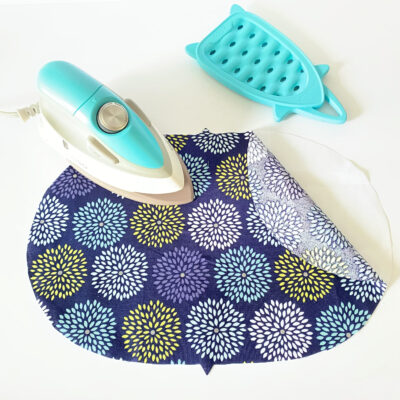
2. Fuse the Fusible Fleece to the main fabric (the outside fabric) and fuse the interfacing to the lining according to manufacturer’s instructions.
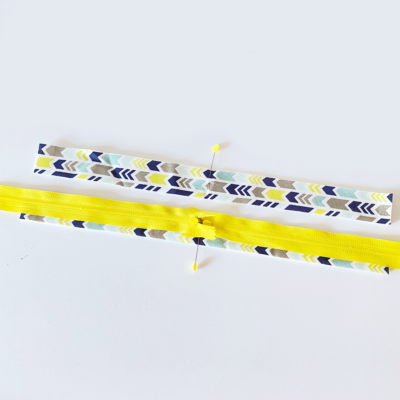
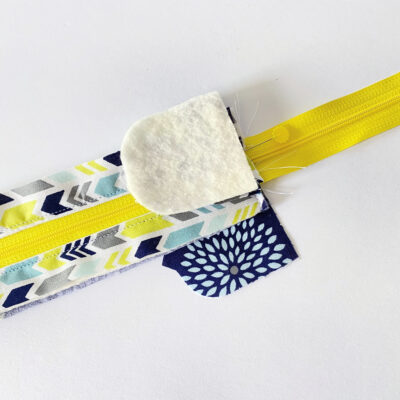
3. Using a pin or a fabric marker, mark the half way point on the top strips. You can do this even if you’ll be using only one zipper. This is to better position the rounded shape to the top strip. Lay the zipper right side down over the right size of the main fabric with the openings of the two zippers butting at the center of the top strip. Pin into place. If you’re only using one zipper just lay the zipper tape with right sides together.
TIP: if your zipper is too long it can be cut!
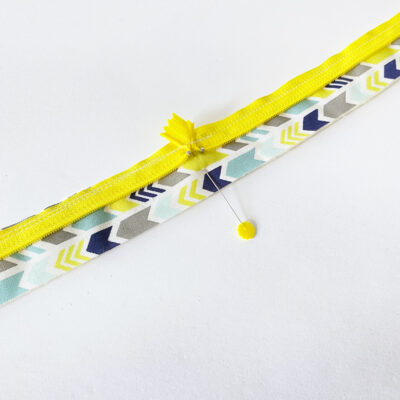
4. Baste the zipper tape to the main fabric. Now place the lining fabri with right side down to sanwich the zipper tape in the middle. Sew into place.
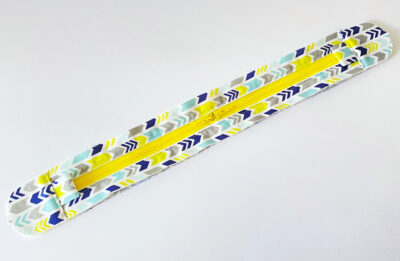
5. Fold the main fabric and the lining fabric back and top stitch about 1/4″ away from the folded edge.
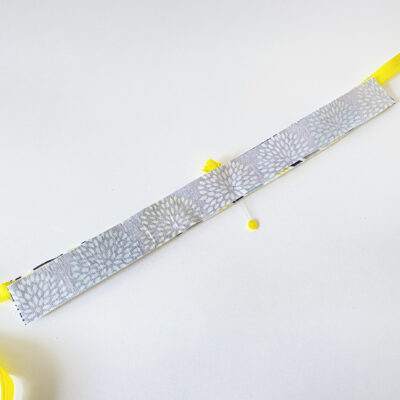
6. Repeat the process for the other top strip. Make sure to line up your zippers at the center on both sides. Set your work aside.
CREATING PULL TABS:
7. To creat the pull tabs, take the 3″ x 4″ piece of fabric and fold it in half length wise. Using a 1/4″ seam allowance stitch down the longest side.
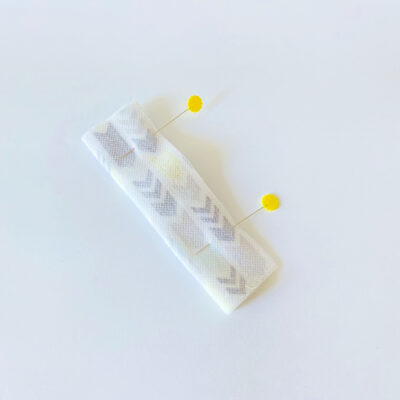
8. Press the seam open, and turn the piece right side out.
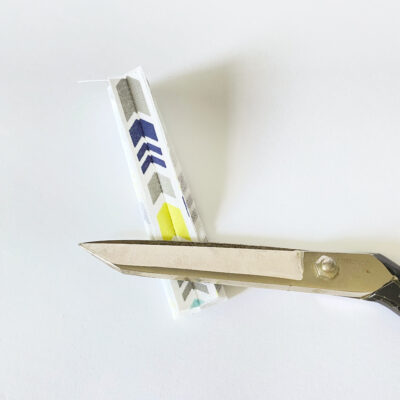
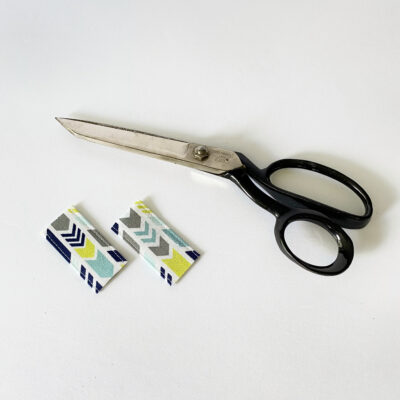
9. Cut the piece in two to create two tab units. Top stitch along the folded edges about 1/8″ away from the edge.
FINISHING OFF THE TOP STRIP:
10. Fold the pull tab in half so that the two raw edges meet and the seam is in the inside fold. Center over the zipper and baste into place. Repeat on the other side. Cut the tail ends of the zippers off if they are too long.
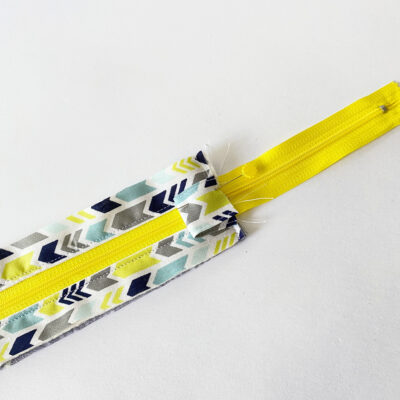
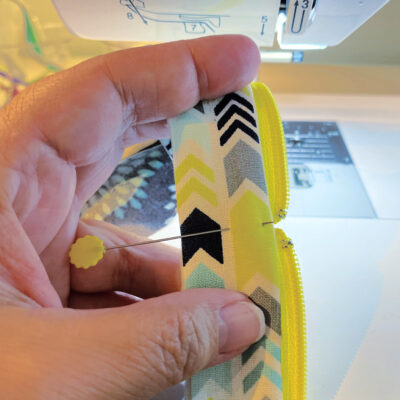
11. Layer the next pieces as follows: side piece lining face up, zipper with top strip face up and finally side piece face down. Line up the edge and sew into place. Repeat the process for the other side.
12. Fold the side pieces down and top stitch into place about 1/8″ from the edge.
13. Baste the main pouch to the lining pouch with wrong sides together. Line up the top strip to the main pouch wrong sides together (or lining in the inside) using the markings on the pattern pieces.
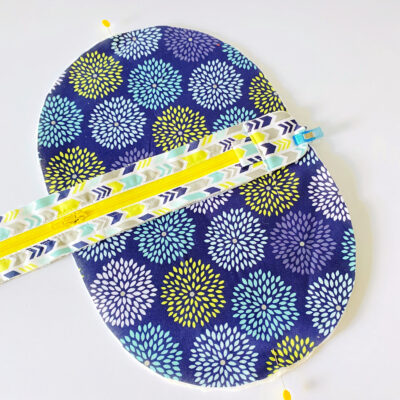
14. Gradually clip the perimeter of the pouch. You’ll end up with what my daughters like to call an oddly shaped fabric taco. Once satisfied that everything is in place and evenly distribute, you can now baste the top strip to the main pouch.
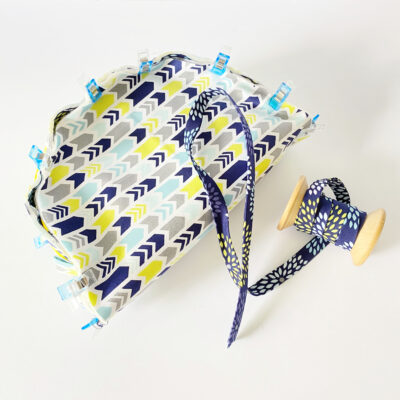
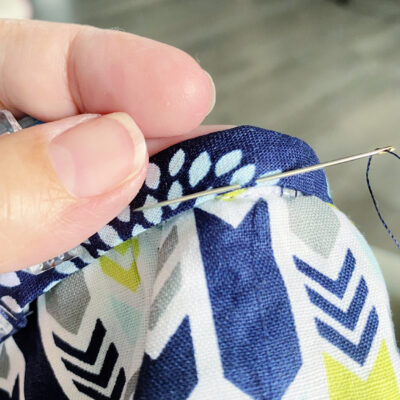
15. Stitch the bias into place on one side using a little more than a 1/4″ seam allowance.
FINISHING TOUCHES:
16. Clip into place. Finish off the second side of the bias by hand using a ladder stitch.
17. Now that you’re done, fill up your cosmetic bag with your beauty essentials and take that trip you’ve been planning!

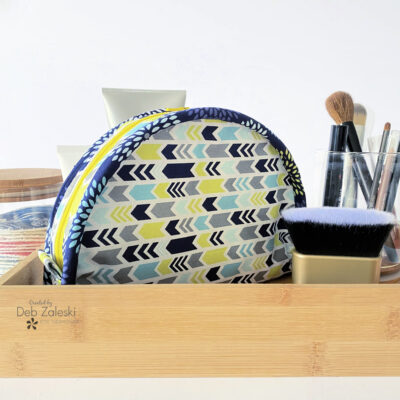

Thanks for joining me and I hope I’ve inspired you to create a new cosmetic bag for your beauty essentials. If you liked this project please let me know by posting a comment. And don’t forget to stop by my Instagram and say HI!