


Hello and welcome!
It’s Julia from Inflorescence Designs! I’m so joyful you are visiting today.
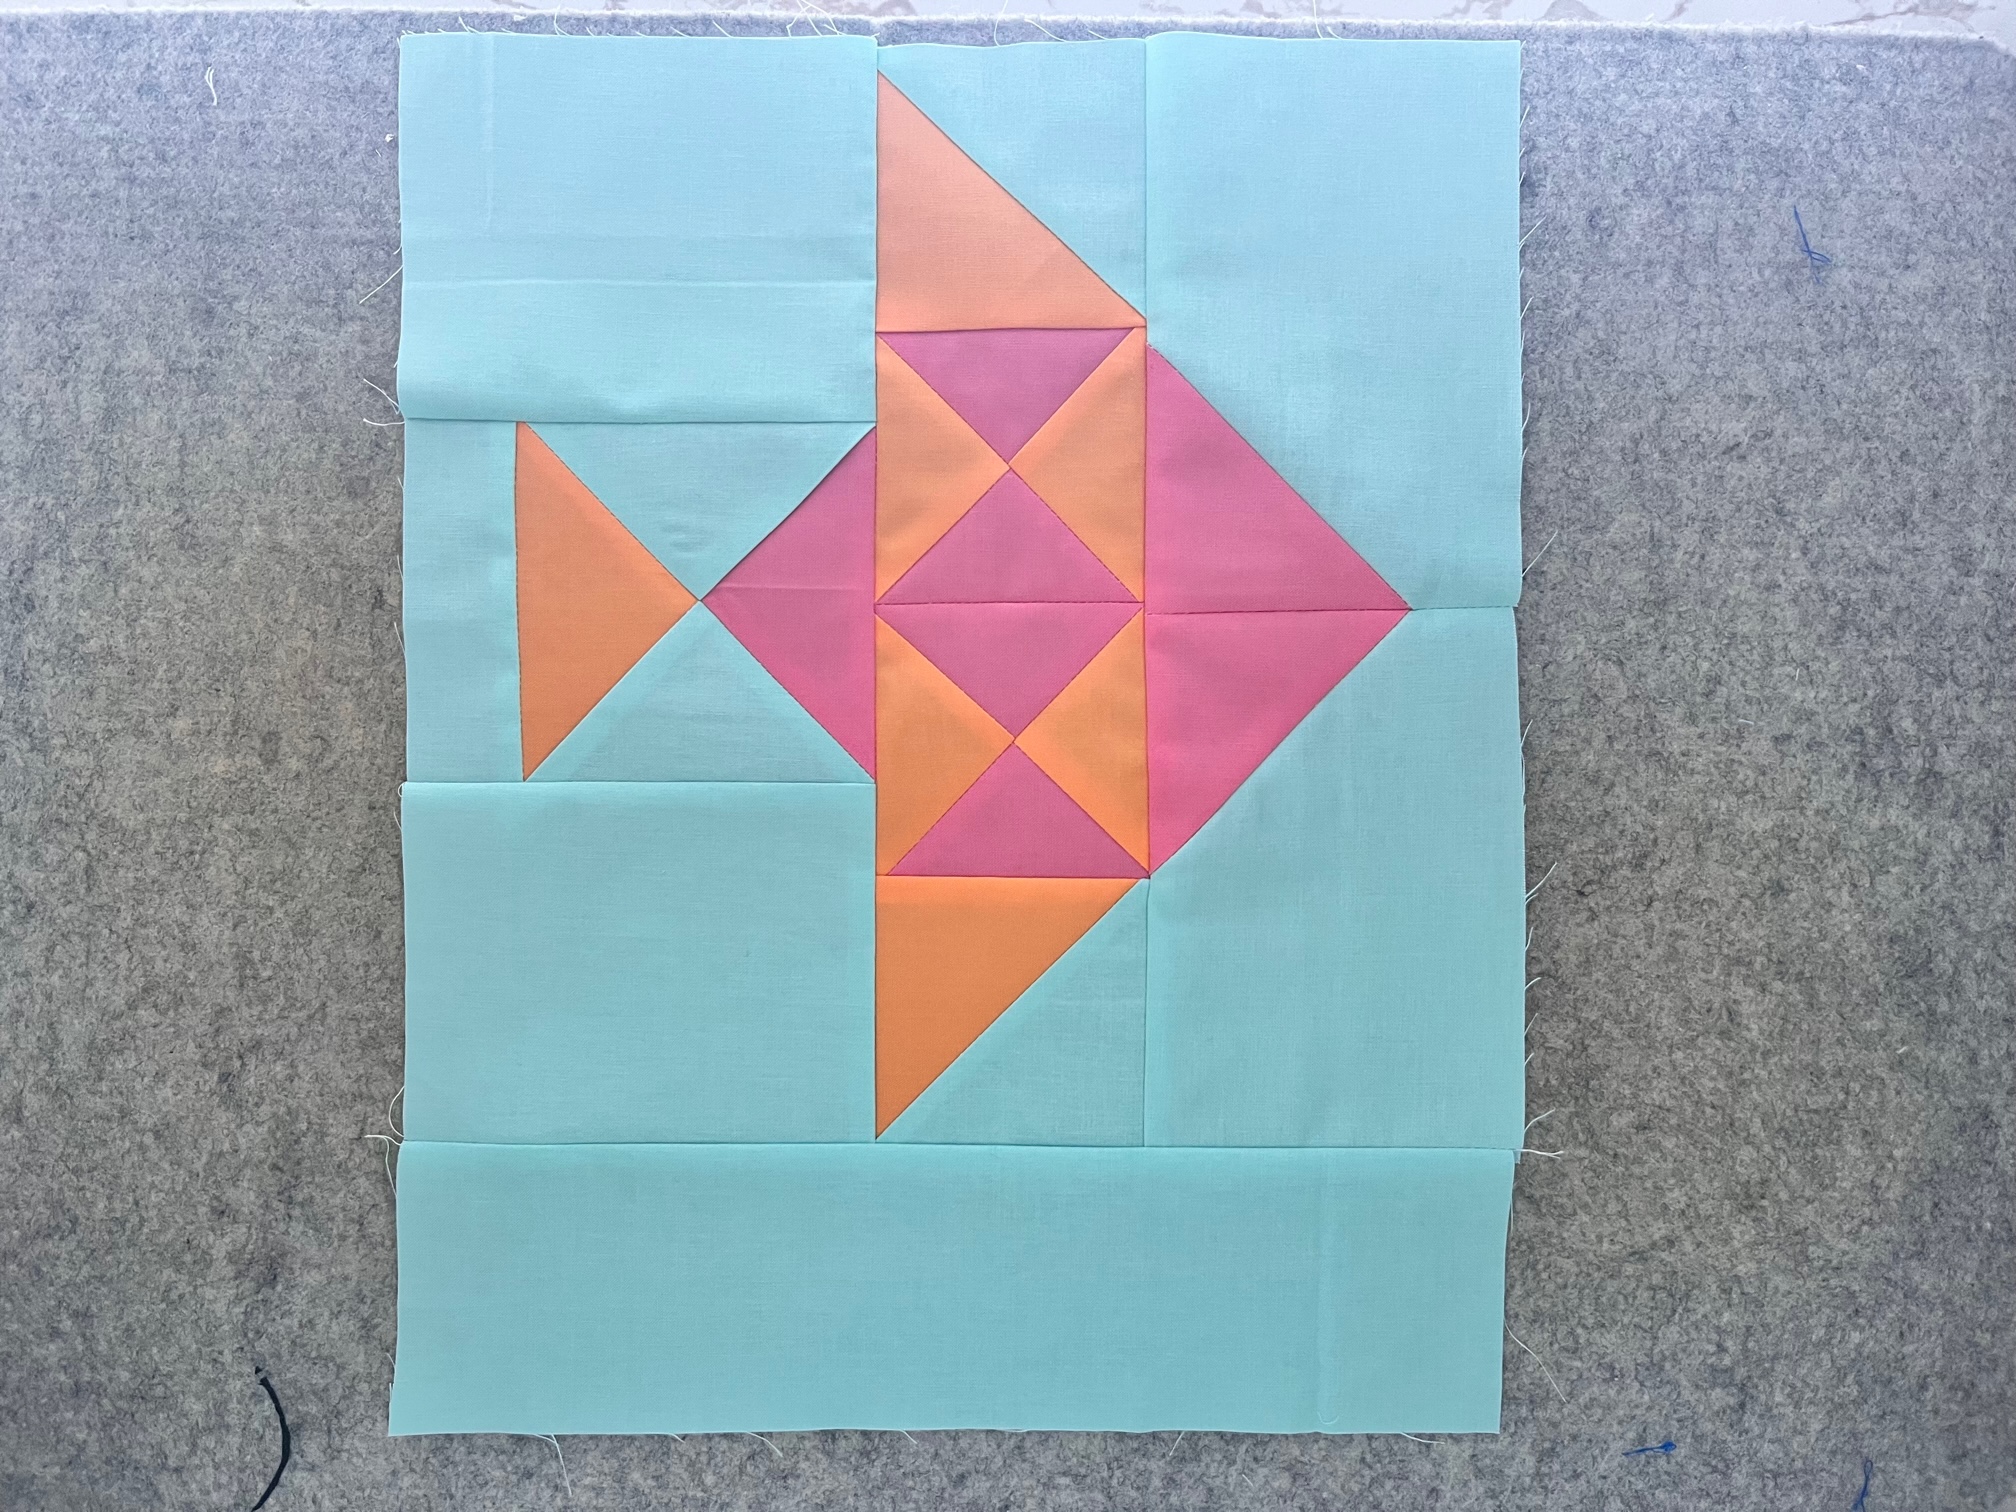
To make this project, you will need to download the quilt block pattern from Thermoweb’s Crafting Facebook page called Therm O Web Craft Room. There you will find not only this fun quilt block pattern but also other FREE blocks that are published monthly as part of a block-of-the-month feature. This pattern is from the July 2023 Block of the Month.
This bag can also be made with any 12 1/2″ block!
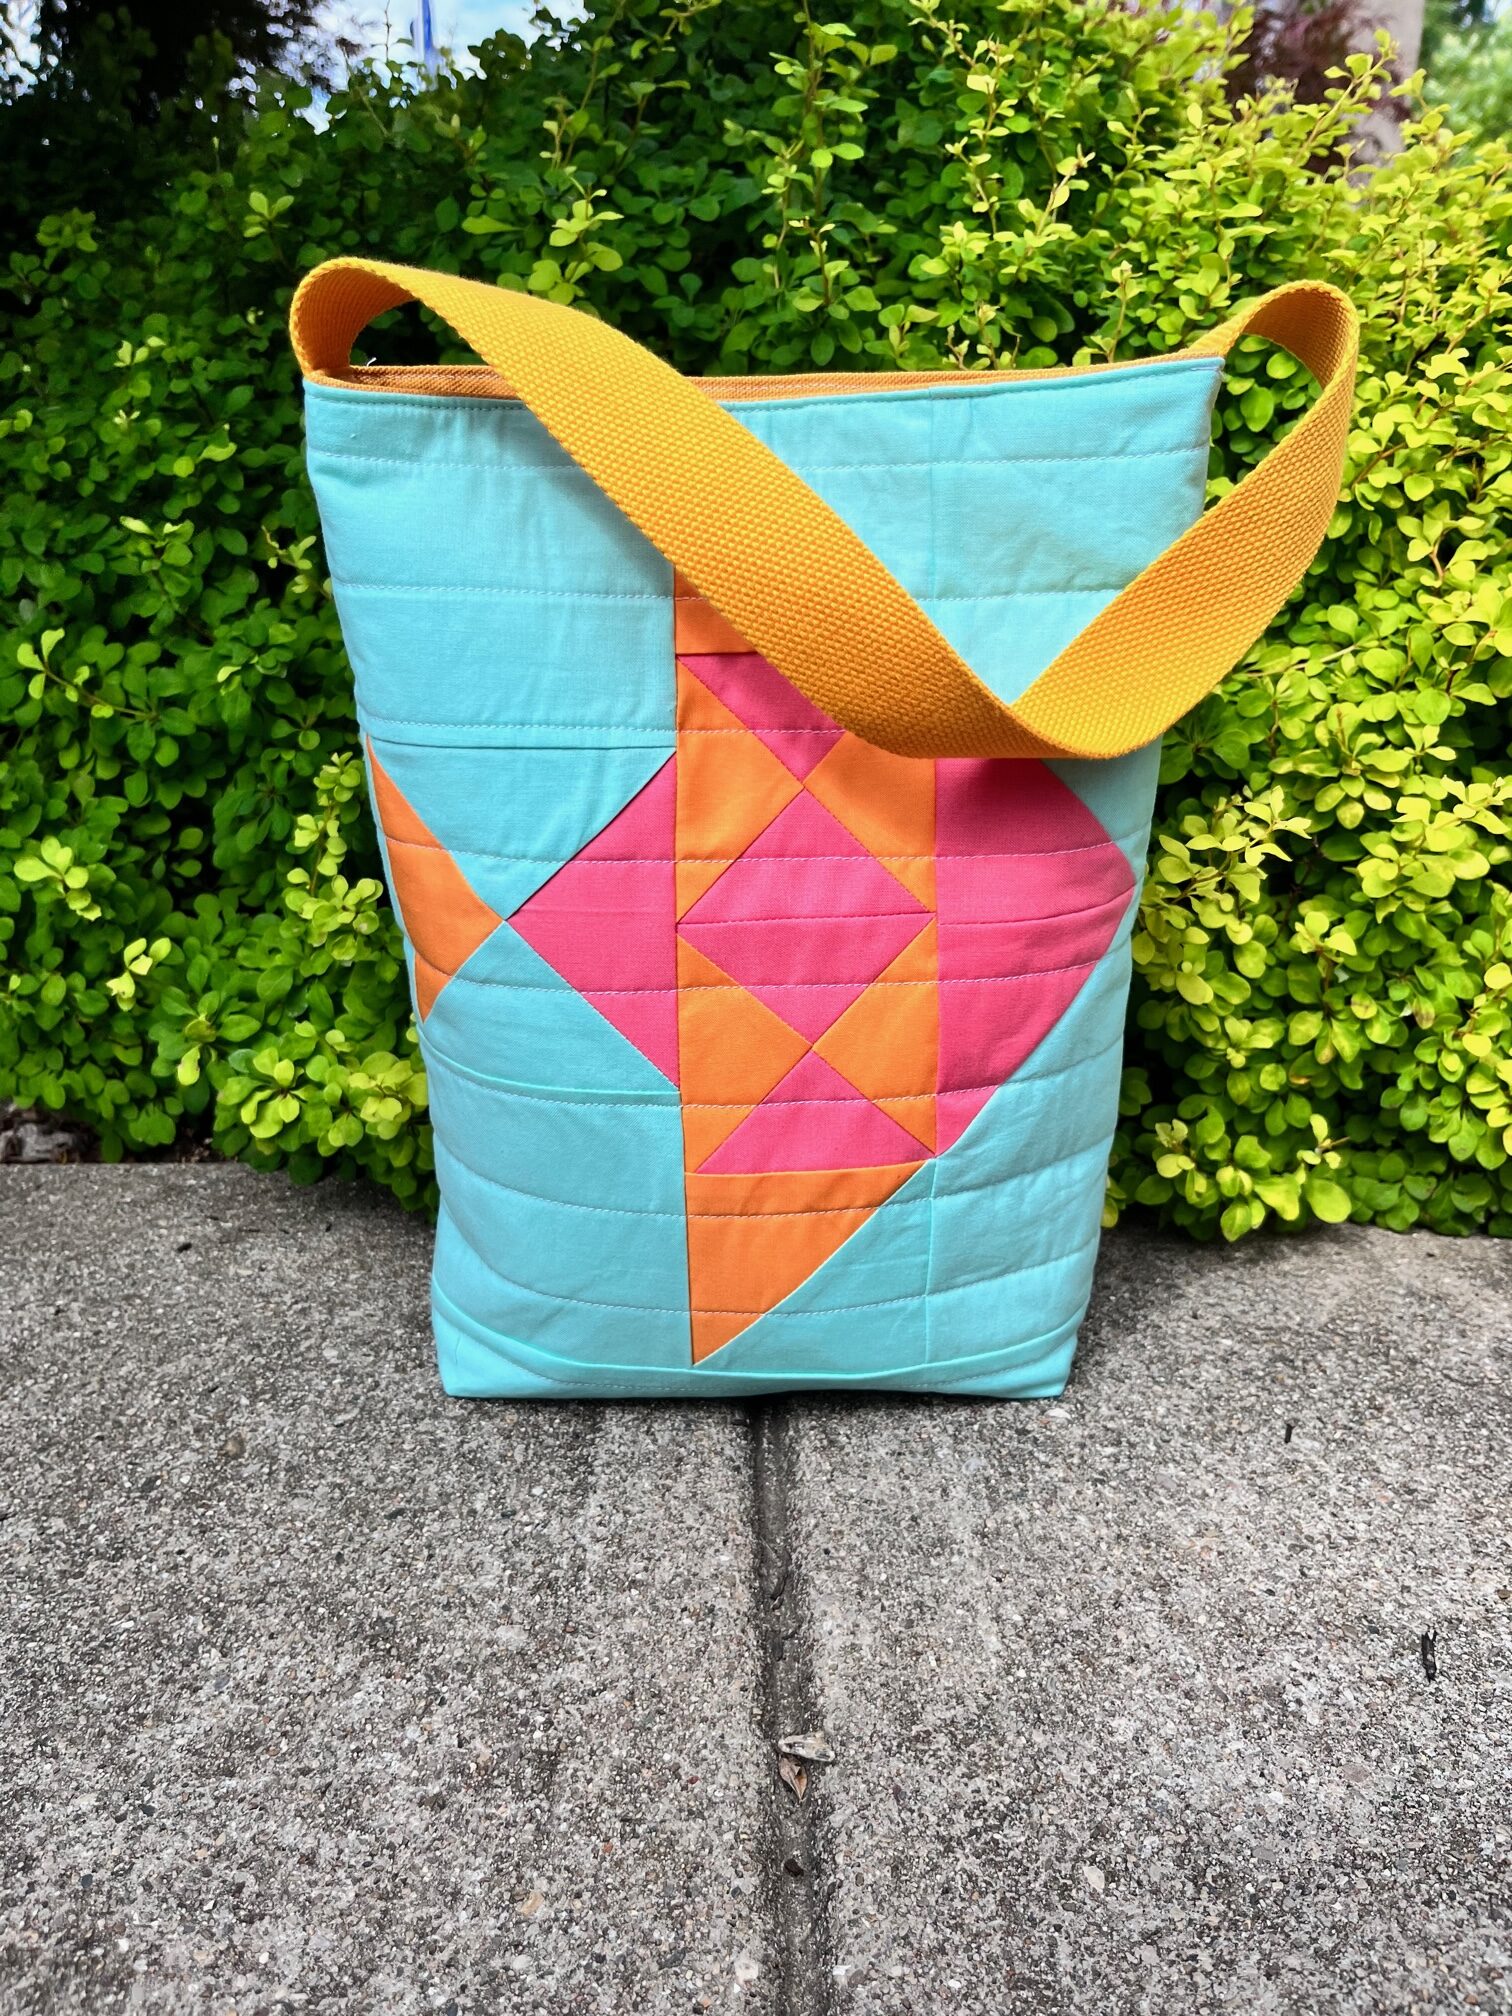
Quilt Block Tote Bag
Supplies:
- Fish Quilt Block Pattern (optional) OR any 12 1/2″ quilt block
- Quilt Block Tote Bag Pattern
- (1) 12 1/2″ quilt block of choice
- (1) 12 1/2″ x 3 1/2″ fabric piece (to match background of quilt block)
- (1) 12 1/2″ x 15 1/2″ fabric for back of outer bag
- (2) 12 1/2″ x 15 1/2″ canvas fabric for lining
- (2) 12″ x 15″ Thermoweb Fusible Fleece
- (1) 1 1/2″ x 19″ cotton webbing for handle
- Basic Sewing Notions
Important Tip: All seams for the tote bag are 3/8″ unless otherwise specified.
Instructions:
Begin by…
Make a 12 1/2″ quilt block. The block used in this tutorial is from Thermoweb’s Block of the Month, July 2023. Next, sew the bottom 12 1/2″ x 3 1/2″ fabric piece to the bottom of the quilt block with a 1/4″ seam.

Next…
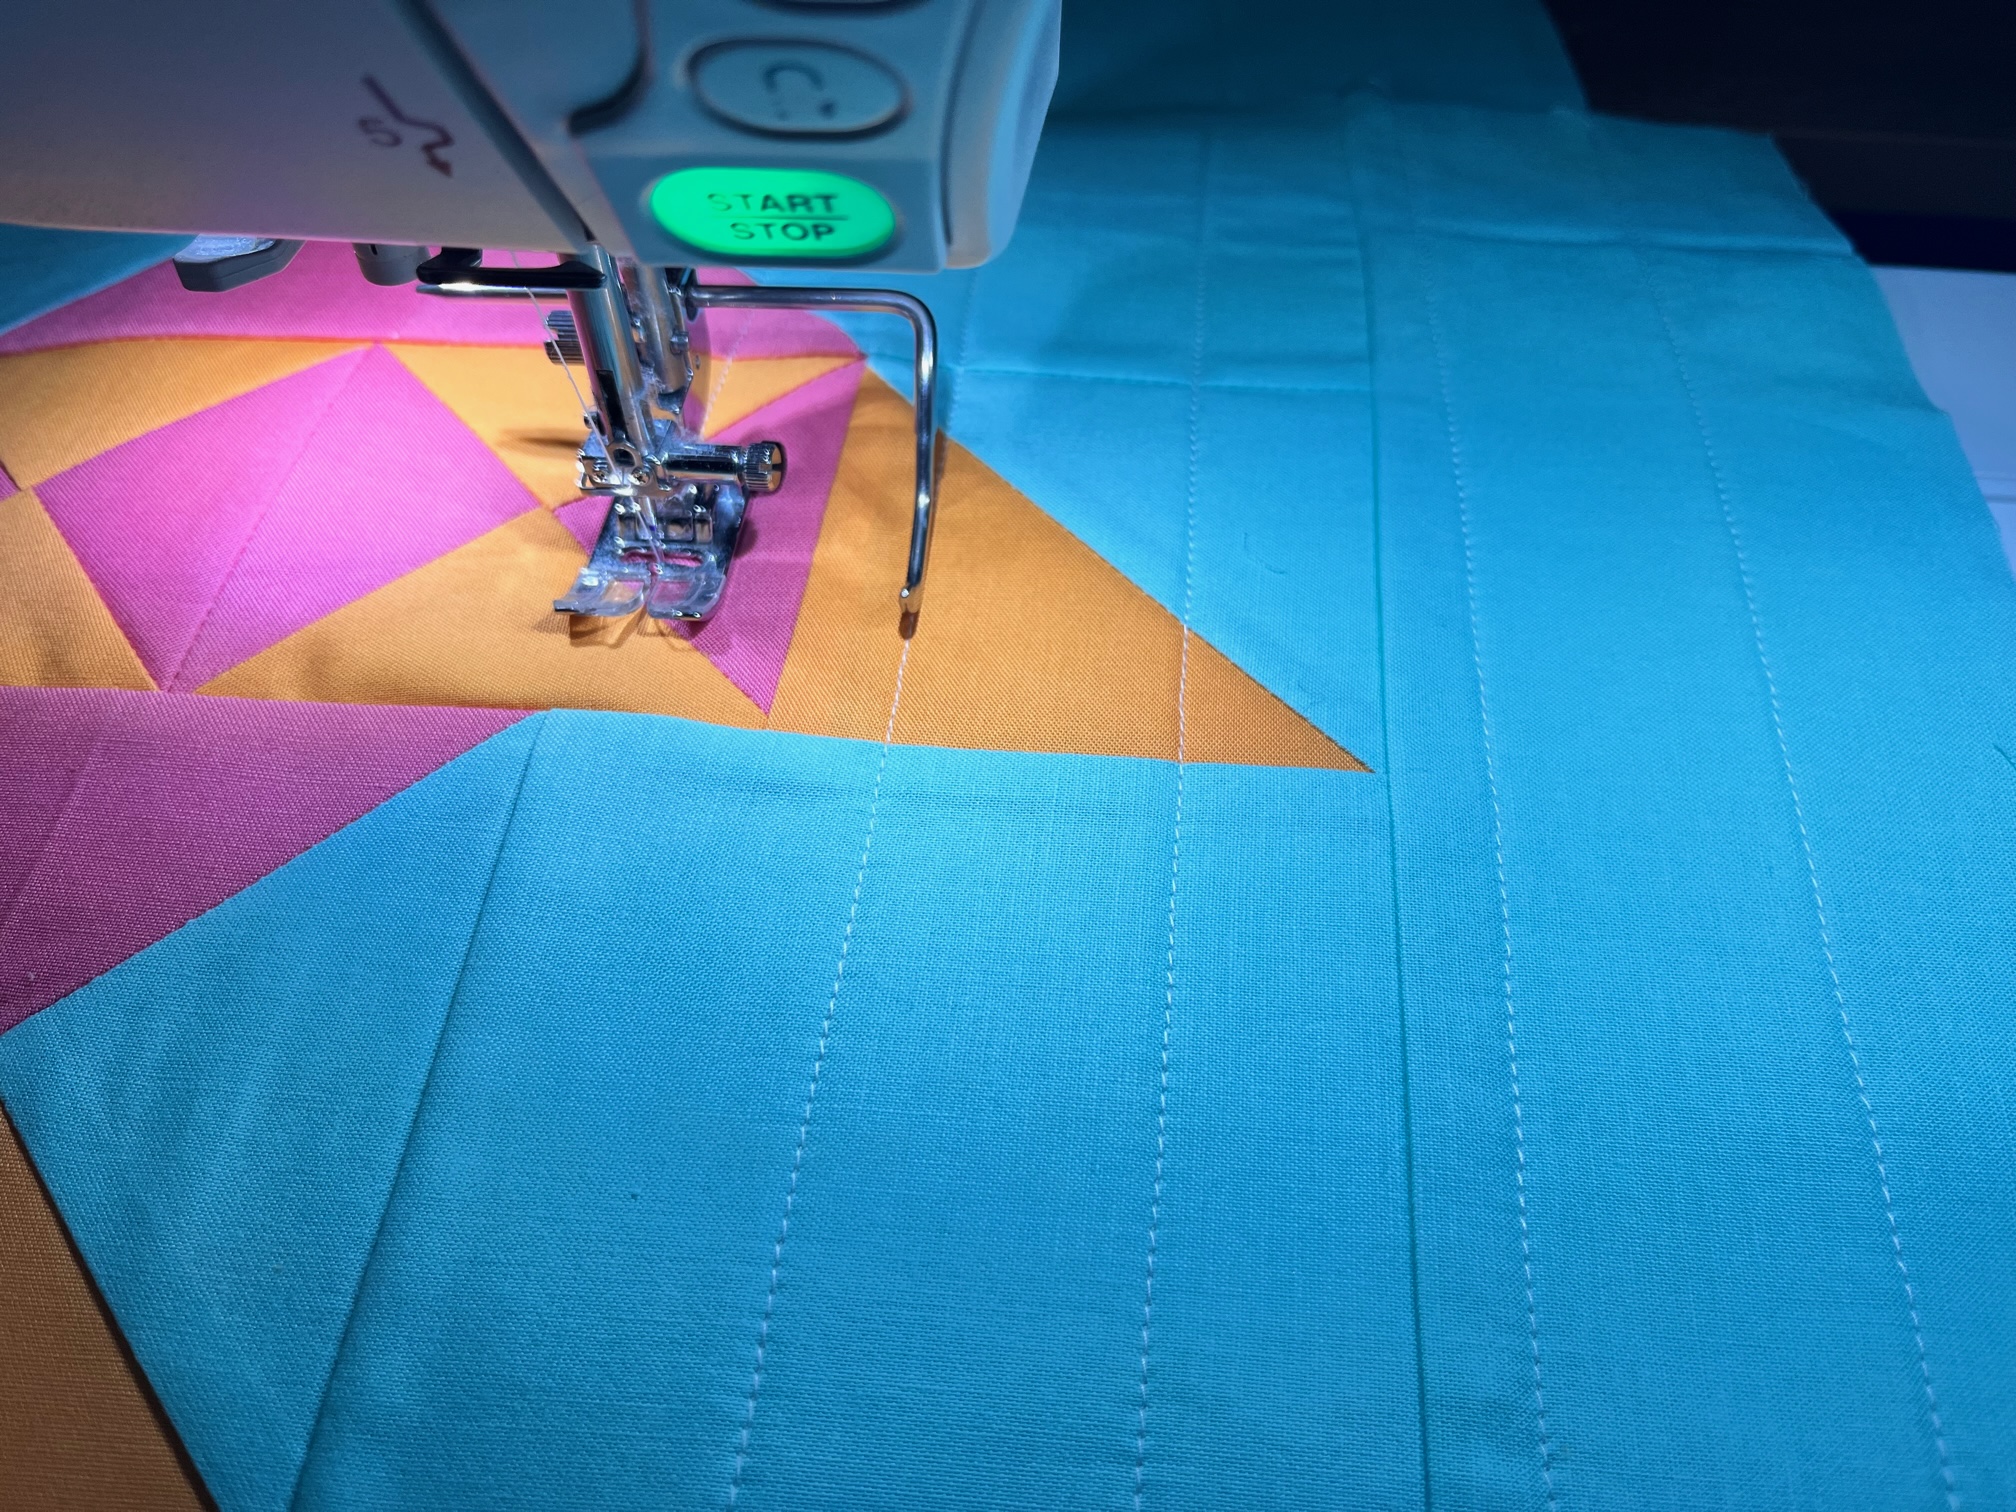
Adhere the fusible fleece to the back of the quilt block piece. In addition, fuse the fleece to the back of the piece of fabric you are using for the back of the tote bag. Then, quilt the front and back using your preferred method.

Continue by…
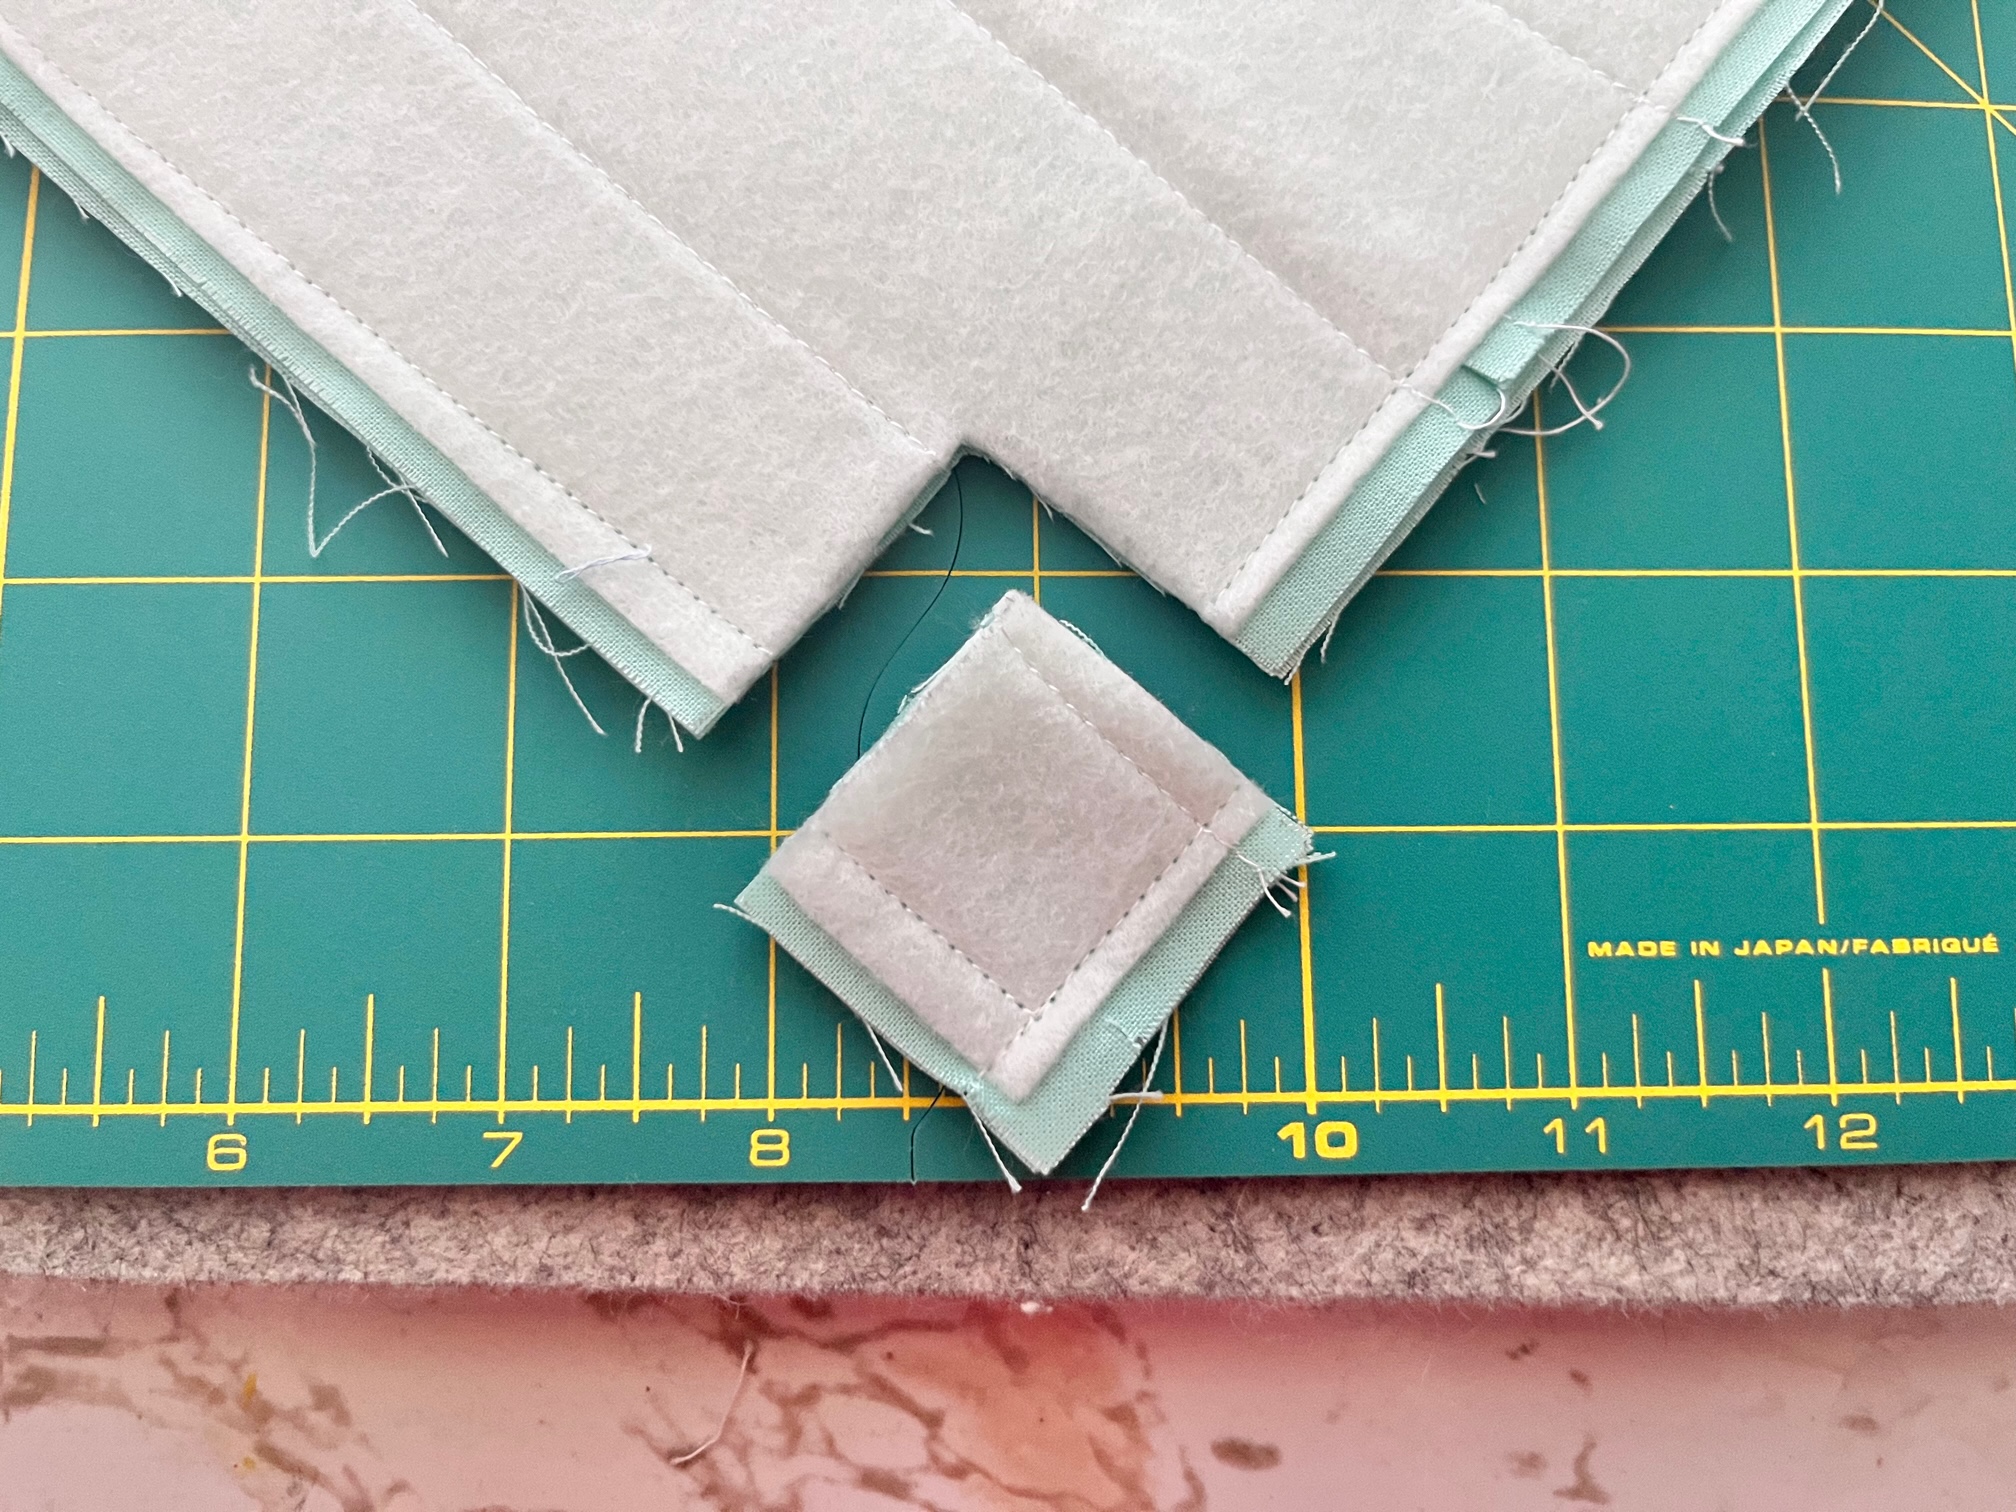
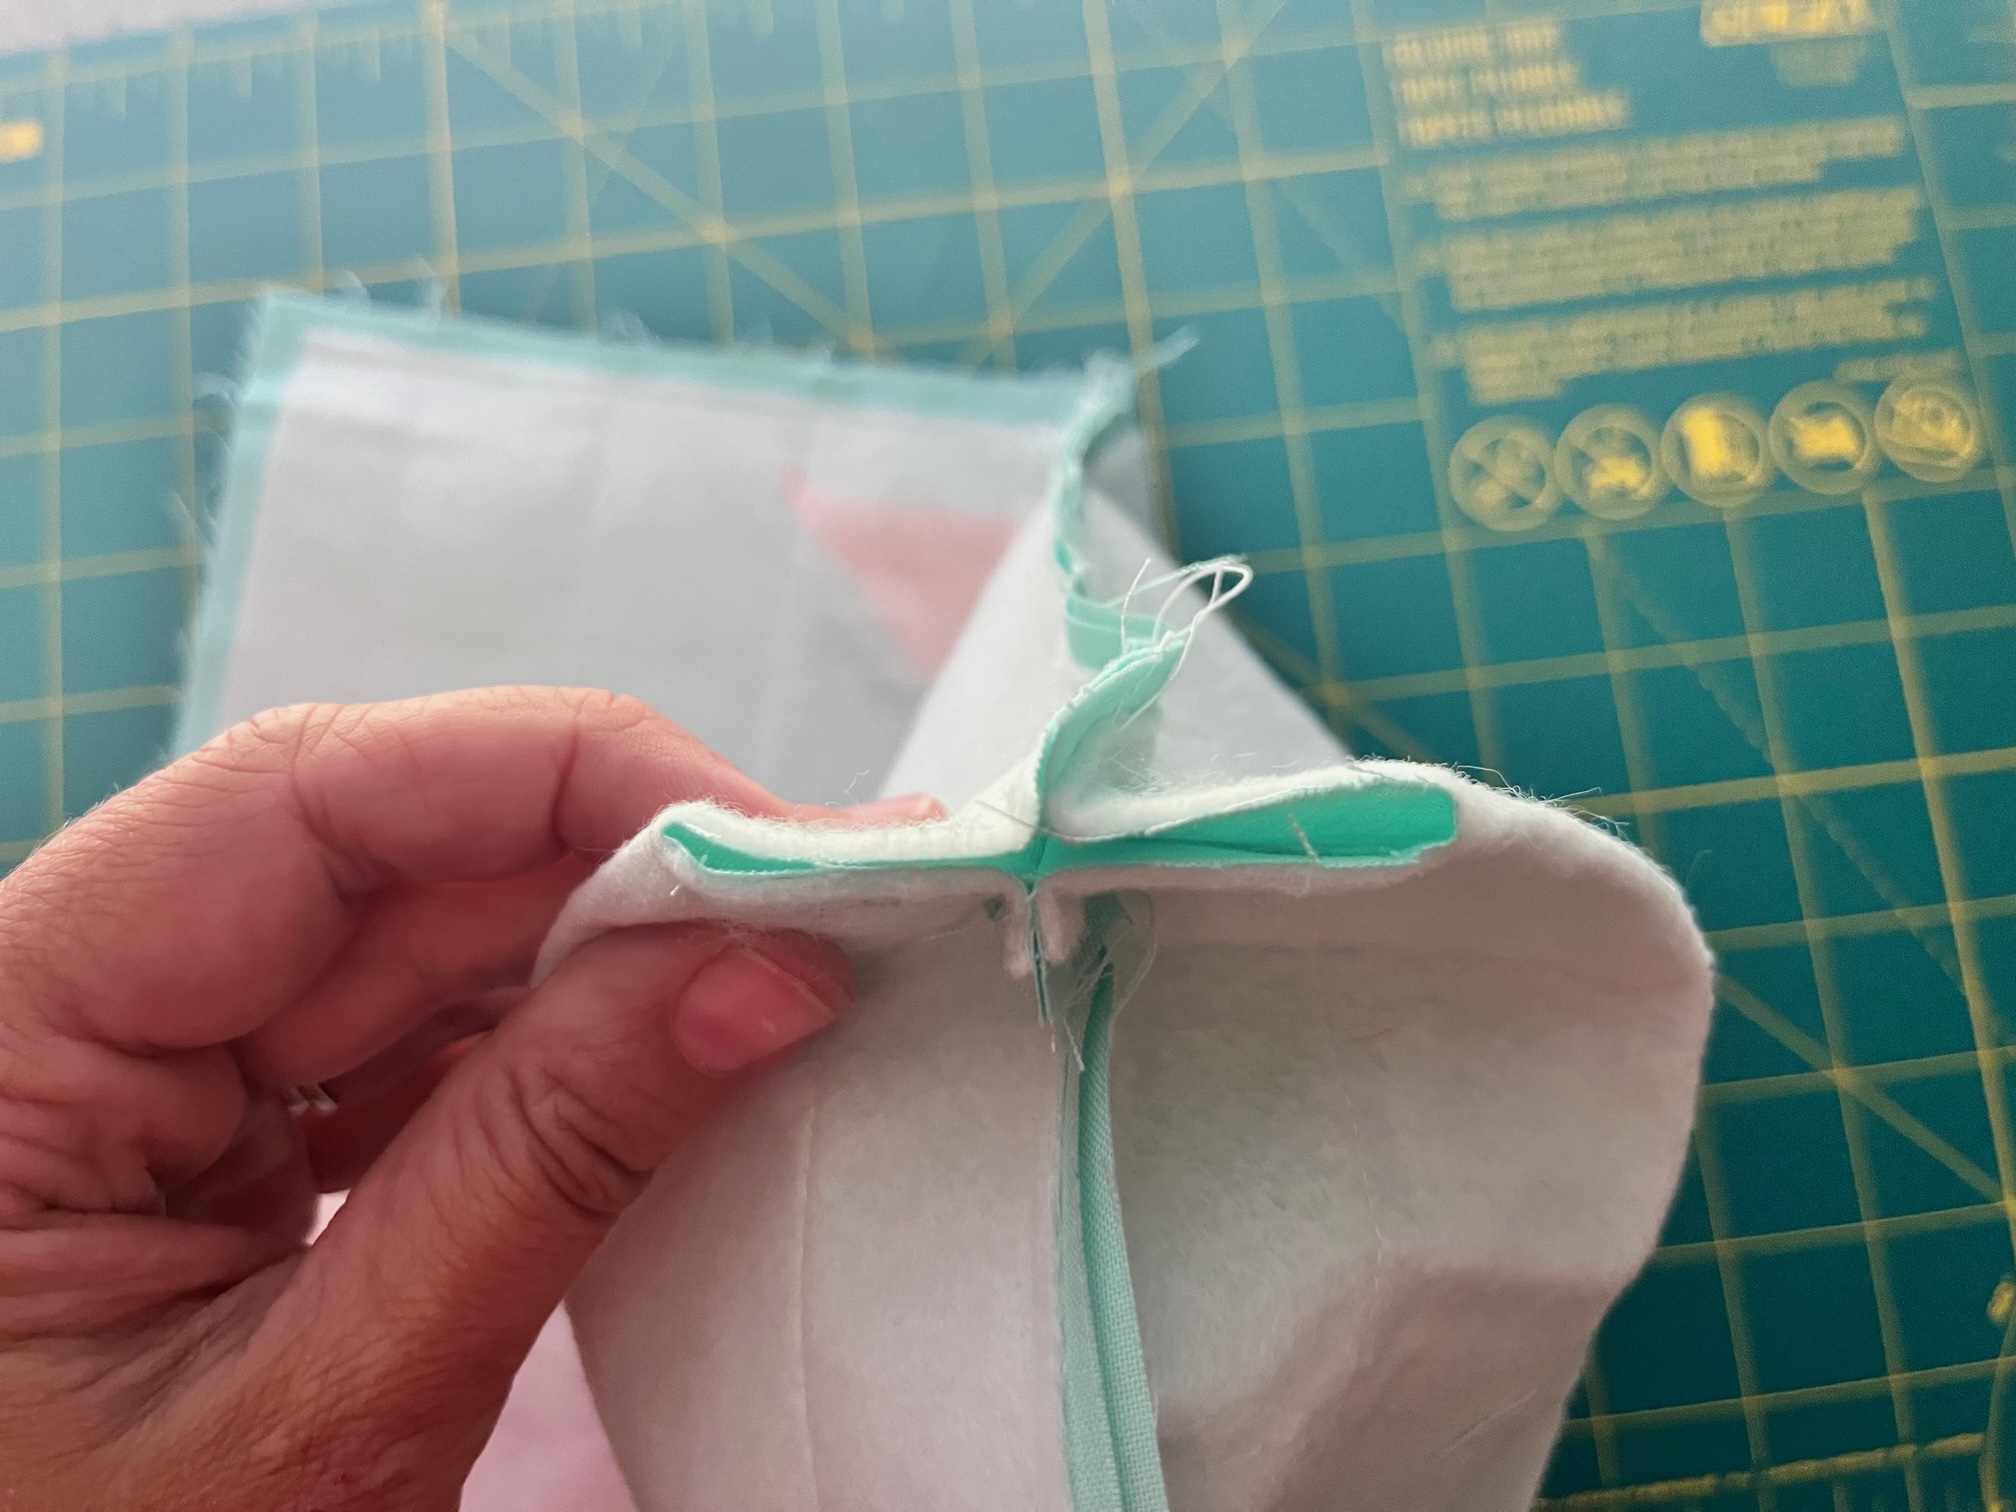
Sew the sides and bottom of the outer bag fabric together. Next, measure 1 1/2″ square on the bottom corners of both the front and back pieces.
Measure from the raw edge and the trim the squares out.
Next…
Pinch together the squares on the bottom of the bag and sew together. Do this for both corners, turn right side out and then set aside.
Continue by…
Repeat the steps above to make the lining. If using canvas, you do not need interfacing. The only difference is that when sewing the front and back together, you will need to leave an opening on the side for turning. Keep the lining inside out.

Then…
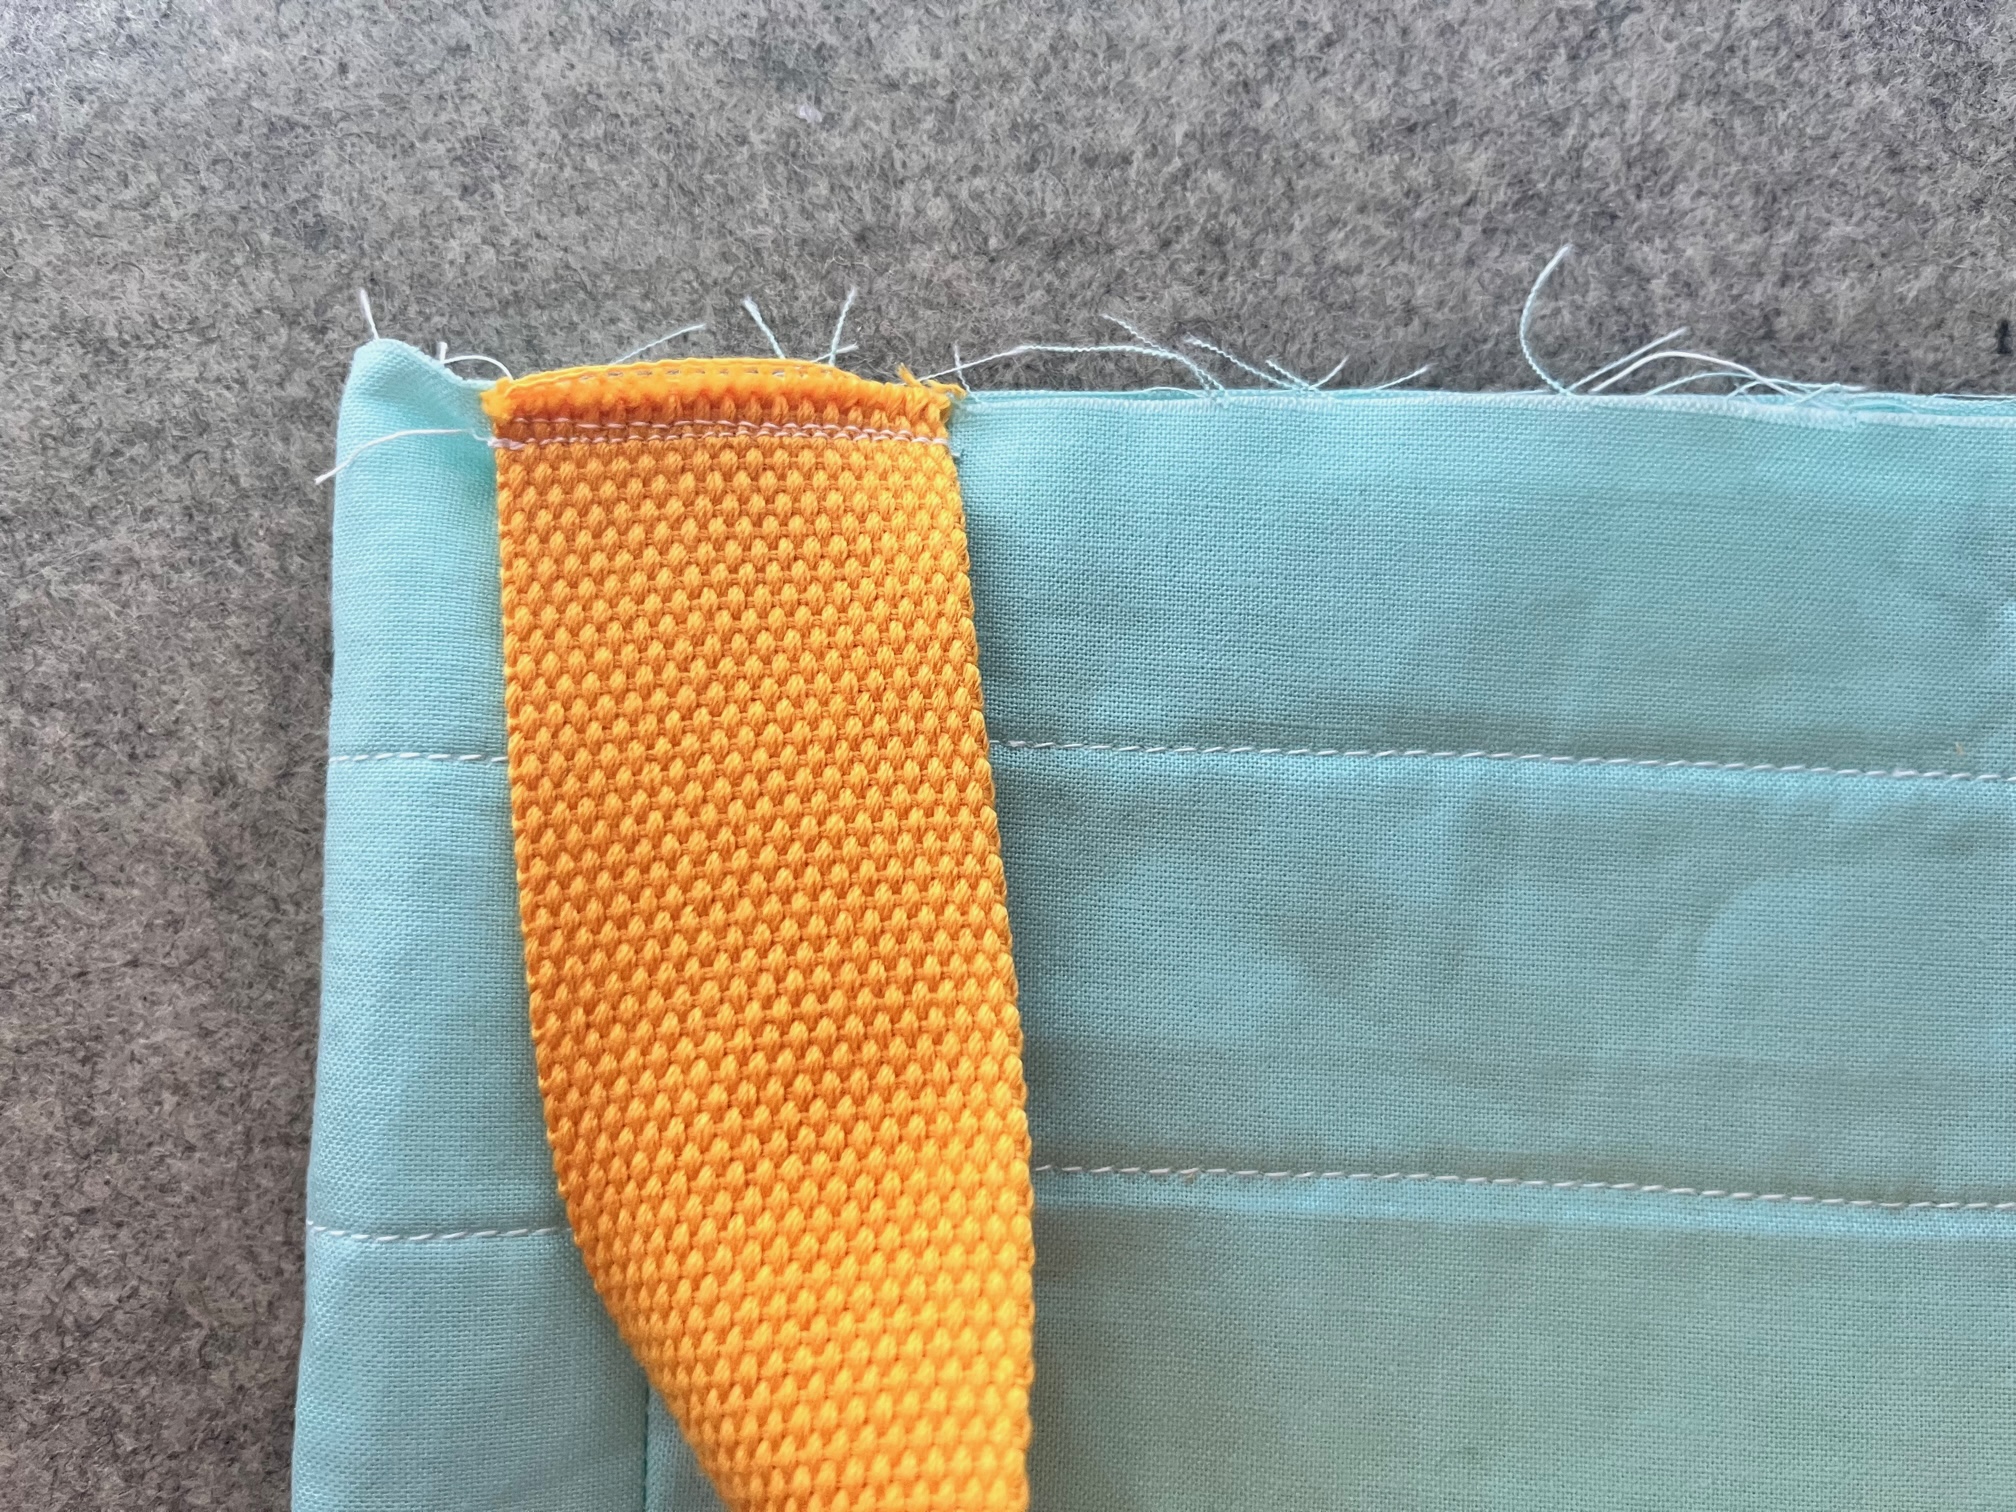
Baste the handle to the sides of the bag.
Next…
Insert the outer bag into the lining. Align the side seams and sew around the entire top of the bag. Then, pull the bag right side out through the opening in the linking. Sew the opening closed. Finally, stuff the lining into the bag and top stitch around the top edge 1/8″.

Finished!
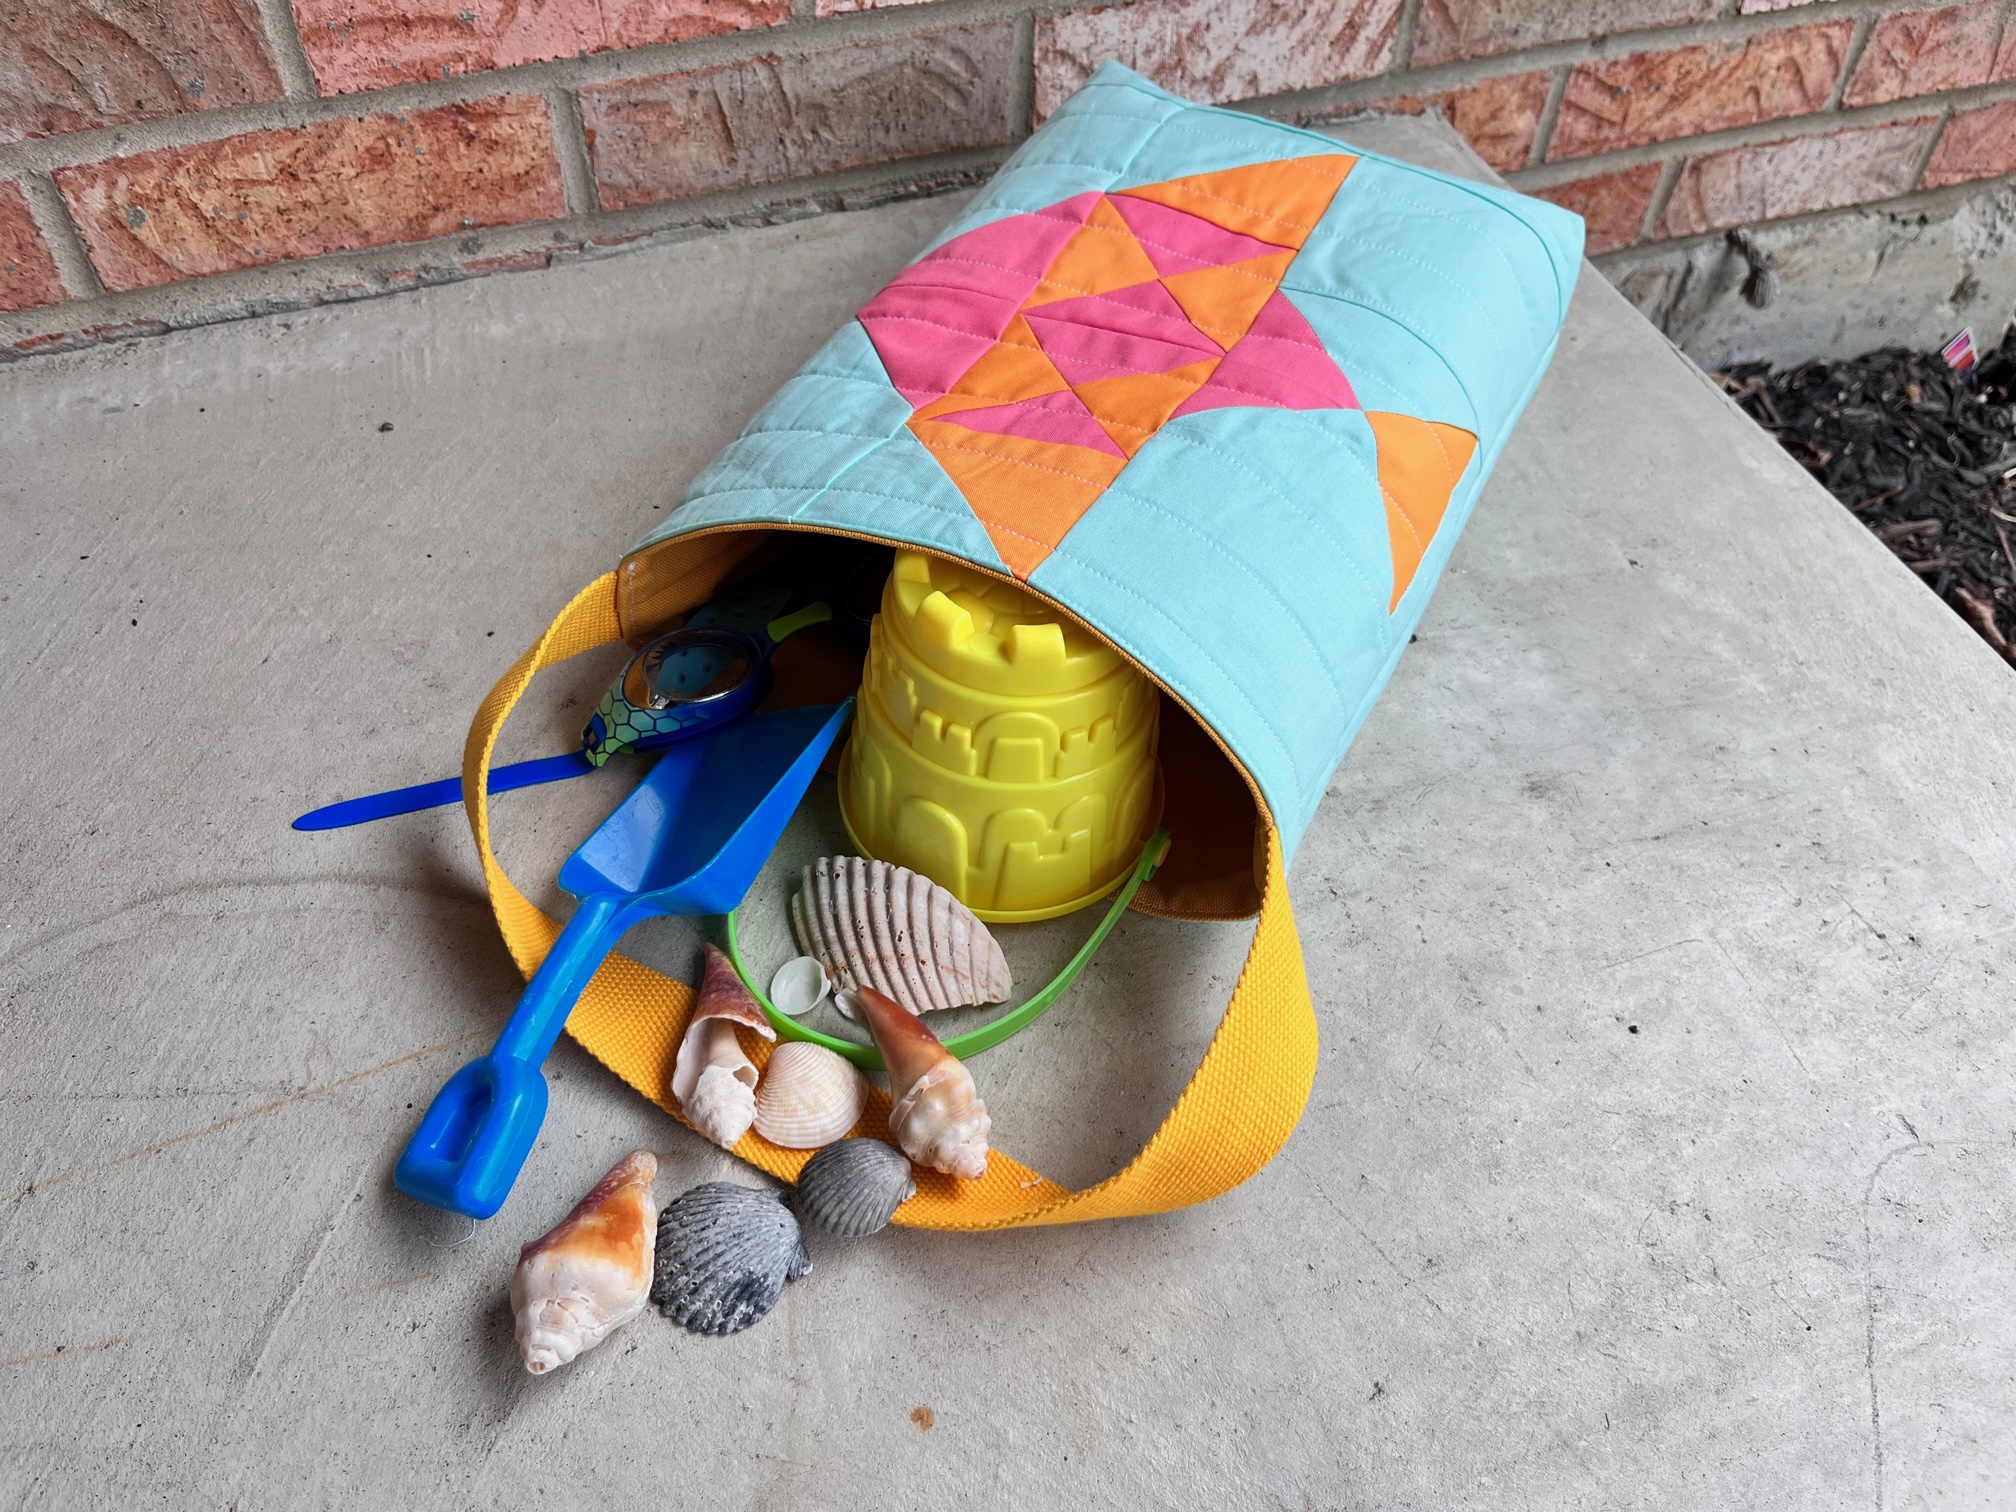
Thank you for visiting today! Come back soon to see what else will be starting to bloom with Inflorescence Designs!