


 Who’s ready for a vacation? I know I am! Carla here from Creatin’ in the Sticks and I am here at Thermoweb to share my Sun and Sand Applique Tote Bag. Consequently, it represents my ideal vacation, relaxing at the beach. Maybe it’s yours too. Most importantly, this bag is big enough to carry all the essentials to the beach. Additionally, it’s stylish too. Let me show you how easy it is to make with HeatnBond.
![]()
Sun and Sand Applique Beach Tote Bag
By Carla Henton at Creatin’ in the Sticks
finished size: the bag is 16″ wide x 14″ tall x 5″ deep
with the handle, the bag is a total of 22″ tall x 16″ wide x 5″ deep
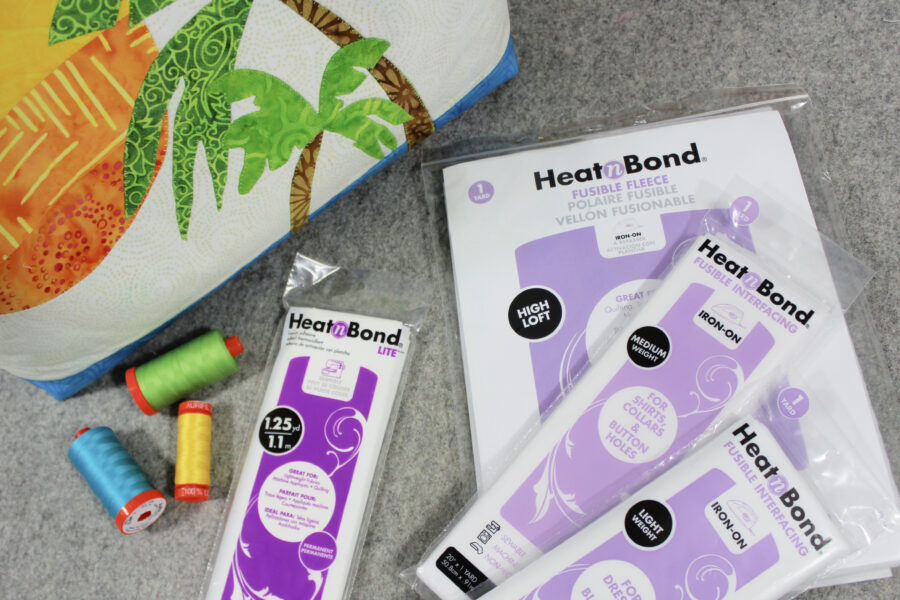
Sun and Sand Applique Tote Bag Supplies
Templates:
Print the FREE PDF templates HERE: Sun and Sand Applique Tote Bag Templates for Thermoweb
HeatnBond Lite Fusible Adhesive
HeatnBond Medium Weight Non-Woven Fusible Interfacing
HeatnBond Light Weight Non-Woven Fusible Interfacing
Thread – Aurfil 50 wt, Iron (I love my Oliso Pro), Sewing Machine, Permanent Marker for tracing, Chopstick for turning circle, Erasable marking pen, ruler and rotary cutter, sharp scissors, and other general sewing supplies.
Fabric: (Island Batik Cotton Fabrics)
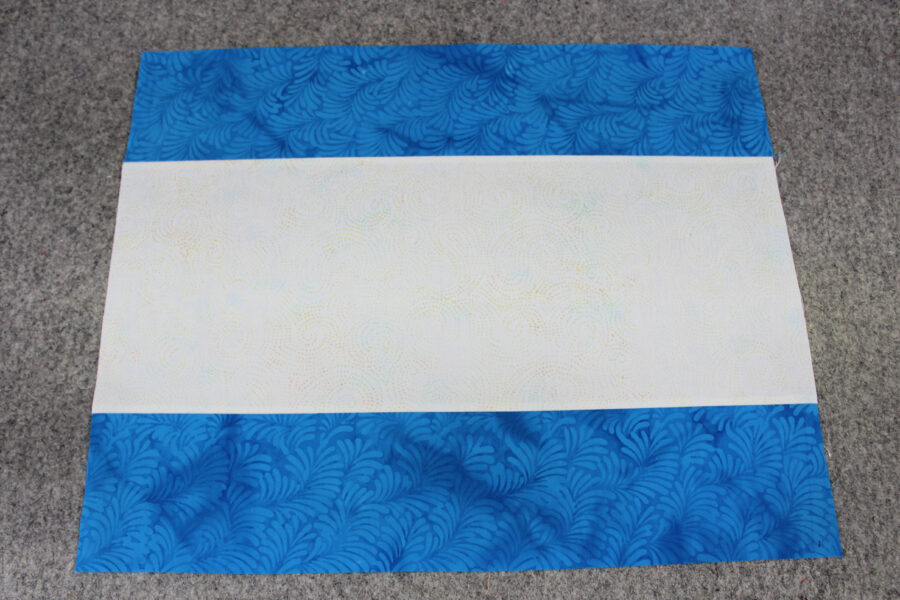
Blue: 1 yard for the top and bottom of the outside of the tote bag, handles, and lining.
Cut 4 strips 4 1/2″ x 20 1/2″ for the top and the bottom of the front and back, next cut 2 rectangles 16 1/2″ x 20 1/2″ for the lining, and then cut 2 strips 2 1/2″ x 18″ for the handles.
Cream: 1/4 yard for the middle of the outside of the tote bag. Two rectangles are needed for the front and back of the outside of the tote bag, 8 1/2″ x 20 1/2″.
Yellow: Four different yellow shades and patterns – strips 2 1/2″ x 8 1/2″
Green: 1 fat quarter for the palm leaves or use 2 different green fabric scraps for the small and large palm trees.
Brown: 1 fat quarter for the palm tree trunks

Sun and Sand Applique Tote Bag Sewing Instructions
*All seams are stitched at 1/4″ unless stated otherwise.
Please read through the instructions before beginning the project.
Step 1:
Stitch the blue strips for the front and back of the outside bag to the top and bottom of the cream rectangles, right sides together with 1/4″ seams. Now, press the seams open. As a result of the stitching, you now have two units that are 16 1/2″ x 20 1/2″ for the outside of the tote bag.
Step 2:
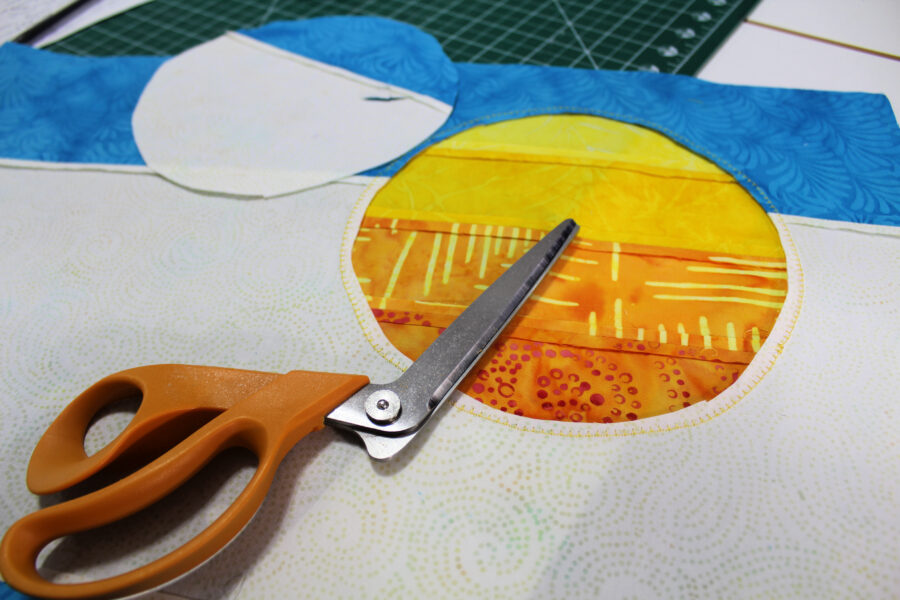
The sun is made by firstly stitching the 4 yellow strips together to form a unit that is 8 1/2″ x 8 1/2″. Secondly, cut a piece of HeatnBond Light Weight Non-Woven Fusible Interfacing 8 1/2″ x 8 1/2″. Thirdly, trace the circle from the pattern templates onto the smooth side of the interfacing with a permanent marker and cut a 3-4 inch slit in the middle of the traced circle for turning later. After that, pin the interfacing to the yellow fabric unit with the right side of the fabric together with the adhesive (bumpy) side of the interfacing.
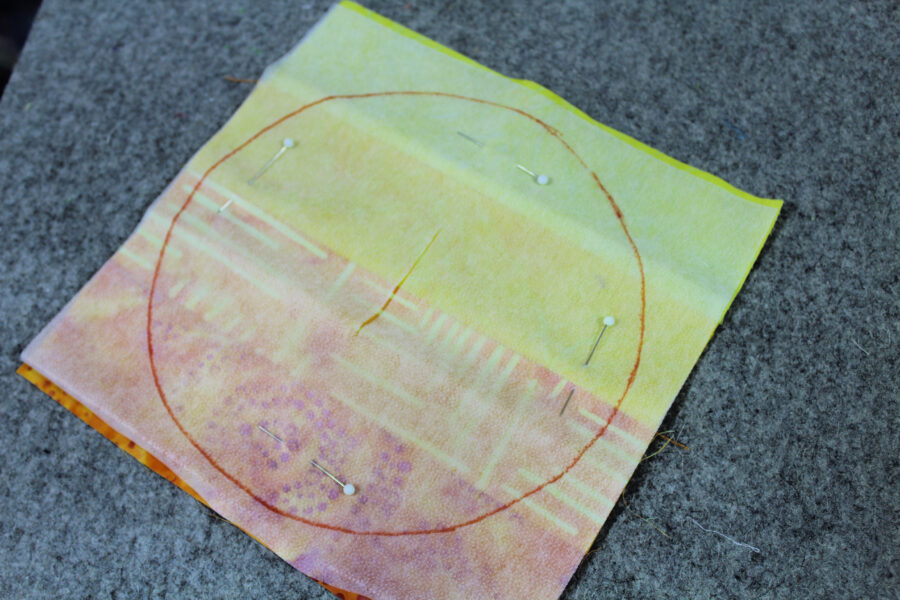
 Stitch around the circle on the traced line. Trim the outside away with scissors 1/4″ from the traced line. The next step is to turn the circle right side out through the cut slit. The chopstick is very important to gently push the seam out and as a result, there is a smooth circle. Finally, place the sun on the prepared background, interfacing down. Use the key in the template download for placement. Press with an iron to bond the sun to the background following the package instructions.
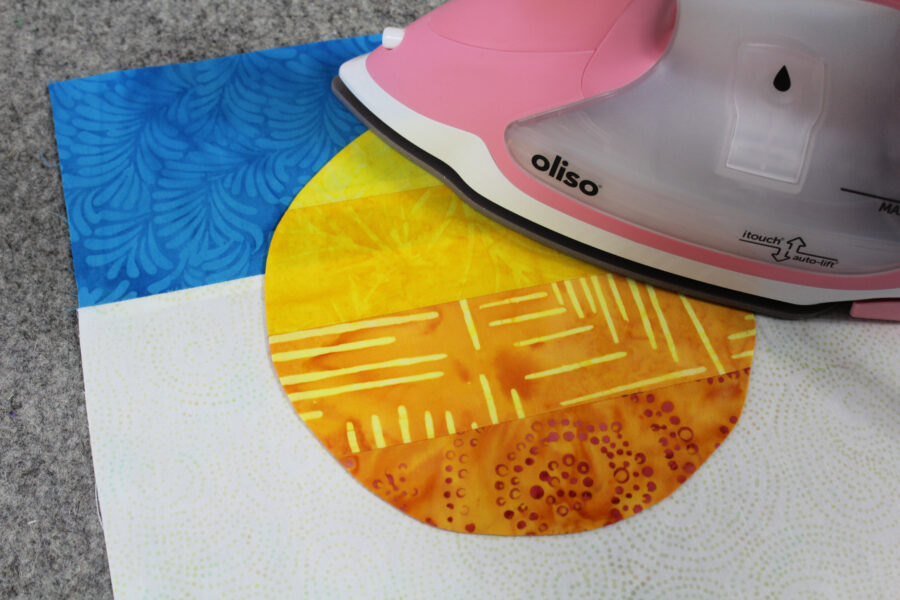
Stitch around the sun with a blanket, straight, or zigzag stitch. After the sun is stitched, turn the front of the unit over and from the back, carefully trim away the center of the circle as shown 1/4″ from the stitching.
Step 3:
Cut the HeatnBond Fusible Fleece by removing 2″ from the long side. Cut two pieces 2″ x 18″ from that piece and set them aside for the handles. The next step is to cut 2 pieces of fleece 16″ x 20″. Follow the package instructions to bond the fleece to the center of the wrong sides of the prepared outsides of the tote bag. The fleece is smaller than the fabric to keep the seams less bulky as you sew.
Step 4:
The pattern templates are already reversed for you. With HeatnBond Lite Fusible Adhesive, trace the palm tree pieces onto the paper side of the adhesive with a permanent marker.
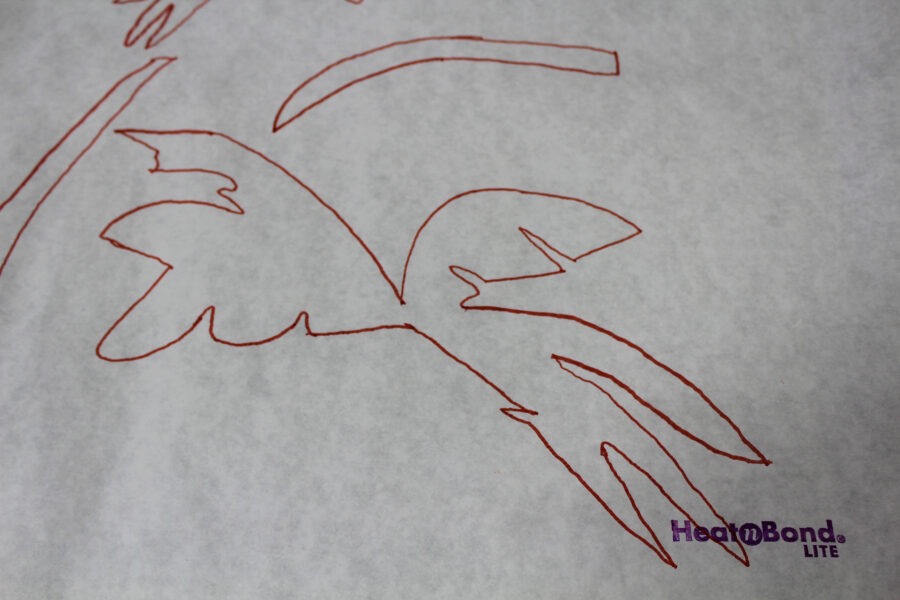
Bond the HeatnBond Lite onto the wrong side of the green and brown fabrics. Carefully cut the applique with sharp scissors, peel the backing paper off, and place the applique, adhesive side down, on the prepared tote bag background with the sun. Next, follow the package instructions to bond the palm trees to the background with an iron.
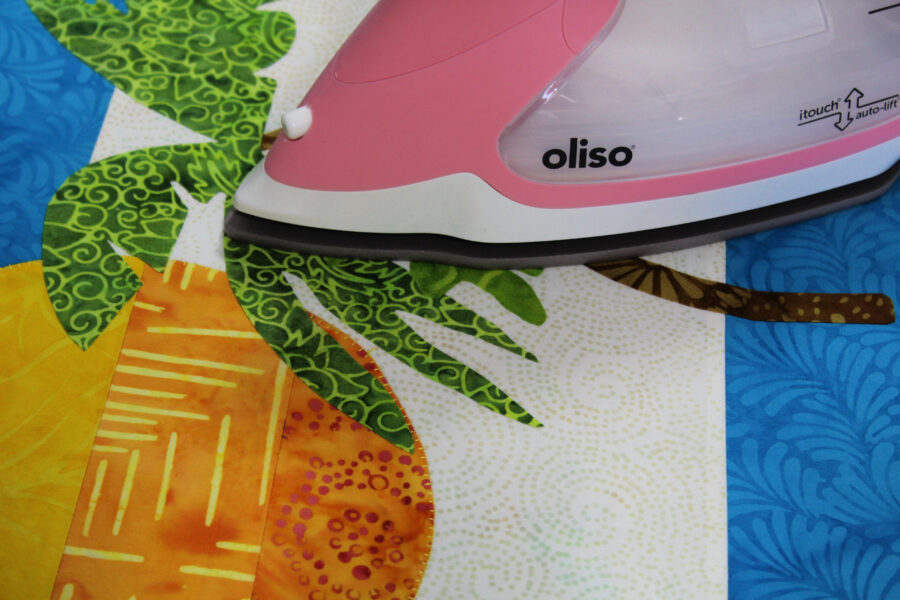
Stitch around the palm trees with a blanket, straight, or zigzag stitch with Aurifil 50 wt thread. If desired, quilt both the front and back pieces of the tote bag. This one was stitched with single lines in the blue strips.
Step 5:
To start the lining, cut 2 pieces of HeatnBond Medium Weight Non-Woven Fusible Interfacing 16″ x 20″. The next step is to bond the interfacing to the wrong side of both pieces of lining fabrics. Follow the package instructions. Next, pin the lining pieces together and stitch around the sides and bottom leaving a 6″ opening in the bottom center for turning the tote bag right side out later.
Step 6:
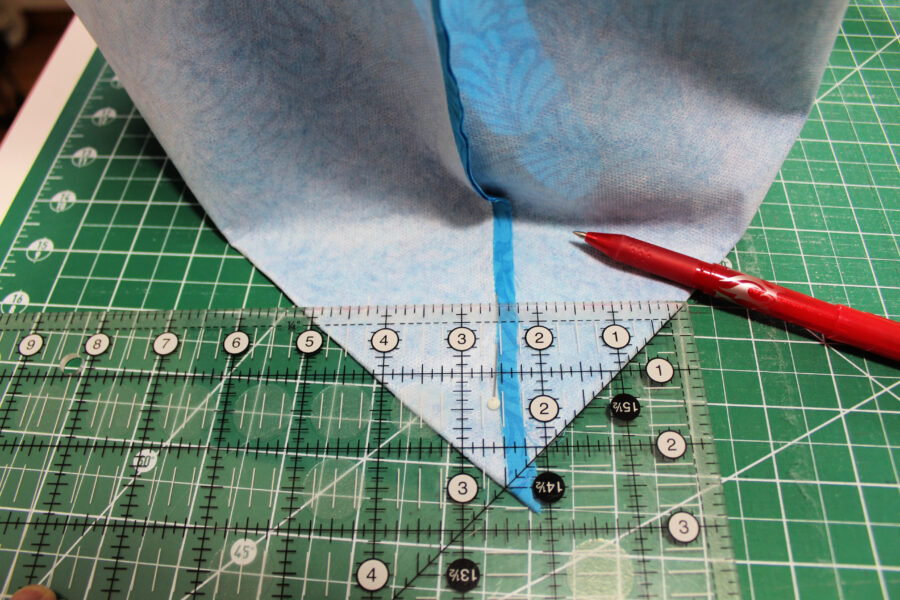
Pin the outsides of the tote bag right sides together and stitch around the sides and bottom with a 1/4″ seam. Square the corners on the outside and lining of the bag by flattening the bottoms to form triangles at the seams. Center the seam in the triangle, measure 2 1/2″ from the end of the seam and mark the triangle on each corner with an erasable pen. Stitch on all 4 marked lines.
Turn the outside of the tote bag right side out.
Step 7:
To prepare the handles, bond the 2″ x 18″ HeatnBond Fusible Fleece that was cut in step 3 to the wrong sides of 2 of the fabric cut for the handles. Center the fleece in the center of 2 of the 2 1/2″ wide fabric strips and bond according to the package instructions. Secondly, pin one fleece-backed strip to one non-backed strip with right sides together. Pin the remaining 2 strips together in the same way. Stitch 1/4″ from the edge on the long sides of each set of strips to form 2 tubes. Turn both tubes right side out, press, and topstitch along the long edges. Quilt the handles if desired.
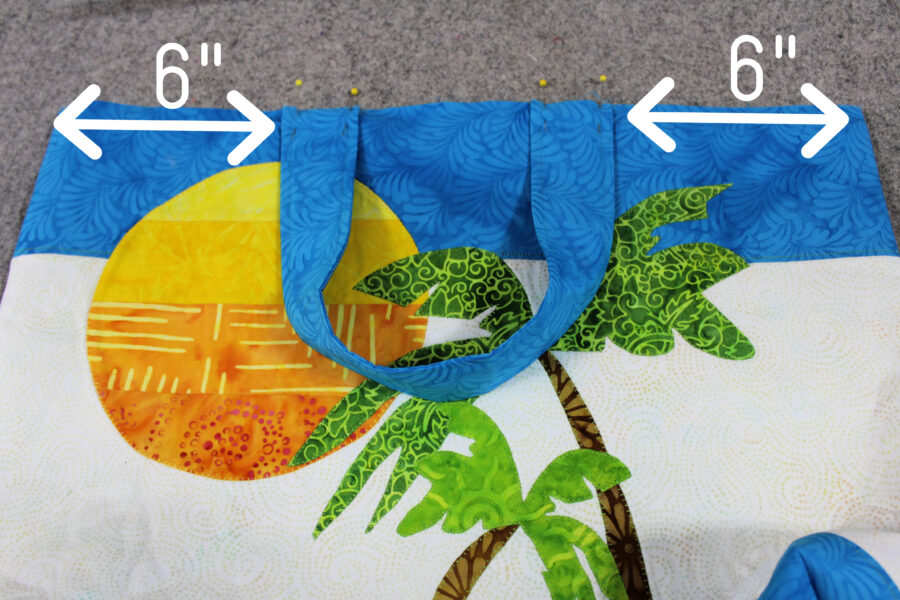
Place the outside of the bag on a flat surface and pin the handles 6″ in on the front and on the back. Baste the handles in place.
Step 8:
Tuck the outside bag into the lining, right sides together, and pin around the top, matching seams.
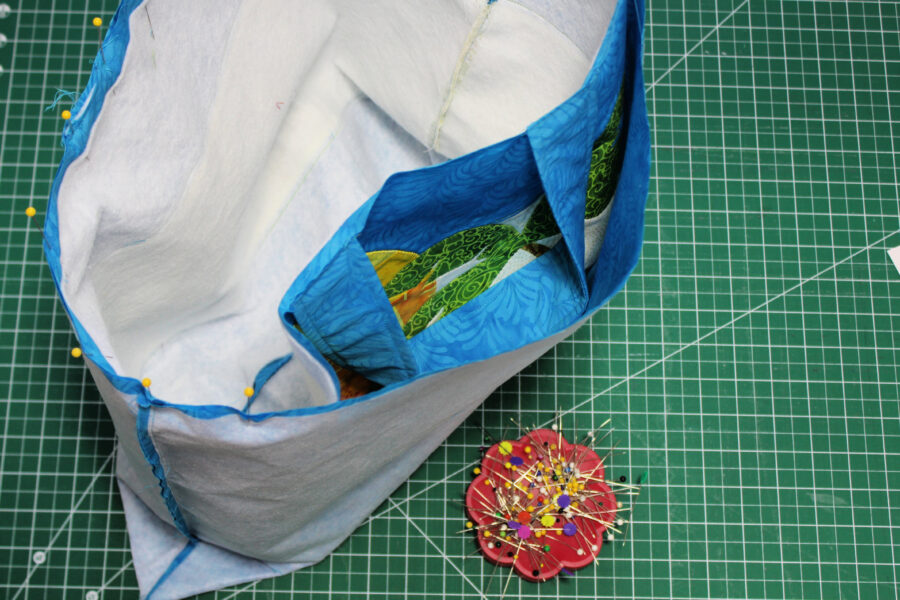
Stitch 1/4″ from the edge around the top of the bag. Turn the bag right side out through the opening in the lining. Push the corners out and then slip stitch or take a narrow machine stitch to close the opening in the lining. Tuck the lining into the bag, press, and stitch around the top of the bag 1/8″ from the edge. Stitch again 1/4″ from the edge to reinforce the handles.
![]()
Step 9:
Take your new bag and go on vacation!
![]()
I know I am ready to try out my new tote bag in the Sun and Sand!
Carla