


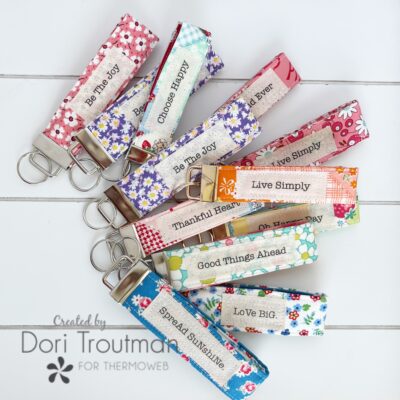
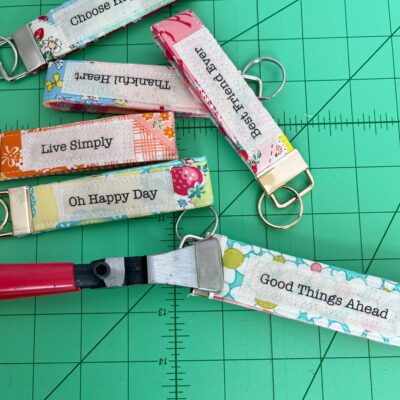
Hello friends! I am so excited to be back again to share a project with you that you will just love! I’ve made these super fun personalize key fobs as gifts for years and they are always a hit. So today I decided its time to teach you how to make them to gift as well! So lets gather our supplies and get started!
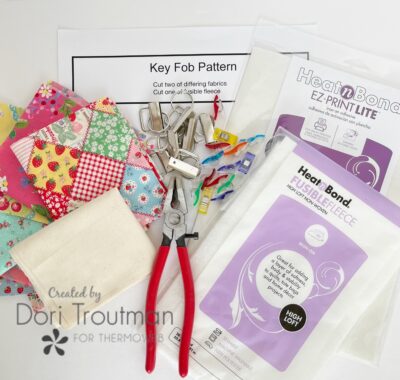
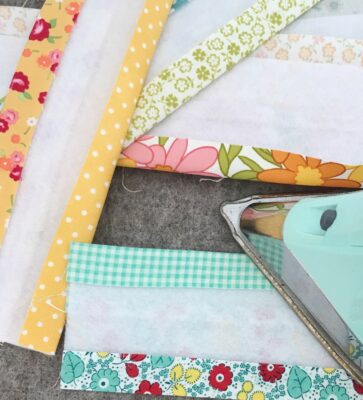
Key Fob Supplies
- Key Fob Pattern Piece
- Key Fob Words
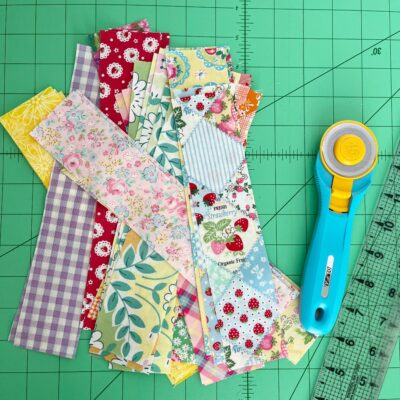
- Fabric scraps at least 10″ x 2″ (2 fabrics for each Key Fob)
- Muslin fabric scrap cut to 8.5″ x 11″
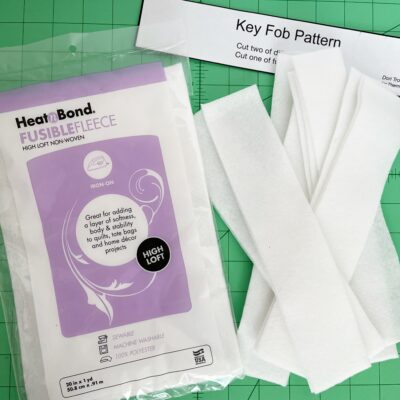
- Heat n Bond Fusible Fleece
- Heat n Bond EZ-Print Lite
- Wonder Clips or Pins
- Iron
- Key Fob Kit (I purchased mine here)
Step By Step Instructions
Optional: My Key Fobs have fun words and phrases sewn onto them. If you prefer to make yours without them, skip to step four! Otherwise, start here with step one!
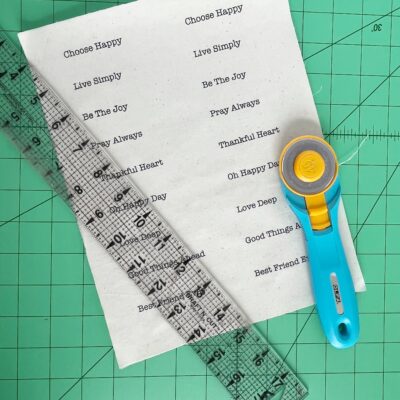
Step One: You can use a word processing program and format your own words or names. But you can also use mine; I’ve attached a print out here: Key Fob Words. Upload that into your computer and lets get our fabric page ready to print.
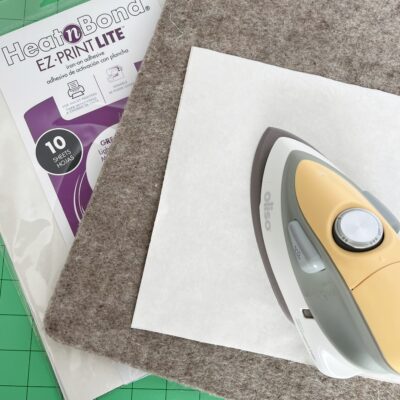
Step Two: Iron a sheet of the EZ Print Lite to the 8.5″ x 11″ muslin fabric. Make sure it is completely adhered and let it cool.
Step Three: Place this muslin sheet into the printer exactly as you would a piece of paper. Your printer may be different than mine, but I place my page fabric side down. The goal is to have your printer print on the fabric. Set print quality to normal and print your page! It’s that easy and that fun! Once dry, you can cut your word phrases either with scissors or with a rotary cutter. Set aside for now.
Step Four: Choose your fabric pieces. If you want to do a large bundle of Key Fobs it is easy to make them assembly line style! So keep that in mind in choosing and cutting your fabric! Iron your fabric pieces and use the pattern piece to cut them out. If you would prefer to use a ruler and rotary cutter, cut each fabric piece 10″ x 2″. (You will need two fabric pieces for each Key Fob.)
Step Five: Cut one Fusible Fleece per Key Fob using the same pattern piece (or cutting 10″ x 2″). Set aside for now.
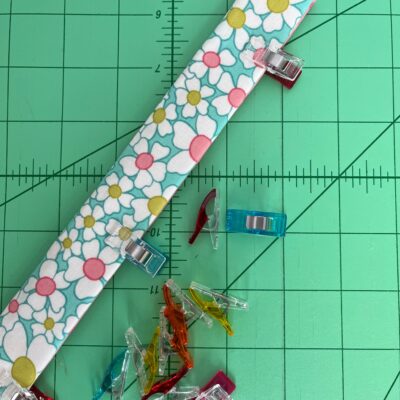
Step Six: Sew two fabric strips, right sides together, down the long side. Iron seam open. Do this with each Key Fob you plan to make.
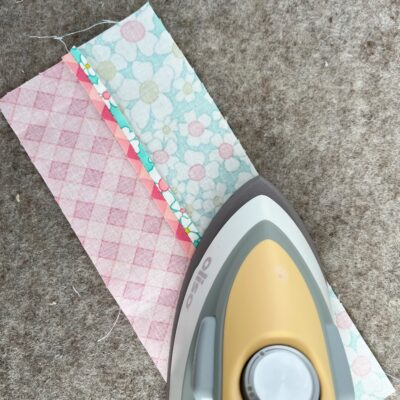
Step Seven: Place the Fusible Fleece down the center of the sewn fabric. It will line up on the ends and go directly down the center of the sewn seam. Iron to the fabric. Do this with all fabric pieces.
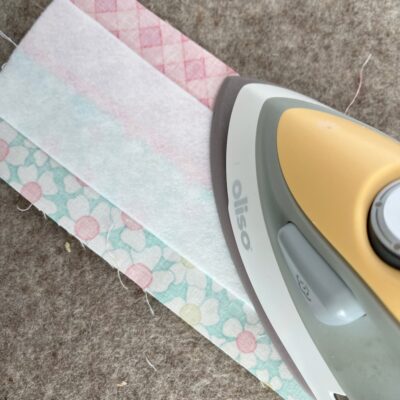
Step Eight: Iron the long raw edge over the fusible fleece. Repeat on the opposite long edge.
Step Nine: Fold each fabric strip in half, wrong sides together. Press and use Wonder Clips or pins to hold it in place.
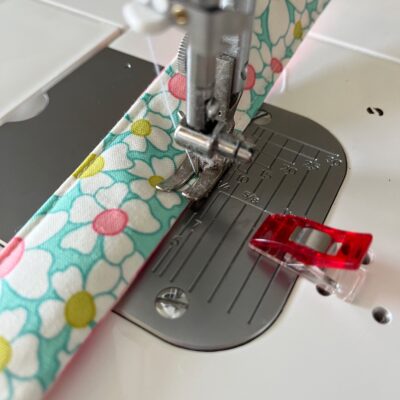
Step Ten: Sew 1/8″ topstitch along each edge.
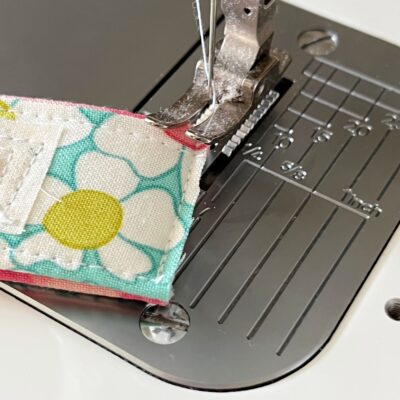
Step Eleven: Now you will carefully cut out the words that you plan to use. I cut them approximately 1 inch wide and the length of the word. But you can adjust this as necessary. Remove the paper backing from each word. Determine where you would like to place your word on the Key Fob and iron it in place. (Keep in mind this will be folded in half, so double check that when you fold it, you won’t be cutting off your word!)

Step Twelve: Sew along the raw edges of the fabric word, permanently adhering it to the Key Fob. I sew around mine twice because I like the way it looks! You can do it only once if you’d like.

Step Thirteen: Fold your Key Fob in half and sew along the raw edges. Trim any threads.
Step Fourteen: Following manufacturer instructions, attach the hardware to your Key Fob.
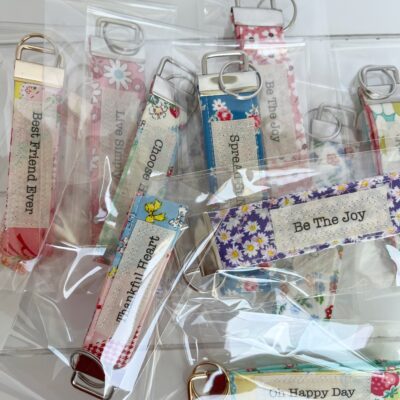
You are done!!! Hopefully you have made a big pile of Key Fobs and can begin gifting them right away! I place mine in a little plastic sleeve and they look so professional to gift! Honestly I just feel like you can’t go wrong with a homemade Key Fob!
Happy Sewing!