


Hello! It’s Lisa Ruble from Quilty Zest and I’m here to talk t-shirt quilts!
T-shirt quilts are wonderful gifts, and a great way to preserve memories using favorite tees. They’re also not difficult to make, but I’m going to share some tips and tricks to make the process as easy and possible!
 Every t-shirt quilt is different – not just based on the t-shirts used, but also considering the size of squares, layout decisions, and sashing and border choices. Reading this tutorial will give you the tools you need to make your own. Head over to my blog to learn the story behind the t-shirt quilt I made.
You’ll Need:
* t-shirts – quantity can vary, but I recommend a minimum of 12
* HeatnBond EZ-Tee Stabilizer Note: This comes in a package of sheets or as a large piece you can cut into custom size pieces. I recommend the large piece – you can cut any size square you need!
* Pressing Paper <–this is the key supply for a t-shirt quilt!
* Fabric yardage for framing blocks, sashing, borders, and binding
* Backing fabric

Getting Started:
1. The first step is to cut up the t-shirts. I recommend starting by cutting off the sleeves and the back of the shirt. This leaves you with the largest possible useable piece for each shirt.
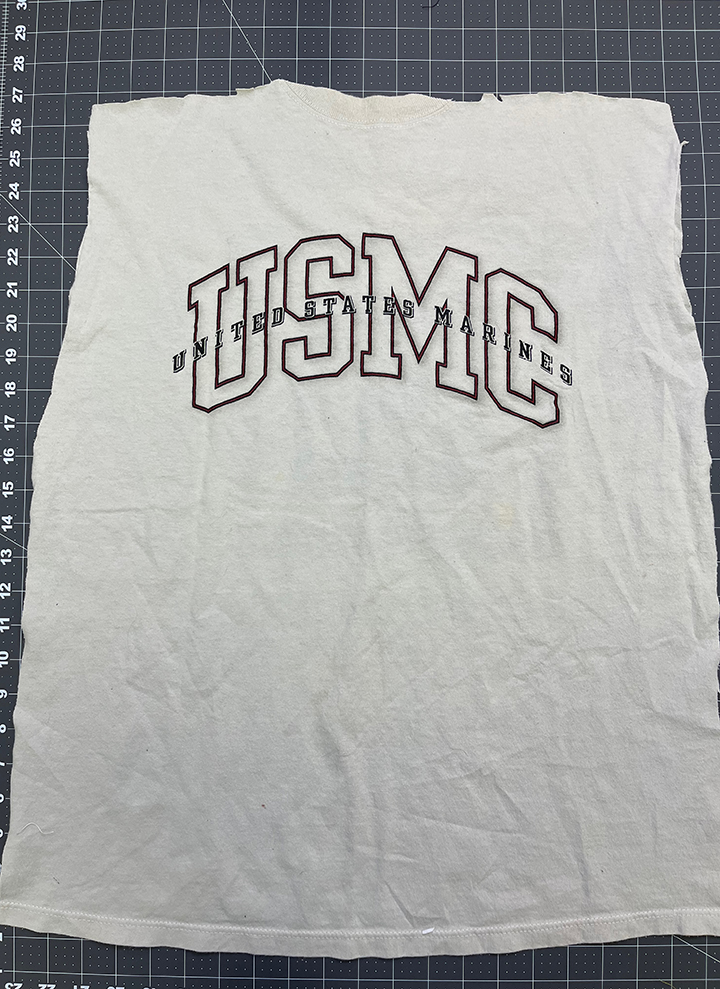
2. Using a ruler, determine both the largest and the smallest square size you can cut from the shirts – this may be restricted by the height or width of the shirt, or the size of the motif. For adult-size shirts, generally the smallest size square will be around the 12-1/2″ square mark (don’t forget to consider seam allowance!).
3. Choose your block size. (DO NOT CUT YET!) For my project, I was able to cut about half of the shirts into 14-1/2″ squares without cutting off any of the motifs. For the rest, I chose a smaller square size for each shirt, with plans to add a frame to enlarge it to 14-1/2″ square.
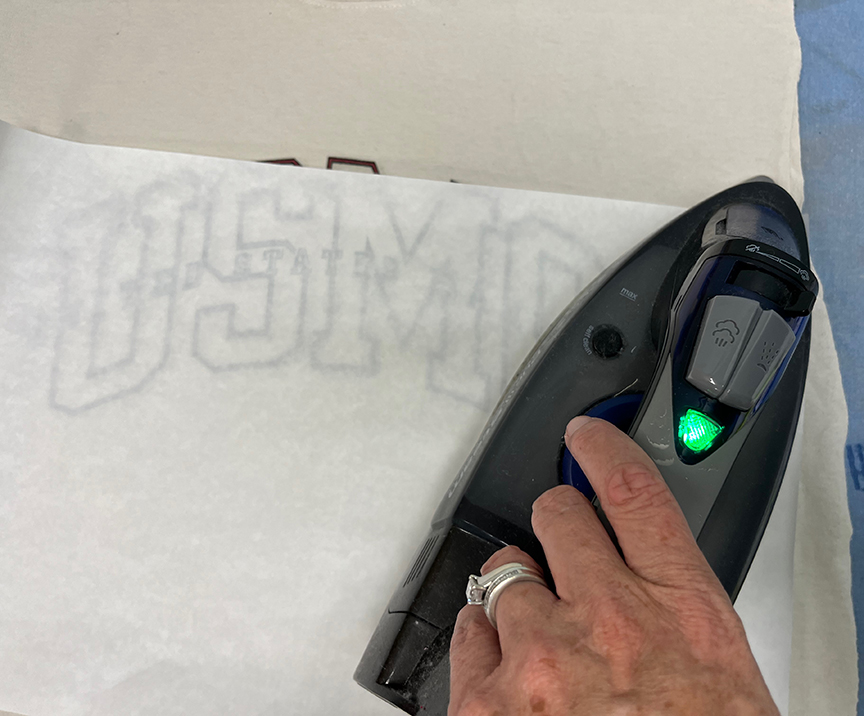
4. Cut squares from the EZ-Tee Stabilizer that are roughly 2″ larger than your planned block size. Fuse these to the wrong side of each t-shirt, roughly centering your motif. This allows you some wiggle room for cutting the blocks from the shirts. Note: Pressing Paper is key for this project. Place it between your iron and your project, shiny side down. This protects your iron from any printing on the t-shirts.

 5. Cut your desired size square from each t-shirt. Note: The Stabilizer should extend to your cut edges. This keeps the t-shirt from stretching as you sew.
Don’t forget the small t-shirt motifs!
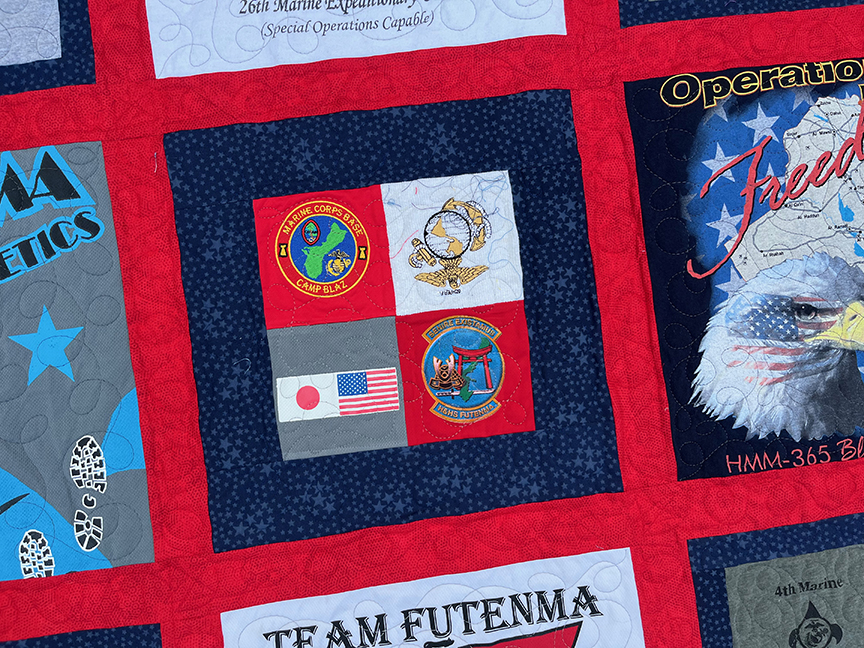
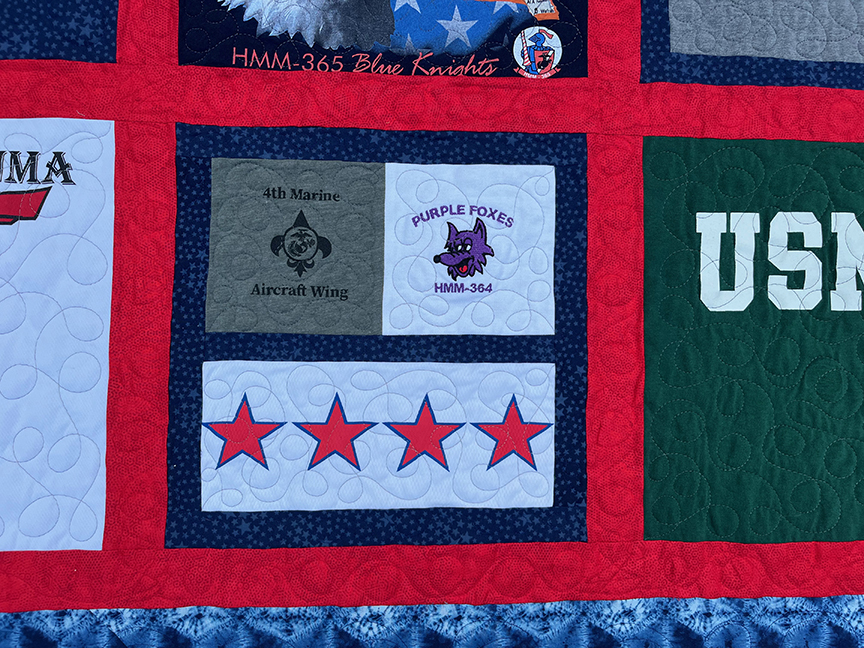
Whether it’s a small logo on a polo or a design on a sleeve, you can use those small designs from your favorite tees too! I cut them into the largest size I could (generally about 6″ square, yours may vary), and then joined them into groups when I got to the layout stage. Don’t forget Stabilizer for these too!
Layout
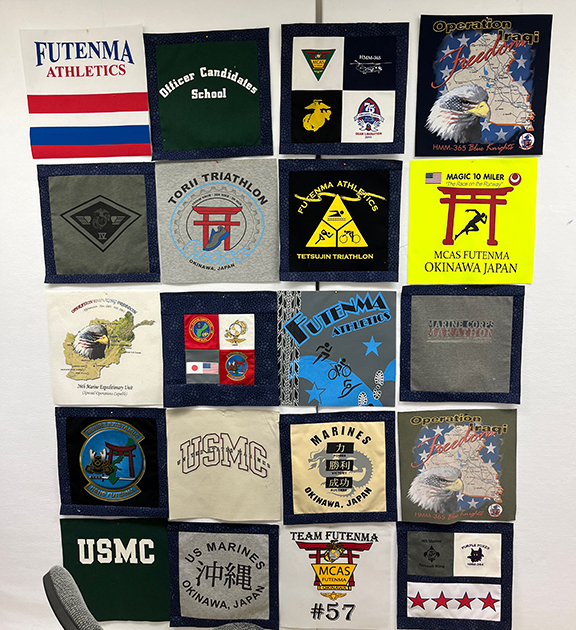
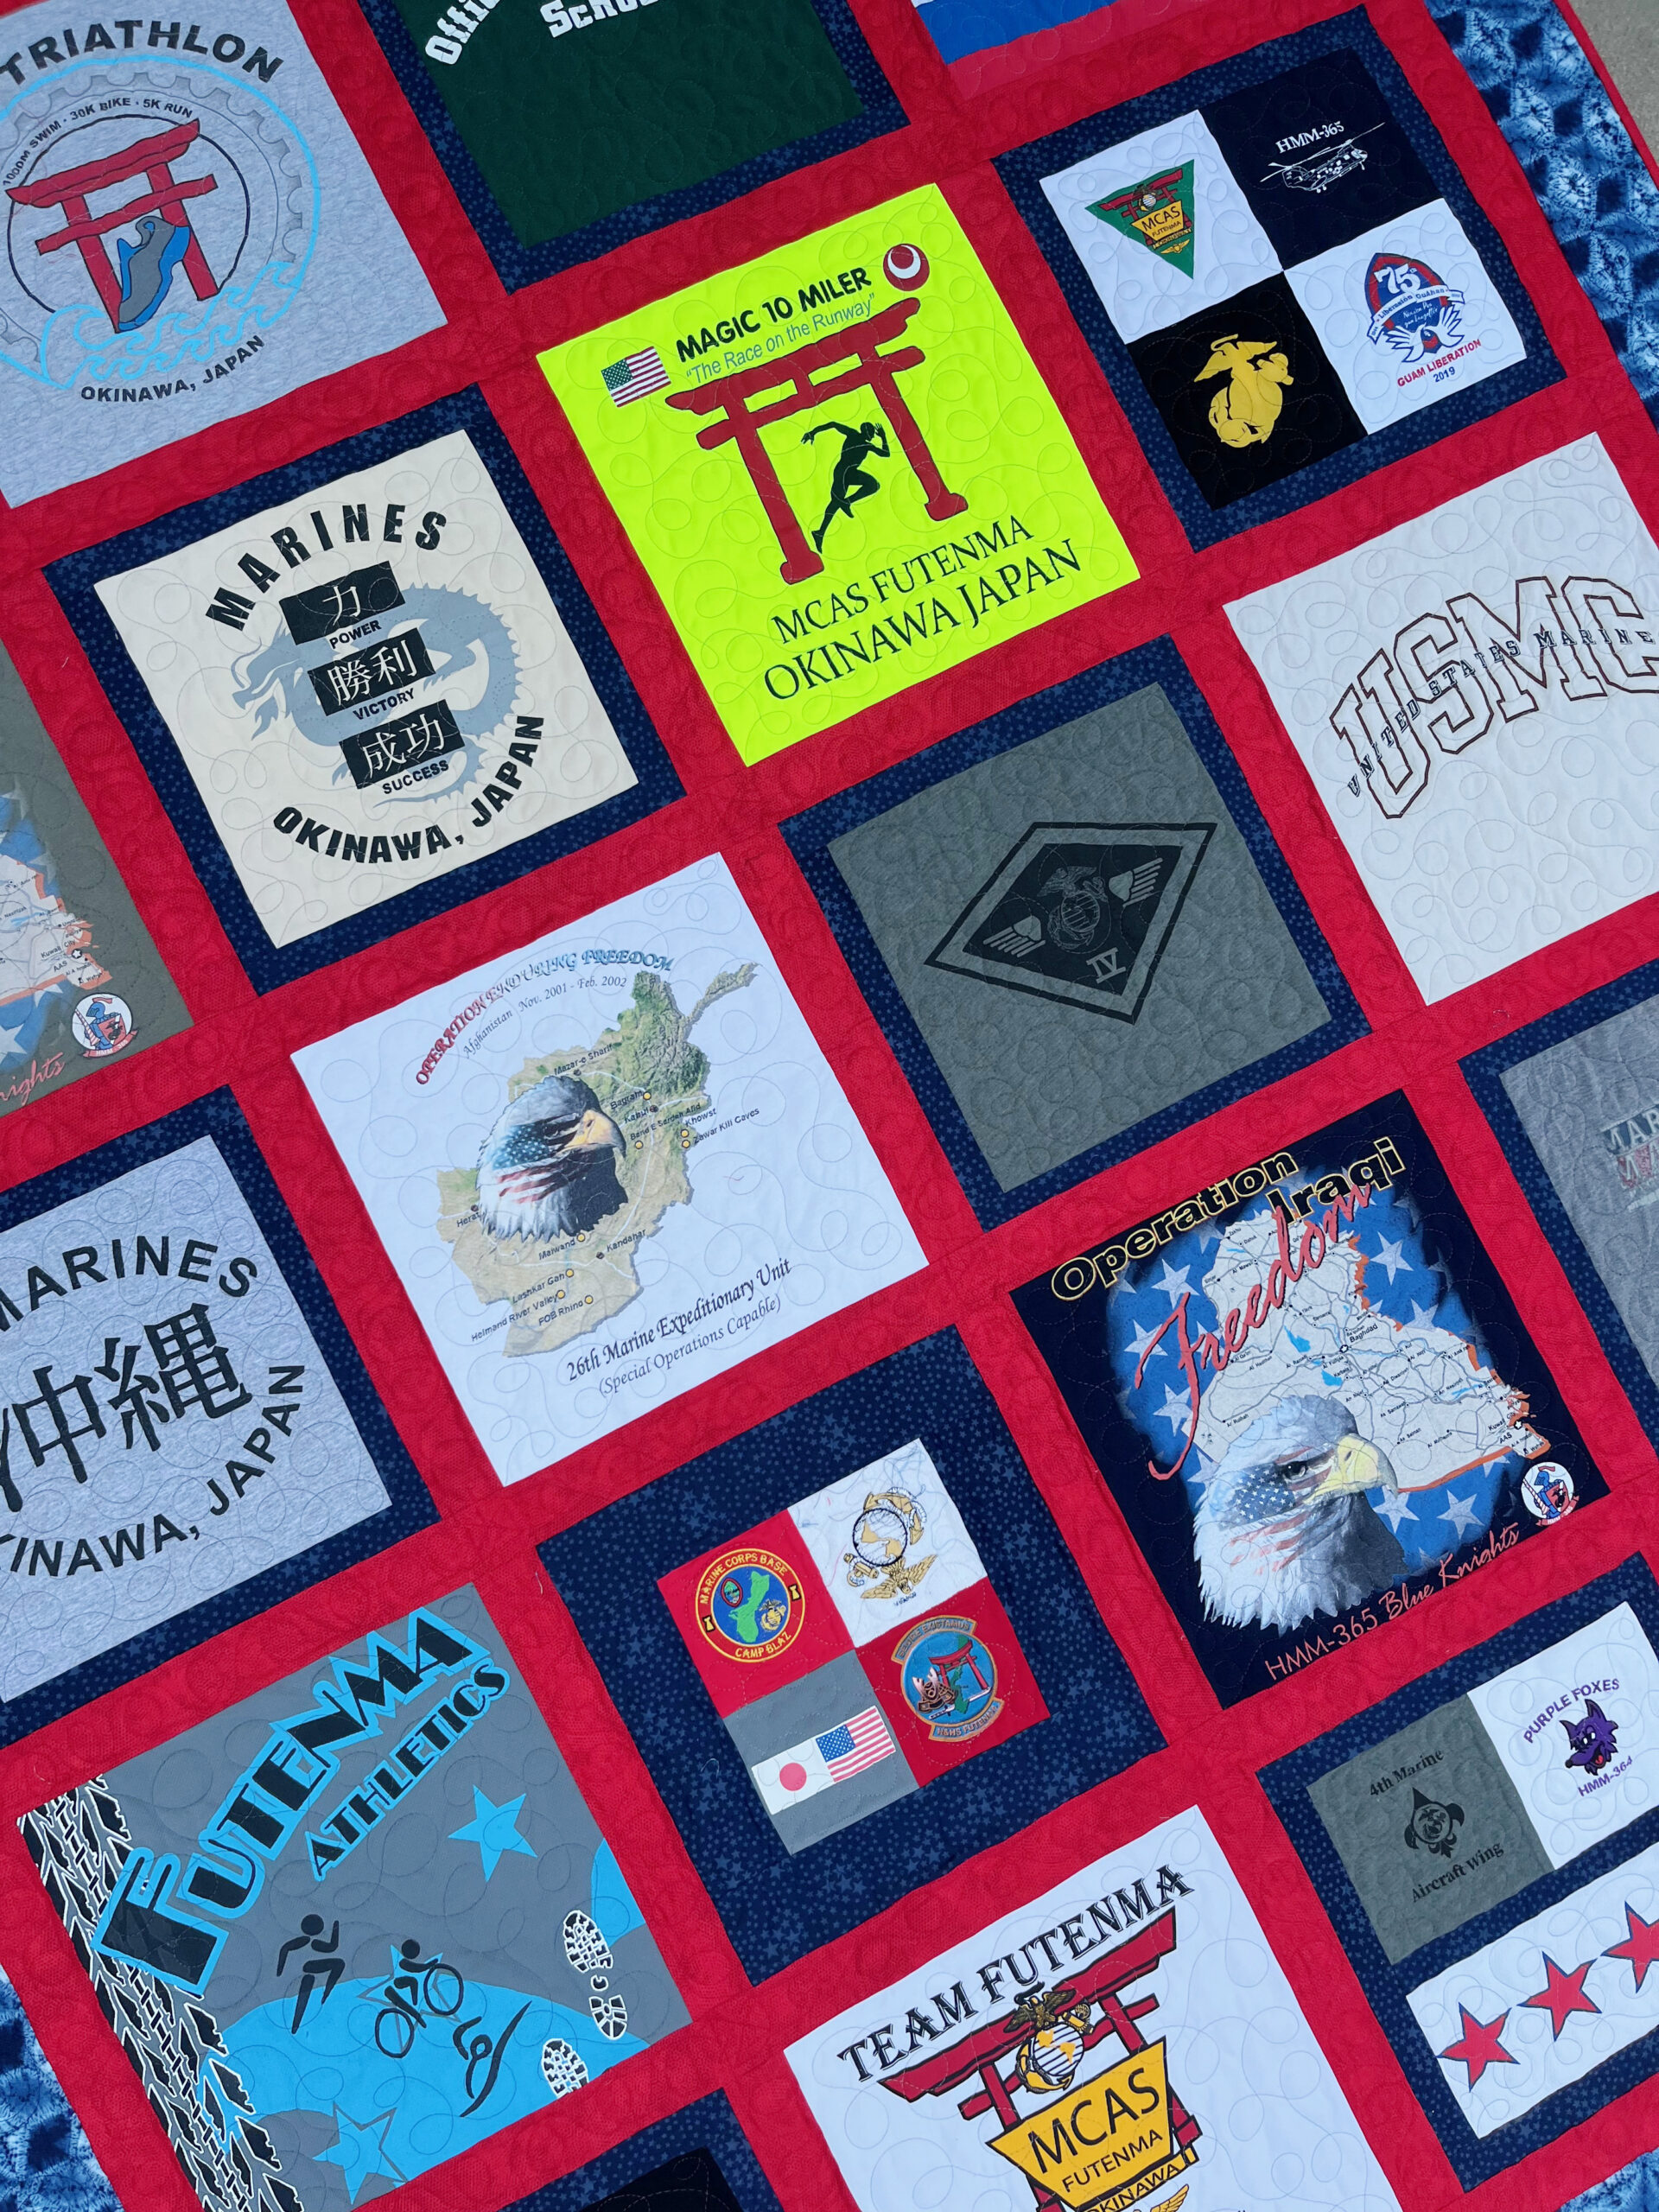
1. With all your blocks cut, it’s time to consider layout. Completely by chance, my quilt worked out to have an equal number of blocks that needed frames to get up to size, and blocks that measured 14-1/2″ square just from the t-shirt. I opted to alternate those two types in my layout (photo below is not a final layout – rather a work in progress as I arranged the blocks to spread out colors and framed/unframed blocks). You can see that I chose a navy star print to frame the smaller blocks. Note: If you have smaller blocks, consider adding frames to all your t-shirts to enlarge the size of your quilt (or add more t-shirts!).
2. Add frames to opposite sides and then top/bottom of your smaller blocks. I did these slightly oversized, and then trimmed to my desired block size.
3. This is also the time to sew your small logo blocks together and add frames. You can see several examples of mine here.
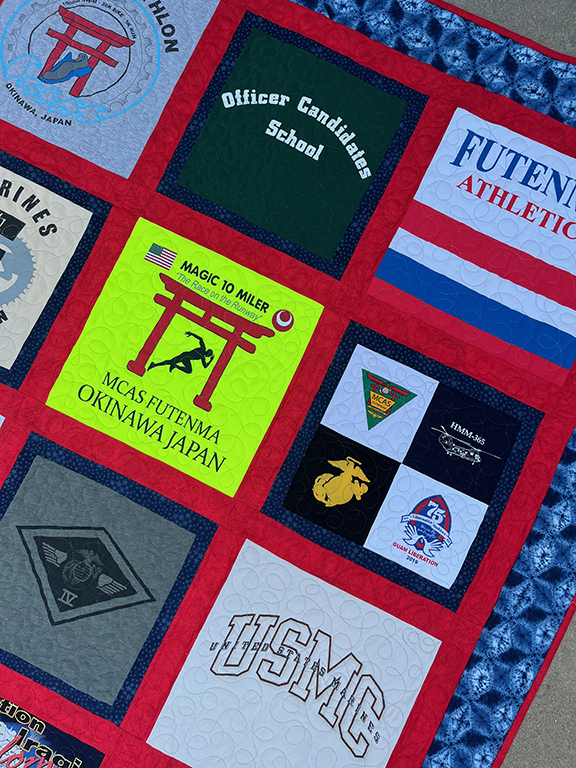
4. Note that I opted to use a sashing fabric. Mine is a military quilt, so I wanted to work in both red and blue. Plus, the t-shirts all tended toward blues, grays and neutrals, so I chose a brighter red sashing to help define the blocks. I shared more about my fabric choices and reasoning on my blog.
Assembly and Finishing
1. Keep using that Pressing Paper for every seam you press! Every time you press a hot iron to a printed t-shirt motif, it has the opportunity to melt on your iron. The Pressing Paper is your best friend.

2. I highly recommend taking a photo of your quilt layout. That way you can refer to it as you join the blocks into rows to make sure your blocks are in the desired order.
3. Once your quilt center is assembled, add borders as desired, quilt, and bind.
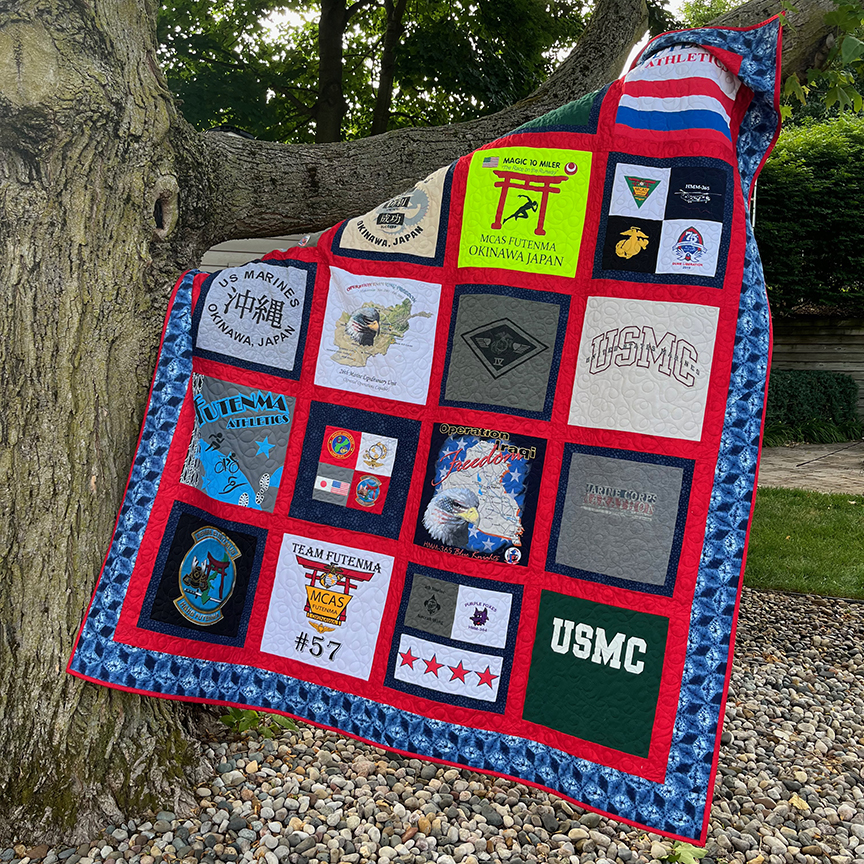
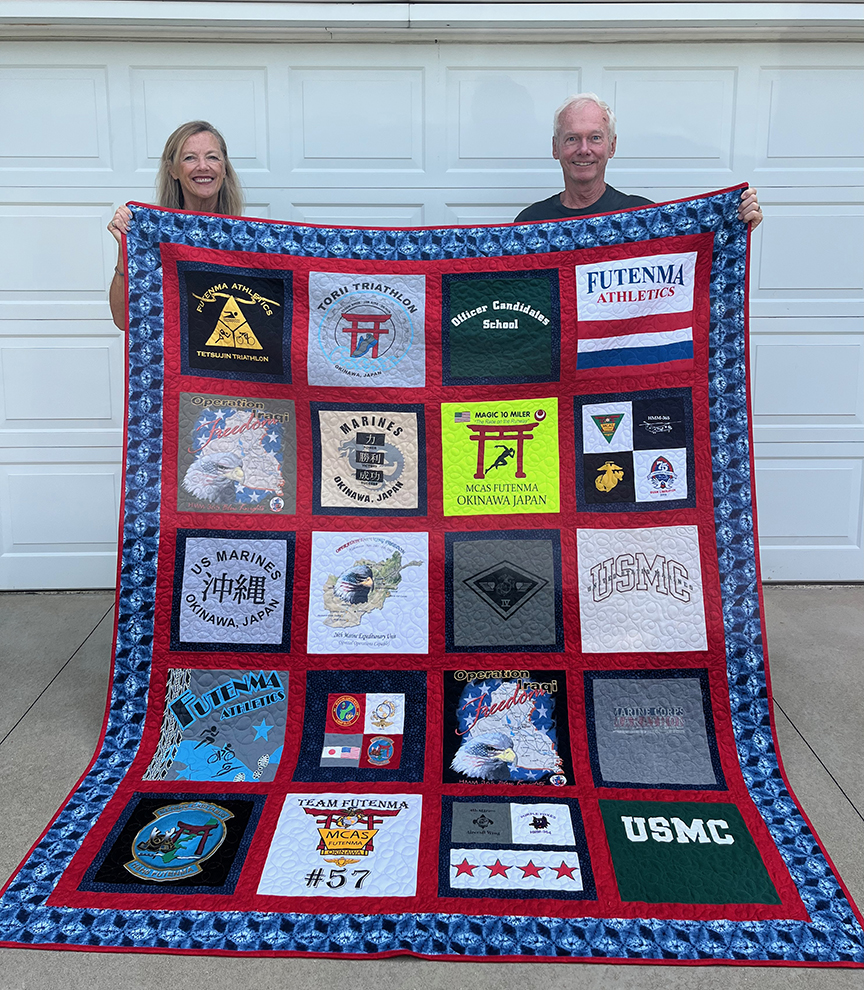
Here’s my finished quilt, held up by my neighbors. They gifted this to their son just last week! Read more about this quilt on my blog.
Have you made a t-shirt quilt? Are you planning to make one? Let me know in the comments! I hope these tips and tricks help!