


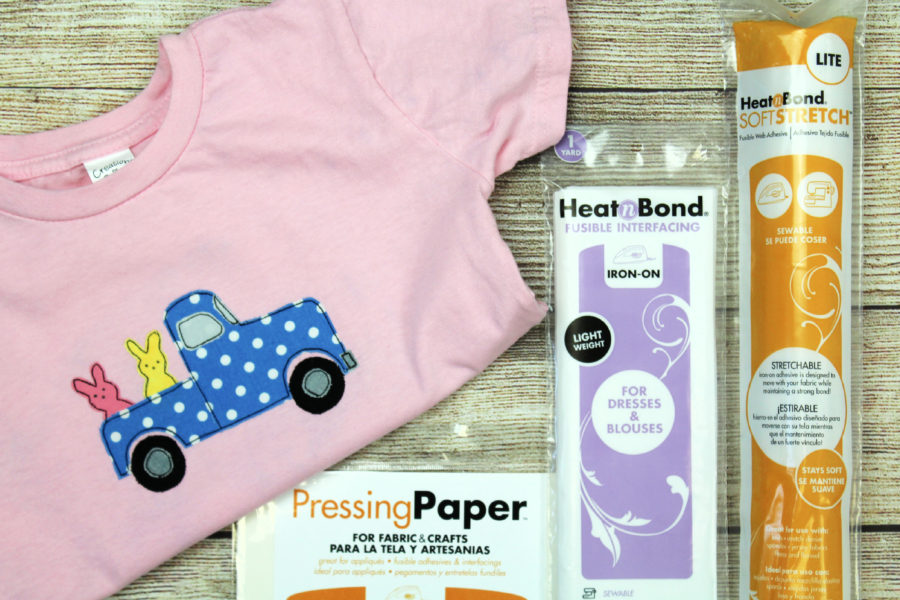
 It’s almost Easter and we are having so much fun with preparations. Carla here from Creatin’ in the Sticks with one of my favorite sewing projects, fabric applique on t-shirts. This was a quilt block I designed, but it’s even more fun on a little tee. HeatnBond Soft Stretch Lite is perfect for fusible applique on t-shirts and this one is so fun for Easter!
![]()
Cruisin’ With My Peeps HeatnBond Easter T-shirt Applique
by Carla at Creatin’ in the Sticks
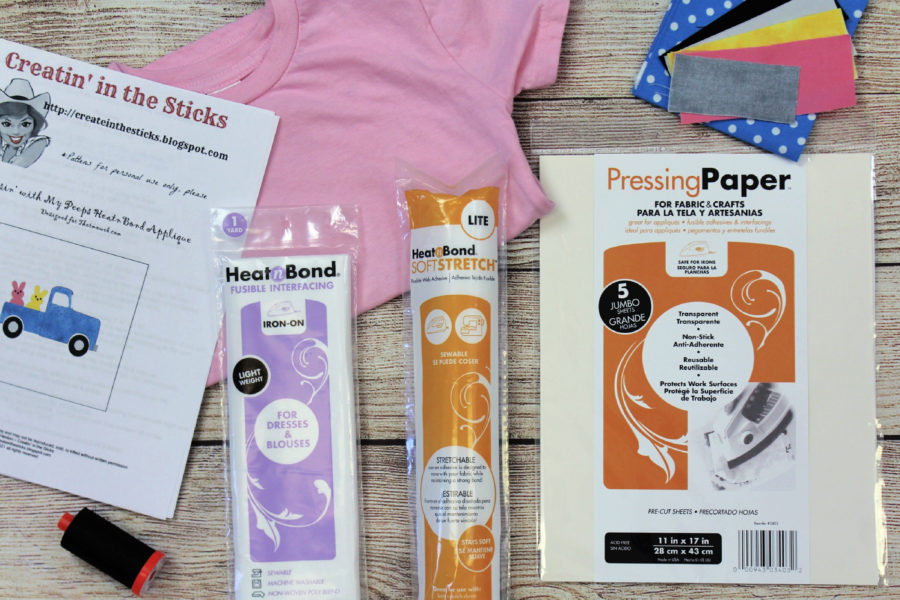
Supplies:
Cruisin’ with My Peeps Applique Pattern – Download here: Cruising with my Peeps Applique by Carla at Creatin in the Sticks
HeatnBond Light Weight Non-Woven Interfacing
HeatnBond Soft Stretch Lite Fusible Web Adhesive
1 – Cotton t-shirt pre-washed (this one is 4T)
Cotton fabric:
Blue – 6 ½” x 6 ½” for truck
Small scraps of yellow, pink, grey, light grey, and black
Other Supplies:
Aurifil 50 wt thread: #2692, InkJet Printer, Iron (I love my pink Oliso), Permanent Marker for tracing, Sharp scissors, Sewing Machine, and general sewing supplies *optional – fabric marker for eyes and nose on the Peeps
Cruisin’ With My Peeps HeatnBond T-shirt Applique Instructions:
please read through the complete instructions before starting.
Step #1
Trace all the templates onto the paper side of the HeatnBond Soft Stretch Lite Fusible Web Adhesive. The patterns have been reversed for you.
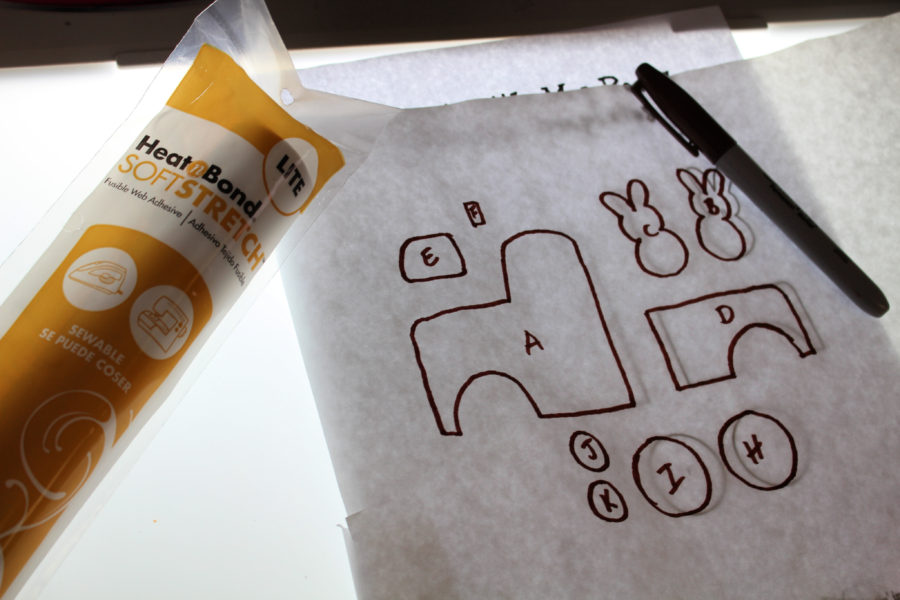
Place the template pieces, fusible web side down, on the wrong side of the cotton fabrics. Working in sections for 5 seconds at a time, press the fusible web to the wrong side of the fabrics with an iron on high heat and no steam.

Let the applique pieces cool. Cut out all applique pieces on the traced lines.
Step #2
Cut one piece of HeatnBond Lightweight interfacing 6 ½” x 6 ½”. Turn the shirt inside out and place the interfacing adhesive side down on the wrong side of the front of the shirt where the applique will be placed. Follow the package instructions to bond the interfacing to the shirt.
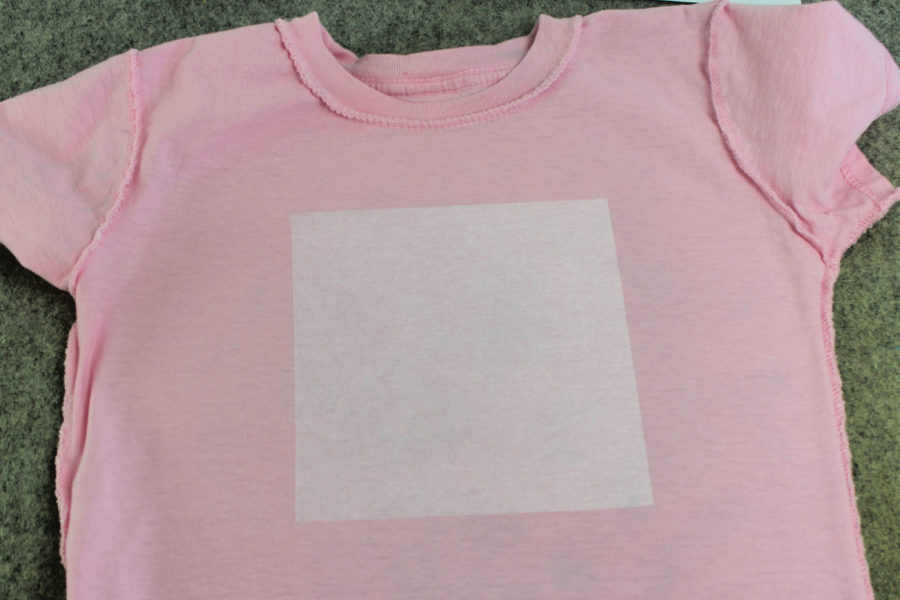
The interfacing will stabilize the shirt for sewing the applique.
Step #3
Cut one piece of Pressing Paper in half on the fold. Turn the shirt right side out and place the shirt on an ironing surface front side up. Insert one-half sheet of Pressing Paper, shiny side up, in the shirt and press the shirt front smooth.
Next, peel the backing paper off of the applique pieces and place them adhesive side down on the prewashed t-shirt using the key in the pattern as a guide.
When the applique is positioned correctly, bond the applique pieces to the shirt by holding the iron with high heat and steam on the applique for 20 seconds.

Let the shirt cool and remove the Pressing Paper.
Step #4
Use the Aurifil thread to stitch around each applique piece 2 or 3 times.
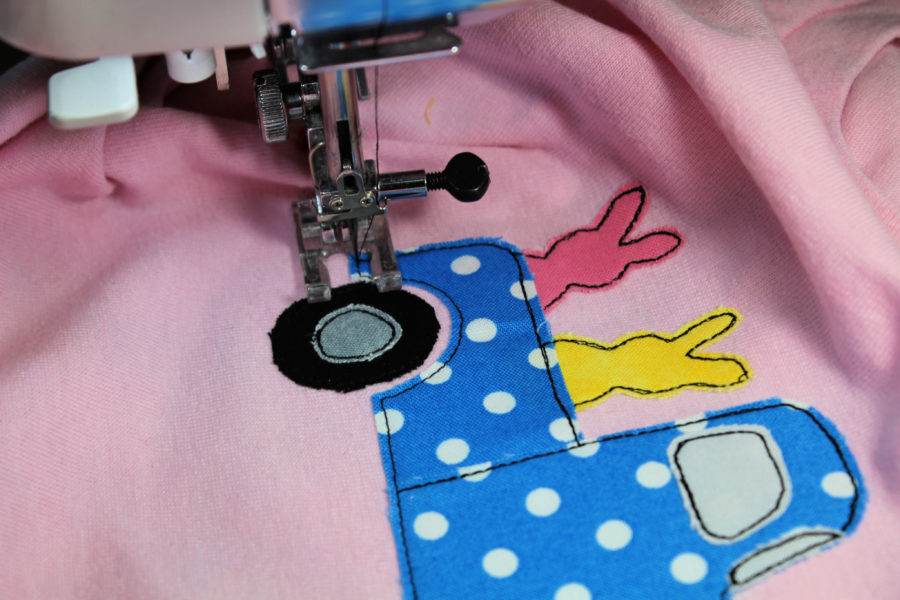
If desired, use a fabric marker to put dots for the eyes and nose as shown in the key of the pattern.
![]()
Have a Happy Easter,
Carla
 Deco Foil
Deco Foil has quickly become one of our most popular products and it’s easy to see why! With a Rainbow of colors available at your fingertips and a wide variety of products to use to apply the Deco Foil…it’s easy to say once you dip your toe in…there’s no going back! Our Deco Foil is perfect for cardmaking, papercrafting, mixed media, and of course for scrapbooking. And now you’ll find more ways to include it with our NEW Deco Foil Toner Sheets available in A2 and Slimline Sizes! So miss entering to win our FairyTale Foil Collection, Deco Foil DUO Transfer Gel, Deco Foil Foam Sheets, Deco Foil Toner Sheets plus your choice of two of our A2 or Slimline Size Toner Sheets, This prize is worth $60!
This post contains affiliate links. For more information, see our disclosure HERE.
This post contains affiliate links. For more information, see our disclosure HERE.