


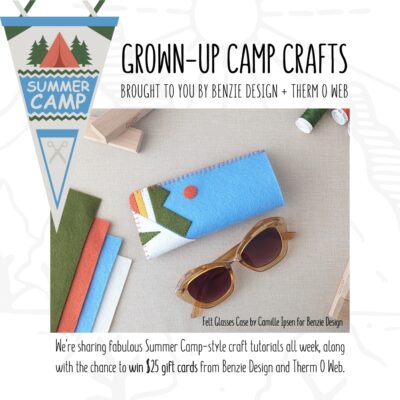
 Welcome to Grown-Up Camp Crafts with Therm O Web + Benzie Design! We’re sharing fabulous Summer Camp-style tutorials on both blogs all week, along with the chance to win gift cards from Therm O Web and Benzie Design. Find the giveaway details at the end of this zipper pouch tutorial designed by Therm O Web sewing & quilting educator, Dori Troutman. PLEASE NOTE: THIS GIVEAWAY HAS ENDED.
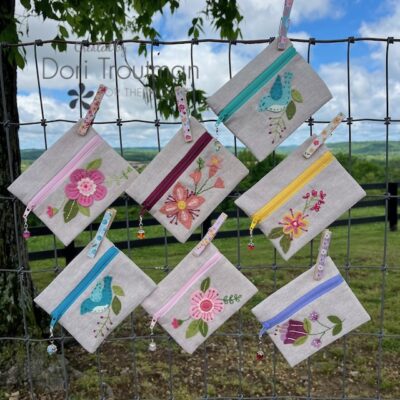
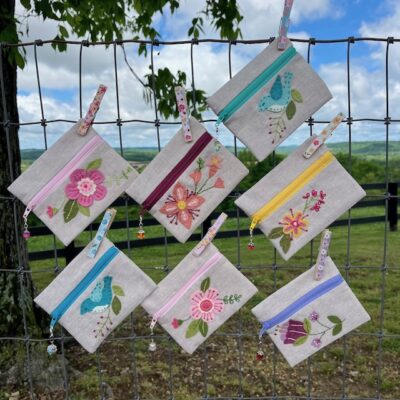
Hello my sewing friends and welcome to Summer Camp!!! I was so excited to work with Benzie Design for this adorable zipper pouch project. The colors of their felt are so vibrant and the quality is amazing. All I could think of was how fun it will be to have a crafting party this summer!
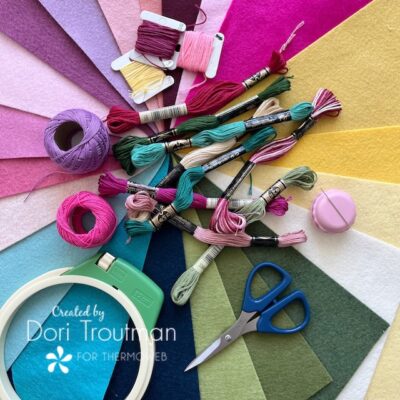
I’m one of those people that love having a little hand sewing project to do in the evenings and after a little thought I decided to cut shapes out of little felt pieces and add some embroidery details. I chose some of the brighter and more vibrant colors of felt and pulled embroidery thread from my stash to match.
And with the thought in mind of a summer crafting party, I knew adding the felt design to linen with a simple embroidery design would be gorgeous. Linen is one of those fabrics that creates a great backdrop to solid colors like this gorgeous felt. What better project to make than a little zipper pouch? Let’s gather our supplies and get started!
Supplies
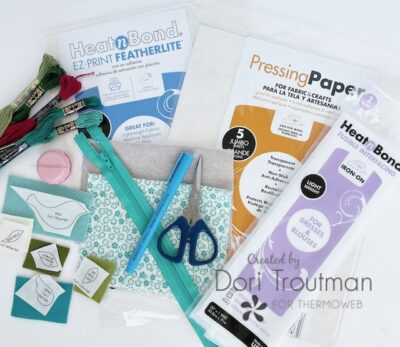
- Pressing Paper
- HeatnBond Fusible Interfacing
- HeatnBond EZ-Print Featherlite
- 6″ x 9″ Linen
- 6″ x 9″ Contrasting cotton fabric
- Benzie Design felt scraps of choice
- Matching embroidery thread
- Embroidery needle
- 9″ or longer polyester zipper (not metal)
- Water soluble fabric marking pen
- Sharp scissors
- Design pattern for felt appliqué
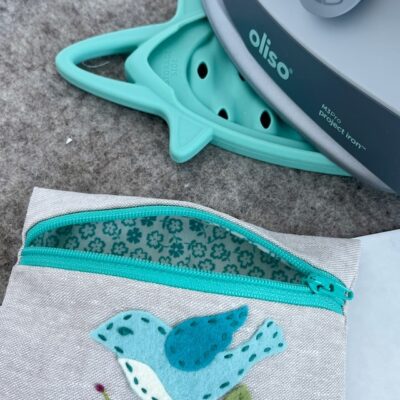
- Iron (I use the Oliso M3Pro Project Iron)
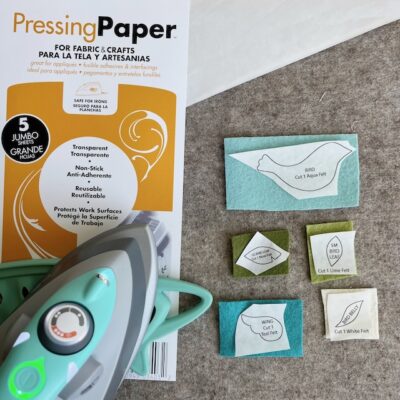
I will admit that I’m not very artistic when it comes to drawing, so I purchased this pattern off of the internet for some little birds and flowers. It actually was perfect because it downloads to a printable page. I simply printed the pattern page on HeatnBond Featherlite EZ Print Sheets and then literally all I had to do was rough cut the little individual pieces out and iron to the felt of choice. You will absolutely want to use Pressing Paper for this step. I found that using the Pressing Paper and my Olisio project iron made this such a smooth process. The Pressing Paper protected the felt from getting too hot and scorching. Cut carefully around each pattern piece, leaving the EZ Print paper on for now.
Take your 6″ x 9″ linen and fold the lower 6″ edge up to a distance of about 3″. Press a nice crease.
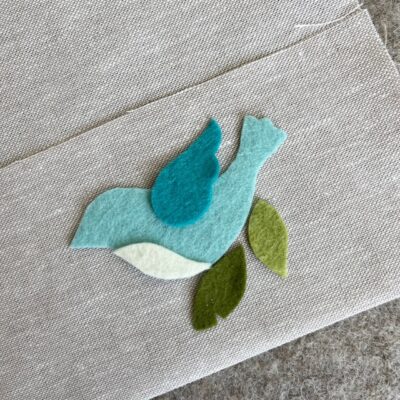
Remove the paper backing from your felt pieces. Lay them out on the that folded over piece on the linen. (Make absolutely sure that the raw edge of the linen is the top of the fold. This is where your zipper will go.) You can just keep readjusting your felt pieces until you get them where you want.
Once you have your design the way you want it, carefully place a sheet of Pressing Paper over and iron the felt in place. The best way to do this is to just hold the iron for 30 seconds on each piece of felt. The Pressing Paper is so important for this step as it allows you to hold the iron in place.
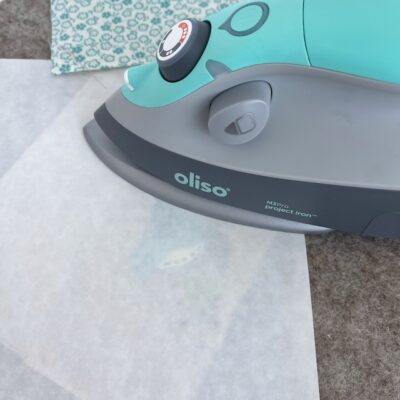
Cut a 6″ x 9″ piece of HeatnBond Fusible Interfacing and iron it to the back of the linen piece.
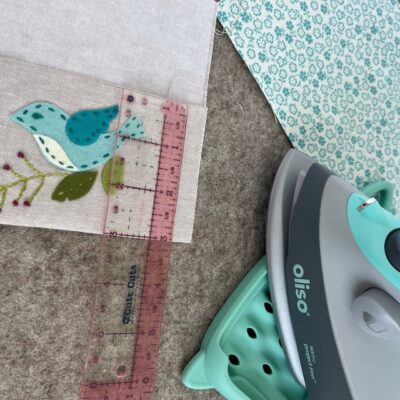
Embroider your felt pieces to the linen in any way you would like. Be sure to unfold the linen for the embroidering. I went very simple and did not do any fancy stitches at all. I used the water-soluble marker to add any additional lines that I chose to use and embroidered those as well. Using your Pressing Paper, fold that 3″ of fabric again creating a firm crease.
I finished the pouch by adding a zipper and the contrasting lining. (If you are not familiar with installing a zipper to the front of a pouch, versus the top you can refer to this tutorial. Be sure to use the fabric and zipper measurements I’ve stated in the instructions!)
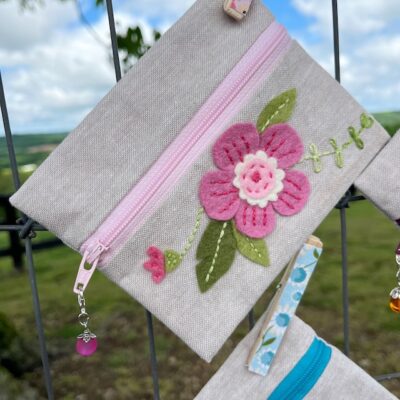
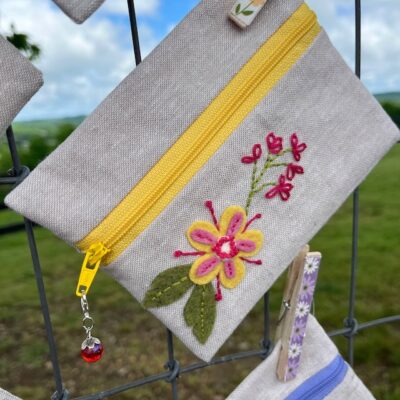
I added some fun home made beaded zipper pulls that matched each felt applique design. I couldn’t stop making these pouches and they just got quicker and easier!
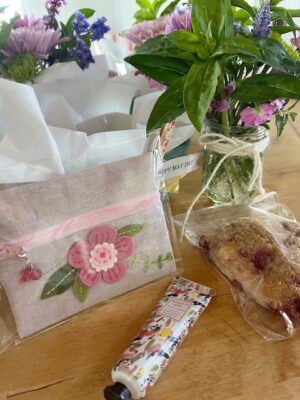
An absolute perfect gift for a favorite friend in your life. I put mine in May Day baskets with other little treats! Delivering them to my friends was so much fun. Now, I’m looking forward to hosting a Summer Crafting Camp!
A special thanks to Benzie Design for supplying the gorgeous wool felt, wool-blend felt, poms and floss for the projects being featured this week.
PLEASE NOTE: THIS GIVEAWAY HAS ENDED.
Be sure to follow both Therm O Web and Benzie Design on Instagram and comment on the Instagram post promoting this tutorial for a chance to win a $25 digital gift card to thermoweb.com. Watch for more chances to win and more Summer Camp-inspired projects all week on the Benzie Design and Therm O Web blogs.
Don’t wait, enter now! The giveaway comment period will end at 11:59pm PDT on Friday, May 24th. All winners will be announced on the Therm O Web Instagram page on Monday, May 27th. Good luck!
Happy Summer Crafting!
Meghan Kennihan
May 20, 2024 at 2:07 pm (2 months ago)These pouches are soooo cute! And you made it so easy to make!
Karen
May 20, 2024 at 7:39 pm (2 months ago)Love all these zipper pouches and the beautiful felt colors! They would make great gift, and I would love to try and make these!
Elizabeth
May 20, 2024 at 7:44 pm (2 months ago)Love these pouches and thank you for the tutorial!
Brenda S
May 20, 2024 at 8:44 pm (2 months ago)Pouches look fun to make
Carolee Cucinella
May 21, 2024 at 8:15 am (2 months ago)Wow! I can’t believe how easy these are to make and so cute!
Linda
May 21, 2024 at 1:34 pm (2 months ago)Dori your pouches are adorable! I’d love to try this felt! Embroidery is so much fun!
Denise Bryant
May 24, 2024 at 11:52 pm (2 months ago)I love these pretty zipper pouches! Pretty designs to decorate them!