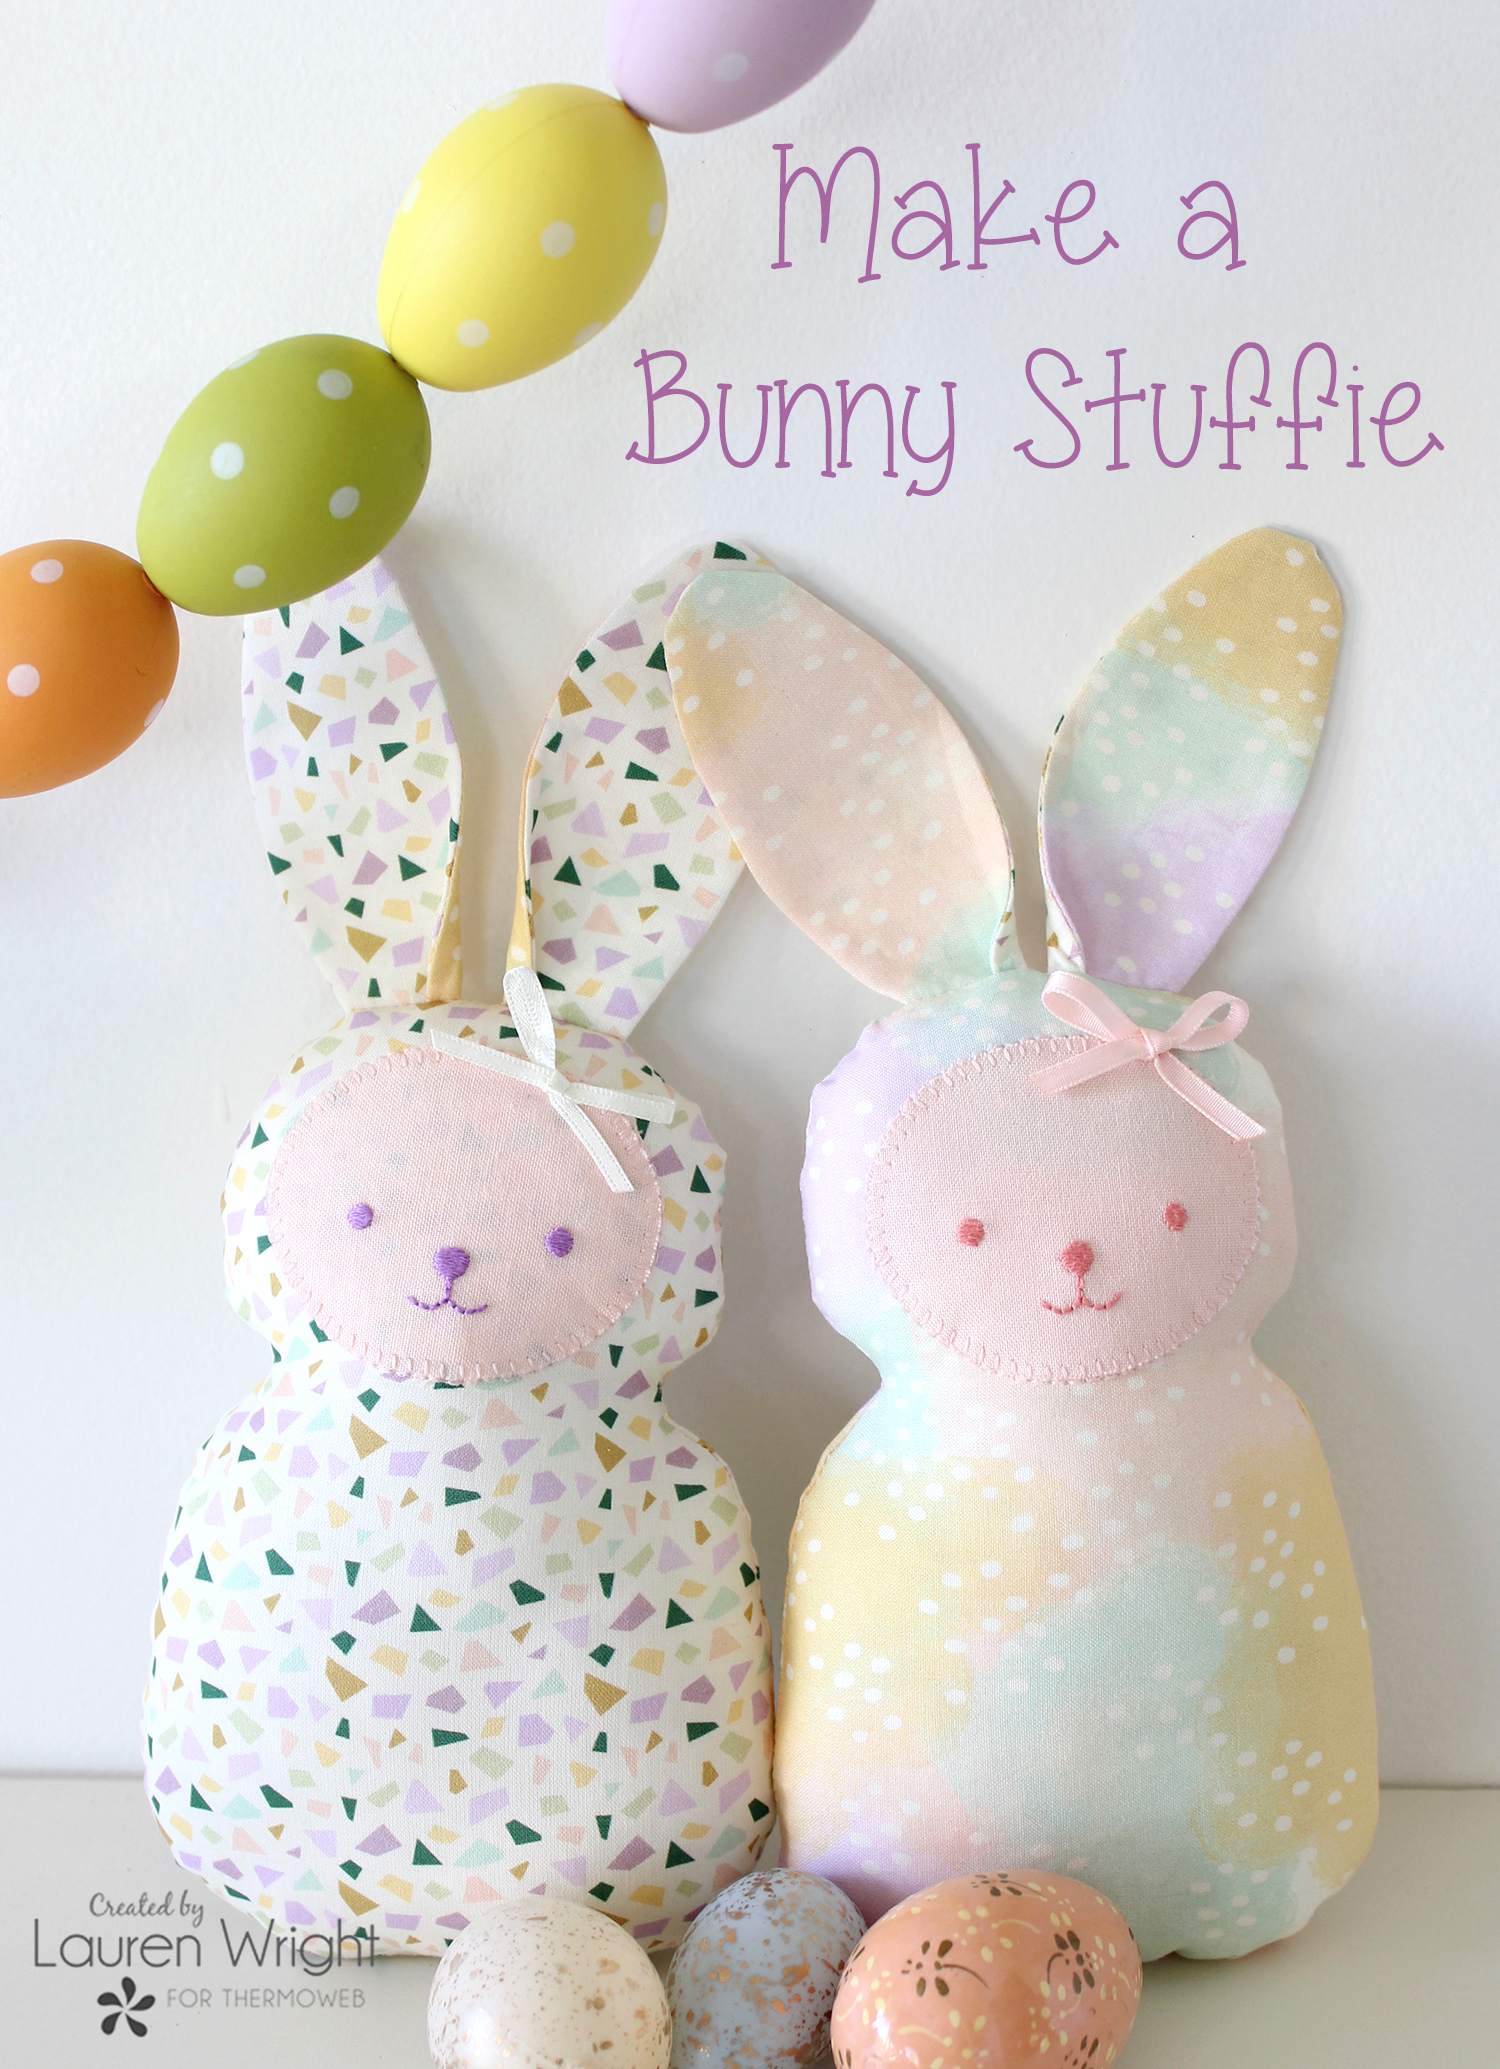
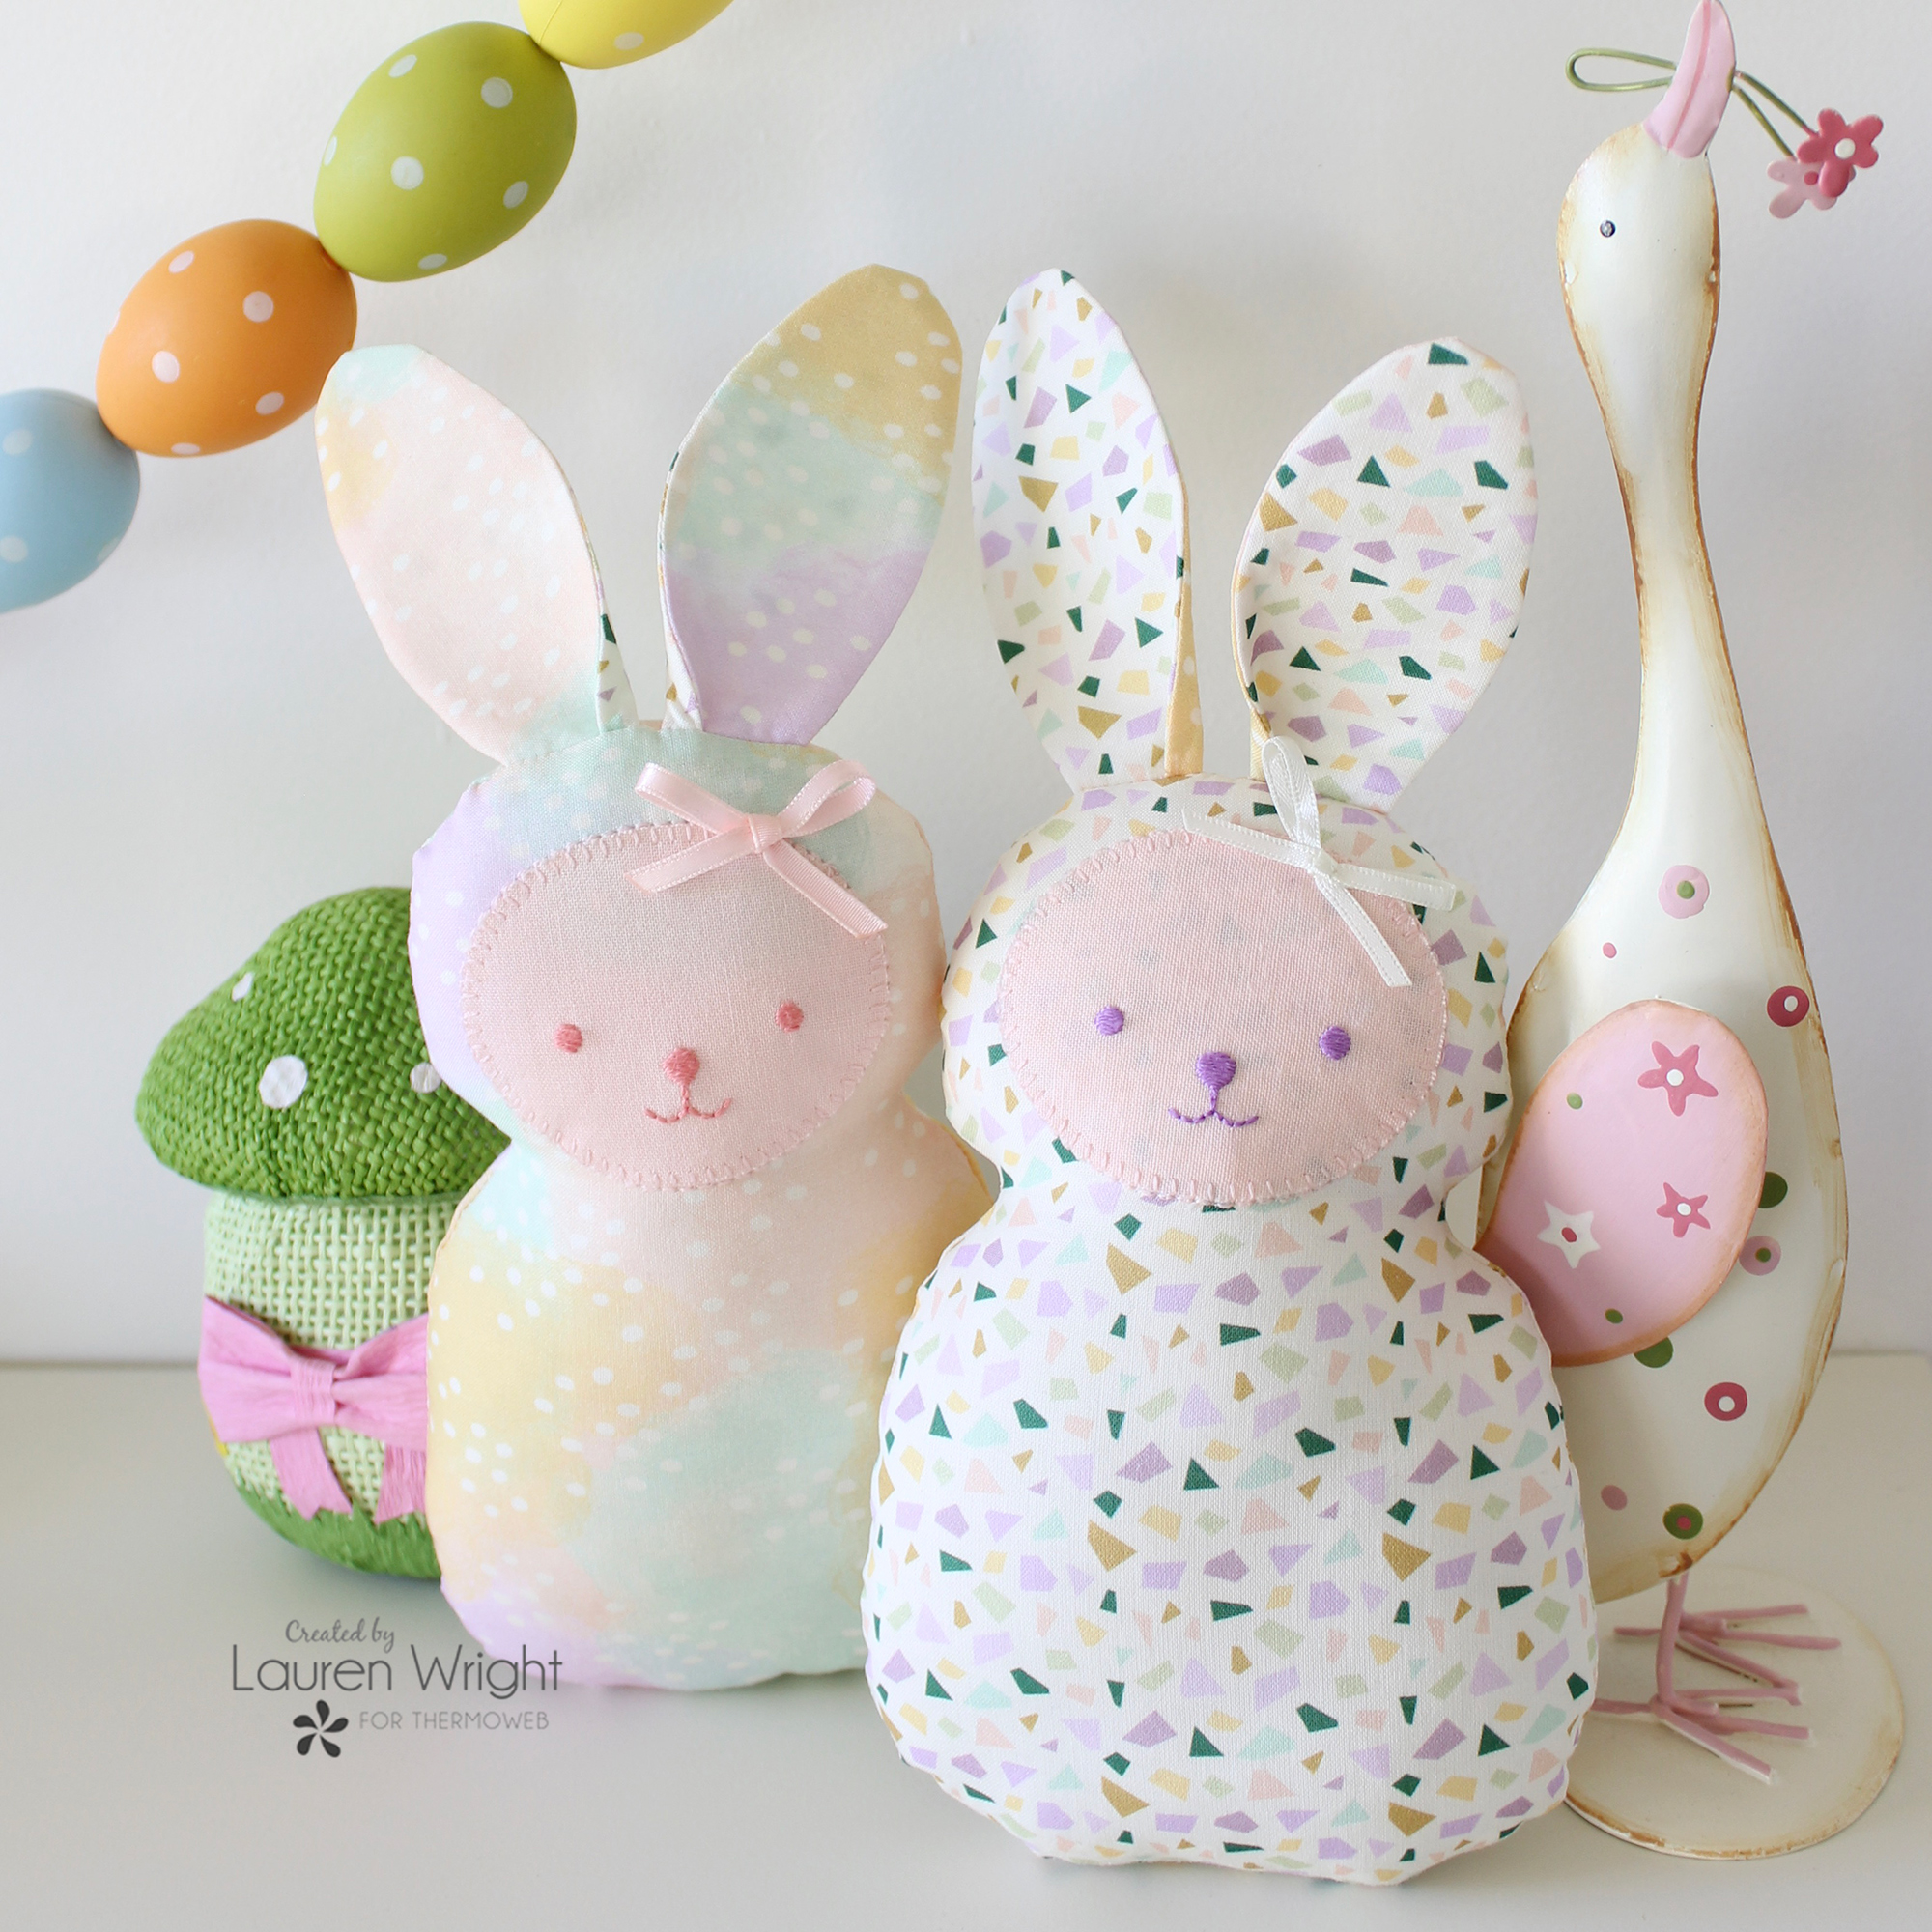
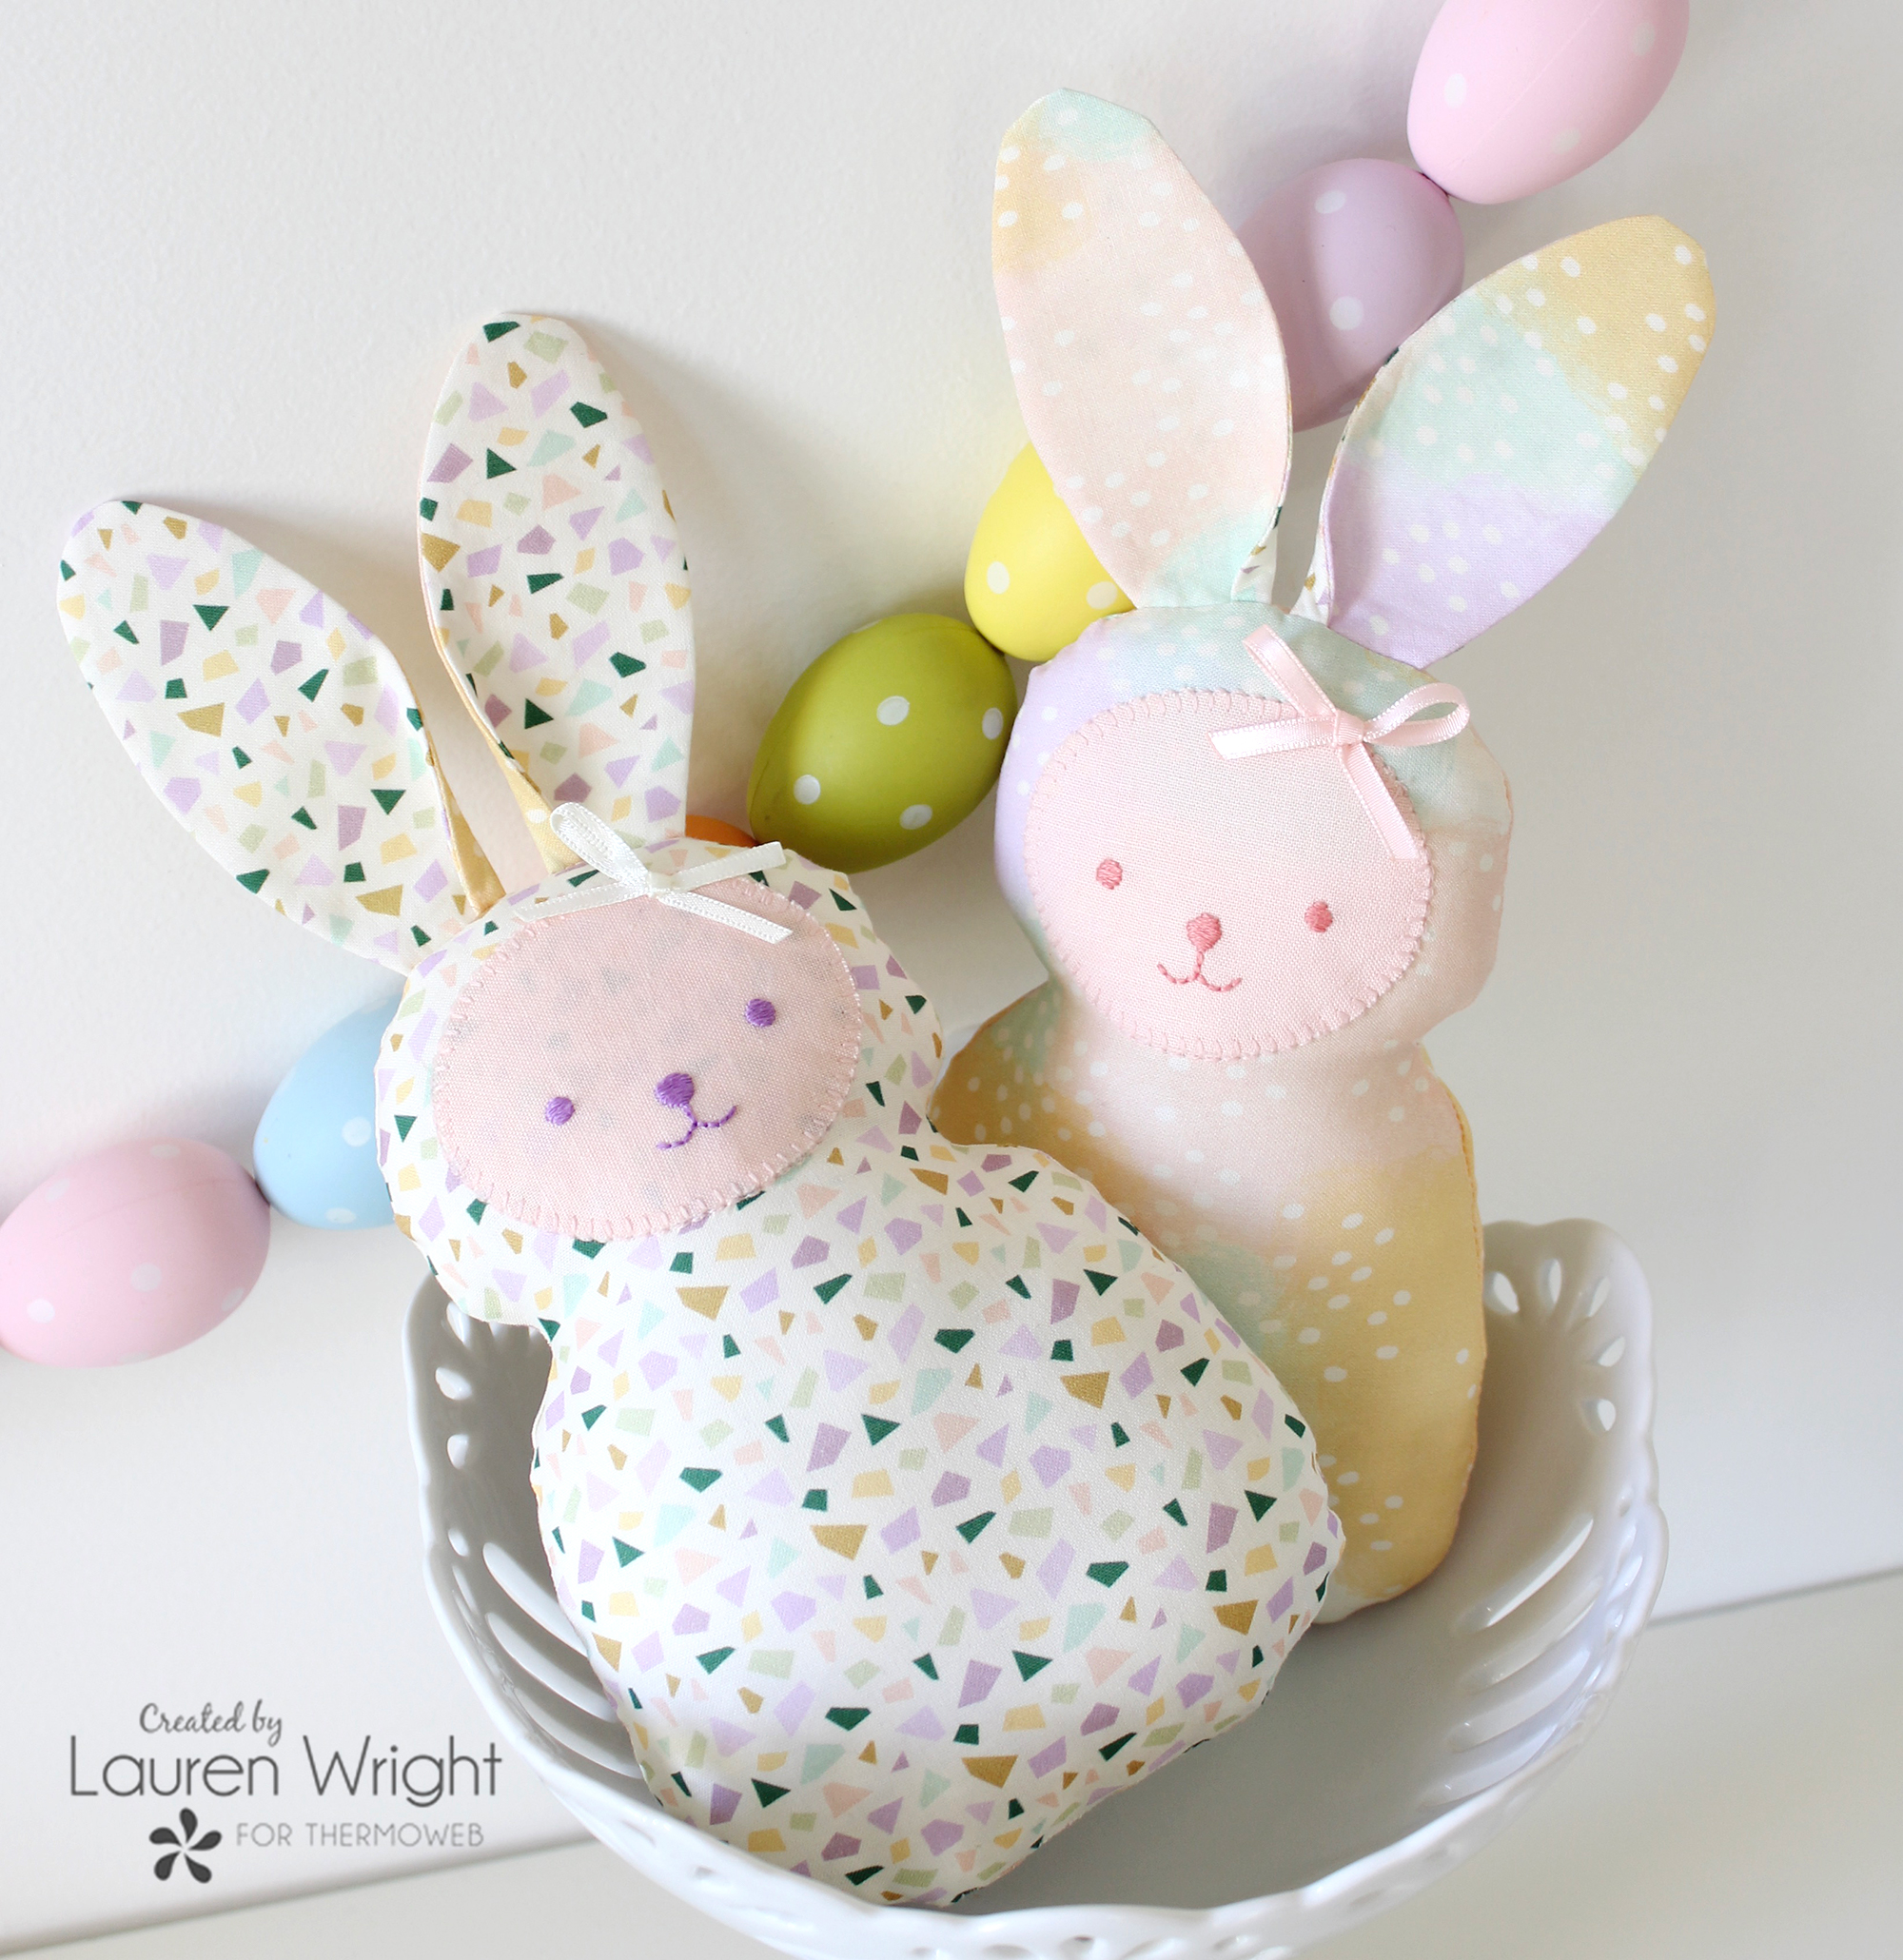
It’s Lauren here from Molly and Mama, with a fun Easter bunny stuffie tutorial! This sweet and simple bunny project makes a lovely chocolate-free Easter gift, but would also be the perfect present for a new baby. Featuring simple hand embroidery on the appliqué face, the straightforward construction of this project makes it easy to put together.
FINISHED SIZE: Each bunny rabbit measures just over 9″ (including the ears) and the body is 4″ wide.
TIP: Read the entire tutorial from beginning to end, before you start sewing.
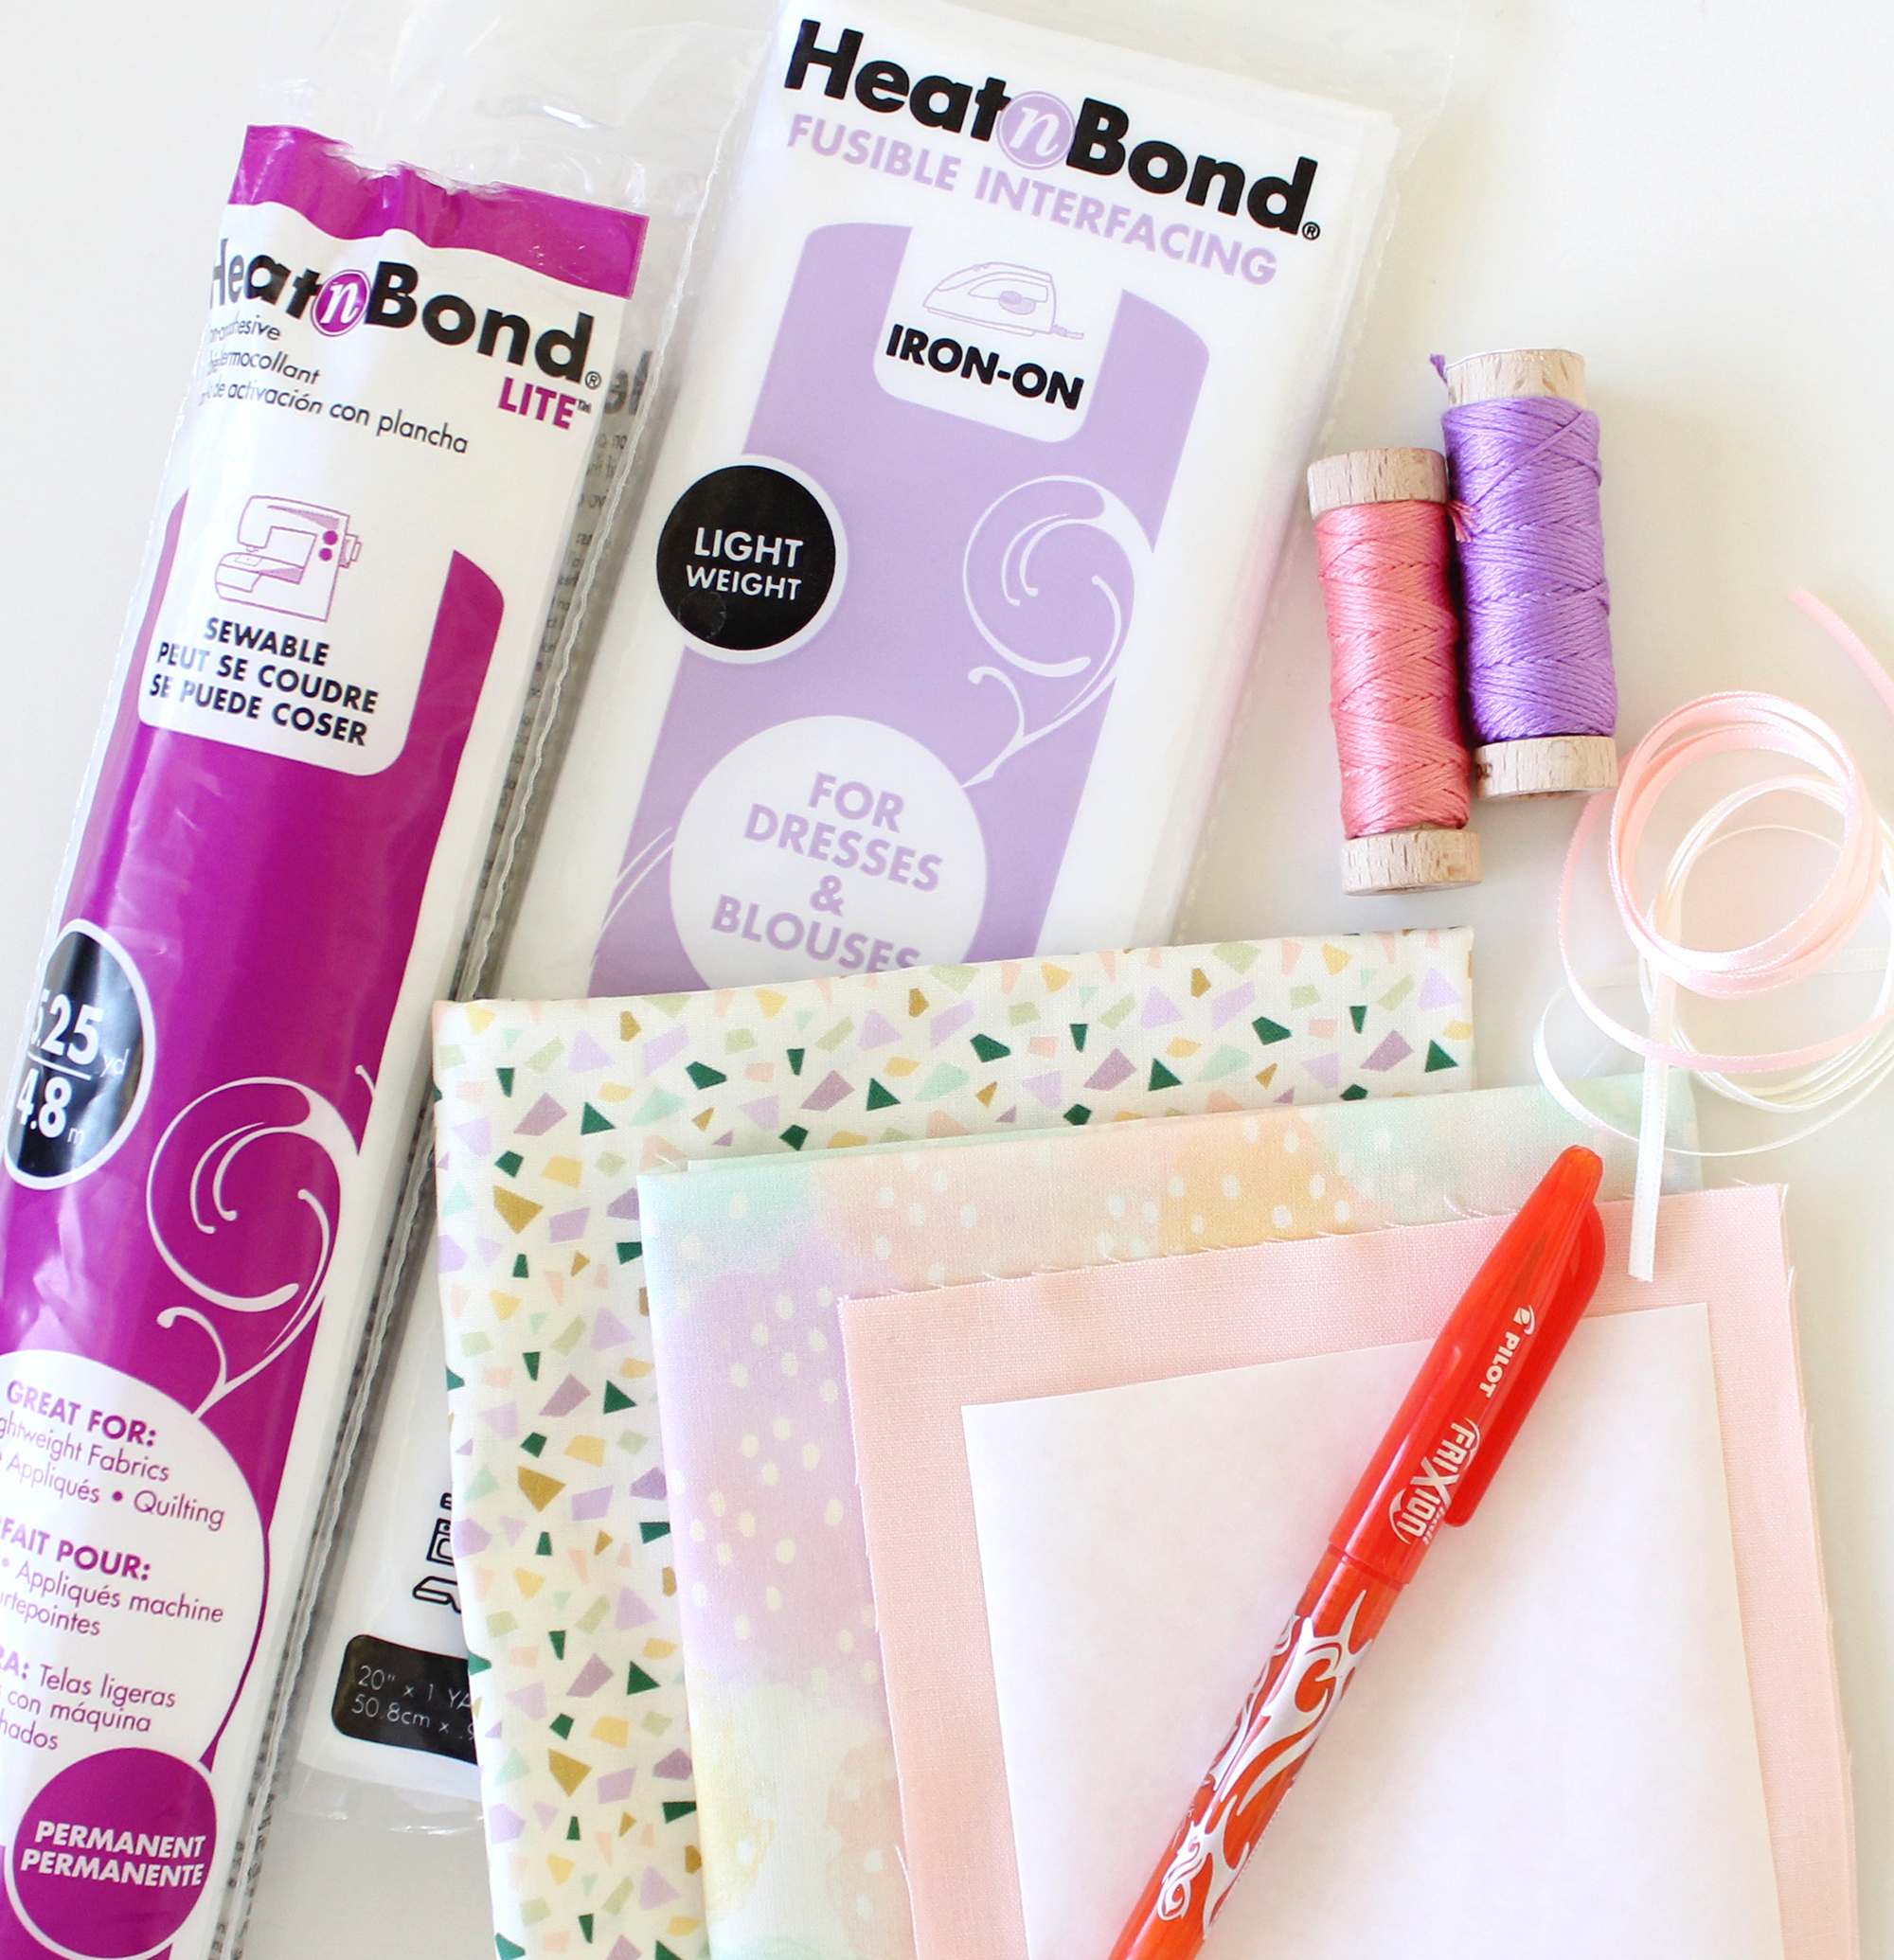
Materials Required
NOTE: I made two bunnies for this tutorial, but the materials list below outlines the requirements to sew one bunny.
These bunnies were made using the ‘Urban Jungle‘ fabric range designed by Mable Tan for Hawthorne Supply Co.
- 9″ x 14″ print fabric for the body
- 5″ square of plain fabric for the appliqué face
- Two 5″ squares of print fabric for the ears (one square of the body fabric, one square in a complementary print)
- Two 5″ squares of Heat’n’Bond lightweight Fusible Interfacing
- 4″ square of Heat’n’Bond Lite Fabric Adhesive
- 8″ square of clear template plastic
- polyester hobby fill (or similar stuffing)
- 8″ of narrow ribbon
- embroidery needle and floss (to match the main color of the fabric)
- pinking shears (zig zag scissors)
- erasable marking pen
- light pad (optional)
- 4″ embroidery hoop (optional)
- general sewing supplies
- print out of the TEMPLATE
Let’s Get Sewing!
Save then print out the TEMPLATE with no scaling or cropping. Using a pencil, trace the body shape, ear shape and face shape onto template plastic and cut out.
Embroider the Face
Following the instructions on the packet, fuse one square of the Heat’n’Bond lightweight fusible interfacing to the wrong side of the plain fabric for the face (I used a pale peach color). This will help ensure the fabric pattern on the bunny doesn’t show through the appliqué on the face.
Using an erasable marker, trace the face details onto the right side of the fabric. Place the paper template onto a lightbox or up to a window. Position the face fabric over the template and trace the face onto the center of the square.
Center the fabric into an embroidery hoop (optional).
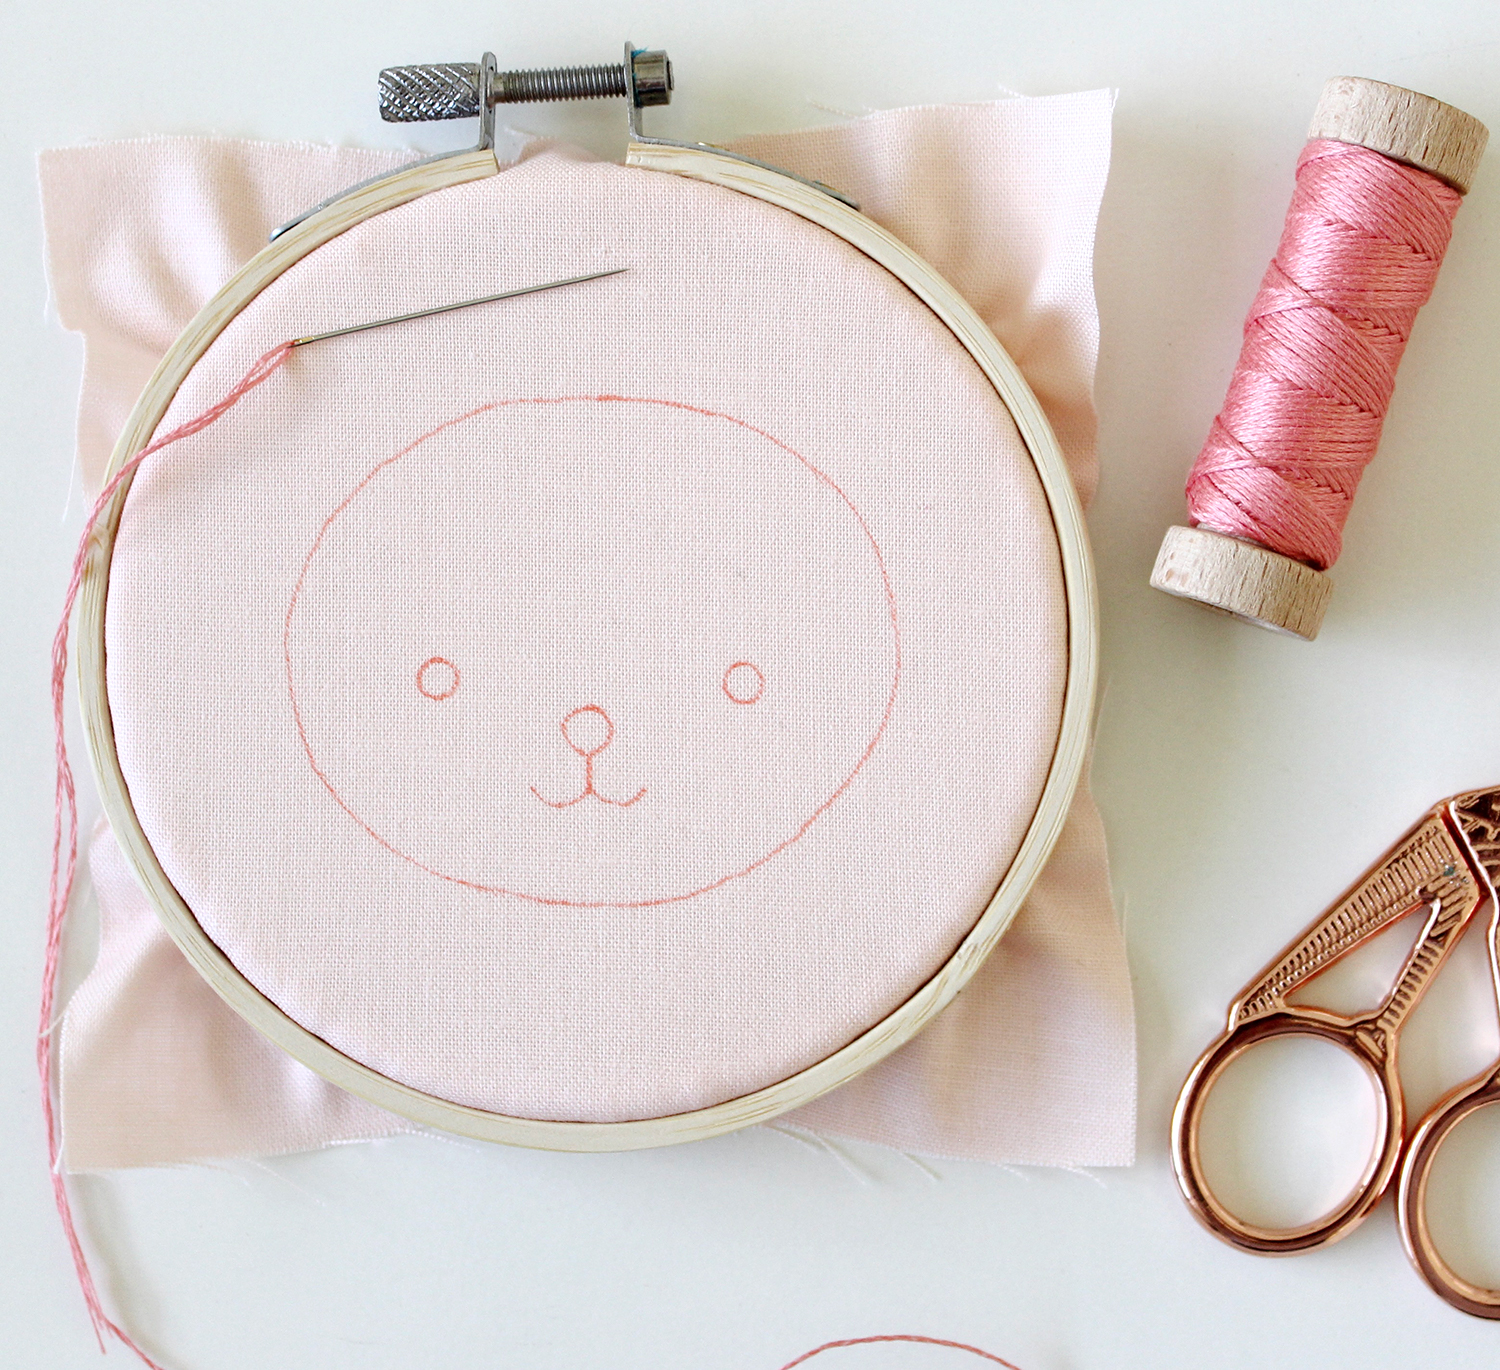
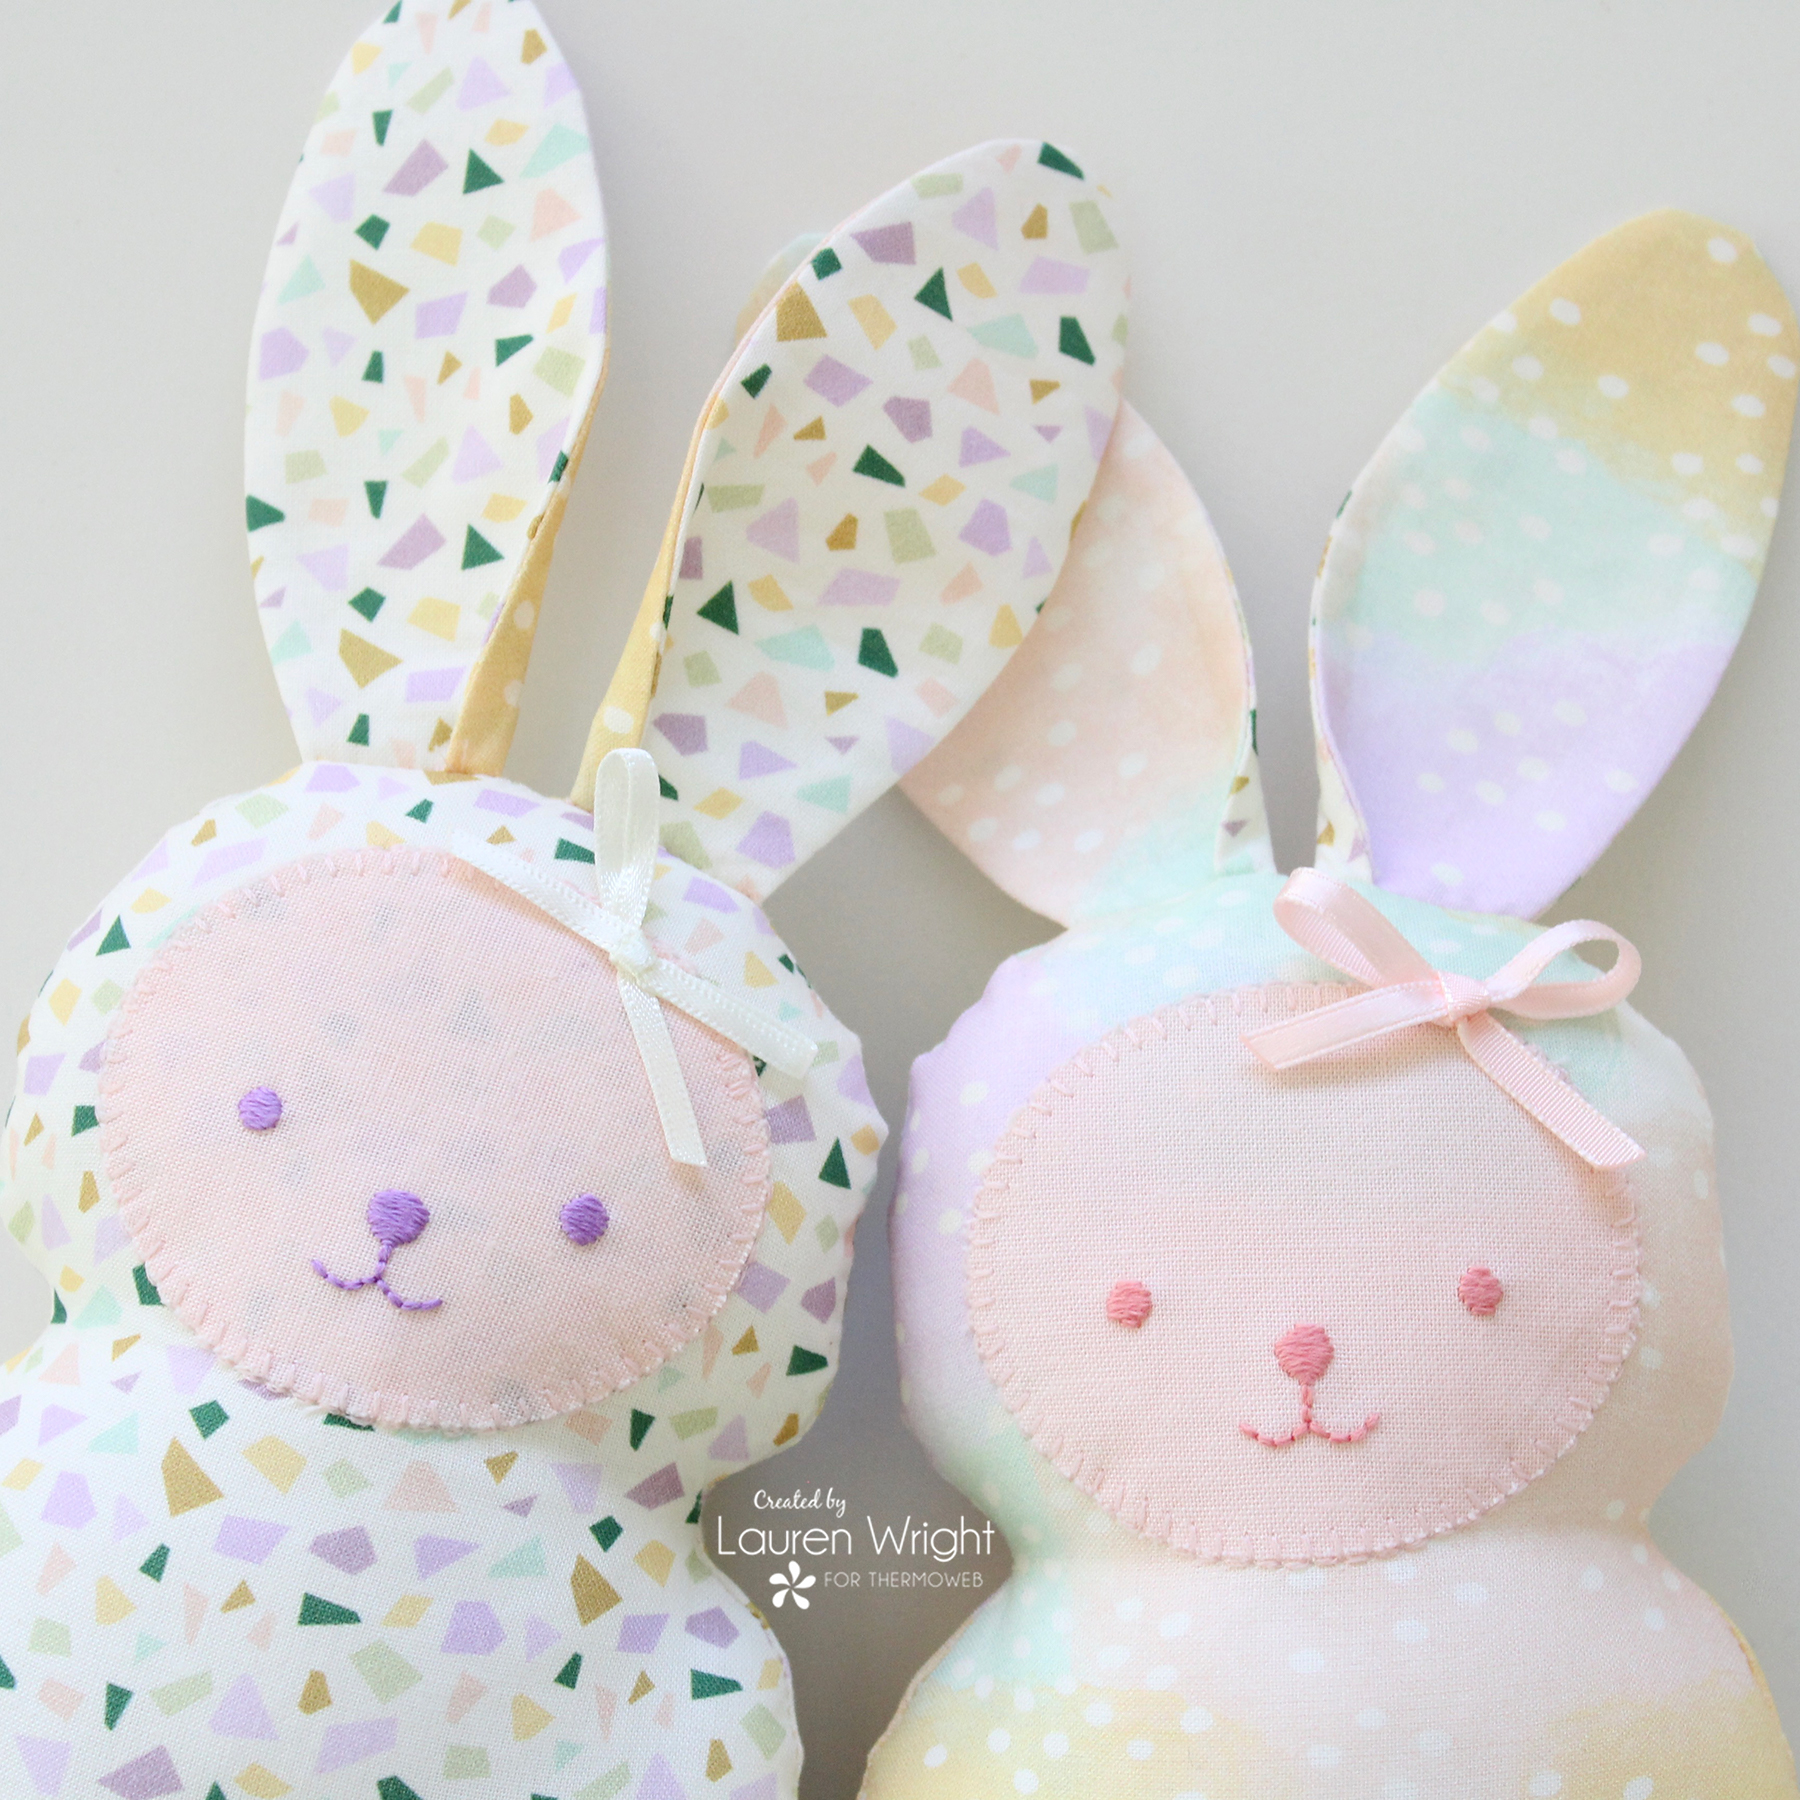
Embroider the details using three strands of embroidery floss. Backstitch the mouth and use a horizontal satin stitch (straight stitches close together) for the nose and eyes. For more tips on backstitch, you might like this tutorial.
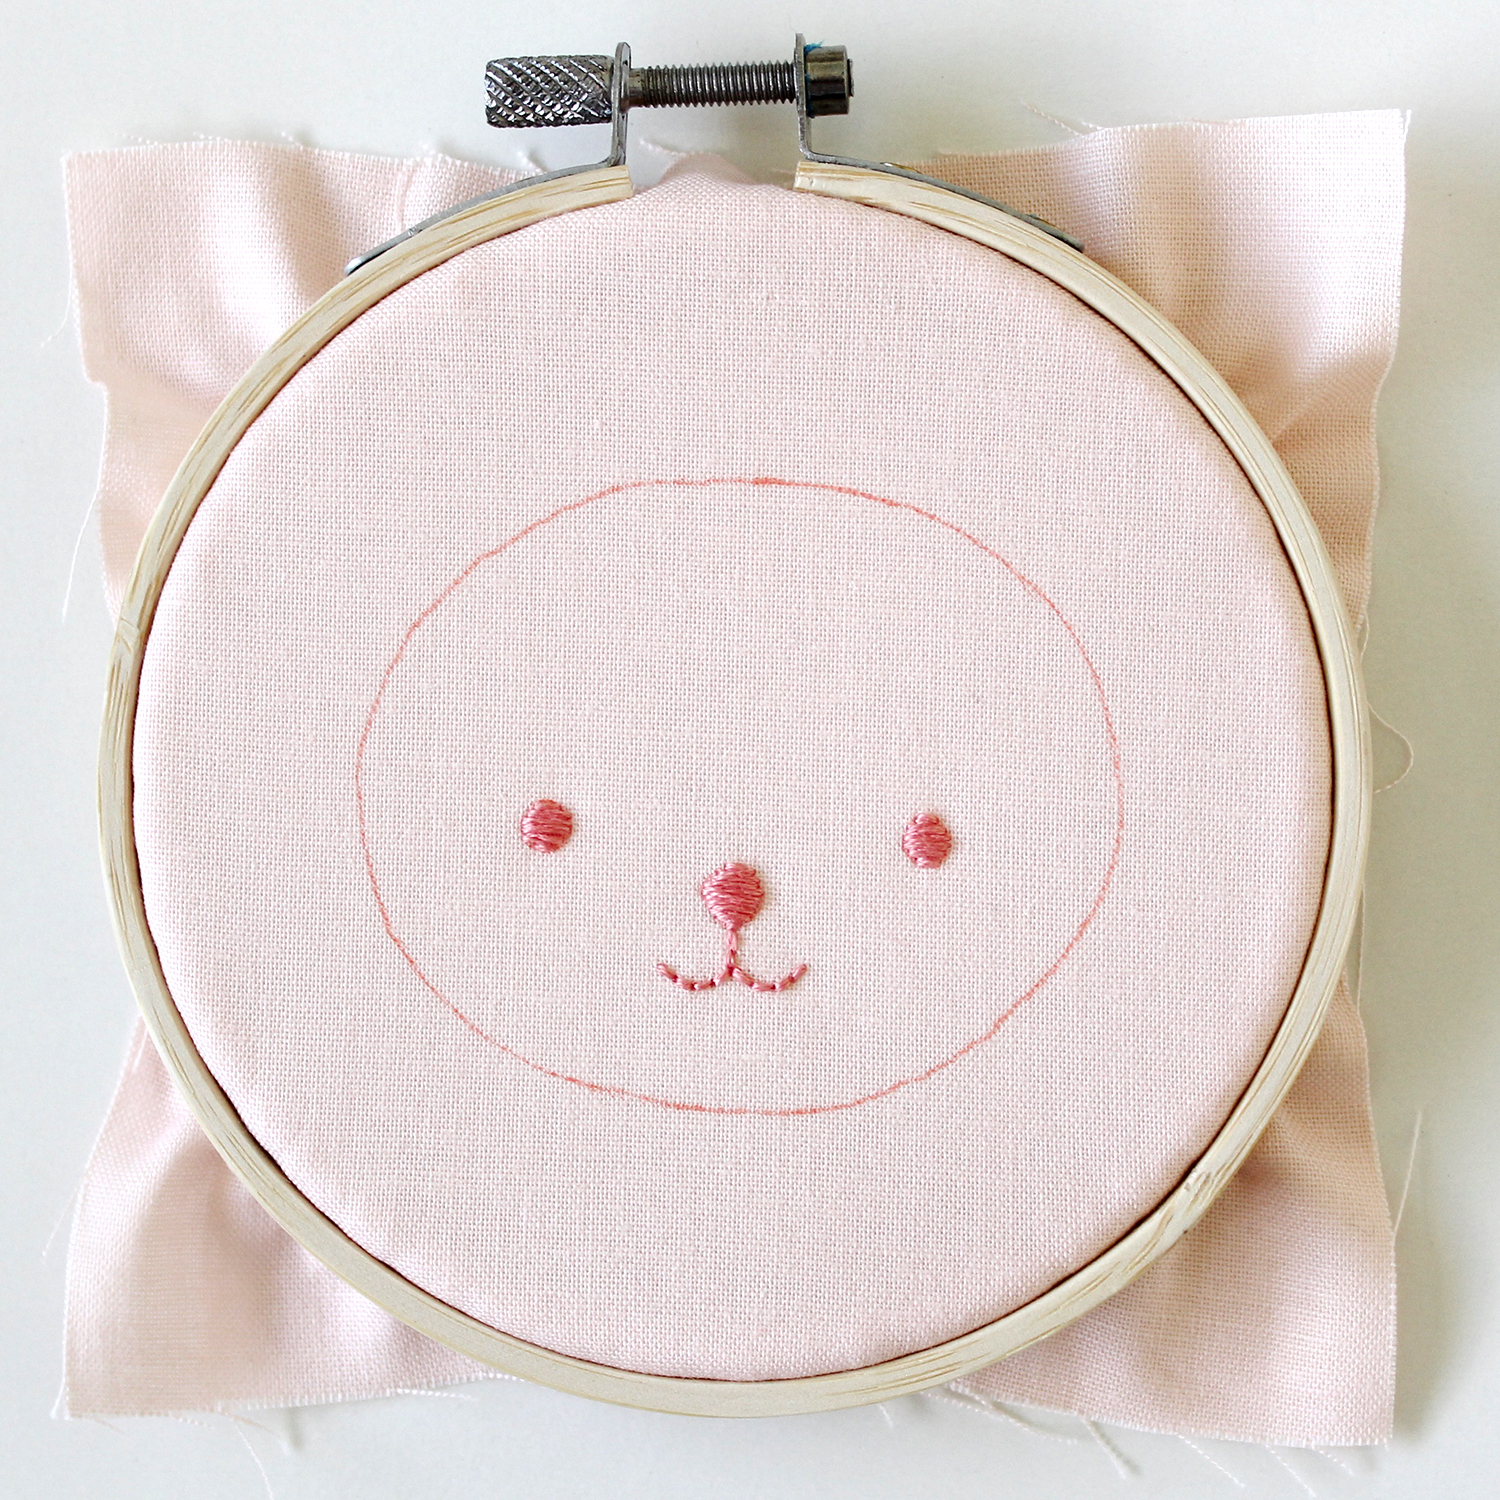
Remove any erasable marking lines.
Following the package instructions, fuse the square of Heat’n’Bond Lite fabric adhesive to the wrong side of the embroidered face (over the top of the interfacing).
Using the paper template as a guide, reposition the plastic template face over the embroidered details and retrace the outline of the face shape (if this outline was removed when using heat from the iron).
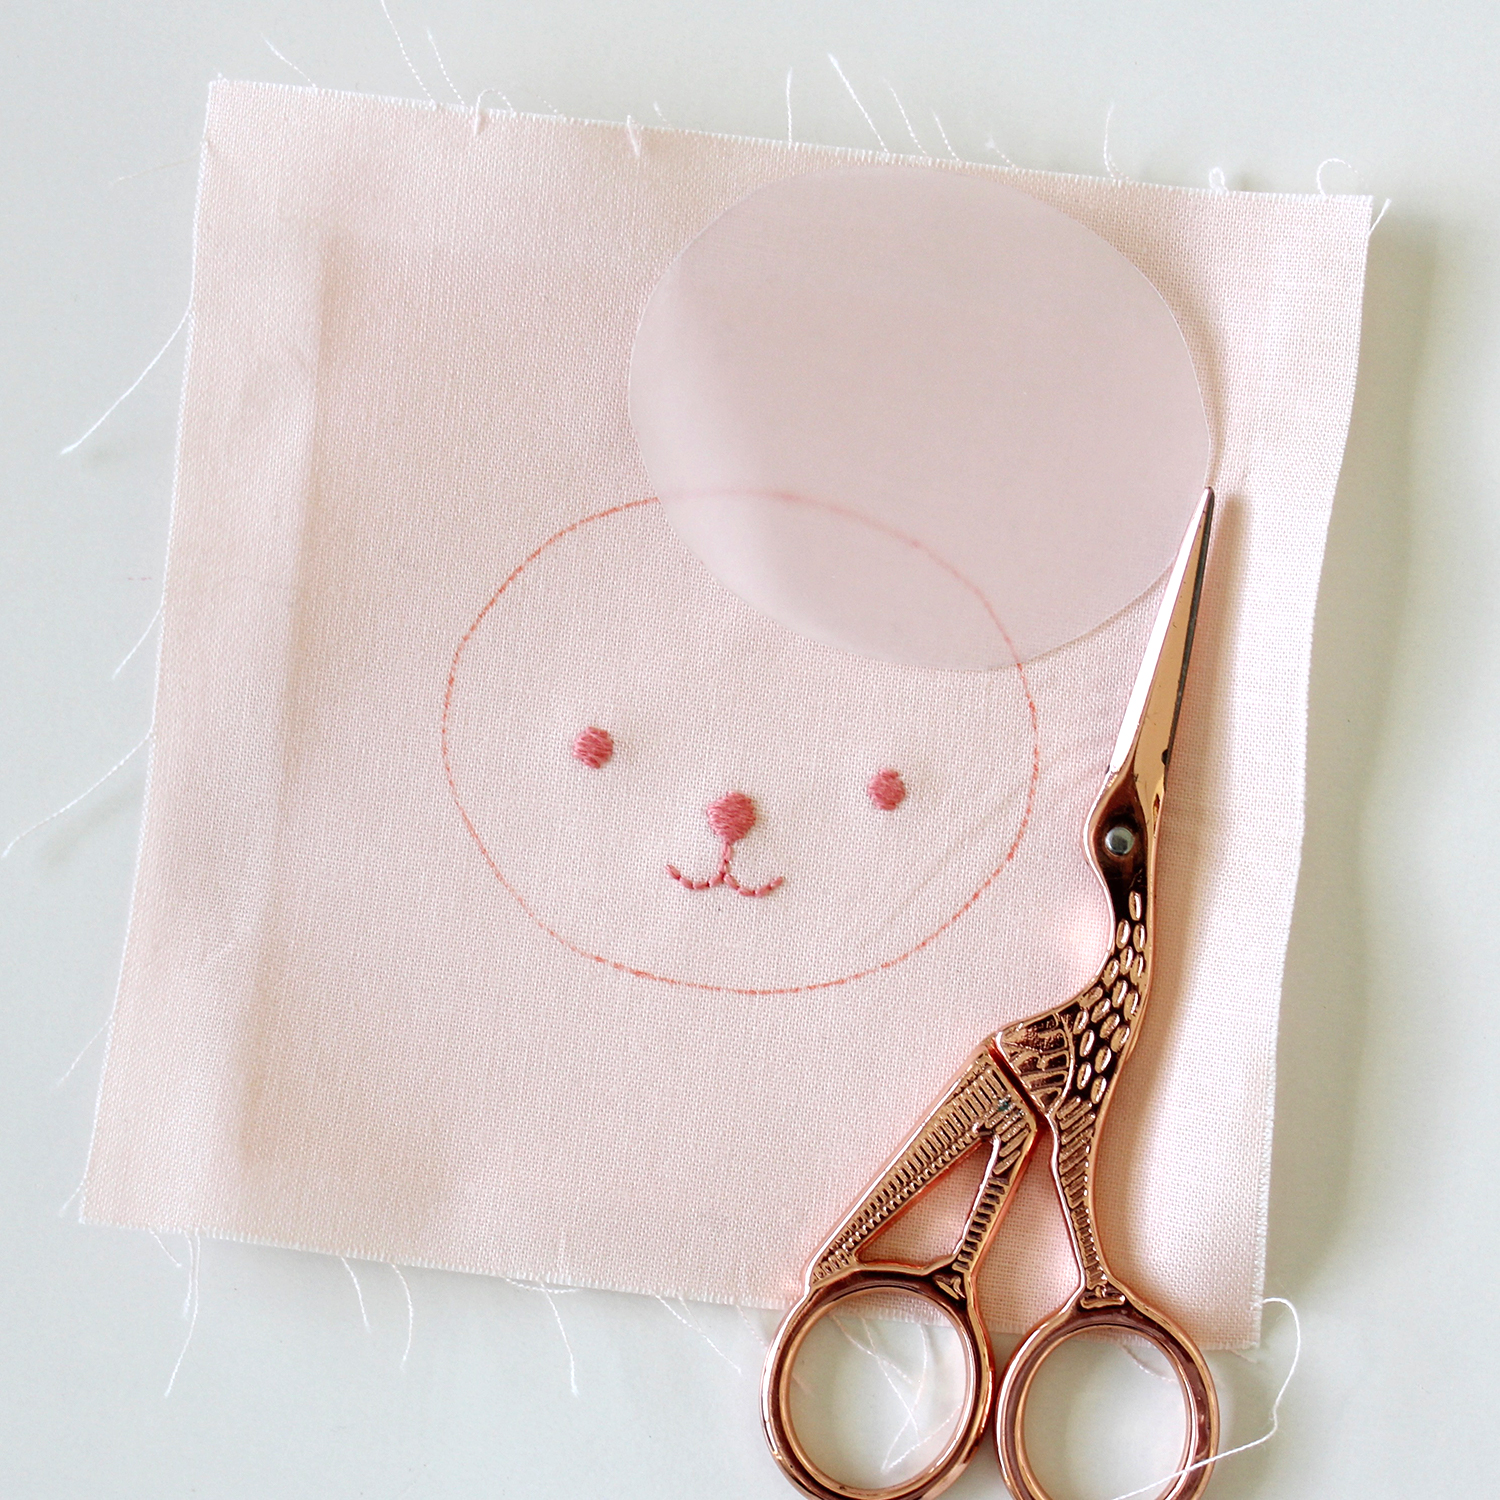
Cut out the face shape on the line and peel off the adhesive backing paper. Set aside.
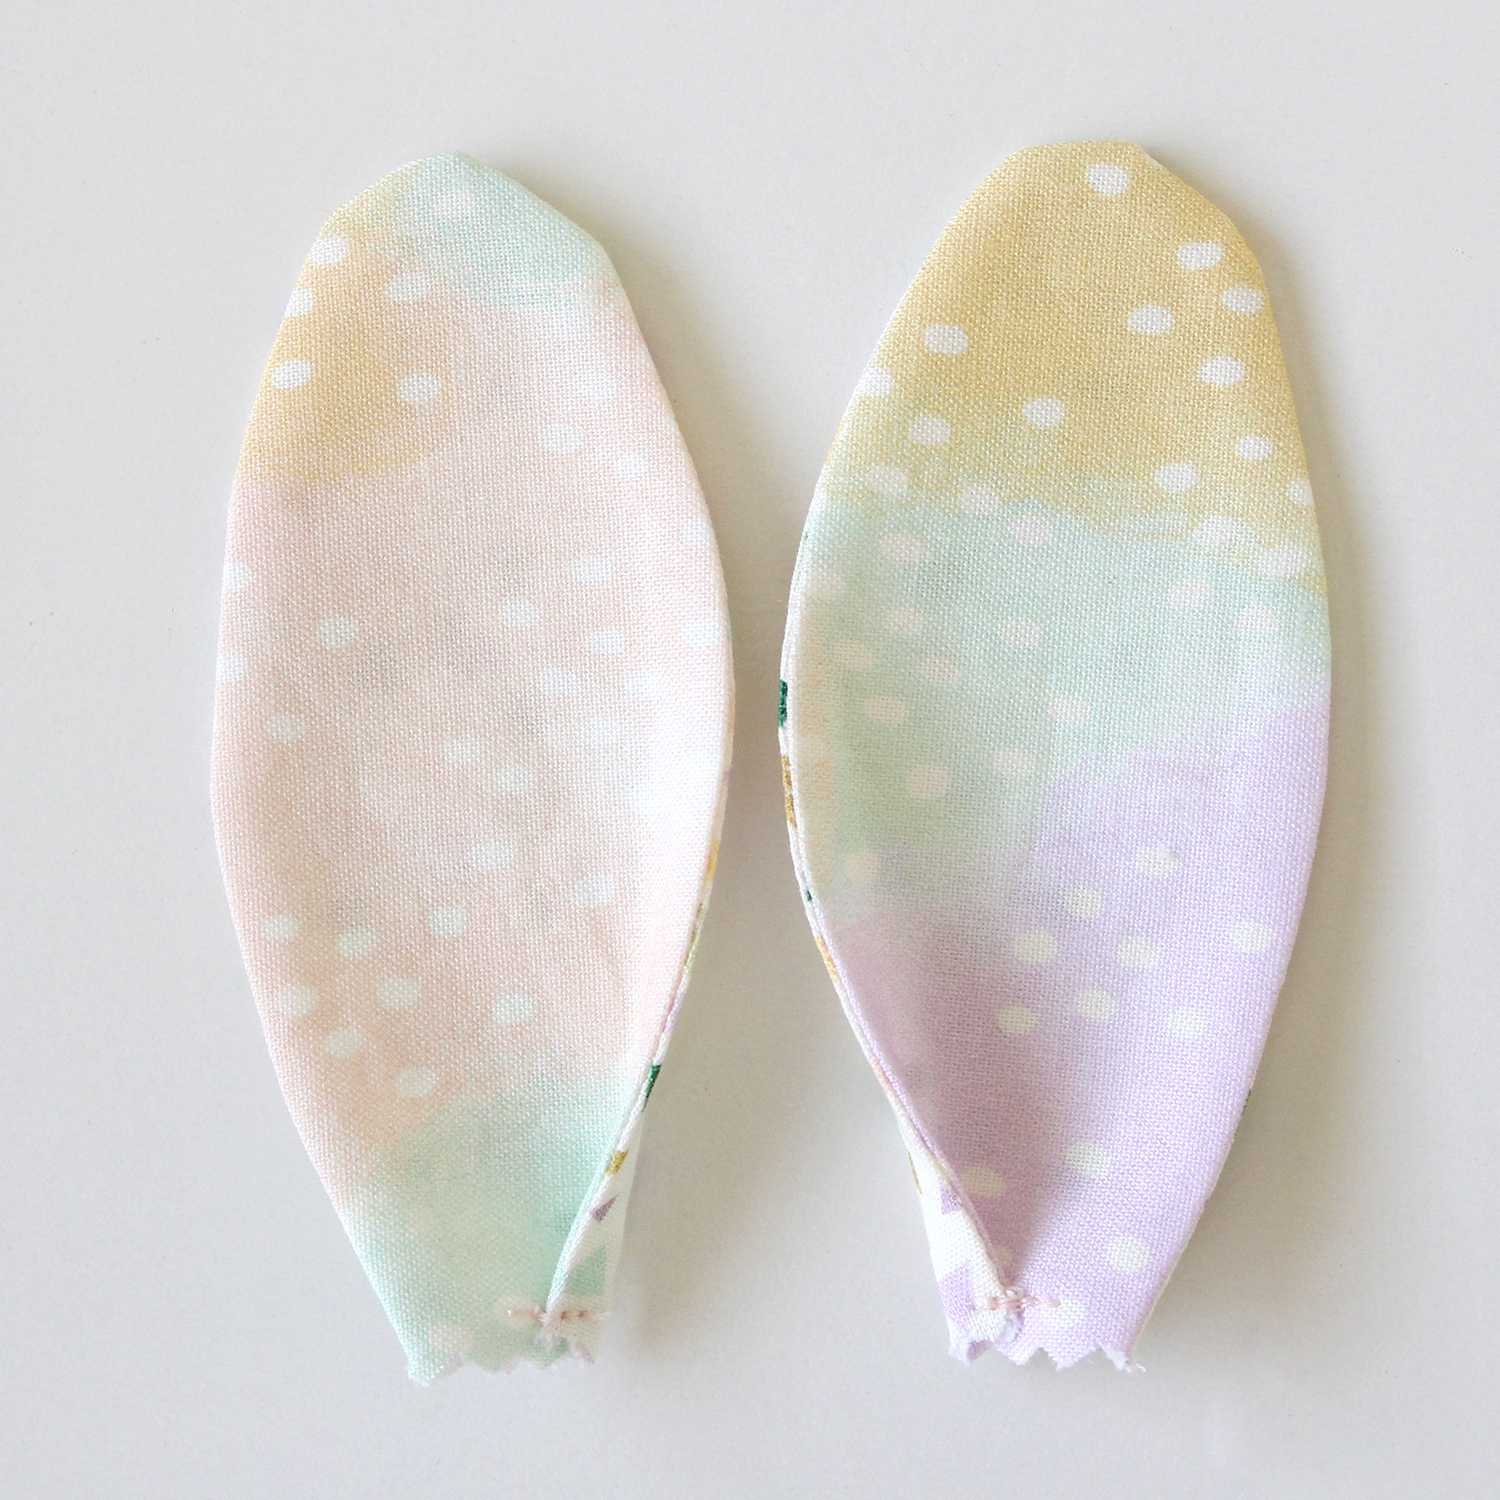
Assemble the Ears
Fuse the remaining 5″ square of Heat’n’Bond lightweight fusible interfacing to the wrong side of the 5″ print fabric square in the same fabric as the bunny body.
Place this 5″ square together with the other print fabric square and ensure the right sides are facing.
Position the plastic ear template on the left of the fabric (ensuring it is at least a 1/4″ from the fabric edge). Trace around the ear using an erasable marker. Repeat this process to trace around the second ear, keeping at least 1/2″ gap between the two.
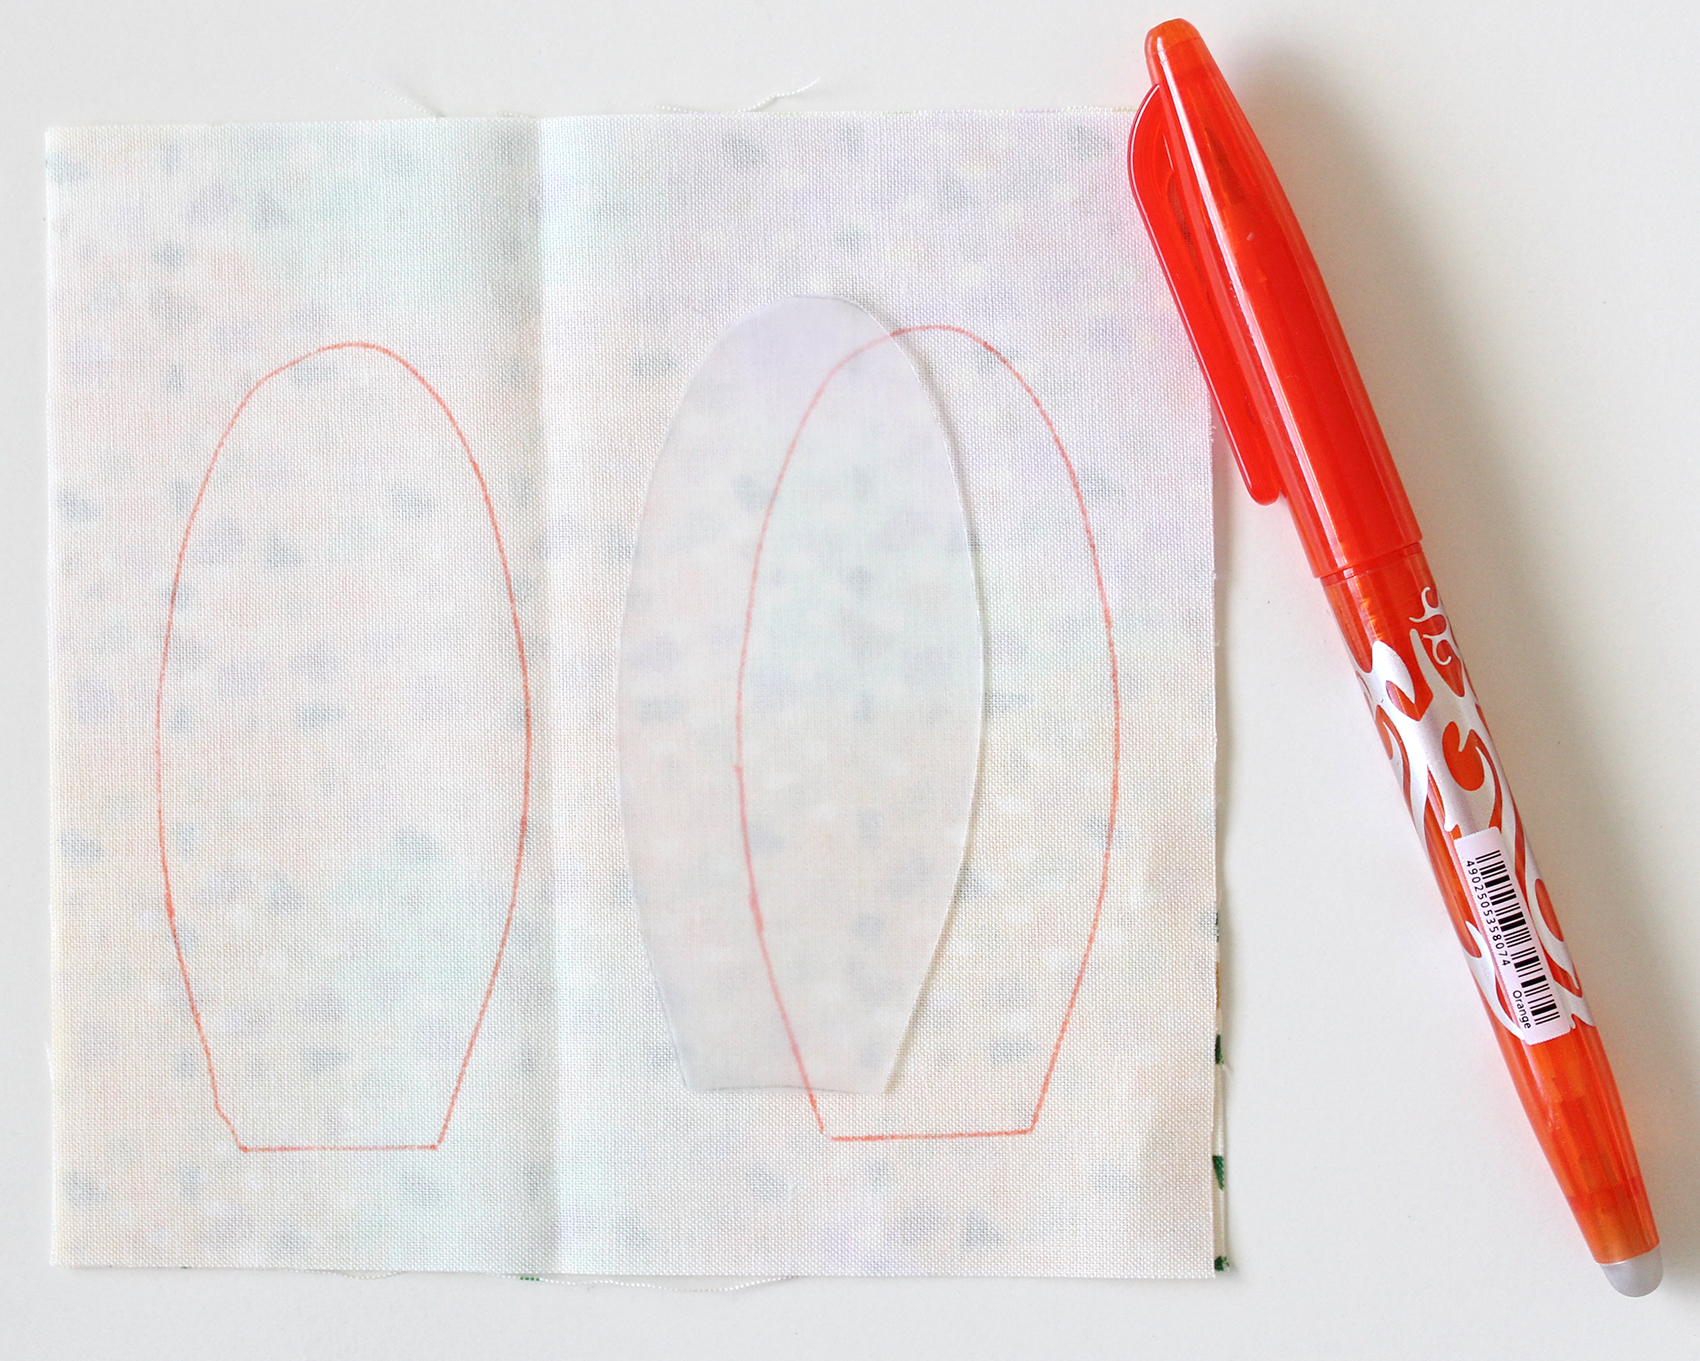
Pin the fabric together and then sew the curved shape of each ear directly on the traced line (being sure to leave the straight bottom edge open for turning.
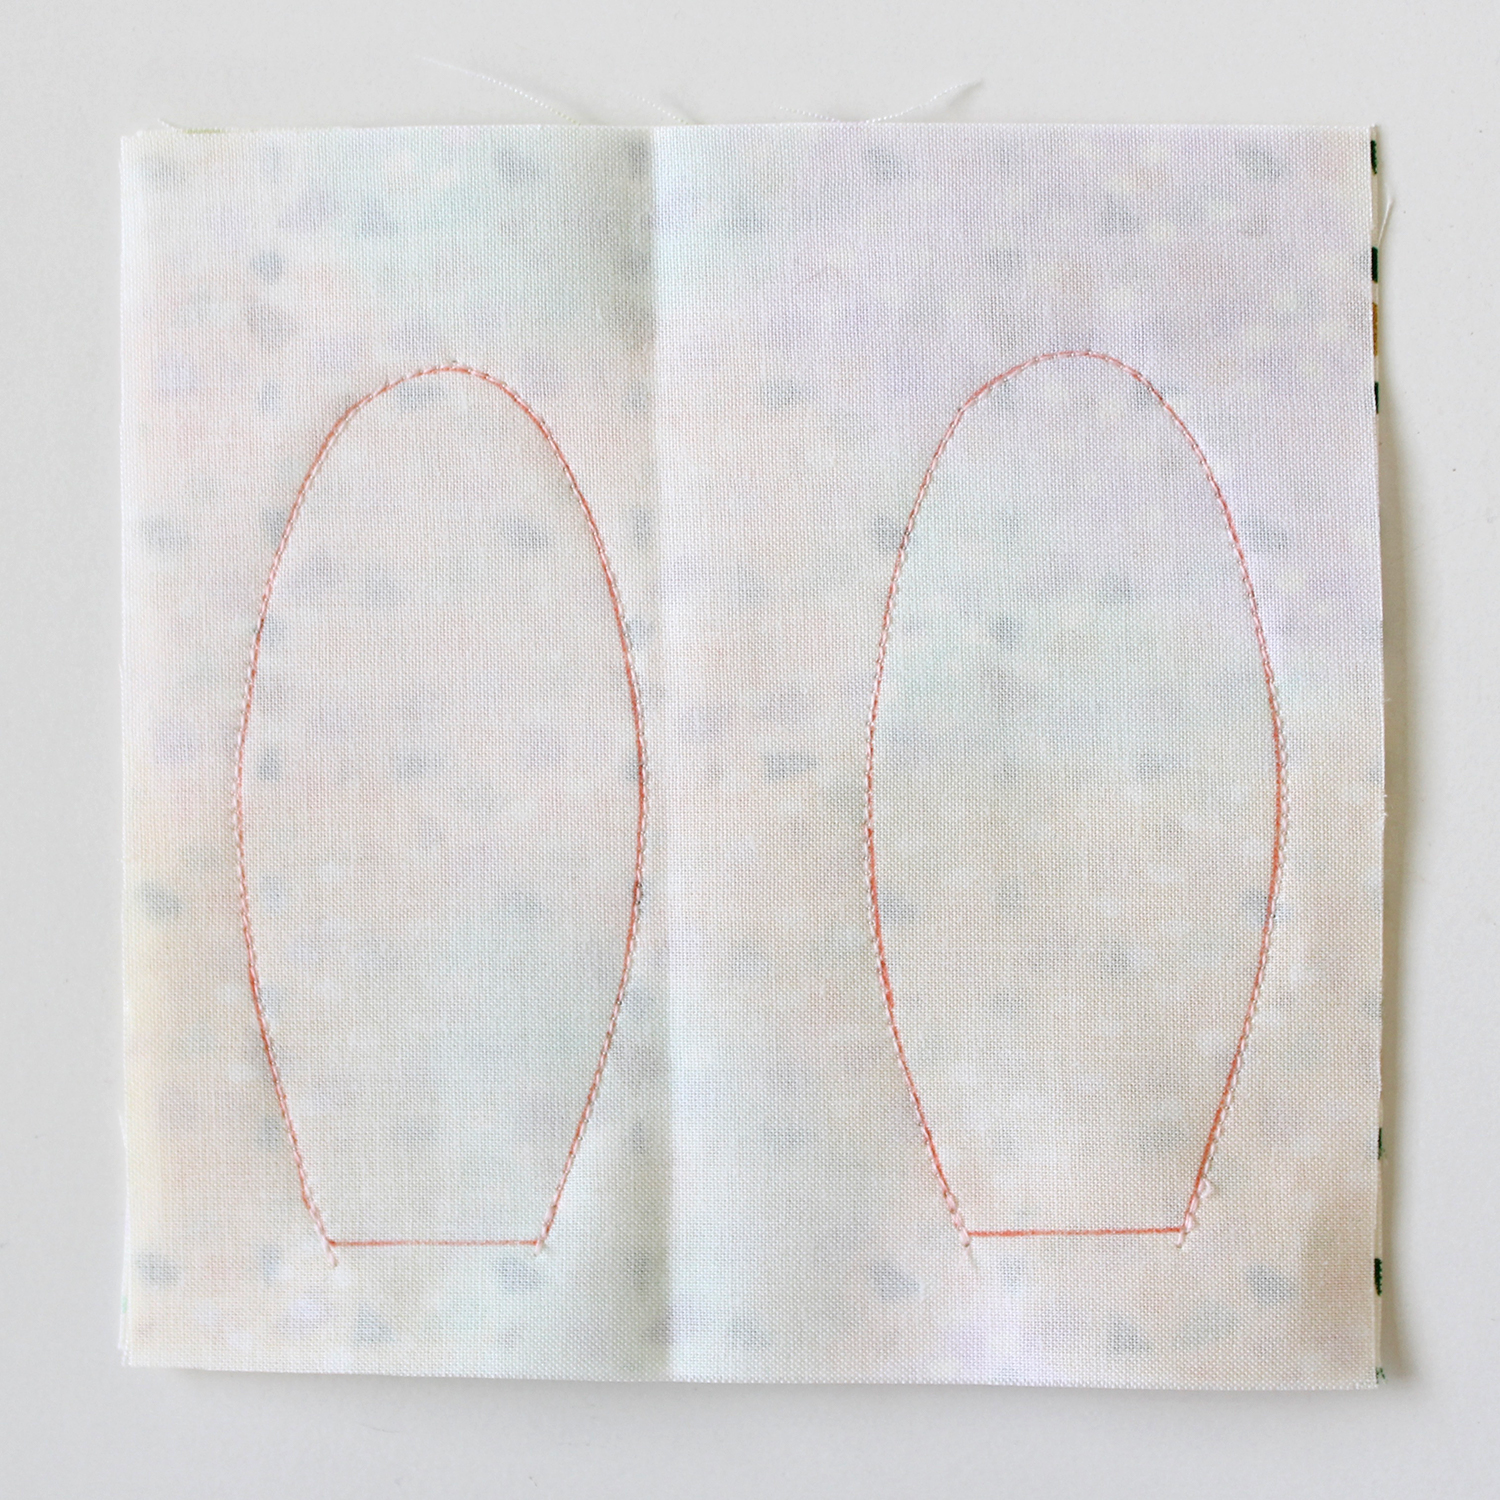
Use pinking shears to trim around the outside edge of each ear with a 1/8″ seam allowance. Trim directly along the straight bottom edge line. Alternatively, use normal scissors, cutting notches in the curves as you go. This will help the ears sit well when turned the correct way out.

Using the gap at the base of the ears, turn the ears right way out and press.
With the interfaced fabric facing the top, fold the inside edge of each ear in by 1/4″ and stay stitch in place, 1/8″ from the base. Set the ears aside.
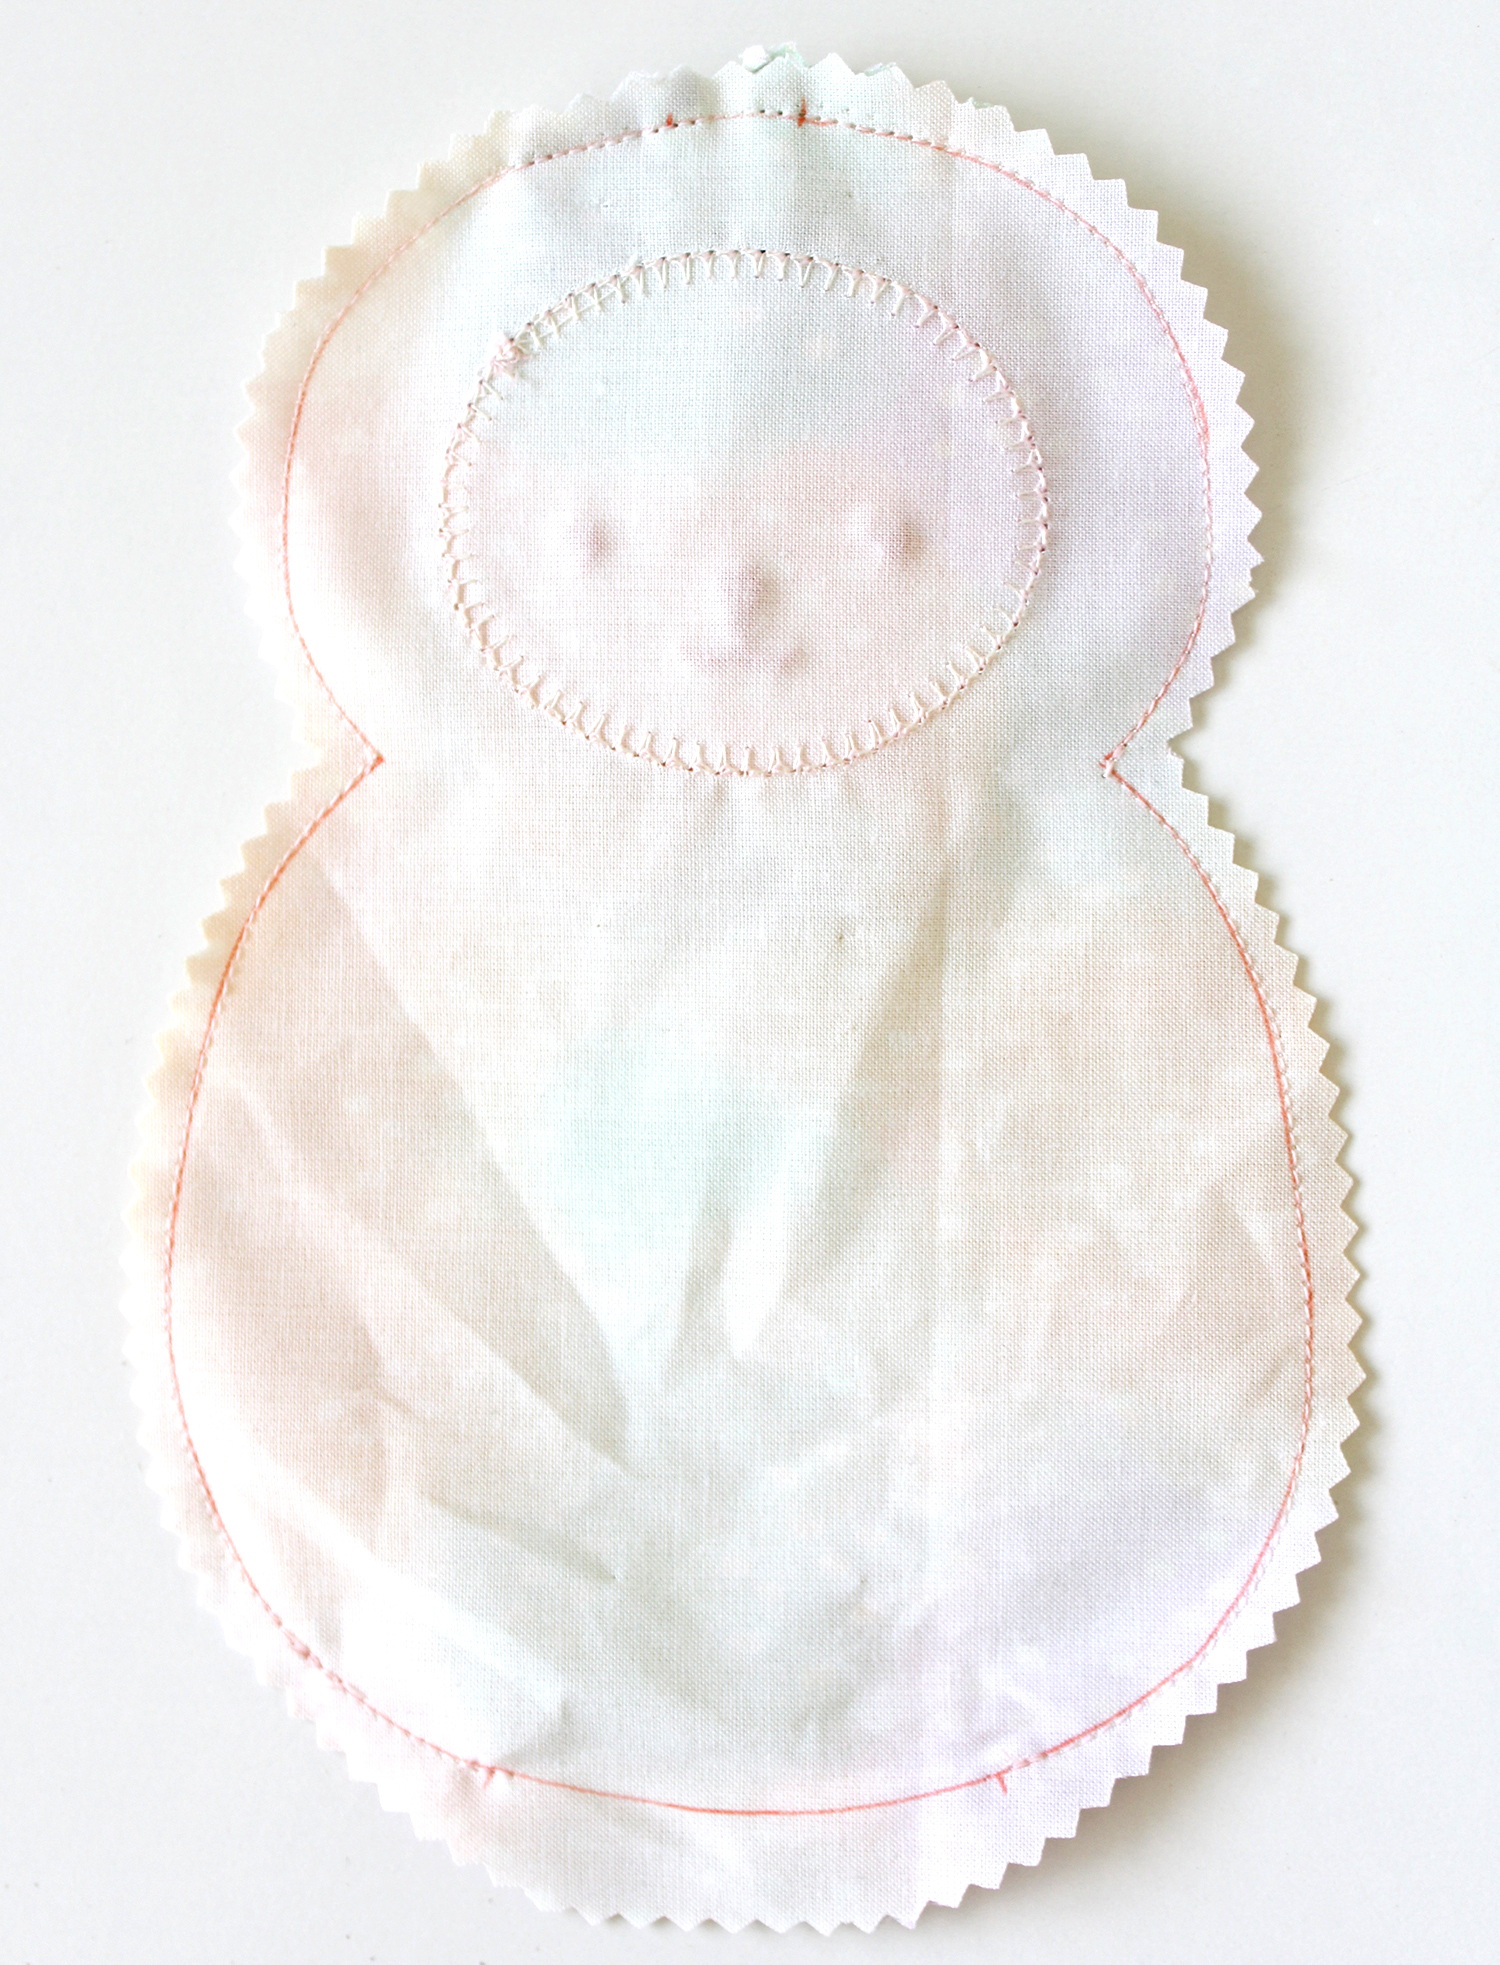
Appliqué the Face
Cut the 9″ x 14″ print fabric into two rectangles 9″ tall and 7″ wide. On one of the rectangles, center the appliqué face fabric on the top half of the right side of the fabric rectangle. Use the plastic body template to make sure there is enough space to fit the whole body shape onto the fabric.
Follow the instructions to iron the appliqué face to the fabric. Use a fine blanket stitch on your machine to sew the edges of the appliqué in place. Start at the top right-hand side and sew around the face until you return to the same spot.
For more tips on the appliqué process, see my beginner’s tutorial. You can see an example of the completed stitching below.

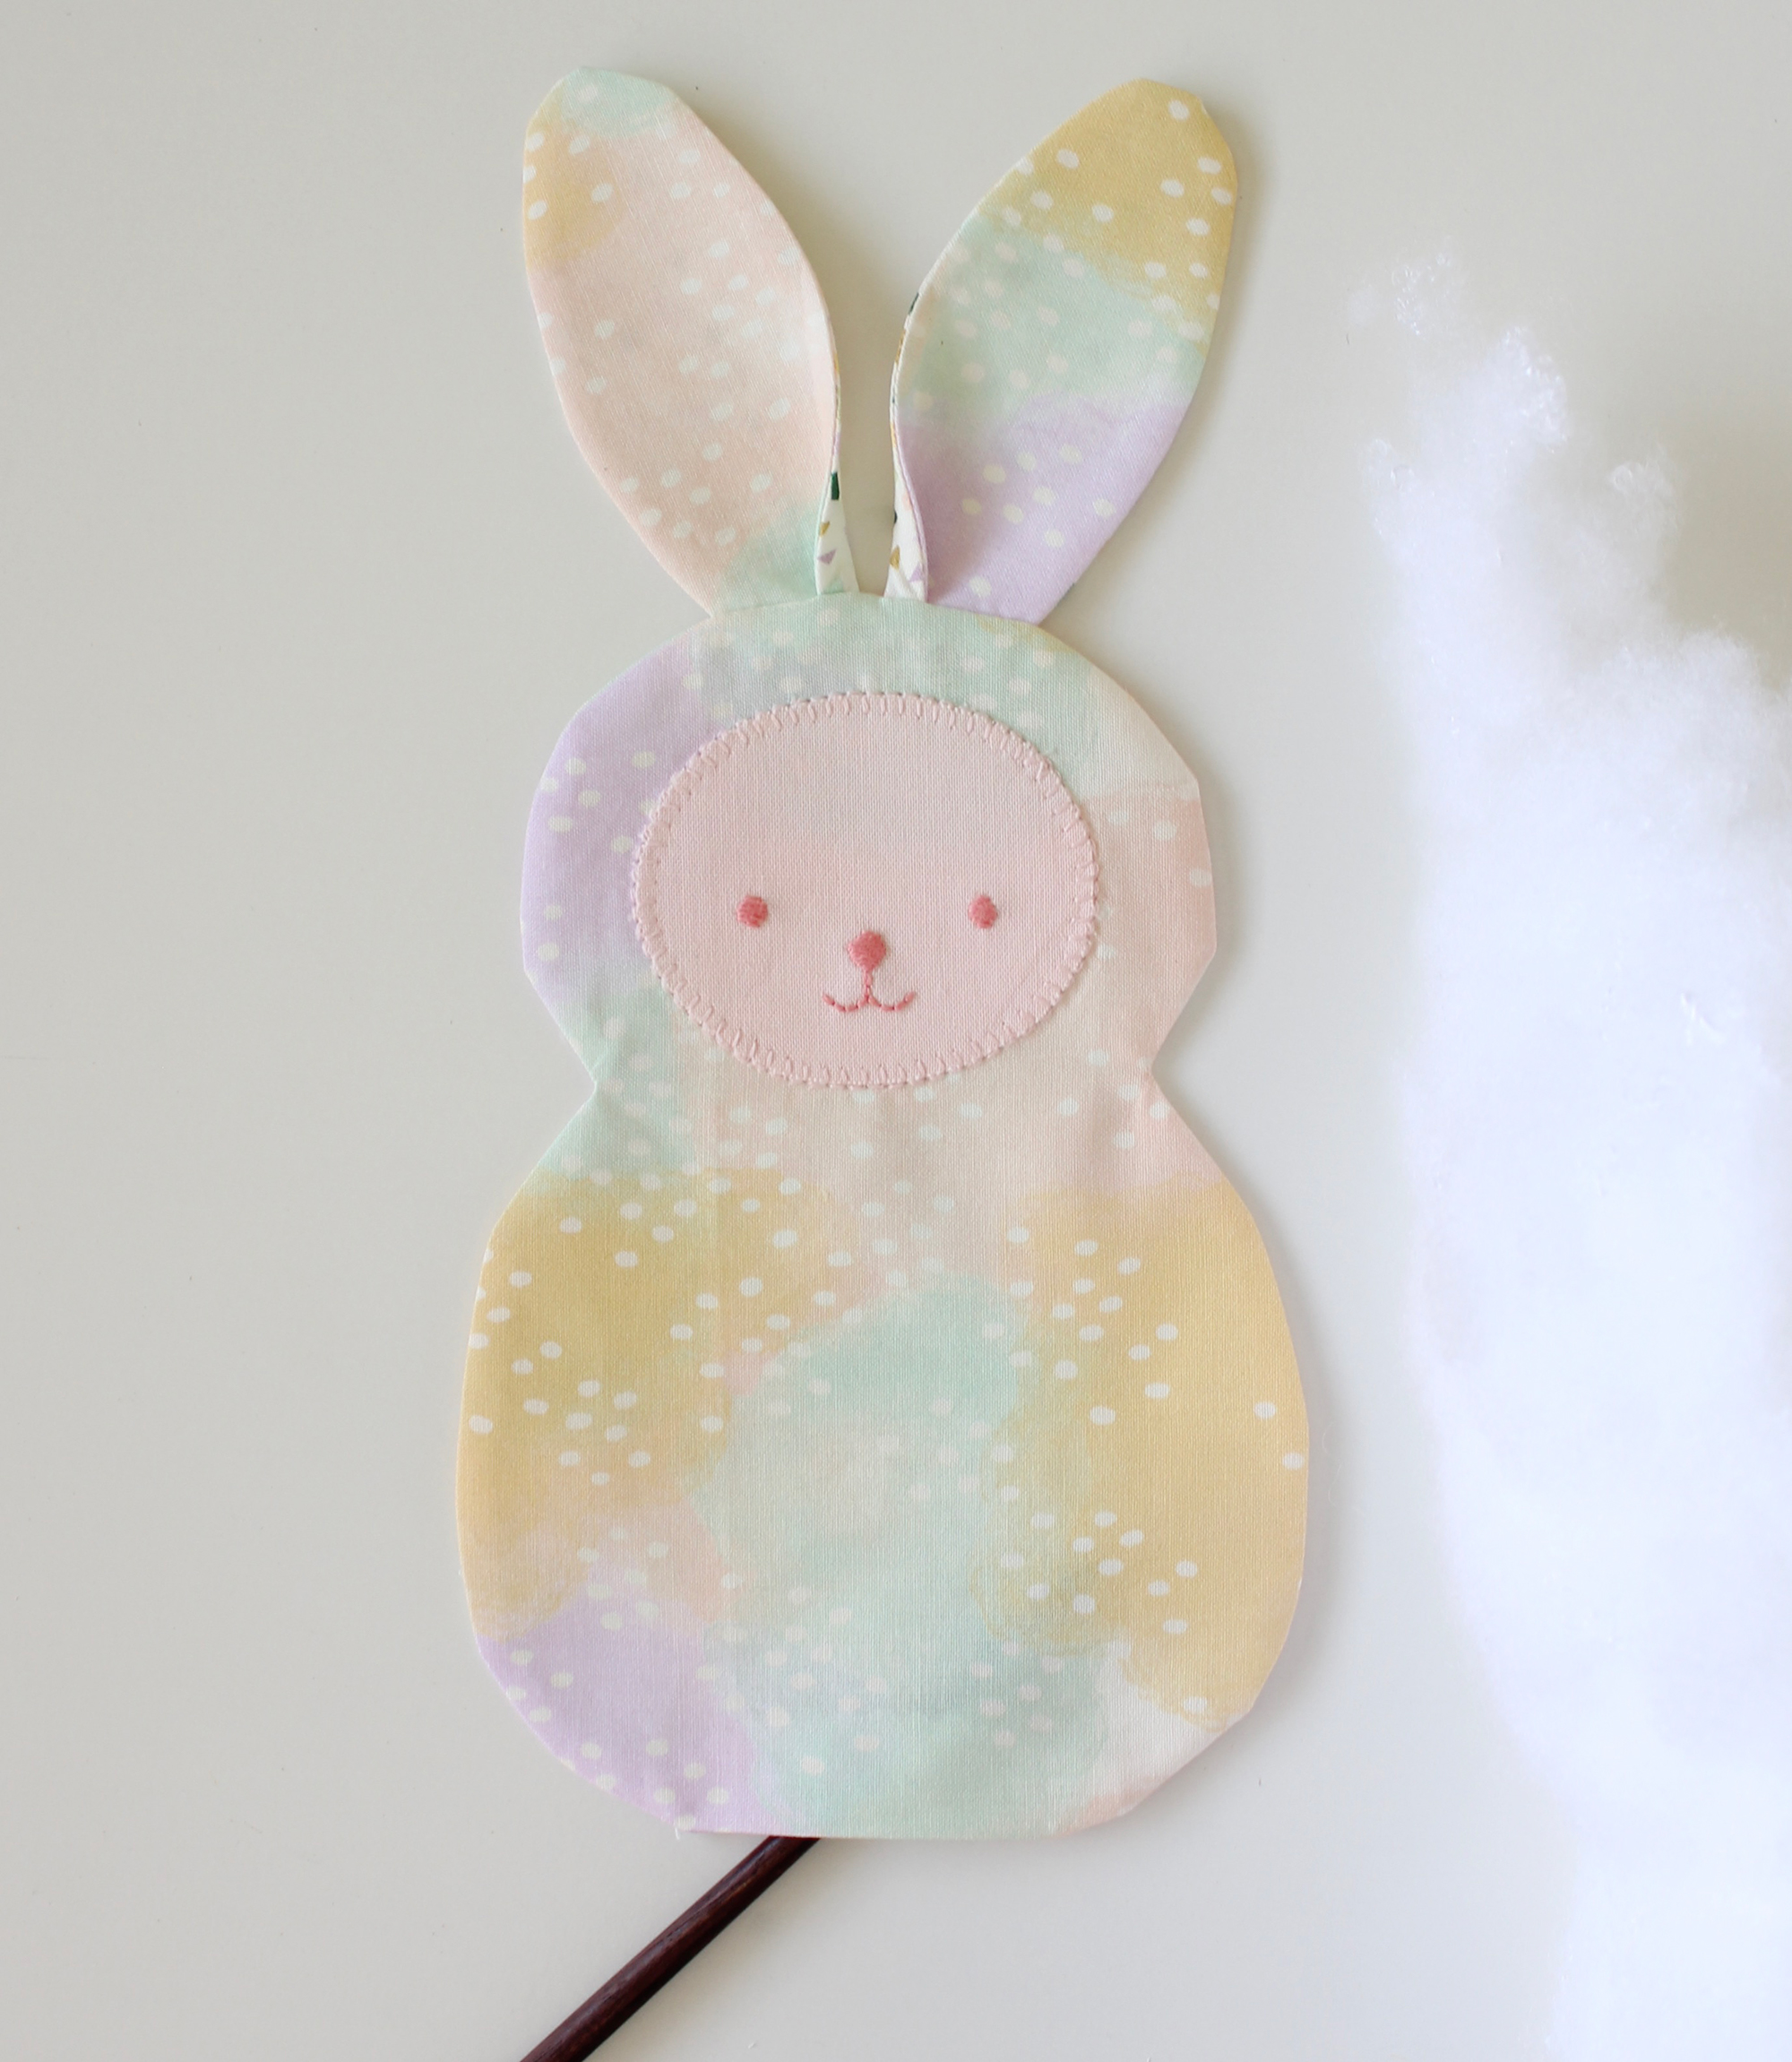
Assemble the Bunny
Place the two rectangles of bunny body fabric together so that the right sides are facing and the rectangle with the bunny face is on the top. Using the printed template as a guide, position the clear plastic template on the fabric so that the appliqué face shape is centered inside the head. Trace with an erasable marker, being sure to add the marks for the turning gap and ear placement.
Carefully position the ears behind the top piece of bunny body fabric. Position the base of the ears about 1/4″ above the drawn seam line, so that the folded ear edges are both in the center and are facing the bunny face. Pin all the layers in place.
Sew around the bunny shape on the traced line, being sure the base of the ears are carefully caught in the seam. Start at one mark at the base and sew up, around the body and head, and then back down the other side to the other mark.
Use pinking shears to trim the seam allowance down to a 1/8″ from the stitching line, leaving a little extra seam allowance at the base of the turning gap (as pictured below). Carefully clip the neck curves close to the seam. You may also wish to cut notches around the curves, but leave the turning gap fabric intact.
Press the bunny and then turn right way out.
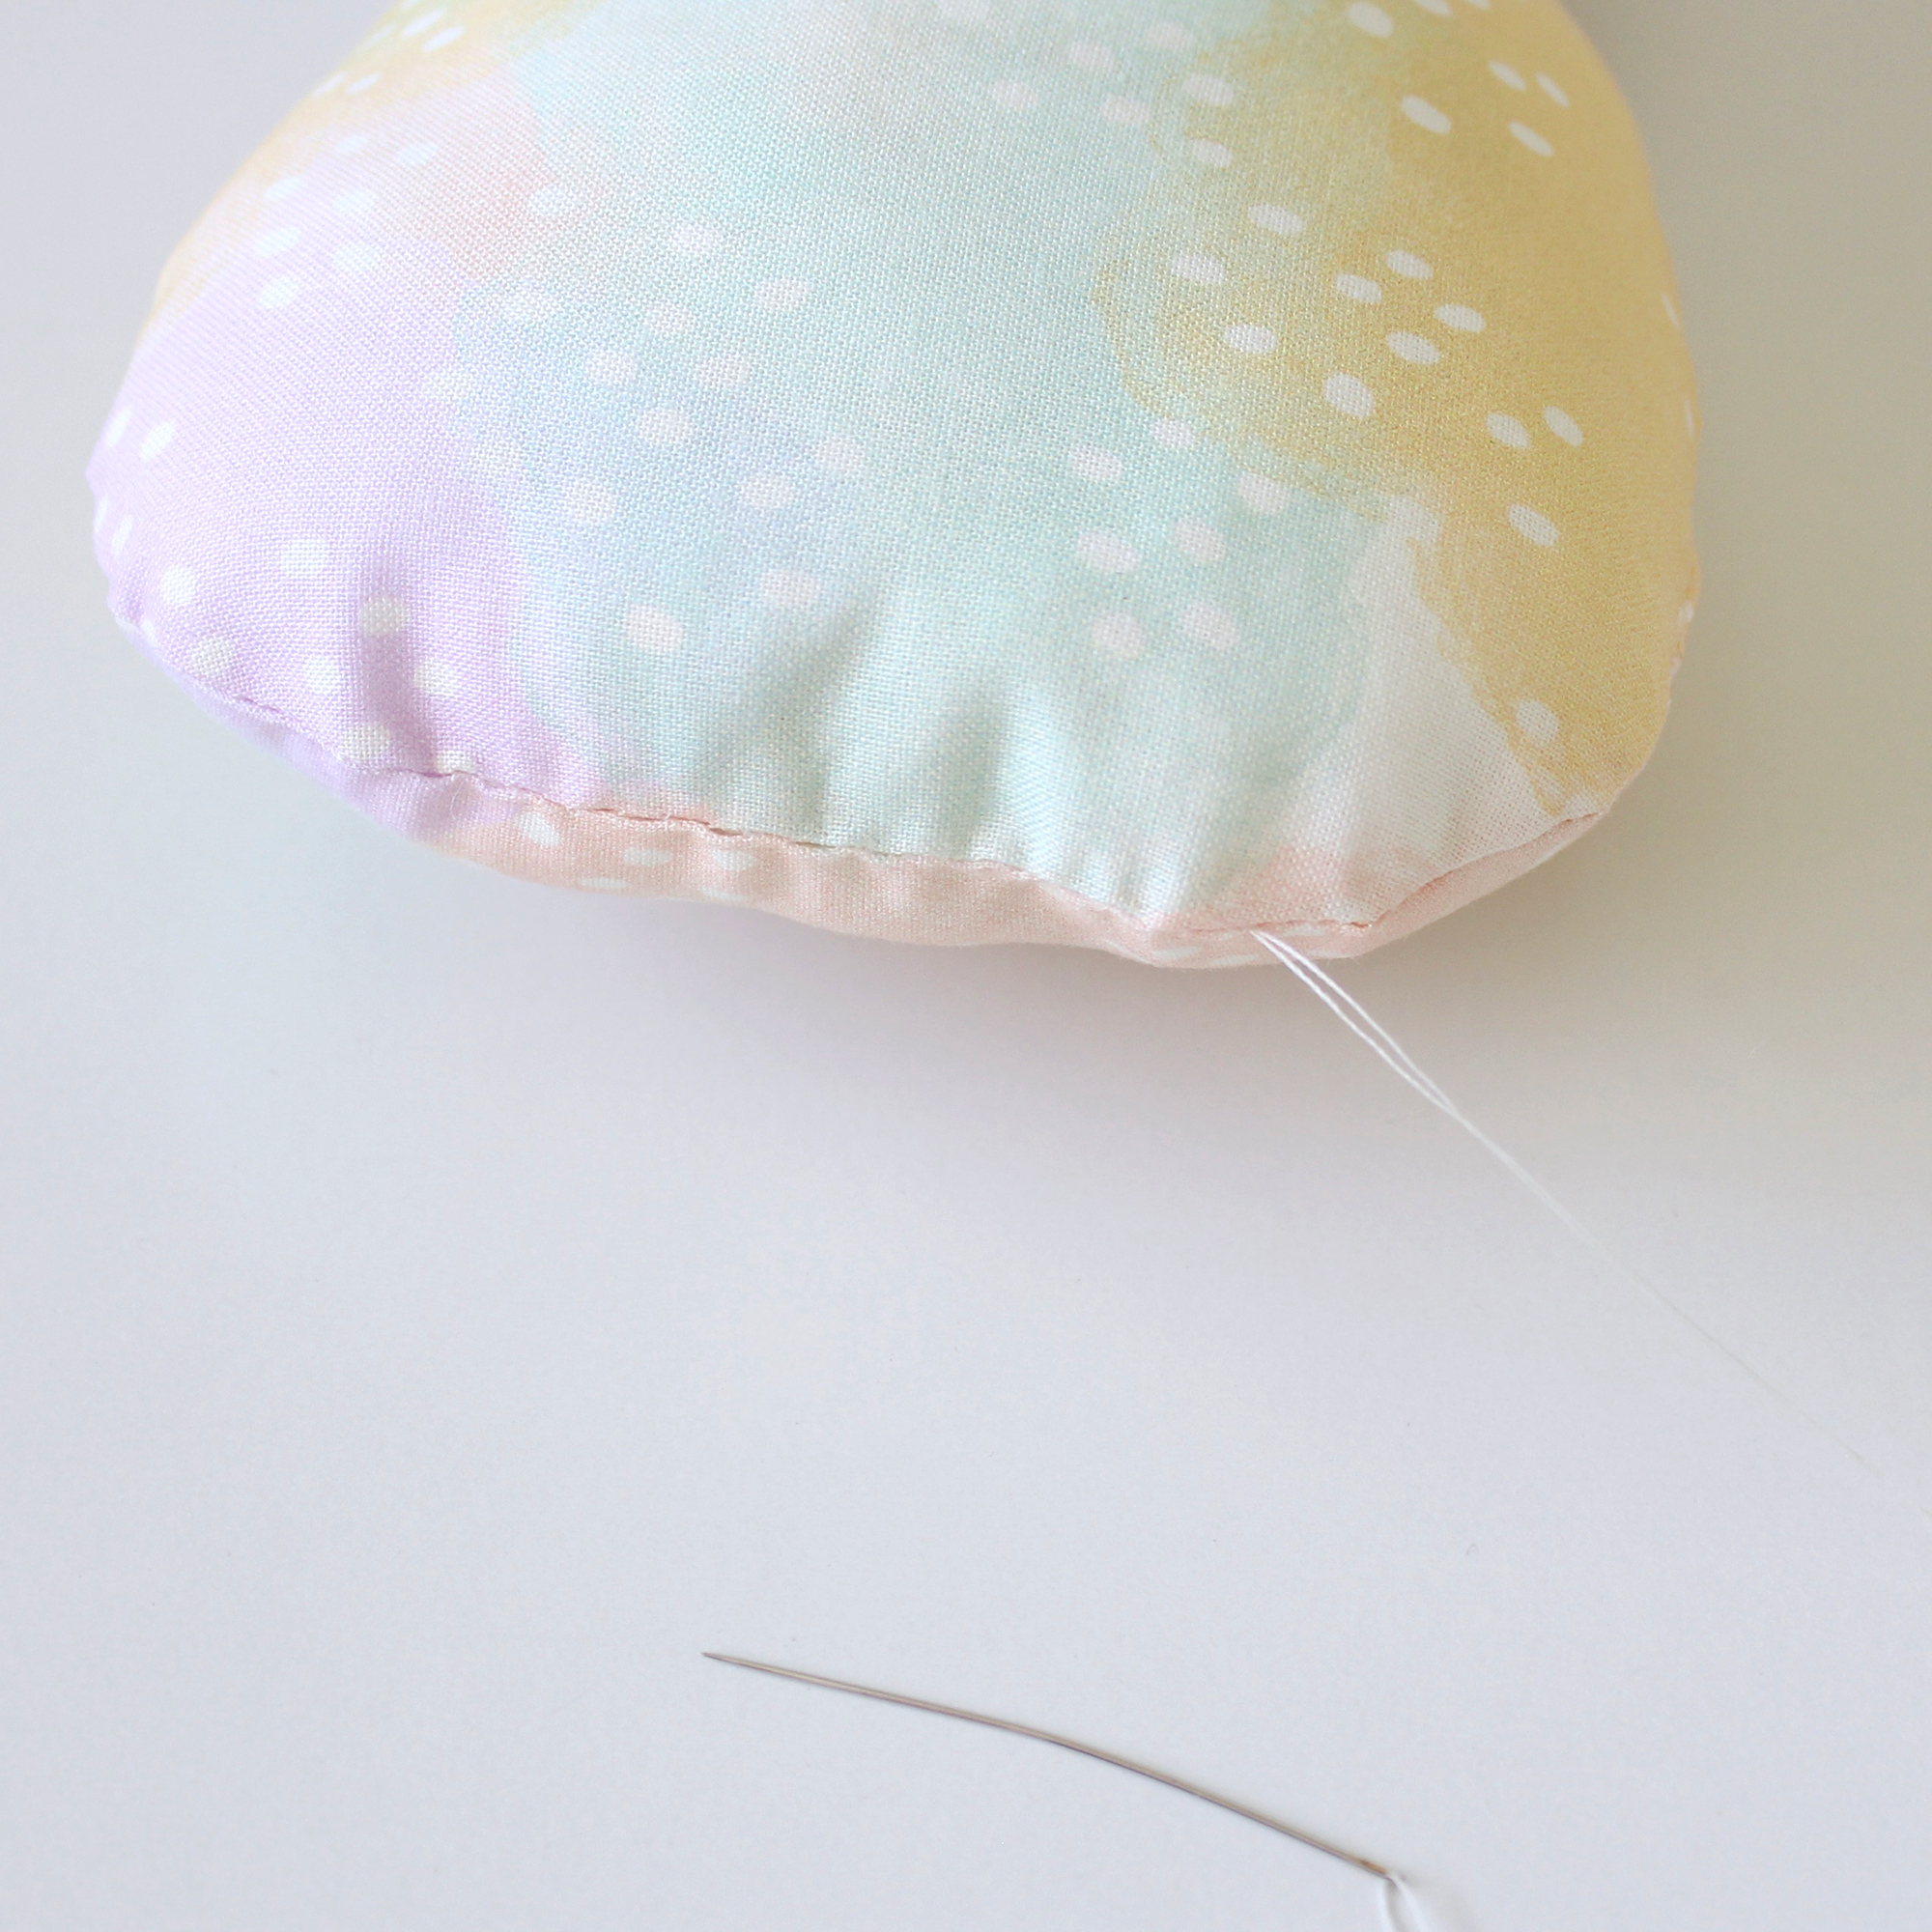
Use a chopstick or similar tool to maneuver small amounts of polyester stuffing into the head and then the body until the bunny is firmly stuffed.
Close the turning gap by using a fine ladder-stitch sewn with a doubled over the thread.
Tie a small bow with the 8″ of ribbon. Trim (then heat seal) the ends. Use invisible stitches to sew the bow to the top right-hand side of the bunny’s face, over the starting point for your blanket stitching.
The little bunny is all set for fun and play!
Happy Stitching
I hope this tutorial inspires you to make a bunny or two for your loved ones at Easter. I love to design projects for beginners that teach you a range of skills that can then be transferred to new and different projects. You might enjoy some of my other tutorials too!
If you make a Bunny Stuffie be sure to let me know. It gives me such a thrill to share in your excitement for your finished projects! Visit me on Facebook or share it on Instagram and tag @mollyandmama. Use the hashtags #thermoweb #heatnbond and #mollyandmama.
Happy stitching, Lauren x
 Deco Foil
Deco Foil has quickly become one of our most popular products and it’s easy to see why! With a Rainbow of colors available at your fingertips and a wide variety of products to use to apply the Deco Foil…it’s easy to say once you dip your toe in…there’s no going back! Our Deco Foil is perfect for cardmaking, papercrafting, mixed media, and of course for scrapbooking. And now you’ll find more ways to include it with our NEW Deco Foil Toner Sheets available in A2 and Slimline Sizes! So miss entering to win our FairyTale Foil Collection, Deco Foil DUO Transfer Gel, Deco Foil Foam Sheets, Deco Foil Toner Sheets plus your choice of two of our A2 or Slimline Size Toner Sheets, This prize is worth $60!
This post contains affiliate links. For more information, see our disclosure HERE.
This post contains affiliate links. For more information, see our disclosure HERE.
[…] would make a cute Easter gift! Lauren from Molly and Mama shares a tutorial and free pattern over at the Therm O Web blog for making these sweet little bunny […]
[…] Easter Bunny Stuffie […]