


 Hello and welcome!
It’s Julia from Inflorescence Designs! I’m so joyful you are visiting today. This week is all about CAKE!
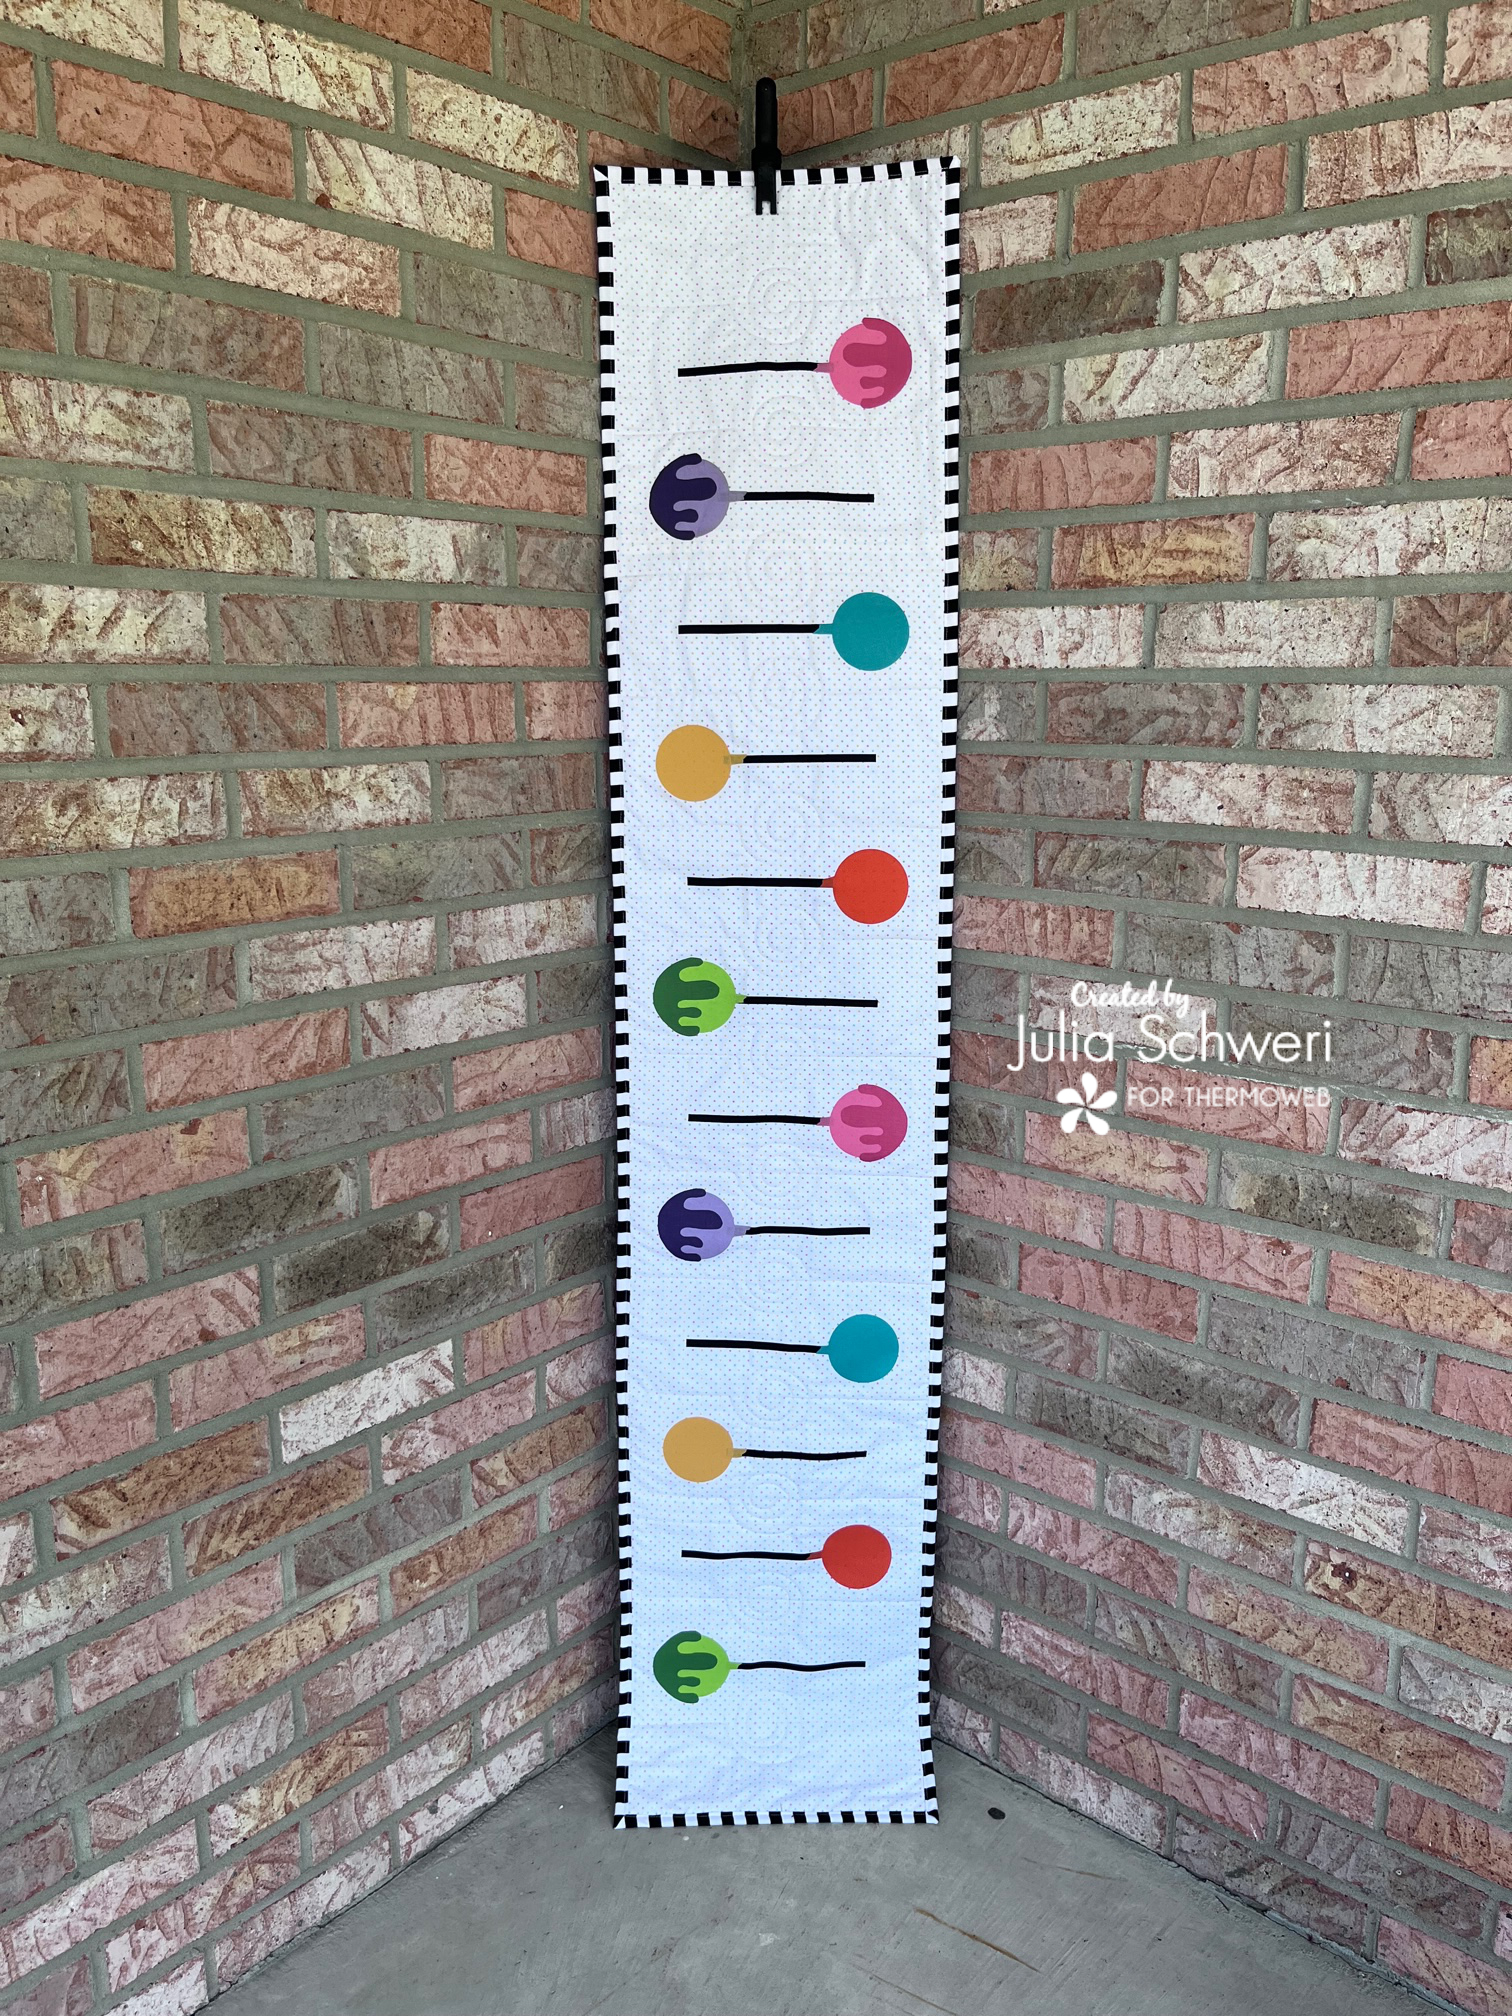
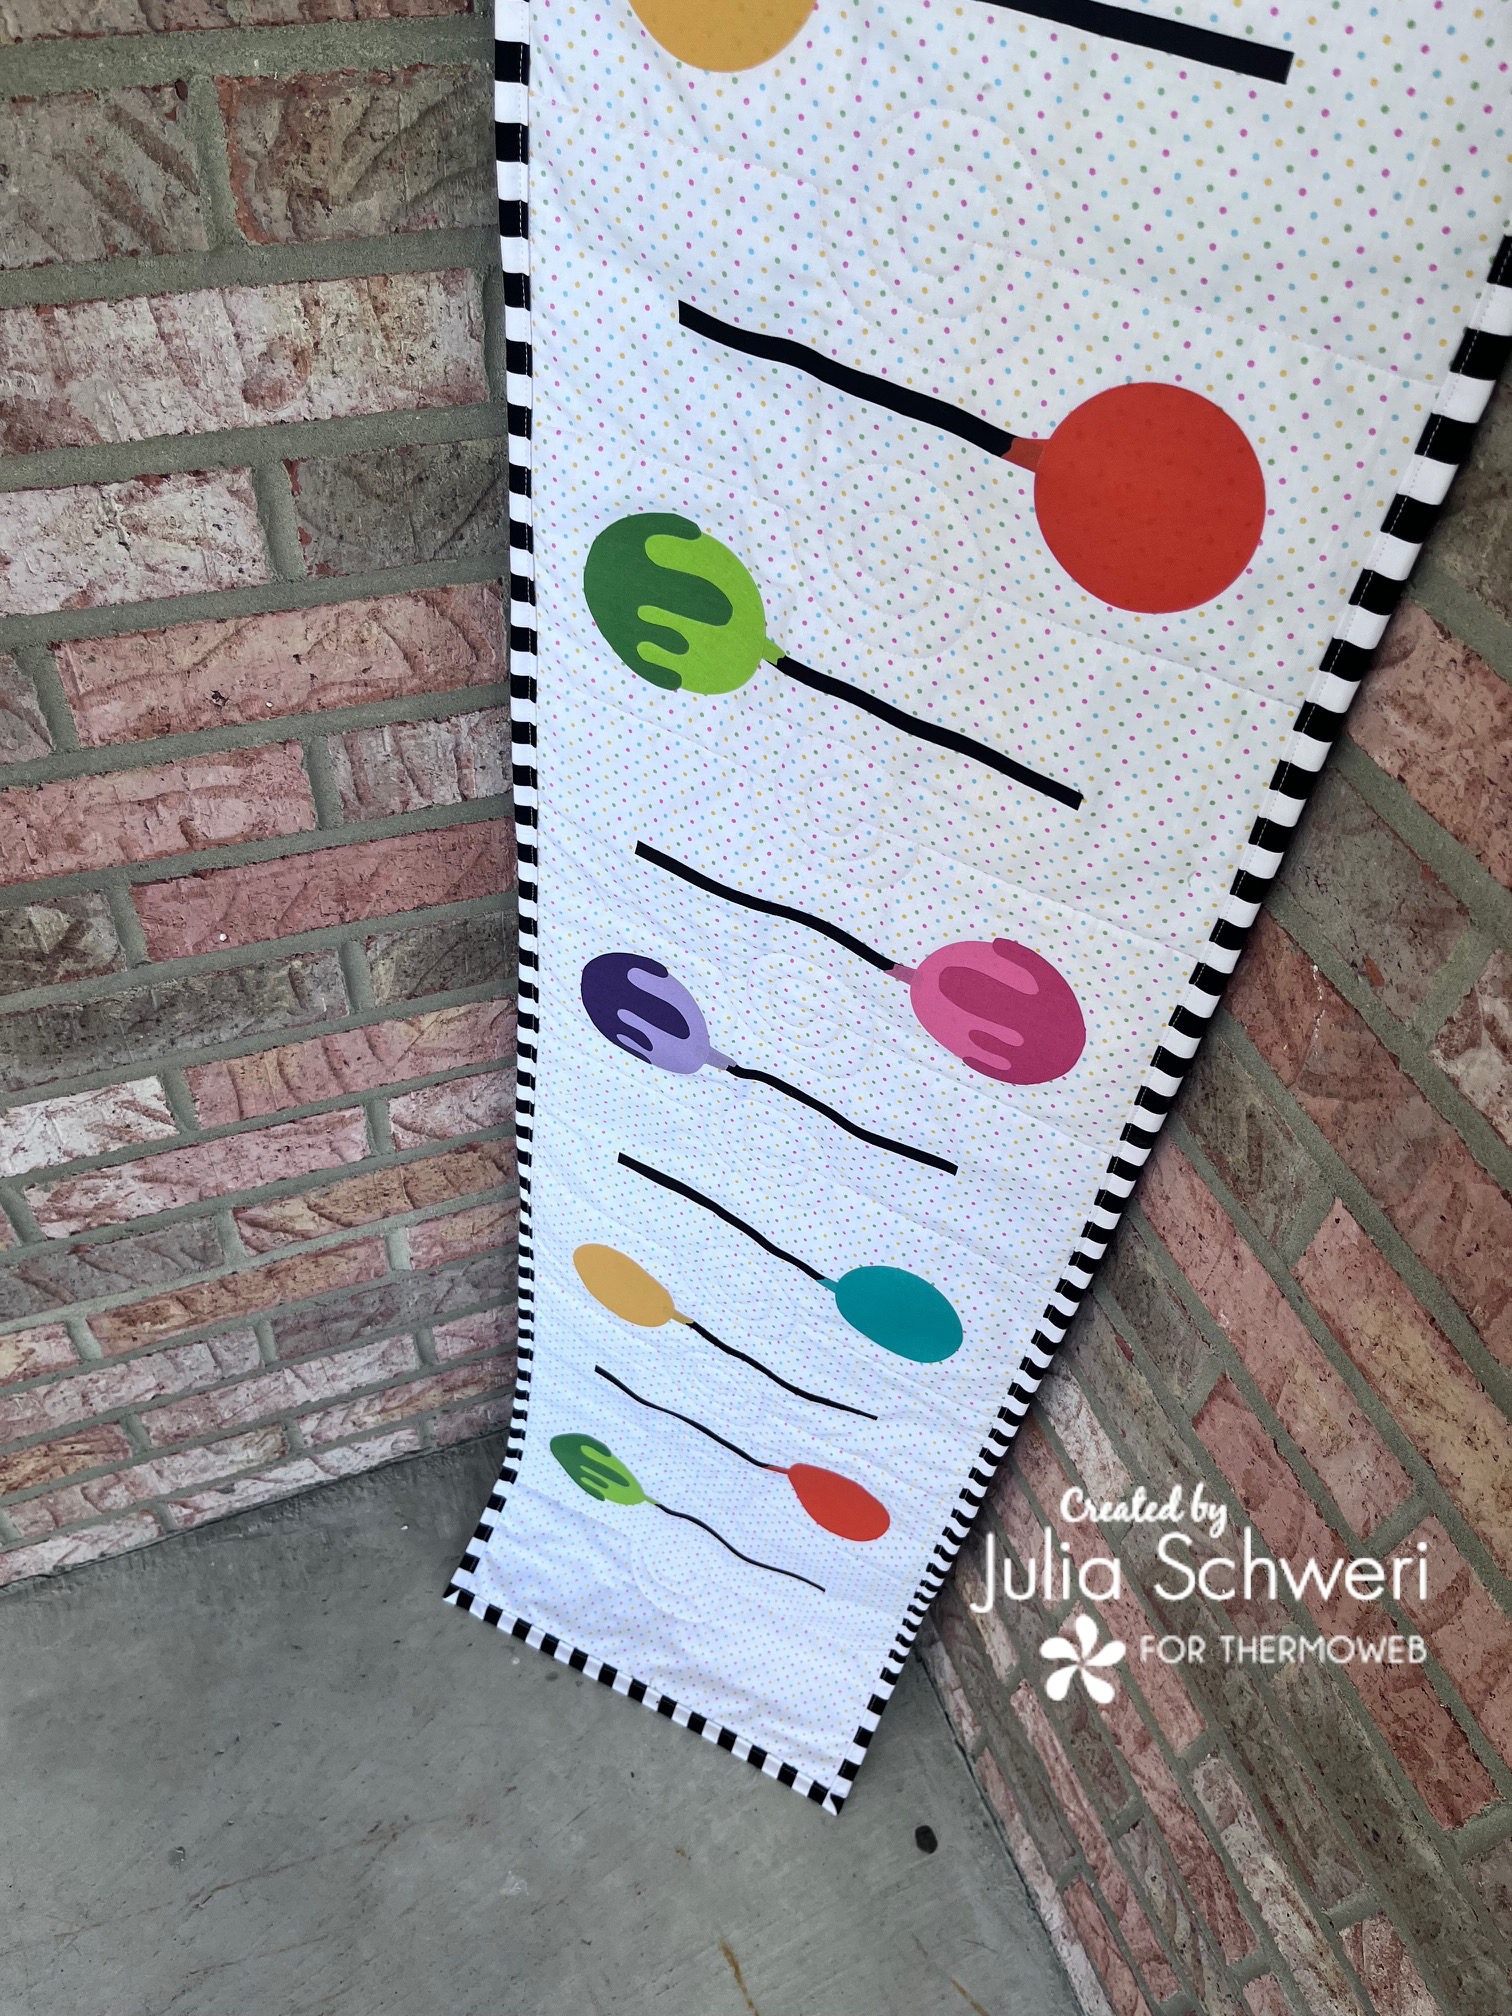
Cake Pop Table Topper
Beginner sewing pattern!
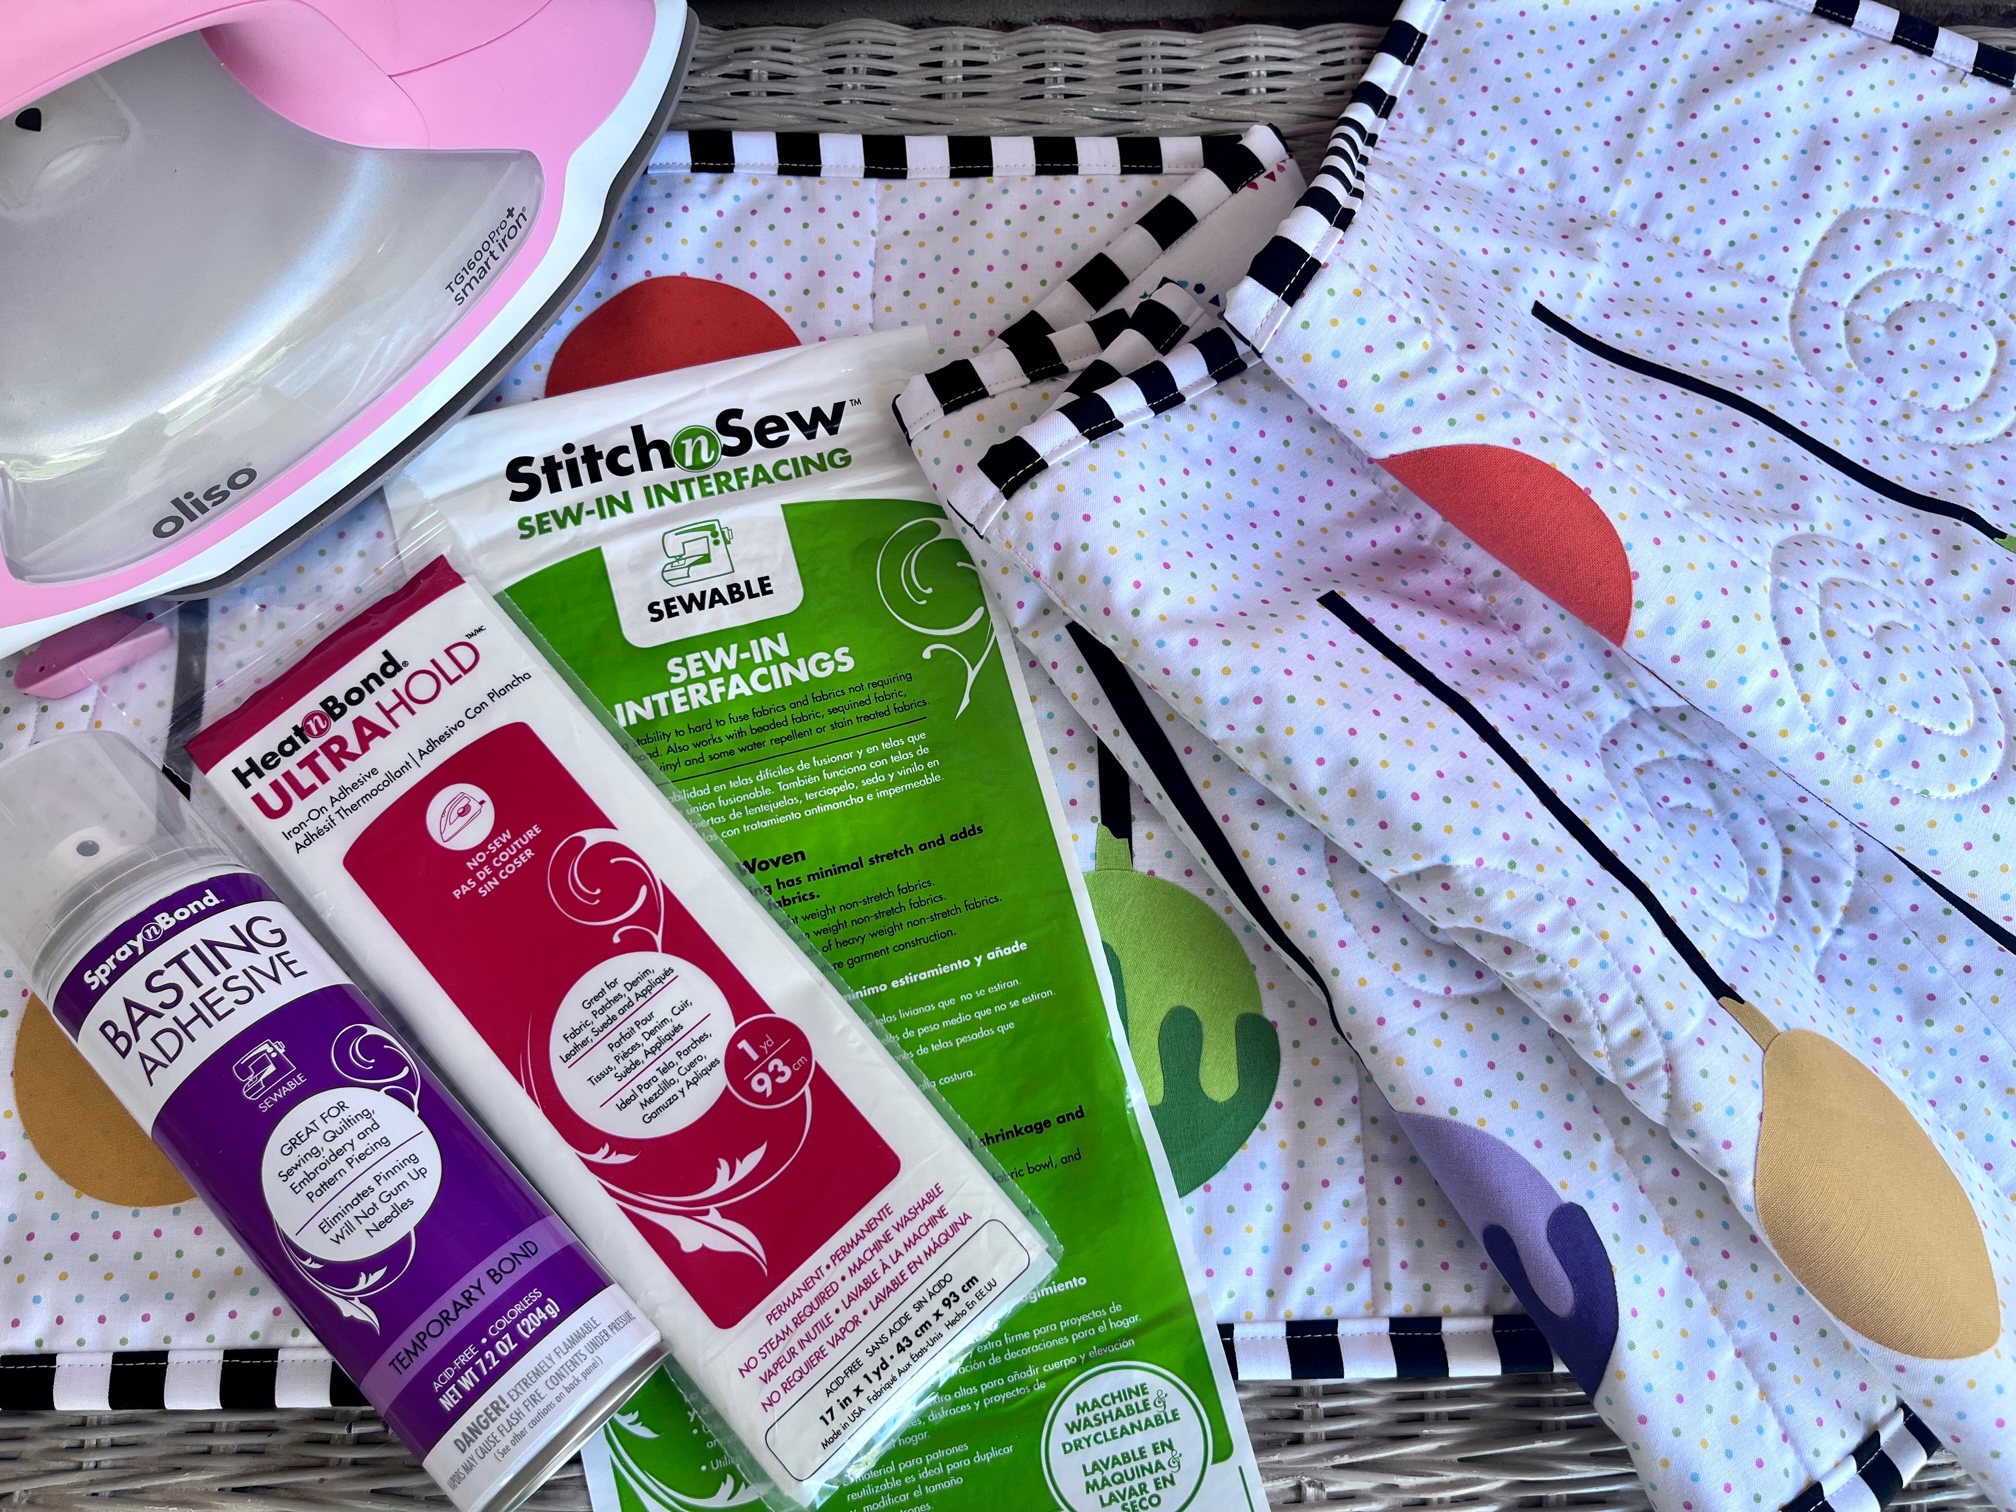
Supplies:
-
Cake Pop Table Topper Pattern
- HeatnBond Ultra Hold
- Thermoweb SpraynBaste Basting Spray
- Oliso Iron
- Basic sewing notions
- StitchnSew Fleece 15″ x 69″
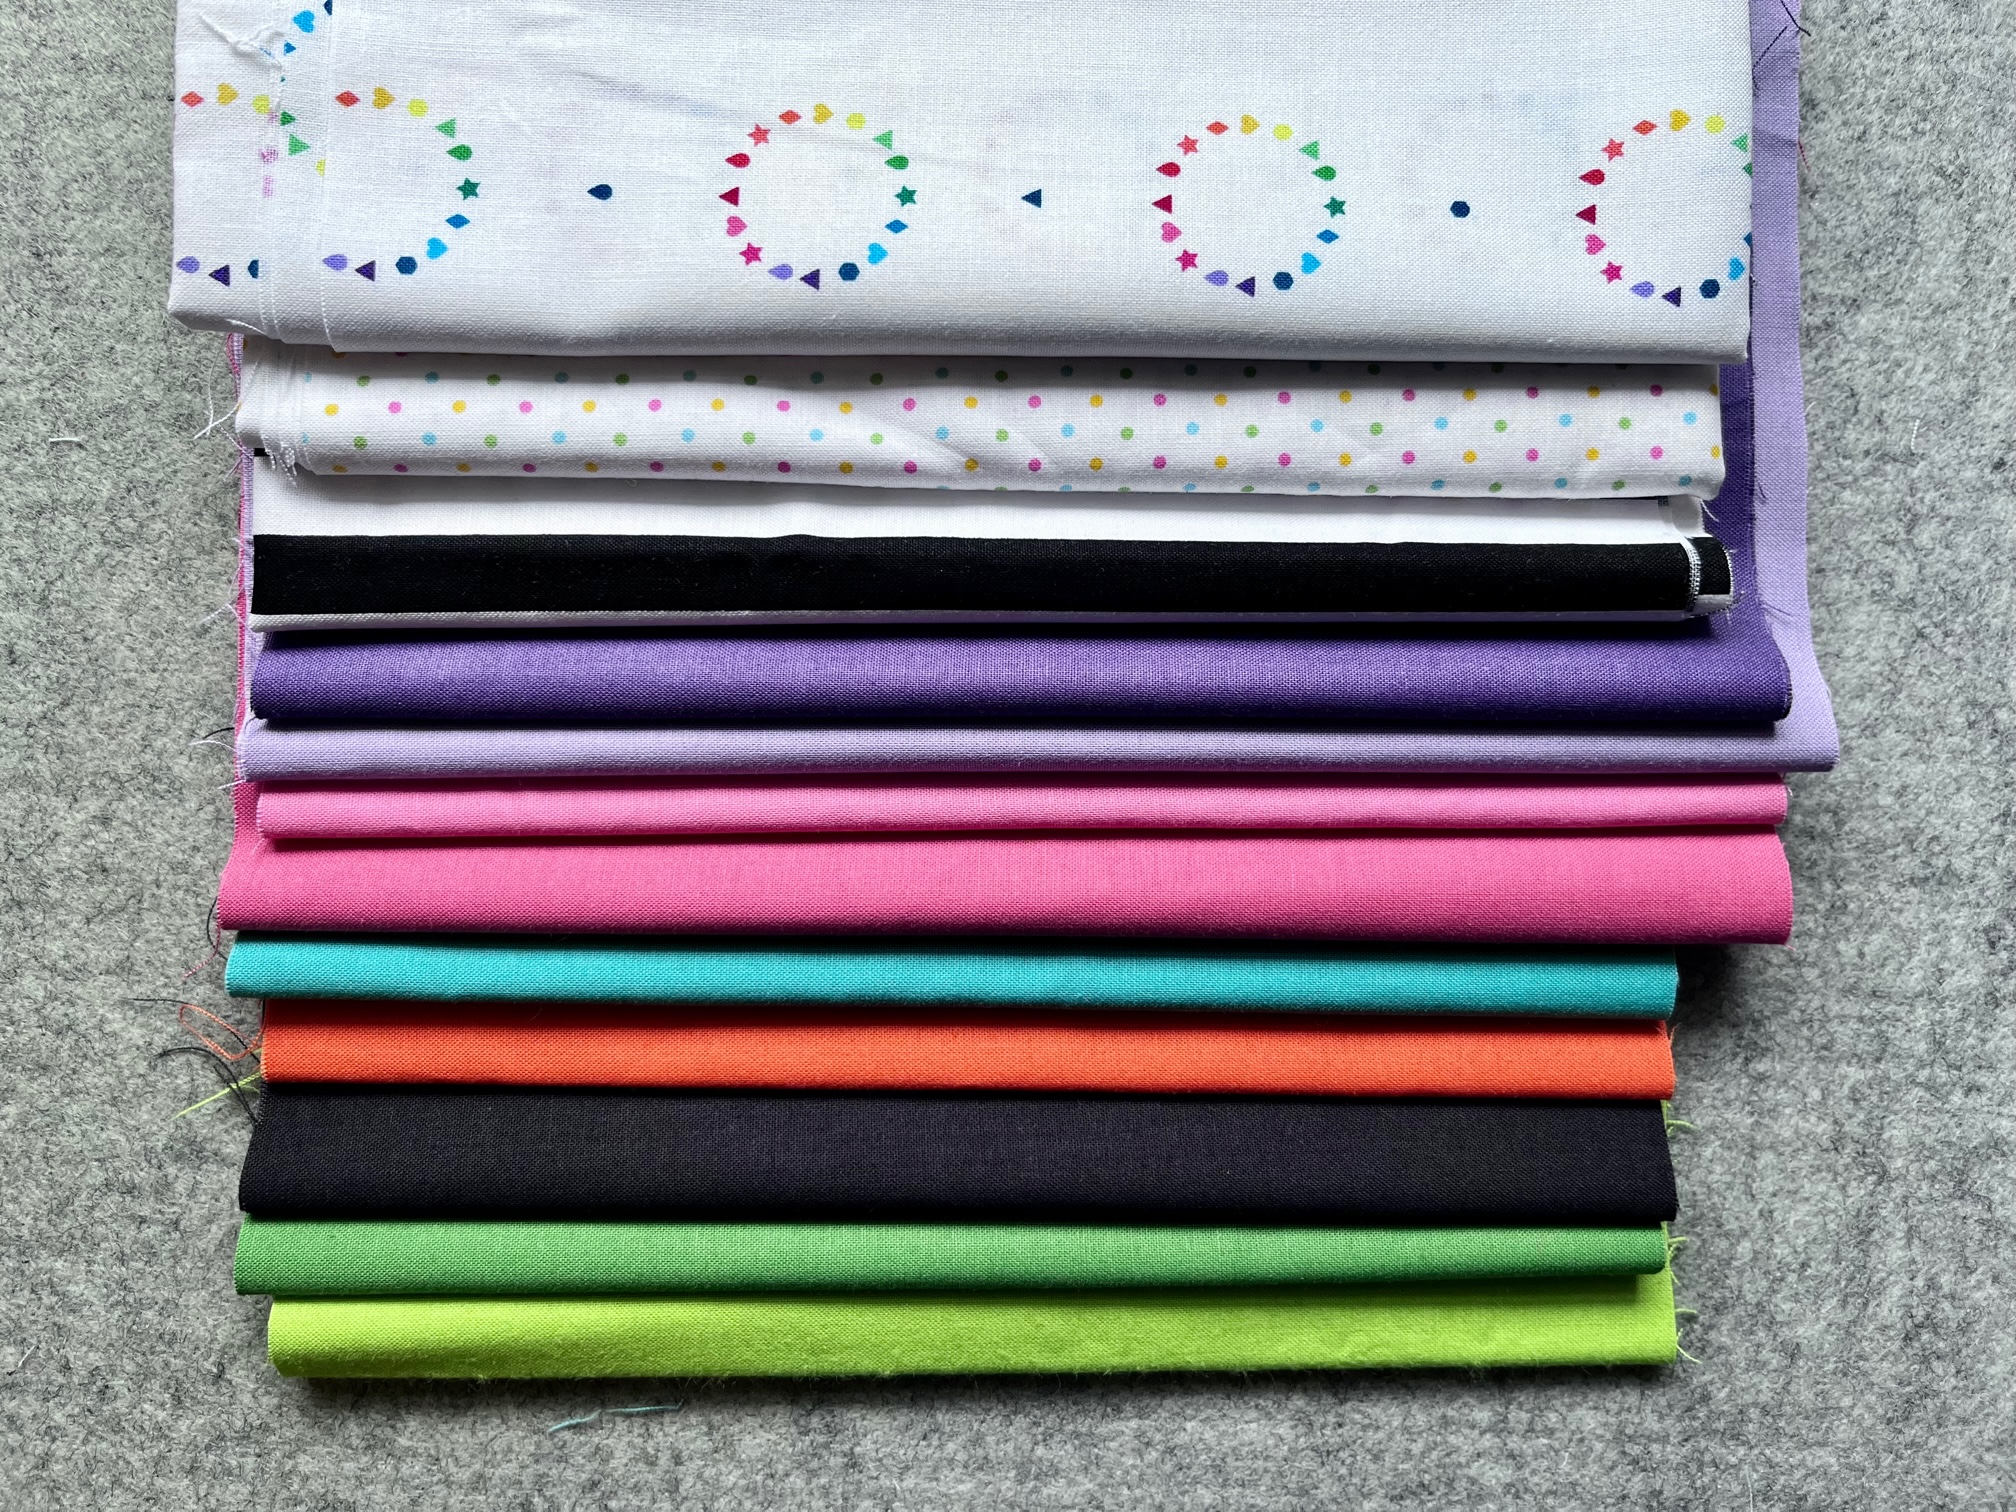
- Fabric Requirements:
- Background Fabric: 14″ x 68″ (Riley Blake Swiss Dot C660-03 GIRL)
- Backing Fabric: 15″ x 69″ (Riley Blake Imagine Color White Wheel C12161-WHITE)
- Binding Fabric: (Riley Blake 1/2″ Stripe Black C530-110 BLACK)
- Cake Pop Fabric: (Riley Blake Confetti Cotton: C120 Licorice, Rileyorange, Rileylime, Holly, Rileylilac, Grape, Vivid, Tea Rose, Sugar Pink and Kona Cotton Ochre
Instructions:
Begin by cutting and piecing your front background fabric and backing fabric. I pieced my front and back using 3 pieces. Most fabrics have a usable 42″ width, I used this length for the middle of my table runner and pieced a 14″ x 14″ square on both ends for the front and a 15″ x 15″ square on both ends for the backing. I used a 1/2″ seam allowance. This was a personal preference. I wanted identical seams on both sides of the front of my table runner.
Next…
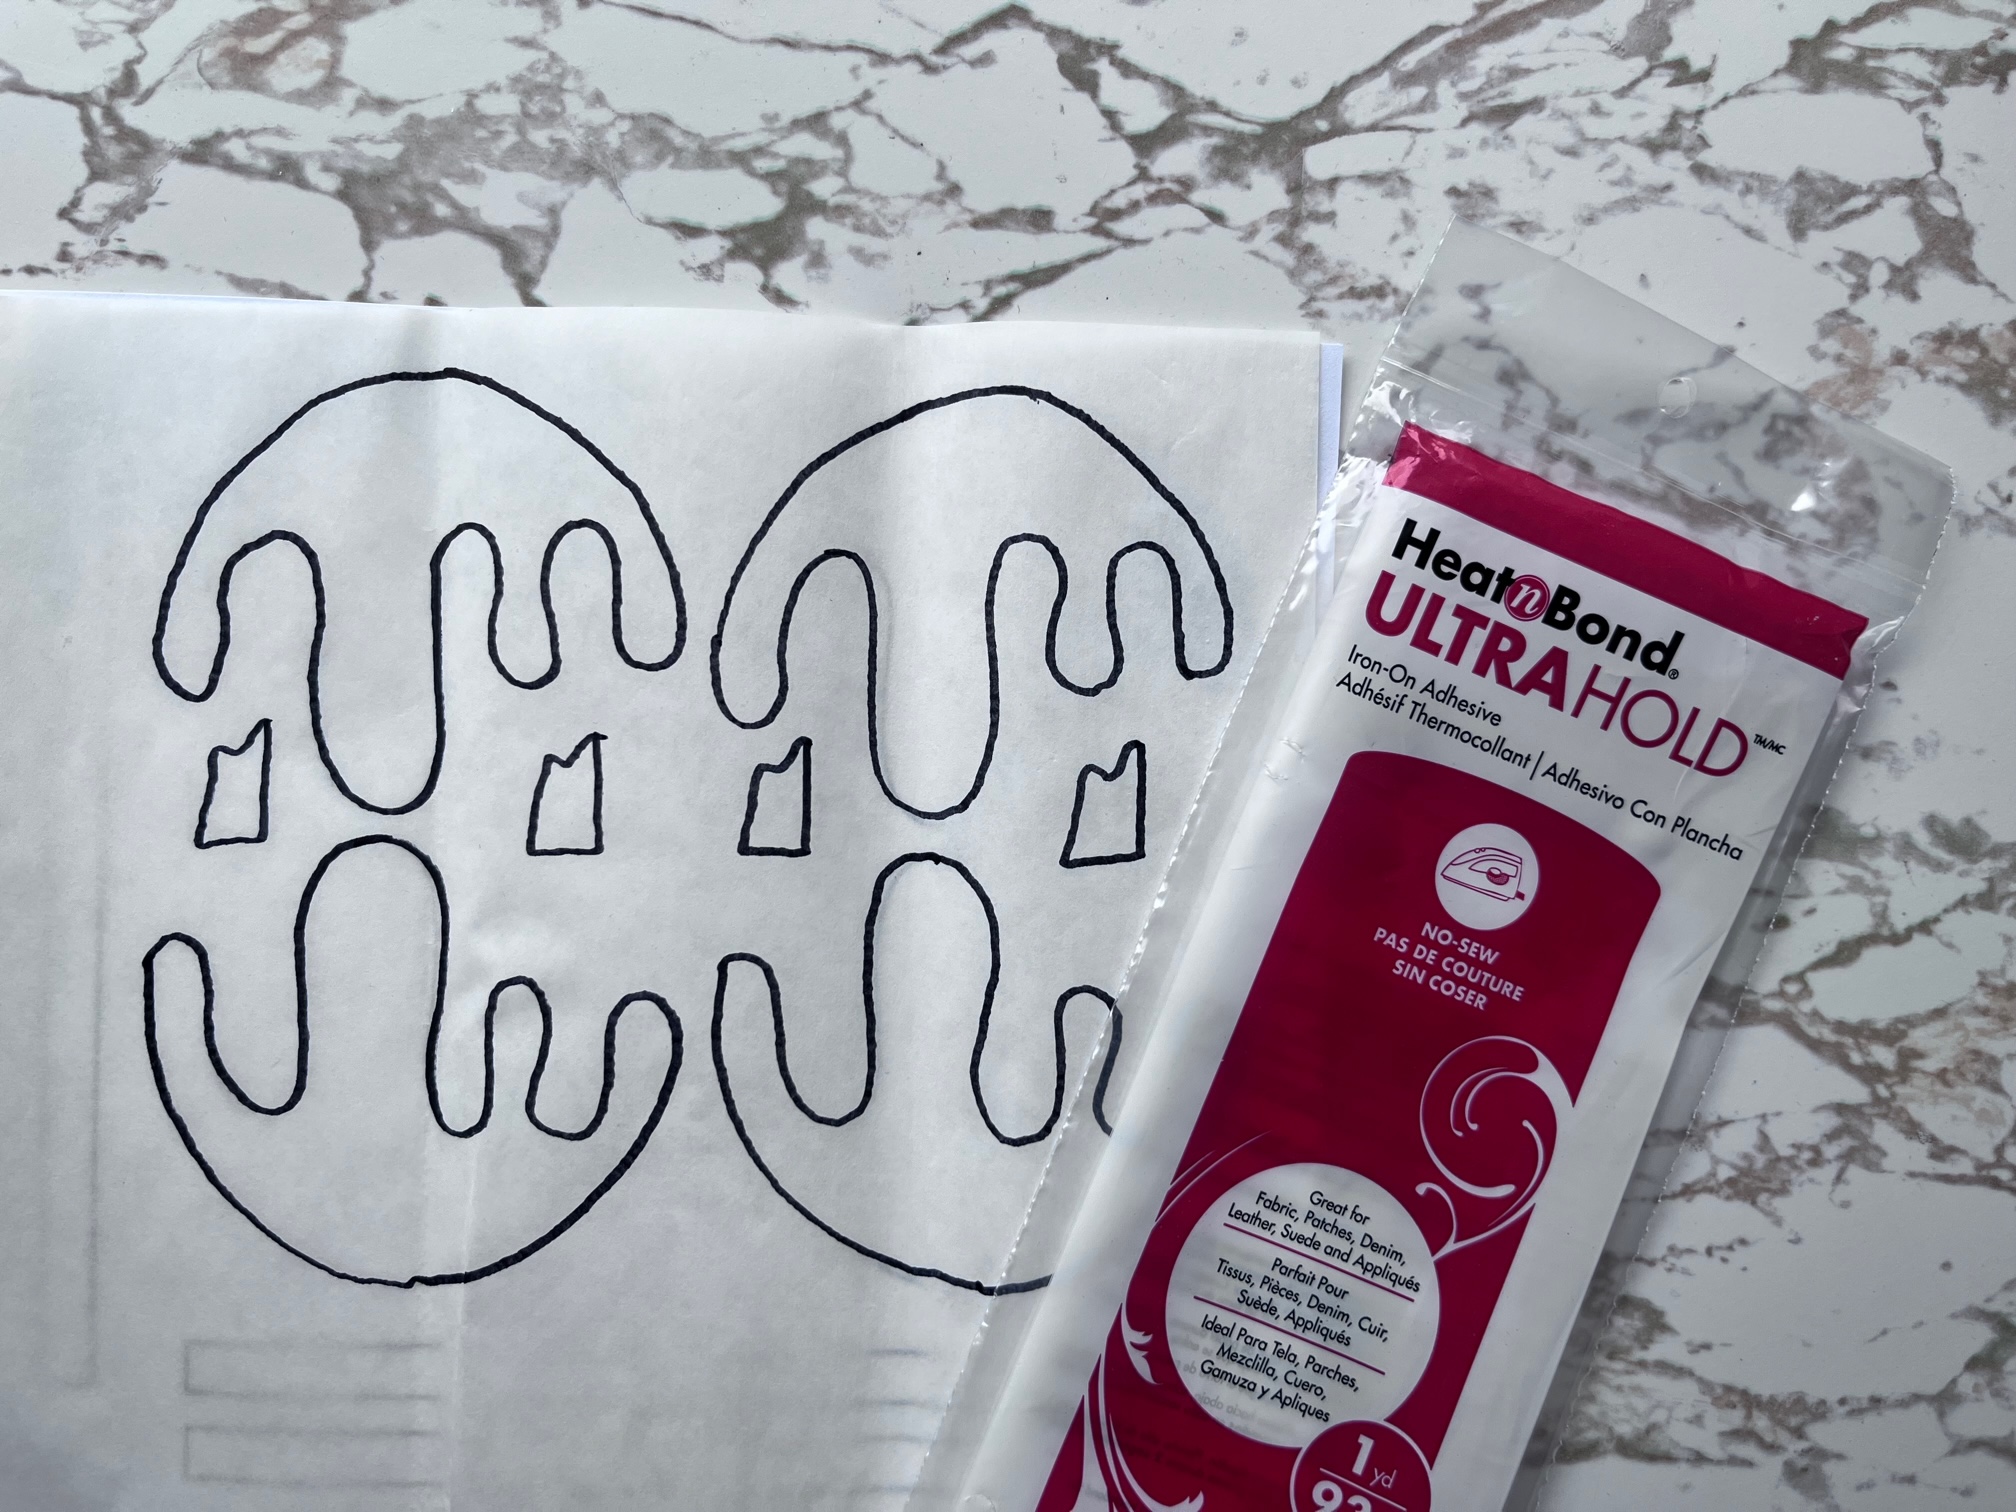
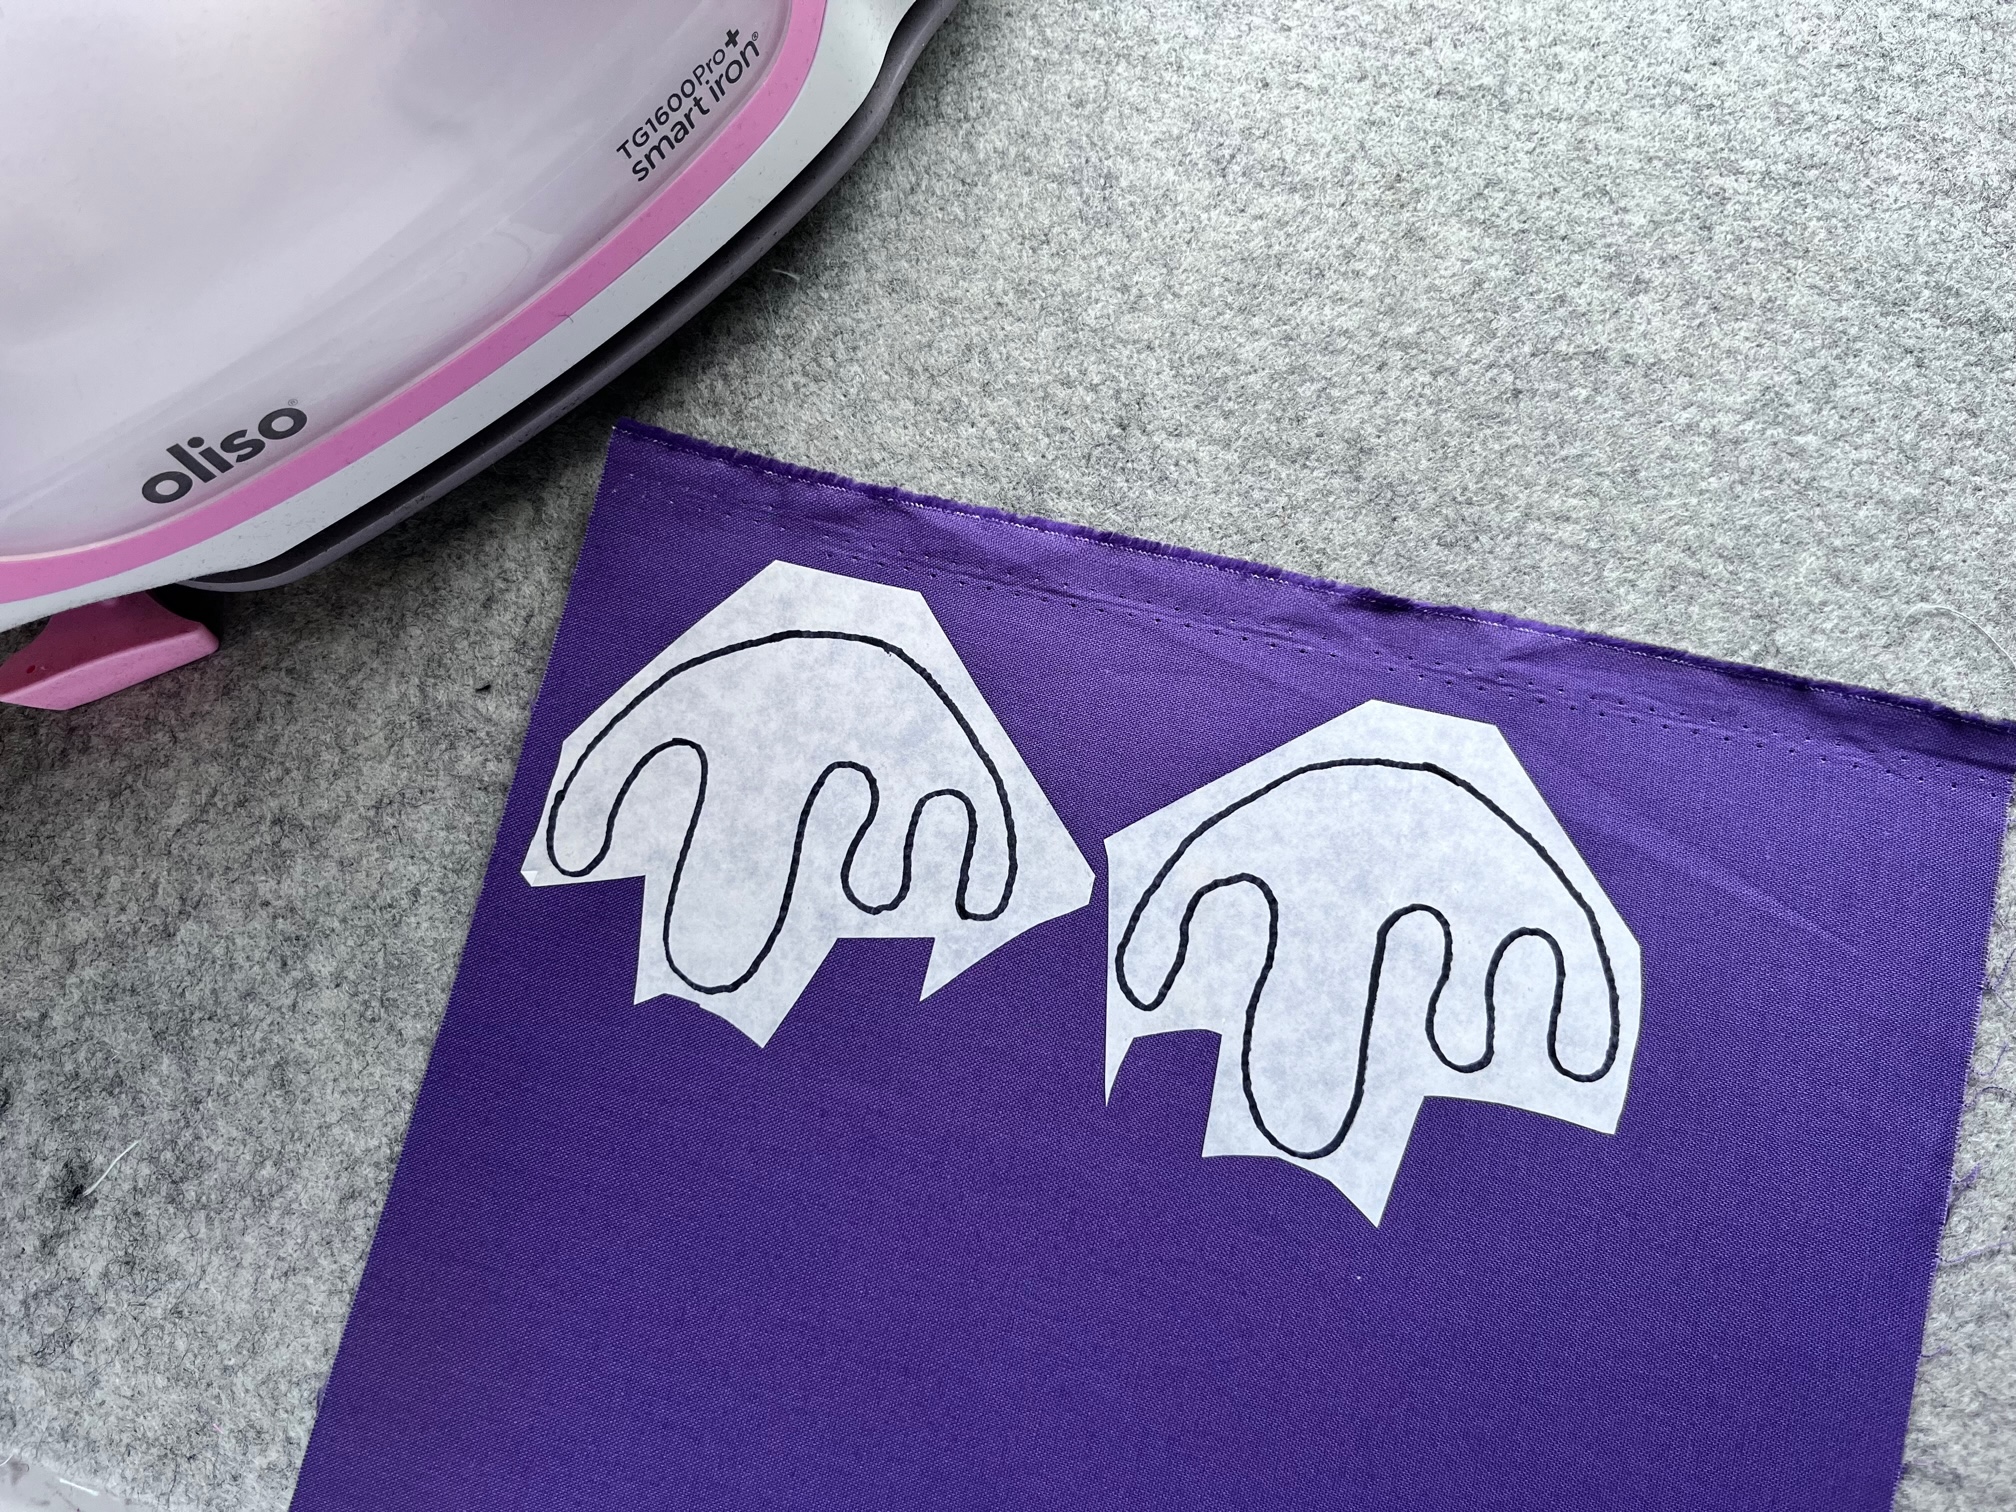
Prepare your HeatnBond Ultra Hold patterns. Trace the “Cake Pop Topper” patterns onto your HeatnBond Ultra. With HeatnBond Ultra no sewing is required. However, if you would like to applique your project use either HeatnBond Lite or FeatherLite. The printable pattern above was designed to be compatible with Thermoweb’s EZ-Print Iron-On Adhesive Sheets.
Next…
Once all your patterns are traced, begin fusing the adhesive to your fabric.
Then…
Cut out all the applique pieces.
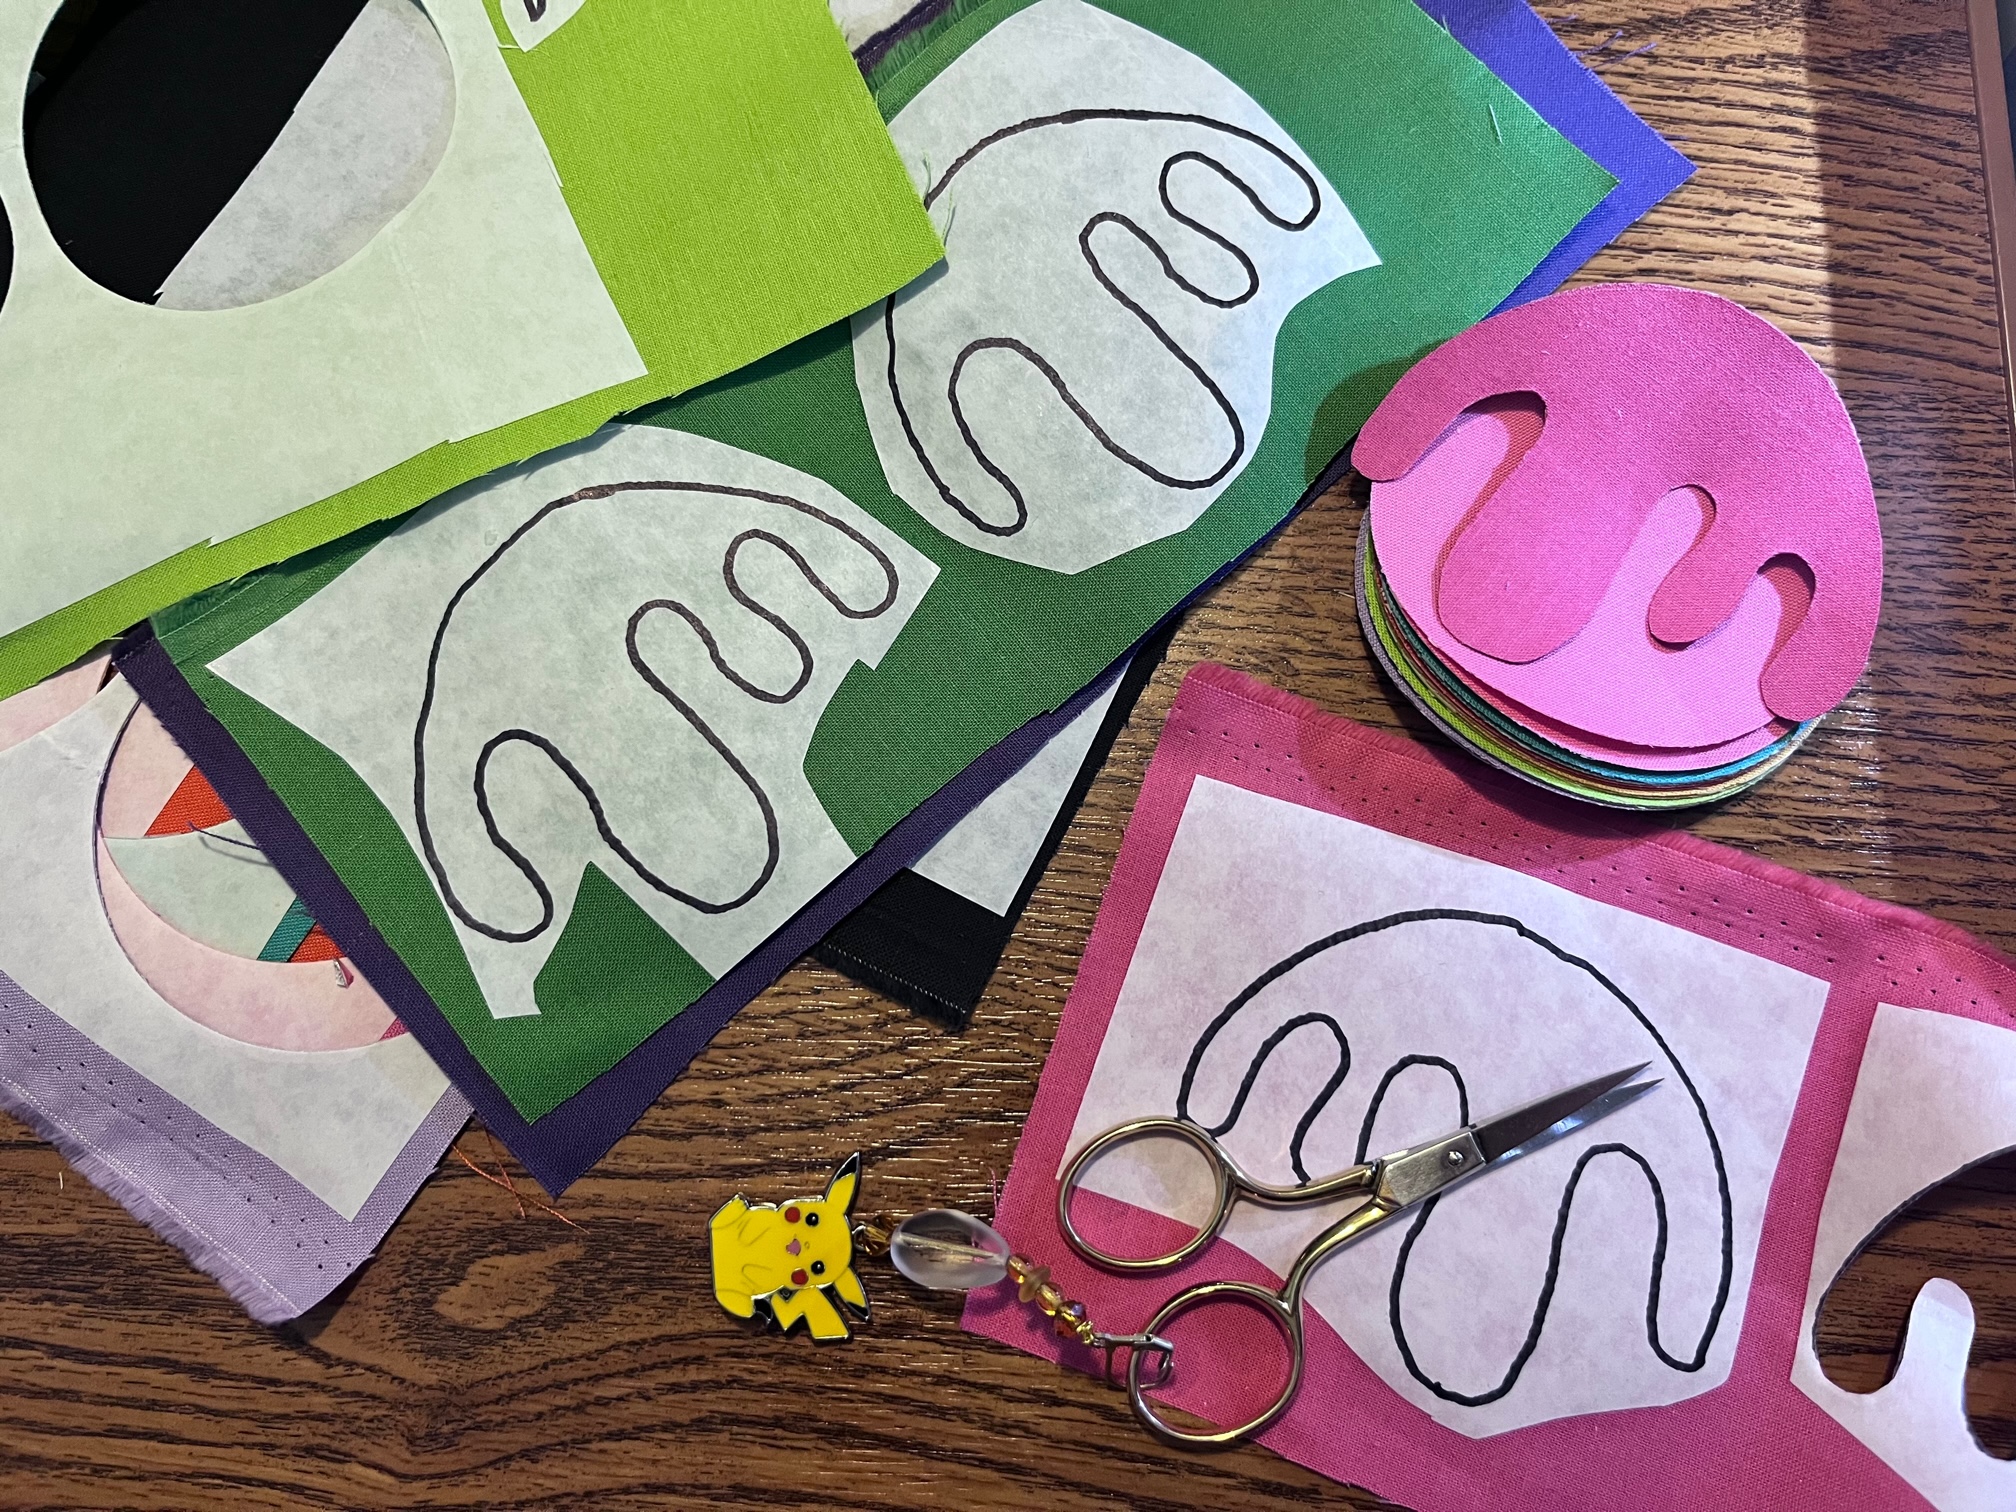
Table Topper Assembly
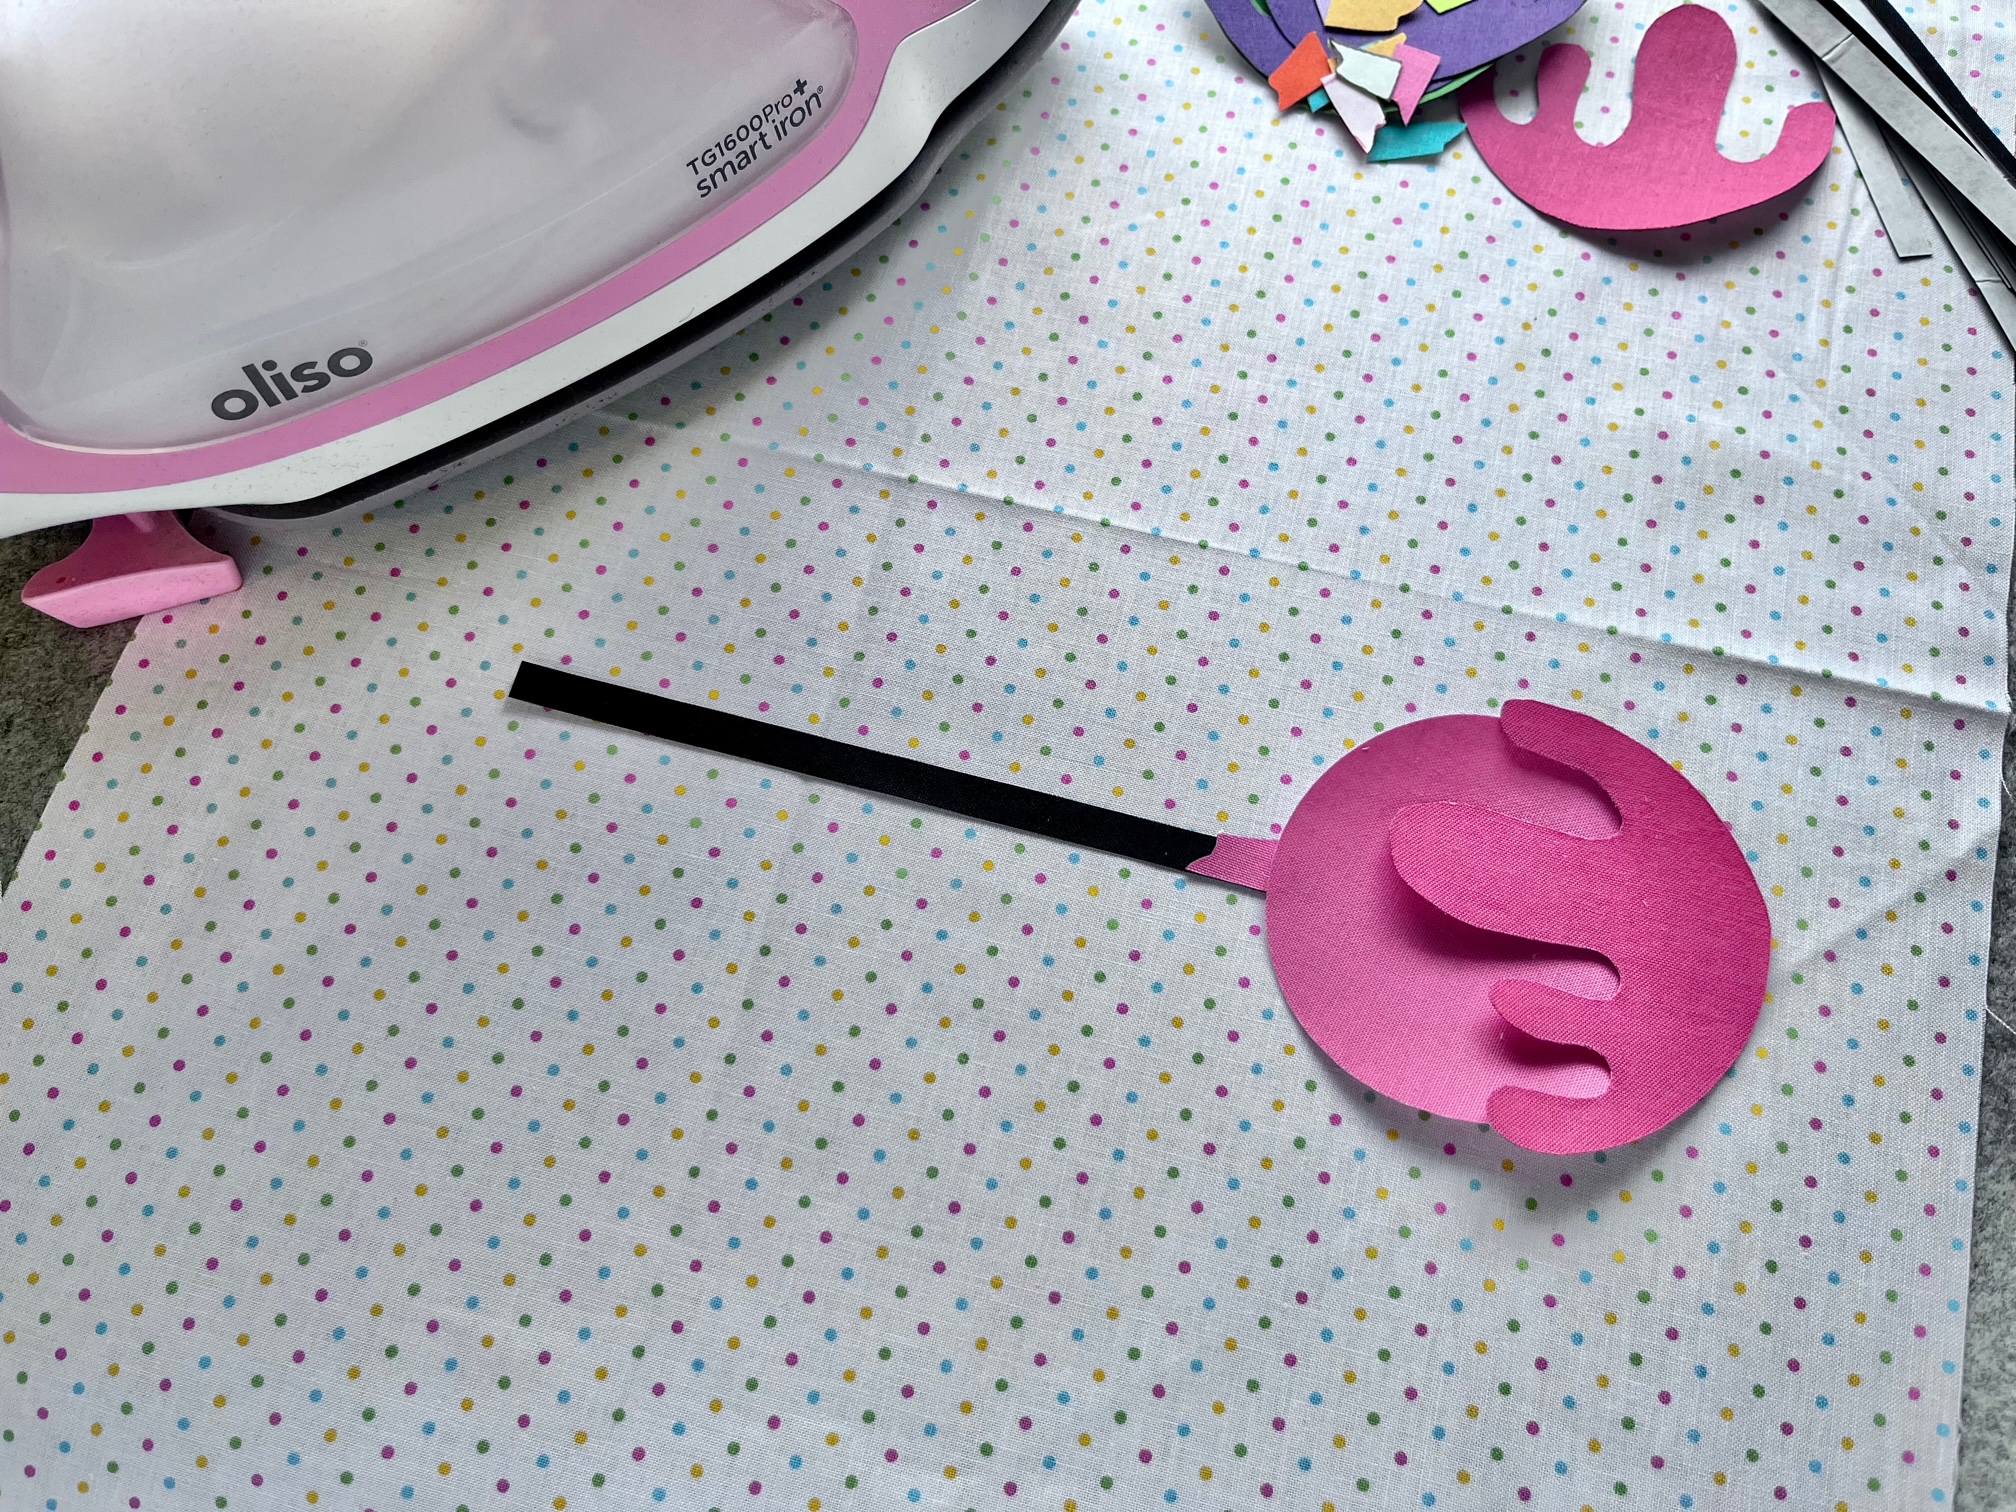
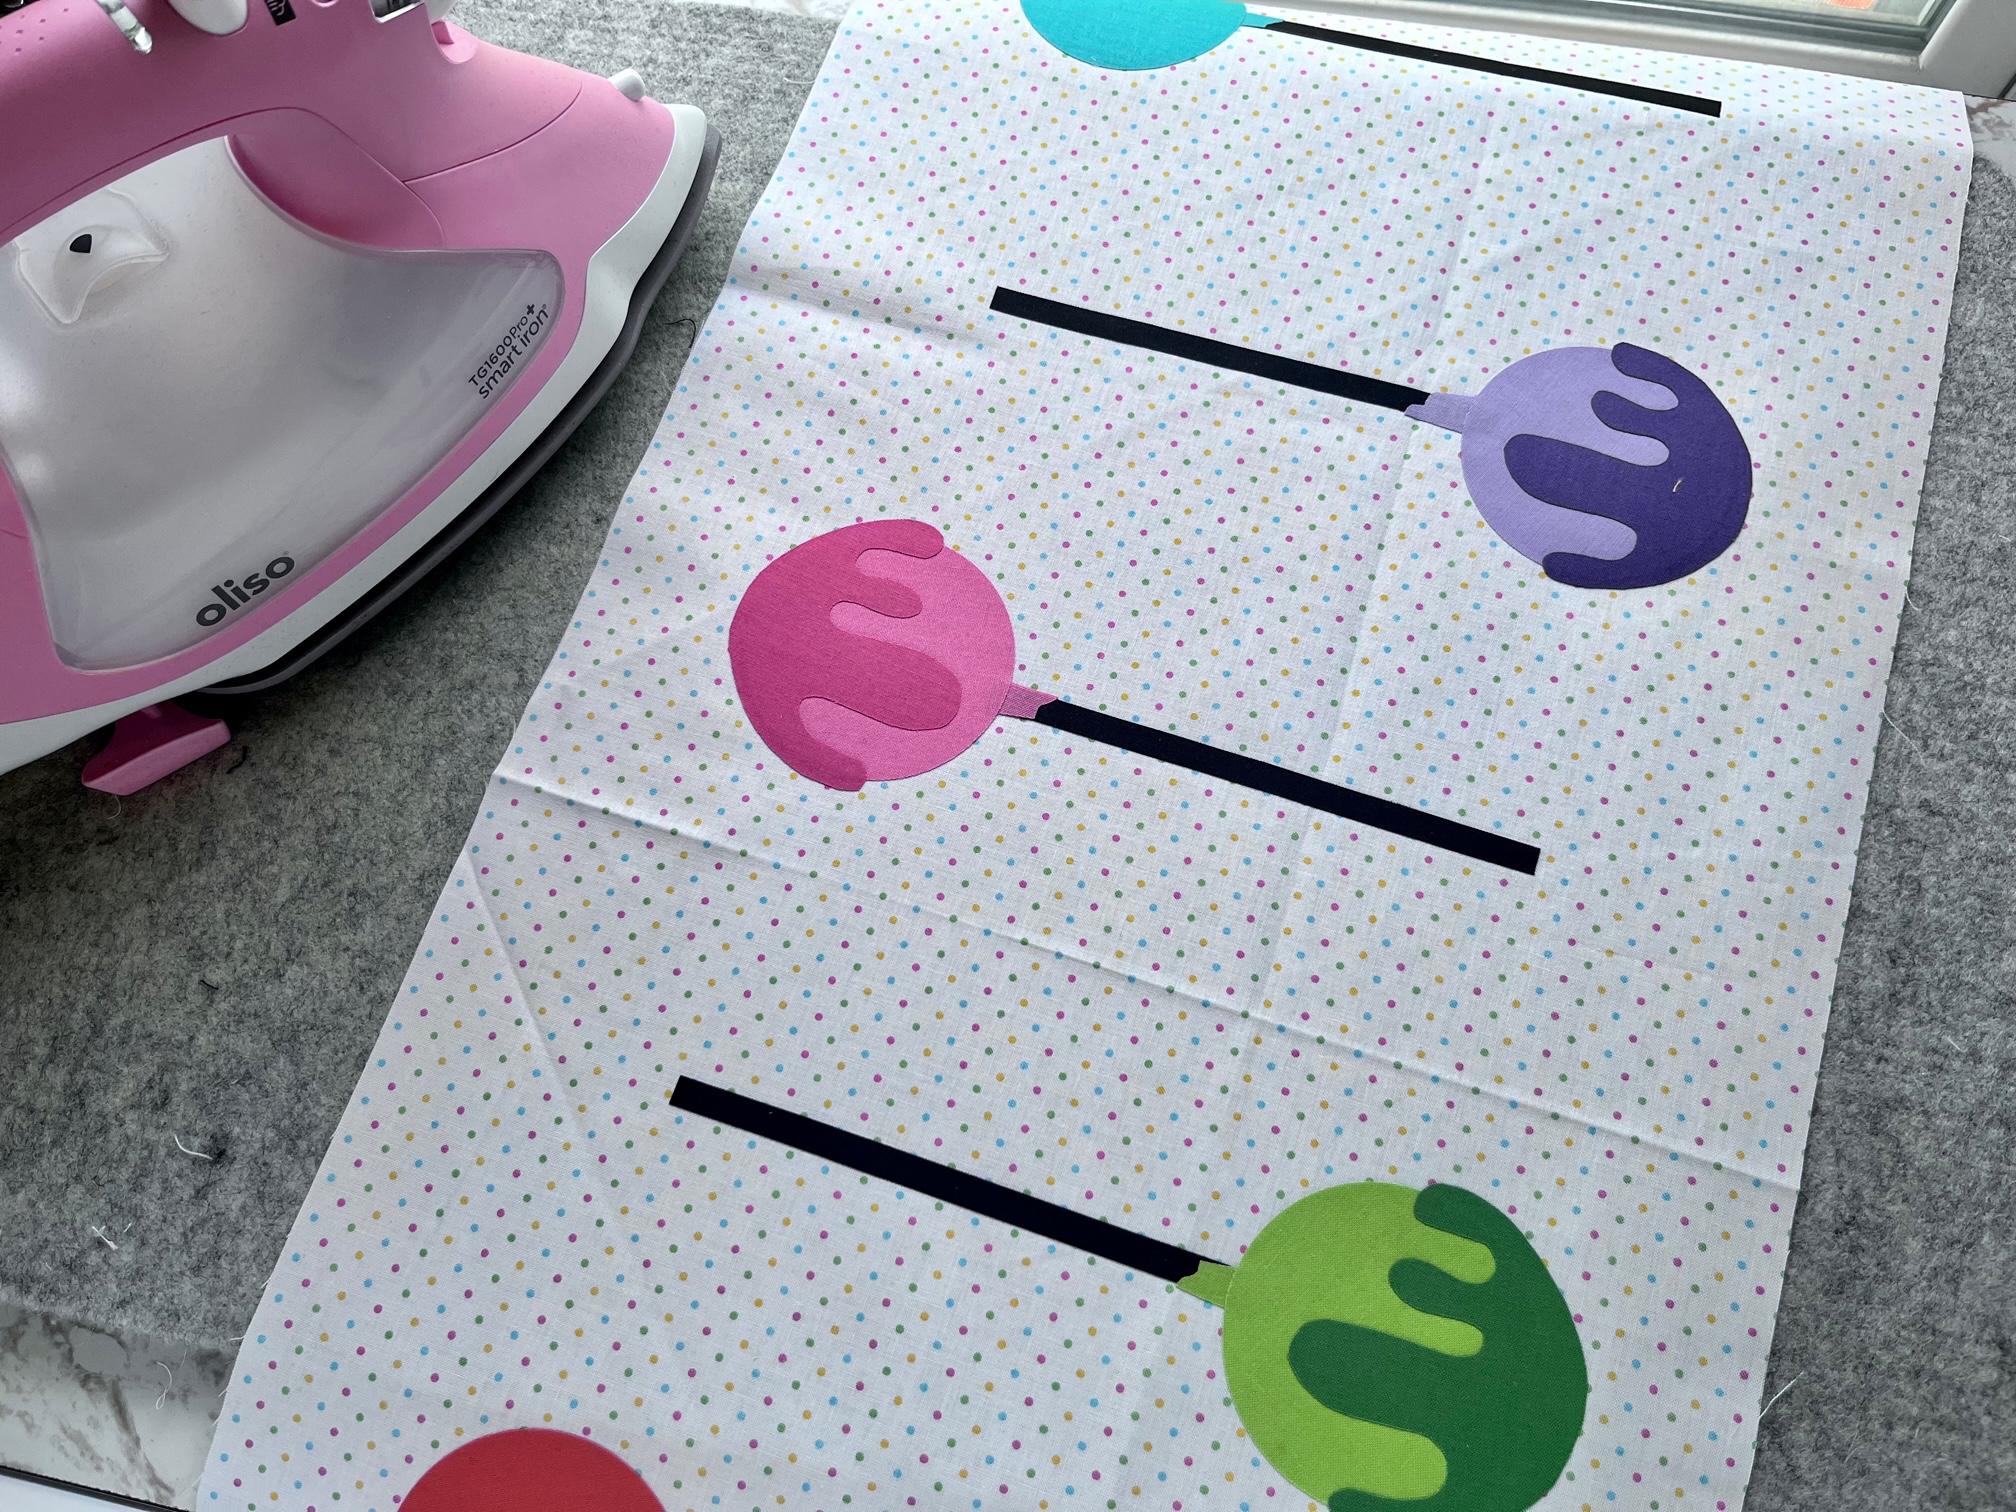
Begin assembling your table topper. I started in the middle of the background fabric and measured 1″ out from the center in relation to the circle applique piece. The circle applique piece is also 2″ from the side edge and the cake pop stick is 3″ from the other edge. Each cake pop stick is 4 3/4″ away from each other.
Important Tip: Check out the diagrams included with the pattern for easier placement understanding.
Once you have decided the placement of your first cake pop, peel the protective backing off your applique pieces and fuse to your background fabric.
Continue placing and fusing each cake pop till all 12 have been fused.
Next…
Once all the cake pops are fused, baste your table topper fleece and backing fabric. Quilt as desired and bind to finish.
Important Tip: Just remember, if you used HeatnBond Ultra Hold, sewing is NOT needed or recommended. Quilt AROUND your applique.
Finished!
Thank you for visiting today! Come back soon to see what else will be starting to bloom with Inflorescence Designs!
Starting to bloom by choosing JOY ~ Julia