


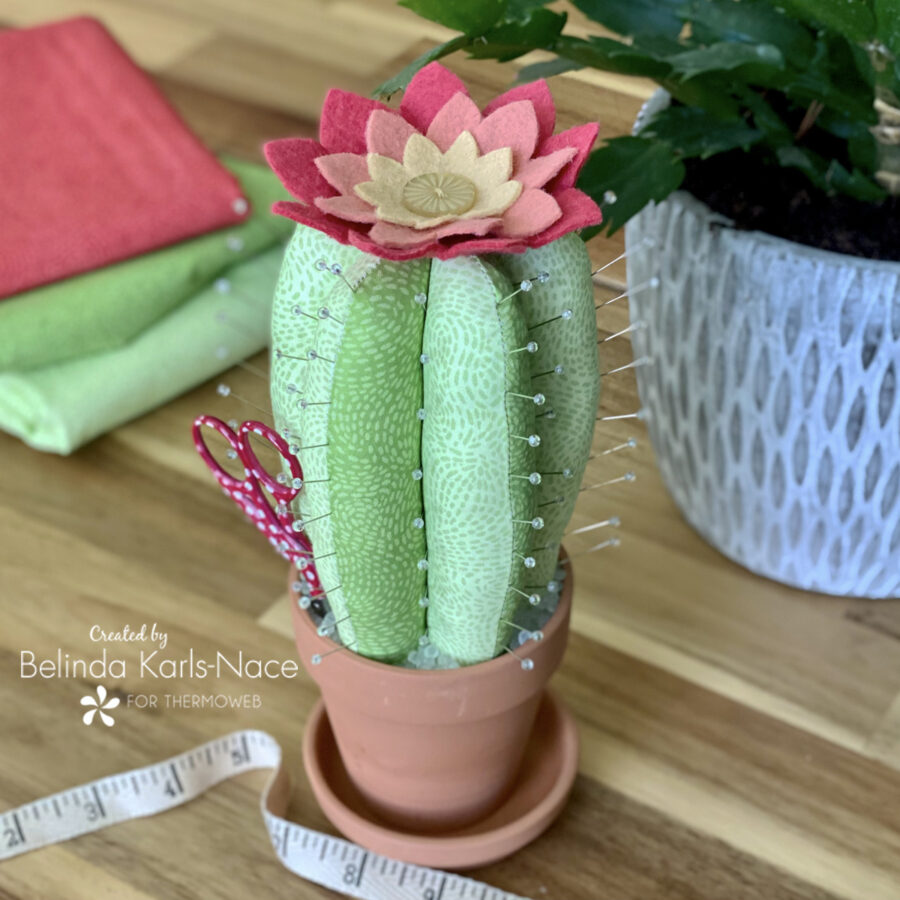
Prickly Potted Pincushion featuring SpraynBond
Greetings! It’s Belinda from Blue Ribbon Designs, here today with a brand new project tutorial featuring some of my favorite SpraynBond products. Today, I am excited to share my “Prickly Potted Pincushion” with you.
Several years ago, after hiking the Grand Canyon with my second dad, I fell in love with blooming cacti. Living in the Midwest my entire life, it is not often I see a cactus in bloom. On our springtime hike, I took a selection of photos featuring cacti with bright, colorful blooms. My project for today’s blog tutorial is based on one of those photos. As always, I encourage you to use the supplies you have on hand to make this flowering succulent.
Time to get creative! Simply gather the materials/supplies listed below, then download the PDF templates and layout diagram.
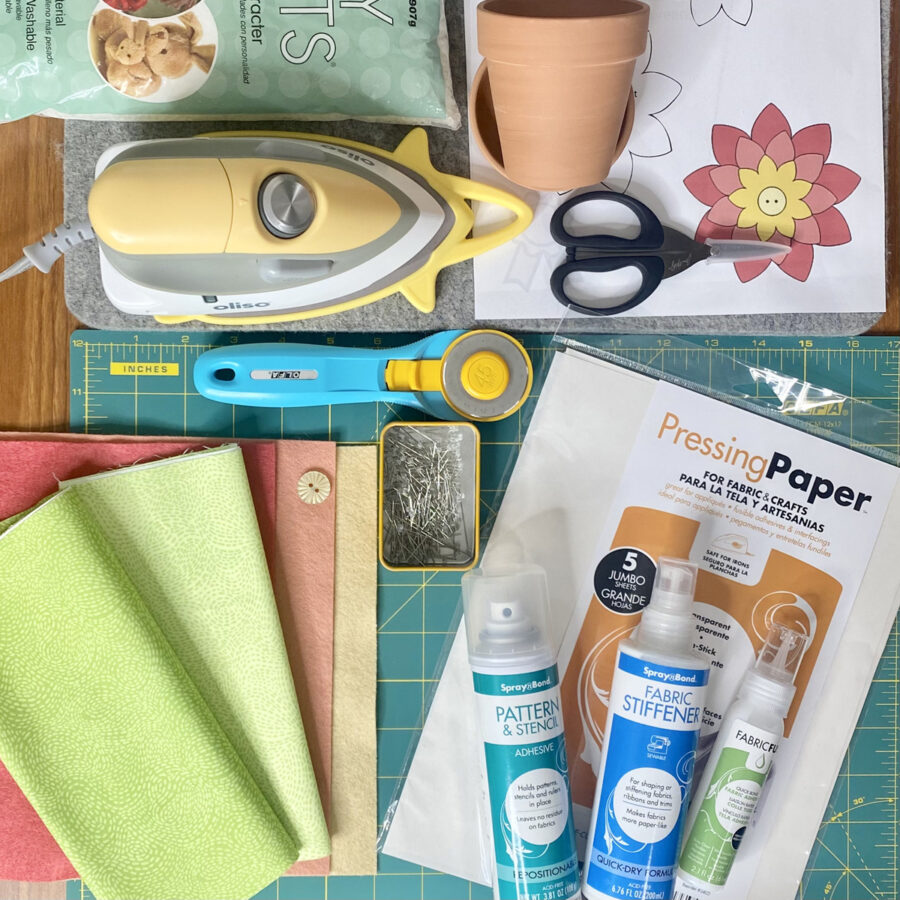
What you need:
- SpraynBond Pattern & Stencil Spray
- SpraynBond Fabric Stiffener Spray
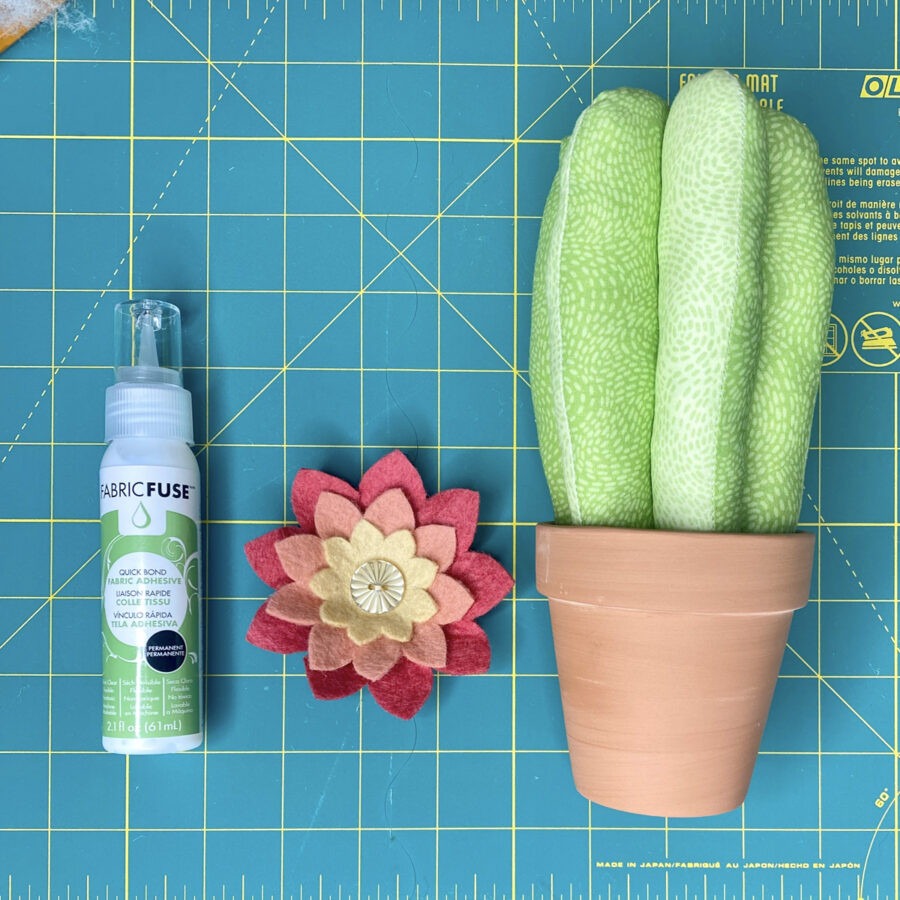
- HeatnBond Fabric Fuse Liquid Adhesive
- Pressing Paper Fabric and Craft Sheets
1 Sheet - Cotton Fabrics: model uses Waved by Erin Borja for PBS Fabrics – small pieces or scraps will work great. I used two colors of green to give my cactus dimension – you can use one or multiple green prints.
- Light Green – 8 ½” x 15” (120-22153 Chartreuse)
- Medium Green – 8 ½” x 15” (120-22163 Lime)
- Wool Blend Felt: model uses Benzie Design
- Bottom flower – 4 ½” x 4 ½” Strawberry (Dark Pink)
- Middle flower – 3 ½” x 3 ½” Grapefruit (Coral Pink)
- Top Flower – 2 ½” x 2 ½” Shortbread (Yellow)
- Coordinating Button
1 – ¾” round - Pincushion Stuffing of your choice (model used fiberfill)
- Pins
- Poly Pellets
- 3” Terracotta Pot with optional Saucer
- A small scrap of cotton batting
- Oliso Iron
- Olfa Cutting Tools (cutting mat, rotary cutter)
- Sewing Machine
- Basic Sewing Supplies/Tools (small sharp scissors, clips or pins, rulers, strong sewing thread, hand sewing needle, pencil, etc.)
How to Make a Prickly Potted Pincushion
(9” H, approximately 5” diameter with pins)
- Download and Print the Prickly Potted Pincushion PDF
Prickly Potted Pincushion – A Project for the Therm O Web Blog
Print actual size – do NOT “fit to page” or “shrink to fit.” Print both pages on regular printer paper.
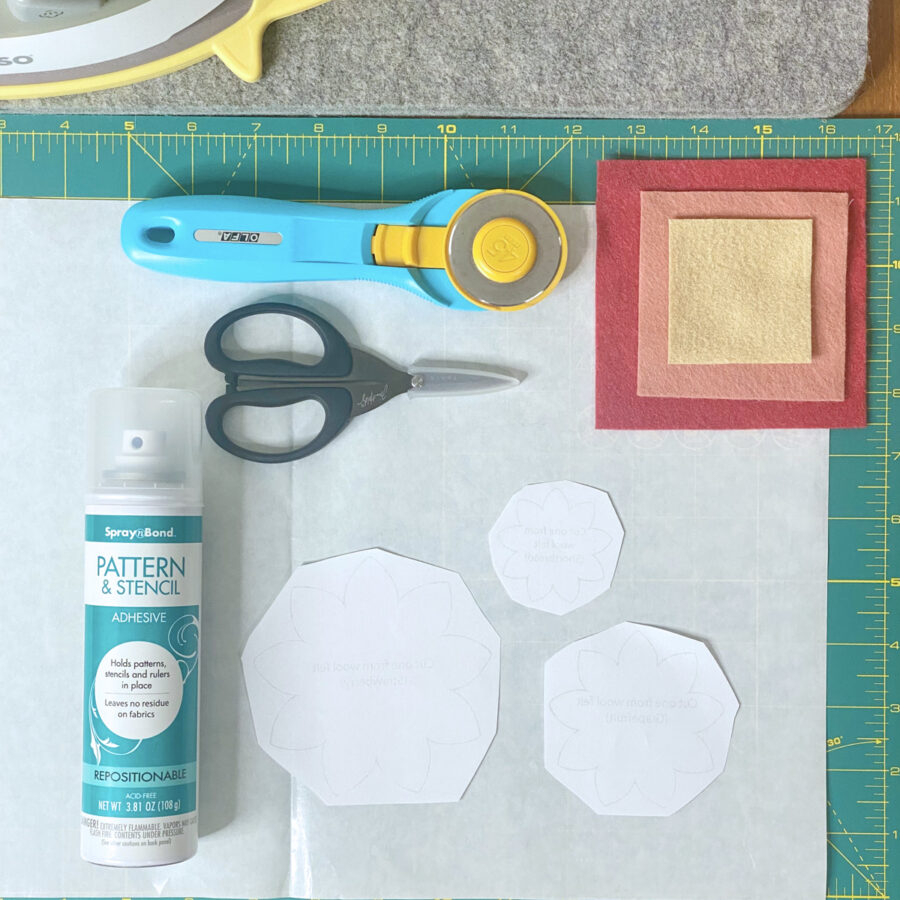
- Prepare flower layers
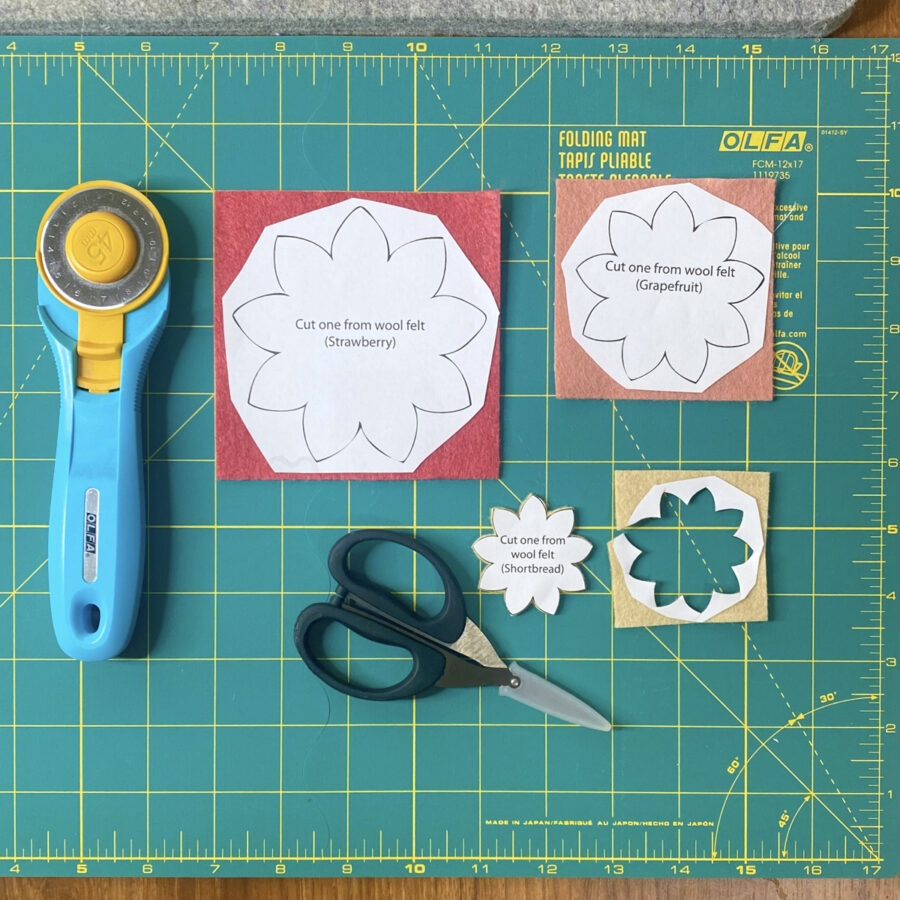
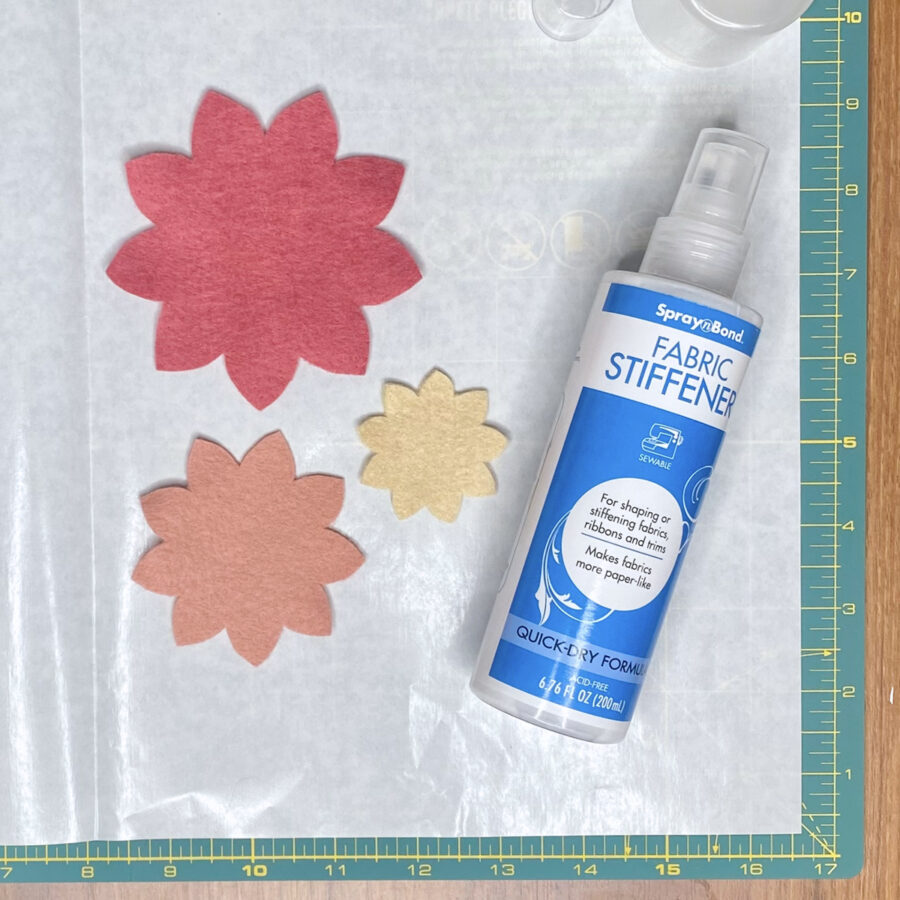
- To cut the wool felt flowers, loosely cut apart the flower templates printed on regular printer paper and apply to the selected wool felts with SpraynBond Pattern & Stencil Spray following the bottle instructions.
- Shake well
- Apply a light coating to the back of the paper template in a sweeping motion
- Wait one minute
- Adhere to wool felt
- Cut out shape on the solid line, using small sharp scissors
- Remove paper template
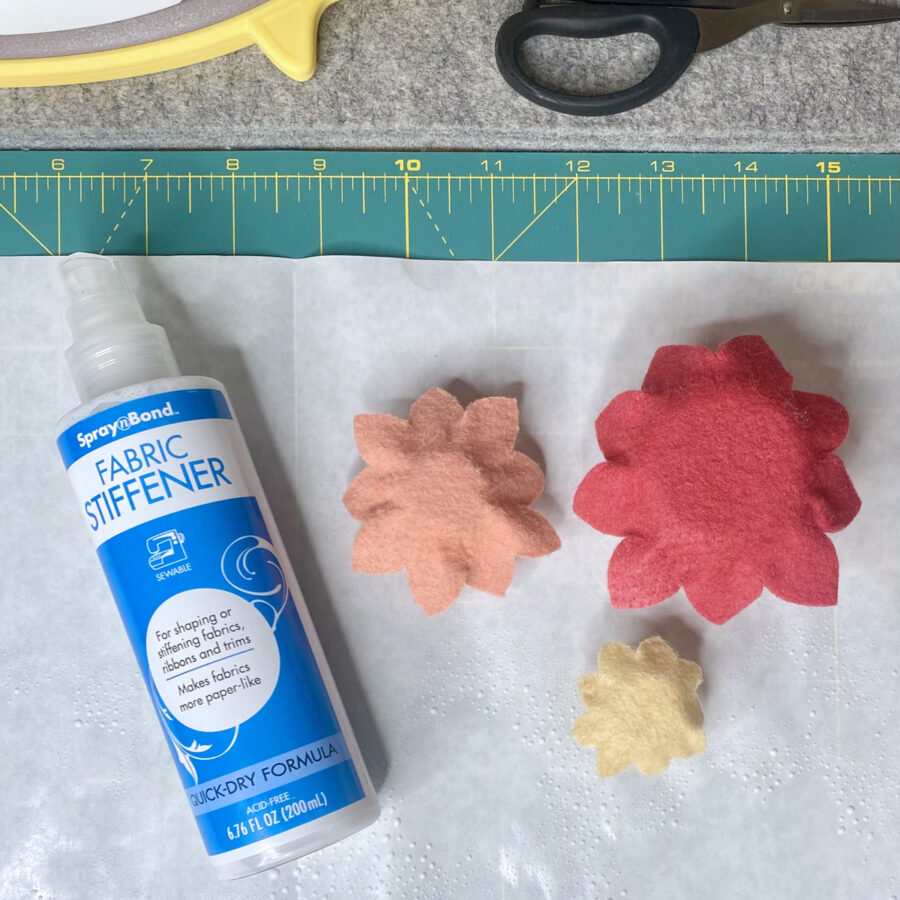
- To give the flower layers dimension, place the wool felt flowers on a Pressing Paper Fabric and Craft Sheet and spray both sides with SpraynBond Fabric Stiffener Spray, following the bottle instructions. Do not soak. Place each flower over a rounded surface (model flowers were place on top of the SpraynBond and Fabric Fuse lids) and mold the petals over the edges. Set them aside to dry.
- Create the cactus trunk/ribs
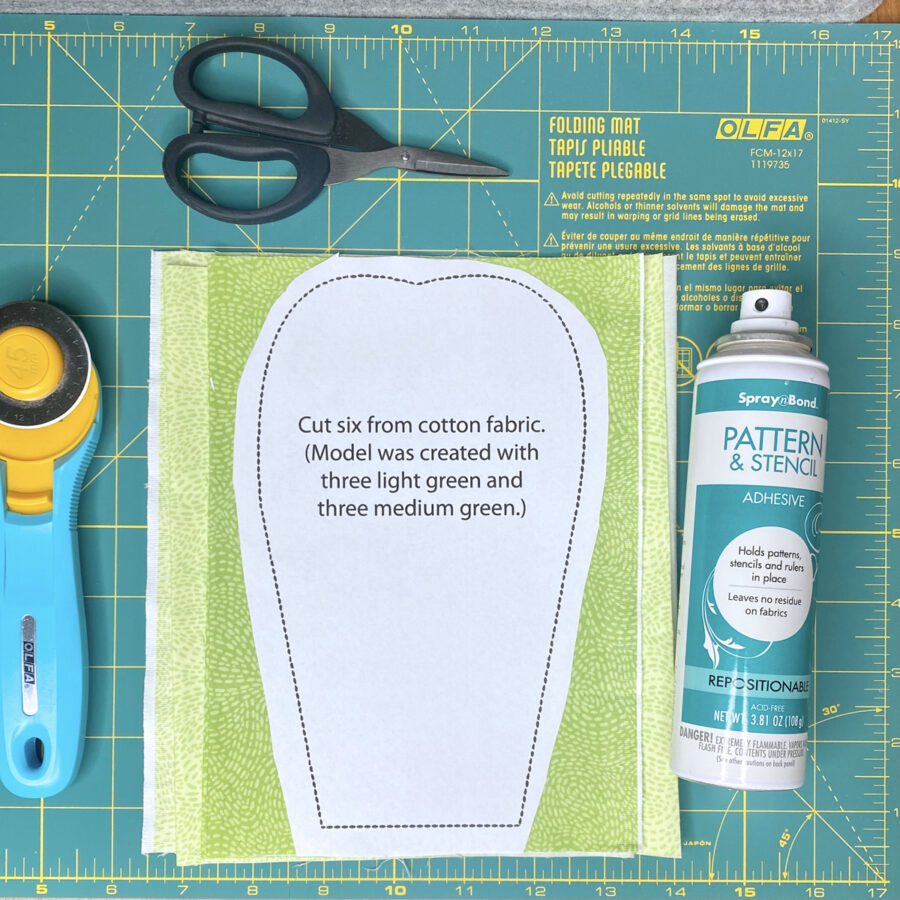
- To cut the six trunk pieces, loosely cut out the trunk template printed on regular paper and apply to the selected cotton fabrics with SpraynBond Pattern & Stencil Spray following the bottle instructions (the instructions are also listed in Step 2). Cut the shape on the dotted line. Pattern & Stencil Adhesive is repositionable, re-usable and does not leave residue on fabrics. You can cut one fabric layer at a time or cut multiple layers.**PRO TIP**: For the model I cut all six layers at one time with sharp scissors. Simply fan fold the fabric(s). Lightly spray the SpraynBond Pattern & Stencil Spray between each layer to hold the fabrics together, then apply the template to the top of the fabric stack. The Pattern & Stencil Spray will stop the fabrics from shifting while cutting. The fabric layers will easily pull apart after cutting. I pressed each piece with a hot iron afterwards.
- Arrange the trunk pieces in three pairs (model used one light green and one medium green for each pair). Place one pair right sides together and sew together using a ¼” seam allowance. Back stitch at the beginning and the end. Sew around the top and sides, leaving the flat bottom open for turning. Repeat for the other two pairs.

- Turn all three trunk units right side out and press.

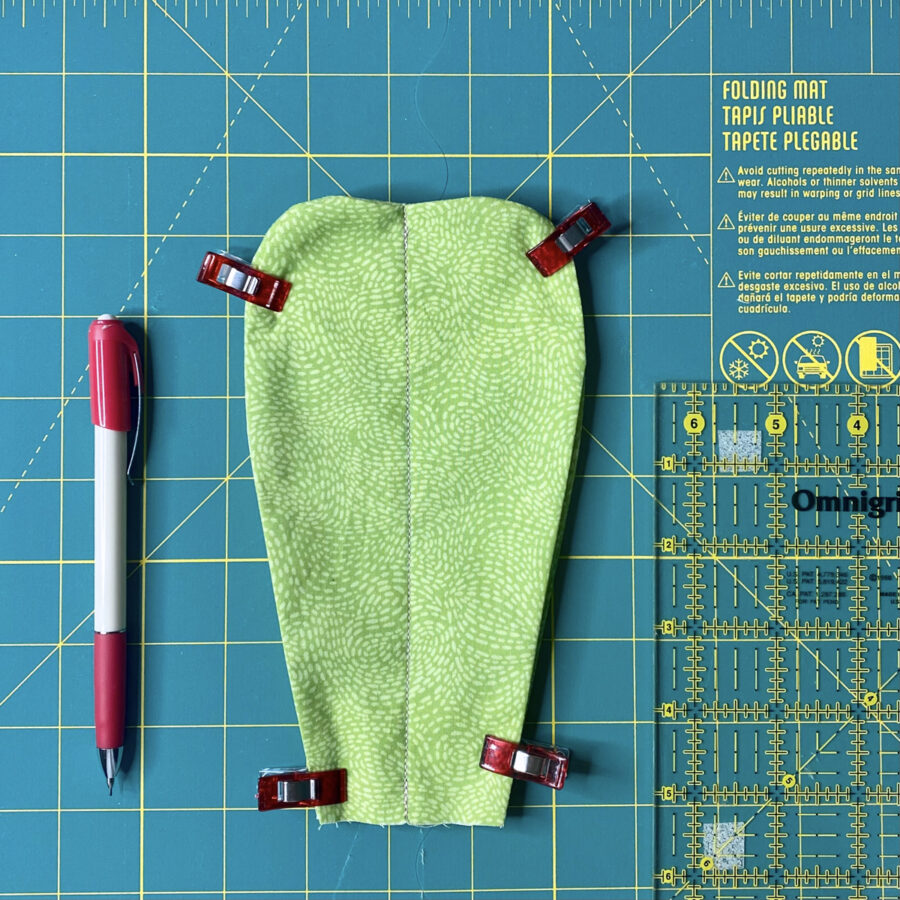
- Layer all three trunk units on top of each other. Clip or pin together.
- Draw a pencil line down the center (from the top center to the flat bottom center).
- Stitch on the pencil line, back stitching at the beginning and the end.
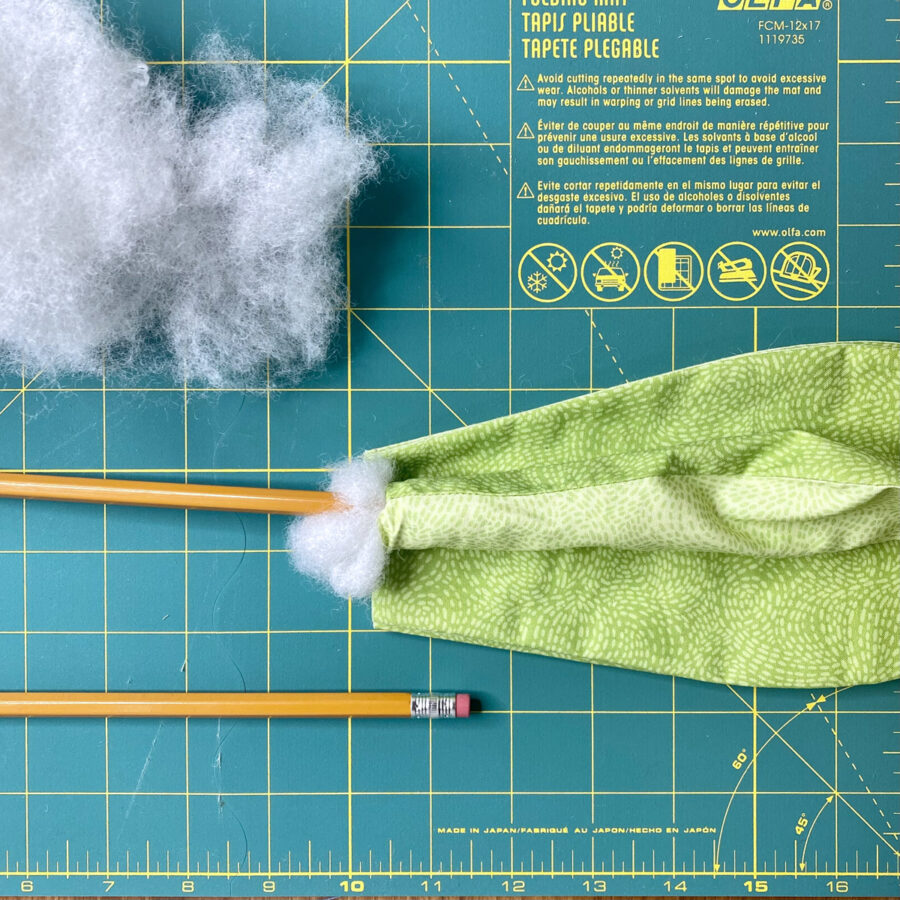
- Stuff the ribs firmly with fiberfill.** PRO TIP**: The eraser end of a pencil makes this step easy. The openings are small and difficult to get your fingers inside. The pencil fits nicely and the eraser grabs the fiberfill making it easy to stuff firmly.
- To keep the bottom of the pincushion flat and the stuffing inside, apply a small scrap of batting to the bottom of the cactus using HeatnBond Fabric Fuse Liquid Adhesive.
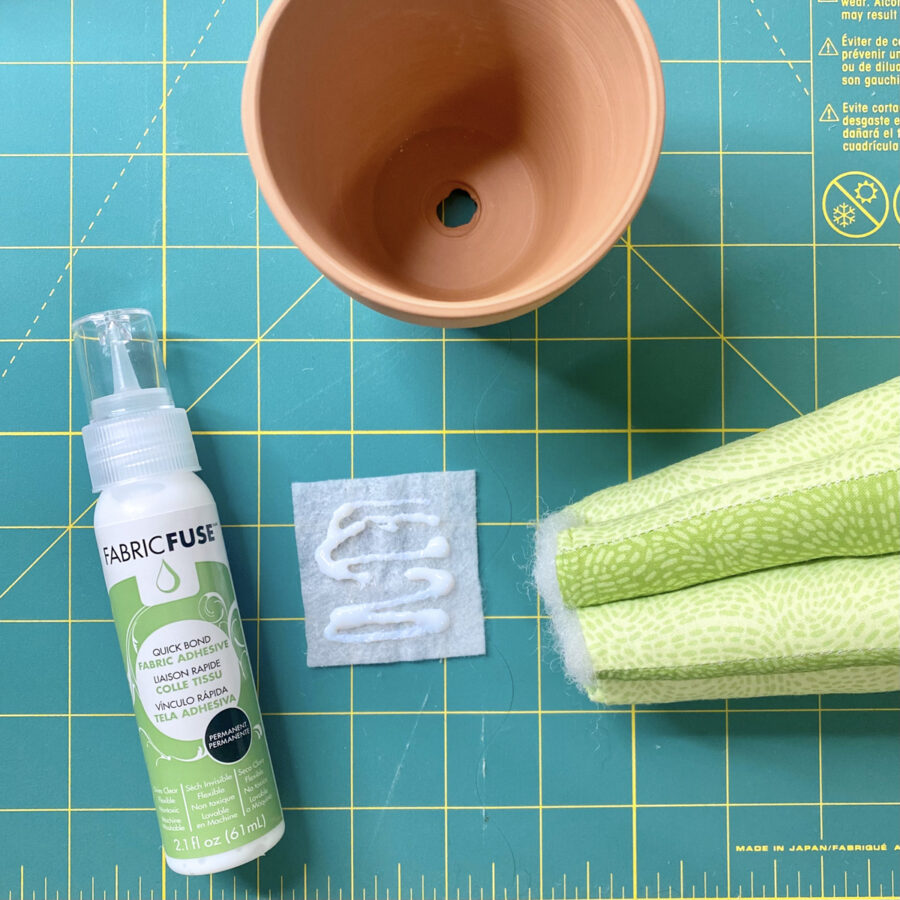
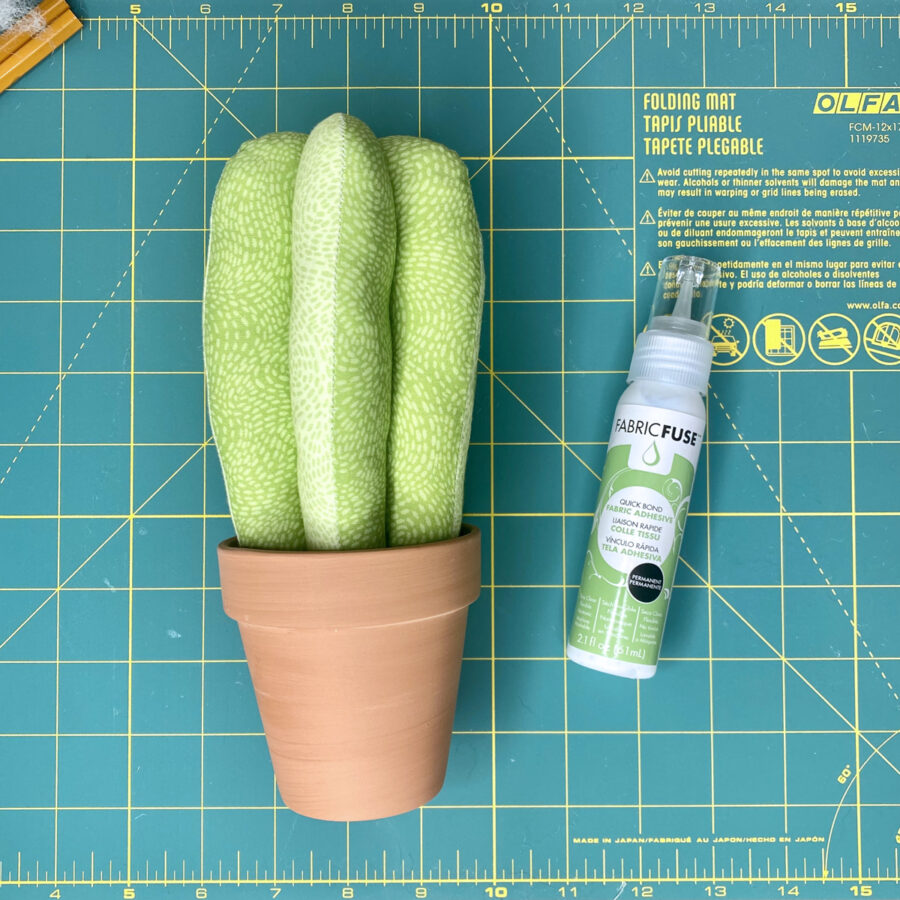
- Once dry, adhere the bottom of the cactus (batting scrap) to the bottom of the 3” terracotta pot using HeatnBond Fabric Fuse Liquid Adhesive.
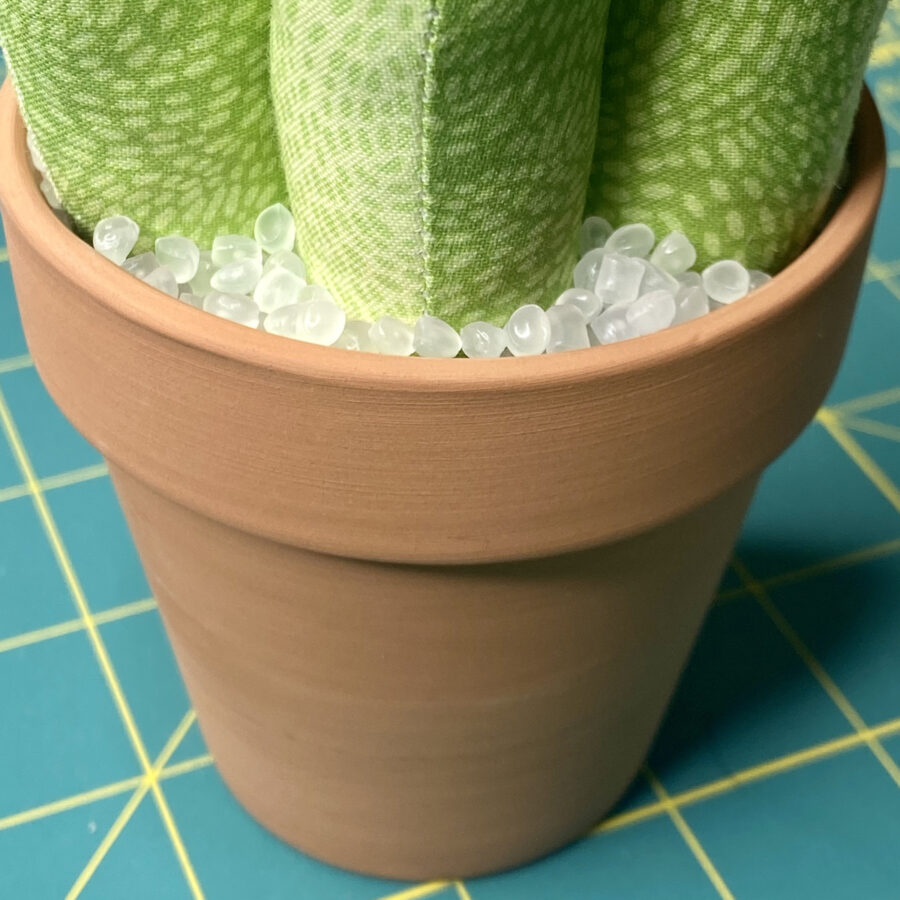
- Fill the pot between the ribs of the cactus with poly pellets. This will fill in the gaps and allow scissors or tools to be stuck in the pot.
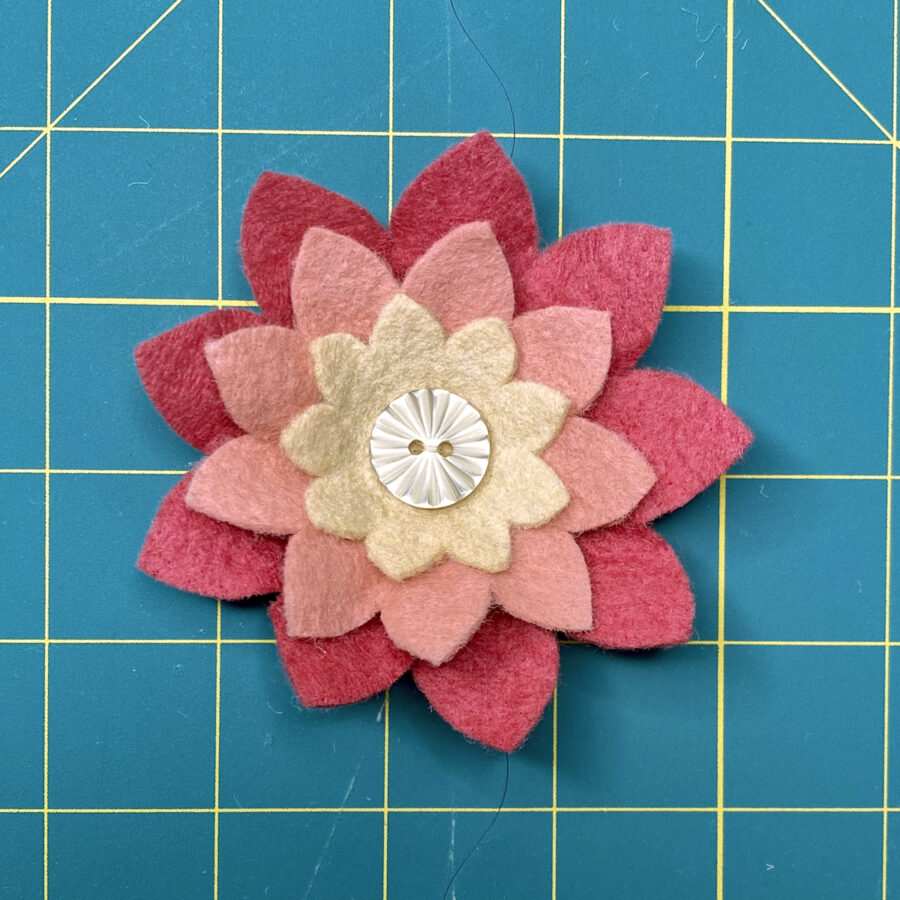
- Finish the flower
- Once the flower layers are dry, arrange in order (largest to smallest). Place a button on the top, in the center of the smallest flower. Using coordinating sewing thread and a sharp hand-sewing needle, attach all layers together.
- Use HeatnBond Fabric Fuse Liquid Adhesive to attach the flower to the top of the cactus.
- Complete the cactus
- Add sewing pins to the cactus for spines/barbs.
- Add a small pair of scissors or your favorite stitching tools by sticking them in the poly pellets between the cactus ribs.
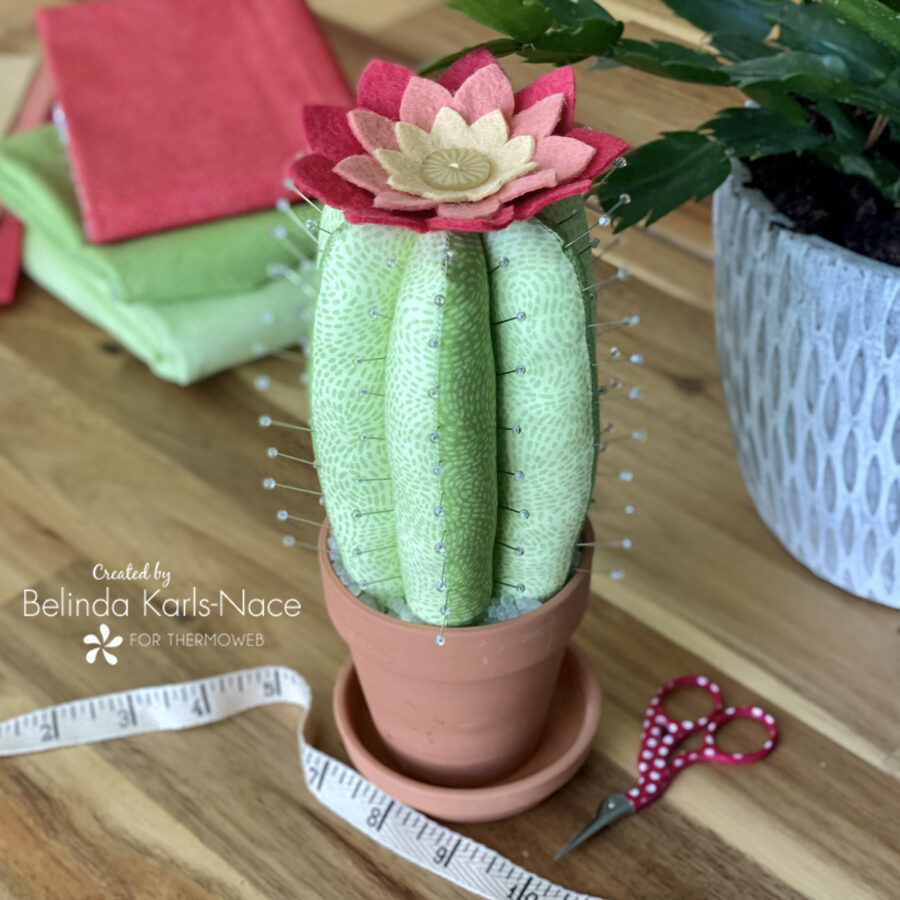
- Your Prickly Potted Pincushion is now complete. Add this blooming cactus to your stitching nest and enjoy!
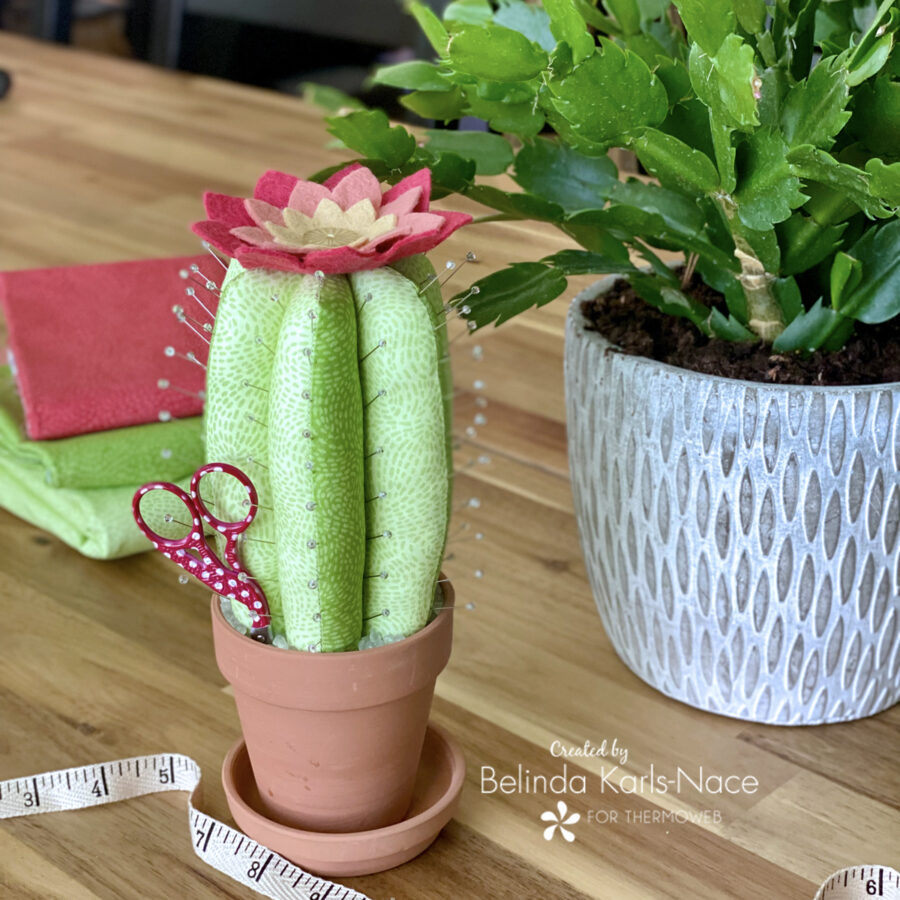
Thank you for joining me today for my Therm O Web blog tutorial. I hope this post inspires you to create a Prickly Potted Pincushion that matches your personality and style, using materials you have on hand. This cheerful pincushion is perfect to have next to your sewing machine or by your stitching chair. To see more of my projects, stop by my blog, website, or Instagram – I would love to visit with you and see what you create!
Carol J
June 20, 2023 at 12:48 pm (10 months ago)Love this Belinda! Thank you for sharing <3
Belinda Karls-Nace
June 21, 2023 at 8:30 pm (10 months ago)Thank you Carol – I hope you will create one for your stitchy space! <3