


Flamingo Favorite Scrapbook Layout
by Jessica Michaels
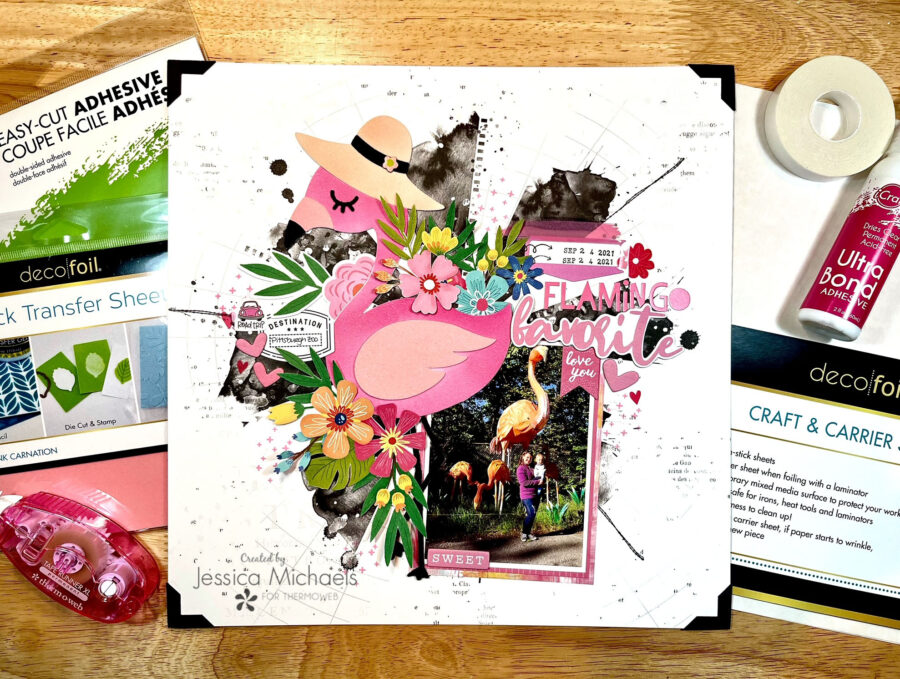
Hello everyone! Jessica here with a layout featuring Deco Flock and Easy Cut Adhesive!I am documenting a photo of my son and I with our favorite Asian lantern at the Pittsburgh Zoo during the Asian Lantern Festival in September, 2021.
Therm O Web Supplies Used
Memory Runner XL
Memory Runner XL Refill
UltraBond Liquid Adhesive, 2fl oz
Craft & Carrier Sheets
Easy Tear Tape ½”
Easy Cut Adhesive Sheets 5.75 in x 5.75 in, 5pk
Deco Foil Flock Transfer Sheets, White Latte
Deco Foil Flock Transfer Sheets, Pink Carnation
Deco Foil Flock Transfer Sheets, Black Velvet
Other Supplies Used
Cocoa Vanilla Studio Sunkissed collection
OLFA 12×17 Folding Cutting Mat
OLFA AK-4 Cushion Grip Art Knife
Distress Oxide Inks in Kitsch Flamingo, Picked Raspberry, Tattered Rose
Elle’s Studio Thankful stamp set
Bella Blvd Florence Alphas
49 and Market background paper and chipboard pieces
Cutfile
Laminator
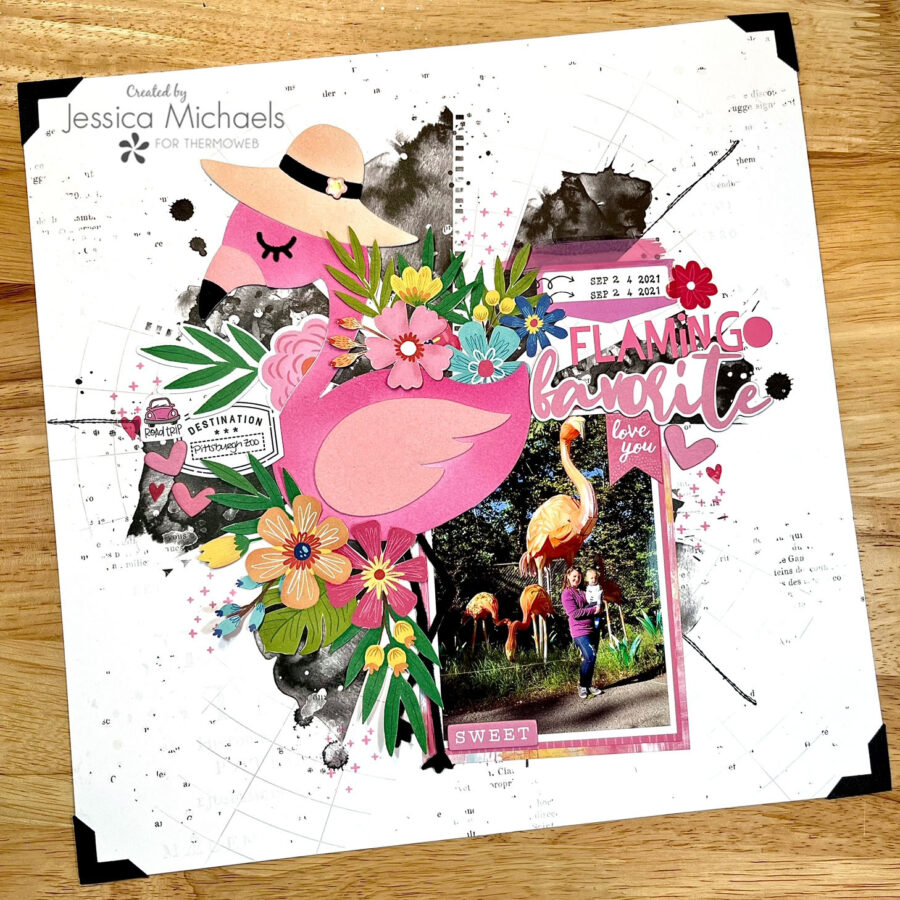
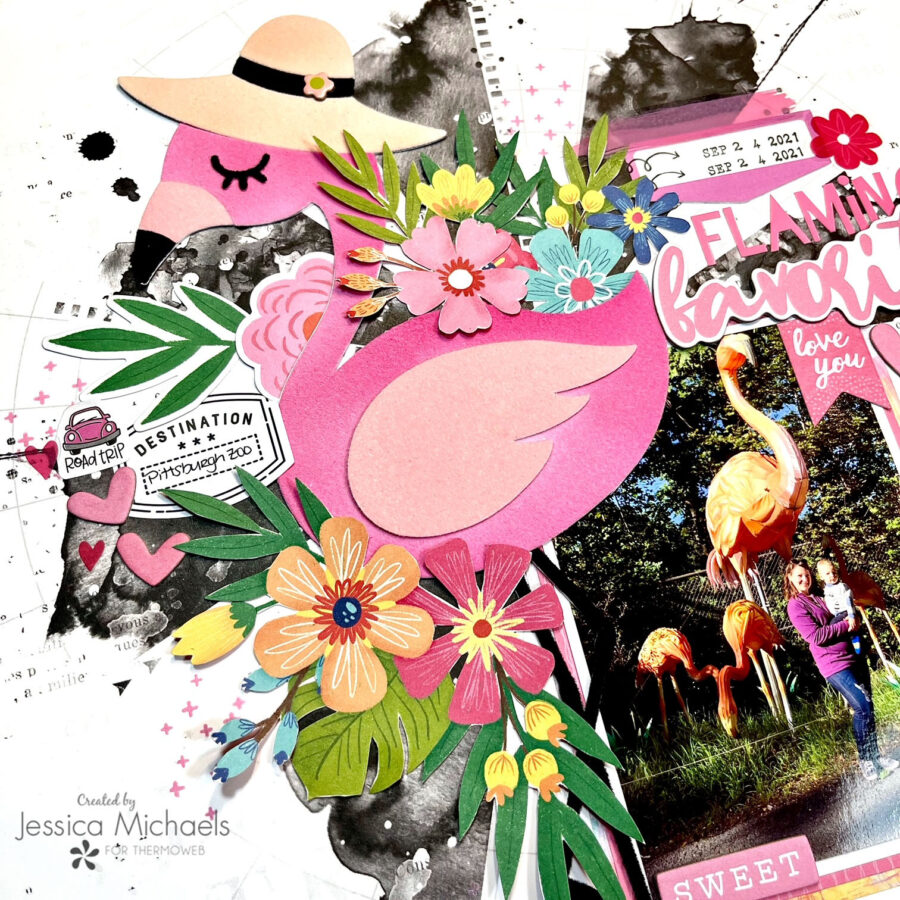
I started this layout by cutting my flamingo cutfile from Etsy on a nice thick white cardstock. Mine was 110lb. I cut the full flamingo with all the layers flattened so I would have a nice base to adhere all the layers to and it would make it a bit thicker. I then grabbed two sheets of Easy Cut Adhesive and adhered them both to another sheet of the thick white cardstock by pulling just the top backing piece off(leave the other attached). I cut all my flamingo layers using the Posterboard+ setting because I have mine set to double cut on that setting so it cuts through the thick cardstock and the easy cut adhesive sheet with the top backing piece attached. Once I separated all my layer pieces, I pulled out some white latte, black velvet and pink carnation flock transfer sheets. I then peeled off the top backing sheet from the layer pieces and laid them on their coordinating flock colors. I used white for the hat and main dark pink body of the flamingo because I did not have the dark pink sold in the shop! I then ran them through my hot laminator between a craft and carrier sheet to get a nice transfer of that fuzzy flocked goodness!

Next, I inked my flamingo body with blending brushes and Distress Oxides in Kitsch Flamingo(how convenient) and Picked Raspberry, applying the darker color on the edges for dimension. I then applied Distress Oxide in Tattered Rose to the hat to make it a nice safari shade. I then glued my layers together using my tape runner for the bigger areas and the UltraBond Liquid Adhesive around the edges and smaller areas. I also added a cute chipboard flower to the hat from my stash!
I matted my photo with some smooth white cardstock and added some layers with some patterned papers from the Cocoa Vanilla Studio Sunkissed collection. Yes, I’m still using this one! I love this collection but would love to get it used up this year. I then adhered my photo to my 49 and Market background paper with some ½ inch Easy Tear Tape. I used my Memory XL Tape Runner to adhere the large flamingo.
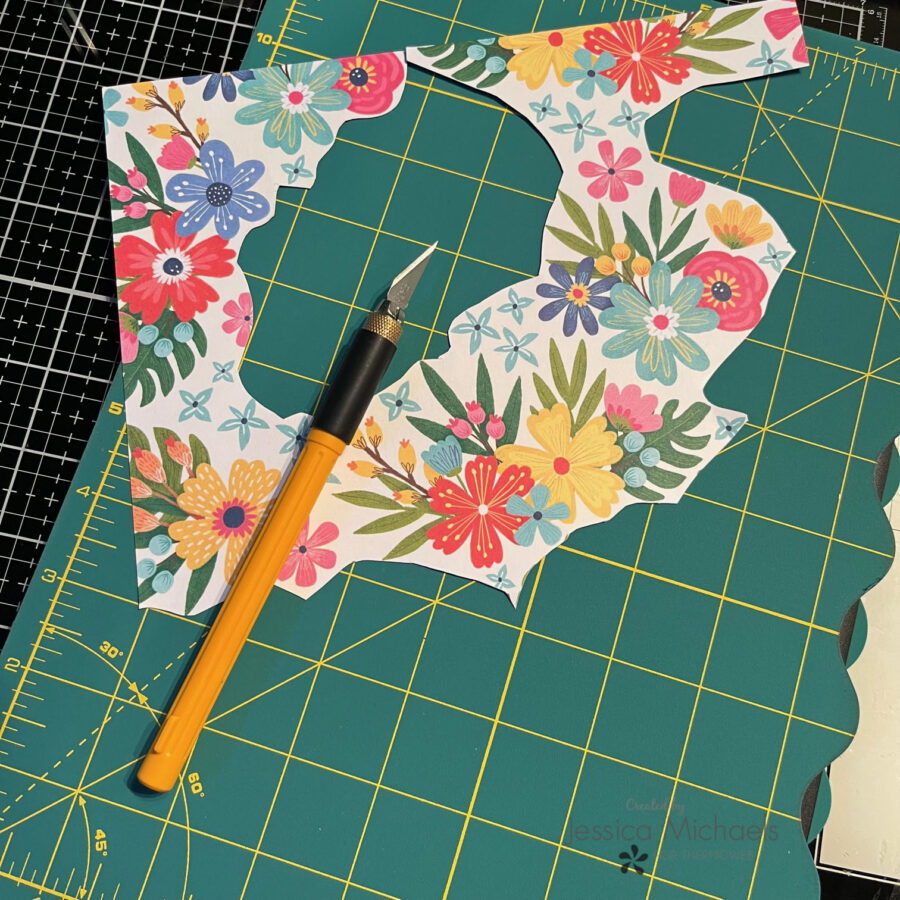
I decided to fussy cut some of the flowers from one of the papers in the collection to scatter around the flamingo for a nice jungle feel. I like to fussy cut with my cutting blade and cutting mat from OLFA, linked in the products. It seems to go quicker for me cutting them that way than with scissors. I then used the more of the UltraBond Liquid Glue to adhere them around the flamingo.
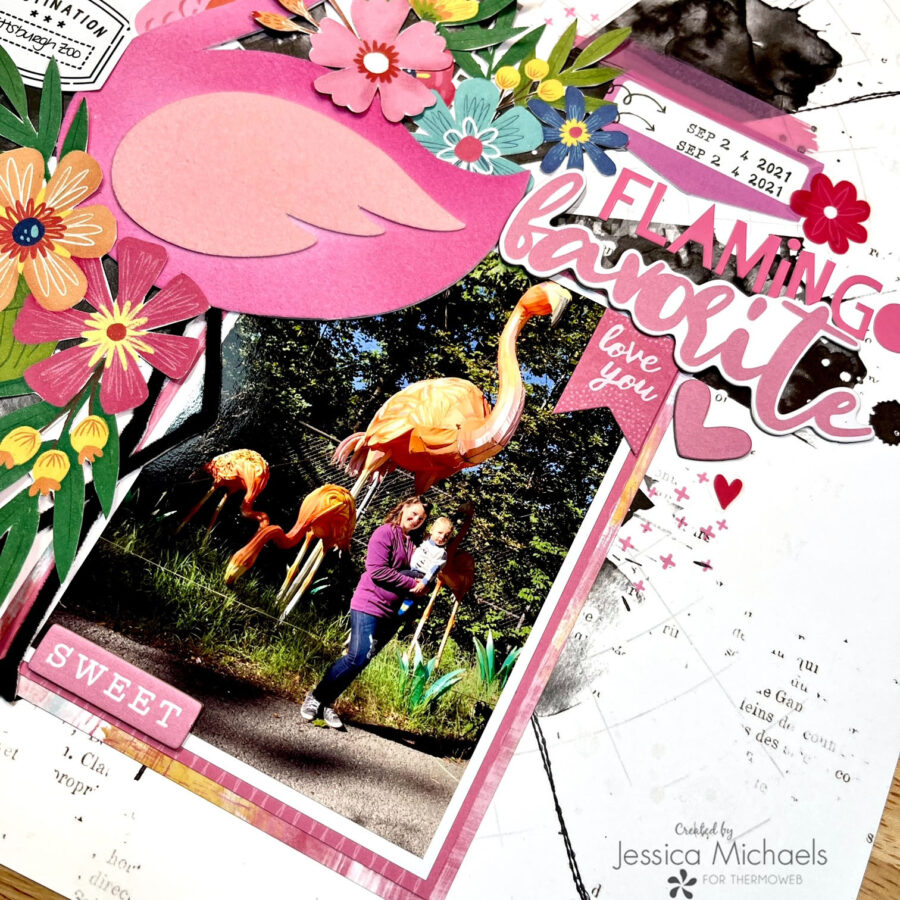
Lastly, I added my title using a piece from 49 and Market and some Bella Florence alphas. I also added a few chipboard bits here and there and little road trip pieces on the left.
I have a process video the Thermoweb YouTube channel if you’d like to see how this came together.
Thank you for being here today and I hope I was able to inspire you to create!
Jessica
This post contains affiliate links. For more information, see our disclosure <a href=”http://thermoweb.com/blog/designers/about-us/affiliate-disclosure/“>HERE</a>.