


Kids Fabric Four-Leaf Clover Rainbow Bag
One of these little bags is the perfect way to give the gift of luck to someone special. Stitch the HeatNBond applique four-leaf clover, fill the bag with chocolate gold coins, and enjoy the smiles! These Kids Four-Leaf Clover Bags are like the pot of gold at the end of the rainbow!
![]()
Kids Fabric Four-Leaf Clover Rainbow Bag
By Carla Henton at Creatin’ in the Sticks
finished size: 3 1/2″ x 7″ (including handle)
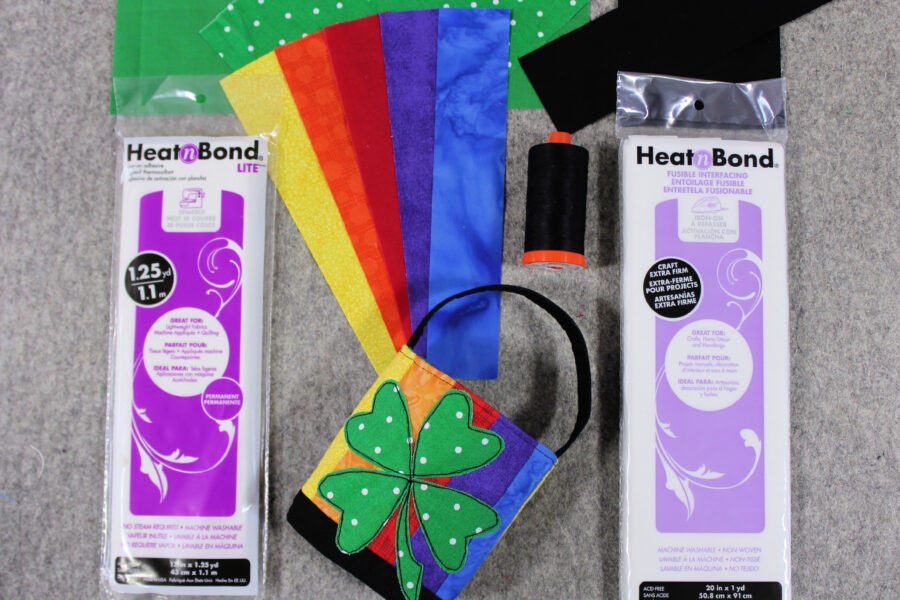
Kids Fabric Four-Leaf Clover Rainbow Bag Supplies:
Print the FREE PDF template HERE – HeatnBond Four-Leaf Clover Template
Heat-n-Bond® – Craft Extra Firm Fusible Interfacing
HeatnBond EZ Print Lite iron-on adhesive – 1 sheet or HeatnBond Lite Fusible Adhesive if you want to trace the templates
Fabric: Cut 5 strips of cotton fabrics 1 1/2″ x 8″ – blue, purple, red, orange, yellow
From black fabric cut one rectangle 3 1/2″ x 5 1/2″ for the bottom of the bag and one rectangle 2″ x 7 1/2″ for the handle
Cut one rectangle 5 1/2″ x 10 1/2″ from green cotton fabric for the lining of the bag
One 5 1/2″ x 7 1/2″ green polka dot cotton fabric for the HeatNBond applique four-leaf clover
Thread – Aurfil 50 wt (#2692)
Iron (I love my Oliso Pro)
Sewing Machine
Permanent Marker for tracing
Erasable marking pen and other general sewing supplies

Kid’s Four-Leaf Clover Bag Instructions:
Stitch all seams 1/4″unless stated otherwise.
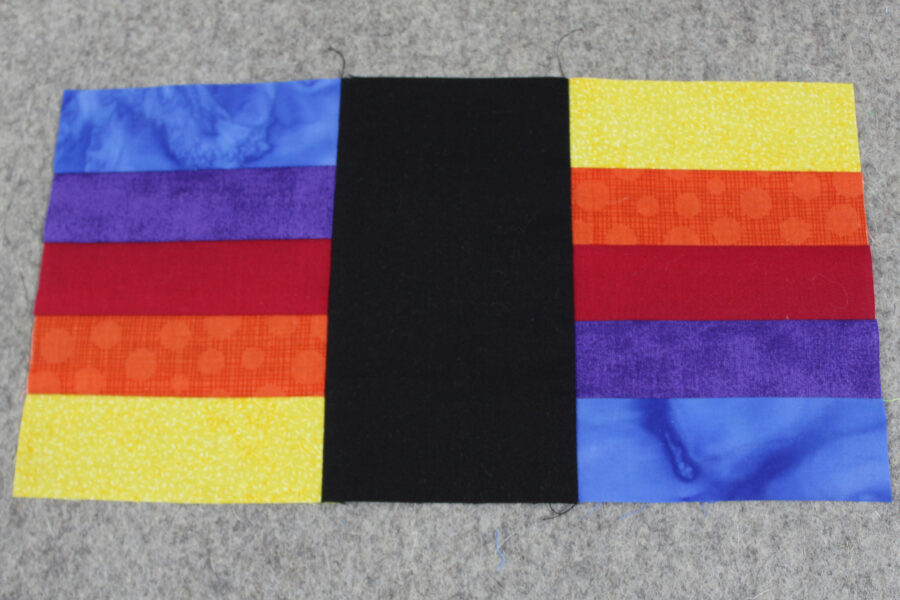
Step 1:
Stitch the 1 1/2″ x 8″ fabric strips together to form a 5 1/2″ x 8″ unit. Next, cut the unit to form two 5 1/2″ x 4″ units. After the units are cut, stitch the units to the black rectangle as pictured below and press.
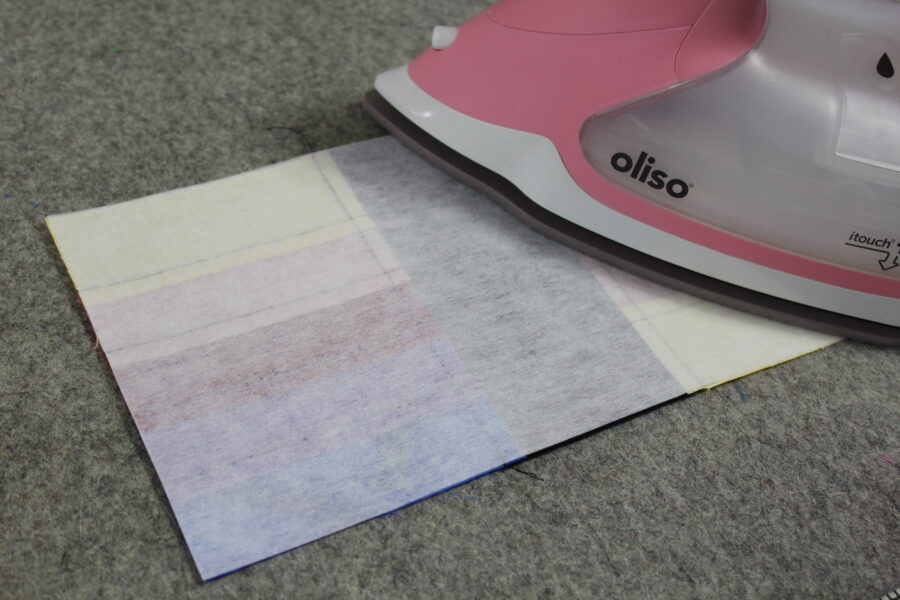
Step 2:
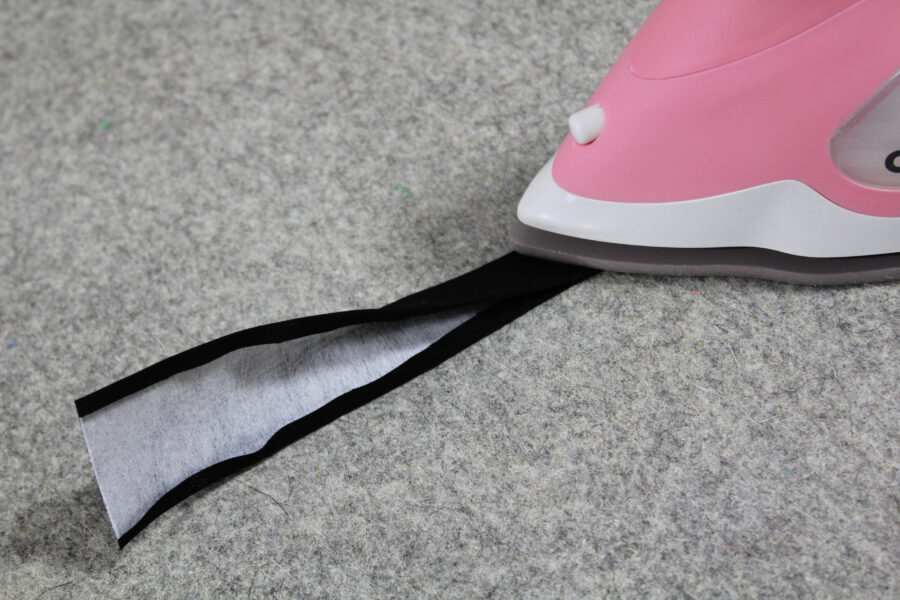
Cut one rectangle from the Heat-n-Bond® – Craft Extra Firm Fusible Interfacing 5 1/2″ x 10 1/2″ for the bag and one rectangle 1 1/2″ x 7 1/2″ for the handle. Set the handle interfacing aside. Turn the unit from step 1 wrong side up on an ironing surface. Next, bond the Heat-n-Bond® – Craft Extra Firm Fusible Interfacing to the wrong side of the fabric following the package instructions.
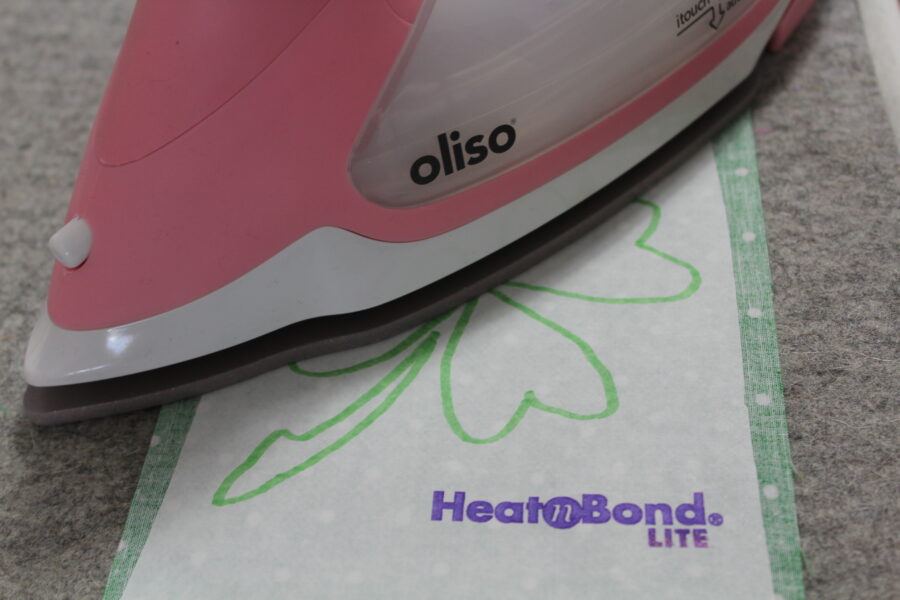
Step 3:
If you are using HeatnBond EZ Print Lite sheets, print the applique pattern template with your inkjet printer. NO TRACING! How awesome is that? The pattern is already reversed for you. With HeatnBond Lite, just trace the pieces onto the paper side of the adhesive. Bond the HeatnBond Lite onto the wrong side of the green polka dot fabric.
Carefully cut the applique with sharp scissors, peel the backing paper off, and place the applique, adhesive side down, on one side of the rainbow background. Leave 1/4″ at the top of the rainbow background when placing the four-leaf clover design. Next, follow the package instructions to bond the four-leaf clover to the background with an iron.
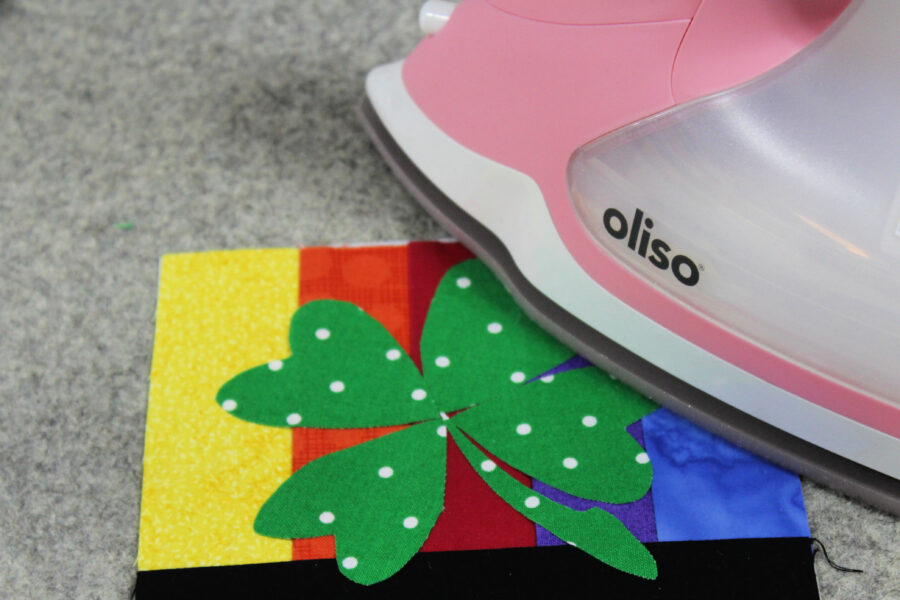
Stitch with Aurifil 50 wt thread #2692 and sew about 1/8” in from the edges of the four-leaf clover. Sew around each applique piece at least twice.
Step 4:
Prepare the handle. Bond the 1 1/2″ x 7 1/2″ interfacing to the wrong side of the 2″ x 7 1/2″ piece of black fabric centering it in the middle. Press the edges of the fabric over the interfacing, then fold the handle in half lengthwise and press it. Stitch 1/8″ from the edge lengthwise on both sides of the handle.
Step 5:
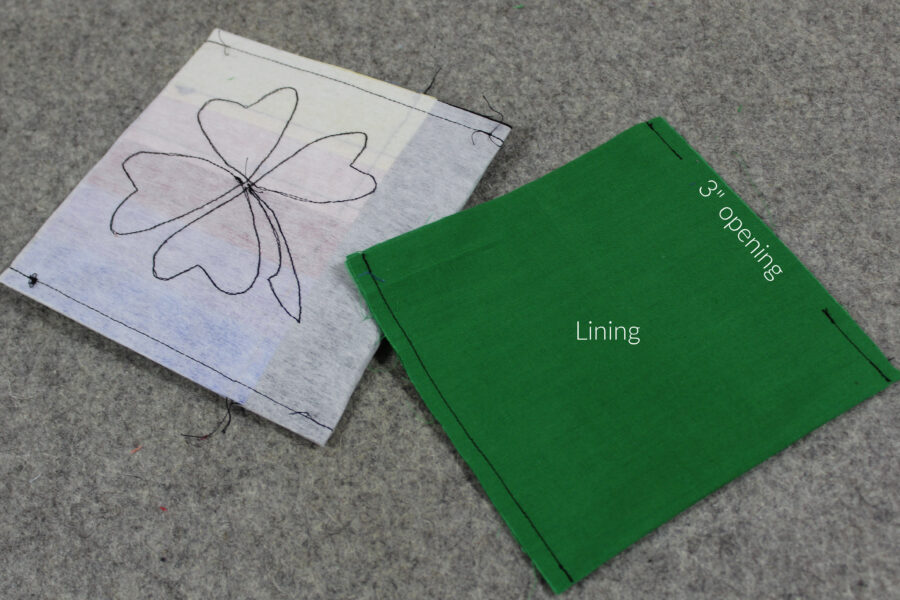
 Fold both the green lining piece and the prepared outside bag fabric in half with right sides together and pin, matching seams on the outside fabric. Now stitch 1/4″ from the edge of both sides of the bag. For the lining, one side is stitched 1/4″ from the edge and the other side is stitched 1/4″ from the edge one inch down from the top, leave a 3″ opening, and then stitch the bottom of the side. This opening is for turning later. Be sure to backstitch at the beginning and end of all stitching.
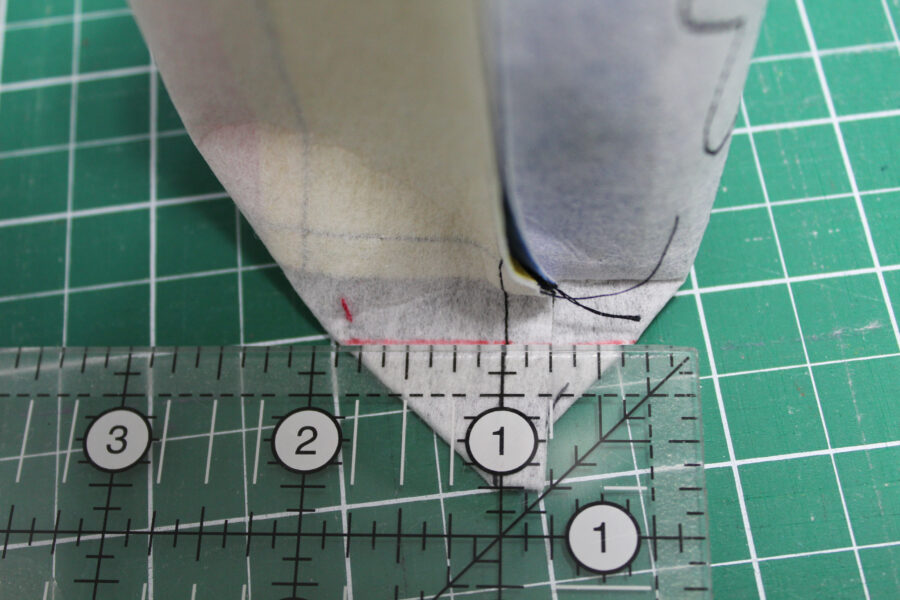
Square the corners on the outside and lining of the bag by flattening the bottoms to form triangles at the seams. Center the seam in the triangle, measure 3/4″ from the end of the seam and mark the triangle on each corner with an erasable pen. Stitch on all 4 marked lines.
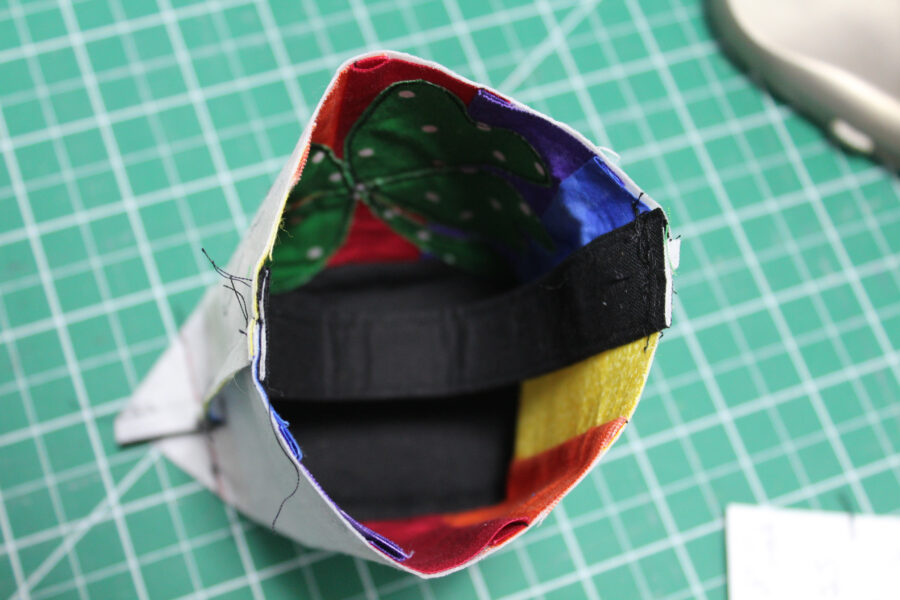
Turn the lining right side out. Slip the handle inside the bag as shown in the picture below. Stitch the handle 1/8″ from the edge of the basket fabric centering each end on each side seam of the bag, right sides together.
Step 6:
Slip the lining into the outside of the bag, right sides together, and pin around the top, matching seams.
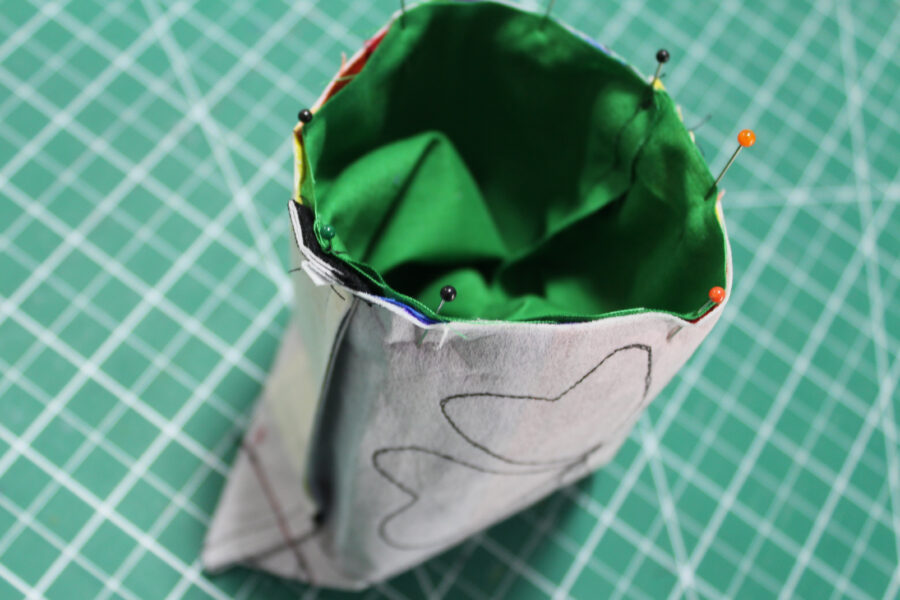
Stitch 1/4″ from the edge around the top of the bag. Turn the bag right side out through the opening in the lining. Push the corners out and then slip stitch or take a narrow machine stitch to close the opening in the lining. Tuck the lining into the bag and stitch around the top of the bag 1/8″ from the edge.
The final step is to fill the bag with goodies and good luck wishes!
![]()
Wishing you all the luck,
Carla
This post contains affiliate links. For more information, see our disclosure HERE.