


 Hey, friends! I love this time of year. I love jackets, fall leaves, hot cocoa, and anything pumpkin flavored.
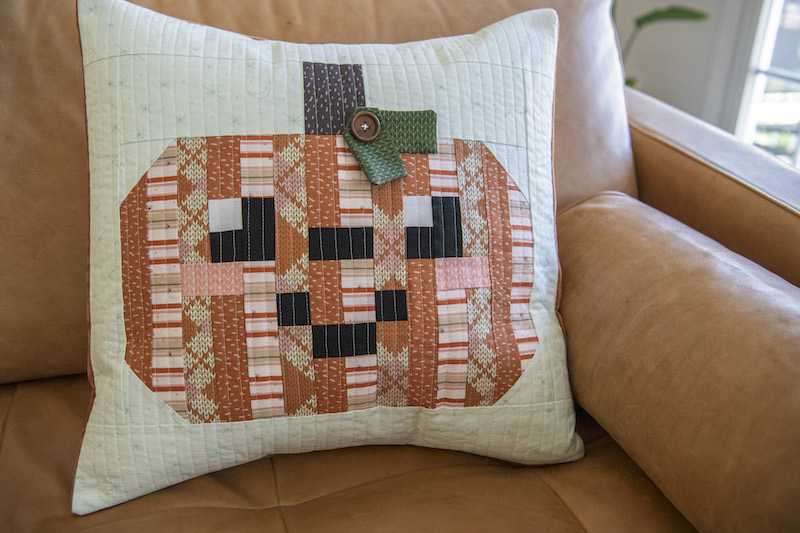
Today, we are going to make the happiest little pumpkin together. The quilt block I have created is 18.5”x18.5” square. You can turn it into anything but today we are going to make it into a pillow cover.
Happy Pumpkin Quilt Block and Pillow
You can chop down the background fabric around the outside of the pumpkin easily to make your block a bit smaller as well (or add to make it larger). Hopefully, you love him as much as I do. Let’s get started.
Cut Guide:
Brown: (1) 2.5”x3.5” rectangle (stem)
Pink: (2) 1.5”x2.5” rectangle (cheeks)
White: (2) 1.5” squares (white of the eyes)
Black: (4) 1.5”x2.5” rectangles (mouth, nose and smile), (4) 1.5” squares
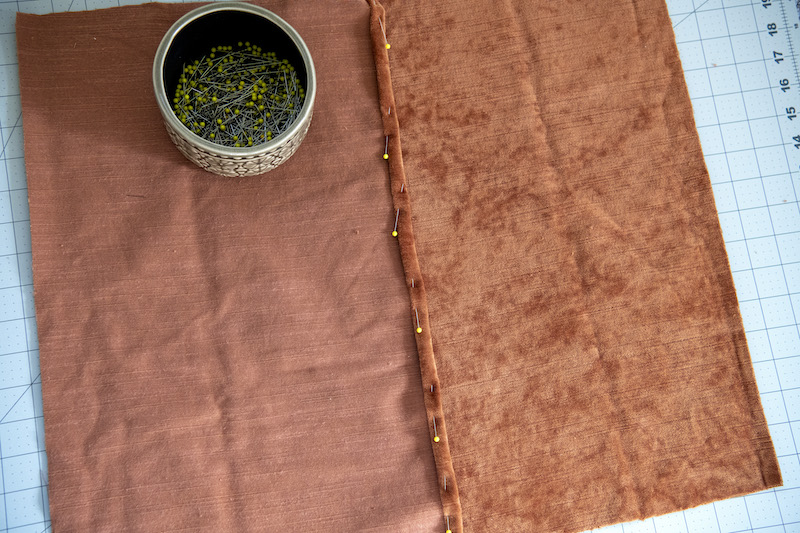
Orange: For the orange, I suggest cutting 1.5” strips and then going through the row guide below for what length to make each strip if you are using more that one orange fabric. You can use as many orange fabrics as you want up to 14 different prints like I did on the bright orange pumpkin or two or three prints like I did on the others.
Background fabric (WxH for directional prints):
(4) 2.5” square (corners of pumpkin)
(2) 6.5”x3.5” (left and right of the stem)
(2) 2.5”x12.5” (side columns)
(2) 18.5”x3.5” (top and bottom strip)
Additional materials needed:
- Small amount of green felt or 3.5”x7.5” green fabric rectangle if making the ribbon
- Pattern pieces for the pumpkin leaf (DOWNLOAD HERE)
- One button
- Hand-sewing needle and thread
- SpraynBond Fabric Stiffener Spray
- Pressing Paper
- HeatnBond 18.5”x18.5” fusible fleece square
- Two 12.5”x18.5” medium-weight fabric panels for the envelope-style pillow back
- Pillow form (18”x18” or 20”x20”)
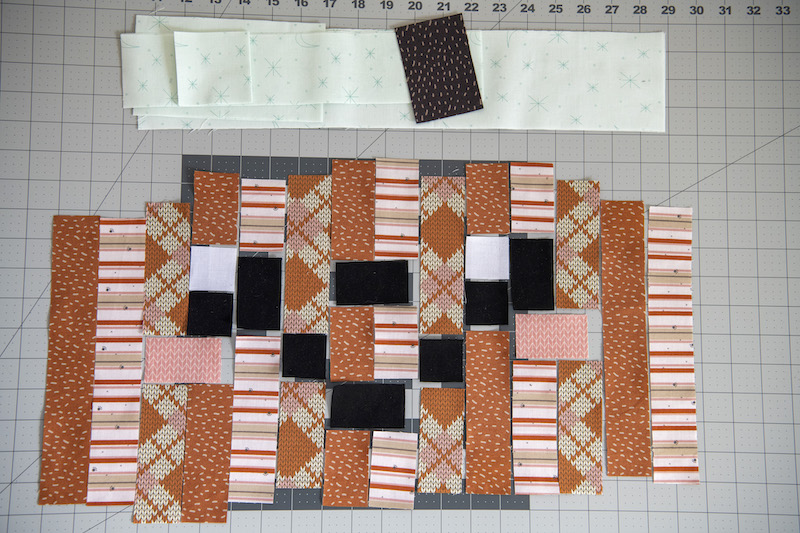
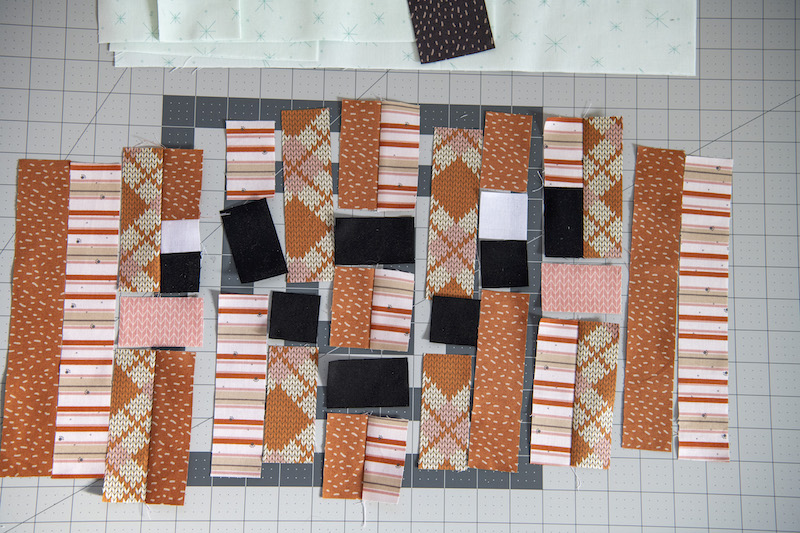
Let’s start by assembling the pumpkin body. We will be going column by column VERTICALLY left to right. Lay out the following (do not sew yet):
- Column 1: 1.5”x9.5” orange strip
- Column 2: 1.5”x9.5” orange strip
- Column 3: 1.5×4.5” orange strip, 2.5”x1.5” pink strip (**this strip is horizontal and will also be in row 4), 1.5”x4.5” orange strip
- Column 4: 1.5”x2.5” orange strip, 1.5” white square, 1.5” black square, the horizontal pink strip from row 3 will fill this spot when assembled, 1.5”x4.5” orange strip
- Column 5: 1.5”x2.5” orange strip, 1.5”x2.5” black strip, 1.5”x5.5” orange strip
- Column 6: 1.5”x5.5” orange strip, 1.5” black square, 1.5”x3.5” orange strip
- Column 7: 1.5”x3.5” orange strip, 2.5”x1.5” black strip (placed horizontally so it’ll be in row 8 as well), 1.5”x2.5” orange strip, 2.5”x1.5” black strip (also placed horizontally)1.5”x2.5” orange strip
- Column 8: 1.5”x3.5” orange strip, (black strip for row 7), 1.5”x2.5” orange strip, (black strip from row 7), 1.5”x2.5” orange strip
- Column 9: 1.5”x5.5” orange strip, 1.5”black square, 1.5”x3.5” oranges strip
- Column 10: 1.5”x2.5” orange strip, 1.5” white square, 1.5” black square, 1.5”x5.5” orange strip
- Column 11: 1.5”x2.5” orange strip, 1.5”x2.5” black strip, 2.5”x1.5” pink strip (placed horizontally so it’ll be in row 12 as well), 1.5”x4.5” oranges strip
- Column 12: 1.5”x4.5” oranges strip, (pink strip from row 11), 1.5”x4.5” orange strip
- Column 13: 1.5”x9.5” orange strip
- Column 14: 1.5”x9.5” orange strip
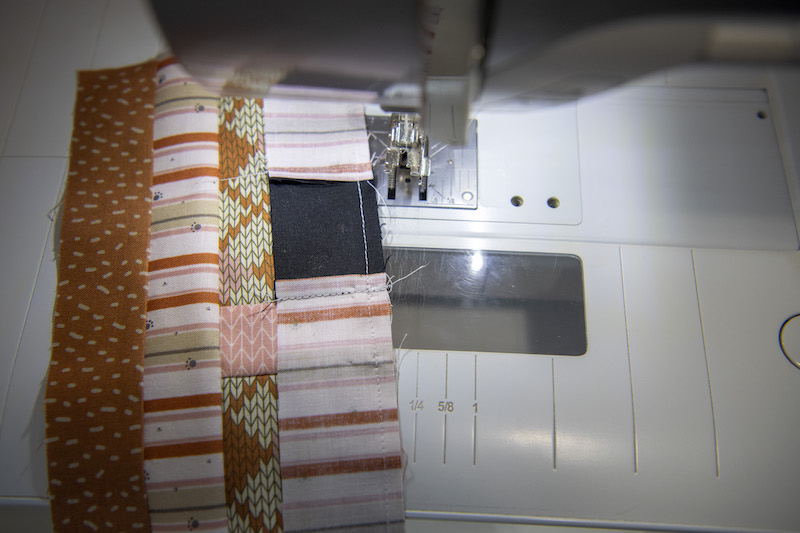
Ok, now that we have our columns laid out for us let’s get sewing them together. We will be using a ¼” seam allowance.
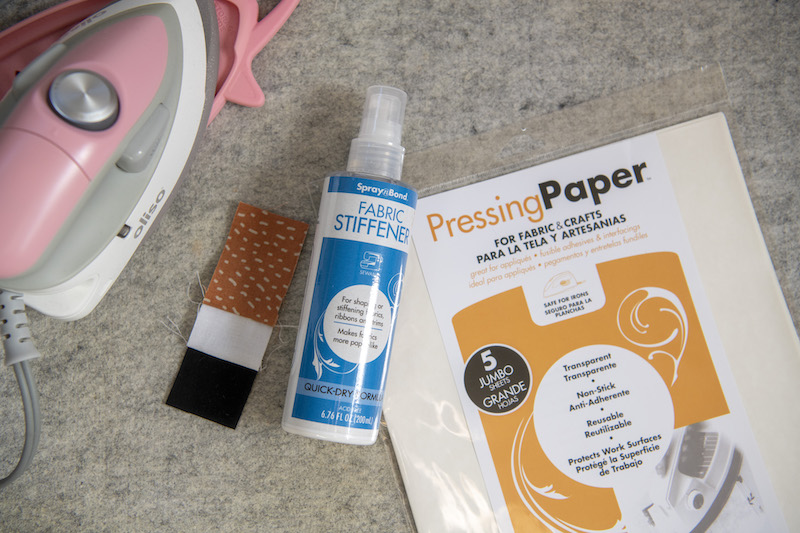
We need to start with the columns that have a vertical strip in them. Row 3 & 4, 7 & 8, and 11 & 12. To assemble these columns we need to sew the strips above them and below them before we can sew them together with the vertical strip. For Columns 4 and 11, you’ll need to sew the pieces in the column above the vertical piece together first. Use fabric Stiffener Spray and Pressing paper to help keep the small pieces in each row laying flat and crisp.
Once you’ve sewn the pieces together in each column, sew the vertical columns together that are above and below the 2.5”x1.5” vertical strips.
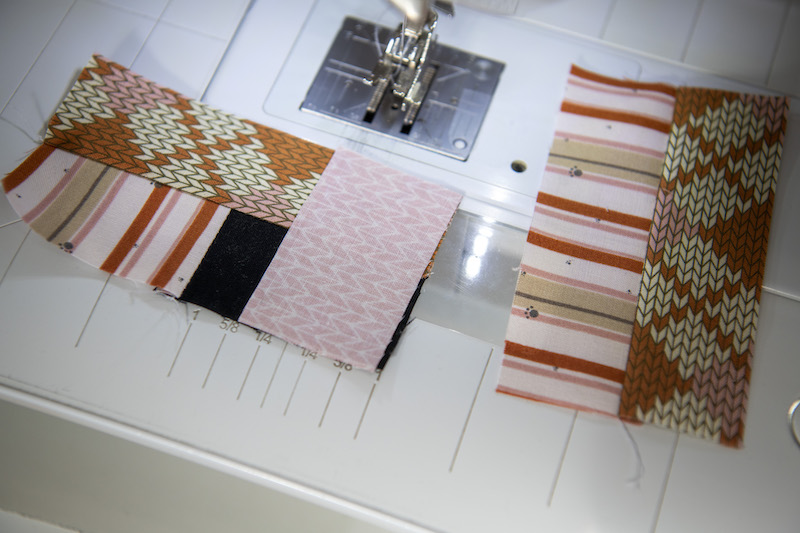
Next, sew the vertical strip in between the rows. Press.
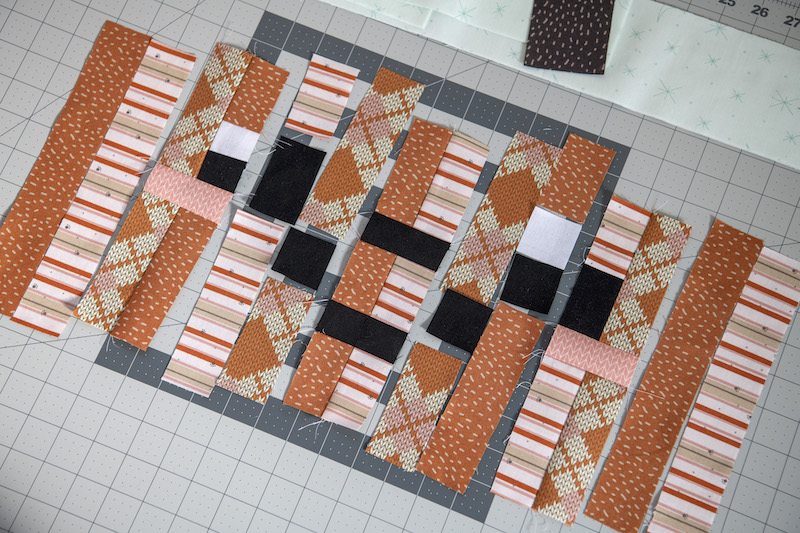
So at this point, it should look like this with columns 3 and 4, 7 and 8, and 11 and 12 complete.
Sew the remaining rows together vertically.
Once your columns are sewn vertically, sew all of the rows horizontally together.
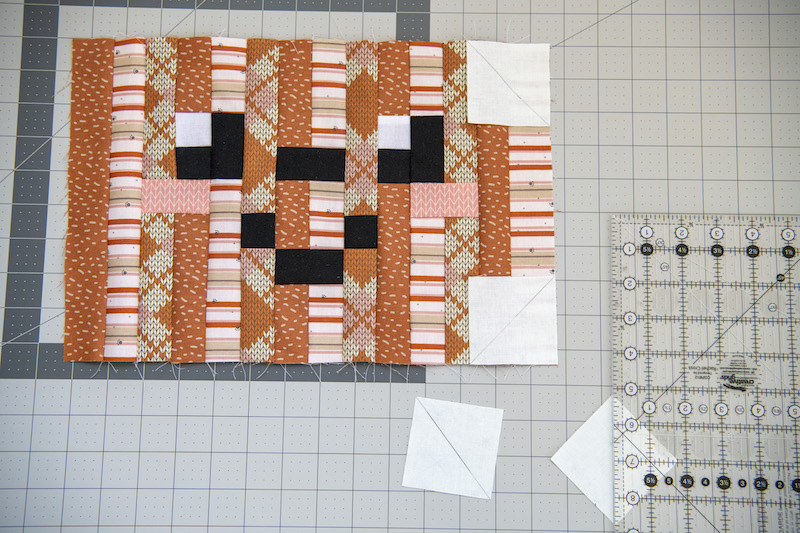
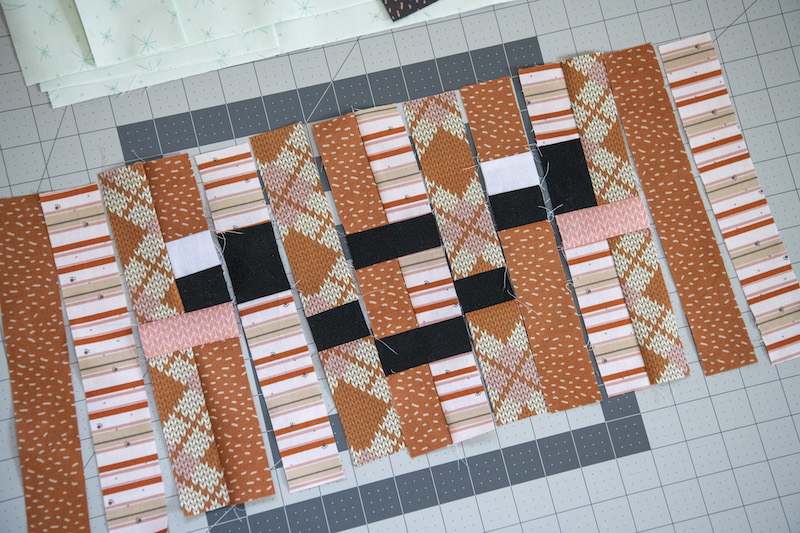
Now let’s move on to our background. Grab your four 2.5” background squares and draw a line on the back from one corner diagonally to the other side.
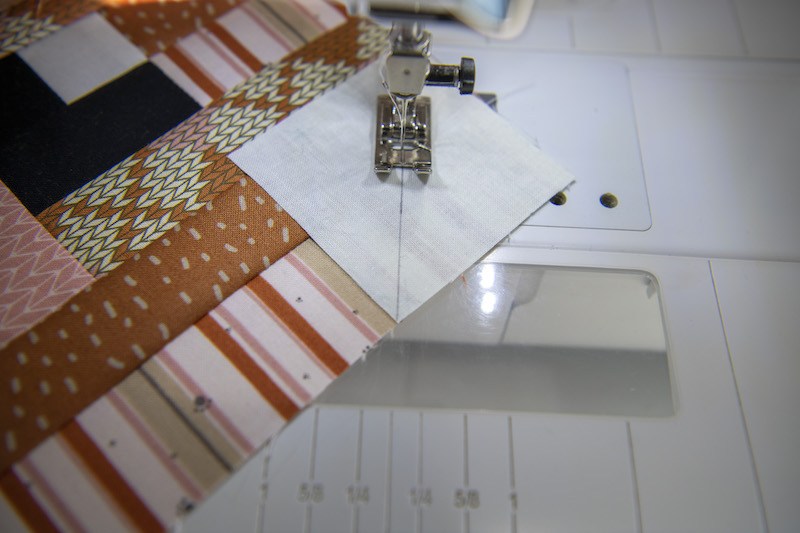
Place one square on the corner of each corner of your pumpkin, right sides together. Sew on each square sewing on your drawn line.
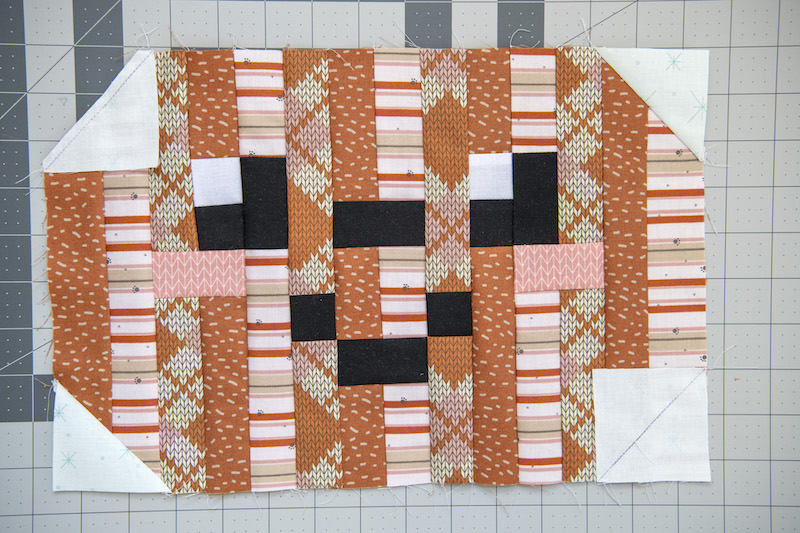
Trim the outside corner ¼” from the sew line and press open.
Lay out the rest of your background pieces around your pumpkin block. If you have questions, refer to the cut guide for what each is and where it goes.
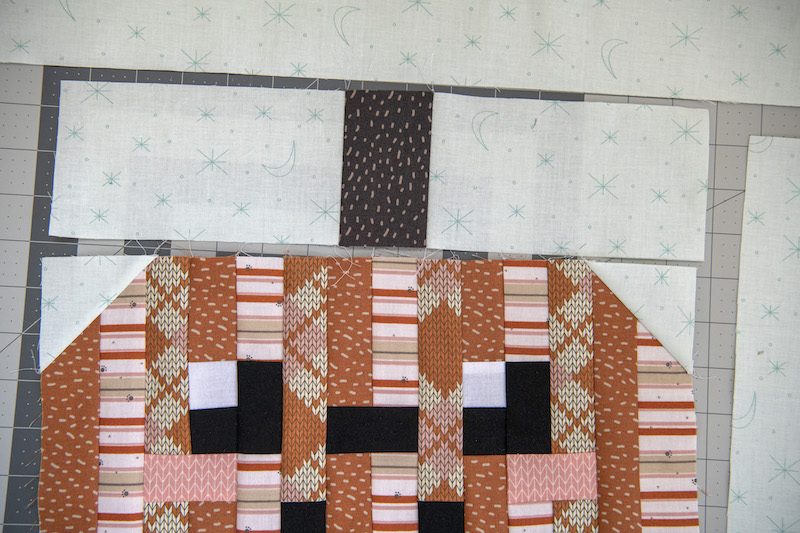
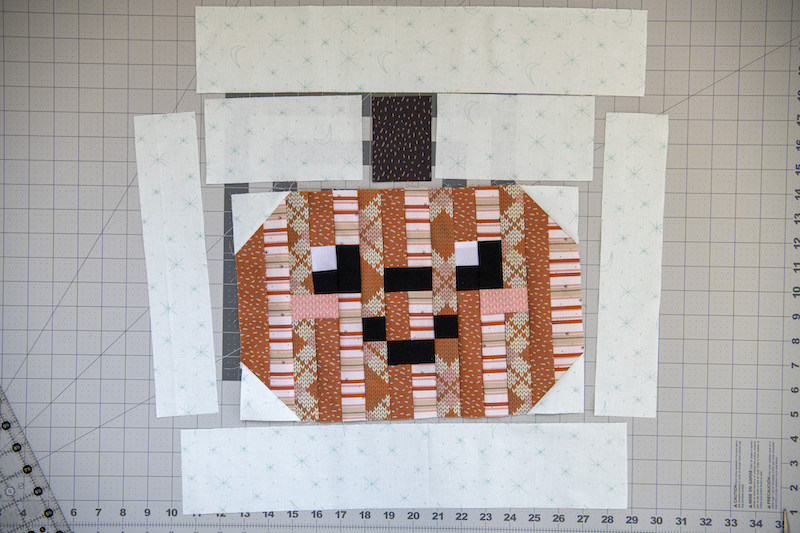
Start by sewing the two background pieces on both sides of your stem. Then attach the stem to the main pumpkin.
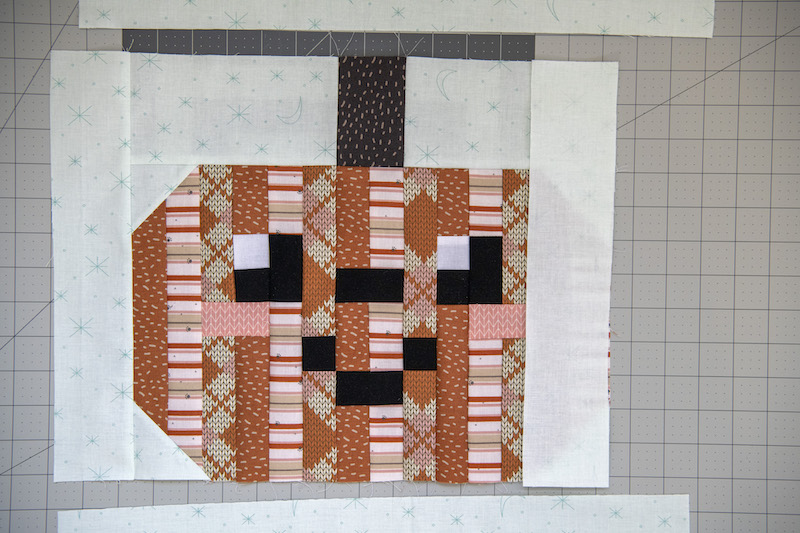
Next, sew the two side strips to the pumpkin. Press open.
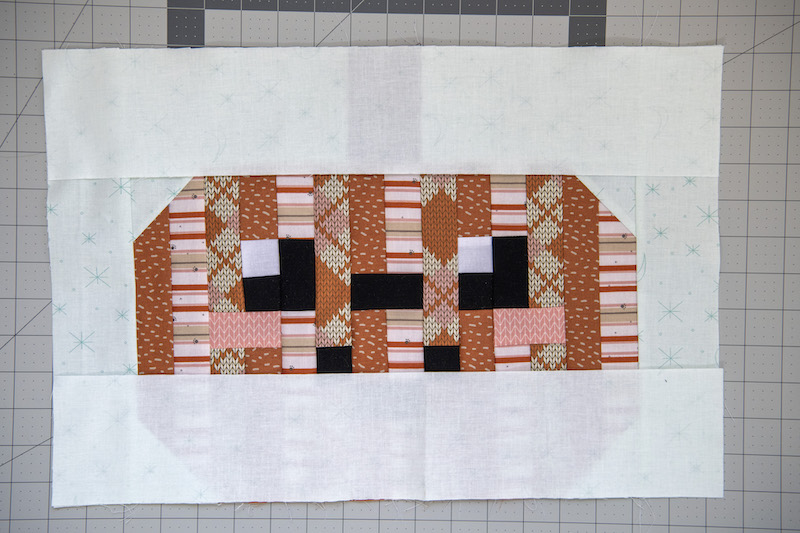
Lastly, we just need to sew the top and bottom strips on to finish our block. Press them open.
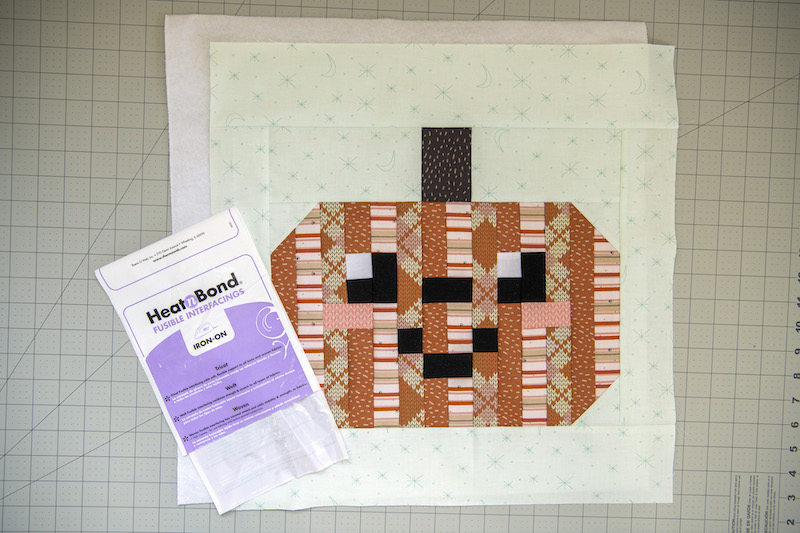
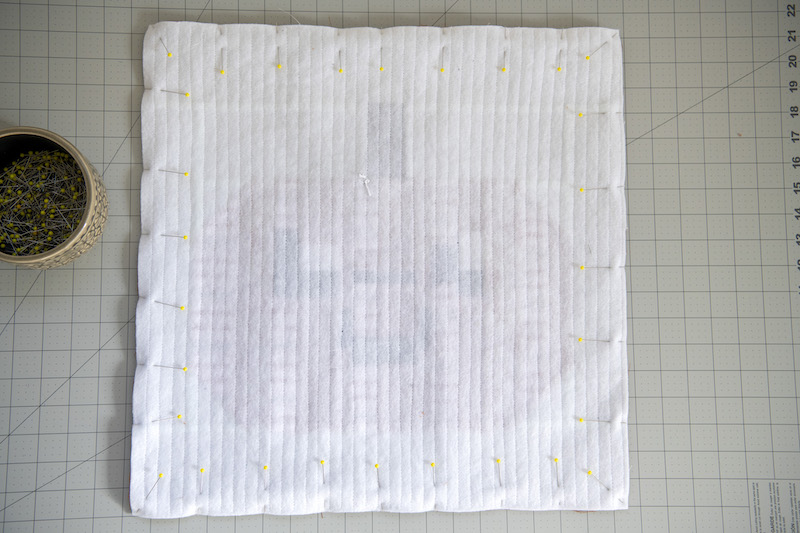
Alright, I’m going to walk you through how I turned my block into a pillow cover. First, we need to quilt our block. Place your block over your 18.5”x18.5” fusible fleece and adhere the two layers together.
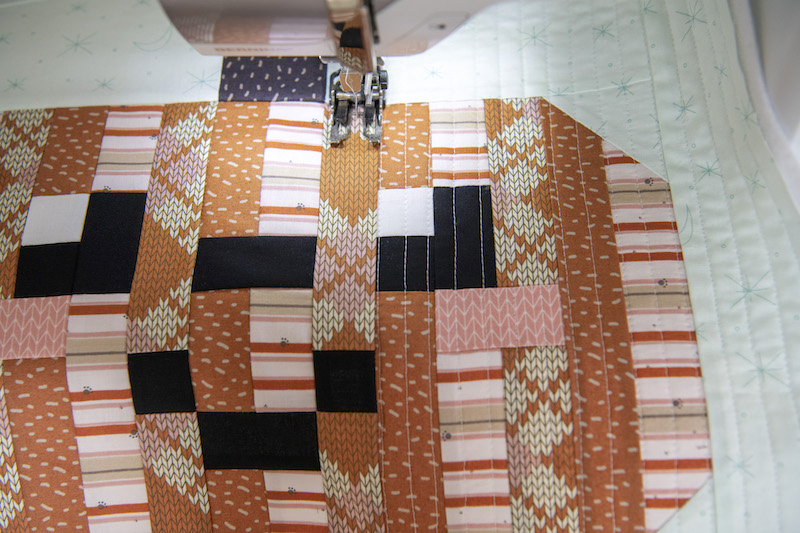
Quilt the two layers together. I keep it simple and just do vertical lines.
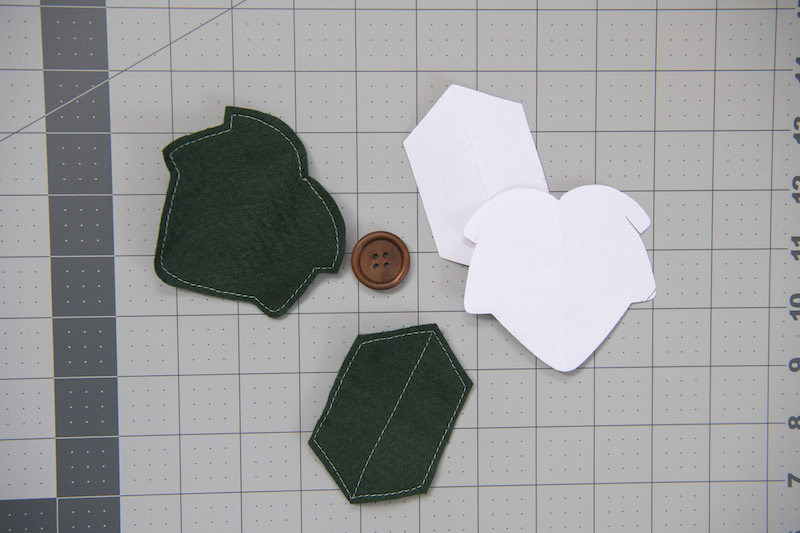
Next, we need to attach our leaf. I had a hard time deciding which leaf option I liked best so I included all three. Choose which leaf option you like. Print and cut out the pattern if you choose one of the shaped leaves. Trace it onto your felt and cut out. I like to add a bit of sewn detail to tie it in with my pumpkin.
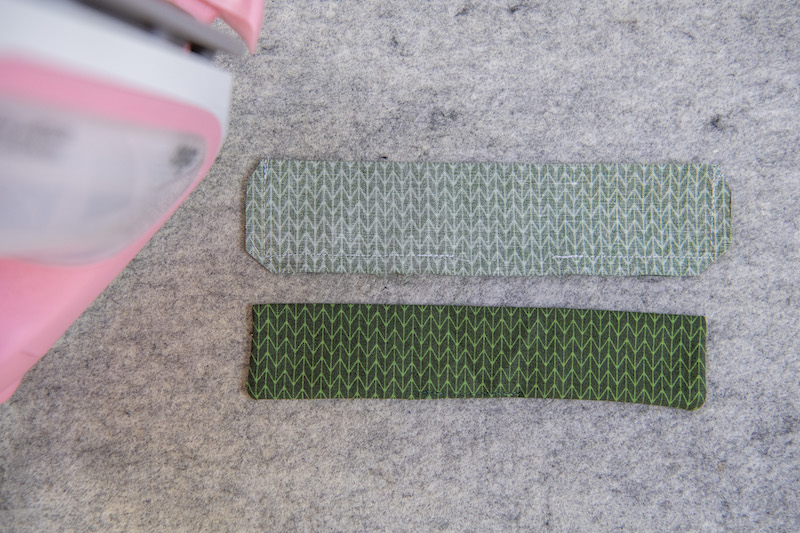
You’ll need a 3.5”x7.5” green strip of fabric for the ribbon option. Fold it in half like a hotdog bun. Sew using our ¼” seam allowance leaving an opening for turning. Turn, press, and sew the opening closed.
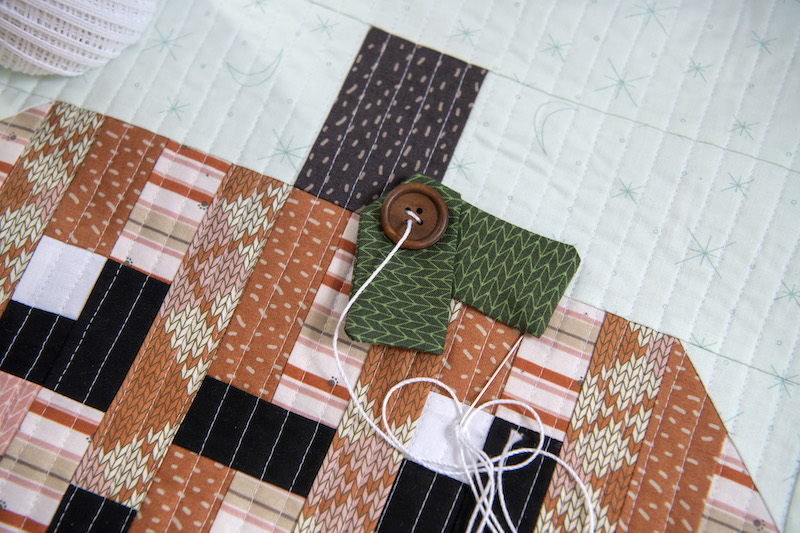
Next, attach your choice of leaf to your pumpkin using a hand-sewing needle and thread with your button.
Finally, we just need to make our envelope-style pillow back. Grab your two 12.5”x18.5” medium-weight fabric panels. On one of the taller sides turn the fabric under ¼” and then under another ¼” and pin (so now it should measure 12”x18.5”). Top stitch. Repeat with the second panel.
Once you have sewn the two seams we’re ready to assemble the pillow. Lay your first envelope flap on your workstation right side up with the sewn seam to your right. Lay the second flap on top of the first, right side up, with the sewn seam to the left overlapping the first panel enough that the width is 18.5”.
Now lay the finished pumpkin block on top of the flaps with the wrong side facing up (so the two sets of fabrics are right side together). Pin the fabrics together all the way around the perimeter.
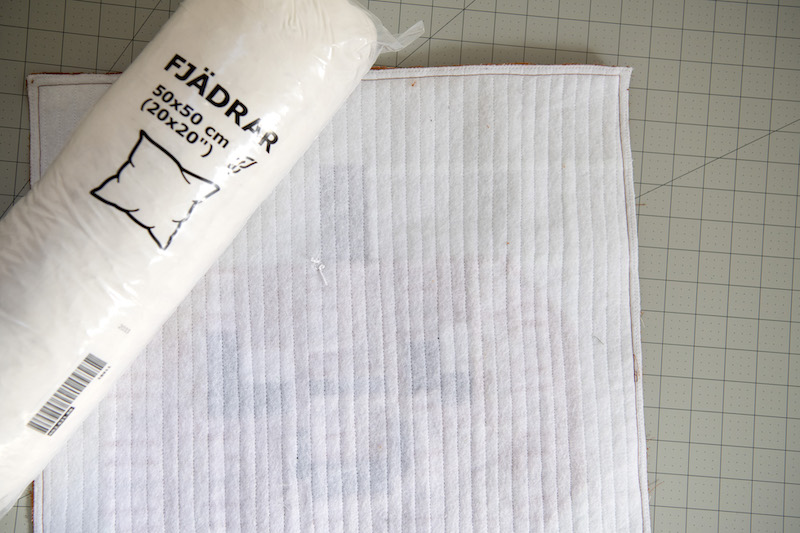
Take to your sewing machine and sew around the perimeter using our ¼” seam allowance. Sew around again using a zigzag stitch just around the seam to finish the seam off. I use a 20”x20” pillow form from Ikea.
Turn right side out and press. Fill with the pillow form and you’re all done!
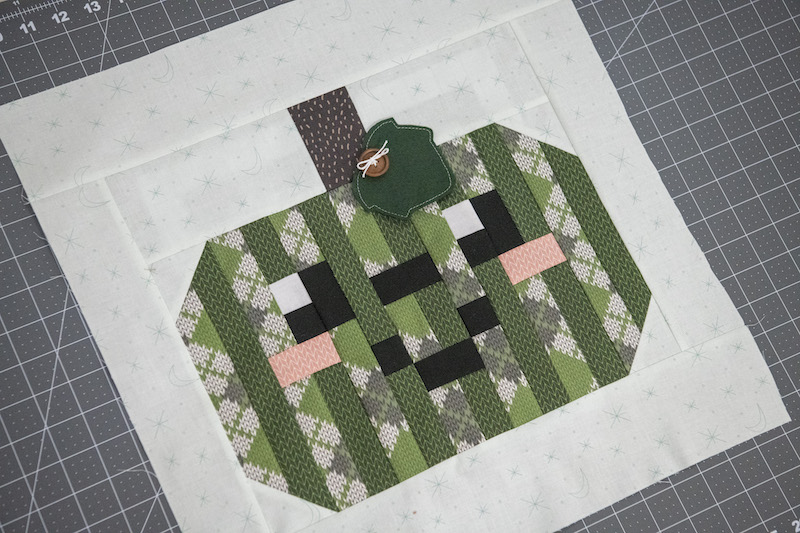
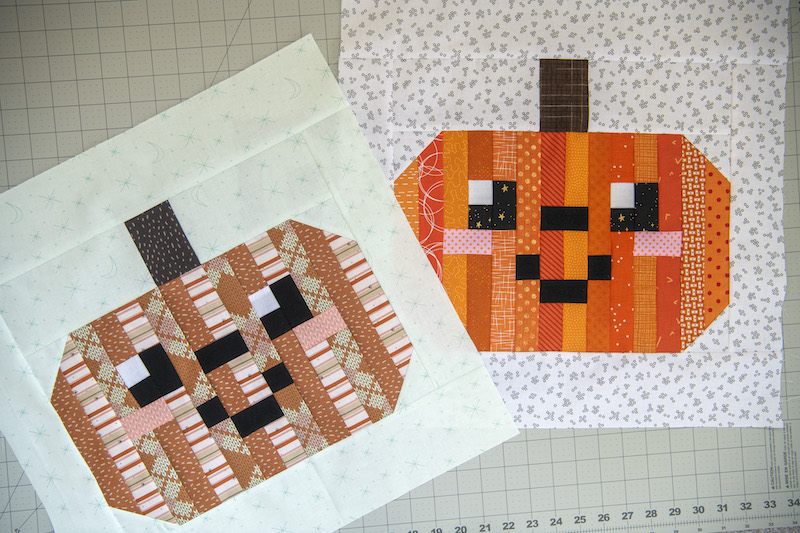
You can try him out in other colors, too! I included the rounded leaf option on this one and think it’s a fun alternative. 🙂