


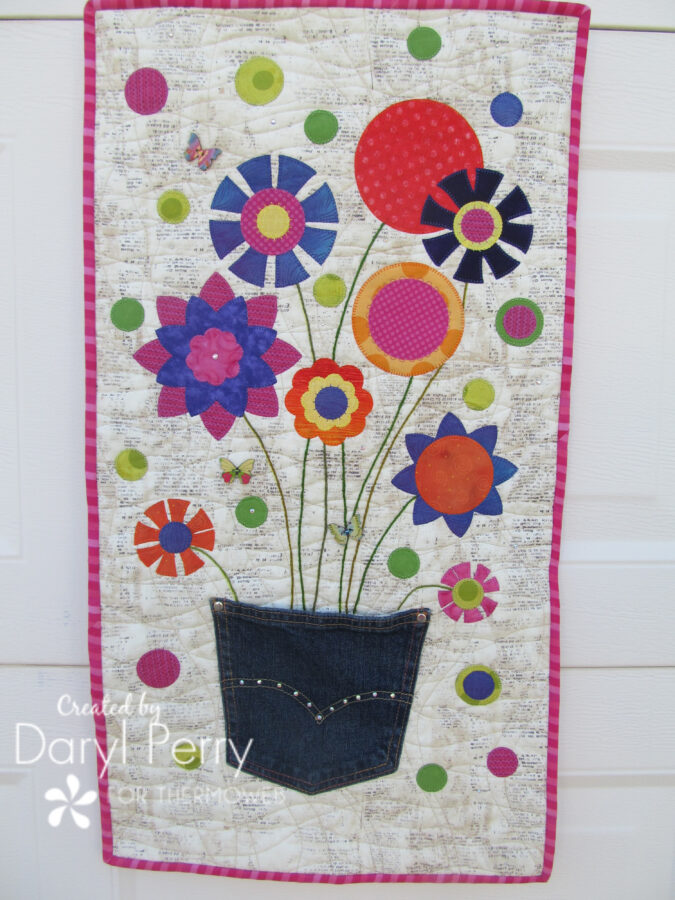
 Hello my lovely flowers! Daryl here from Patchouli Moon Studio to show you how to make your own Flowers in a Denim Pocket Quilt.
Supplies Needed:
- Background fabric: 1/2 yard
- Backing fabric: 1/2 yard
- Binding fabric: 1/4 yard
- Fabric scraps for flowers
- Embroidery floss in greens for stems
- Hand embroidery needle
- Machine embroidery thread to match or contrast with your appliqué flowers
- Machine embroidery needle
- Bobbin weight thread
- Thread for quilting
- Thread for stitching the denim pocket
- StitchnSew Sew-in Fleece
- HeatnBond Lite Iron-On Fusible Adhesive
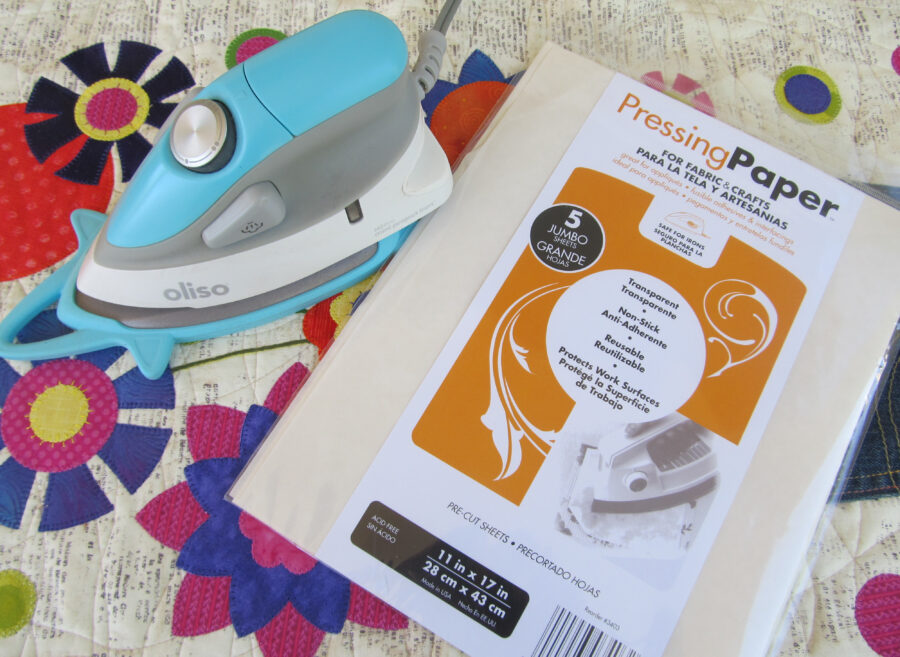
- HeatnBond Pressing Paper
- SpraynBond Basting Spray
- Iron (Mini Oliso Iron is great for pressing the flowers)
- A denim pocket removed from a pair of denim jeans (or make your own pocket)
- Crafter’s Edge Crossover II Die cutting machine or similar die cutting machine
- Crafter’s Edge Large Flower die cut set, .5-inch Increment Circles die cut set, Flower die cut set or die cuts of your choice
- Rivets, hot fix crystals, buttons or other embellishments (optional)
- Frixion pen or other marking pen that can be removed
Let’s get started ~ (Please read through first before starting)
- First cut your background fabric, fleece and backing fabric a bit oversized, so cut it at least 1″ larger all around than the finished size quilt. I cut mine at about 17″ wide x 28″ high. (The finished quilt measures 15 1/2″ wide x 26″ high, but this is just a suggestion).
- Next, fuse HeatnBond lite adhesive onto the wrong side of the fabric scraps for the flowers, and keep the paper backing on the fabric.
- Using your die cutting machine and the die cuts that you choose to use, place the die cuts onto the fabrics with the fused adhesive and cut out using the machine. If you do not have a die-cutting machine, you can use any appliqué flowers of your choosing. Google flower clipart for ideas or use appliqué flowers from books or patterns that you already have. Or just use circles and you can use my tutorial on how to make flowers from circles that you can find here.
- Layer your fabrics: place the backing fabric wrong side up on a table, place the fleece on top, then place your background fabric right side up on top of the fleece. Smooth everything and then follow the directions on the SpraynBond Basting Spray to adhere the 3 layers together.
- Now quilt as desired, using your quilting thread and bobbin weight thread in the bobbin. You can Free Motion Quilt or use a walking foot and quilt in a grid, etc. I used a walking foot and quilted wavy lines vertically and then horizontally, but quilt as you prefer doing.
- After quilting press the front and the back of your quilt. DO NOT Trim the quilt! Just press it flat.
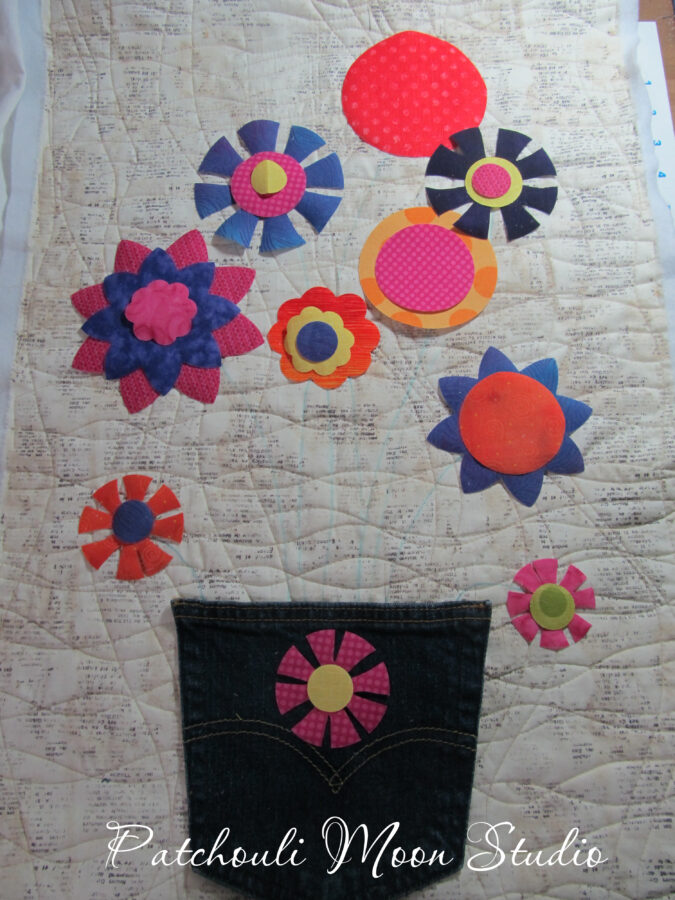
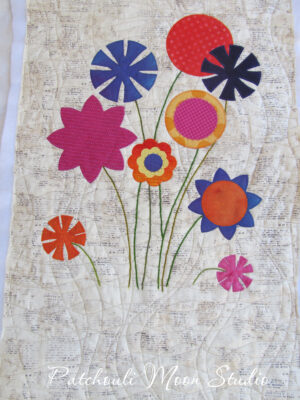
- Now take your appliqué flower pieces and the denim pocket and place it on the quilted piece. DO NOT FUSE anything yet! You are first just positioning things as you like them as in the photo below. Take a photo with a camera or your phone camera when you like how it looks so you will remember where to replace the flowers later. This won’t be set in stone, as you can make some changes later, but it should be close to how you want it.
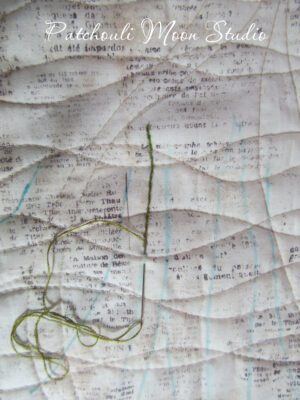
- Now with the pocket and flowers still in place on top of the quilt, take your marking pen or pencil and draw stem lines from just underneath the flowers to the top of the pocket (go just inside the top pocket with your lines).
- Remove the pocket and the flowers for now and set them aside. Take your hand embroidery needle and using 2-3 strands of the embroidery floss, embroider a stem stitch following the lines that you drew for the stems. Here is a stem stitch tutorial. I stitched each stem and then stitched again alongside each stem to make the stems thicker. (See photo below)
10. Once all your stems have been embroidered, grab your camera or phone and find that photo that you took and then place the flowers and pocket back in place to make sure it all looks and fits nicely. If you are happy with how everything looks, then peel off the paper backing from the flowers and place the flowers back in place and then using your Pressing Paper, place it on top of the flowers and press to fuse. Fuse all the flowers in place. Remove the denim pocket and set aside for now.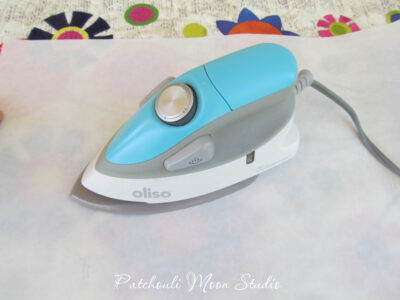
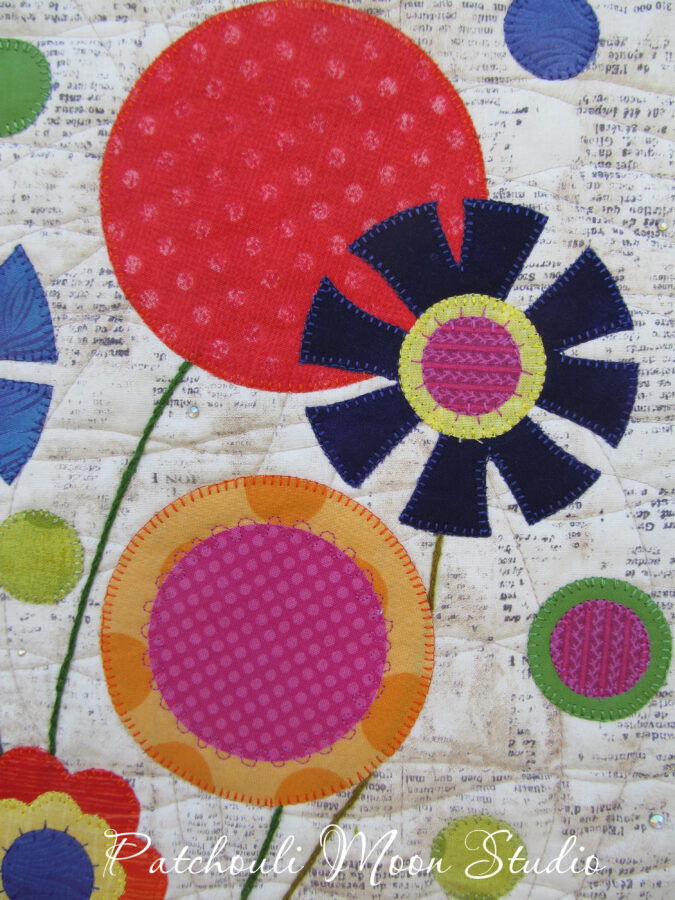
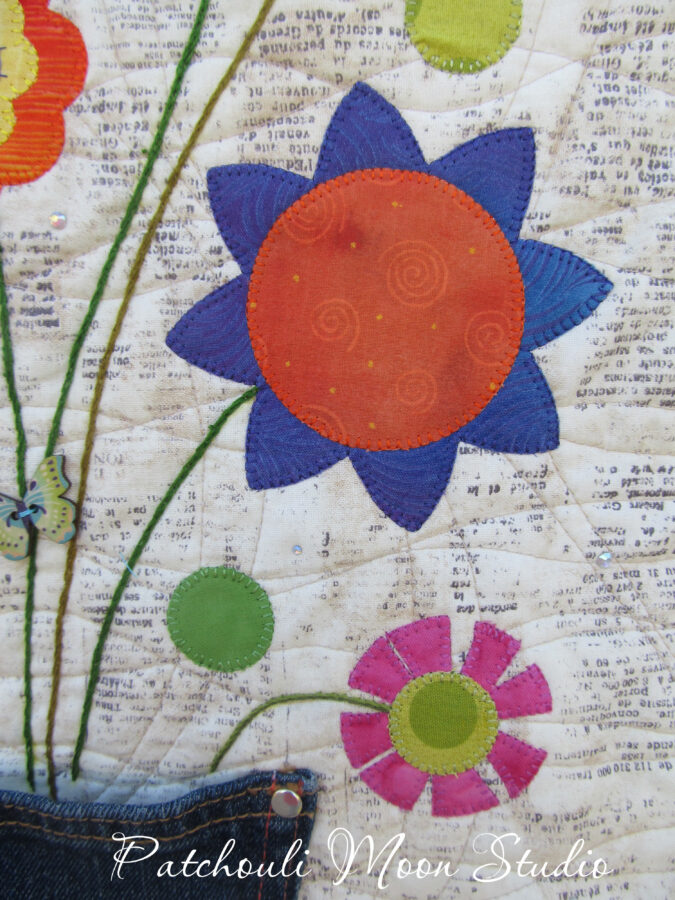
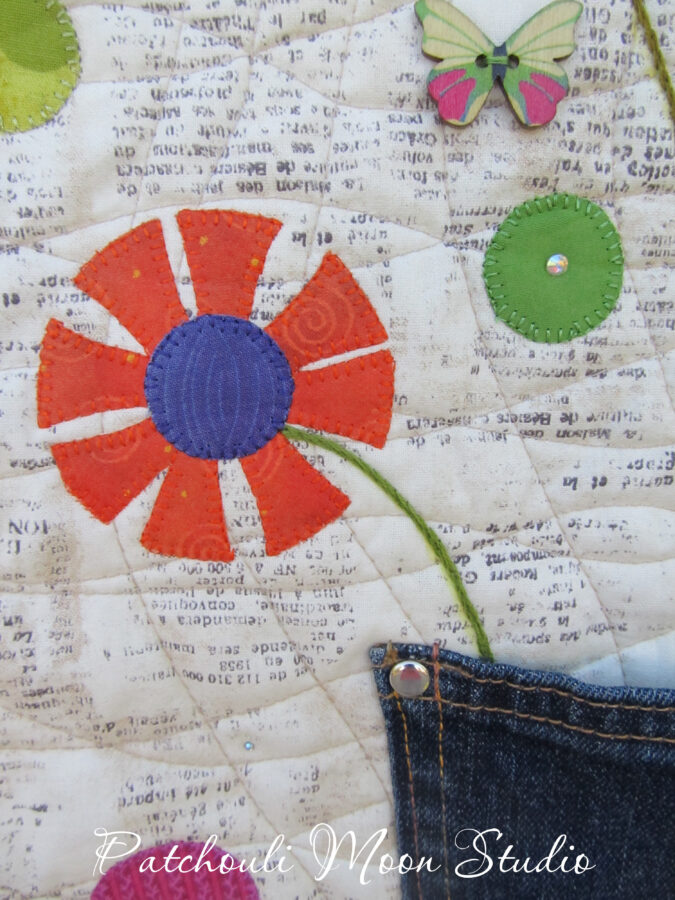
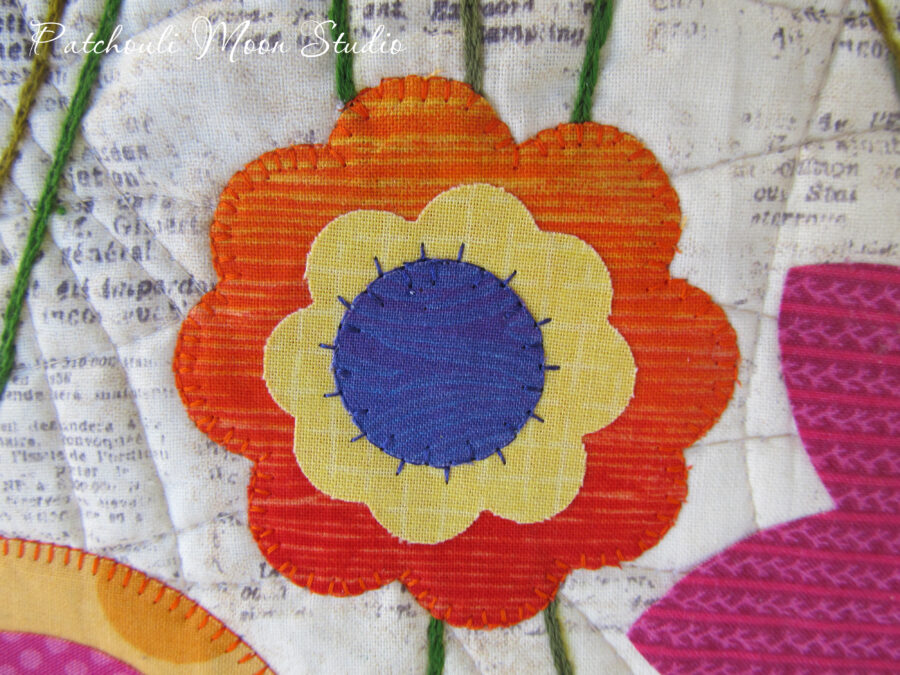
11. Next, thread your sewing machine with the embroidery thread you wish to use and bobbin weight thread in the bobbin. Use a machine embroidery needle and select the machine stitch you want to use. I used a blanket stitch for most of the flowers and a couple other stitches for the center circles on a few flowers. Stitch around all the flowers.
12. Place the pocket over the stems so that a tiny bit of the stems go inside the pocket and center it as you like it. Pin pocket in place. Then stitch the pocket in place by following the outer stitch lines from where you ripped the pocket off from the jeans. Then stitch the inner lines. See the photo below. I used an orange/gold variegated thread to stitch the pocket. Then if you want to add a rivet to each top right and left side of the pocket, you can do that now. I also fused hot fix crystals to the pocket. I decided I did not want to appliqué a flower onto the pocket (see the 3rd photo in step 8 above), so I removed the flower appliqué from the pocket and didn’t fuse it.
13. Once you have finished, press your quilt and then square it to 15 1/2″ wide x 26″ high or close to that size. Cut your binding strips to the width that you like and sew them together and bind the quilt in your preferred method. Sew on buttons or add other embellishments as desired. Add a label on the back of the quilt and hanging sleeve, if desired.
Now hang up your pretty new quilt and admire it. Here are some close-up photos below.

~ Happy Stitching, Daryl