


Hello Friends!
I’ve been enjoying doing some simple Foundation Paper Piecing (FPP) recently and I’m wondering… do you enjoy this form of fabric piecing?

I’ve never done very much of it, mainly because of a very annoying thing (which I’ll share at the end of this post) but because of some awesome Thermoweb products, I’m really loving it! If you’ve never done FPP before, this is a great little project to start with! One thing that I do really love is you can piece together tiny little blocks and have the points come out perfect.
Necessary Supplies
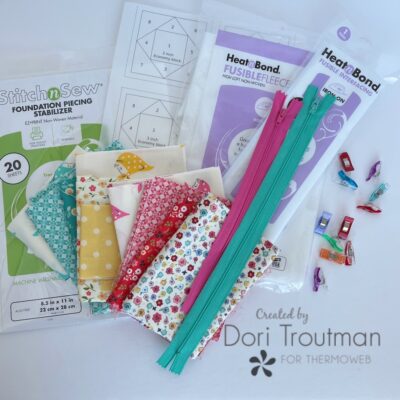
- Stitch n Sew Foundation Piecing Stabilizer
- HeatnBond Fusible Fleece
- HeatnBond Lightweight Non Woven Fusible Interfacing
- Paper Pressing Sheet
- Fabric Scraps
- Zippers
- Wonder Clips
- FPP pattern
Instructions
Before we get started on this little tutorial I’d like to encourage you to look at a few YouTube tutorials on Foundation Paper Piecing. Keep in mind that everyone has their own way of doing it, but by watching some videos it will make a little more sense. I used a free pattern from Rosie Taylor Crafts. This is free template that you can download by clicking here: FPP Mini Quilt Blocks
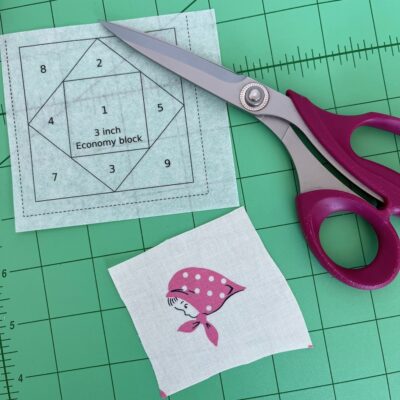
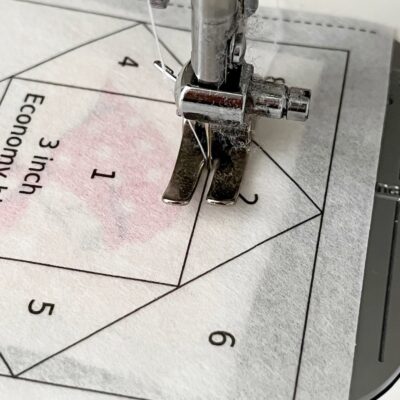
Step One: Download the above linked pattern. Using a sheet of the StitchnSew Foundation Piecing Stabilizer, print the page with the 3 inch Economy Blocks. You will need to use three of these little blocks, cut them out leaving plenty of room beyond the printed border.
TIP: You will be continually flipping your little foundation pattern to the front and back as you place your fabric, sew and trim. This is normal and might feel a little awkward at first.
Step Two: Focus on the little square, labeled 1, in the center of the block; don’t pay any attention to the other parts of the pattern just yet. Look through your fabric scraps and find a little piece of fabric that you want to use for the center focus of the block. Roughly cut it out to a size quite a bit larger than you need, just to make sure you have plenty to center it properly. It does not need to be cut squarely.
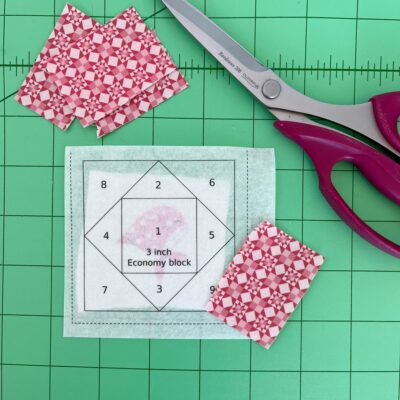
Step Three: Flip the little fabric piece so it is WRONG side facing up, place the printed foundation paper piece on top of the fabric so it is centered. If you can’t see it for sure, you can hold it up to a window to make sure that piece is centered. Confirm that the little center fabric is wrong side facing through the block pattern (it will be right side up on the back). Cut four small pieces of fabric that are larger than the triangles labeled 2, 3, 4, and 5. (Some people roughly cut large triangles for this step… but it’s not necessary. Just make sure whatever scrap you are using is large enough to completely cover the printed triangle.)
Step Four: Carefully flip your pattern and fabric piece over so that the center fabric is on top. Take a small scrap of fabric and place it right side down on the triangle labeled 2. You will want your raw edge to be along the raw edge of your center piece. Be sure right sides are facing each other.
I’m so sorry that somehow my photo of this step did not turn out and I did not realize it until it was too late.
Step Five: Now Flip your pattern and fabric pieces over again (printed pattern facing up) and take it to your sewing machine. Change your stitch length to 1.5. Sew on the line between the number 1 and number 2 on your pattern. Be sure to back stitch at the start and finish. I like to start about one stitch before the line and one stitch after.
Step Six: Remove from the sewing machine, flip over and open the fabric at the seam and press.
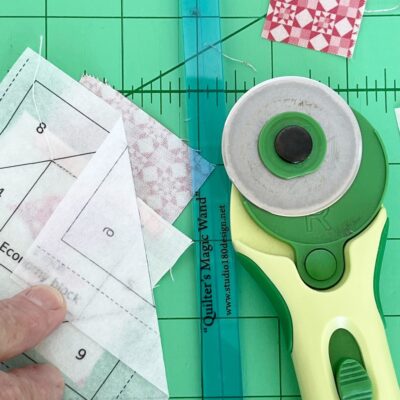
Step Seven: Flip over again so the right side of your pattern is facing up and the right side of your fabric is facing down. Fold the pattern over at the line where you sewed and using a ruler, cut the fabric 1/4 inch away from the pattern fold. A quarter inch ruler is nice for this, but definitely not necessary.
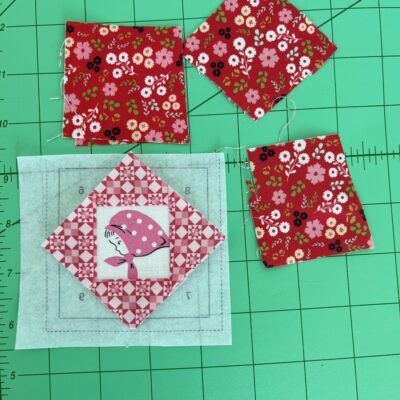
Step Eight: Repeat step seven on the other three triangles labeled 3, 4, and 5; sewing, pressing and trimming. Once you have done that, turn your block over and press carefully. If it’s been properly sewn and trimmed it will look like the little square below.
Step Nine: Cut four more scraps of contrasting fabric larger than the triangles labeled 6, 7, 8 and 9. Sew each of the fabric scraps the same way you sewed the previous four triangles, pressing them open, but DO NOT TRIM them yet!
Step Ten: Carefully press the entire block and trim your fabric exactly on the dotted line of the square, using a ruler and rotary cutter. Using your fingers, tear off each piece of the pattern until all the paper backing is removed. Press again.
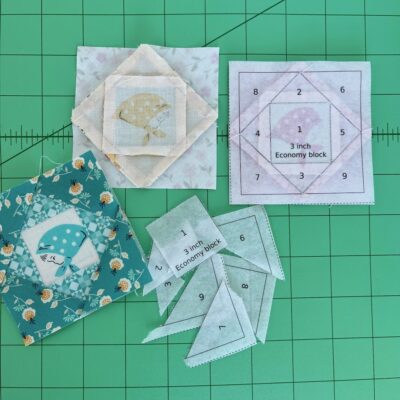
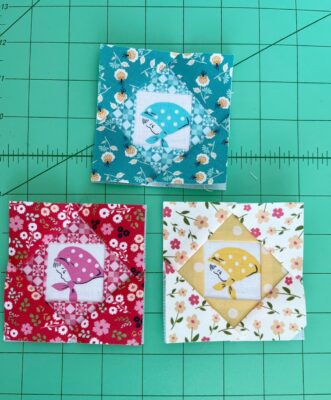
Step Eleven: You will end up with three perfect little pieced blocks with all points lined up perfectly!
NOW… to tell you why I’ve never been a great fan of FPP, but thanks to Thermoweb I now love it… it’s all in the Foundation Piecing Stabilizer. This is like a nice weight interfacing that runs through a printer so beautiful. And it stays neatly intact while sewing. Even if you make a mistake and have to remove a few stitches, it still holds. When it is time to tear the stabilizer away from the fabric, it tears easily and neatly. I’ve only ever used regular paper in the past and I’ve never enjoyed the process. SO, if you’ve never tried the piecing stabilizer, now is the time!
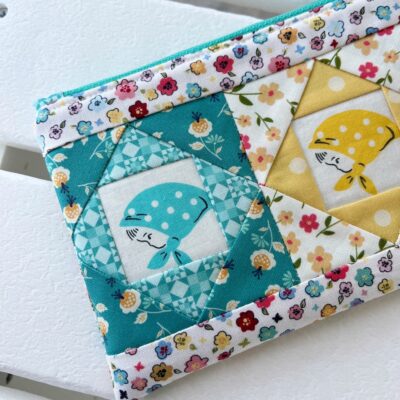
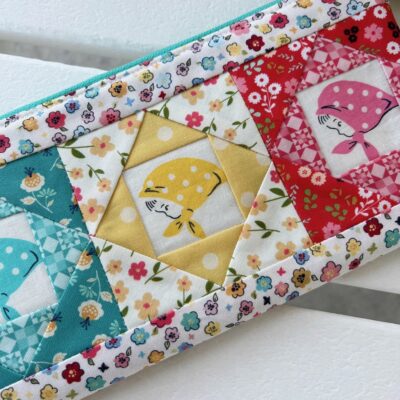
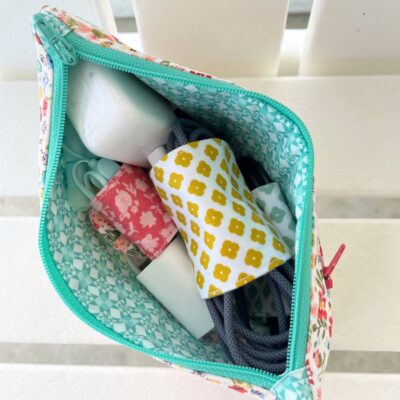
I’ve taken these adorable little blocks and turned them into a zipper pouch! I used the pattern called the Zipster Pouch . However, if you are familiar with making zipper pouches you can simply make one yourself with no need to purchase the pattern. (You can do some many fun projects with these little blocks… a simple Mug Rug would be super fun!)
Tips:
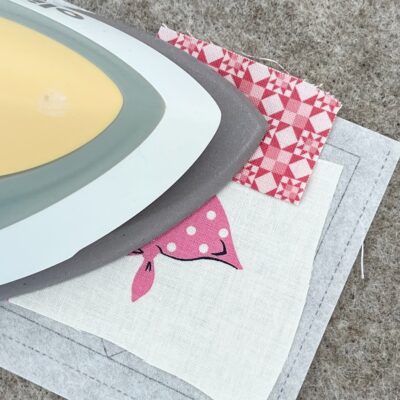
For all my ironing I used a sheet of Pressing Paper. This might be one of my most favorite Thermoweb products. You can use one sheet over and over and over!!! It literally lasts so long.
I used HeatnBond Light Weight Non-Woven Fusible Interfacing on my zipper pouch lining fabrics. This just gave it a little added stability. On the outside pouch pieces I used HeatnBond Fusible Fleece.
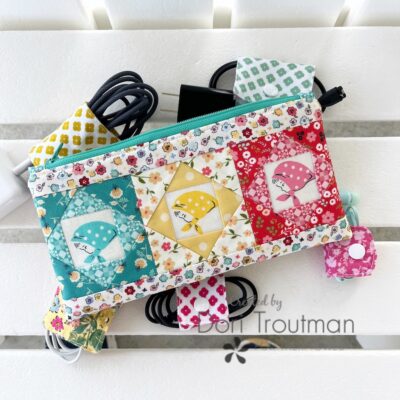
I don’t know about you, but I’ve always got my electronic cords all over the place, which is fine at home but when traveling it drives me crazy. After making this zipper pouch I decided it was the perfect size for my most used electronic cords! I quickly made these darling cord savers and wow!!! Total game changer!
I’d love to hear your thoughts and see your projects with Foundation Paper Piecing! Thank you for following along!
Happy Sewing!