


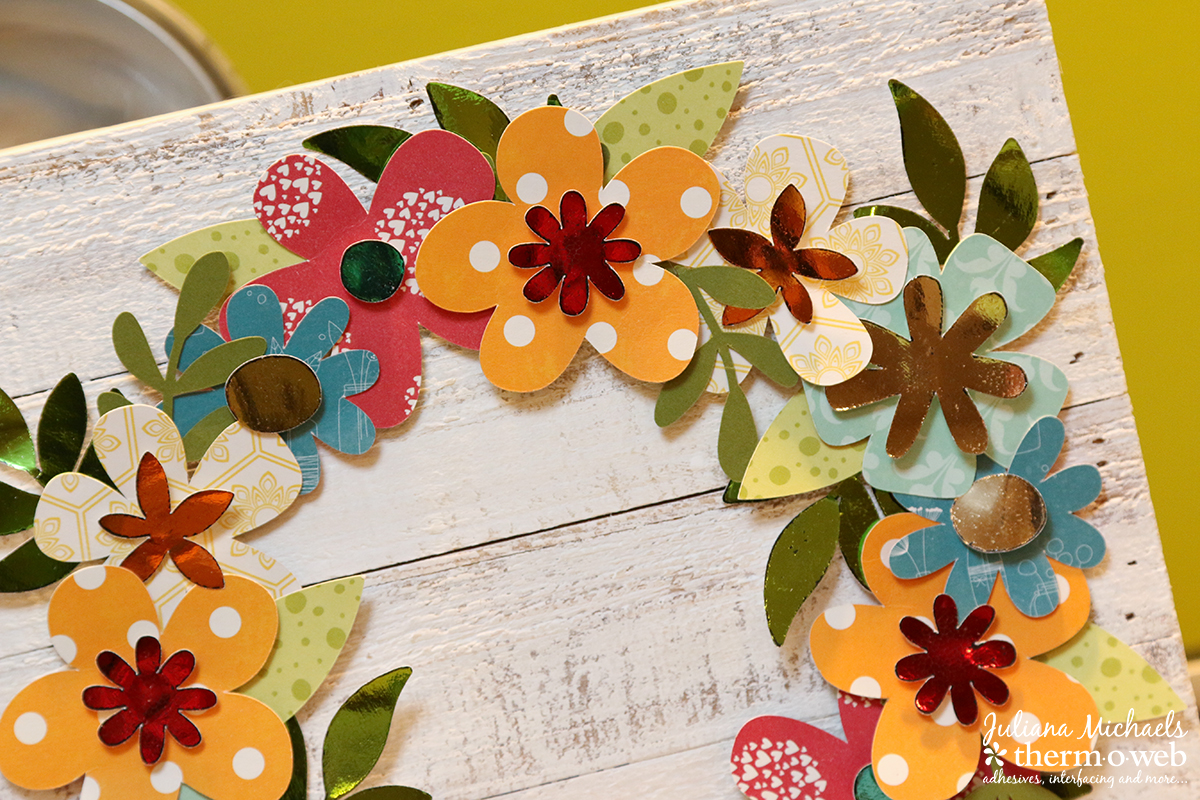
Spring is coming, right?! As I write this post, it is starting to snow and I truly hope this is the last of the snow and that Spring will be on it’s way soon. To help get us all in the mood for Spring, I’m sharing a Deco Foil Spring Wreath with you. I created a digital cut file for you to use to create your own version, so make sure you download it for free below.
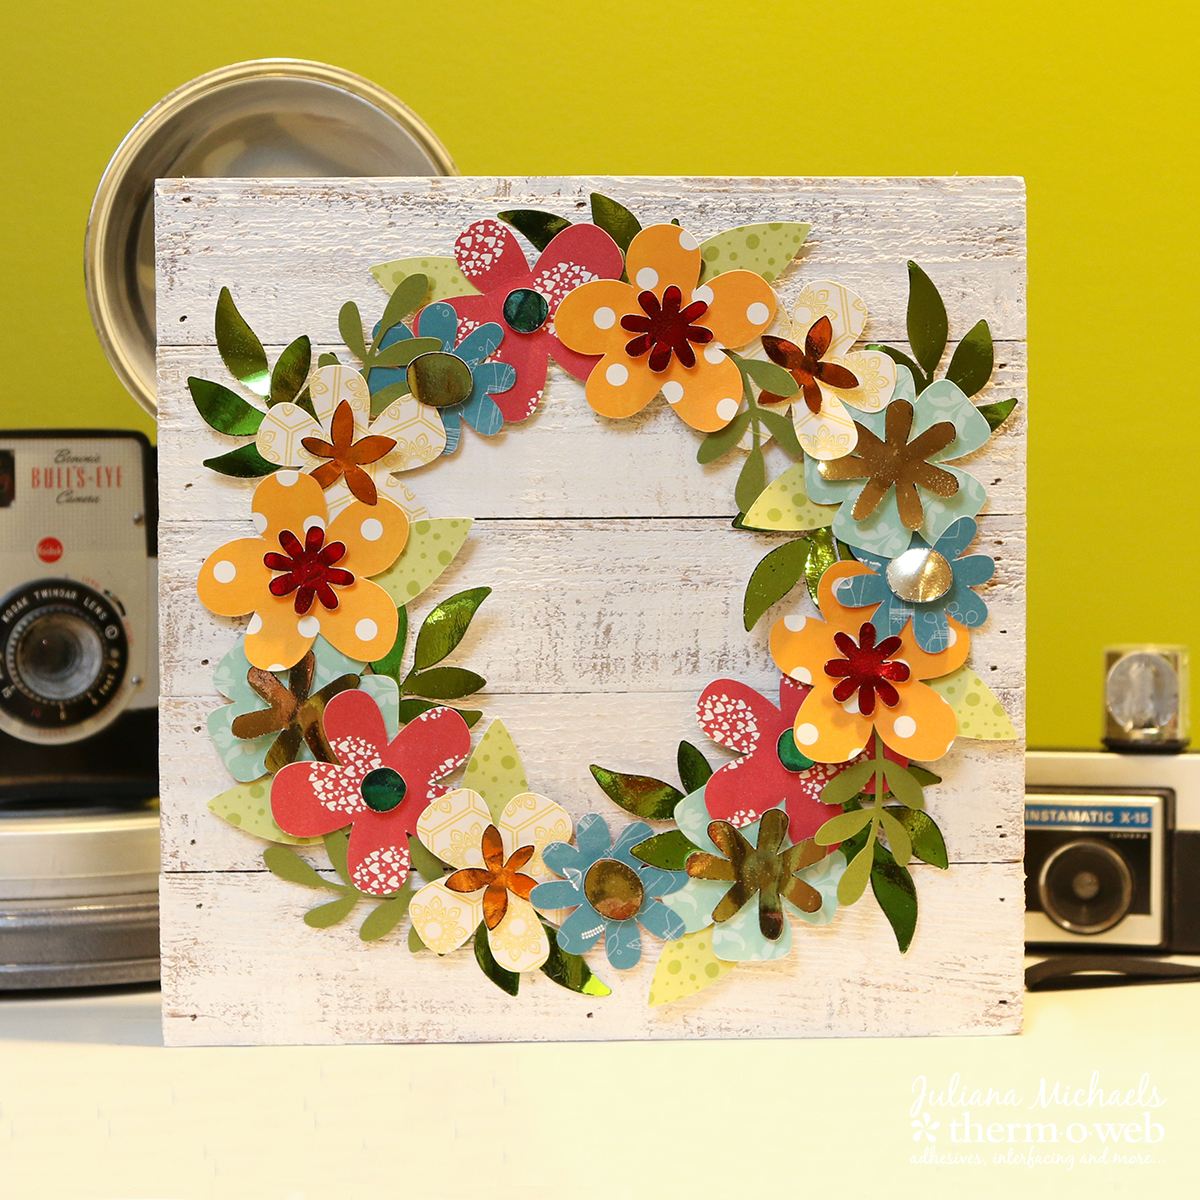
Deco Foil Paper Floral Spring Wreath
First, download the Spring Flowers Wreath Free Digital Cut file.
These files will work with a wide variety of machines, including the Silhouette, Cricut and Brother Scan N Cut.
After you have the file downloaded, start planning what colors of papers and Deco Foil you want to use to create your Spring Wreath. (For this project, I used 6 patterned papers, 1 piece of cardstock and 5 colors of Deco Foil.)
Foiling Die Cuts
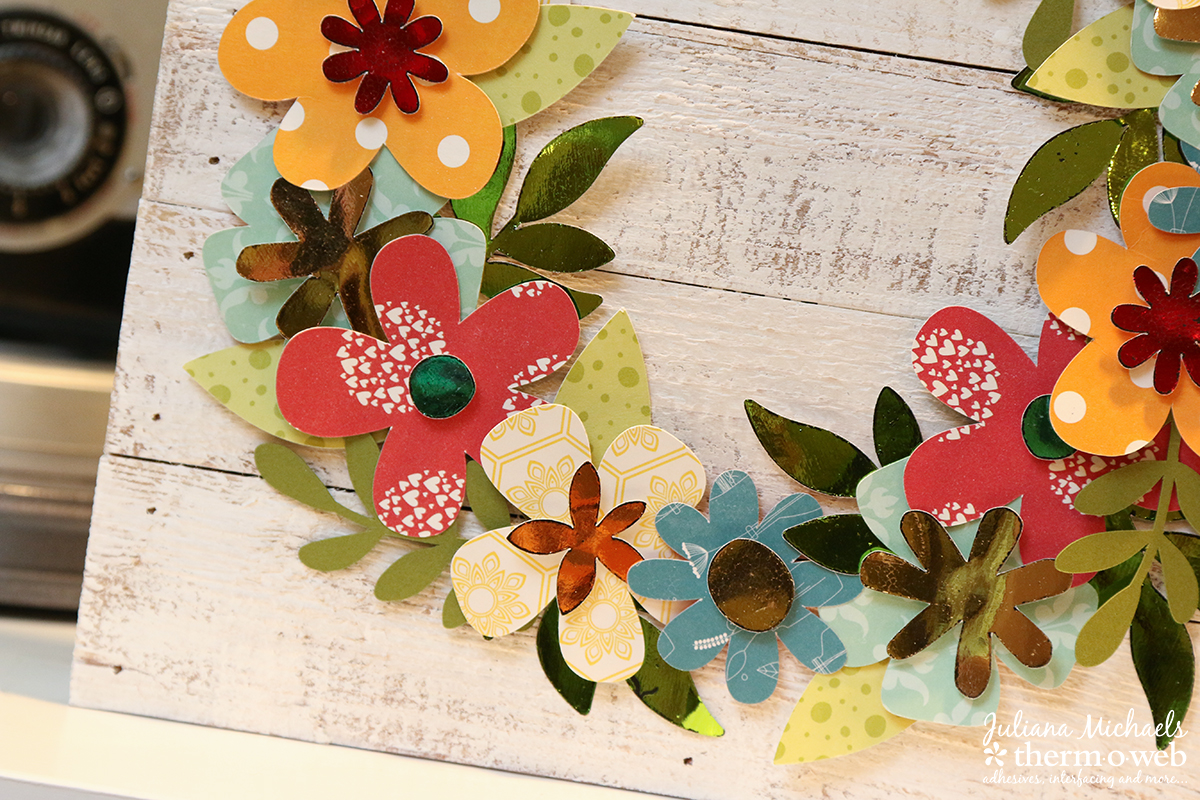
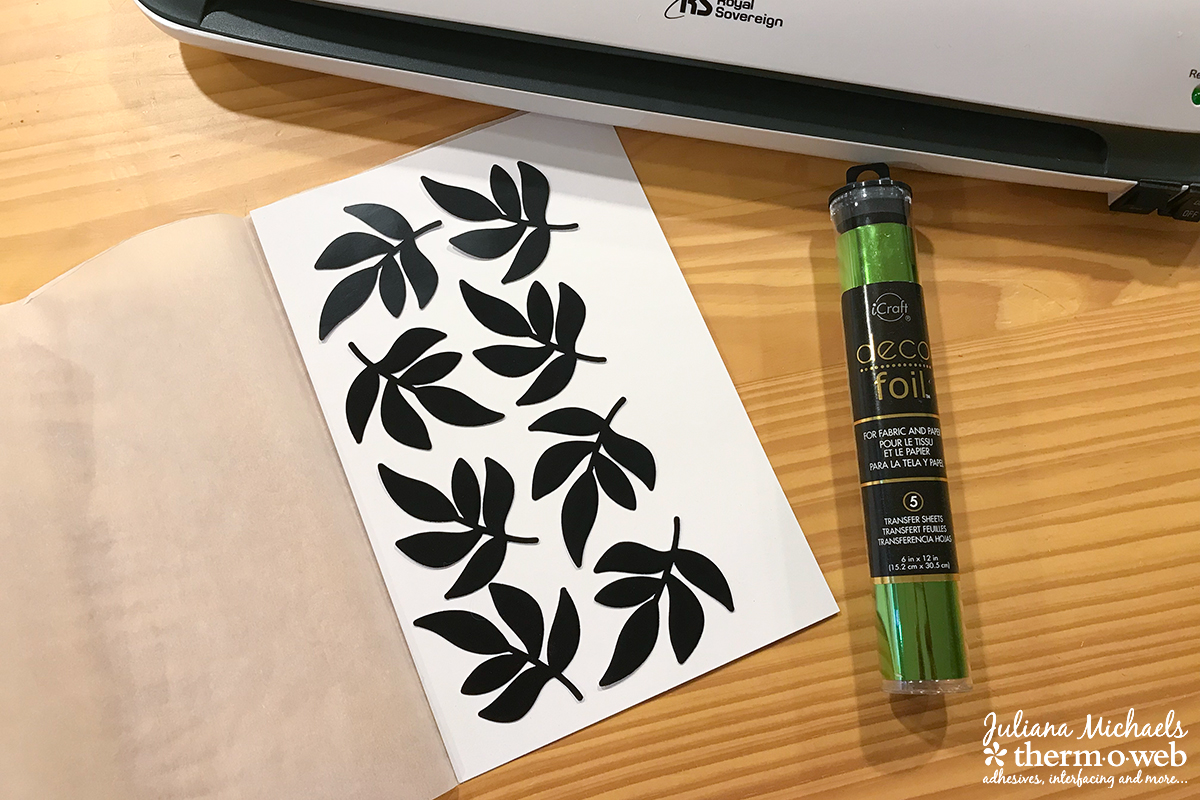
Once you have this part planned out, you can then start cutting things out using your electronic cutting machine. Begin by cutting out the flower centers and 1 of the leaf designs from a piece of Therm O Web iCraft Deco Foil Toner Sheets.
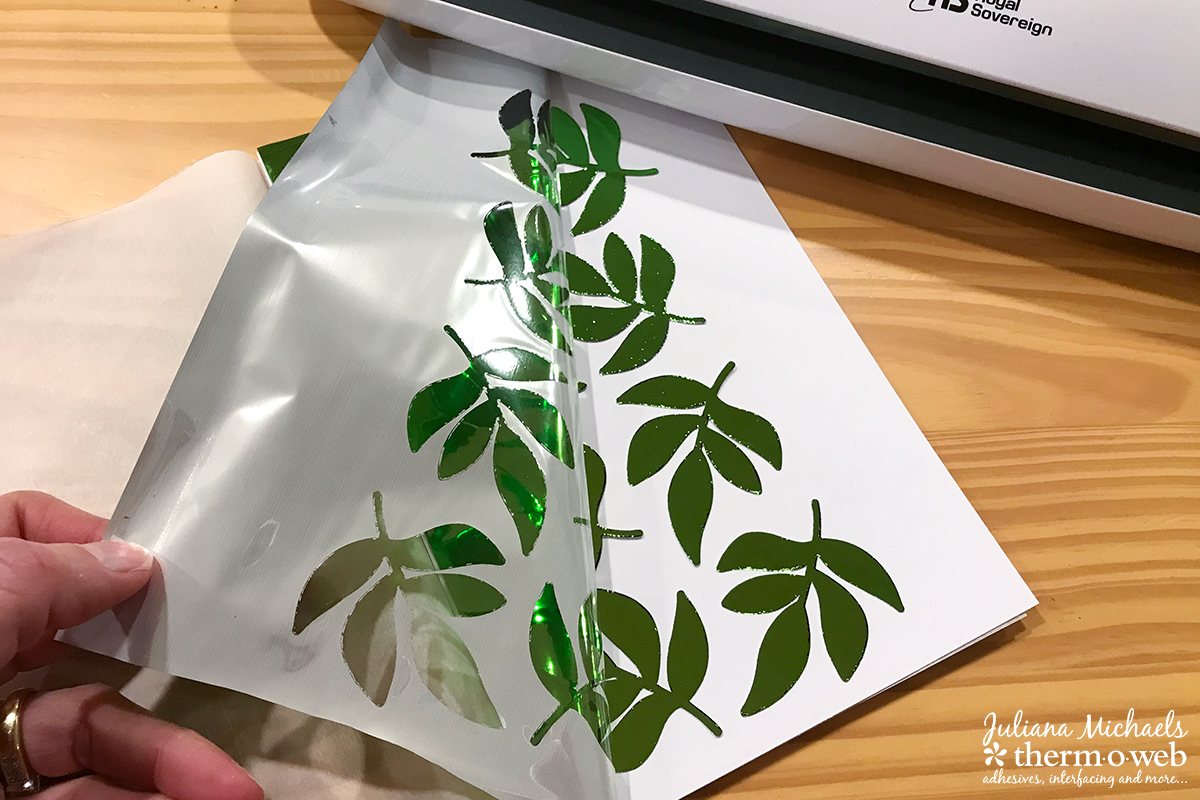
Place the die cuts on a piece of cardstock inside a piece of folded parchment paper. The cardstock will give the die cuts more stability and allow the pieces to go through the laminator without jamming the machine. Next, place a piece of Deco Foil on top of them and run it through the laminator. Repeat this process with the flower centers.
Once it comes out the backside of the machine, allow it to cool briefly and then peel back the transfer sheet to reveal the foiled images.
Next, it’s time to die cut the flowers and remaining leaf shape from paper or cardstock. After you are finished with all of the die cutting you are ready to start assembling your wreath.
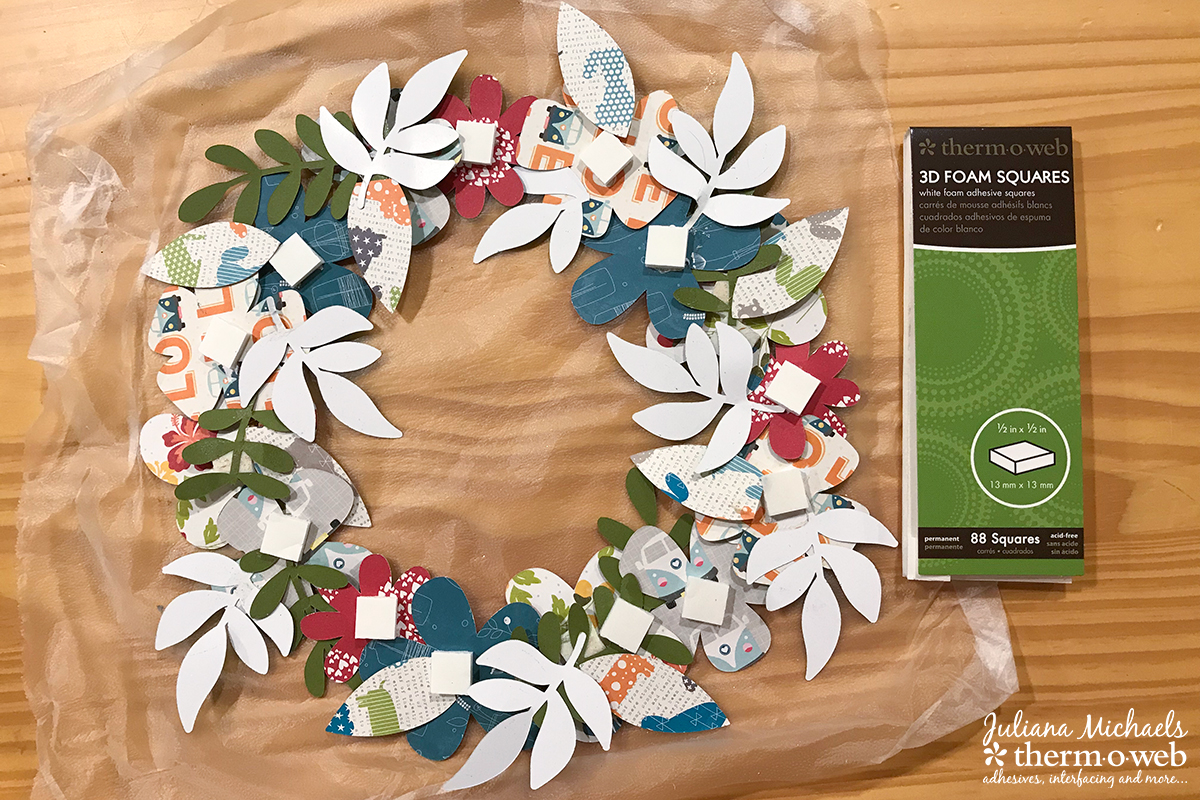
Arranging the Wreath Design
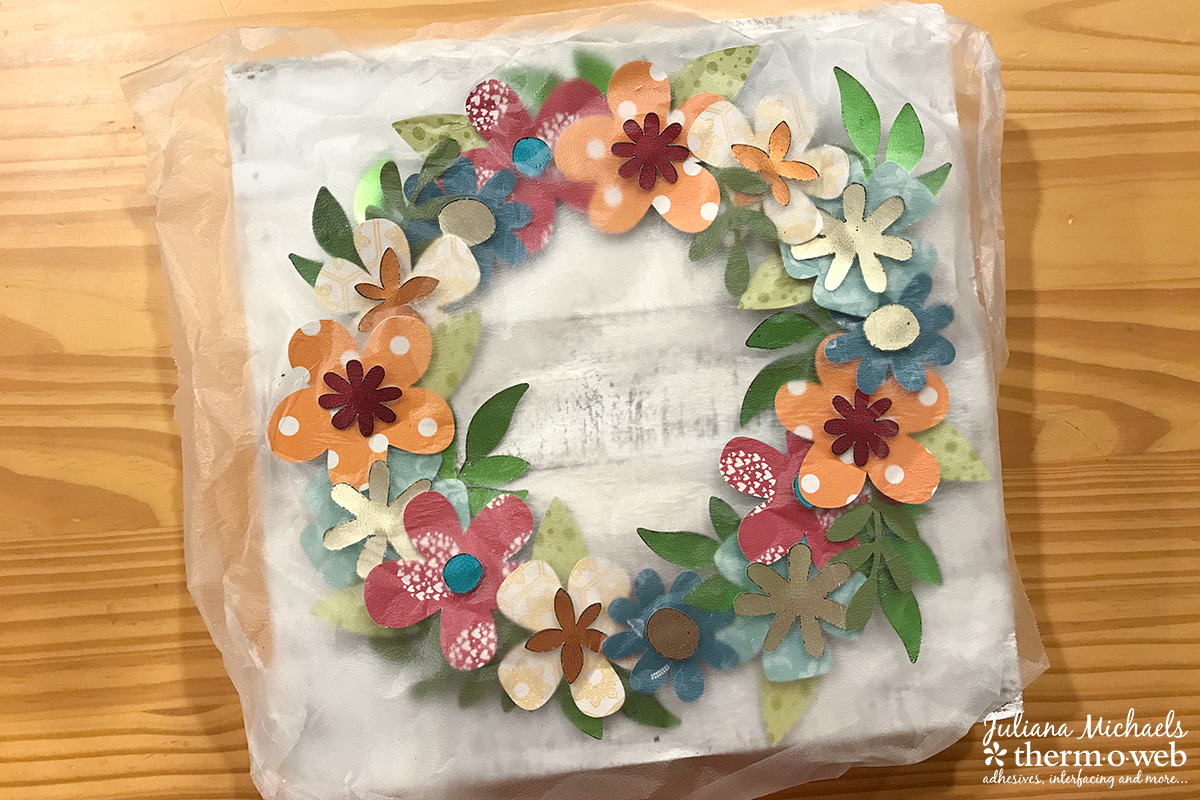
Begin by laying out the design on top of a wood plank or other desired surface. Use 3D Foam Squares to pop up the centers on all of the flowers. Once you have your wreath laid out, place a piece of Press N Seal on top of the design. Press down until all of the shapes are stuck to the Press N Seal. Gently lift the design up from the surface. The Press N Seal helps hold everything in place so you can add adhesive to the backside without messing up your design. Flip this piece over so you can see the back side of the die cuts. Continue to add 3D Foam Squares to pop up the flowers. Run a Memory Tape Runner XL over the shapes to apply adhesive to them.
Once you have adhesive applied to each piece, lift up the wreath, flip it over and place it on top of the wood plank. Press down on each piece to help adhere it to the surface.
You have now created your very own Deco Foil Spring Wreath! You are now officially ready to welcome Spring into your home!
Sharon Gullikson
March 14, 2018 at 10:24 am (6 years ago)Really cute. This wreath makes me happy.
Sue D
March 14, 2018 at 3:22 pm (6 years ago)Very pretty wreath card. thanks for the download.
Ivory
April 14, 2018 at 11:29 am (6 years ago)Extremely fabulou