


Take Your Kid to Work Day Scrapbook Layout
by Jessica Michaels
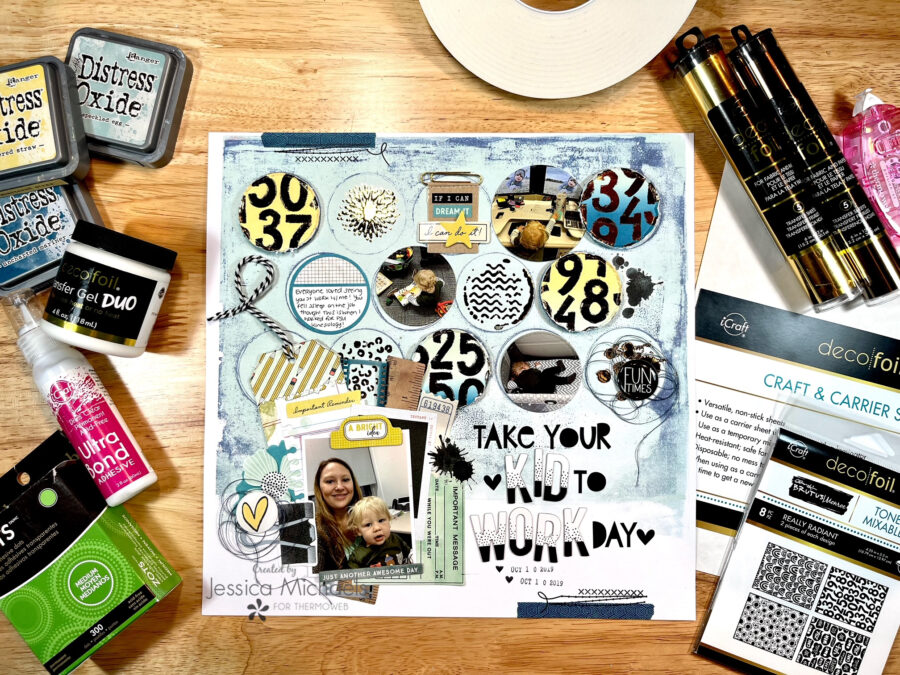
Hello everyone! Jessica here with a layout featuring Deco Foils and Duo Transfer Gel to document some photos of my son and I when I took him to work with me for a day! Everyone at my work just loved him and he was so good most of the visitors to my office didn’t even know he was there until they saw him! He wasn’t a very good financial helper though, he fell asleep on the job!
Therm O Web Supplies Used
Memory Runner XL
Memory Runner XL Refill
UltraBond Liquid Adhesive, 2fl oz
Easy Tear Tape ½”
Jumbo Tape Roll 1/8″
Deco Foil Transfer Sheets, Bronze
Deco Foil Transfer Sheets, Gold
Deco Foil Transfer Gel Duo
Craft & Carrier Sheets
Brutus Monroe Toner Card Front Mixables, Really Radiant
Zots, Medium
Other Supplies Used
Vicki Boutin Print Shop collection
The Crafters Workshop stencil
Elle’s Studio Tag Dies
Distress Oxides in Speckled Egg, Uncharted Mariner, and Scattered Straw
Point Planner Rotary Phrase Roller Date Stamp
Hot Laminator
Manual Die cutting machine
Stitched Circle nesting dies, Echo Park
Epoxy Flair from Scrappin Happy Studio
Bella Florence Alphas and some white/black ones from my stash
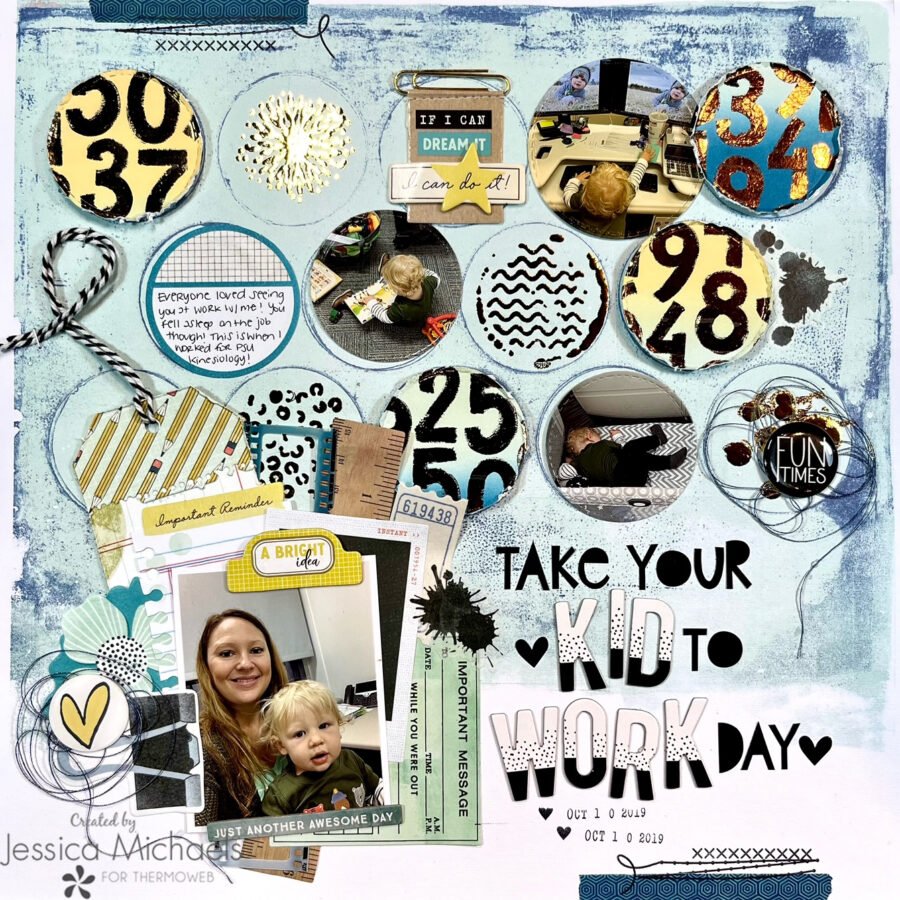
I started this layout by pulling out a pre-made mixed media background by Vicki Boutin. I loved the circular design and decided that was going to shape my layout for this one! I reached for a stencil by the Crafter’s Workshop and did some stenciling inside some of the circles with the Deco Foil Duo Gel and a spatula. You can tape the stencil down using some Pixie Tape if you’d like, but I didn’t for this one since it was such a small area. I then set this aside for the recommended drying time, about 45 minutes.
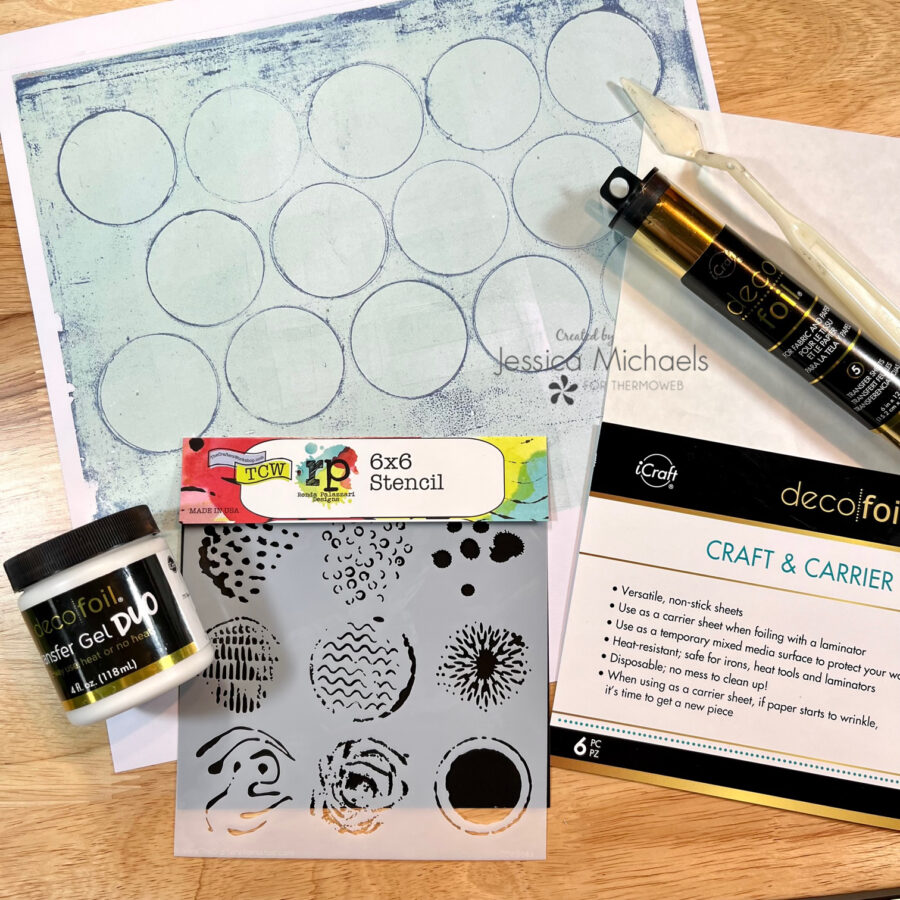
After it was dry, I applied some Deco Foil in gold over where my stenciling was and sandwiched between a craft and carrier sheet to run through my hot laminator. When it came out, all I had to do was peel of the remaining foil and I was left with foiled stenciled bits!
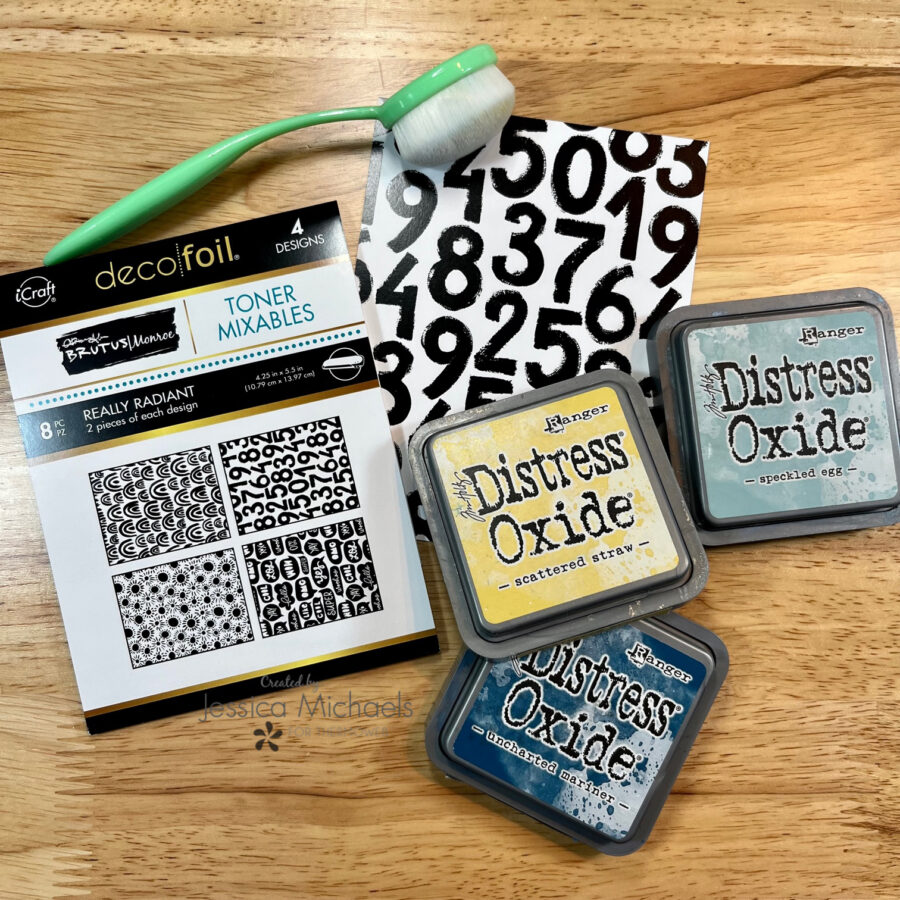
I then went to work on my toner card fronts by Brutus Monroe and blended on some distress inks in an ombre effect, then foiled with Bronze deco foil using my hot laminator again. Once this came out, I die cut some circle shapes using my manual die cutting machine and some circle dies. I then distressed the edges and placed them on my layout, popping them up with some of the 3D foam tape on the jumbo roll. I like the 1/8″ size thickness.
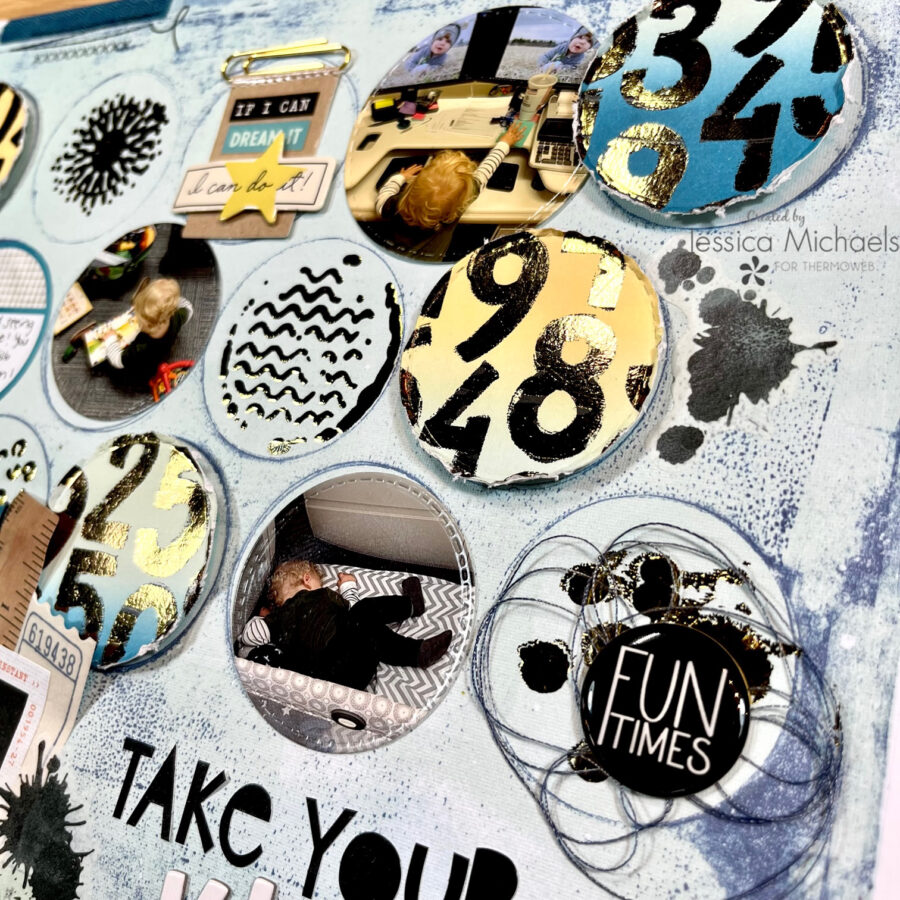
I did a bit of thread twiddling behind some epoxy flair buttons from Scrappin’ Happy Studio and adhered to my layout with some of the medium zots. I find they work best and stick really well! I used my Memory XL Tape Runner to glue down my photos inside some of the circles as well, which I also die cut using my circle dies. Look at my little cutie hard at work with me!
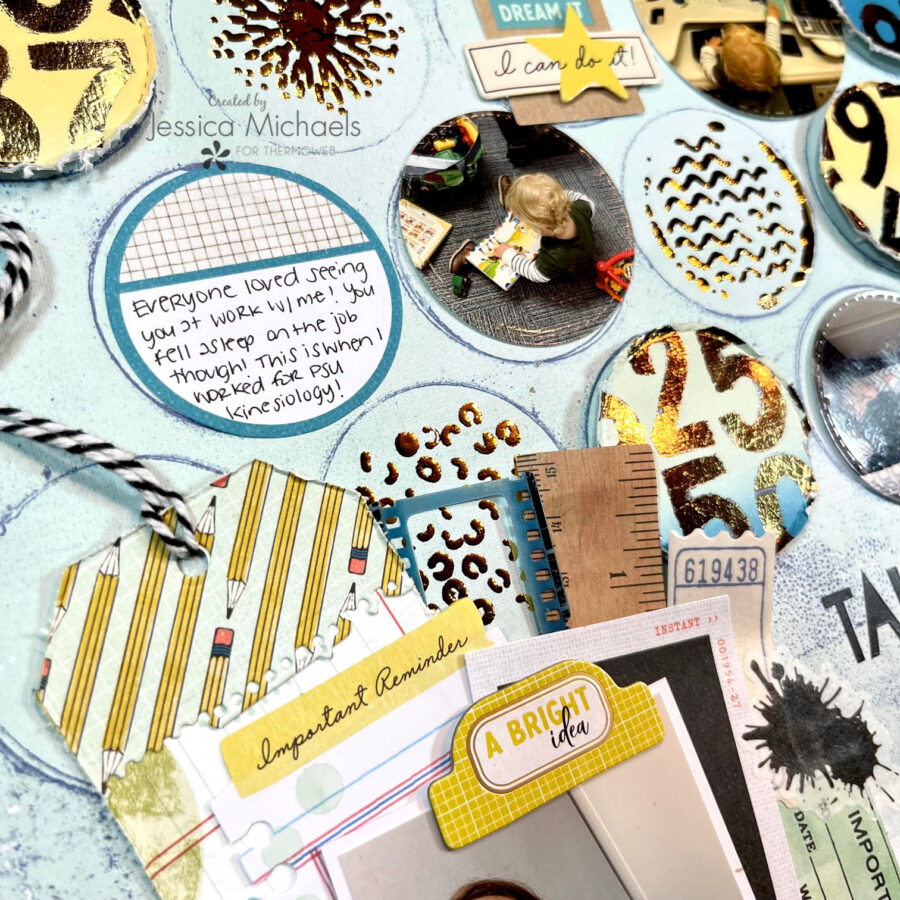
I did a bit of journaling inside an embellishment from the Print Shop Collection by Vicki Boutin and added more embellishments, including a whole bunch behind and around my photo to add lots of layers. I adhered the layers together with some easy tear tape! I cut the tag from an Elle’s Studio tag die and attached some bakers twine to it.
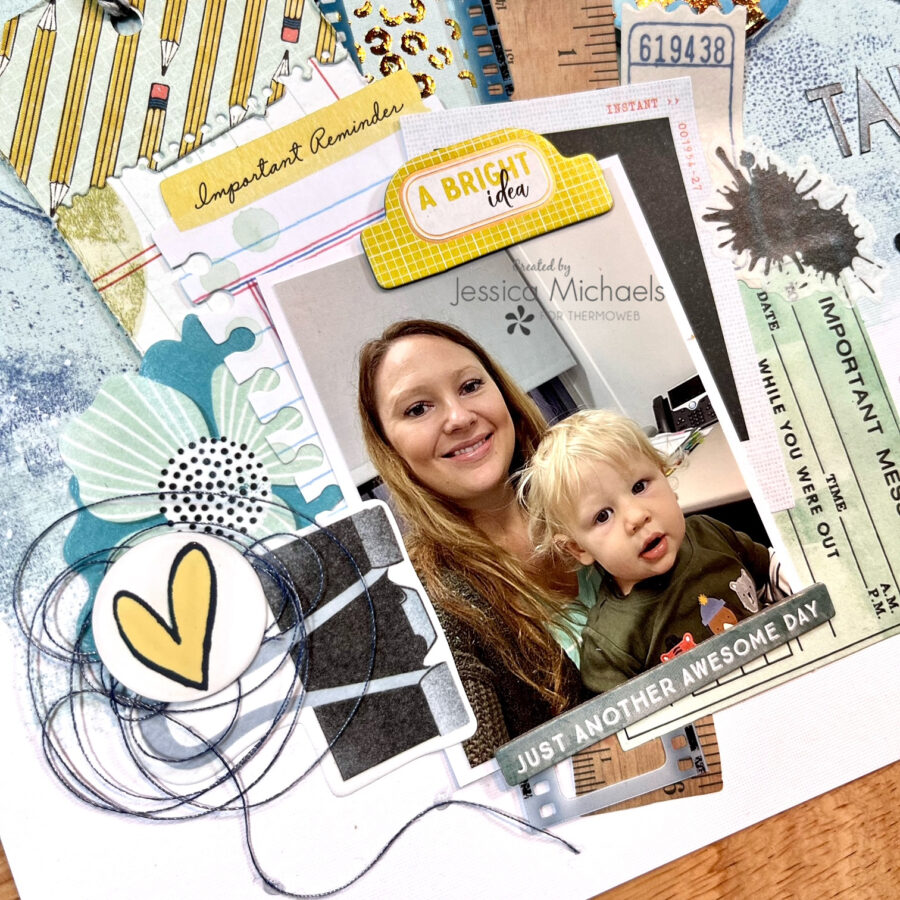
I added another epoxy flair button and glued down some of the chipboard embellishments with the UltraBond Liquid Adhesive. It works great for things like this! I also added little dabs of that glue to my thread to hold the end in place! It dries clear which is great.
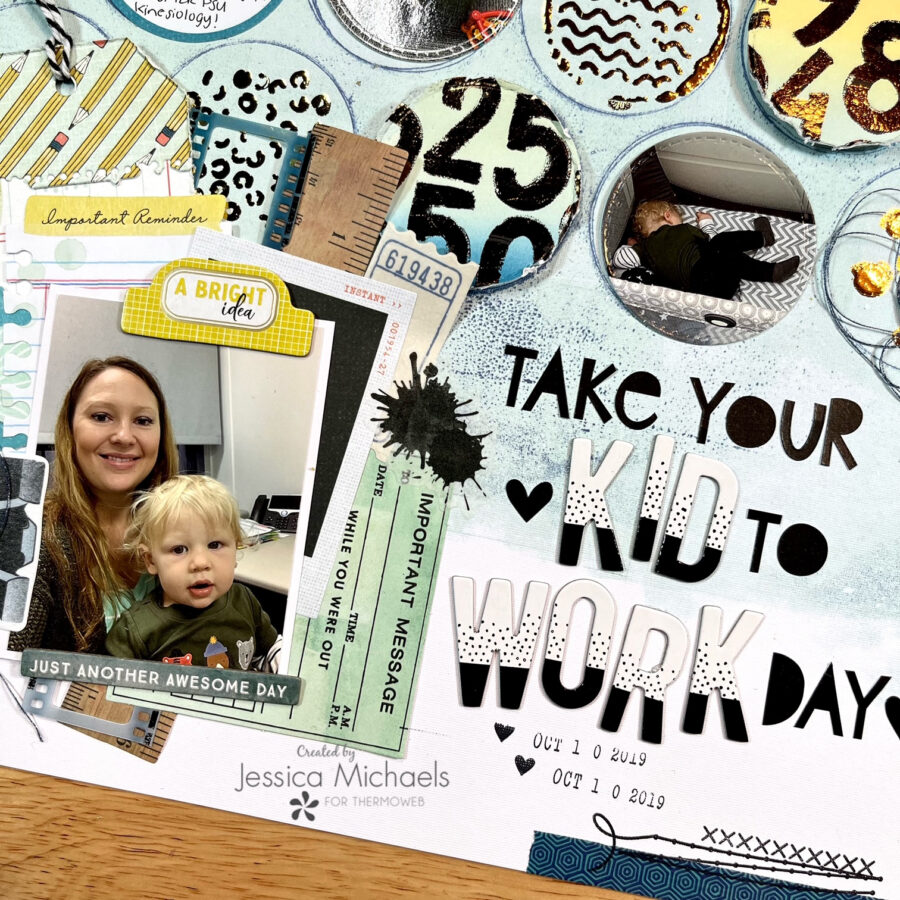
I added my title using some Bella Florence alphas and some from my stash- I’m thinking they may have been from an older Hip Kit Club Kit perhaps? I then finished it off with some stamped stitches using a stamp set by Elle’s Studio, my date stamp and some Washi Tape!
Watch the An Apple a Day Process Video:
Thank you for being here today and I hope I was able to inspire you to create!
Jessica
This post contains affiliate links. For more information, see our disclosure HERE.