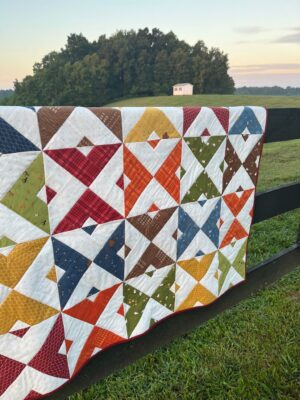
Hello friends! Why is that these months go by so fast!!! I’m excited to be here again to share a sweet little quilt I made for a precious little farm boy! When I received this adorable bundle of fabric called Country Life designed by Jennifer Long, I knew exactly what I would use it for and it made such a fun quilt!
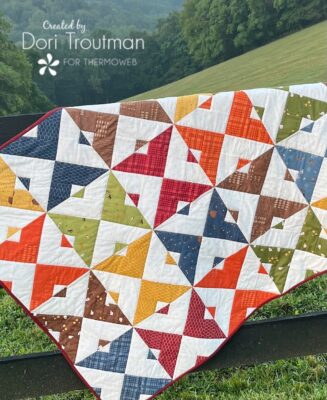
Here’s a secret about me as a quilter. I love simple patchwork. I would be happy if the only quilts I ever made were all kinds of variations of patchwork! I’m not one to follow a pattern or get too excited about quilts with complicated blocks. But I had seen a pattern by Lella Boutique called Double Dutch and I just really loved the looks of it. I purchased the pattern and WOW.. this was the easiest pattern… and it actually looks like it wasn’t! The best kind right?
Since the pattern is one you’ll need to purchase I can’t share that with you; but I thought I would share some of my tips on making a simple quilt that will give you beautiful results.
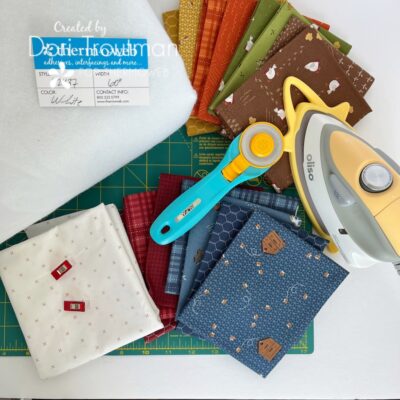
Quilt Supplies
- Fat quarter bundle of fabric of choice
- Low volume fabric for quilt top
- Low volume fabric for quilt backing
- Contrast fabric for binding
- StitchnSew High Loft Sew-In Fleece
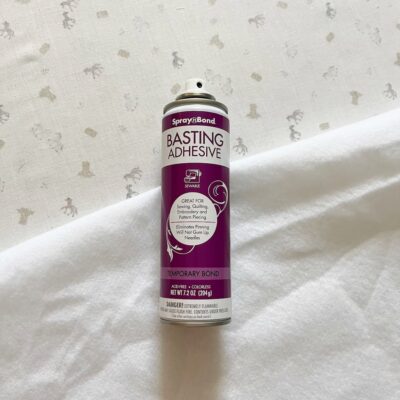
- SpraynBond Basting Adhesive Spray
- Iron
- Cutting Mat, Rotary Cutter and Ruler
- Pins or Clips
- Double Dutch Quilt Pattern
- PeelnStick Removable Ruler Tape
Instructions and Tips
Step One: Print pattern and read the instructions thoroughly. This pattern is really fun because it looks tricky, but is SO EASY!!!
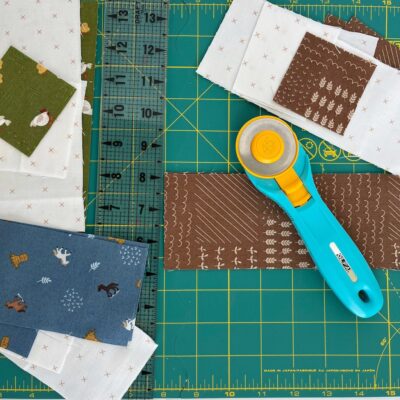
Step Two: After reading the instructions and understanding the way each block goes together it will help you determine what fabrics to use and where the low volume will go. Begin the process of cutting all your fabrics.
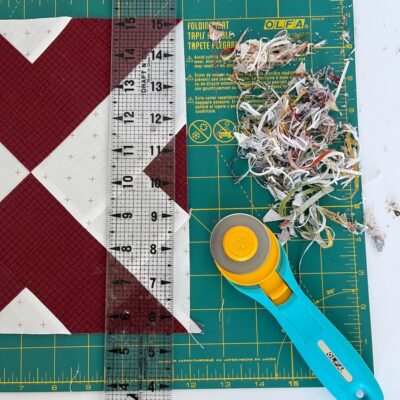
TIP: Make sure your rotary cutter has a nice fresh blade; trust me, this makes a huge difference!
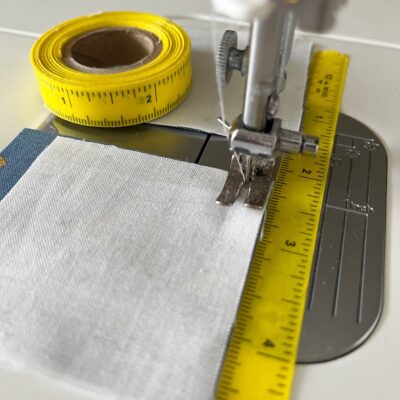
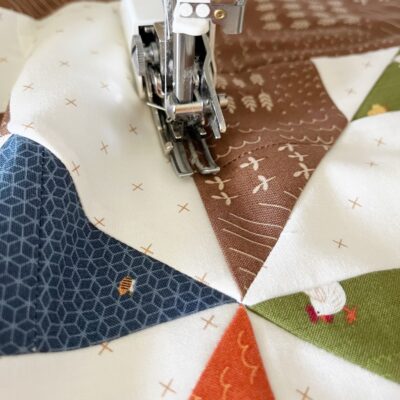
Step Three: Before you begin sewing, confirm that your pressure foot is a 1/4 inch foot. You want your seams to be exactly a 1/4 inch. My foot is off just enough that it can be super frustrating when blocks don’t come out exactly as they should. Even a tiny discrepancy makes a big difference.
TIP: Use PeelnStick Removable Tape to mark an exact 1/4 inch line on your sewing machine. It works like a charm! You literally line your fabric up right next to the tape and you will have a perfect seam allowance every time!
Step Four: Follow all the instructions to sew your first block.
TIP: Always, always press your seams! You cannot believe the difference this makes in the final assembly of your blocks and then your quilt top!
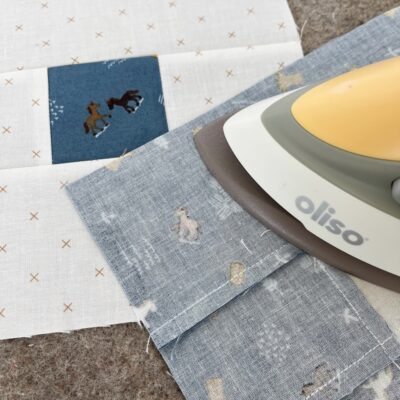
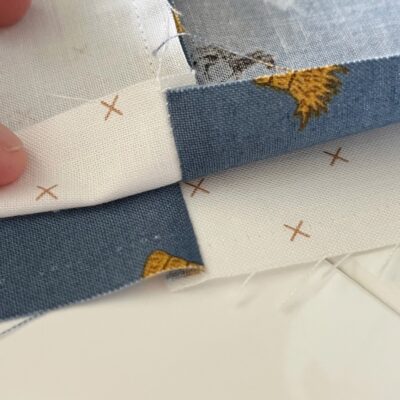
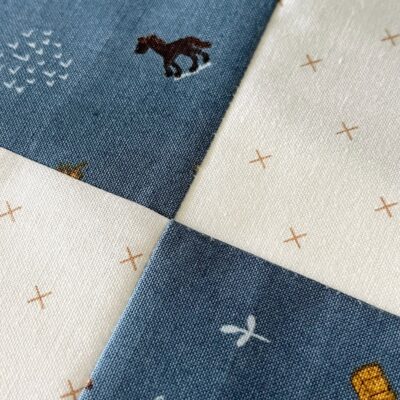
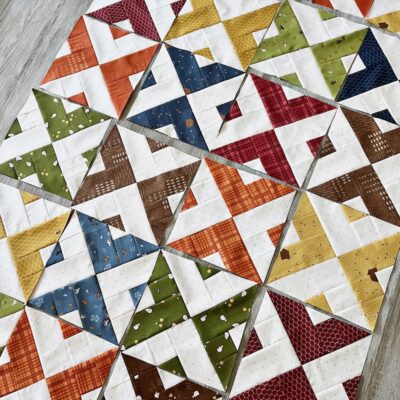
Step Five: Making these adorable blocks requires sewing (and pressing) one way, and then cutting in half and sewing together one more way and that creates a super fun block! (This will obviously make sense to you if you’re following the pattern.).
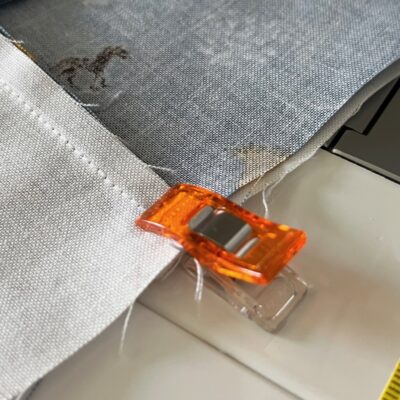
TIP: When sewing the two pieces together, you will be matching a center seam. If you have carefully pressed your seams, they will sandwich together nicely… one seam going one direction and the other seam going the opposite direction. This is called “nesting the seams”. You can see this in the picture below.
I then use a clip right at the nested seams to hold it in place while I sew those two pieces together.
If you’ve followed that tip, you will end up with a perfect match of the points!
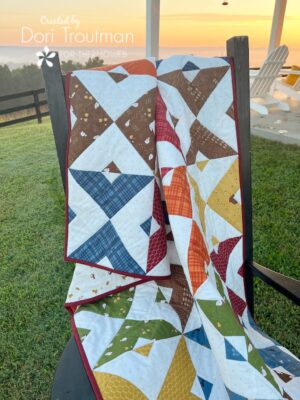
Step Six: Continue making all your blocks until you have the desired amount for your quilt. I made 20 for my baby quilt.
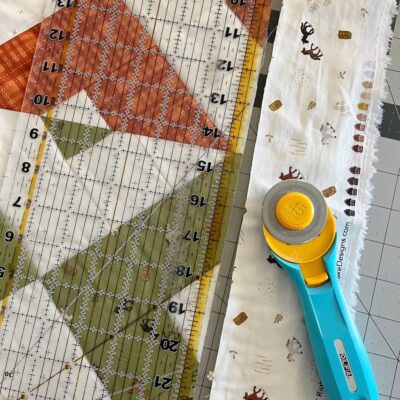
TIP: As you finish each block, press it carefully and then using your rotary cutter and ruler, carefully cut the four sides of each block so they are perfectly square. You will only be removing the tiniest sliver of fabric and sometimes only the little notches on the ends. This makes them sew together perfectly in the final quilt top.
Step Seven: Lay your blocks on the floor (or a design wall if you’re lucky enough to have one). Keep rearranging them until you get them exactly the way you want.
TIP: Take a photo with your phone once you’ve got them arranged the way you want. This way, you won’t get confused on where they go when you begin to sew them into rows! You can always refer back to your picture.
Step Eight: Once you have your quilt top completely sewn together, press all your seams until is is nice and flat. Set aside for now. Cut your backing fabric approximately 4 inches larger than the quilt top (on all sides). Press the backing fabric until it is perfectly smooth. Cut the StitchnSew Fleece approximately 3 inches larger than the quilt top (on all sides).
TIP: Following the tip to nest your seams works wonders in sewing blocks together and then rows together, being sure to press consistently. I know that I am a little OCD about pressing when I am sewing a quilt top. I keep my iron and pad right next to my machine and it makes it very simple. It really does make a huge difference! Don’t skip it!
Step Nine: Now for the fun part! Everyone has their ways of making the “quilt sandwich” and this is my way. I lay the backing fabric to my floor, wrong side facing up. Use painters tape to tape all four edges to the floor. (This tape will not leave any residue on the floor and it removes easily. Check a tiny piece on your floor to confirm.) Spray the entire surface of the backing fabric with SpraynBond Basting Adhesive Spray, it doesn’t require a heavy coat; just a light spray will work! Lay your fleece carefully on top of the backing fabric and use your hands to smooth it in place. Repeat with the quilt top. This takes a little more time as you want to really smooth the quilt top.
TIP: When placing the quilt top on the fleece, I work in sections. I lay the quilt top on the fleece and fold it back half way and I spray the adhesive on the back of that half of the quilt top and smooth is carefully to the fleece. Then I switch to the other half and repeat. This usually works very well for me. The great thing about the Basting Adhesive is that you can easily remove any parts of your quilt that have a pucker or need readjusted. You have plenty of time to work with it.
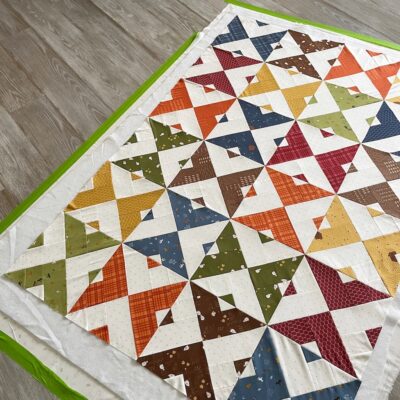
Step Ten: Pull the painters tape off the floor and the quilt backing. I usually look my quilt over for a day or so before I start quilting it… because I don’t always know exactly how I want to quilt it! I love hand quilting and honestly most of my quilts are hand quilted. But since this quilt is for a little boy I knew that machine quilting it was the the best option. Once I decided where I wanted the quilting lines to go, it was a simple process of just straight quilting.
TIP: Use a walking foot if your sewing machine comes with one. It makes a huge difference in the machine quilting. I also quilt with a longer stitch length. Take your time and just slowly quilt it. I recently read where a quilter said, there’s a reason it’s called a “walking foot”… that means just take it slow, steady… it’s not a “running foot”! Ha Ha! So I usually set my machine to medium speed and just take my time.
Step Eleven: Once your quilting is complete, use a rotary cutter and carefully cut all four edges; removing the extra backing and fleece.
TIP: Use a long ruler if you have one! And once again, a sharp blade in your rotary cutter makes all the difference. You will not be cutting into the quilt top… just line your ruler right to the edge and cut only the backing and fleece batting.
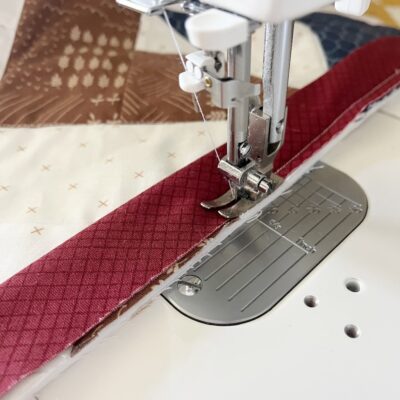
Step Twelve: Cut your quilt binding and machine sew it to the front of the quilt. Once the binding is sewn on the right side of the quilt, carefully turn it and press it to the back of the quilt. Use clips to hold it in place. I prefer to sew final binding stitch on the back of the quilt by hand. It gives it such a nice finish. This is a personal preference for me, however.
TIP: When choosing a binding fabric, I prefer something that will create a nice contrast to both the front of the quilt and the back.
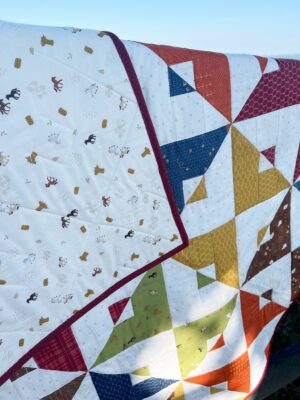
And just like that, your quilt is FINISHED!!! I love how cheerful this little Farmboy Quilt came out. The fabric is precious and the colors are amazing.
Final TIP: Follow all my tips for sewing any quilt… not just this pattern. Even the simplest patchwork pattern comes out nicer with consistent cutting, sewing and pressing!
It’s such an exciting time of year for me because I always look forward to making a winter quilt! And I’m already making plans for the quilt I’ll be making this winter… and guess what? I’m taking you along on the journey! Look for it in December.
Happy sewing my friends!