


When Riley Blake and Thermoweb meet up, you know there is fun to be had!
Welcome to “Scaredy Cats Gone Wonky”! A quick and easy project, using Thermoweb’s StitchnSew EZ-Print Quilt Block Sheets.
Start by downloading the free Scaredy Cats Gone Wonky Pattern
Scaredy Cats Gone Wonky Quilt Supplies
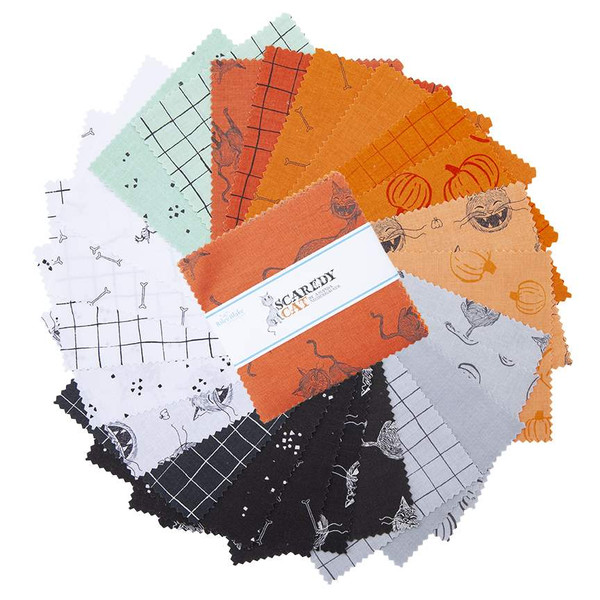
***Riley Blake Scaredy Cat Fabrics***
½ yd Grid – Mint Green
½ yd Grid – Dark Orange
½ yd Grid – Gray
2 yds – Bones White
1 ½ yd – Scaredy Cat Heads Charcoal
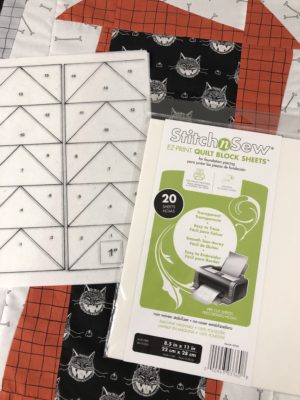
1 package of “Stitch n Sew” EZ-Print Quilt Block Sheets by Thermoweb
Basic sewing supplies, including matching thread
Additional fabric for the backing
Wonky Blocks – Cutting Direction
Cut 1 Strip “Scaredy Cat Head Charcoal” 18” by WOF
Subcut into 3 – 7” wide pieces. Save remaining for
outer Flying Geese border
From each of the 3 grid fabrics, cut 1 – 4” strips WOF
Subcut into 1 – 4” x 18 ½” rectangle and 1 – 4” x 7 ½” rectangle, 2 – 4” squares
From Bones White fabric
cut 3- 4” strips
Subcut those into 3 – 4” x 18 ½” rectangles, 3 – 4” x 7 ½” rectangles,
and 6 – 4” squares
Cut 1 – 12 ½” strip
Subcut into 3 – 13” x 12 ½” pieces’
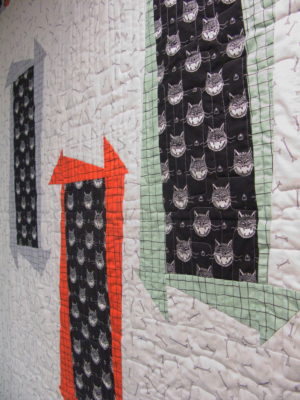
Wonky Block Assembly – Make 3
Stack 1 – 4” white and 4” grid rectangle piece both right sides up.
***This is very important***
Using the lines on your mat, as shown below
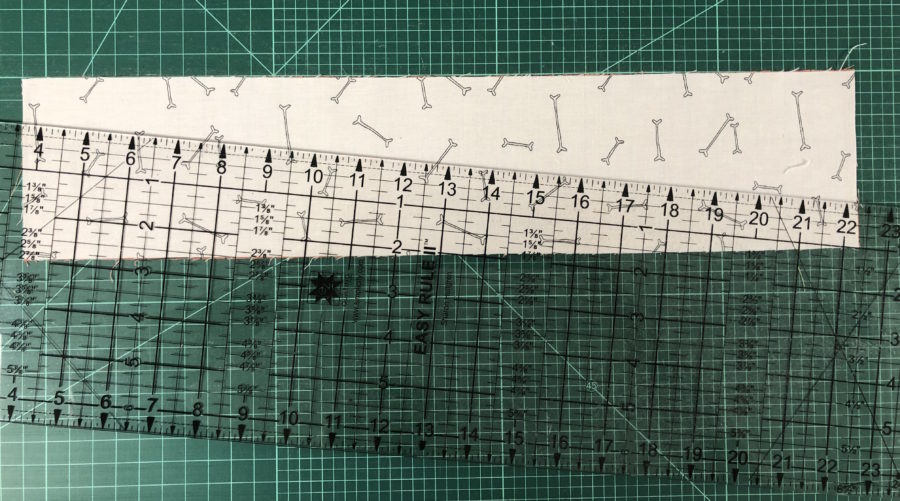
Lay a ruler 1” down on the left side and 1” up on the right side. Carefully cut on this angle.
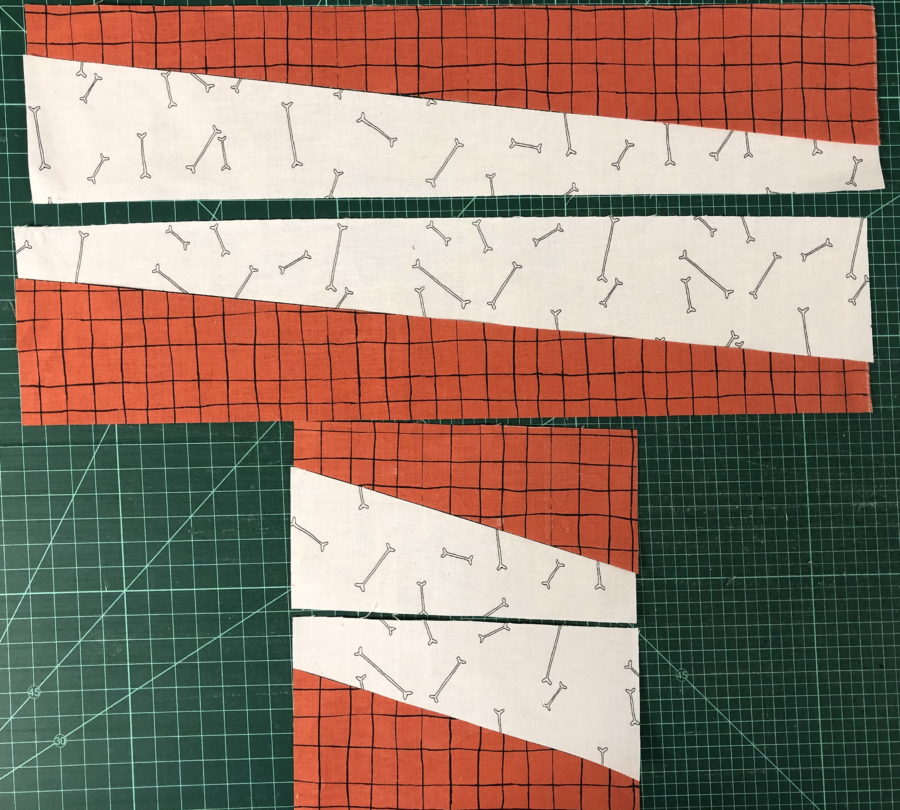
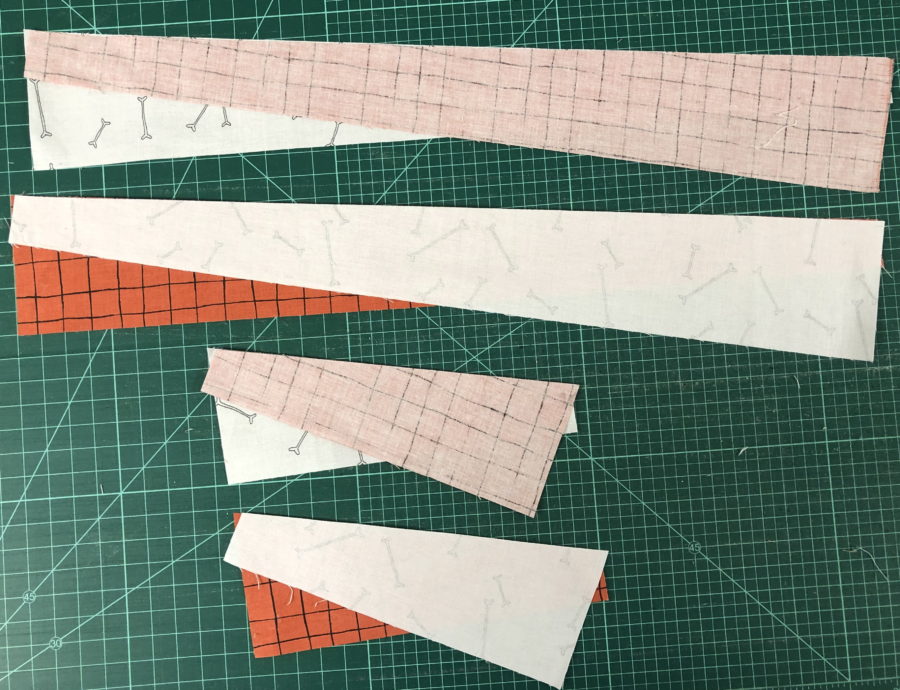
Separate strips and rotate top strip to bottom, keeping angle cut edges together.
Place right sides together, stitch using scant 1/4” seam. Open and press.
This will create both sides and the top and bottom of the block.
Make rails for all 3 wonky blocks.
Trim top and bottom rails to 7” wide. Trim side rails to 18” long.
Corner half-square triangles
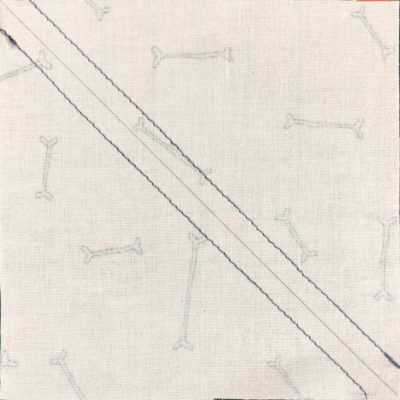
Take 4” squares, draw a line from corner to corner on all white fabric squares. Laying them right sides together with grid fabrics, stitch a scant ¼” on both sides of the drawn line. Cut on drawn center line, press open and trim to 3 ½” square. This creates the half-square triangles in the corners of each wonky block.
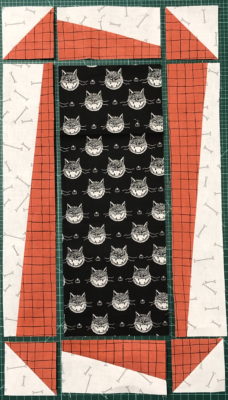
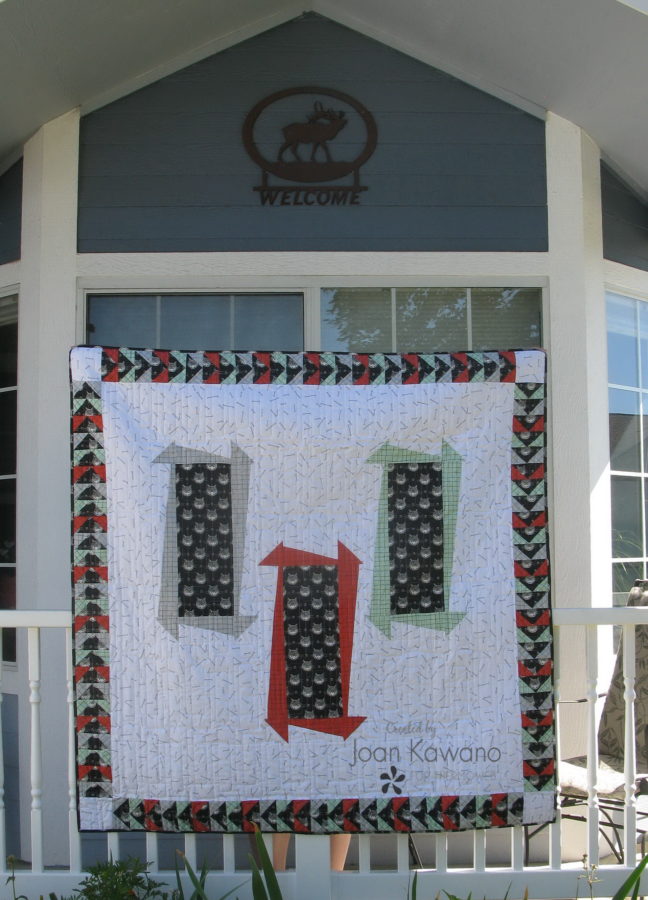
Using the photo above, complete 3 wonky blocks.
Stitch 1, 12 ½” x 13” piece of White Bone fabric to the top of one
wonky block and the bottom of the other 2 wonky blocks. Press open.
Stitch the 3 blocks together.
The unfinished size of this center should be 36” long x 38” wide.
Set aside for now.
Flying Geese Border
I love paper piecing flying geese blocks. The accuracy can’t be beaten. Combined with “Stitch n Sew” EZ-Print Quilt Block Sheets” that is easy to tear away, it makes them a breeze.
If you have never tried it, check out this great video.
https://www.youtube.com/watch?v=d3Uy5w5yOZM
Check the accuracy of the flying geese template by measuring the 1” block on your pattern page.
Print 10 copies of flying geese templates onto Stitch n Sew” EZ-Print Quilt Block Sheets
Cut out templates from the EZ-Print Sheets.
IMPORTANT…
You will need to add ¼” to all sides of the templates as you stitch your fabrics.
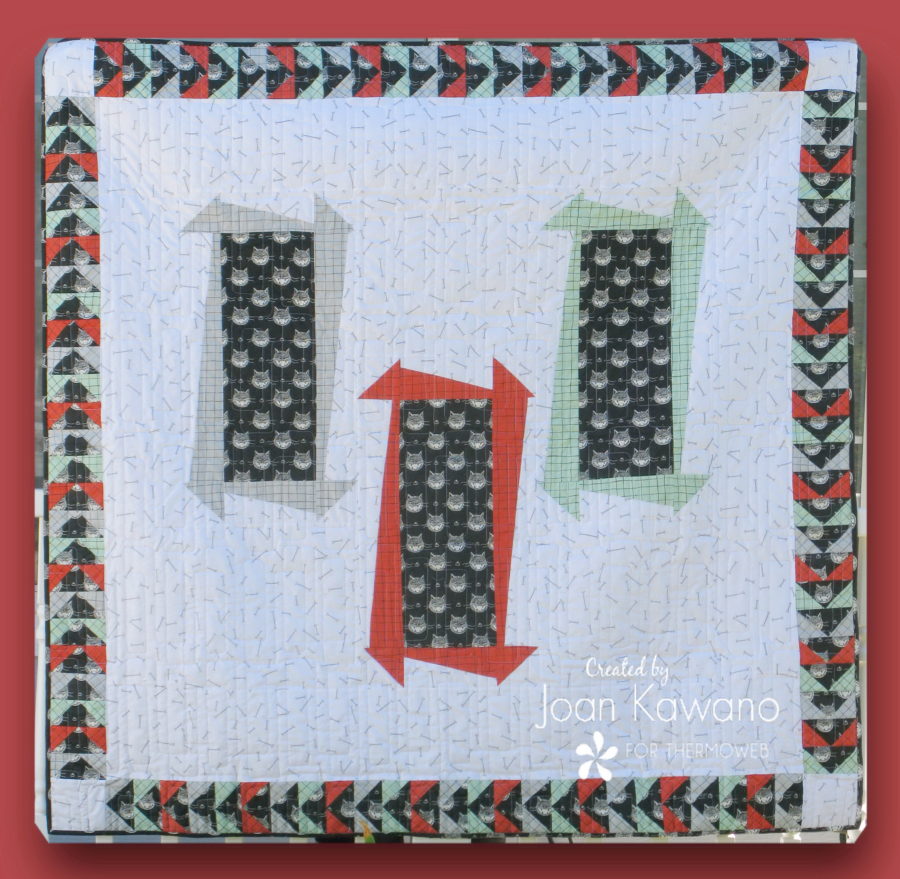
Make 4 sets of 5 templates for each, rotating your colors as shown on the cover photo.
Stitch your 5 templates together using ¼” seam. They should measure 4 ½” x 50 ½” each. Set aside.
Top, Bottom, and Side Sashing
(Cut a bit over-sized and trimmed down)
Cut 2, 7 1/2” x 38” pieces of white bone fabric, stitching one to the top and one to the bottom.
Cut 2, 6 1/2” x 50 ½” long strips of white bone fabric. You will need to piece it, to get the length you need.
Stitch to the sides of the centerpiece.
Trim to 50 ½” x 50 ½” square. Taking a little off each side, if necessary.
Don’t Panic!
The beauty of this quilt is that you can adjust your measurements as needed. Start by measuring your 4, flying geese strips. Make your top, bottom, and side sashing a little larger or smaller, to match your flying geese strip measurements. Cutting a little larger and cutting down, as needed will save you a lot of headaches.
Using the cover photo, layout the flying geese strips as shown. Stitch the side pieces to the center block.
Cut 4 – 4 ½” blocks of white bone fabric for corner blocks. Attach them to both ends of remaining flying geese strips, and stitch to top and bottom. Carefully remove the EZ-Print template paper from the back of the quilt.
Cut 6, 2 ¼” strips of Charcoal Scaredy Cat Head fabric for binding
“Sew” don’t be a “Scaredy Cat”. You can rock this Halloween with your very own “Wonky” delight.
Til next time…Keep on Stitchin’
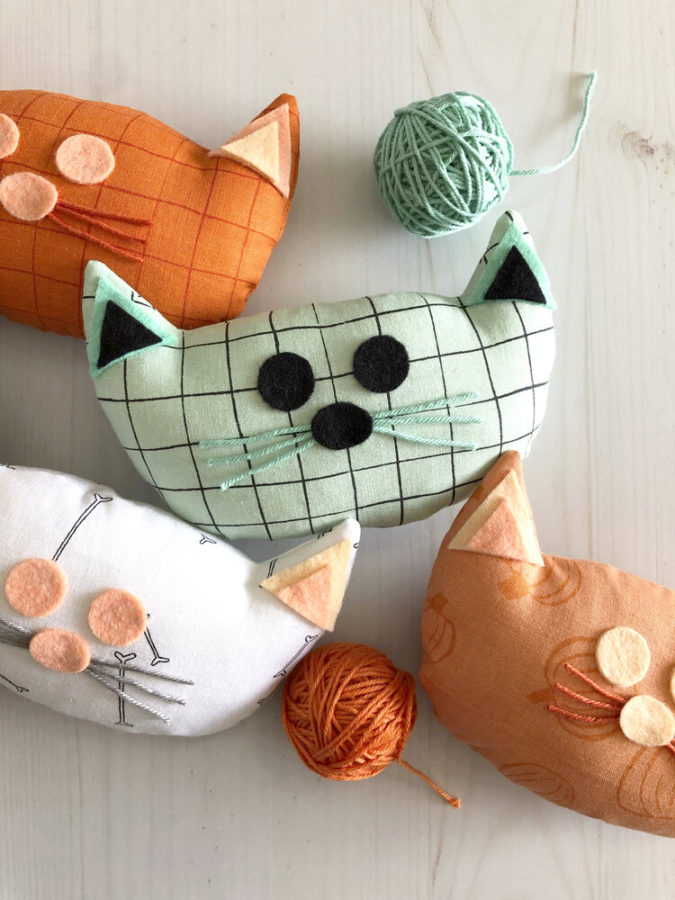
Love the Scaredy Cat Fabrics?!
Loving all the Scaredy Cat projects? Don’t miss these fun BobBon cat stuffies from The Tattooed Quilter! CLICK HERE for more information about them!
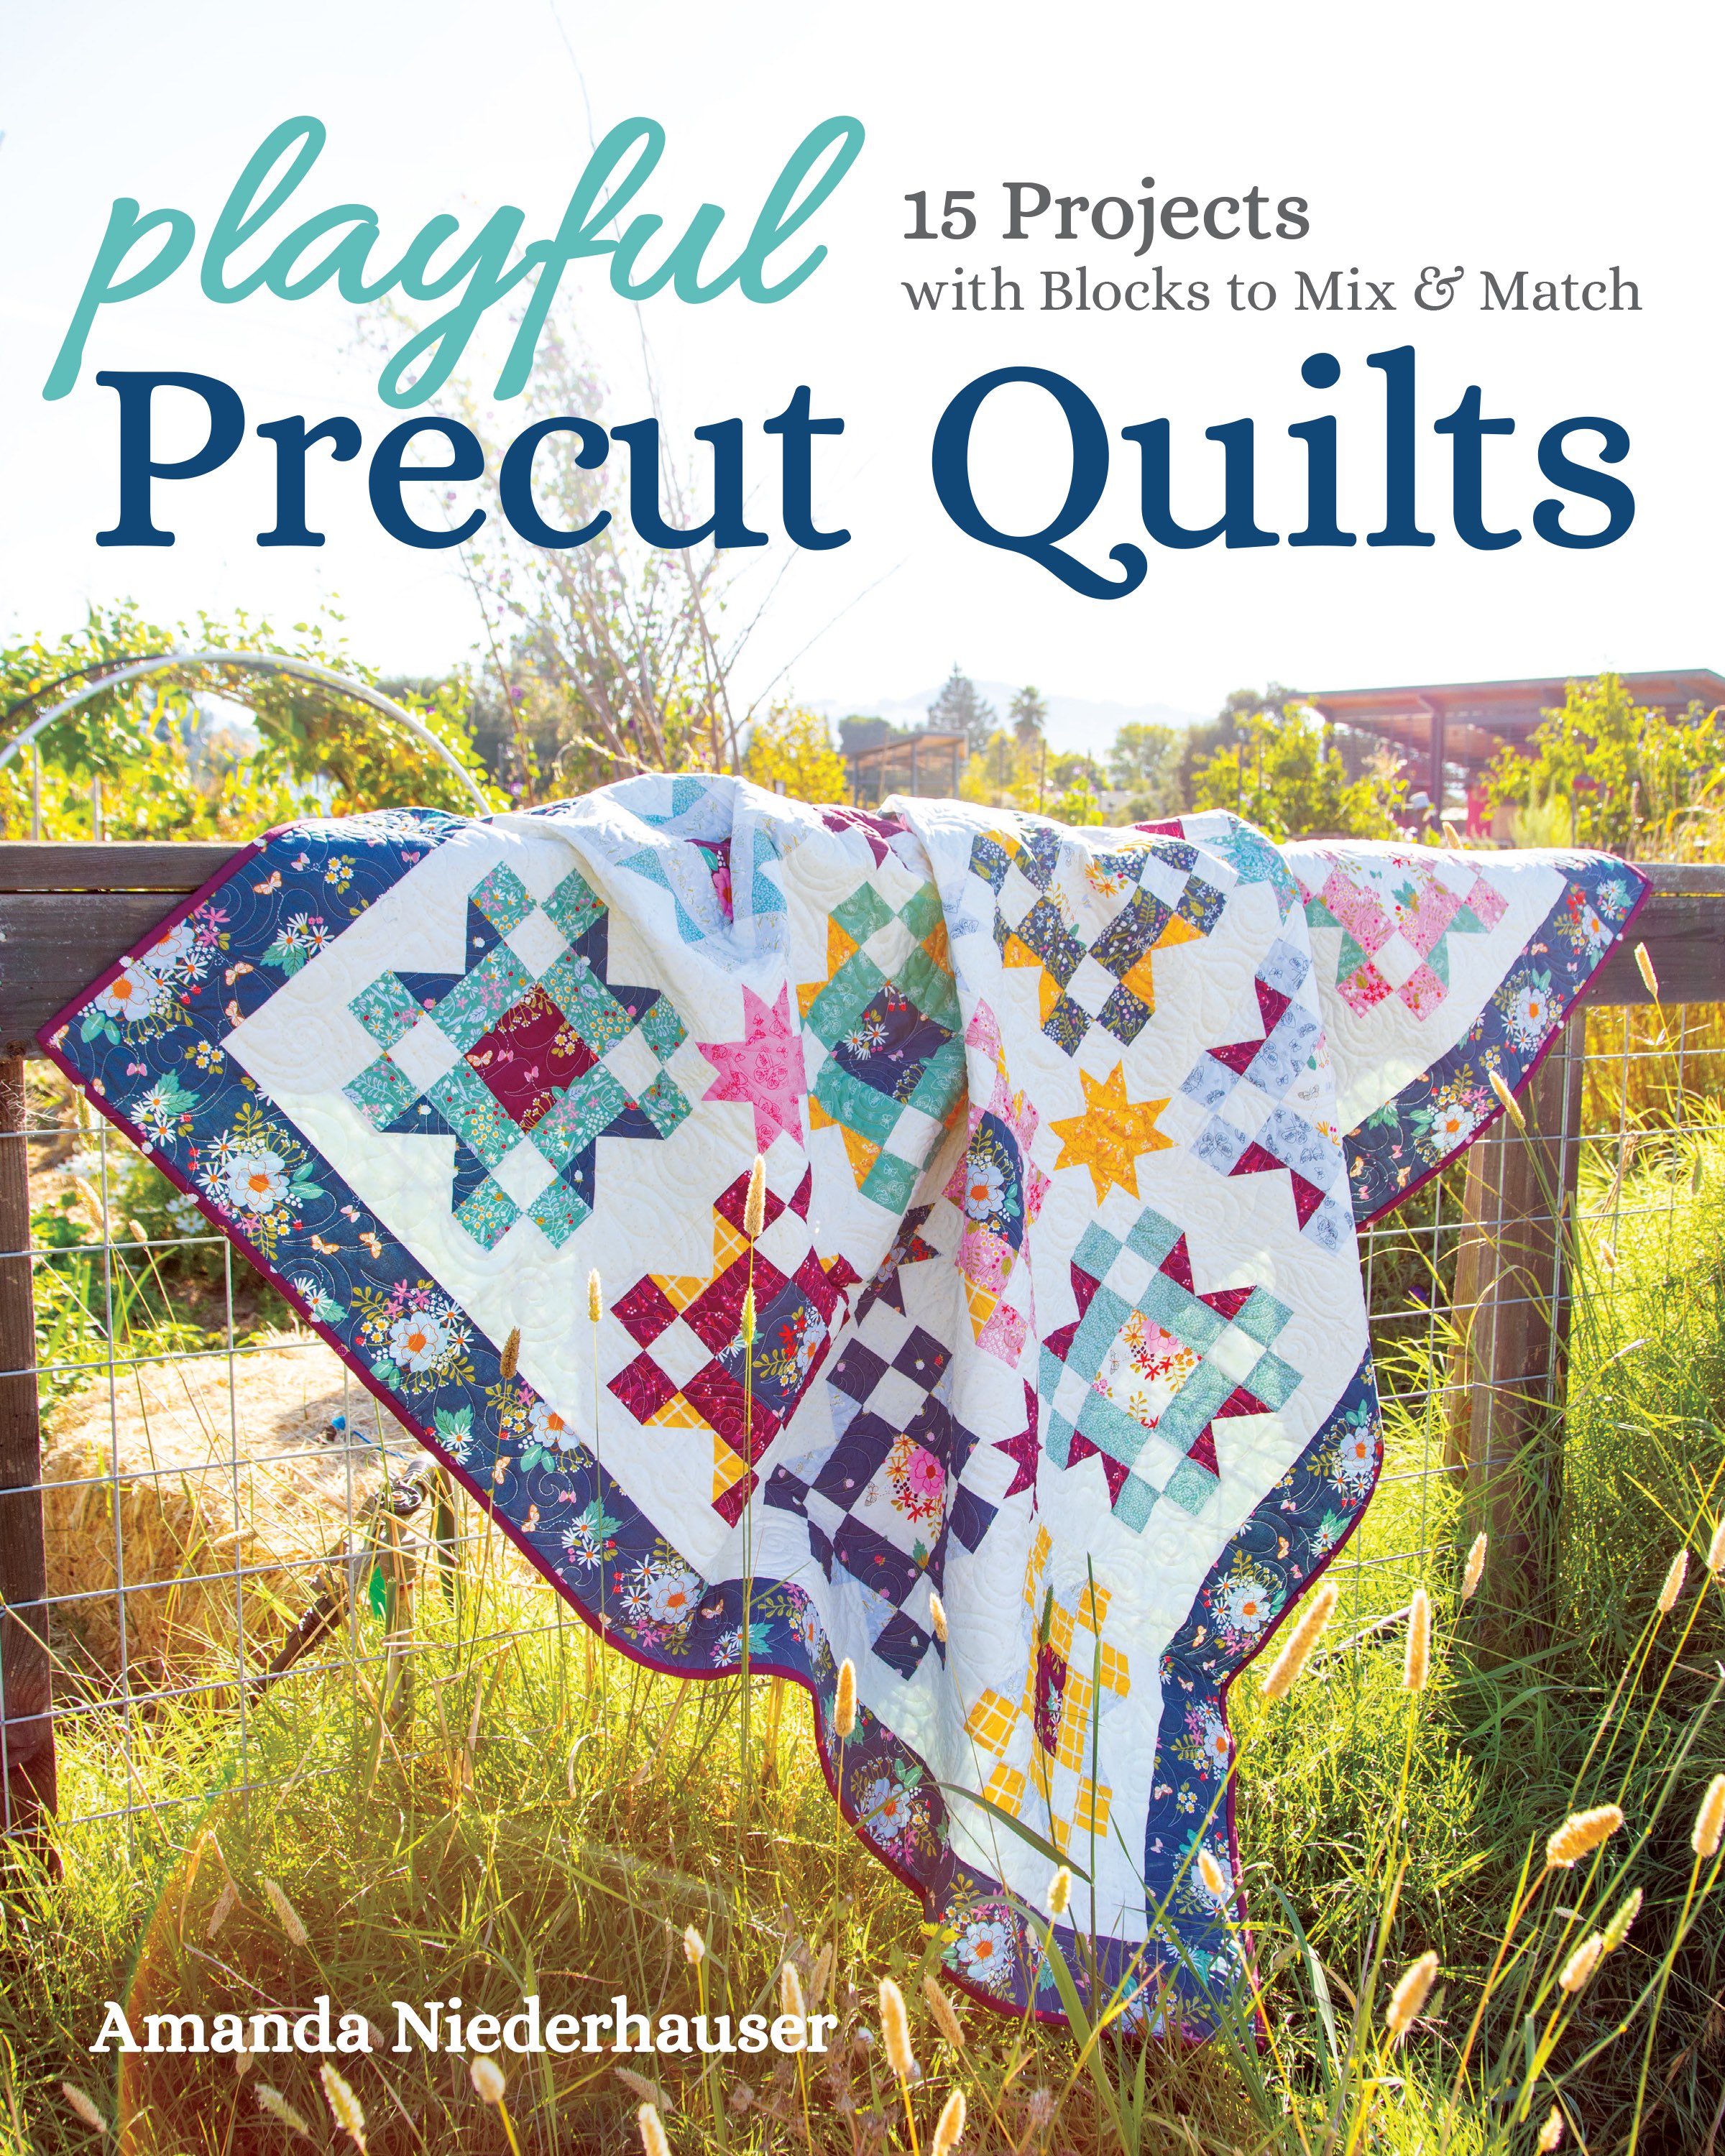
In celebration of this oh so fun fabric from Amanda Niederhauser and her NEW Quilt Book…we’re offering a giveaway for you. Like we said…all treats…no tricks!
Amanda is offering up a copy of her new book that is filled with beautiful quilt projects! And that’s not all…we’re including a $30 Shopping Spree (PLUS FREE SHIPPING) to a lucky winner to shop on our website. Pick up some of Amanda’s favorite so you can make these beautiful quilts!
This post contains affiliate links. For more information, see our disclosure HERE.