Hello friends! This is Jennifer Long from Sew A Story, a fabric designer with Riley Blake Designs and a doll and quilt pattern designer.

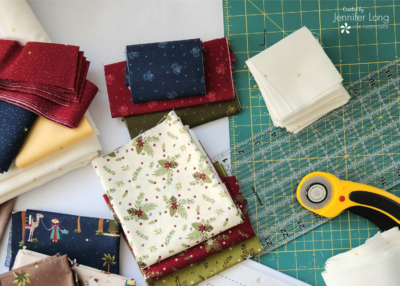
This Scandinavian Star project is no-sew, which makes it a fun and festive way to showcase your favorite fabrics. We’re using the Silent Night collection by Jennifer Long for Riley Blake Designs.
What You Need:
Tools
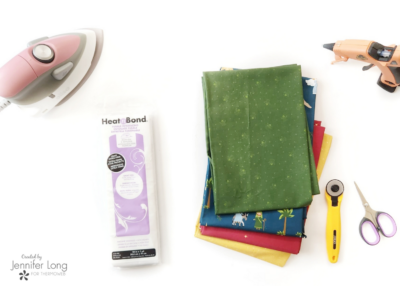
- Rotary Cutter
- Quilting Ruler
- Self-Healing Mat
- Iron and Wool Pressing Mat
- Scissors
Materials
-
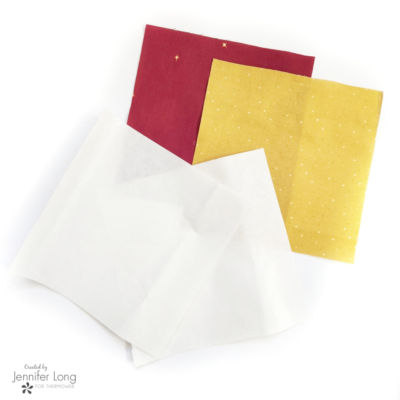
(2) 6 1/2″ x 6 1/2″ squares of EACH of (2) of your favorite cotton fabric prints to make (1) Scandinavian Star (we used some our favorites from the Silent Night collection)
- Embellishments
-
Fabric Glue or Hot Glue
Instructions:
1. Using Heat n Bond Craft Heavy Weight fusible interfacing, place the rough side of the Fusible Interfacing onto the back (wrong side) of material to be bonded. Cover with a lightweight, dry pressing cloth. Press and hold iron with medium pressure for 10-15 seconds. Repeat by lifting iron to a new area and pressing, slightly overlapping the previous area until the entire surface is bonded.
2. Cut (2) – 6 1/2″ x 6 1/2″ squares EACH of (2) contrasting fabrics. This is a total of (4) fabric squares. Remove the paper back from EACH of the squares and fuse (2) contrasting squares together with right sides out. Make (2) total. You will have a (2) firm, 2-tone fabric square.
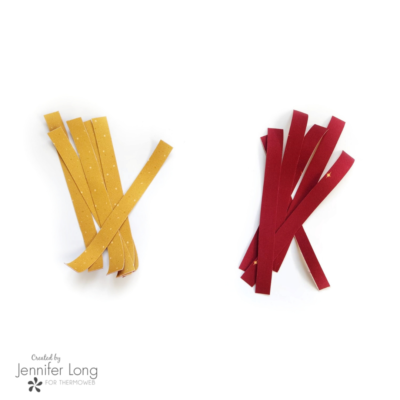
3. Using your ruler and rotary cutter, square off the prepared double-sided fabric square to 6″x6″. Sub-cut (6) 1″ x 6″ strips. Repeat with both squares of a total of (12) strips. Note: they are all the same 2-sided color strips, so you will need to separate them into (2) piles of 6-strips with each color flipped to the top as shown.
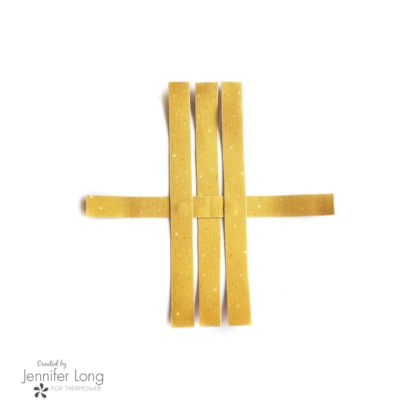
4. We will make (1) side of the Scandinavian Star first. Gather (2) strips and press each strip in half lengthwise to mark the center points. Open each strip and align the center points together to form a cross as shown. Make sure the same fabric color if facing on top. Glue in place.

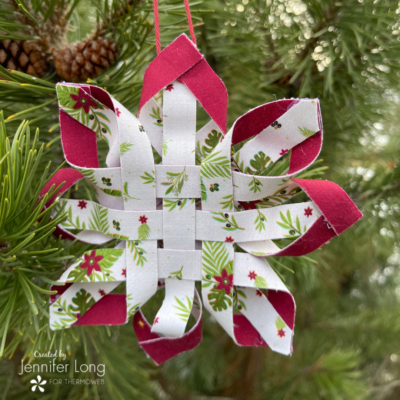
5. Next, gather (2) more strips and lay them on top vertically forming a “WEAVE” pattern as shown in the first image. Leave a 1/8″ spacing between fabric strips. Glue in place.
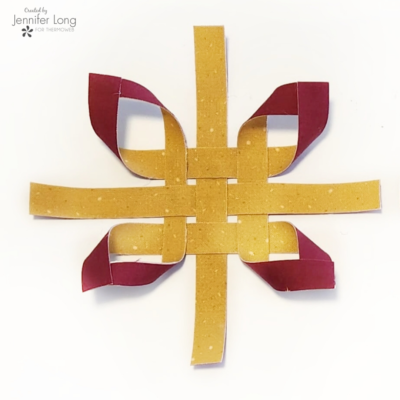
6. Gather the (2) final strips from your first colorway’s pile, and weave them through as shown in the second image. Tack all intersections down with glue.

7. Using EACH corner piece, flip the strip edges over each other to match the corners. This will reveal the secondary color. Glue in place. Repeat for ALL (4) corners as shown and set this first half-Scandinavian Star aside.
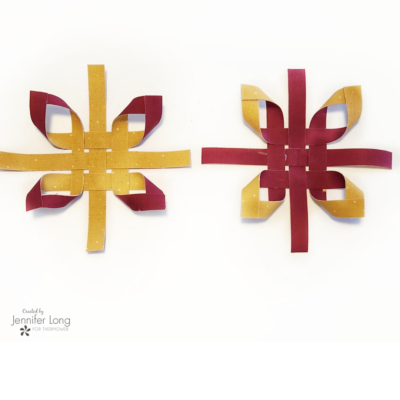
8. Repeat steps 1-7 to make a second Scandinavian Star. Ensure the second star has the reverse fabric color on top as shown.
9. You will have two Scandinavian Star halves in opposite colors as shown. Make sure the glue is dry before continuing on to the next step. Flip, rotate and lay the star centers together. The will nestle nicely and the looped star points will fit where the left-over straight strip is laying.
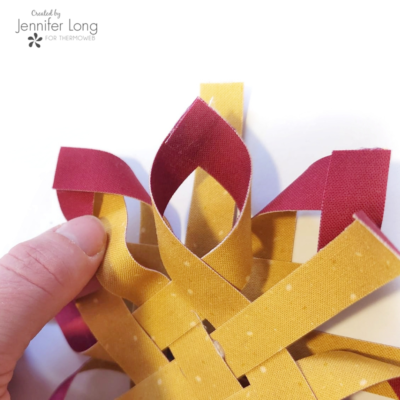
10. Gently weave EACH strip inside the facing star point loop as shown. There will be (4) strips on EACH side of the star to weave inside for a total of (8) woven strip ends. Work on a flat surface and flip your Scandinavian Star in BOTH directions to ensure each end is woven through as shown below.
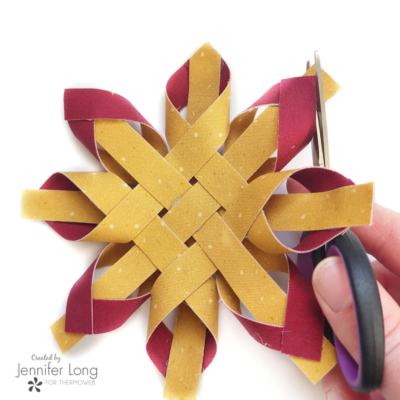
11. Glue EACH star point in place and using a pair of sharp fabric scissors, trim off excess the fabric that extends beyond the point as shown.
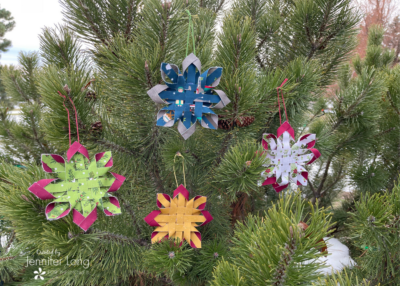
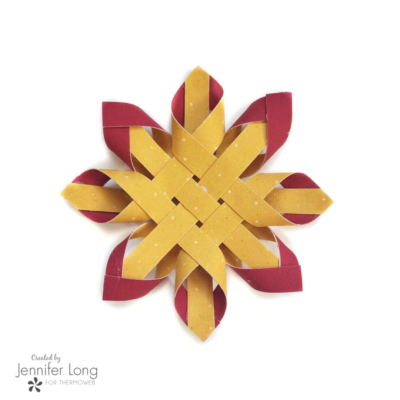
12. Your 6″ Scandinavian Star is COMPLETE! If you would like to hang your star, simply thread a small string or yarn through 1-loop / star point and tie at the top! Have fun making as MANY Scandinavian Stars as you would like! We are sure you can’t stop at making just 1!
Click the link below to watch how to make a quick, no-sew Christmas star. I am a Guest on the Riley Blake Designs YouTube channel sharing all the tips and tricks for this fun craft!
Thanks for crafting along with me to make a Scandinavian Star! Don’t forget to share your project on social media using the hashtag #SASmakersclub and tag @sewastory_jenniferlong.