


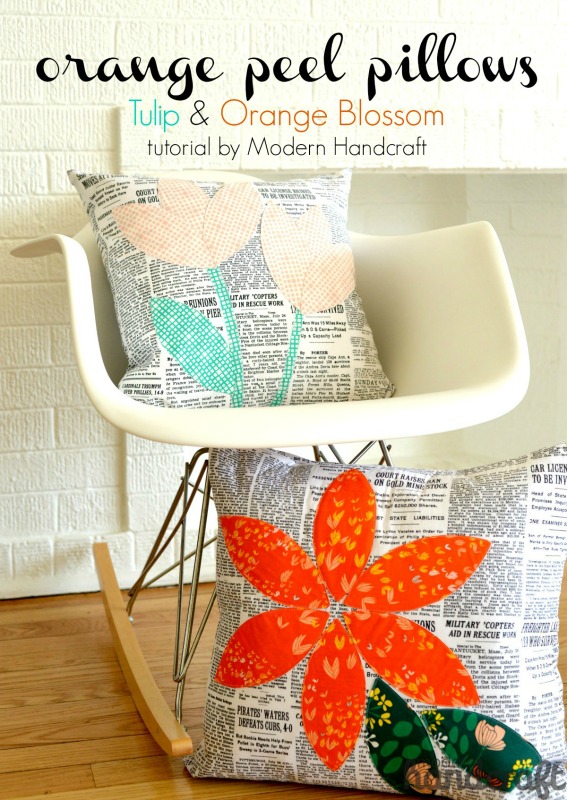
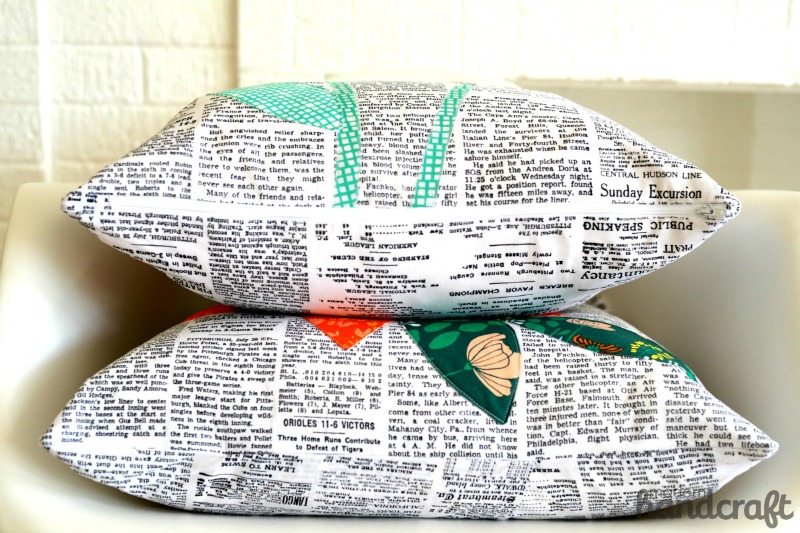
Hi Therm O Web friends, Nicole here today from Modern Handcraft with a tutorial showing you how to create an orange peel applique and two different pillows with the result – The Orange Blossom Pillow and The Tulip Pillow. These pillows are a perfect Mother’s Day present – flowers that last year round!
Materials needed:
- Heat n Bond® fusible lightweight interfacing
- Fabric for your pillow front: 18″ square – Zipper pillow an additional 18″ square for backing // Envelope pillow an additional two pieces of fabric measuring roughly 13″ x 18″
- Fabric scraps or fat quarters in your choice of colors
- Coordinating thread
- Sewing machine and notions : (scissors, cutting mat, rotary cutter, straight pins)
- Orange Peel patttern pdf- click here
- Heat n Bond® fusible fleece for backing of pillow front, or a medium weight fusible interfacing – fleece was used in Orange Blossom example and interfacing in Tulip Pillow.
- Heat n Bond® iron-on adhesive for tulip stalks
- 16″-18″ zipper if making a zipper pillow
Step 1:
- Print out your Orange Blossom Pattern – Orange Peel PDF
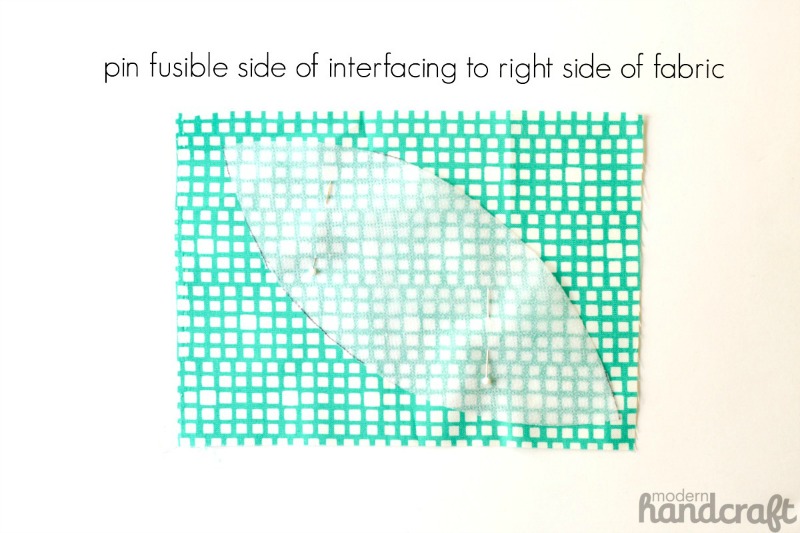
- Cut out pattern and trace onto HeatnBond® lightweight Fusible Interfacing. For the Orange Blossom Pillow you will need 8, Tulip Pillow you will need 7. Cut your pieces out of the interfacing.
- You will now place your interfacing petals fusible side down on your fabric facing right side up – pin in place.
Step 2:
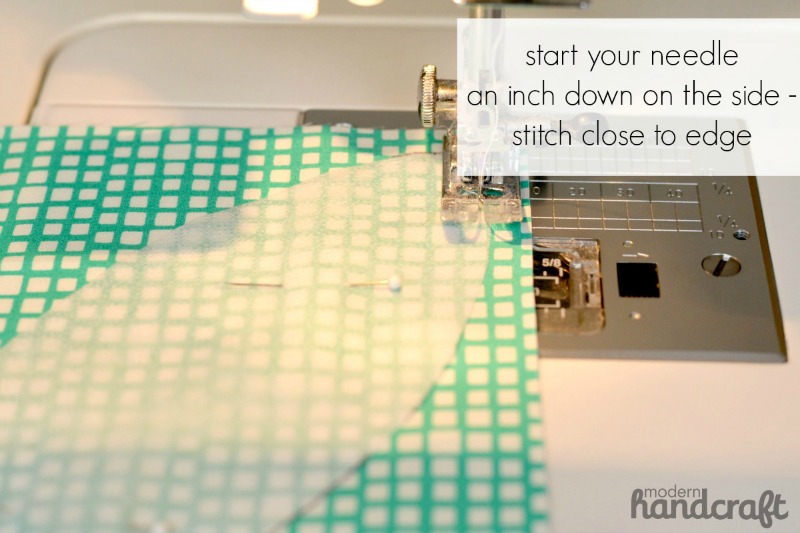
- Now at your machine you will sew around the entire perimeter of your interfacing petal. Start about an inch away from the point. When starting at the point the needle likes to push all of the material down into your machine and makes the thread bunch up since the layers are so light. Also try to stay as close to the edge as you can – if this is hard to do, you can cut a little closer to your stitches in the next step and have the same effect.
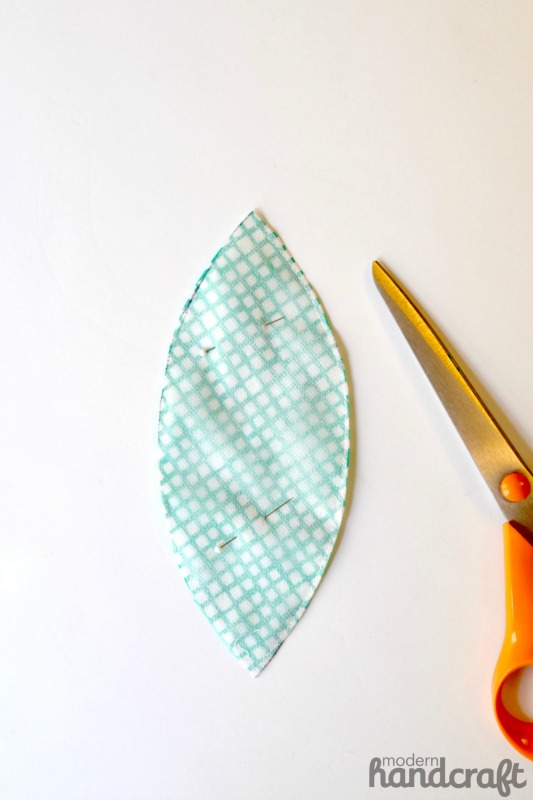
- Using your scissors cut closely to your stitches leaving a very small amount of seam allowance. Also take the straight pins out of the petal piece.
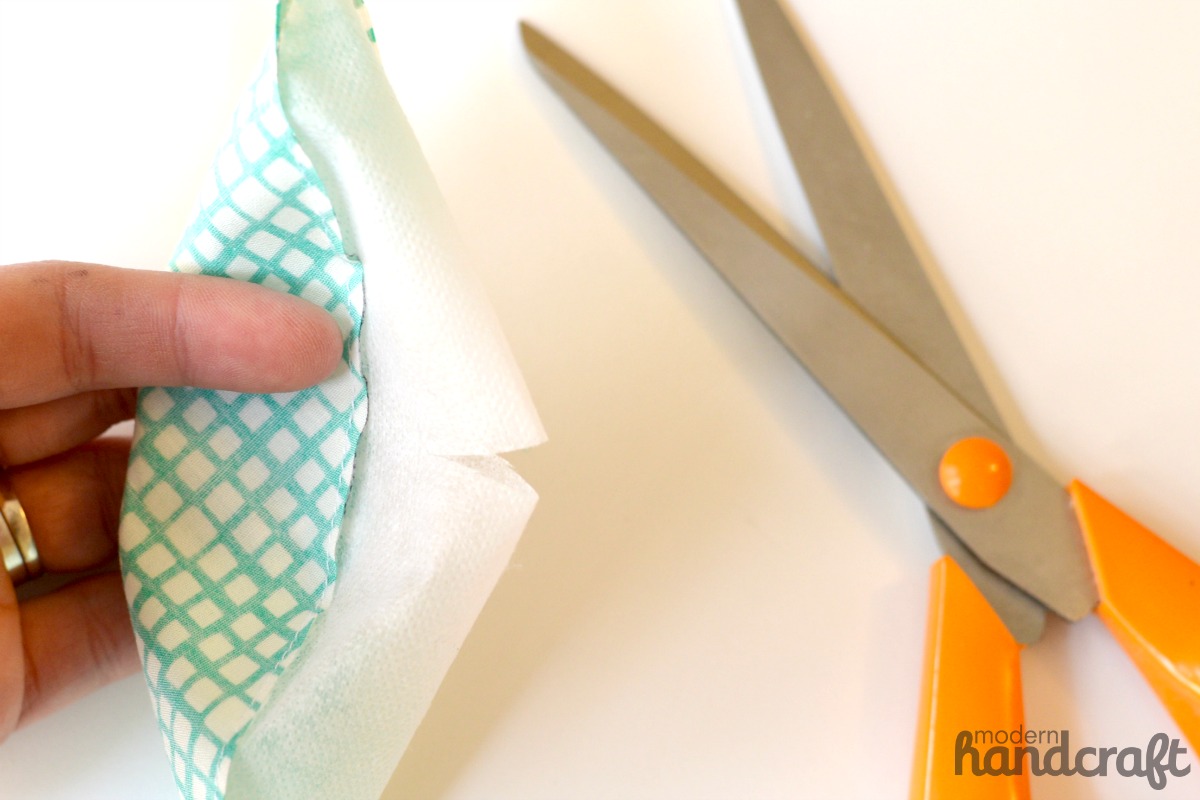
- Very carefully pull your interfacing away from the fabric and make about an inch size cut – like shown. Just make sure not to cut too closely to the sides.
- Very carefully turn your petal right side out through the hole you cut, it gets easier with practice. Tearing the opening a bit is ok, no one will see it once we iron it to our pillow front.
- Use a chopstick or knitting needle to carefully poke out the corners (this is very tearable material so be very very careful at those points)
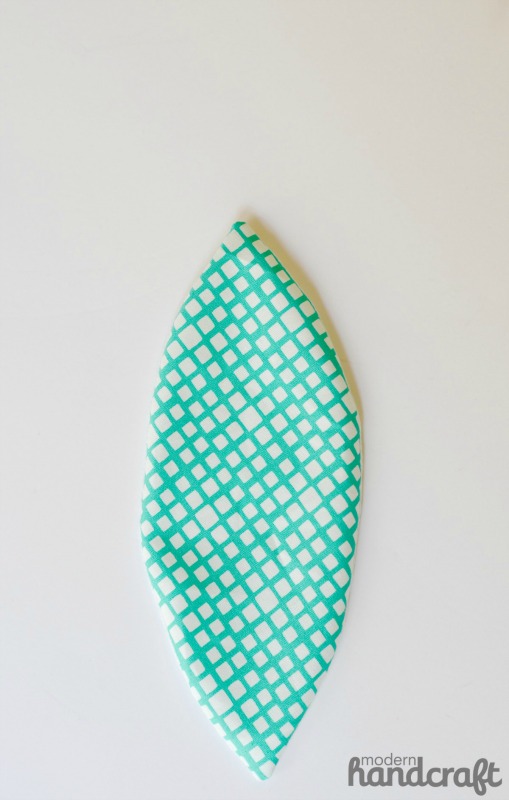
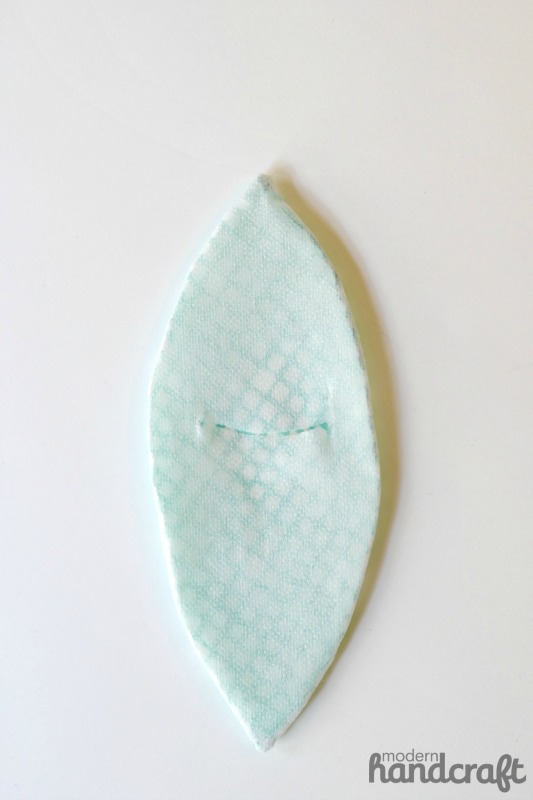
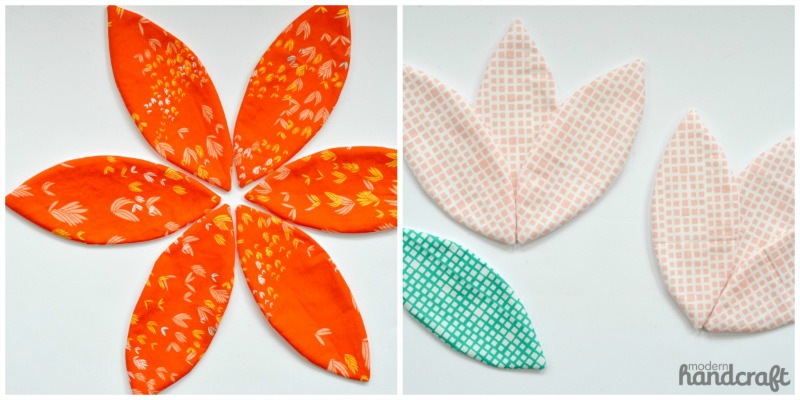
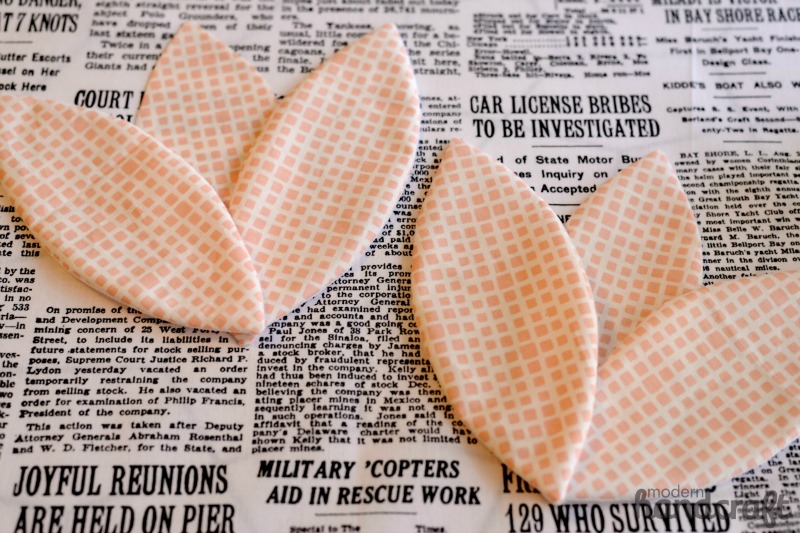
- Flip over and smooth – you have your first orange peel! It should now look like the image above – fabric right side out and the fusible part on the back.
- They will look a bit wrinkled – avoid the temptation to iron these, remember the fusible side is there.
Step 3:
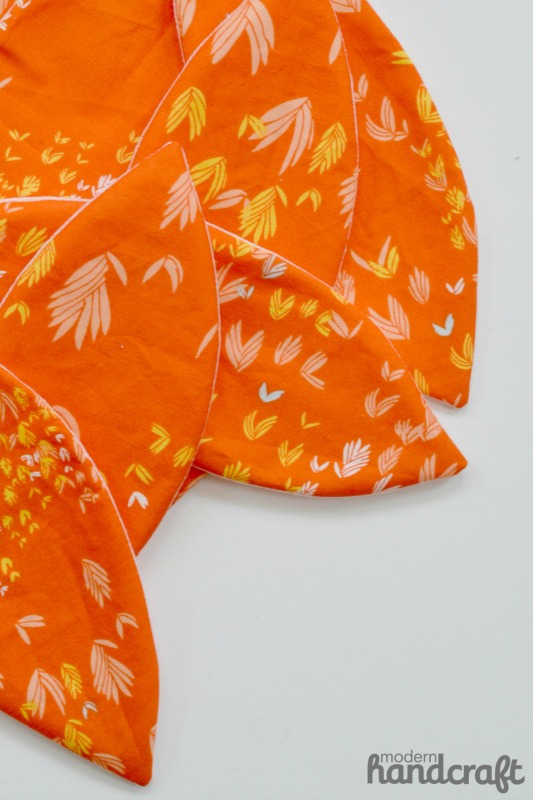
- Now the fun part – playing with the petal shapes! Depending on what pillow you are creating, you can now lay out your design and see how you would like to place everything. Also play around with the spacing on your pillow front before you iron anything in place.
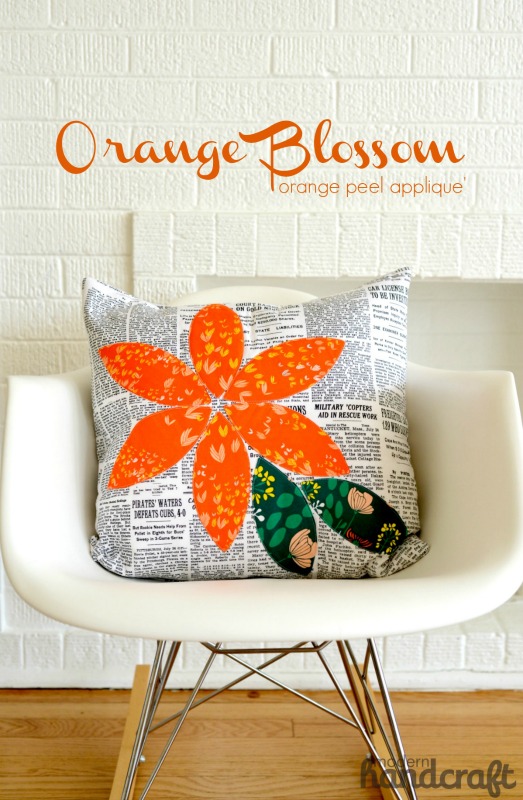
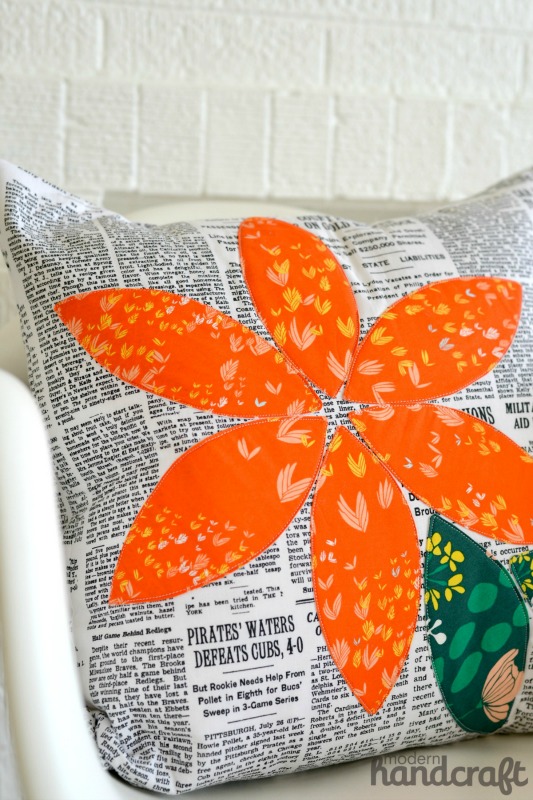
- To create the Orange Blossom Pillow you will need 6 petals for the flower and 2 petals for the leaves.
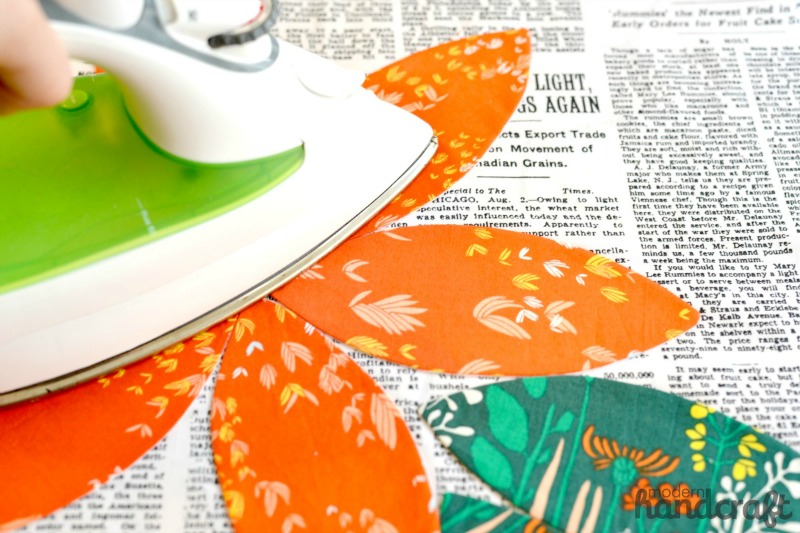
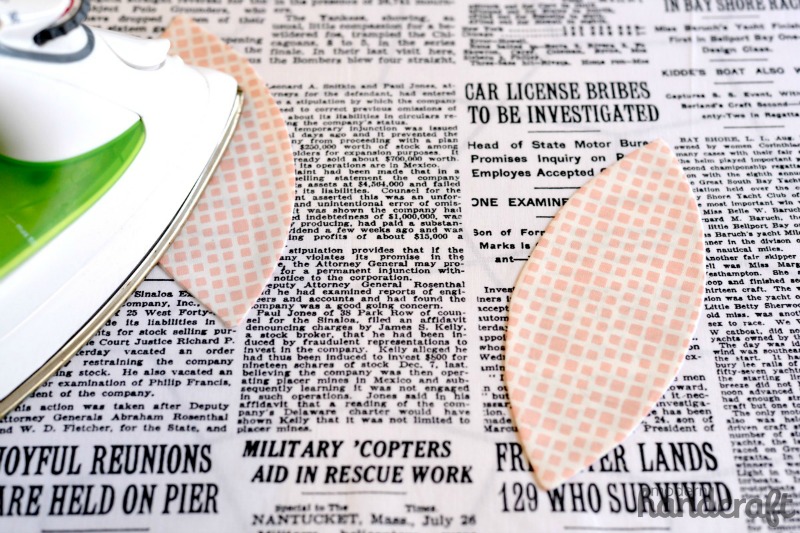
- Lay your design directly onto your 18″ x 18″ square piece of fabric for your pillow front. With your iron on medium heat and steam – iron down your finished flower design.
- Depending how thick you would like your pillow front – you can add a layer of Heat n Bond® Fusible Fleece to the backing – or a HeatnBond® medium weight interfacing for a nicer finish.
- At your machine stitch around each petal with a straight stitch just inside the edge of the petal. Make sure to leave your needle down at the tips and pivot while sewing.
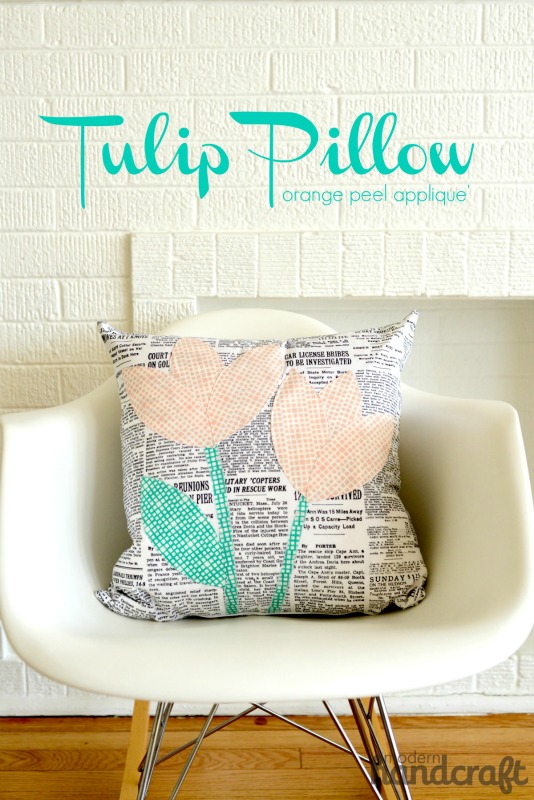
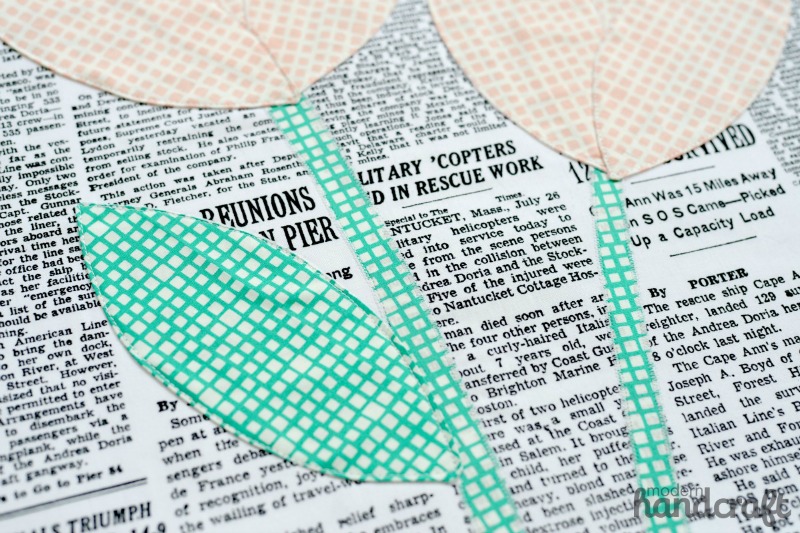
- To create the Tulip Pillow you will need 6 petals for the flower, 1 petal for the leaf, and some fabric fused with Heat n Bond® iron-on adhesive.
- First lay out your petals where you would like them.
- Remove the top two petals and iron & sew the back petals in place.
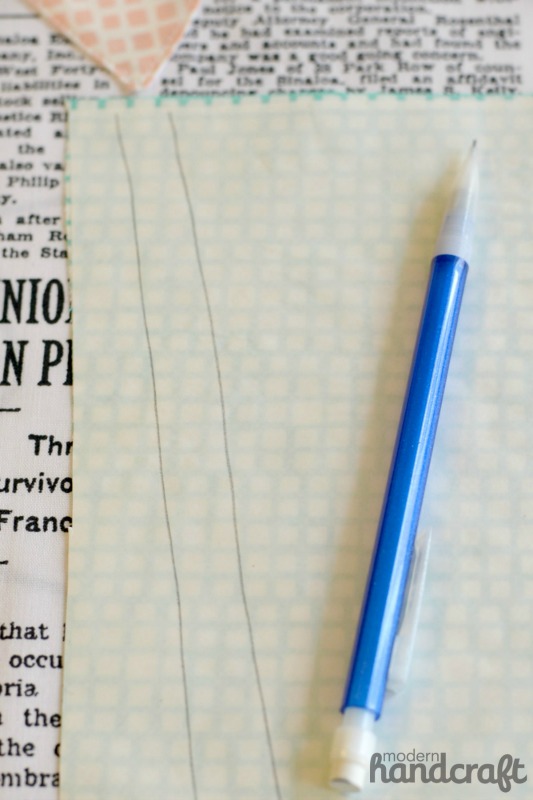
- Iron your Heat n Bond® iron-on adhesive to your stem fabric – Using the same fabric as your petal. Draw a stem on the paper backing of the Heat n Bond®. Draw your stem bending in the opposite direction that you would like it to go – or a mirror image.
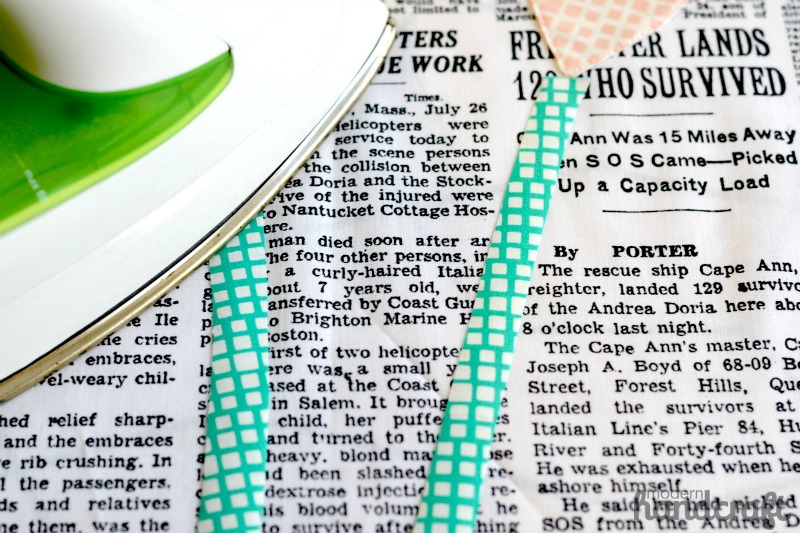
- Cut out your stems – peel off the paper backing and iron to your fabric backing. Use a small zig-zag stitch on each side of the stems.
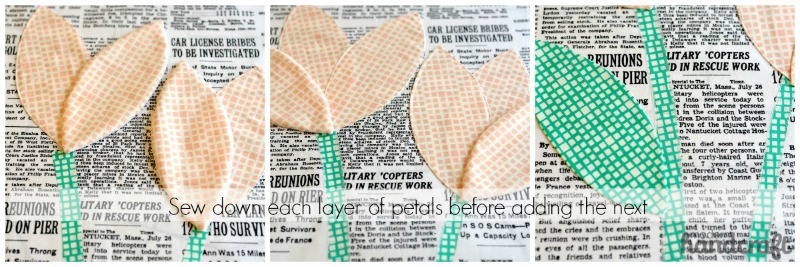
- Now that you have your back petal and stems in place you can now start adding your other layers. Iron down your next two petals and stitch in place, ending with your last two petals and leaf.
- A layer of HeatnBond® medium weight interfacing was added to the back of this pillow front for a nicer finish.
You have now completed your pillow tops! Finish in the manner that you enjoy most – Envelope backed or Zipper, both make for beautiful finished pillows.
I hope that you enjoyed this tutorial and have fun with all of the different designs that are possible with the Orange Peel Applique!
-Nicole