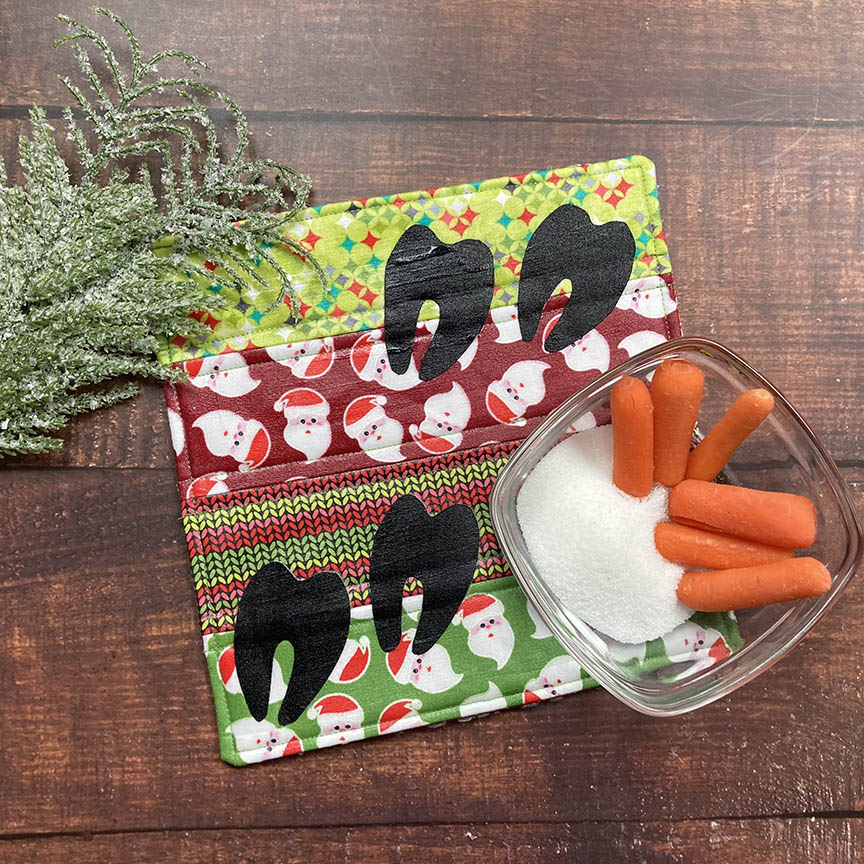
Hi, I’m Lisa Ruble from Quilty Zest. One of our family traditions is leaving cookies and milk out for Santa on Christmas Eve. We also like to leave some sugar and carrots for the reindeer – they have a hard job, flying Santa’s sleigh all over!
Fabric Santa Snack Placemat and Reindeer Mat
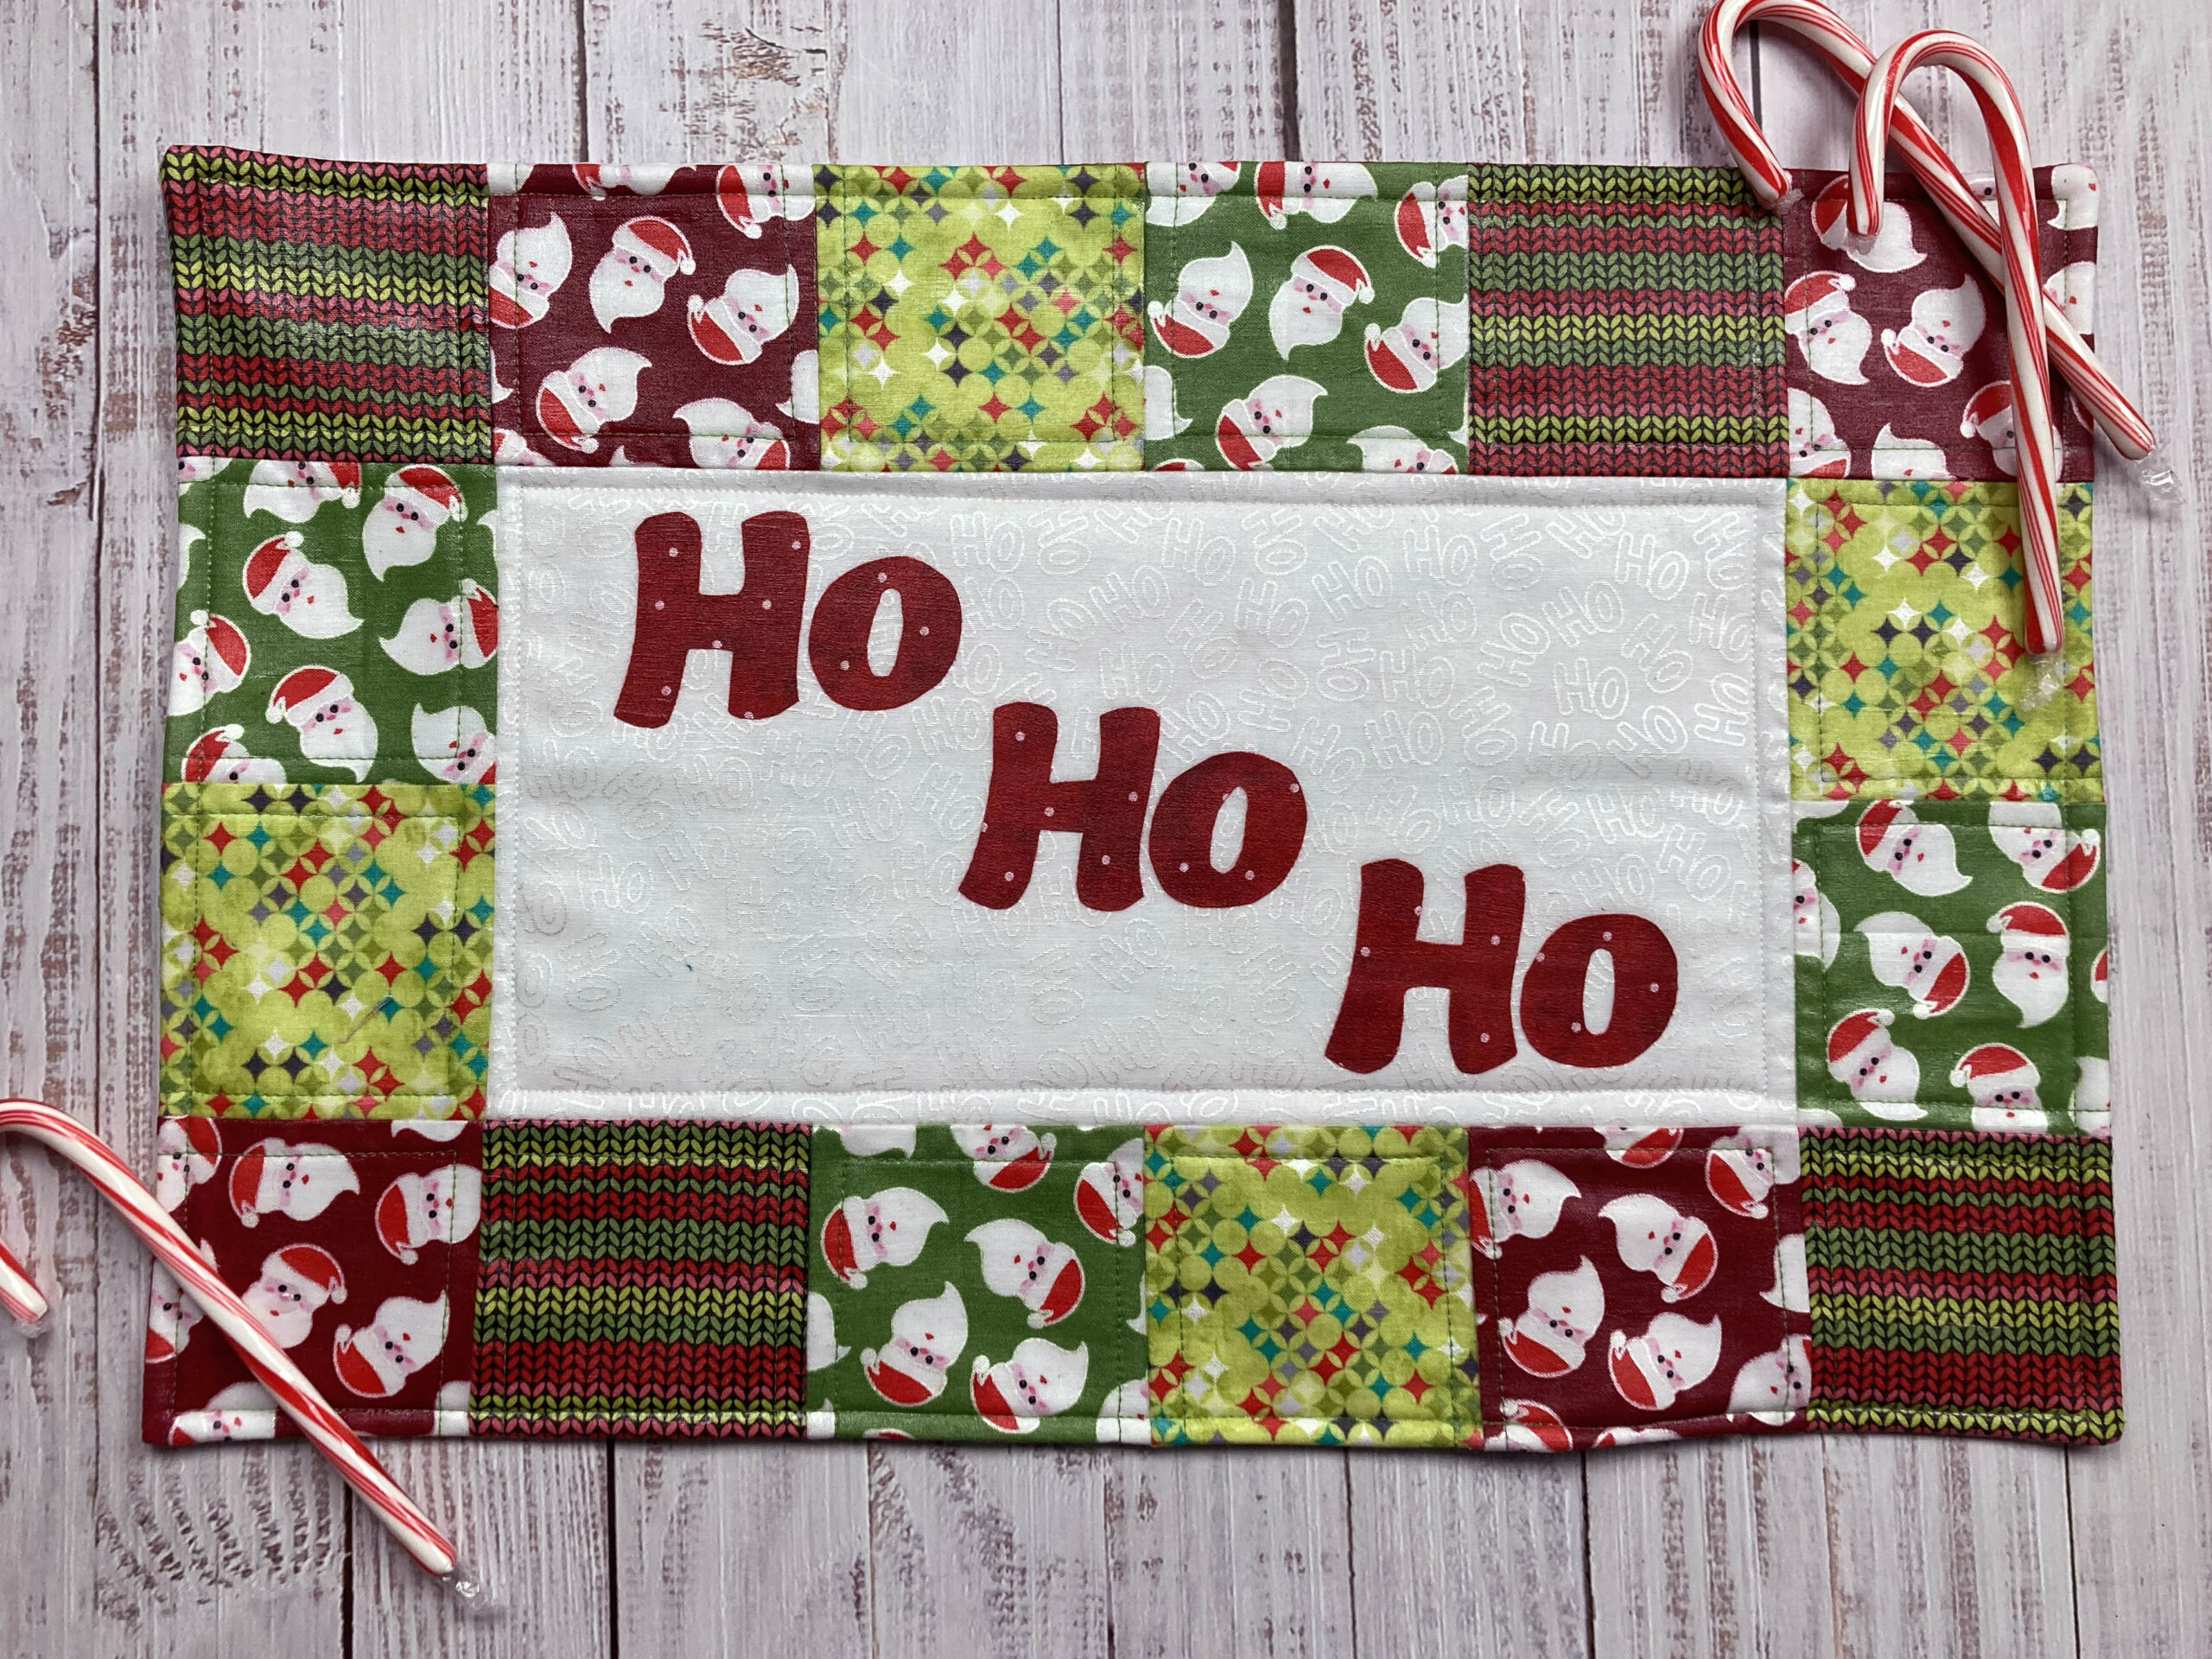
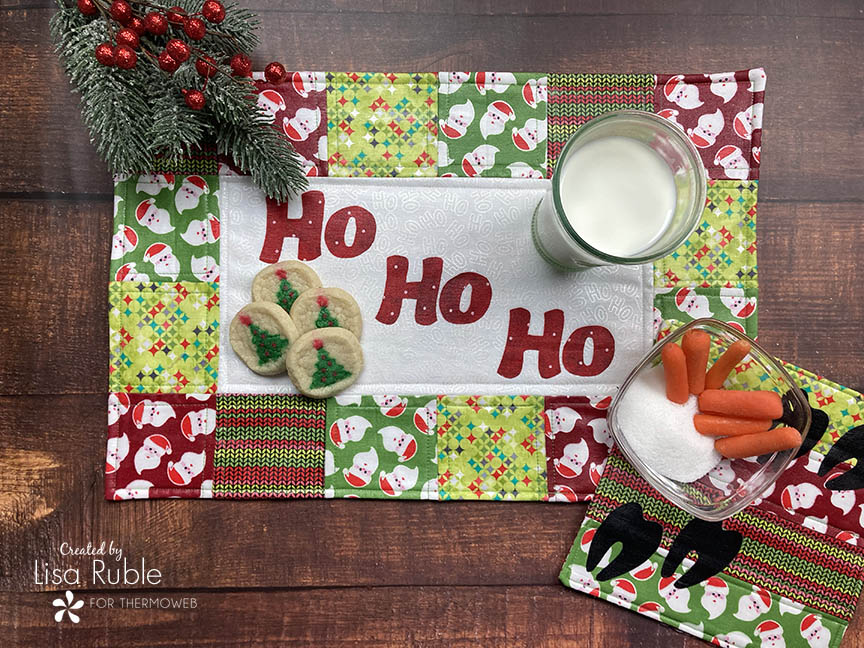 I chose cheery holiday fabrics from A Cozy Winter by Cherry Guidry to create a placemat for Santa’s snacks. Coating it in Liquid Vinyl makes for easy cleanup, and you can even set the cookies right on the placemat if you don’t want to use a plate!
You’ll Need:
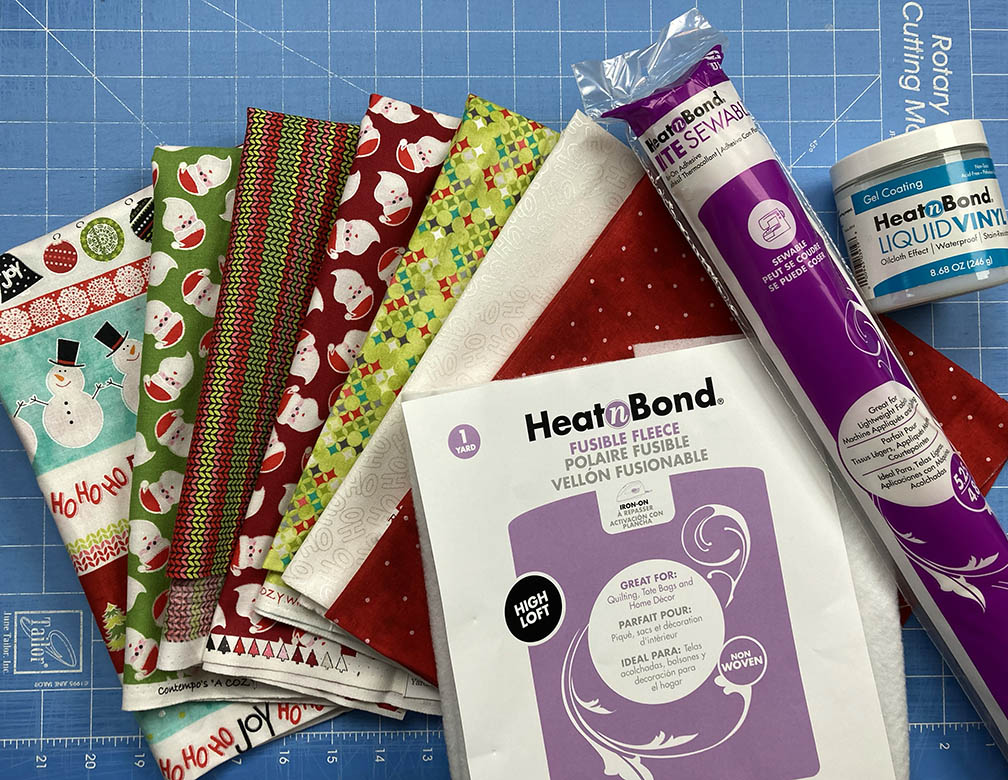
Fat quarter each 4 holiday prints*
Fat quarter red print*
Fat quarter white on white print*
Fat quarter focal stripe for backing*
Black solid scraps
HeatnBond Fusible Fleece
HeatnBond Lite Iron-On Adhesive
HeatnBond Liquid Vinyl
*I used A Cozy Winter print by Cherry Guidry for Benartex Fabrics
 Click here to download the templates
Cutting:
From each of the 4 holiday prints:
(4) 3-1/2″ squares
From the white on white print:
(1) 12-1/2″ x 6-1/2″ rectangle
From focal stripe:
(1) 18-1/2″ x 12-1/2″ rectangle for backing
From the fusible fleece:
(1) 18-1/2″ x 12-1/2″ rectangle
Making the Placemat
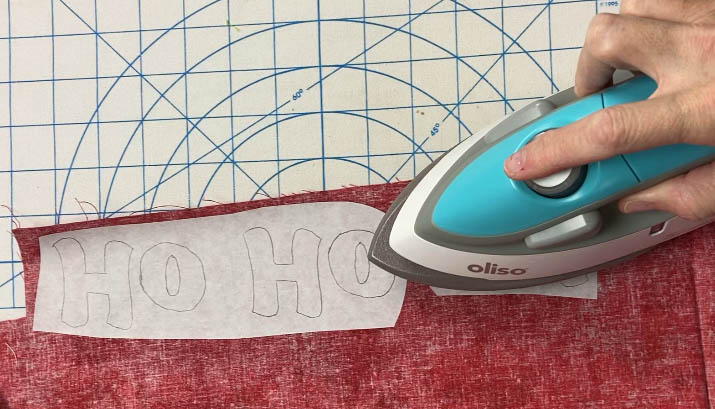
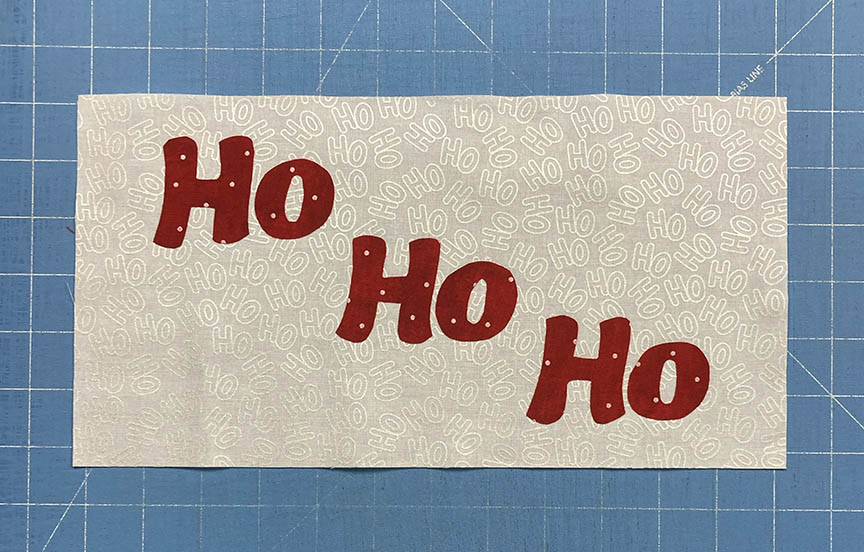
Step 1 Trace the letters “H” and “o” onto the paper side of fusible web three times. Fuse onto the wrong side of the red print. Cut out each letter on the line.
Step 2 Position the letters on 12-1/2″ x 6-1/2″ white rectangle as shown and fuse in place.
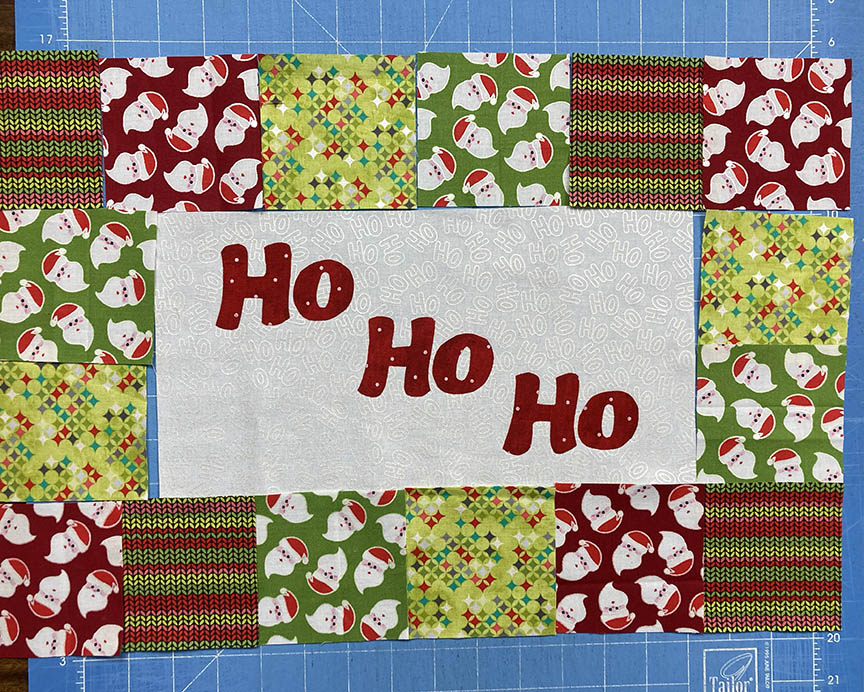
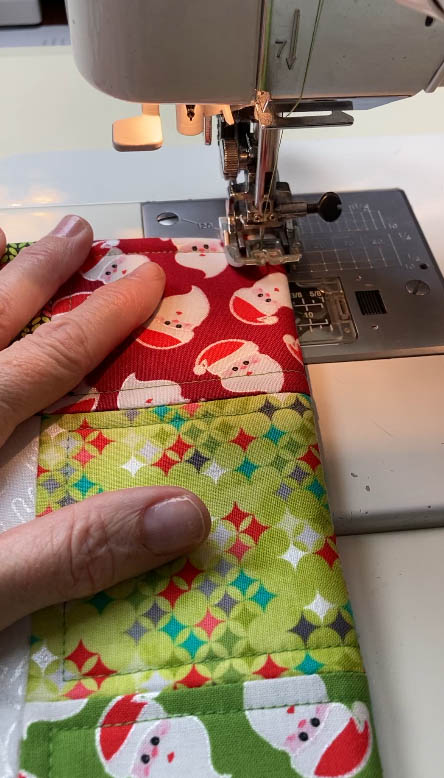
Step 3 Lay out the (16) 3-1/2″ holiday print squares around the white rectangle: (2) on each side and (6) each along the top and bottom.
Step 4 Sew the (2) squares on each side together, and then sew to opposite short sides of the white rectangle.
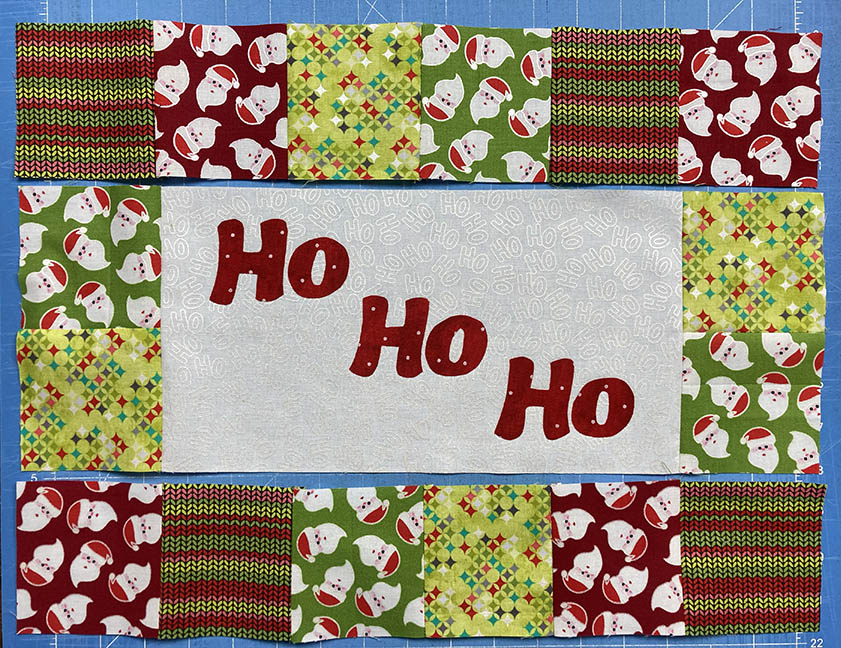
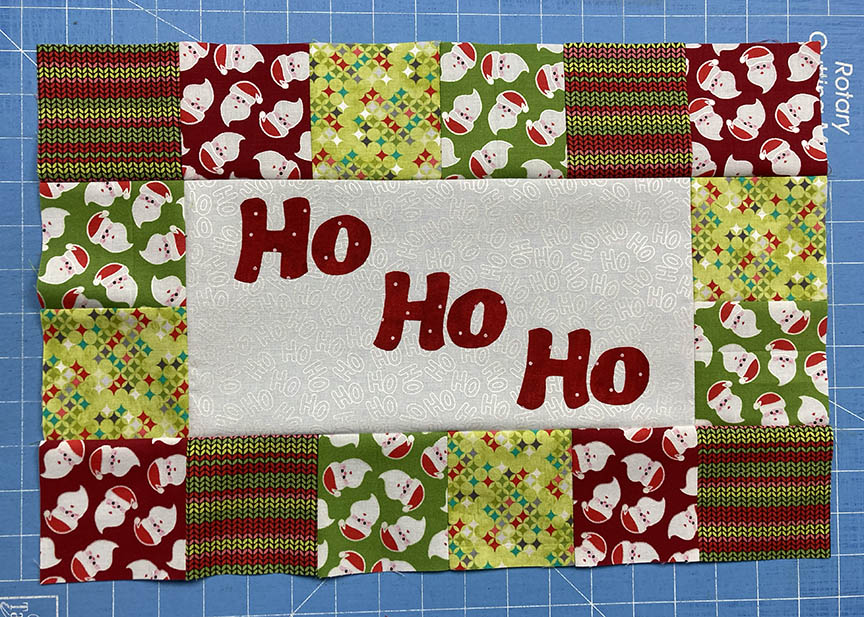
Step 5 Sew the (6) squares together for both the top and bottom rows and sew to the rectangle to complete the placemat top.
Step 6 Fuse the 18-1/2″ x 12-1/2″ HeatnBond Fusible Fleece rectangle to the wrong side of the placemat top. Quilt squares as desired.

Step 7 Lay the placemat top right side up and the 18-1/2″ x 12-1/2″ backing rectangle right side down, aligning raw edges. Stitch around the rectangle, leaving an opening along the bottom for turning.
Step 8 Turn the right side out, press the edges of the opening in, and pin to secure. Topstitch around the outer edge of the mat, securing the opening. Stitch 1/4″ inside the white rectangle edge to secure the backing.
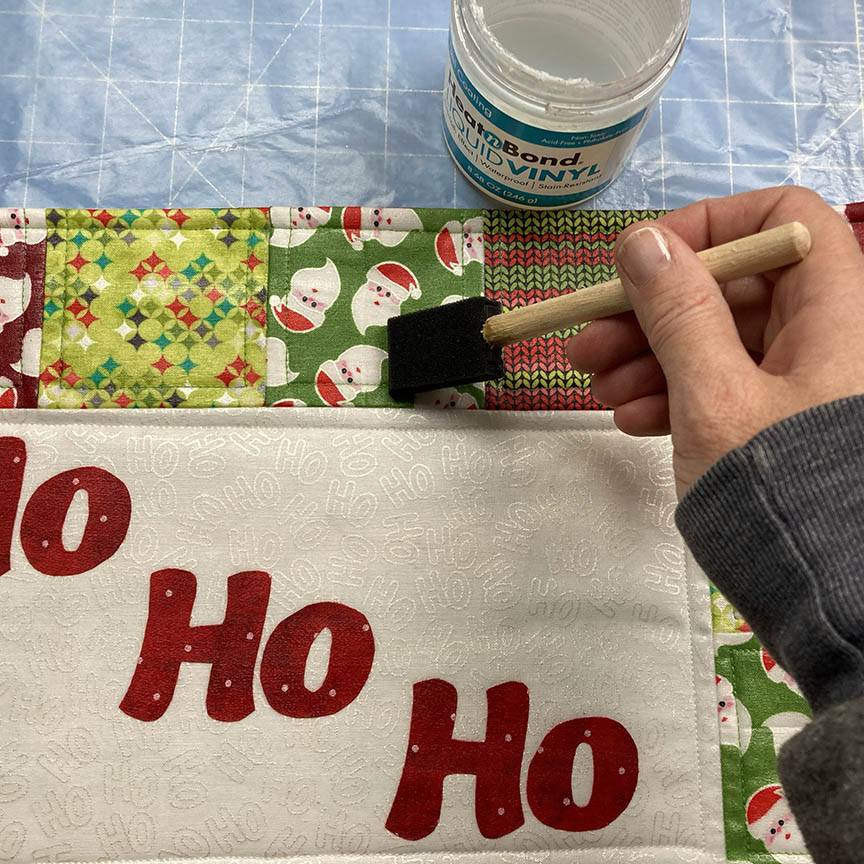
Step 9 Referring to the manufacturer’s directions, apply 2-3 layers of Liquid Vinyl to the placemat.
And your placemat is complete, ready for Christmas Eve! Merry Christmas!
Head over to my blog for instructions to make the reindeer mat!