


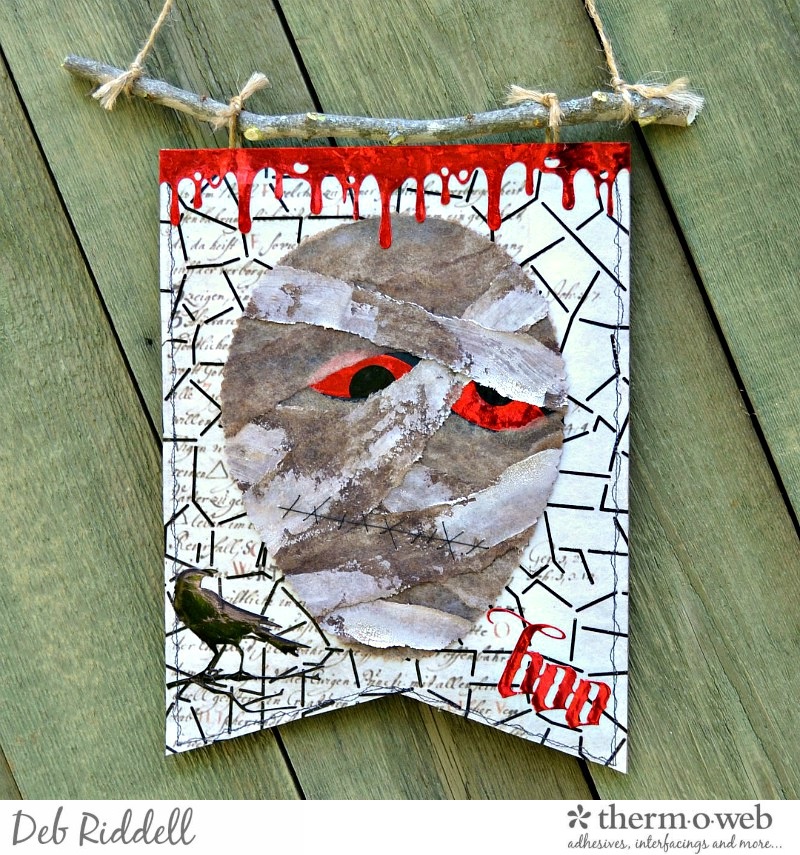
Hello everyone and thank you for stopping by. Deb Riddell here with you today to share a spooky Boo Mummy Banner for Halloween created with Therm O Web’s Mixed Media Sheets, Deco Foil Foil Transfer Sheets, Deco Foil Stencils and Deco Foil Transfer Gel.
Boo Mummy Banner With Mixed Media Sheets And Deco Foil
Therm O Web Supplies Used:
iCraft Mixed Media Sheets • Heavy Weight
iCraft Mixed Media Sheets • Light Weight
Deco Foil™ Transfer Sheets • Red
Deco Foil™ Transfer Sheets • Black
Deco Foil™ Crackle Stencil
Deco Foil™ Transfer Gel
Deco Foil™ Toner Sheets
iCraft Mixed Media Adhesive 2.1 fl oz
Purple Tape
Other supplies used:
Boo Mummy Template – click here to download
Foil Laminator • 12 inch
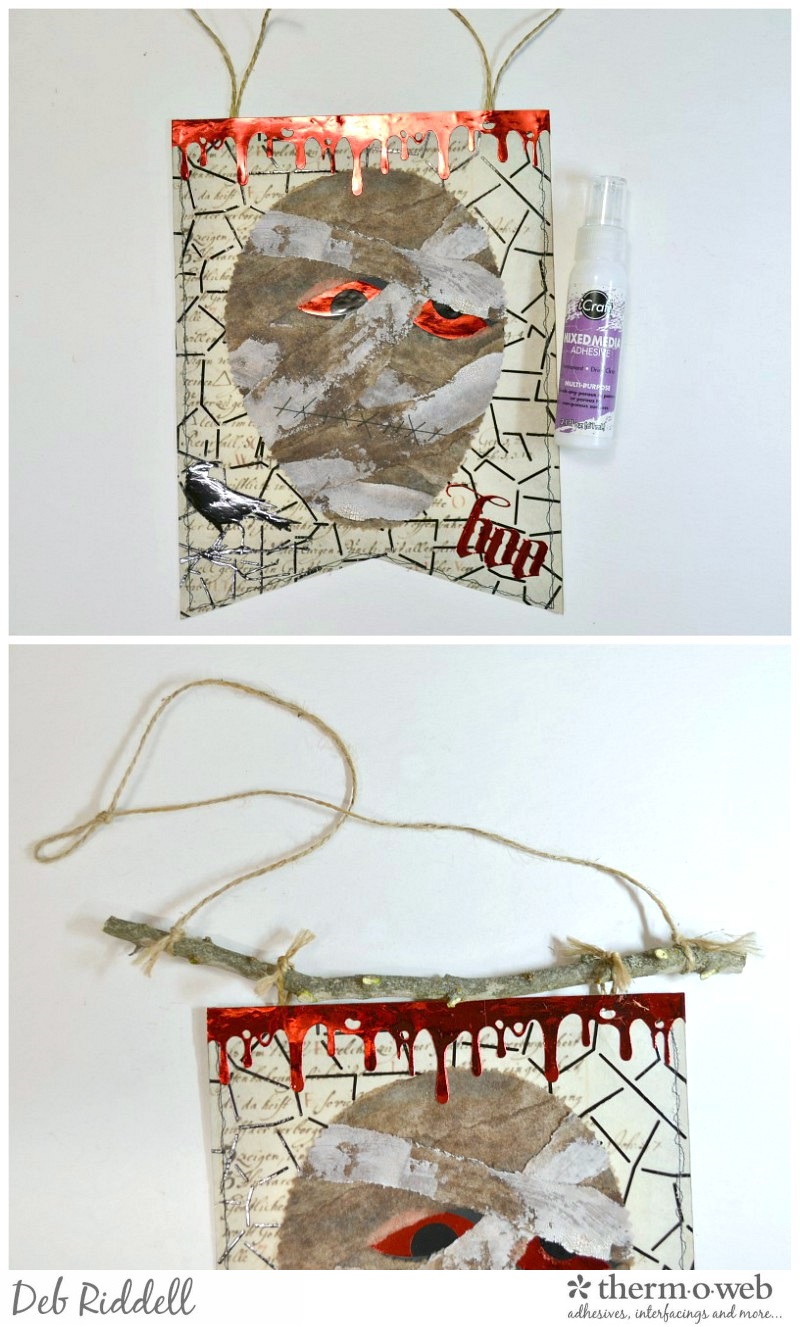
Feather & Ravens; Vintage Spirits; Drip Edge dies – Sizzix
Ground Espresso Distress Ink; Opaque Crackle Texture Paste – Ranger Ink
Carbon Black Media Fluid Acrylic – DecoArt
Miscellaneous – stick or dowel; jute twine; sewing needle and black button thread; sewing machine; die cutting machine; deckle edge scissors; paper trimmer; digital Halloween themed script image; computer printer; paint brush; water sprayer; spatula
Boo Mummy Banner Instructions:
Print a Halloween themed script image onto two pieces of Heavy Weight Mixed Media Sheet, one for the front of your banner and one for the back (this alchemist manuscript image is courtesy of Laura Carson at Artfully Musing, click here to download it from her website if you’d like to use it).
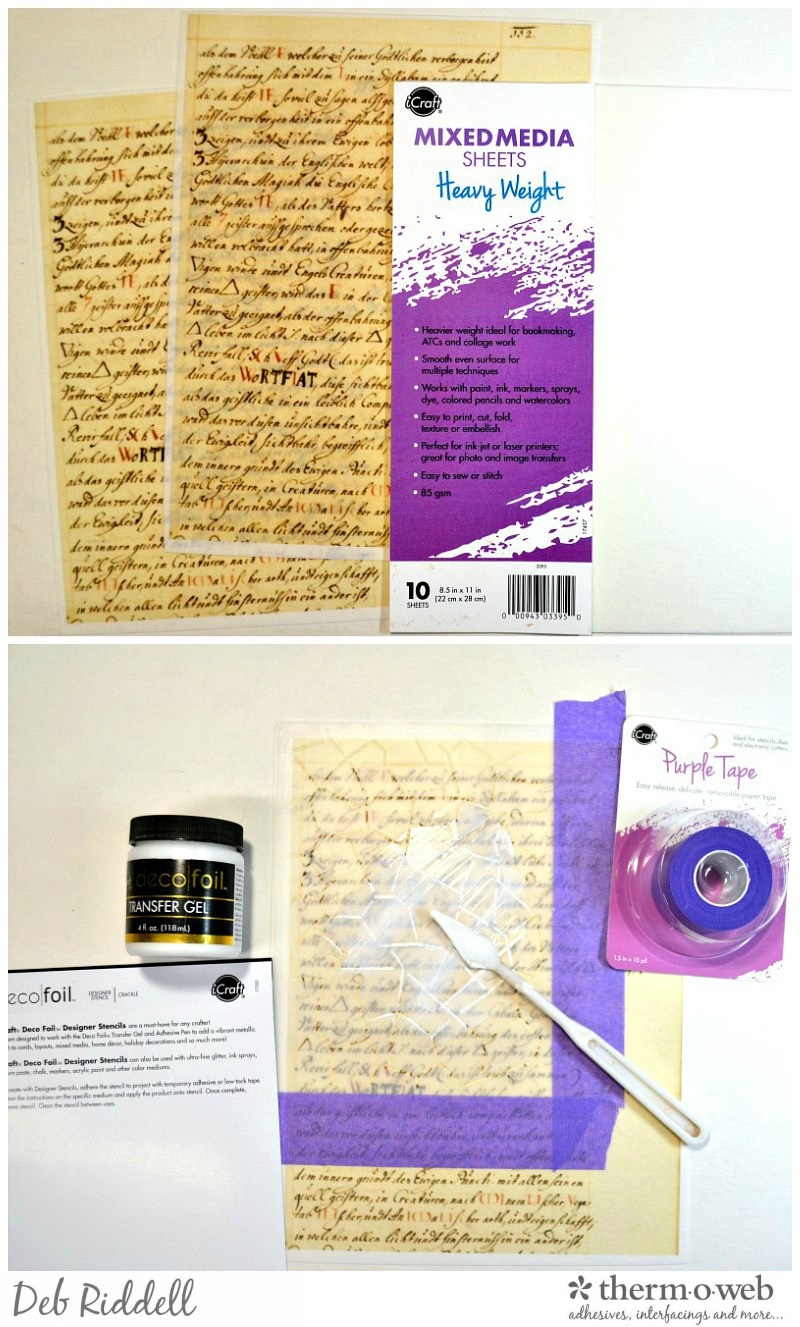
Apply Deco Foil Transfer Gel through the Crackle Deco Foil Stencil on one of the printed Mixed Media Sheets, holding the stencil in place with Purple Tape so it doesn’t shift. Repeat the pattern to cover the entire surface of the Mixed Media Sheet, waiting for each stenciled area to dry before moving the stencil over (the Deco Foil Transfer Gel takes about an hour to dry till clear).
Once the Transfer Gel is dry, run the stenciled Mixed Media Sheet through your preheated laminator with Black Deco Foil Foil Transfer Sheets. Set the background aside for the time being.
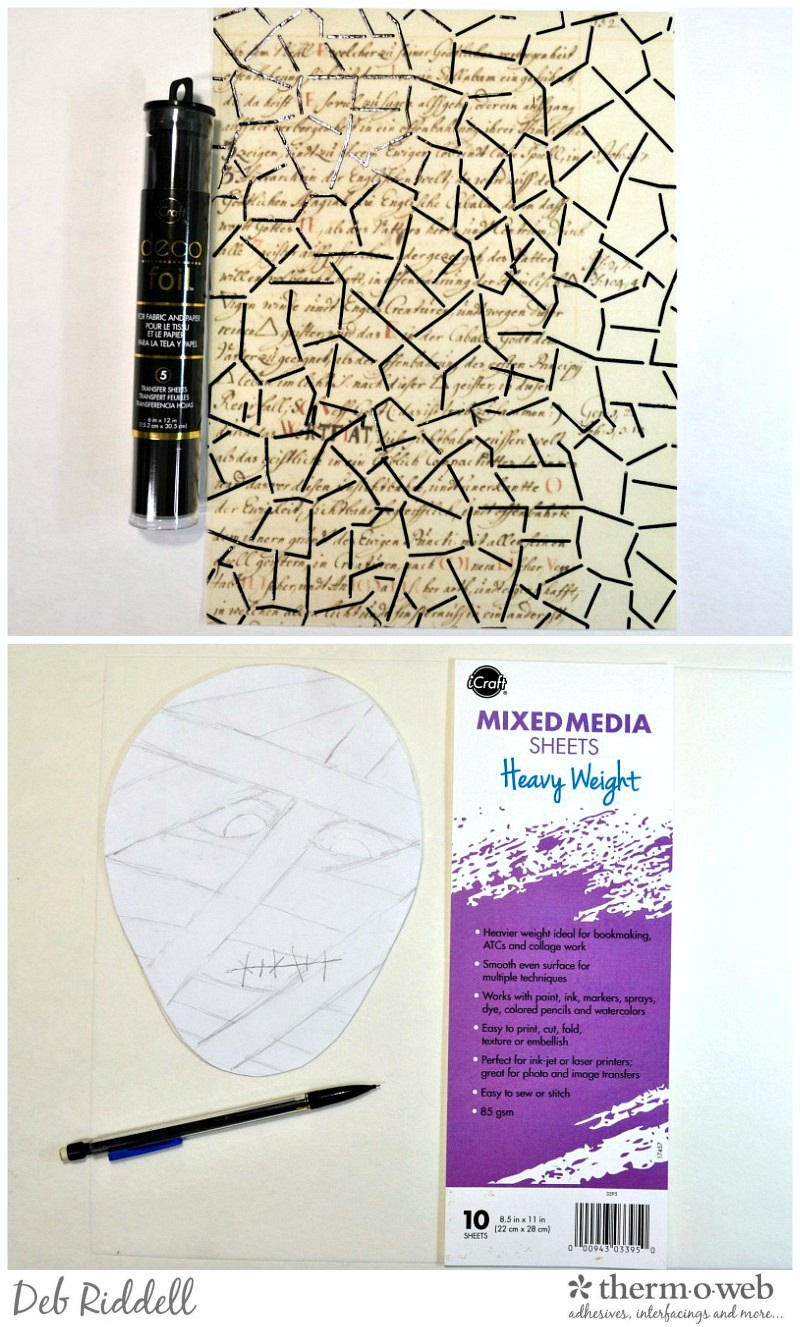
Print the provided mummy template onto cardstock (see the supply list above for the link), cut it out and trace the shape onto more Heavy Weight Mixed Media Sheet with a pencil. Cut out the mummy’s head.
Paint the mummy head with black acrylic paint.
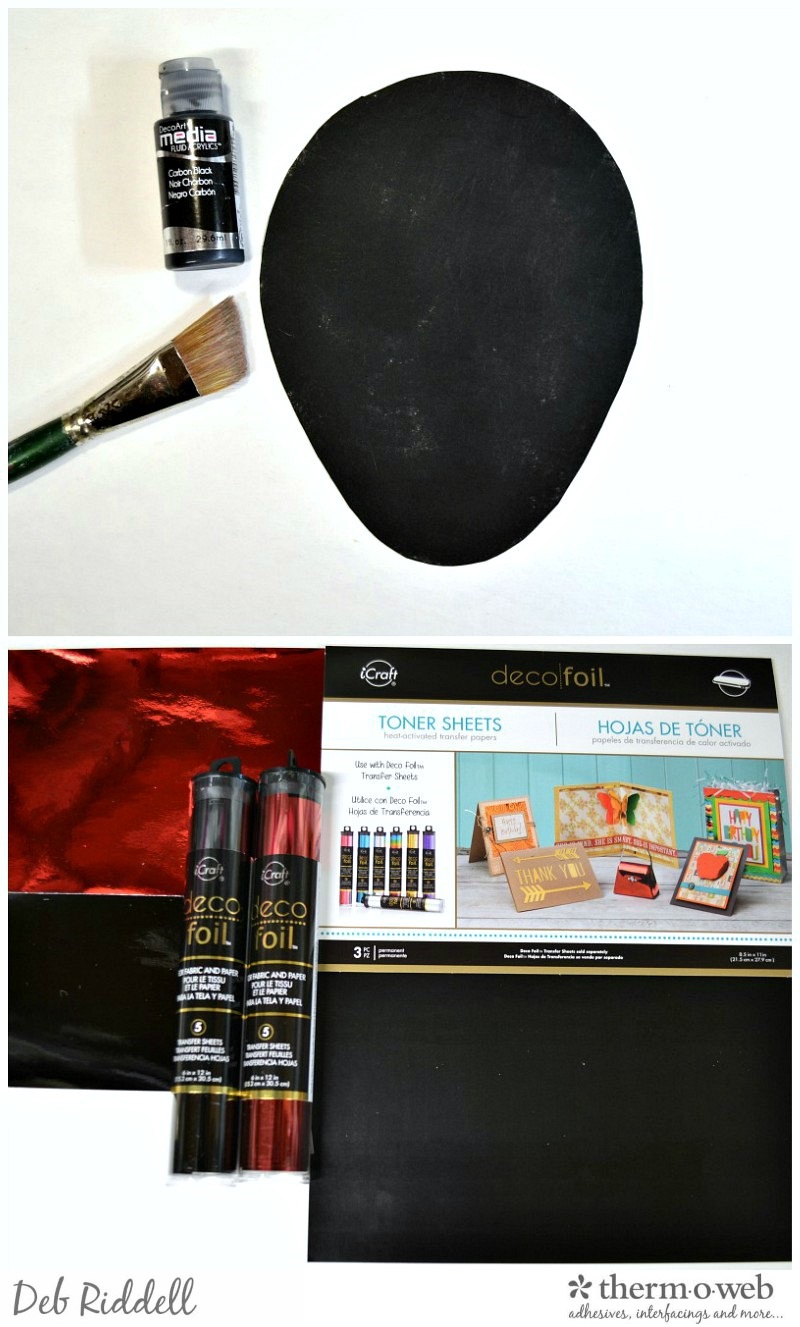
Cover a couple of pieces of Deco Foil Toner Sheet with both Red and Black Deco Foil Foil Transfer Sheets for your die cut embellishments.
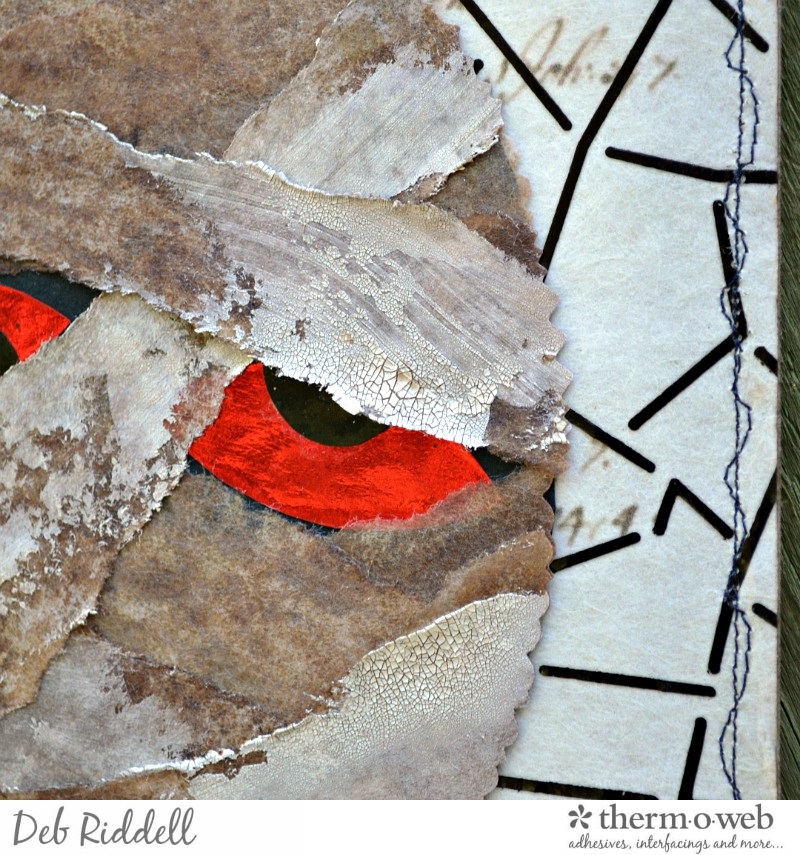
Cut out the eyes from the Red foiled Toner Sheet and the pupils from the Black foiled Toner Sheet, adhering them together with Mixed Media Medium (I used the top of the Mixed Media Medium to trace the pupils ;O).
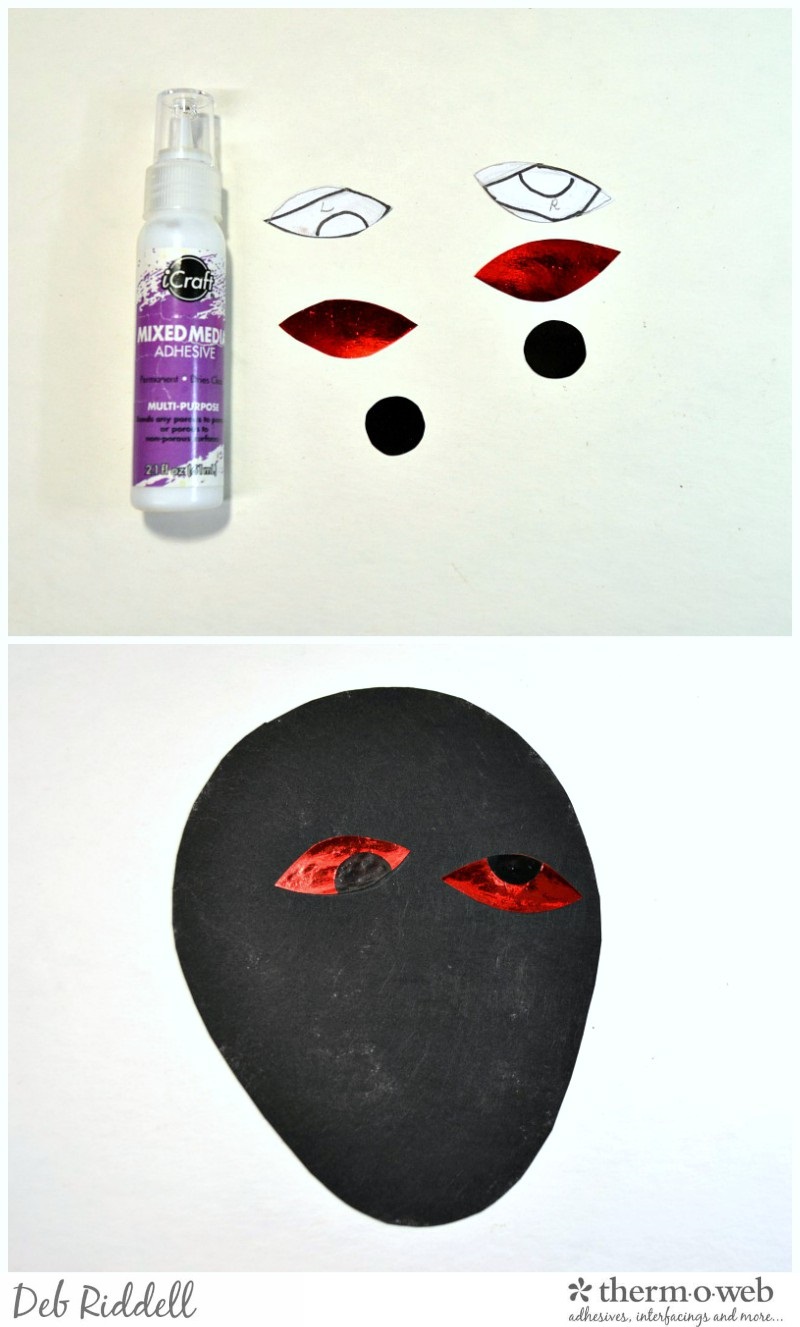
Adhere the eyes onto the painted mummy as indicated on the template with Mixed Media Medium.
Tear Light Weight Mixed Media Sheets into strips (I ended up using about 1 1/2 sheets of Light Weight Mixed Media Sheets for my mummy). Set aside about 5 strips and ink the rest of the strips front and back with dark brown water reactive ink (this is Ground Espresso Distress Ink). Lightly spritz the strips with water and pat them with your fingers for a mottled appearance. Let dry thoroughly.
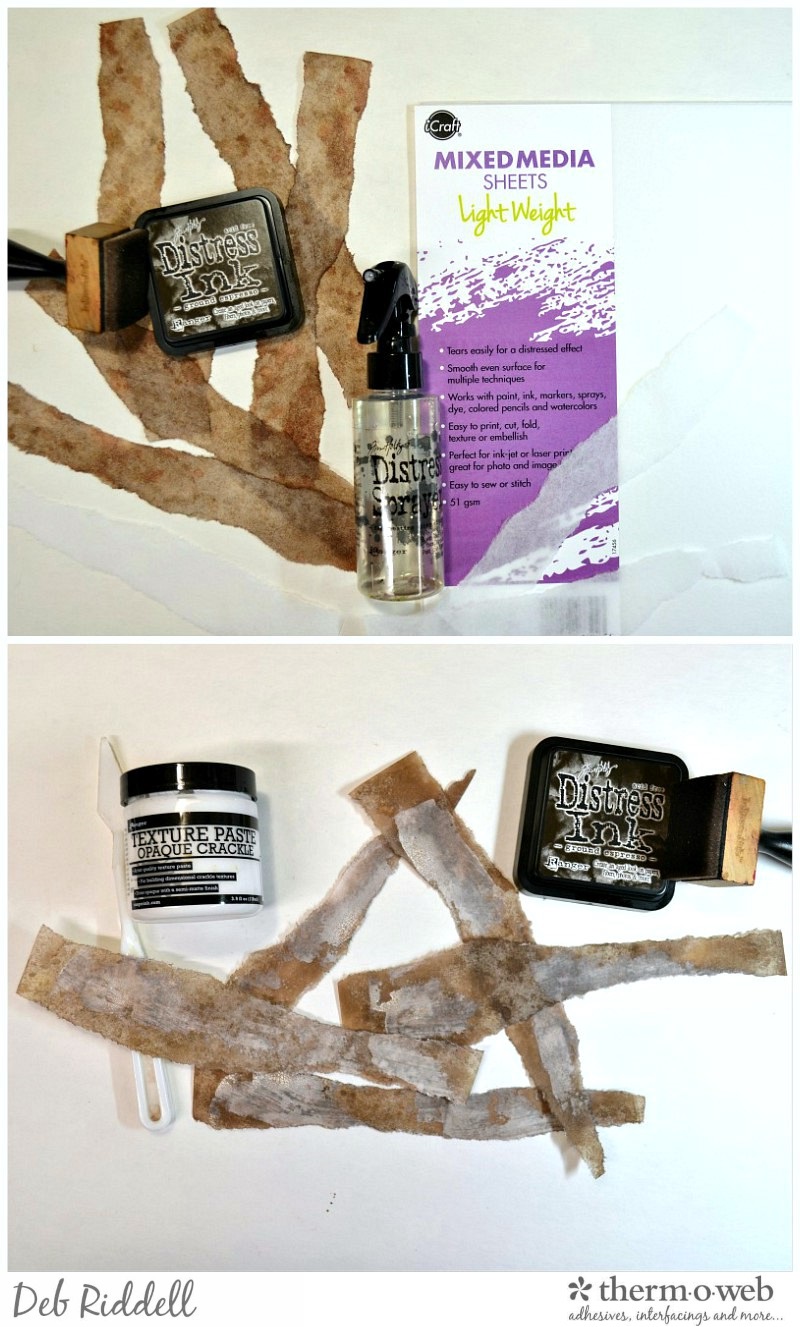
With a spatula, randomly apply crackle texture paste to the reserved Light Weight Mixed Media Sheet strips. Let the texture paste dry till crackled and then ink them with dark brown ink in the same manner as previously described. Let dry thoroughly.
Start applying the Light Weight Mixed Media Sheet strips to your painted mummy with Mixed Media Medium, using the template as a guide.
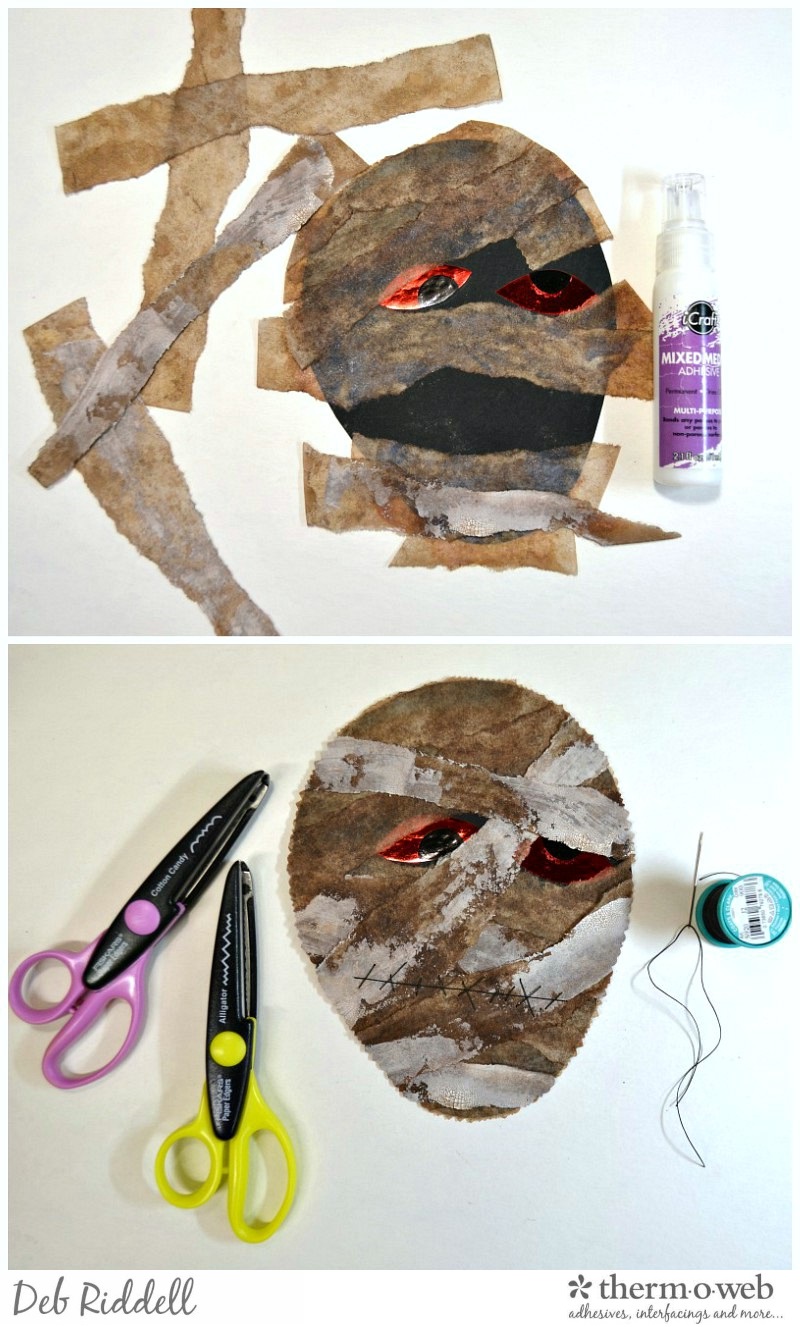
Allow the Mixed Media Medium to dry thoroughly and then trim the overhanging Mixed Media Sheet strips with deckle edge scissors for an uneven edge around the mummy’s head. Sew on his mouth with heavyweight black button thread.
Adhere the mummy’s head onto the stenciled background, adhering it in place with Mixed Media Medum.
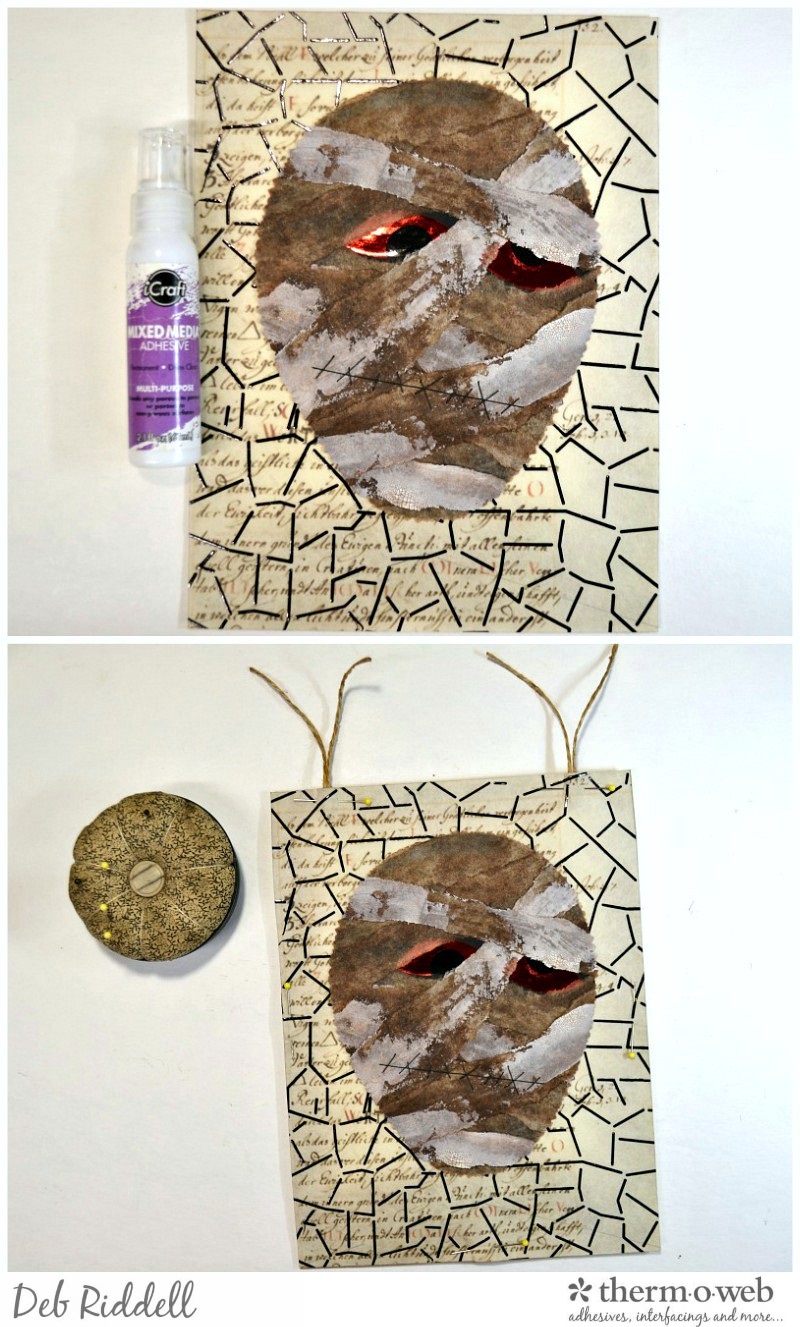
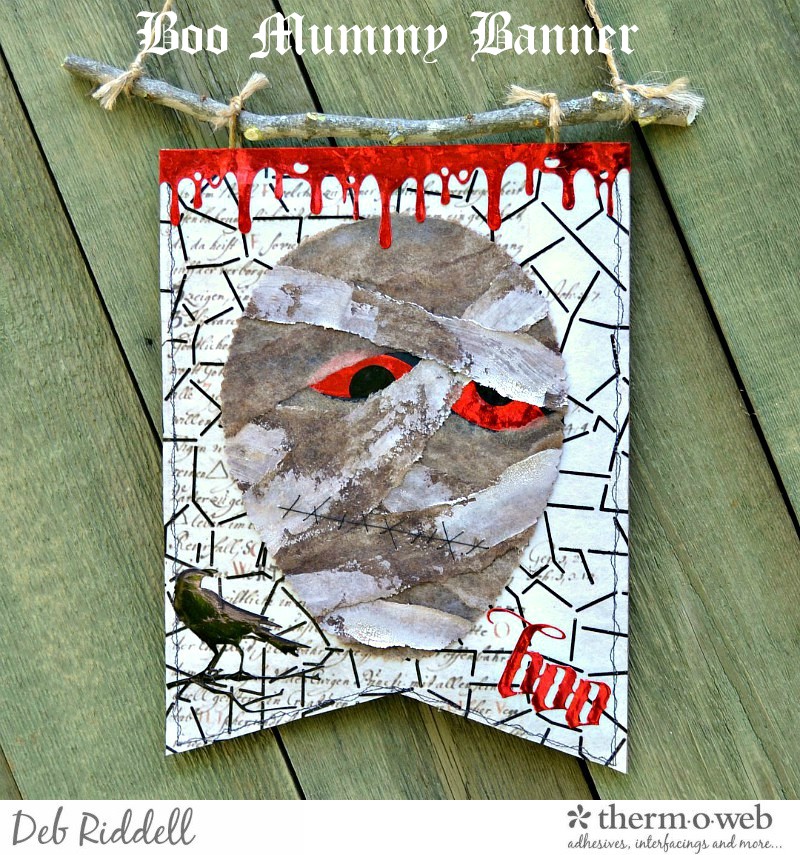
Sandwich a couple of lengths of jute twine in between the two printed Heavy Weight Mixed Media Sheets and pin everything together. Draw the points of your banner onto the bottom of the Mixed Media Sheet with pencil to guide you as you sew the banner together.
Sew around the edges of the banner with a couple of rows of messy stitching using black thread (messy stitching is the only kind of stitching I can do so that’s why I always tell you to do it LOL!). Cut out the banner shape following the stitching line. 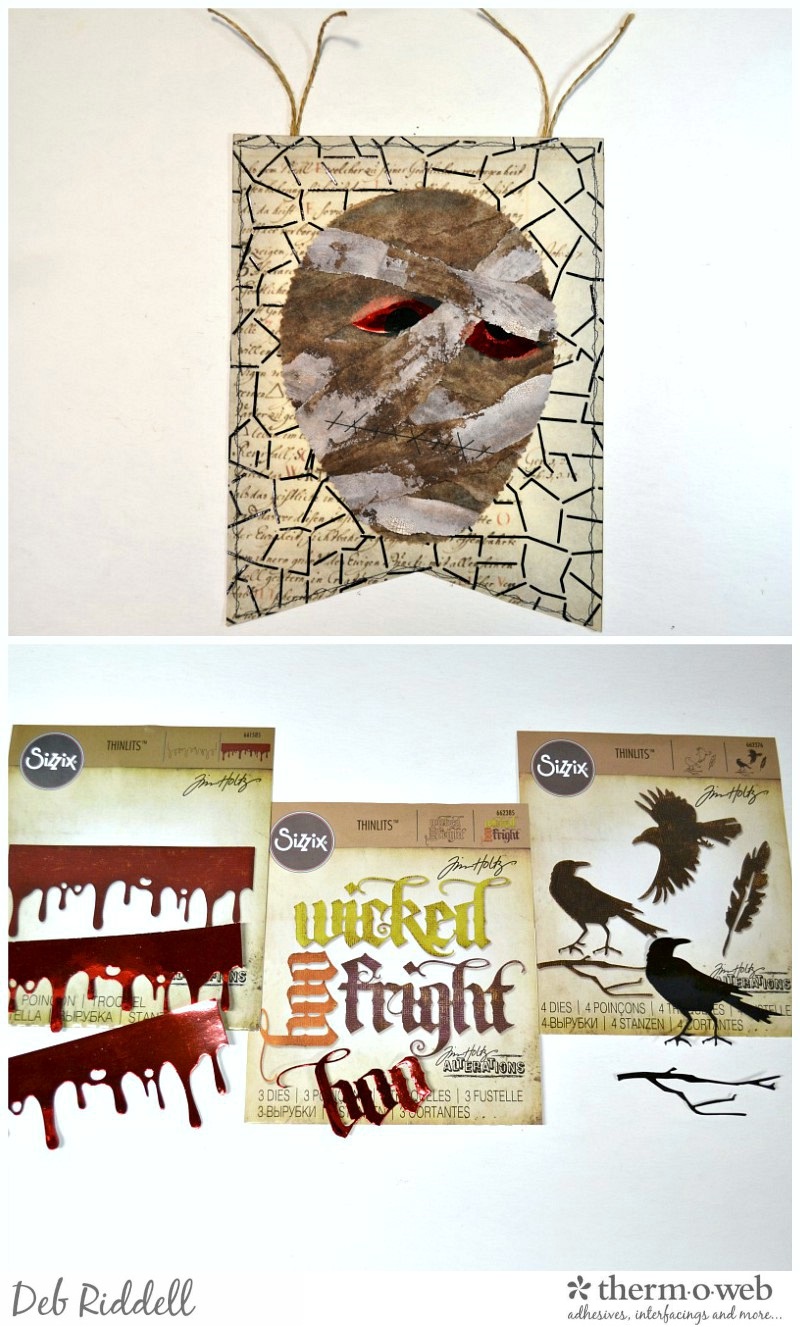
Die cut your embellishments from the Red and Black foil covered Toner Sheets (I used the Drip Edge die from the red foil for the top edge of the banner, the ‘boo’ sentiment in red foil from the Vintage Spirits die set and one of the crows and a branch from the black foil from the Feather & Ravens die set for the banner points).
Adhere the foiled die cuts with Mixed Media Medium.
Cut a stick to about 11 inches long (or use a piece of dowel) and tie the banner onto the stick. Add more jute twine for a hanger and your Boo Mummy Halloween banner is complete!
Here are a few closeups of the completed banner.
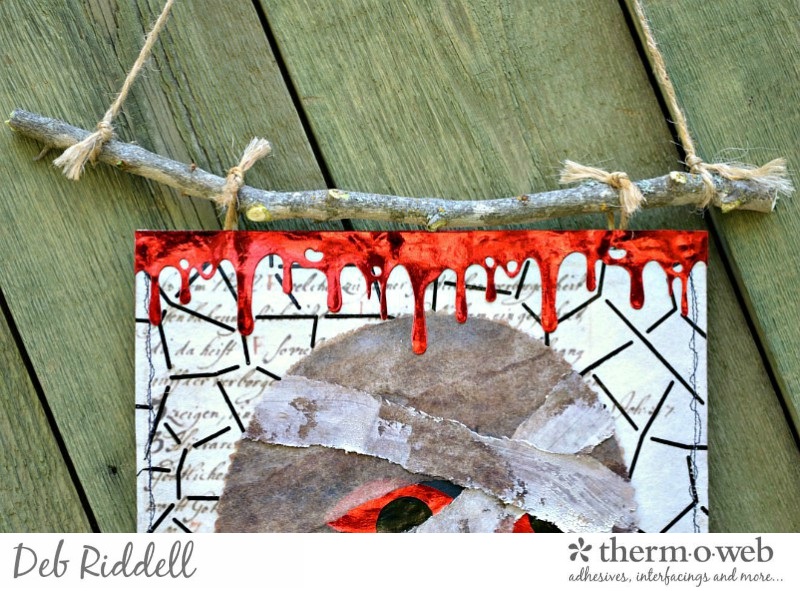

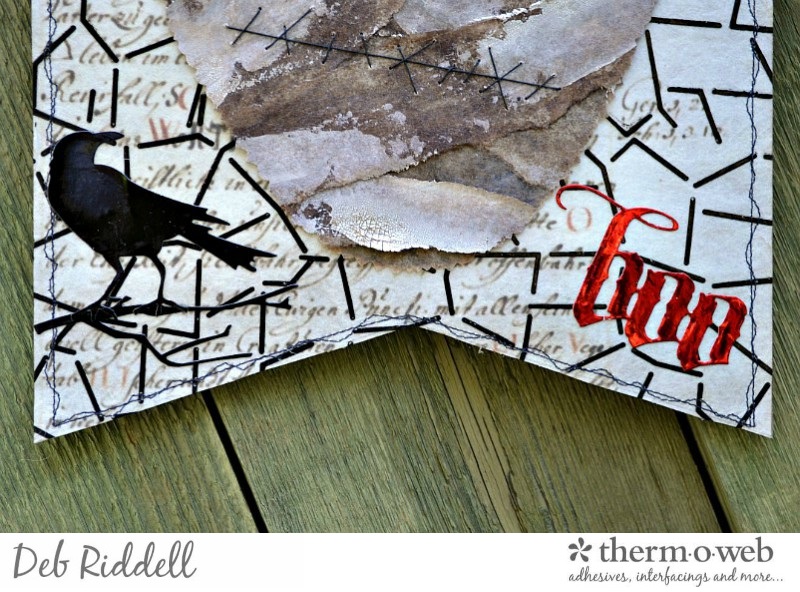
Love the texture from the crackle medium when applied to the Mixed Media Sheets!
Hope that you have enjoyed seeing how my Boo Mummy Banner came together and that you’ve been inspired to get out those Mixed Media Sheets and your Deco Foil products and make one of your own. Happy haunting everyone!
Deb xo

We’re pleased to share with you today the kick-off of our NEW HeatnBond How-To Video Series! We know it’s important to see how to use our products and that’s exactly what we’ve done.
Join us starting today and throughout the next few weeks as we bring you our NEW How-To Video series that will cover how to use our Heatnbond products, SpraynBond, StitchnSew and our Fabric Fuse. Be sure you are a subscriber to our YouTube Channel!
Maureen Reiss
October 2, 2018 at 11:04 am (6 years ago)I love this banner!! Soooo Creepy Cool!!!
Deb Riddell
October 5, 2018 at 8:36 pm (6 years ago)Thanks Maureen, glad you like it! Deb xo