


 We could all use some beach time right now, don’t you think! Sand between our toes, warm sun, and the salty ocean air is definitely a way to get some much needed relaxation time. Beach Boy Freddie is always ready for beachy fun and he has shown up a few times in other projects on my blog, Just Let Me Quilt.
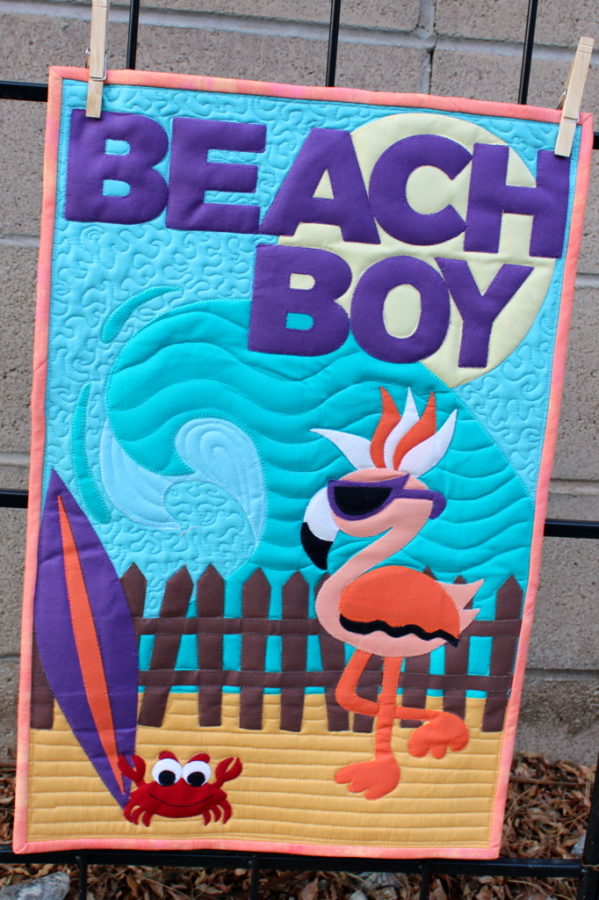
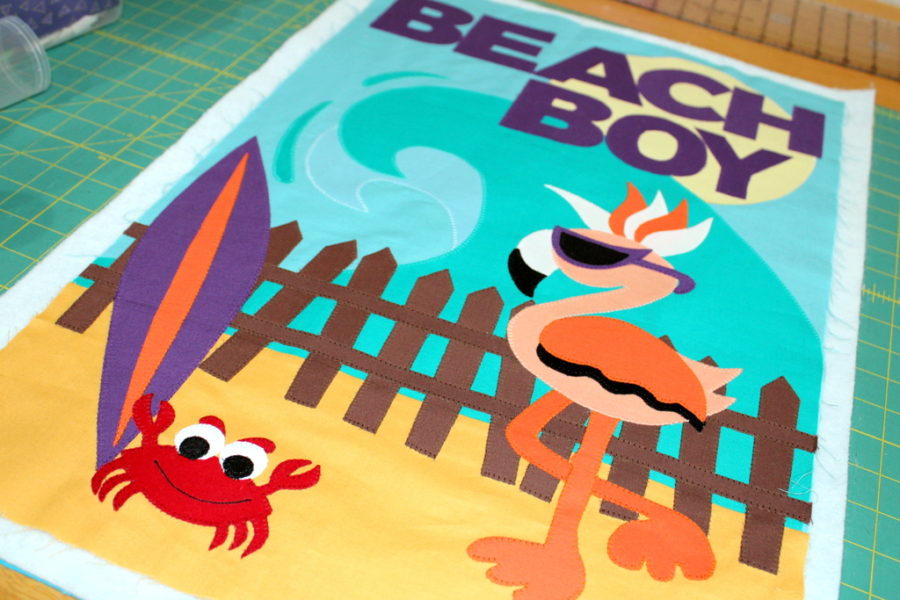
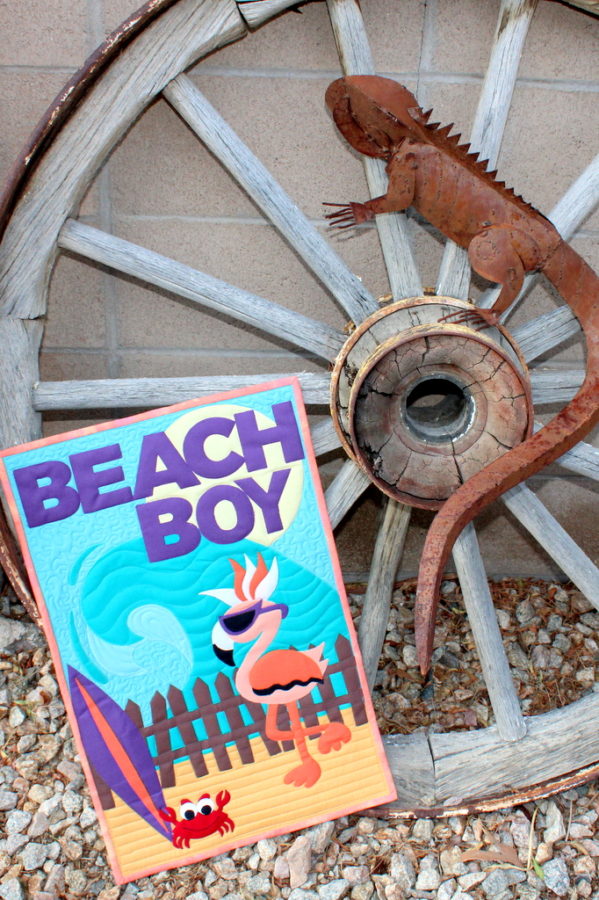
Beach Boy Flamingo Quilt
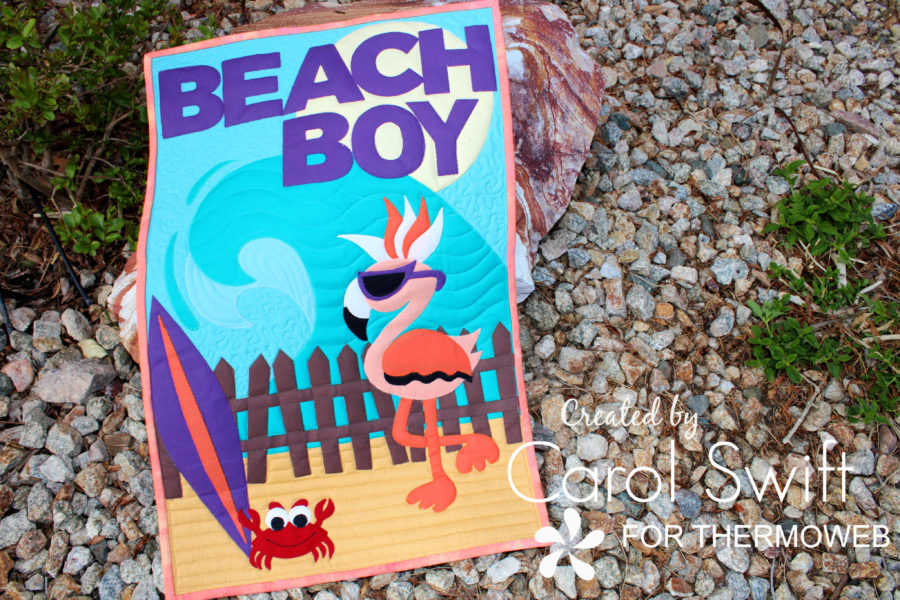
“Beach Boy” wall hanging measures 15″ x 23″ when finished and goes together easily when using ThermOWeb’s amazing products.
SUPPLIES:
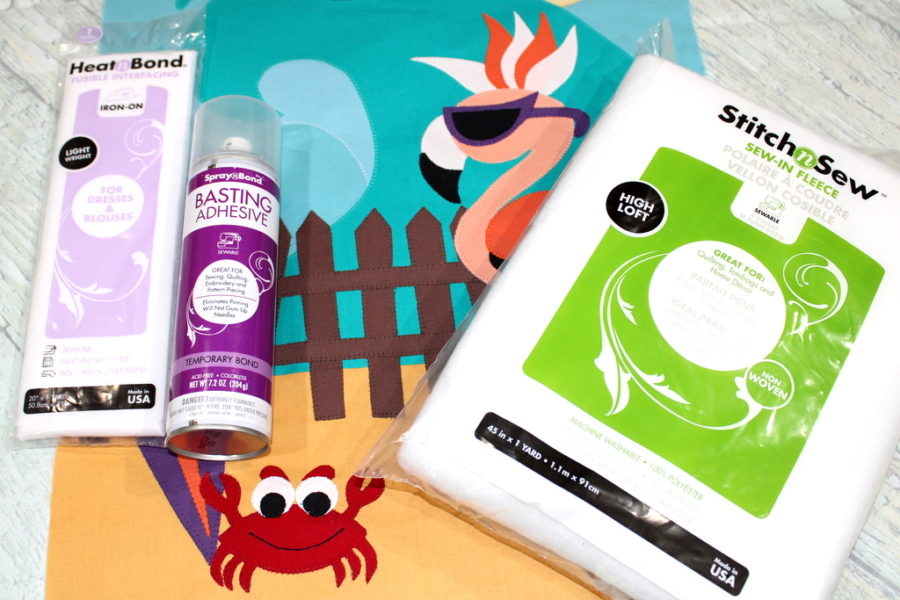
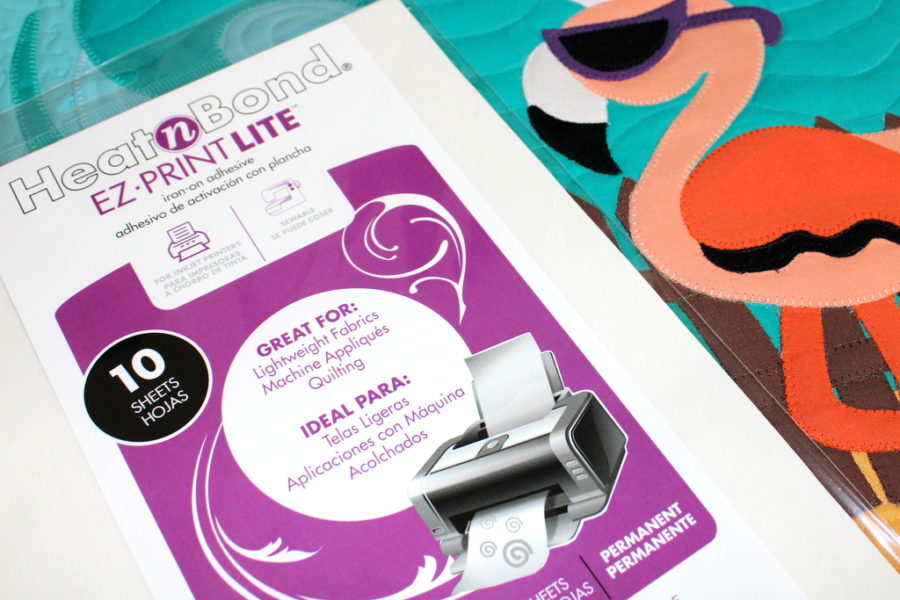
Heat n Bond Lite Iron-on Adhesive
Spray n Bond Basting Adhesive
Stitch n Sew High Loft Fleece
Heat n Bond Light Weight Non-Woven Interfacing
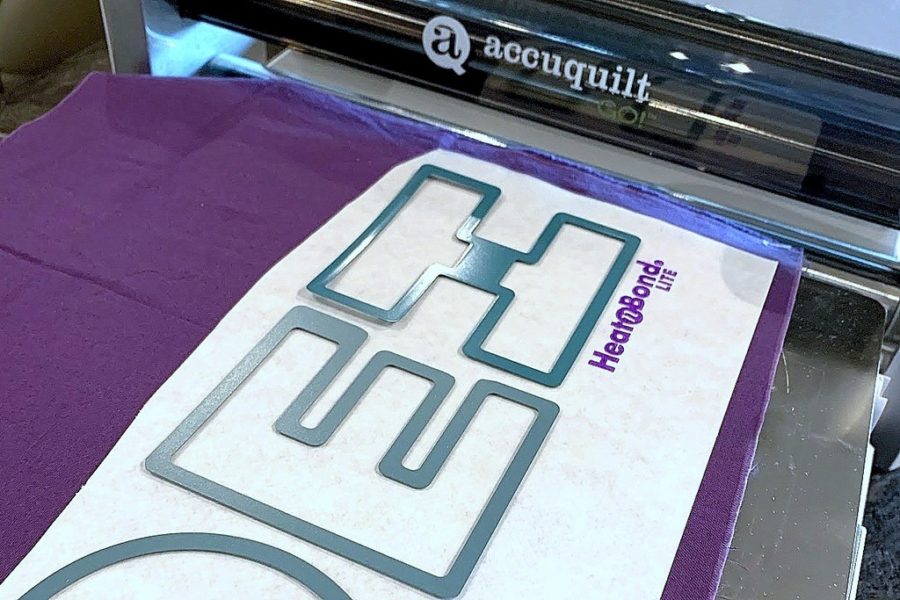
Crafter’s Edge or Accuquilt Die cutter w/adaptor
Crafter’s Edge Letters B, E, A, C, H, O, Y
Oliso Iron
FABRIC NEEDED:
13-15 Fat quarters in various colors
1/2 yard backing
1/4 yard – binding
CUTTING INSTRUCTIONS:
Cut 1 – 15 ½” x 19 ½” sky background
Cut 1 – 4 ½” x 15 ½” sand background
Cut 1 – 15 ½” x 19 ½” interfacing
Cut 1 – 4 ½” x 15 ½” interfacing
Cut 1 – 15 ½” x 23 ½” wall hanging back (allow extra as needed for quilting)
Cut 1 – 15 ½” x 23 ½” Stitch n Sew High Loft Fleece (allow extra as needed for quilting)
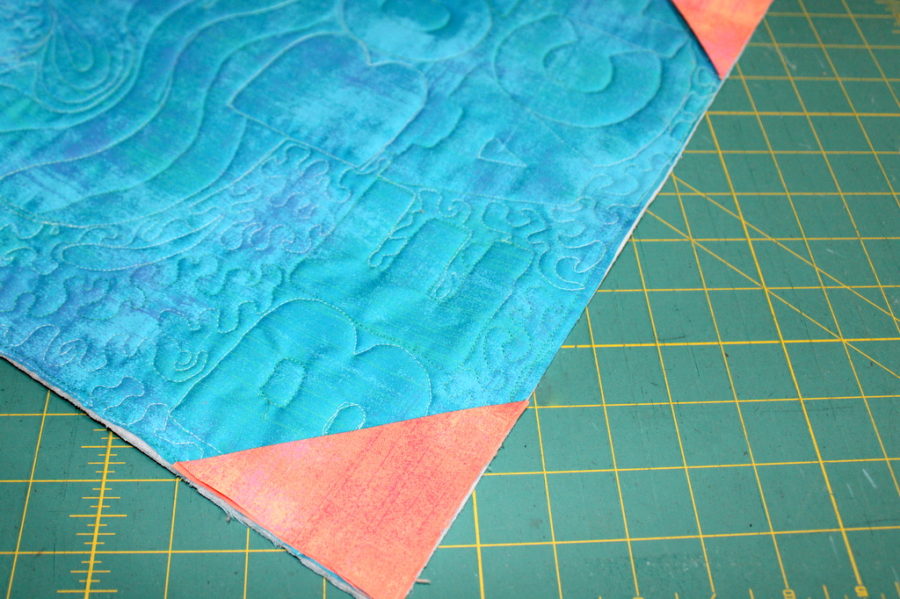
Cut 2 – 3 ½” x 3 ½” squares, corners for hanging
Cut 3 – 2 ½” x 43” strips, binding
SEWING/APPLIQUE INSTRUCTIONS: All seams are sewn 1/4” unless otherwise noted
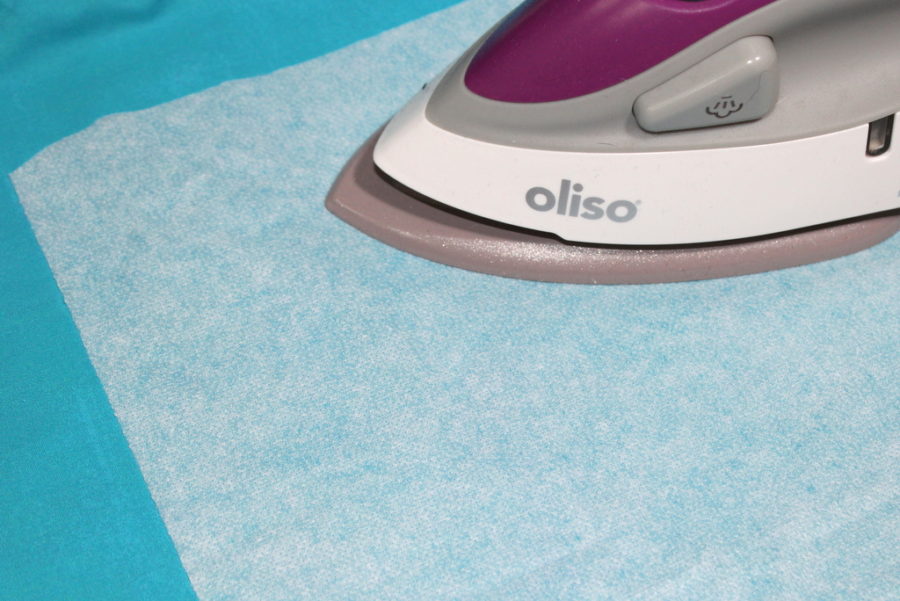
Iron Heat n Bond Light Weight Non-Woven Interfacing to the wrong side of sky and sand background fabric following package directions. *Applique Tip: Ironing Heat n Bond Light Weight Non-Woven Interfacing to the wrong side of your fabric before applying applique will add stability to the fabric and make sewing small pieces easier. An Oliso iron, especially this cute mini purple one, works great for big or small projects.
Prepare the applique designs using Heat n Bond Lite Iron-on Adhesive; follow package directions. Designs can be traced on the adhesive or use Heat n Bond Lite EZ Print Sheets that can be run through an inkjet printer…so easy!
Peel off paper liner from the backs of wave applique pieces. Place wave, adhesive side down, on right side of fabric with bottom of wave along raw edge of sky background fabric. Press according to package directions until entire piece is bonded. Let cool.
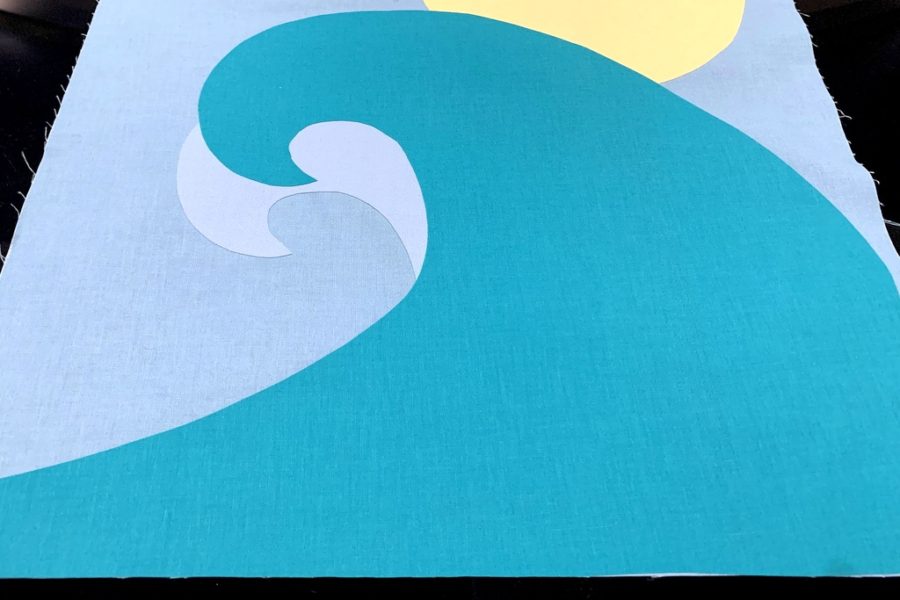
With right sides together, sew 15 ½” x 19 ½” sky background to 4½” x 15 ½” sand background making sure to catch wave between seams. Press seams down.
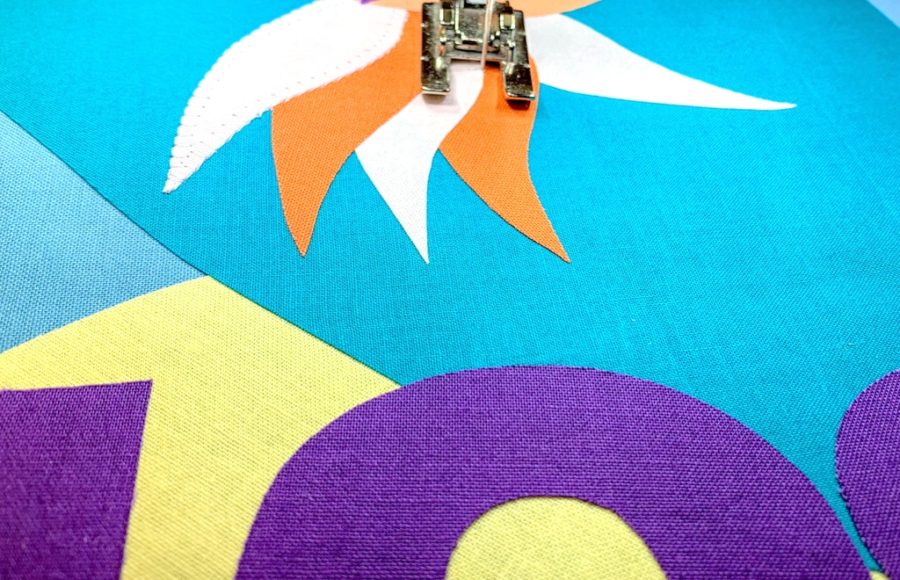
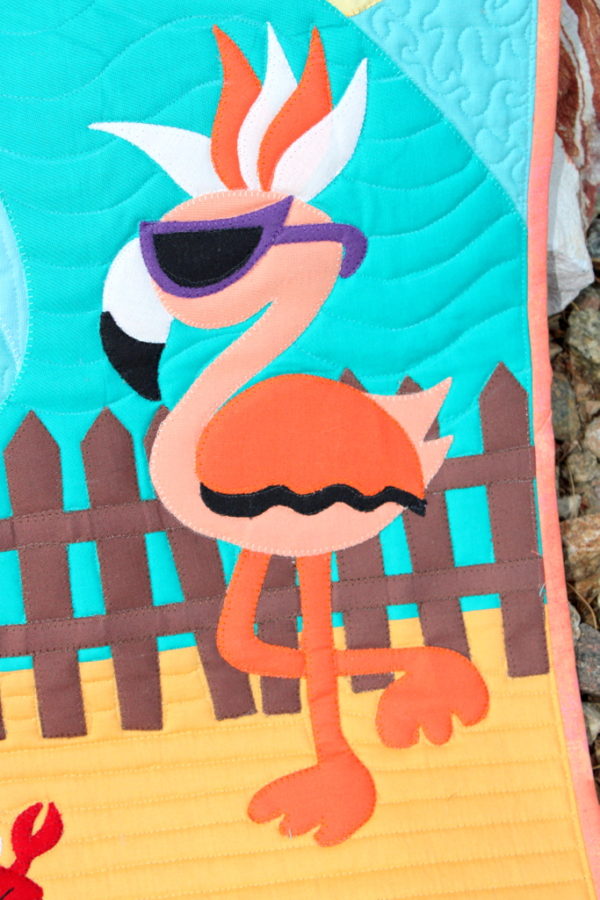
Following package instructions, add remaining applique pieces.

Sew around edges using a straight, zig-zag, or blanket stitch.
Crafter’s Edge Letters – Iron adhesive to the wrong side of fabrics; let cool. Following Crafter’s Edge instructions, place paper side of the adhesive facing up on the platform of the Crossover II or use the adapter to cut Crafter’s Edge letters using an Accuquilt cutting machine.
Cover as directed before running through the machine. Run die and fabric through the machine. Peel off paper liner from the backs of applique pieces. Place applique, adhesive side down, on right side of fabric. Press according to package directions until the entire piece is bonded. Let cool. Sew around edges of applique using a straight, zig-zag, or blanket stitch.
 Assemble wall hanging – Protect the area where you will be working by placing an old sheet or paper under and around the area you’ll be spraying. Place the fleece on work area, smoothing to remove wrinkles. Place the quilt backing, wrong side down, on top of the fleece. Smooth to remove wrinkles. Rollback three or four inches of the wall hanging back to expose some of the fleece. Using the basting spray, spray fabric from one edge to the other.
Carefully lay the wrong side of the wall hanging backing over the sprayed surface of fleece. Smooth fabric to ensure it adheres to the sprayed fleece and removes any wrinkles. Roll back the rest of the wall hanging back to continue spraying and smoothing a few inches. Check for creases or folds you might have missed.

Turn backing and fleece over to have fleece facing up. Lay quilt front, wrong side down, on fleece. Make sure the quilt front is lined up correctly; smooth out wrinkles. Use the same spray and smooth method as the backing. Trim edges and square-up quilt.
 Quilt using your favorite method.
Optional: Add dowel hangers – Create corner pockets on the back using two 3½” x 3½” squares of fabric. Fold the squares in half diagonally and press on fold. Place raw edges of folded corners in top corners of wall hanging back; pin in place and baste.
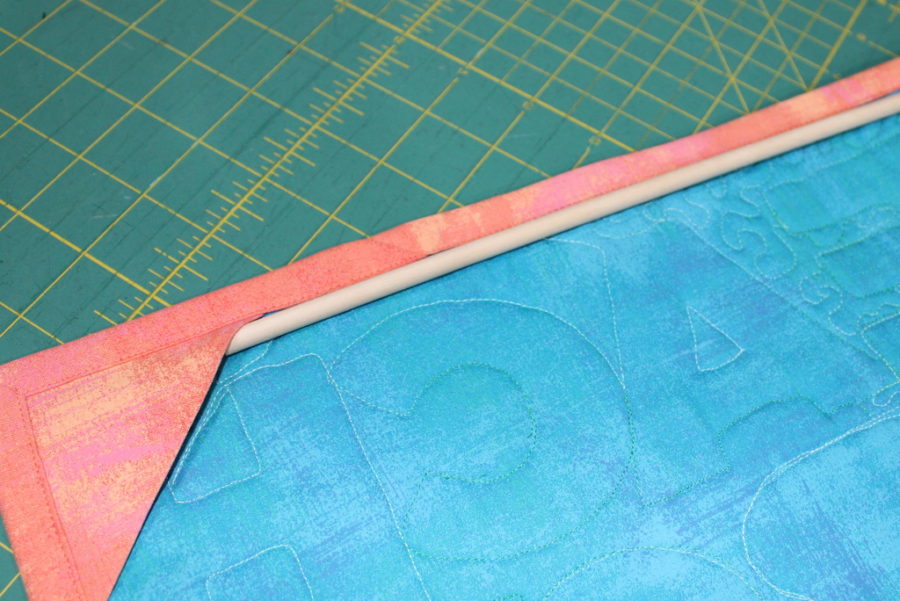
Add binding using your favorite method. Cut a dowel to fit between the two corners. The dowel hangs easily on a nail on a wall.
Hopefully, you’ll get some fun beach time soon! You can find “Beach Boy” in a PDF pattern HERE.
[…] can find Beach Boy Freddie HERE in a previous ThermOWeb post. They make a great […]