


a href=”http://thermoweb.com”>
We’re kicking off a new week with more NEW products because that’s just how we do things!
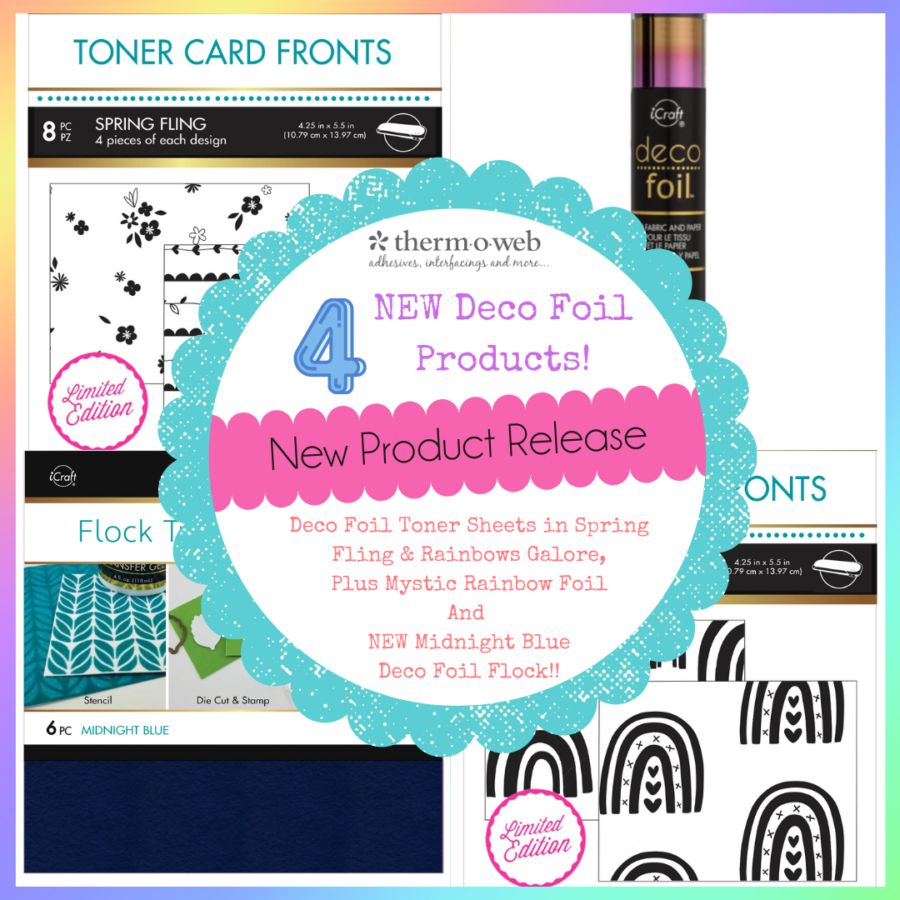
We could not be more excited about our NEW Mystic Rainbow Deco Foil, our two NEW sets of Deco Foil Toner Sheets – Spring Fling and Rainbows Galore and if that wasn’t enough…our NEW Midnight Blue Deco Foil Flock Transfer Sheets.
All this week we have projects to share with you featuring these new products that we’re certain you’re going to love as much as we do! Be sure to read through this post and then get entered to win a $40 Gift Card to shop with us!
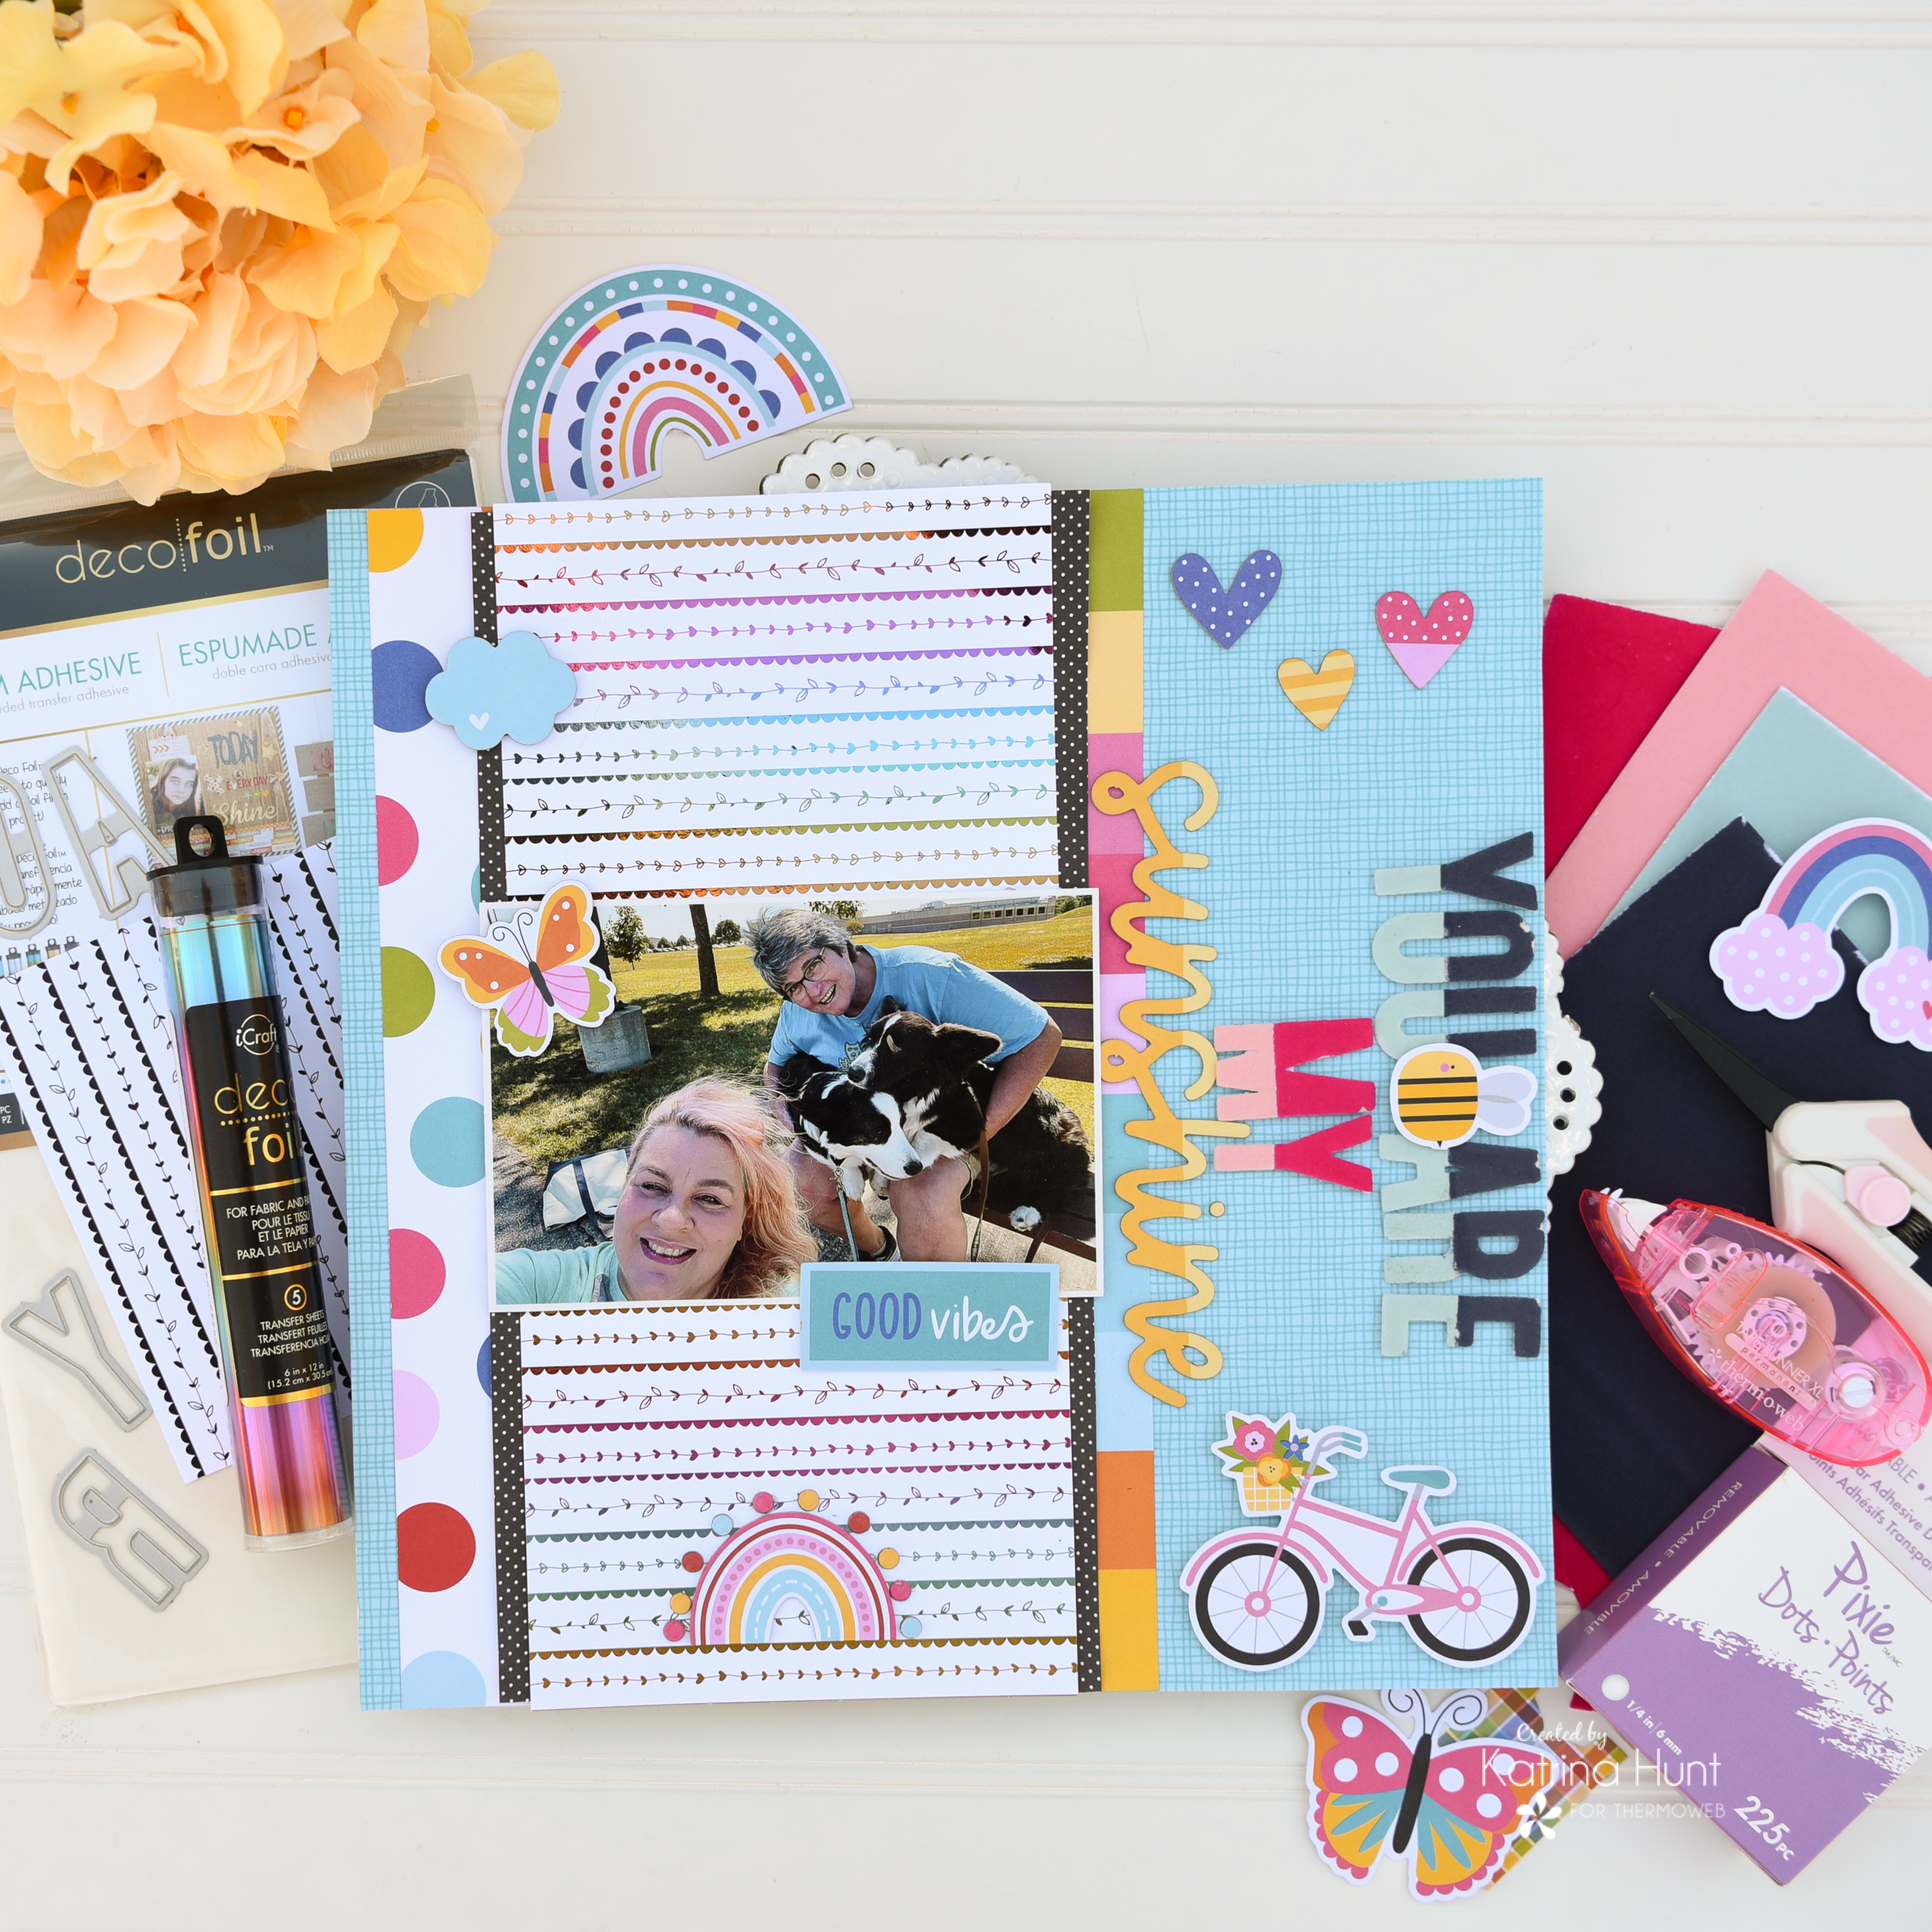
Hey Hey!!! It’s Katrina from Paper, Scissors, Glue and Hybrid Too sharing a layout with some of the NEWLY RELEASED Deco Foil products!!! I have a layout featuring the Spring Fling Card Front Toner Sheets and the NEW Mystic Rainbow foil. AND I have mixed some of the NEW Midnight flock in as well! Let’s take a look!
Therm O Web Supplies Used
Memory Runner XL
Memory Runner XL Refill
3D Foam Squares – Combo Pack
NEW 3D FOAM SQUARES BOX
NEW 3D FOAM TAPE ROLL 1/16
NEW Pixie Tape
NEW Pixie Dots
Gina K Designs Foam Tape Black
Deco Foil Foam Adhesive Sheets
Deco Foil Transfer Sheets – Mystic Rainbow NEW
Deco Foil Flock Transfer Sheets – Midnight NEW
Deco Foil Flock Transfer Sheets-Blue Sky
Deco Foil Flock Transfer Sheets-Think Pink
Deco Foil Flock Transfer Sheets-Pink Carnation
Deco Foil Toner Card Fronts – Spring Fling NEW
iCraft Easy Tear Tape 1/2 inch
Ultra Bond Liquid Adhesive
Other Supplies Used
Bella Blvd You Are My Sunshine Paper Collection
White Cardstock
Elle’s Studio Jane Alpha Dies Large
You Are My Sunshine Layout Details

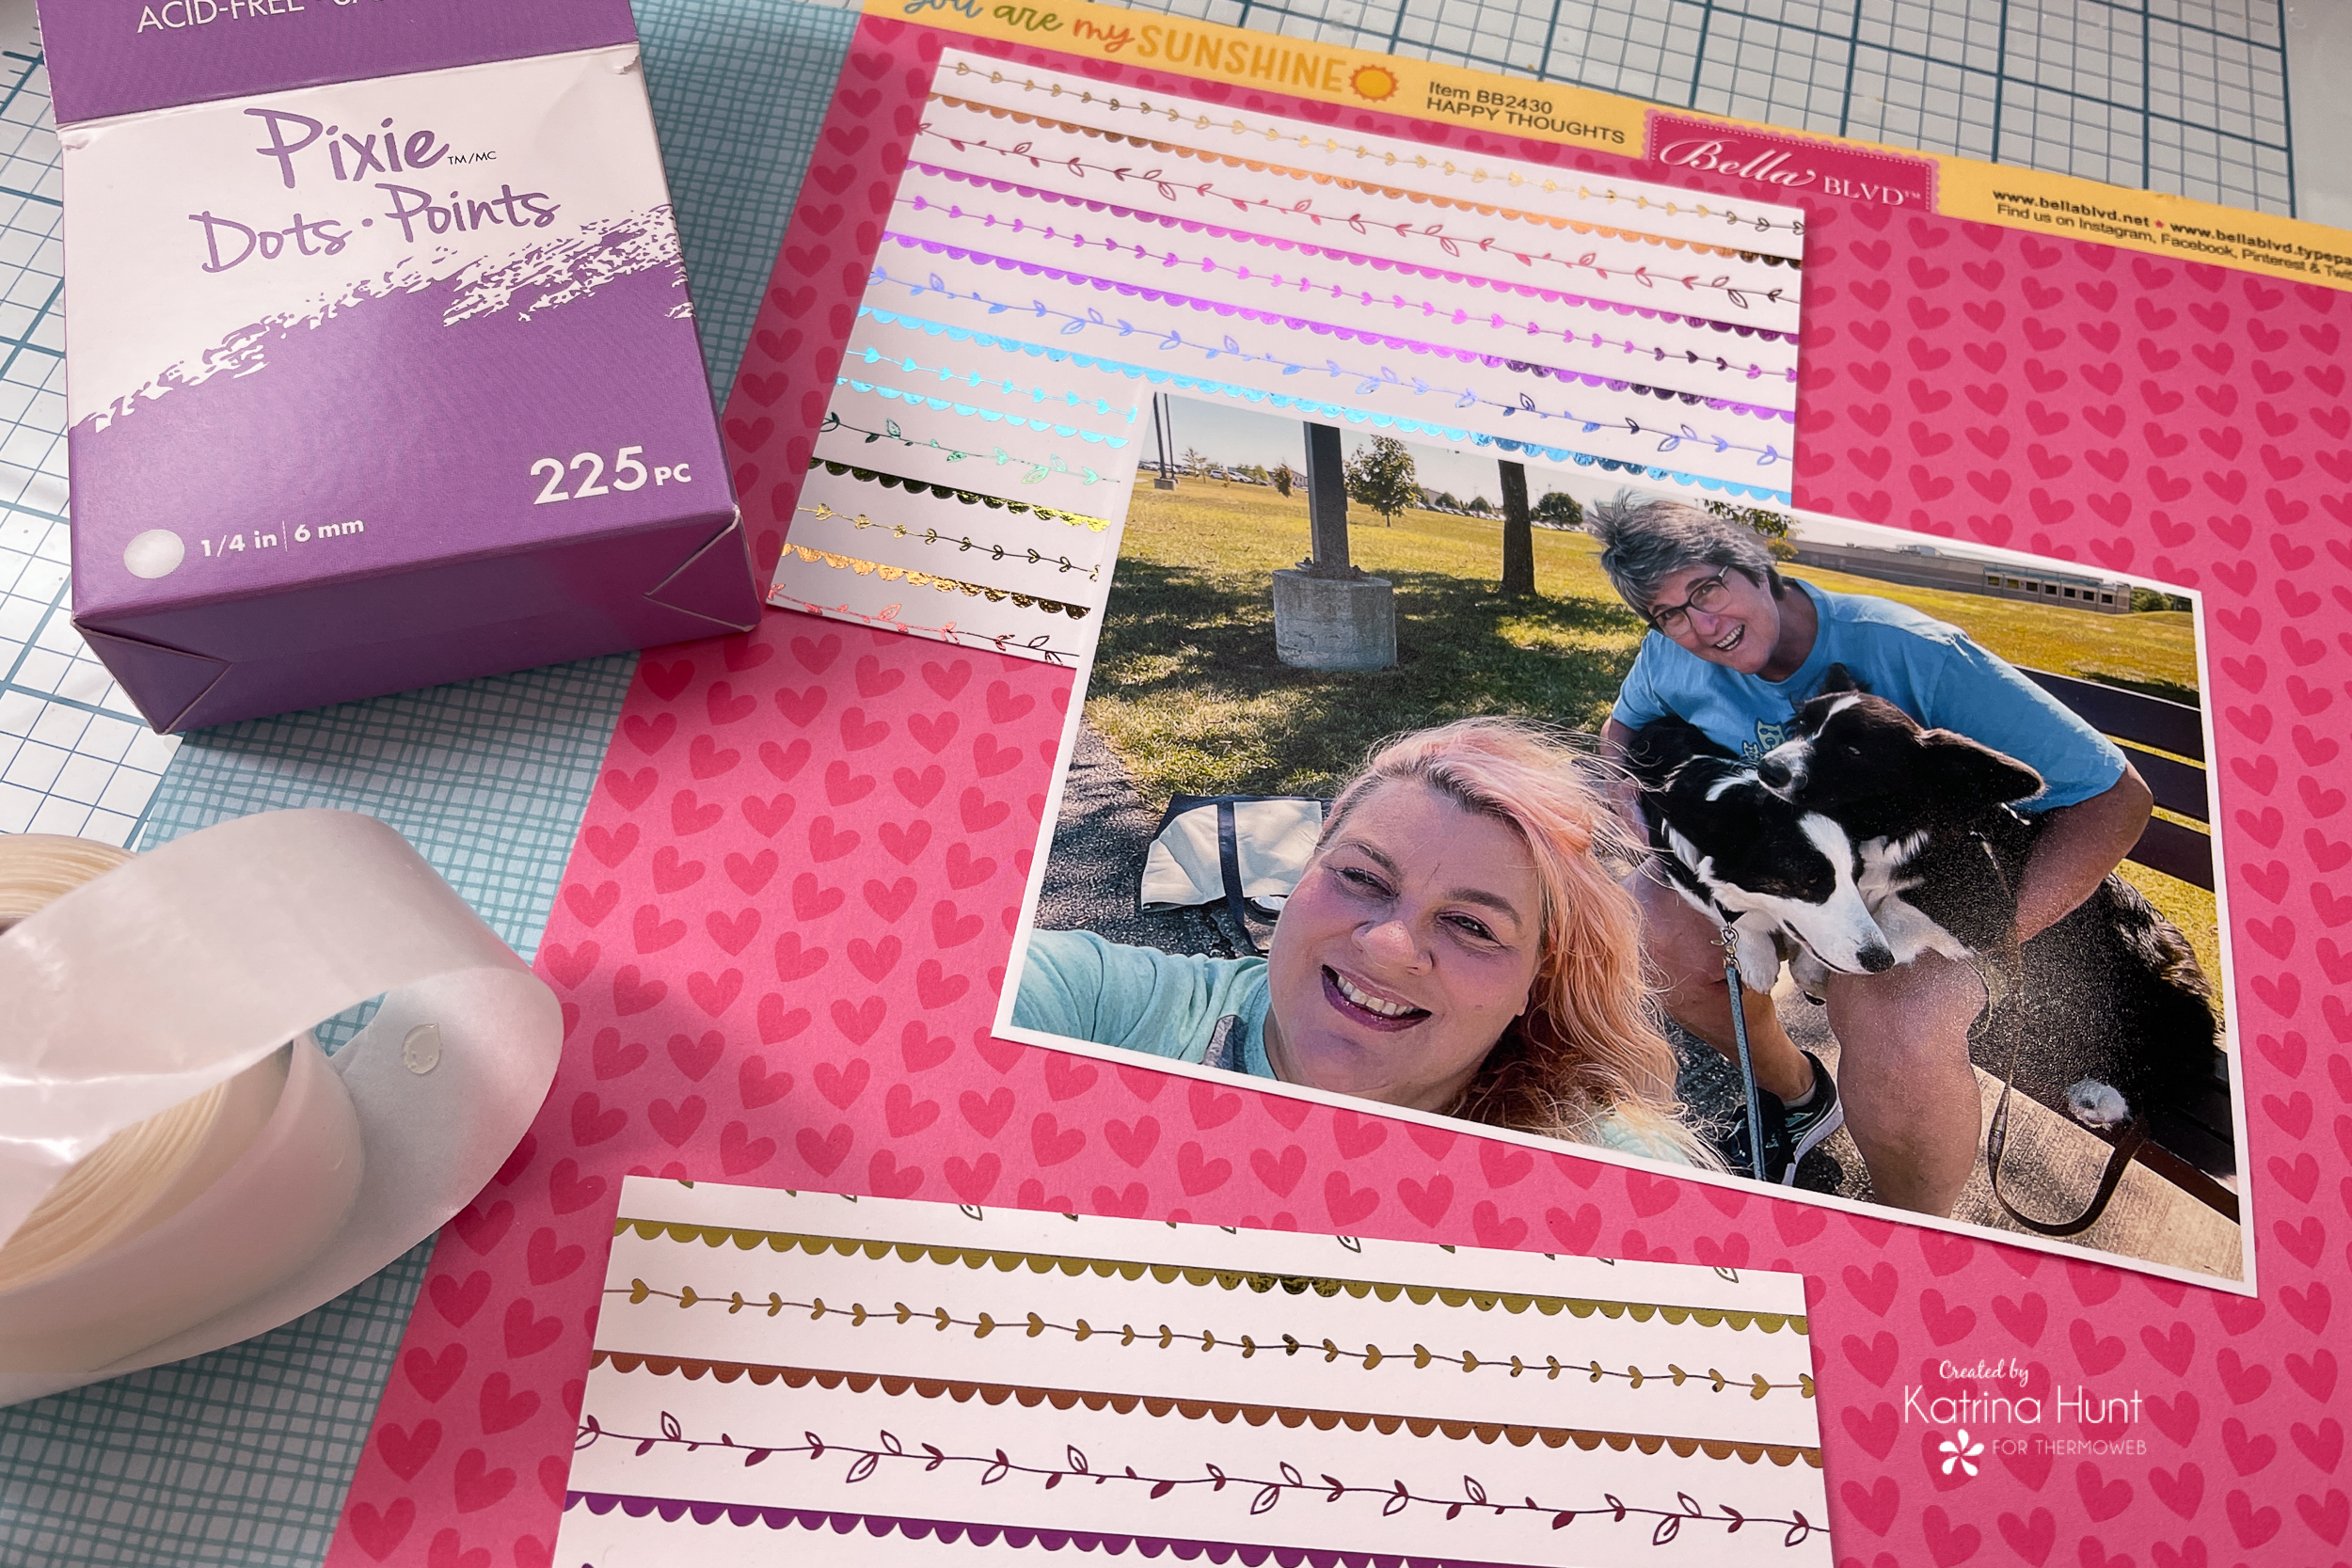
This layout started with the idea of framing my photo with the new toner card fronts. I wasn’t sure which ones I wanted to use, but decided on the Spring Fling set, because I liked the delicate stripes and vines.
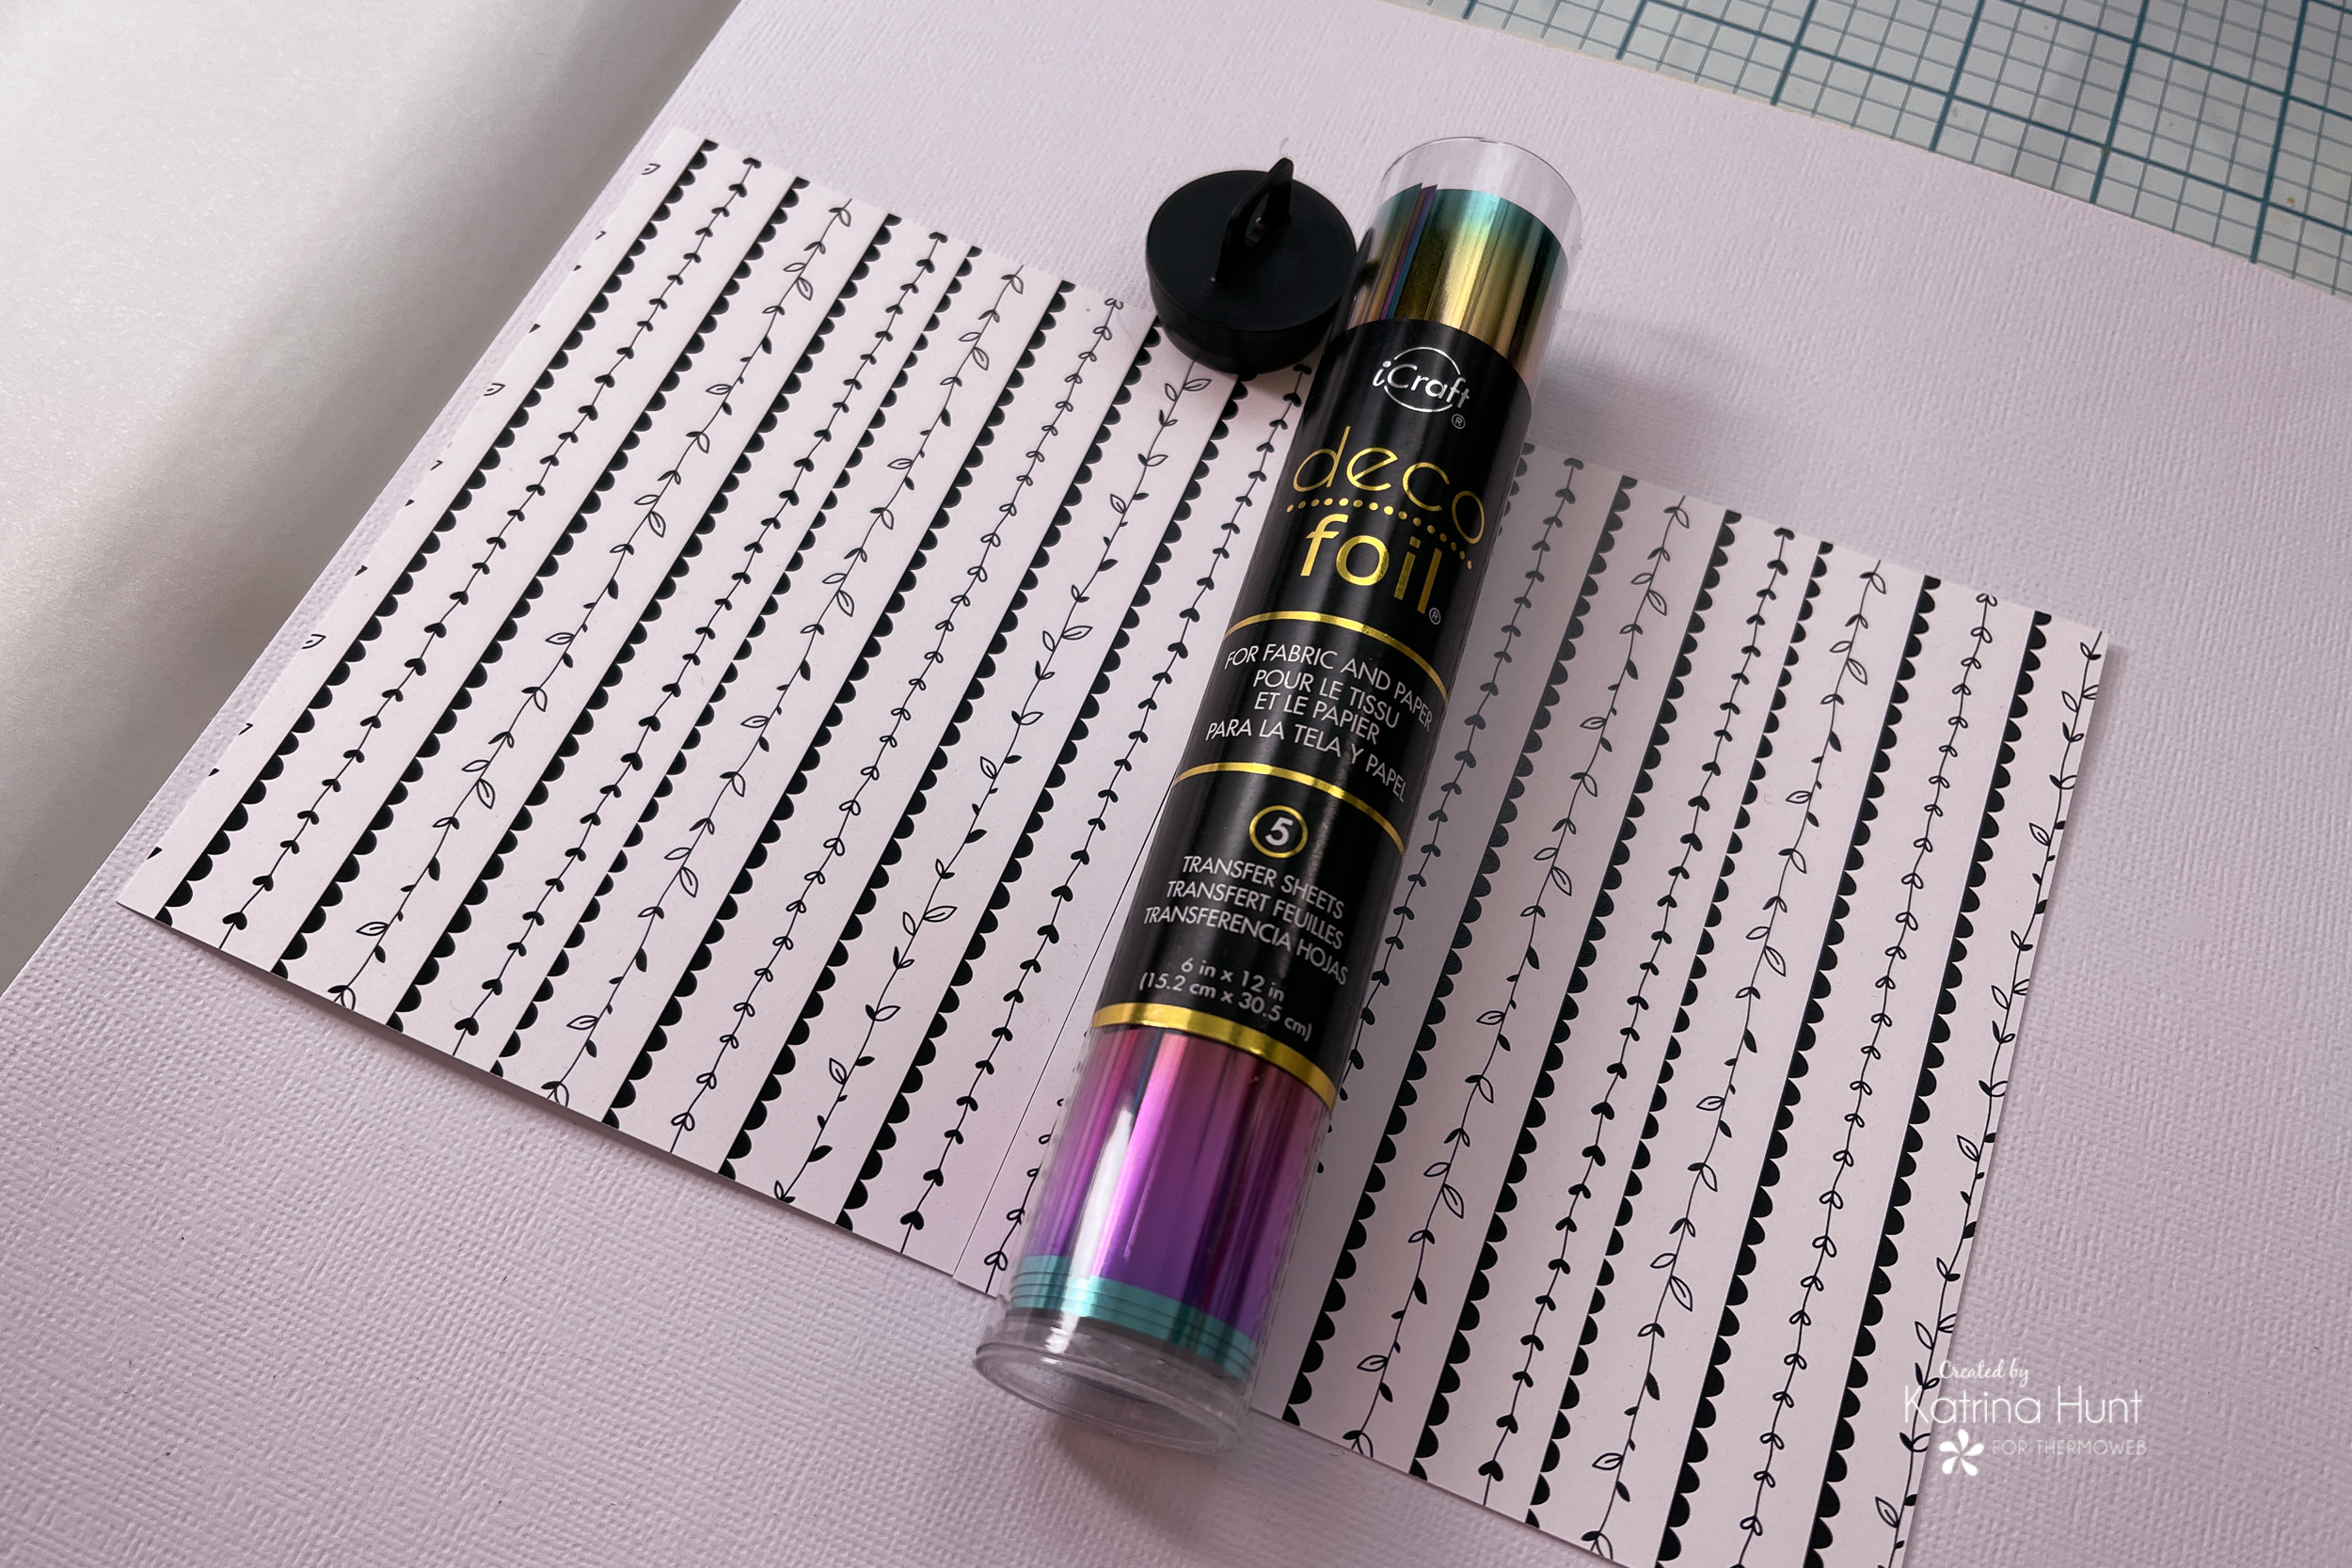
I was also excited to try out the new Mystic Rainbow foil that we had been sent for the release. I love that this is a more pastel type of rainbow and this foil is going to go with so much! I mean, I do like a primary-colored rainbow, but this one is a fun alternate!
I laid my toner card fronts with the stripes going longwise and then I laid the foil stripes going in the same direction. I wanted each line to have a color going across and not up and down. I love the toner fronts turned out! This direction and process also went along with the striped piece of paper that I used on the other side of my section. 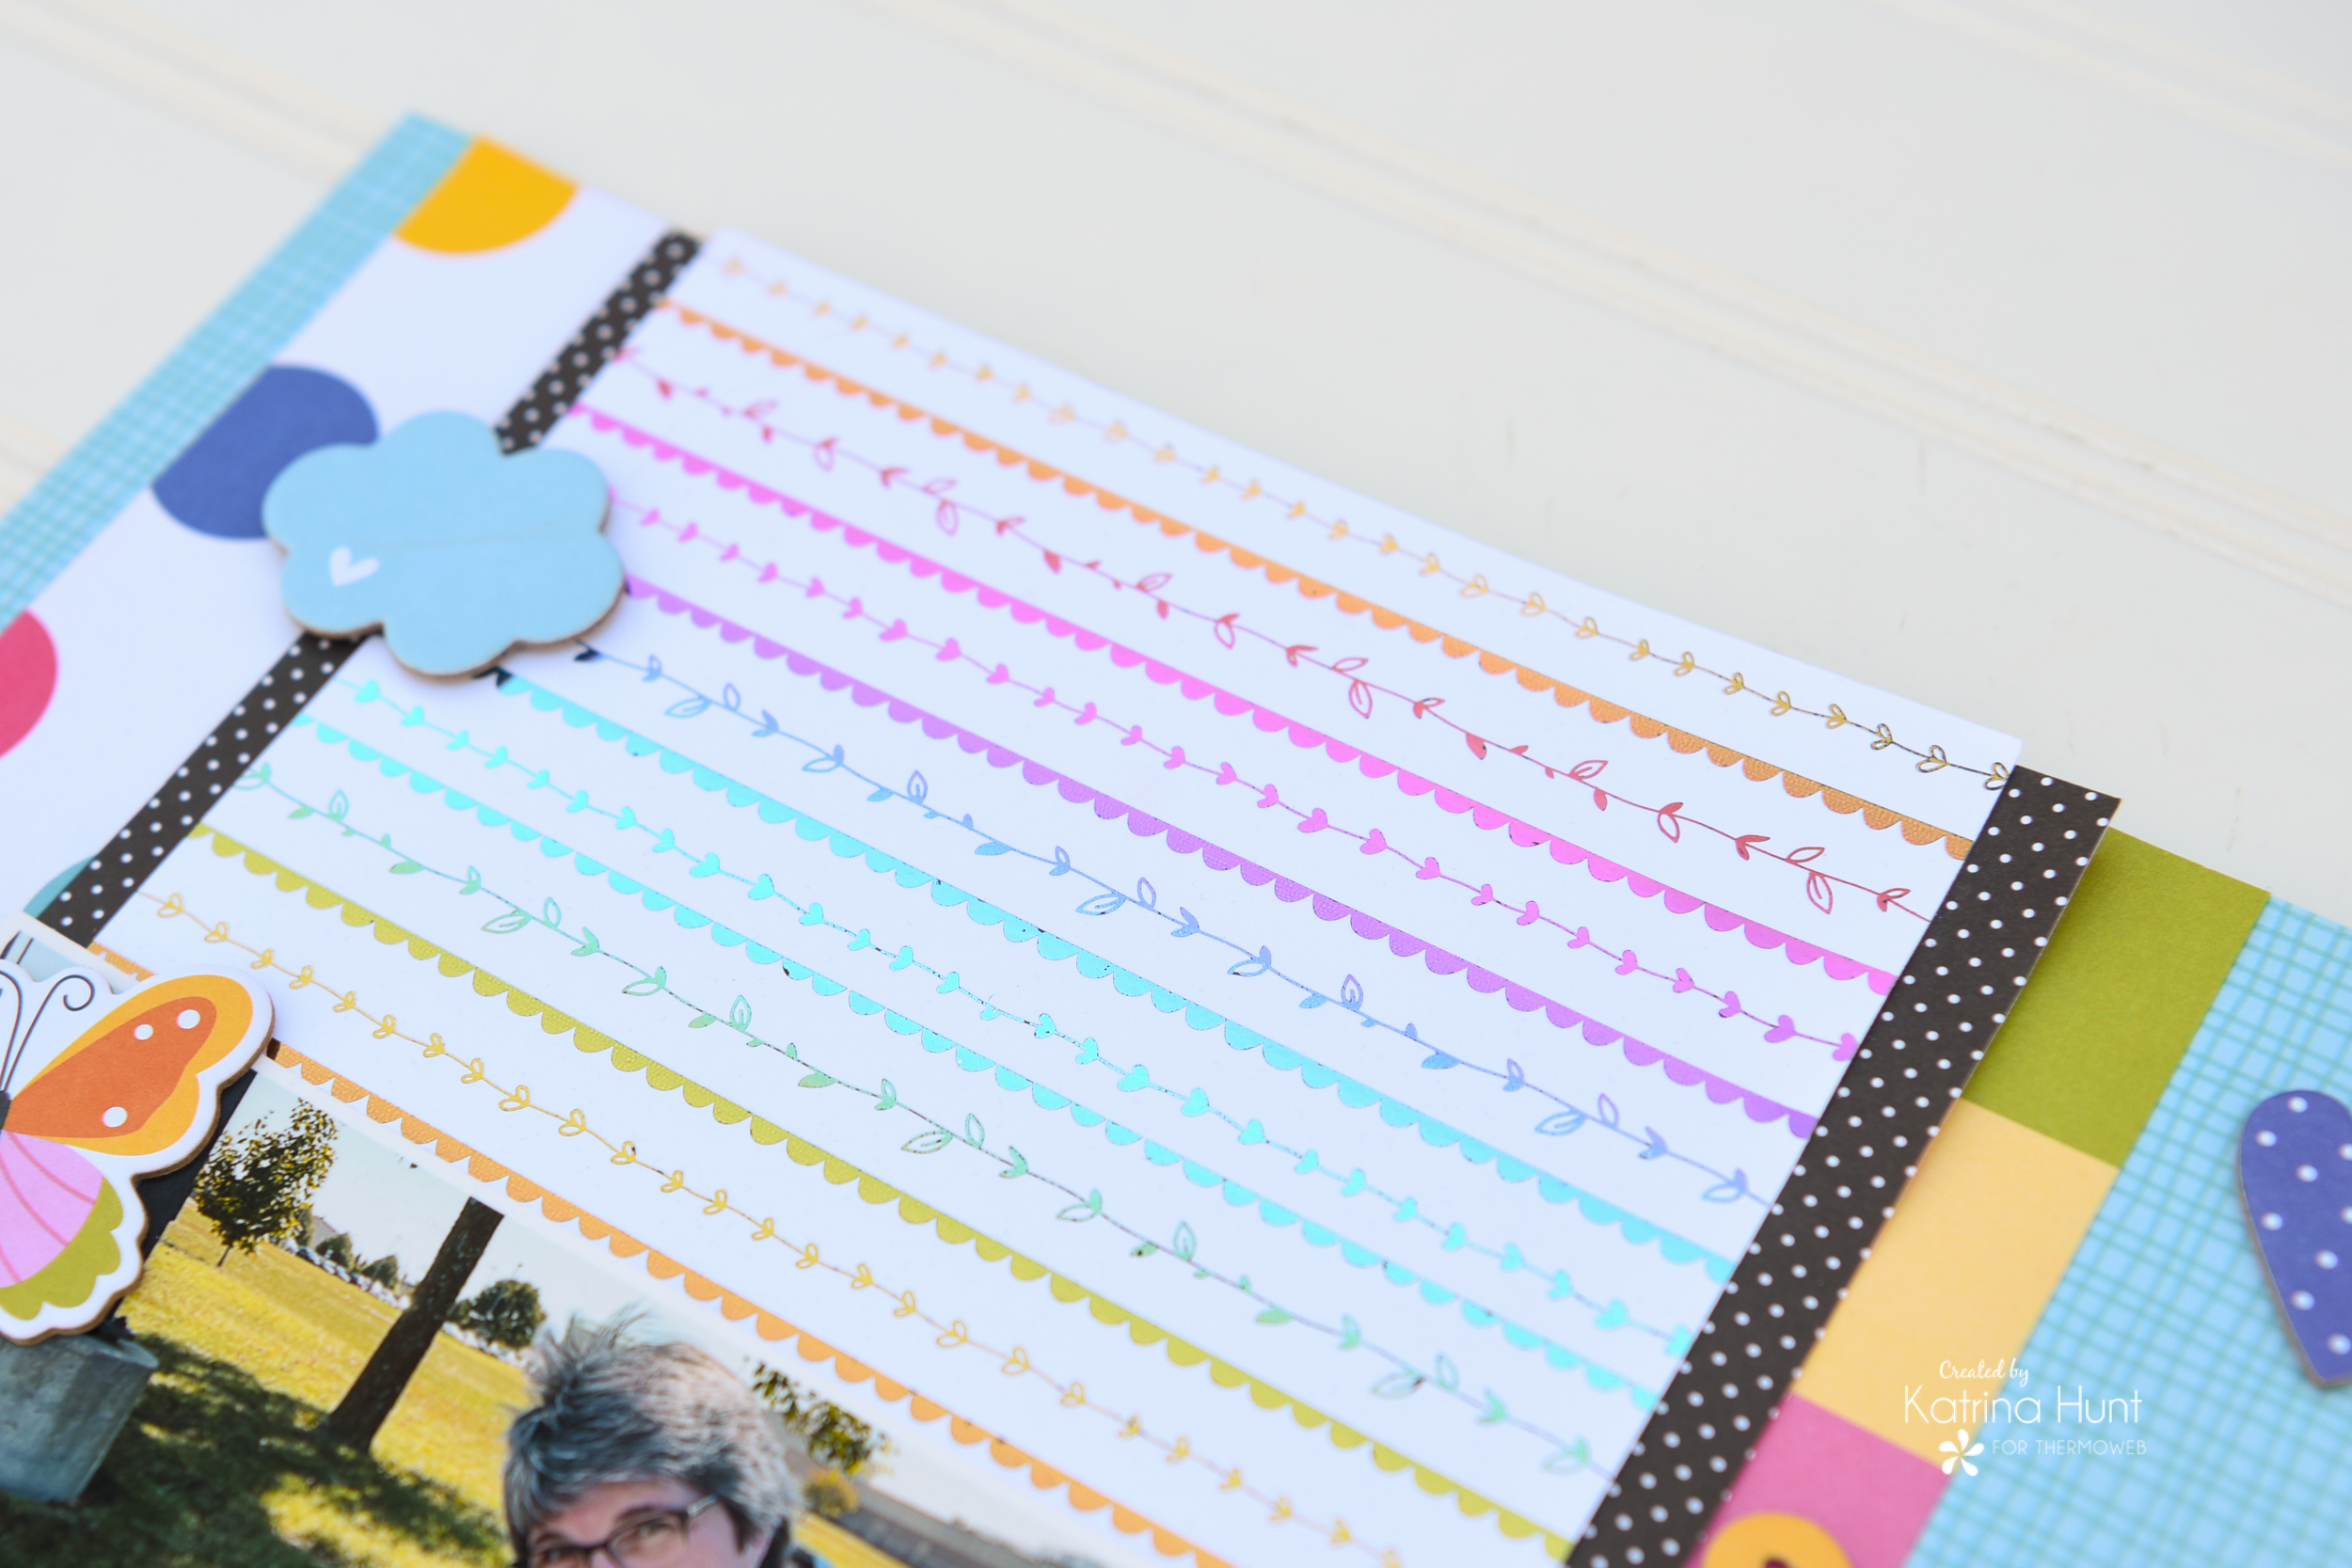
Creating The Focal Point with Photo
Once I had my card fronts foiled, I used the new Pixie Dots to adhere my picture to the card fronts. This way I could work with my picture and the card fronts together. The Pixie Dots are removable, so it was easy to adjust my picture as needed without the worry of ripping or tearing anything.
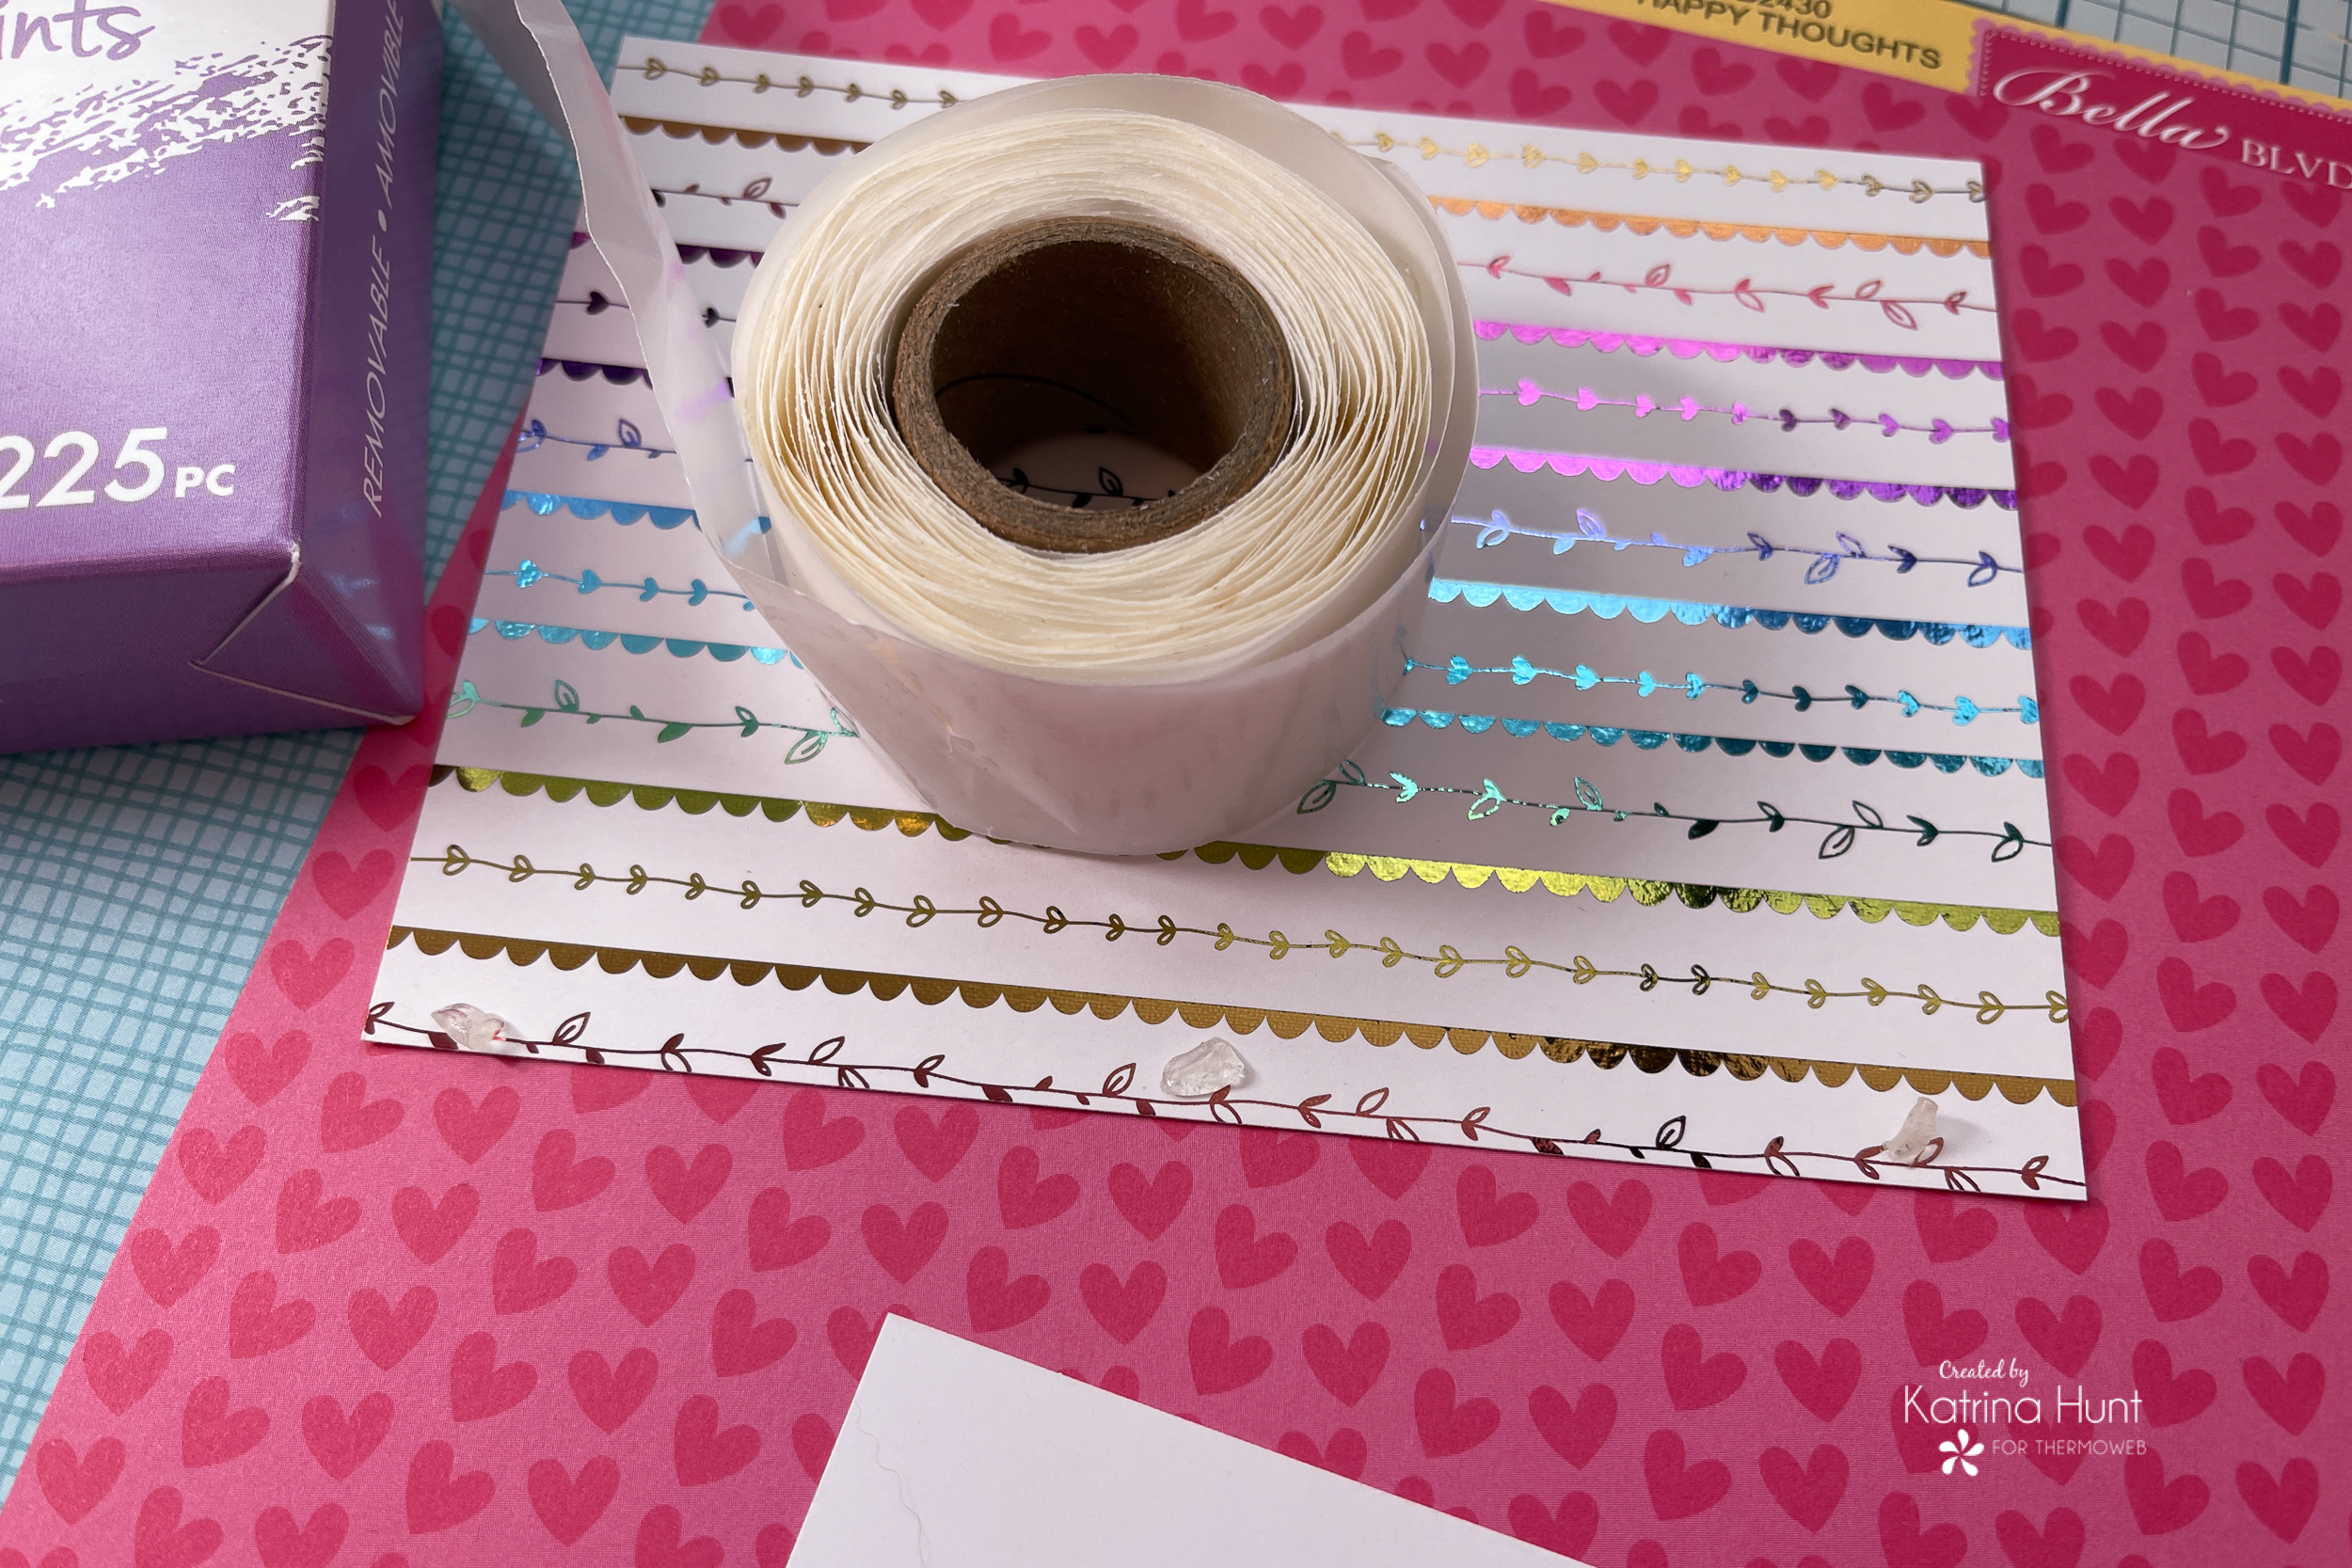
Once I had my picture and toner card fronts adhered together, I cut a small strip of black paper for each side. I held that in place with the new Pixie Tape while I worked on getting my black strips even on both sides. Note: I didn’t have much black paper to work with, so this was a great way to use what I wanted! Once everything was lined up, I used some Gina K Foam Tape on the back to pop the entire section up just a little for some dimension.
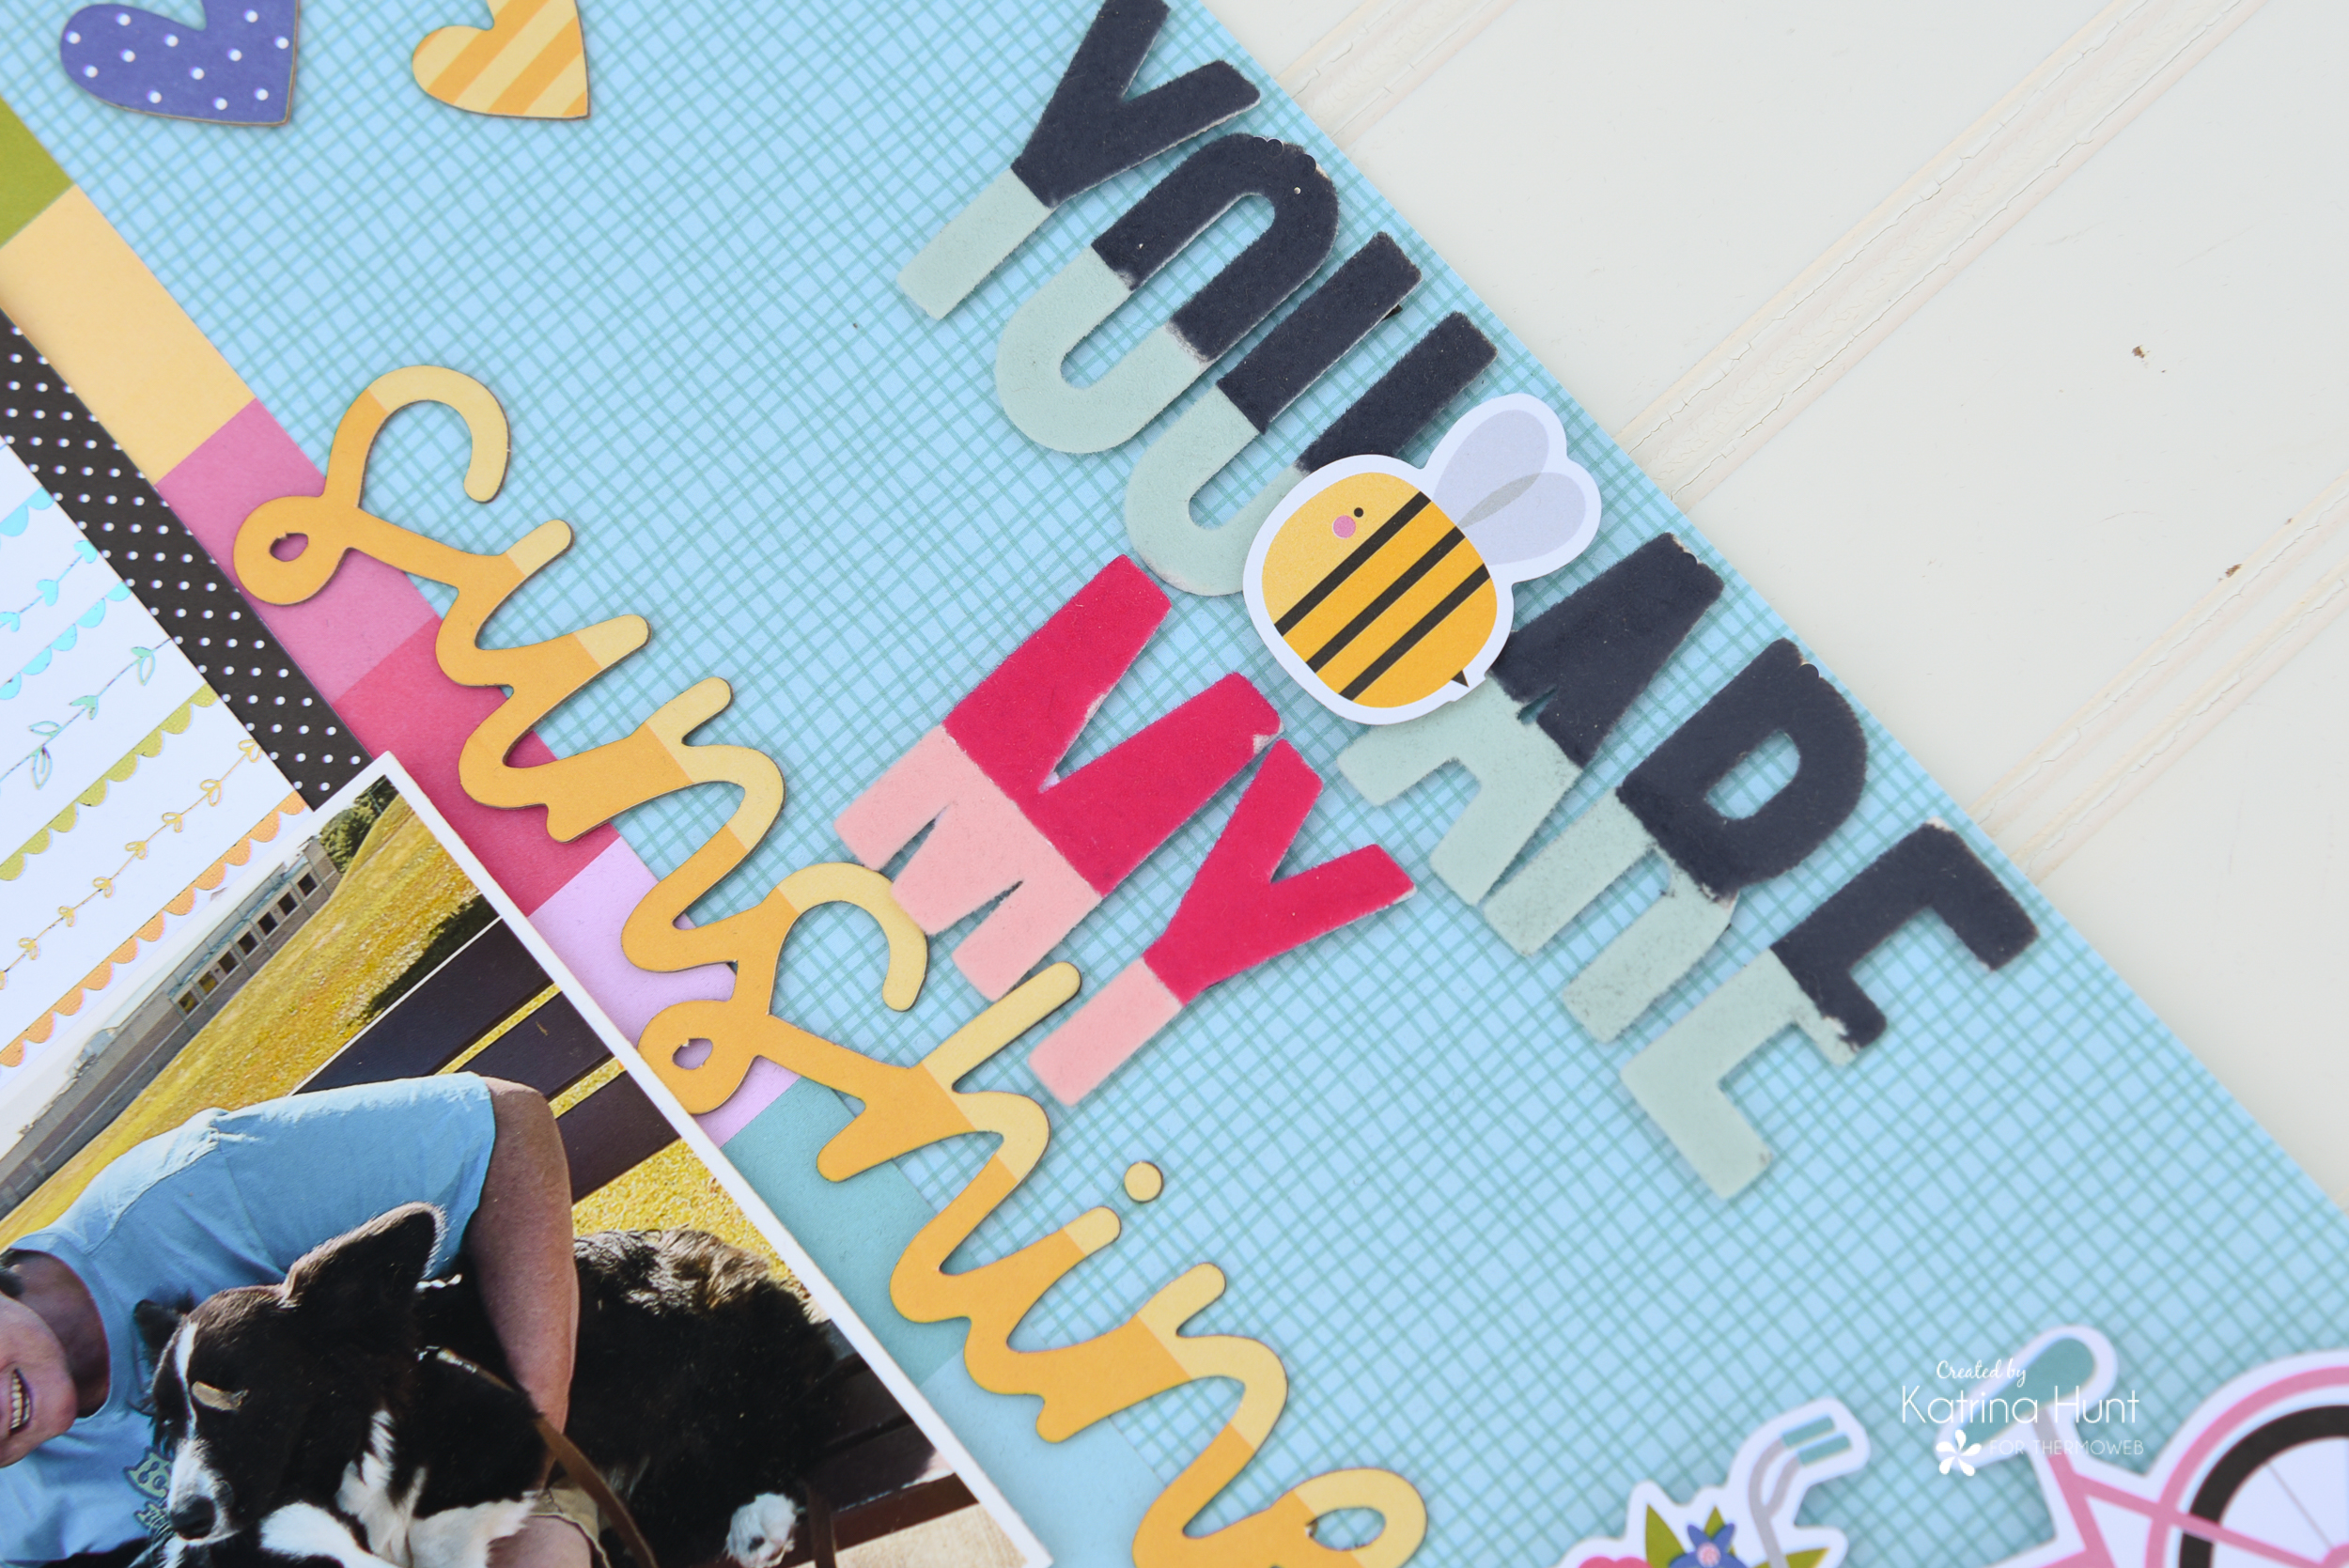
Two-Tone Title Details
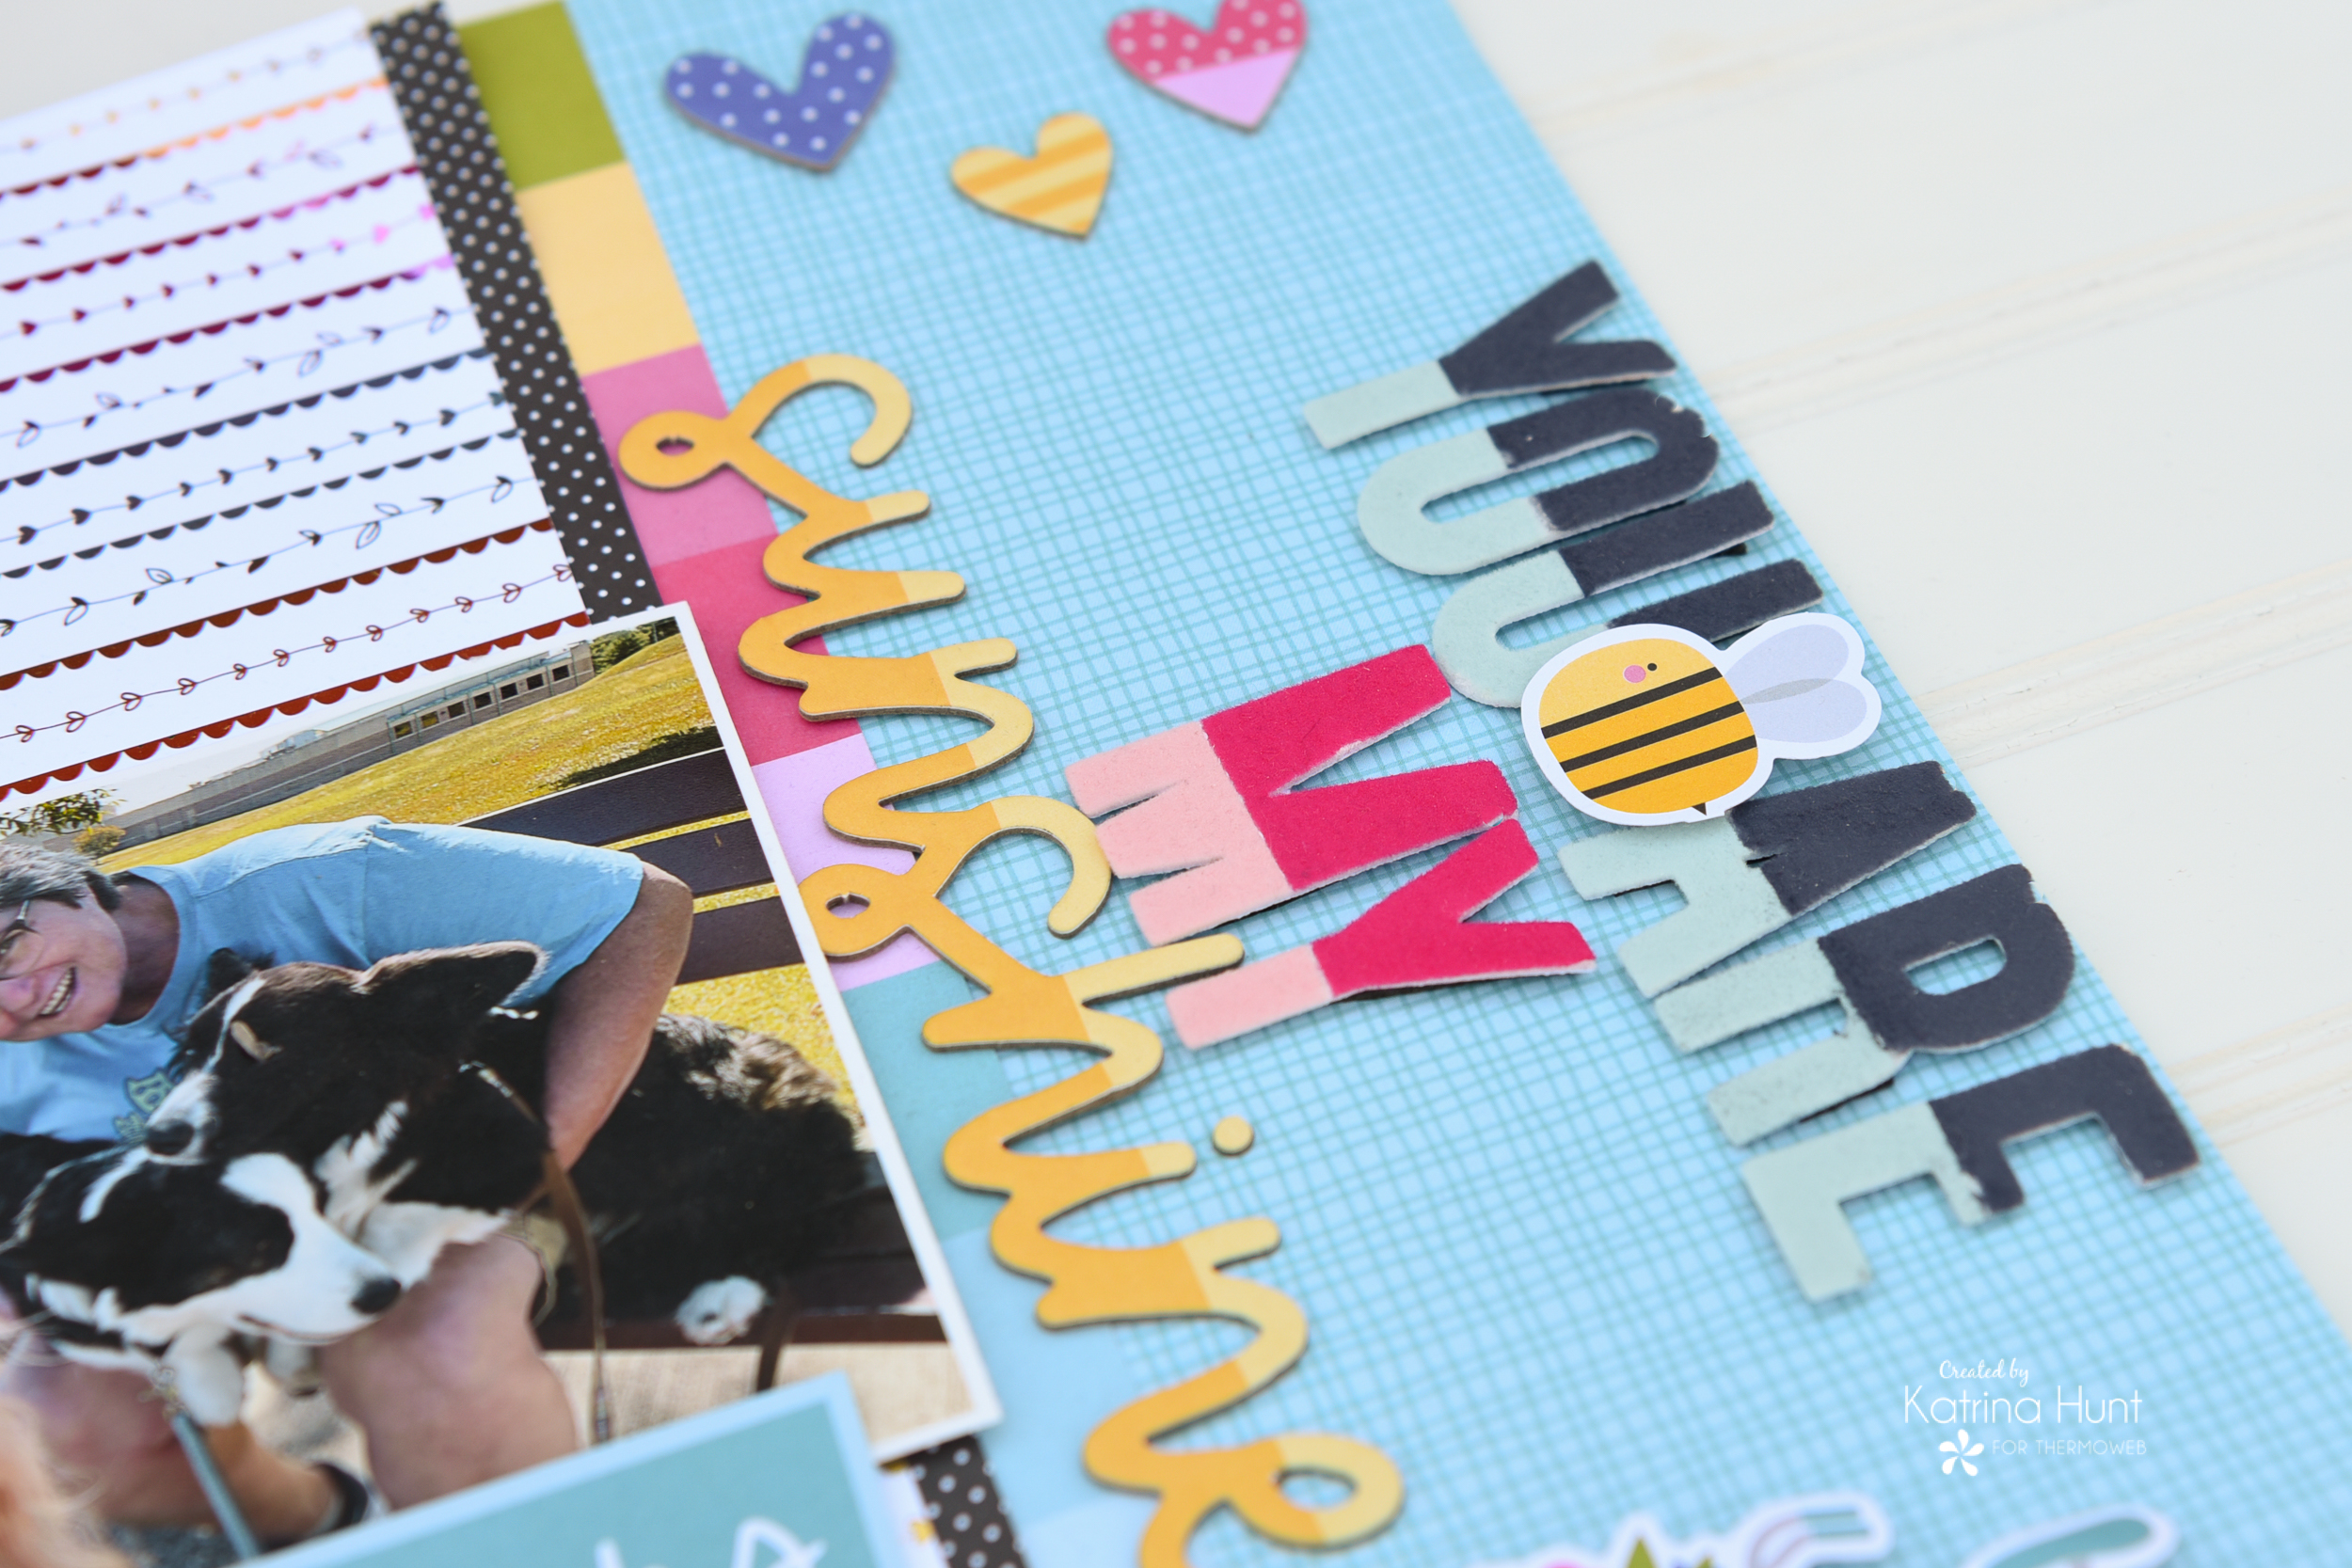
The idea for my title came from the chipboard sheet that is in the collection. It had the same phase, but the “you are my” were in white. I wanted to tie in that Midnight Blue flock, but I also want a little more color than just blue. Two-toned letters to the rescue!

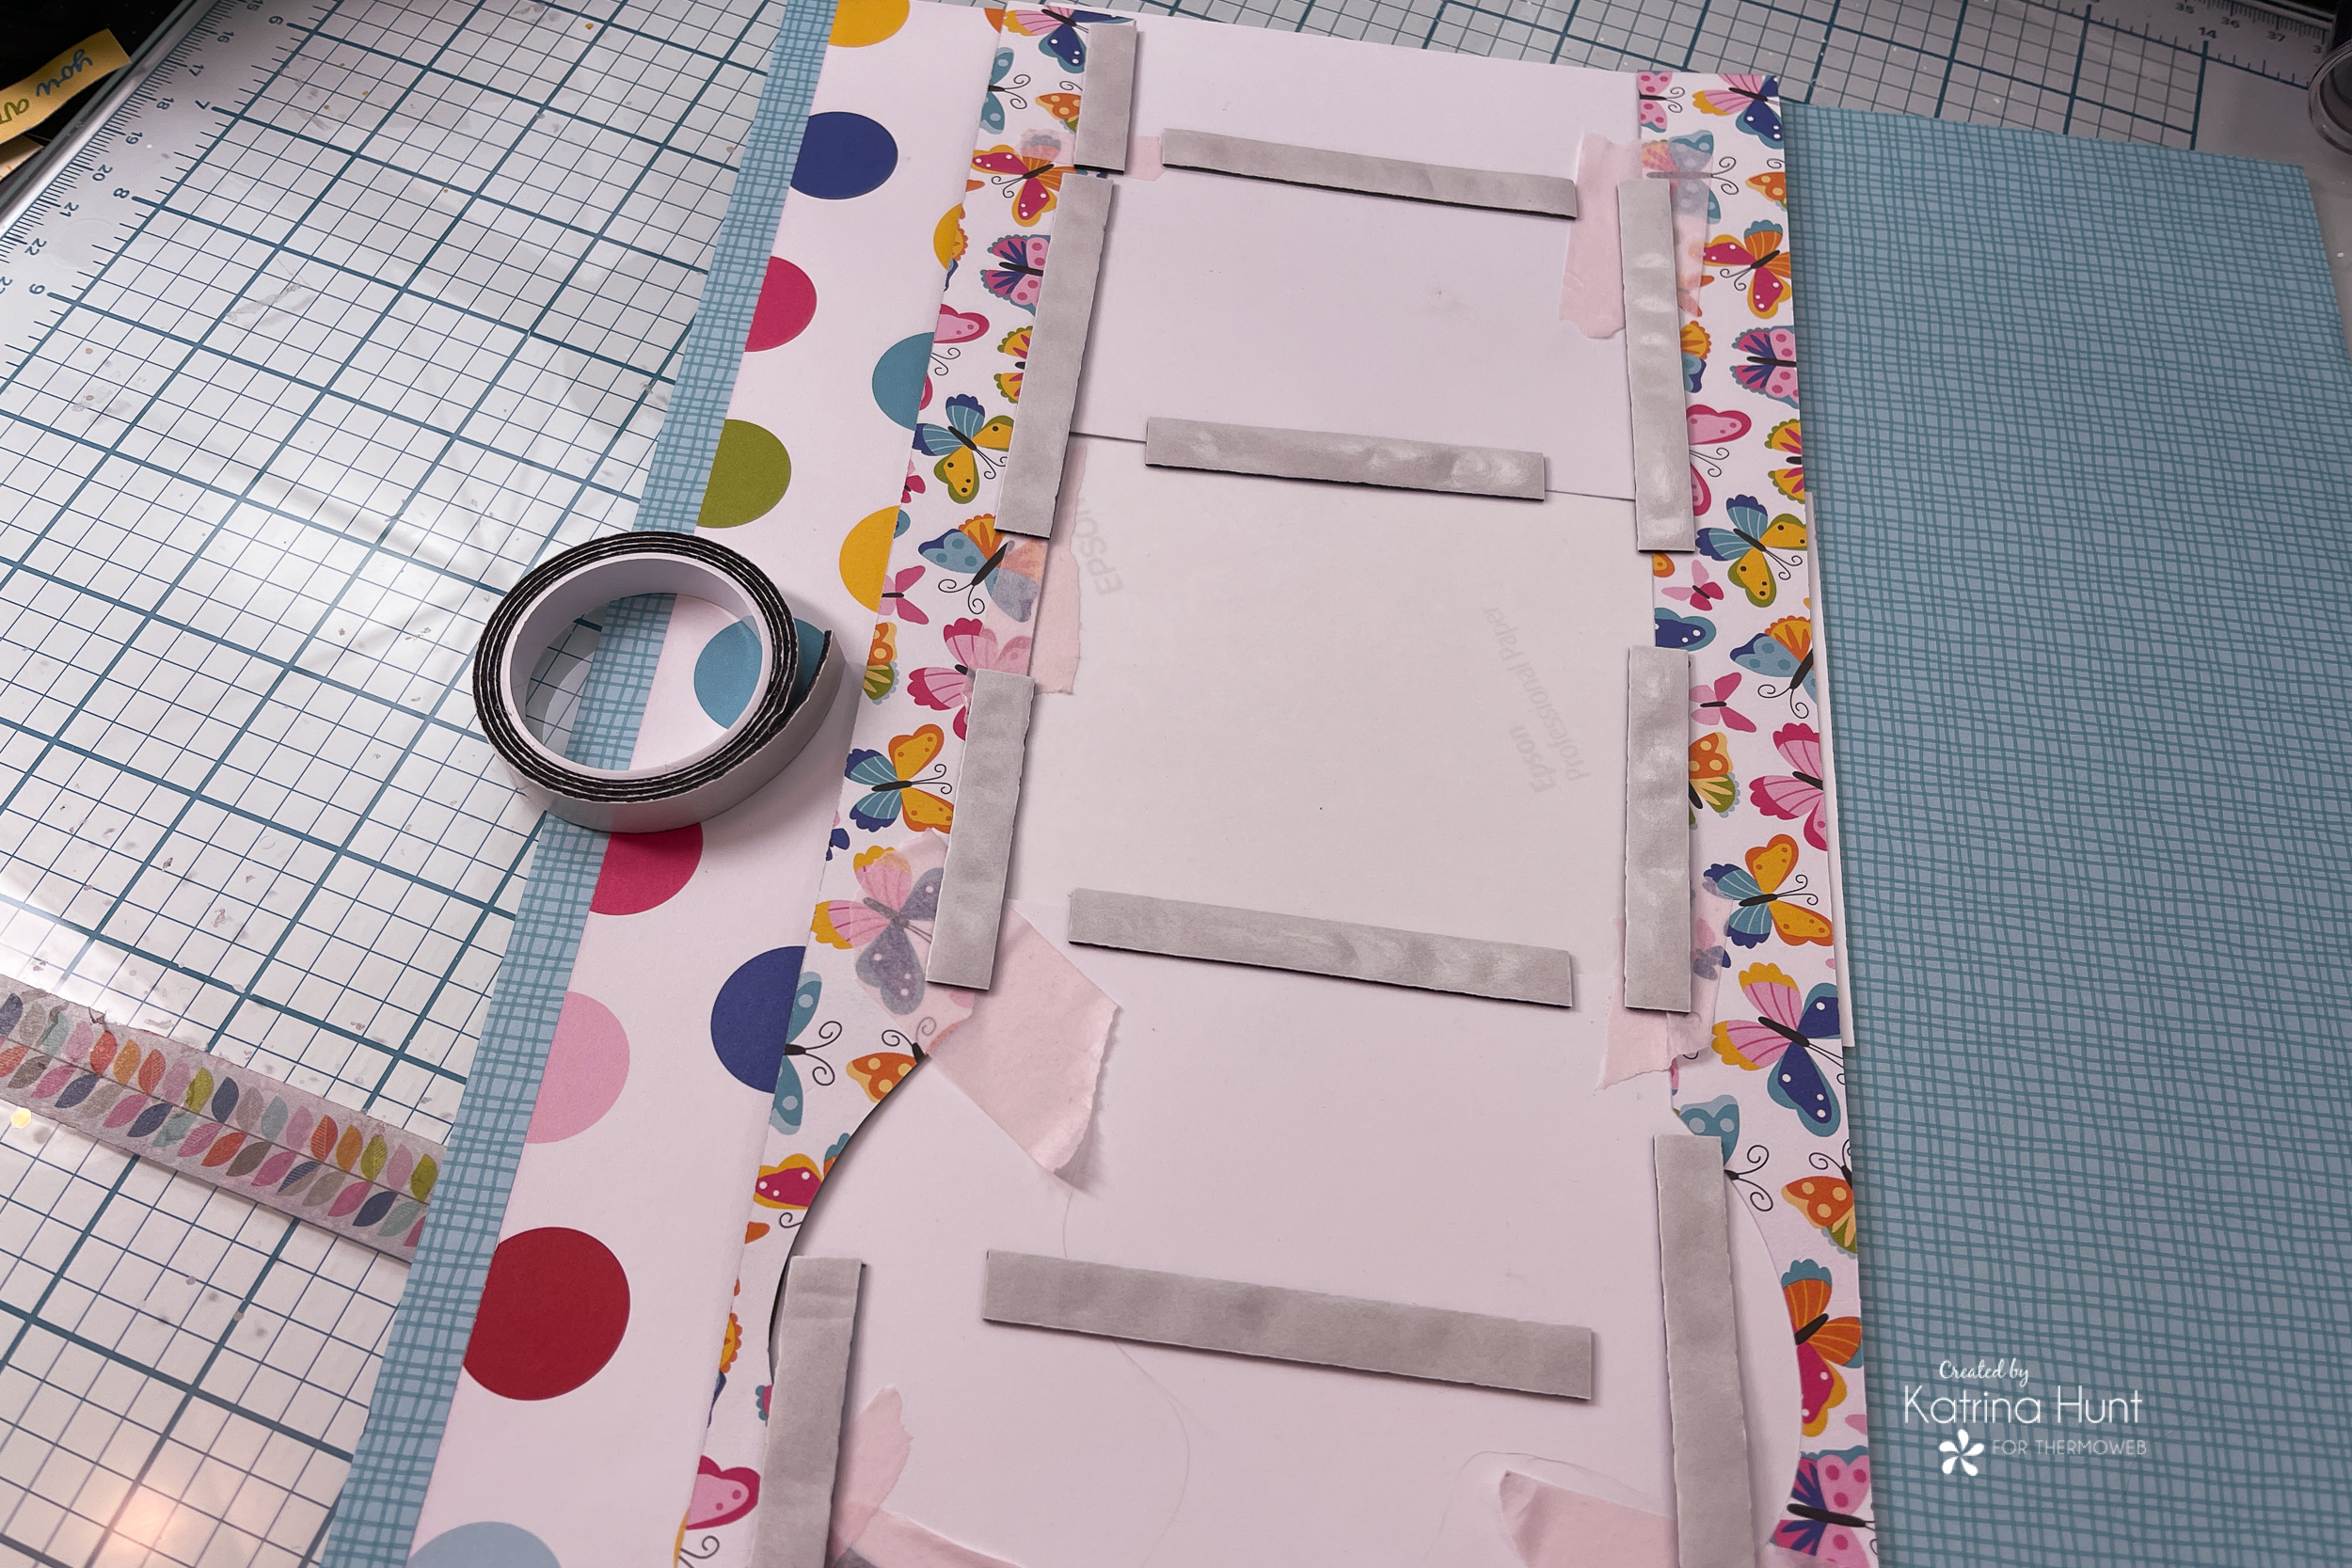
The first step for creating these letters was to adhere a piece of Deco Foil Foam Adhesive to one side of a piece of cardstock. This gives the foam adhesive some stability so that when you remove the flock transfer sheet, the foam will hold its shape and not stretch. When you cut your letters, you will want to place the die-cutting side down on the foam adhesive side, not the cardstock side. This will allow you to have your letters oriented correctly and also be able to apply the flock to them.
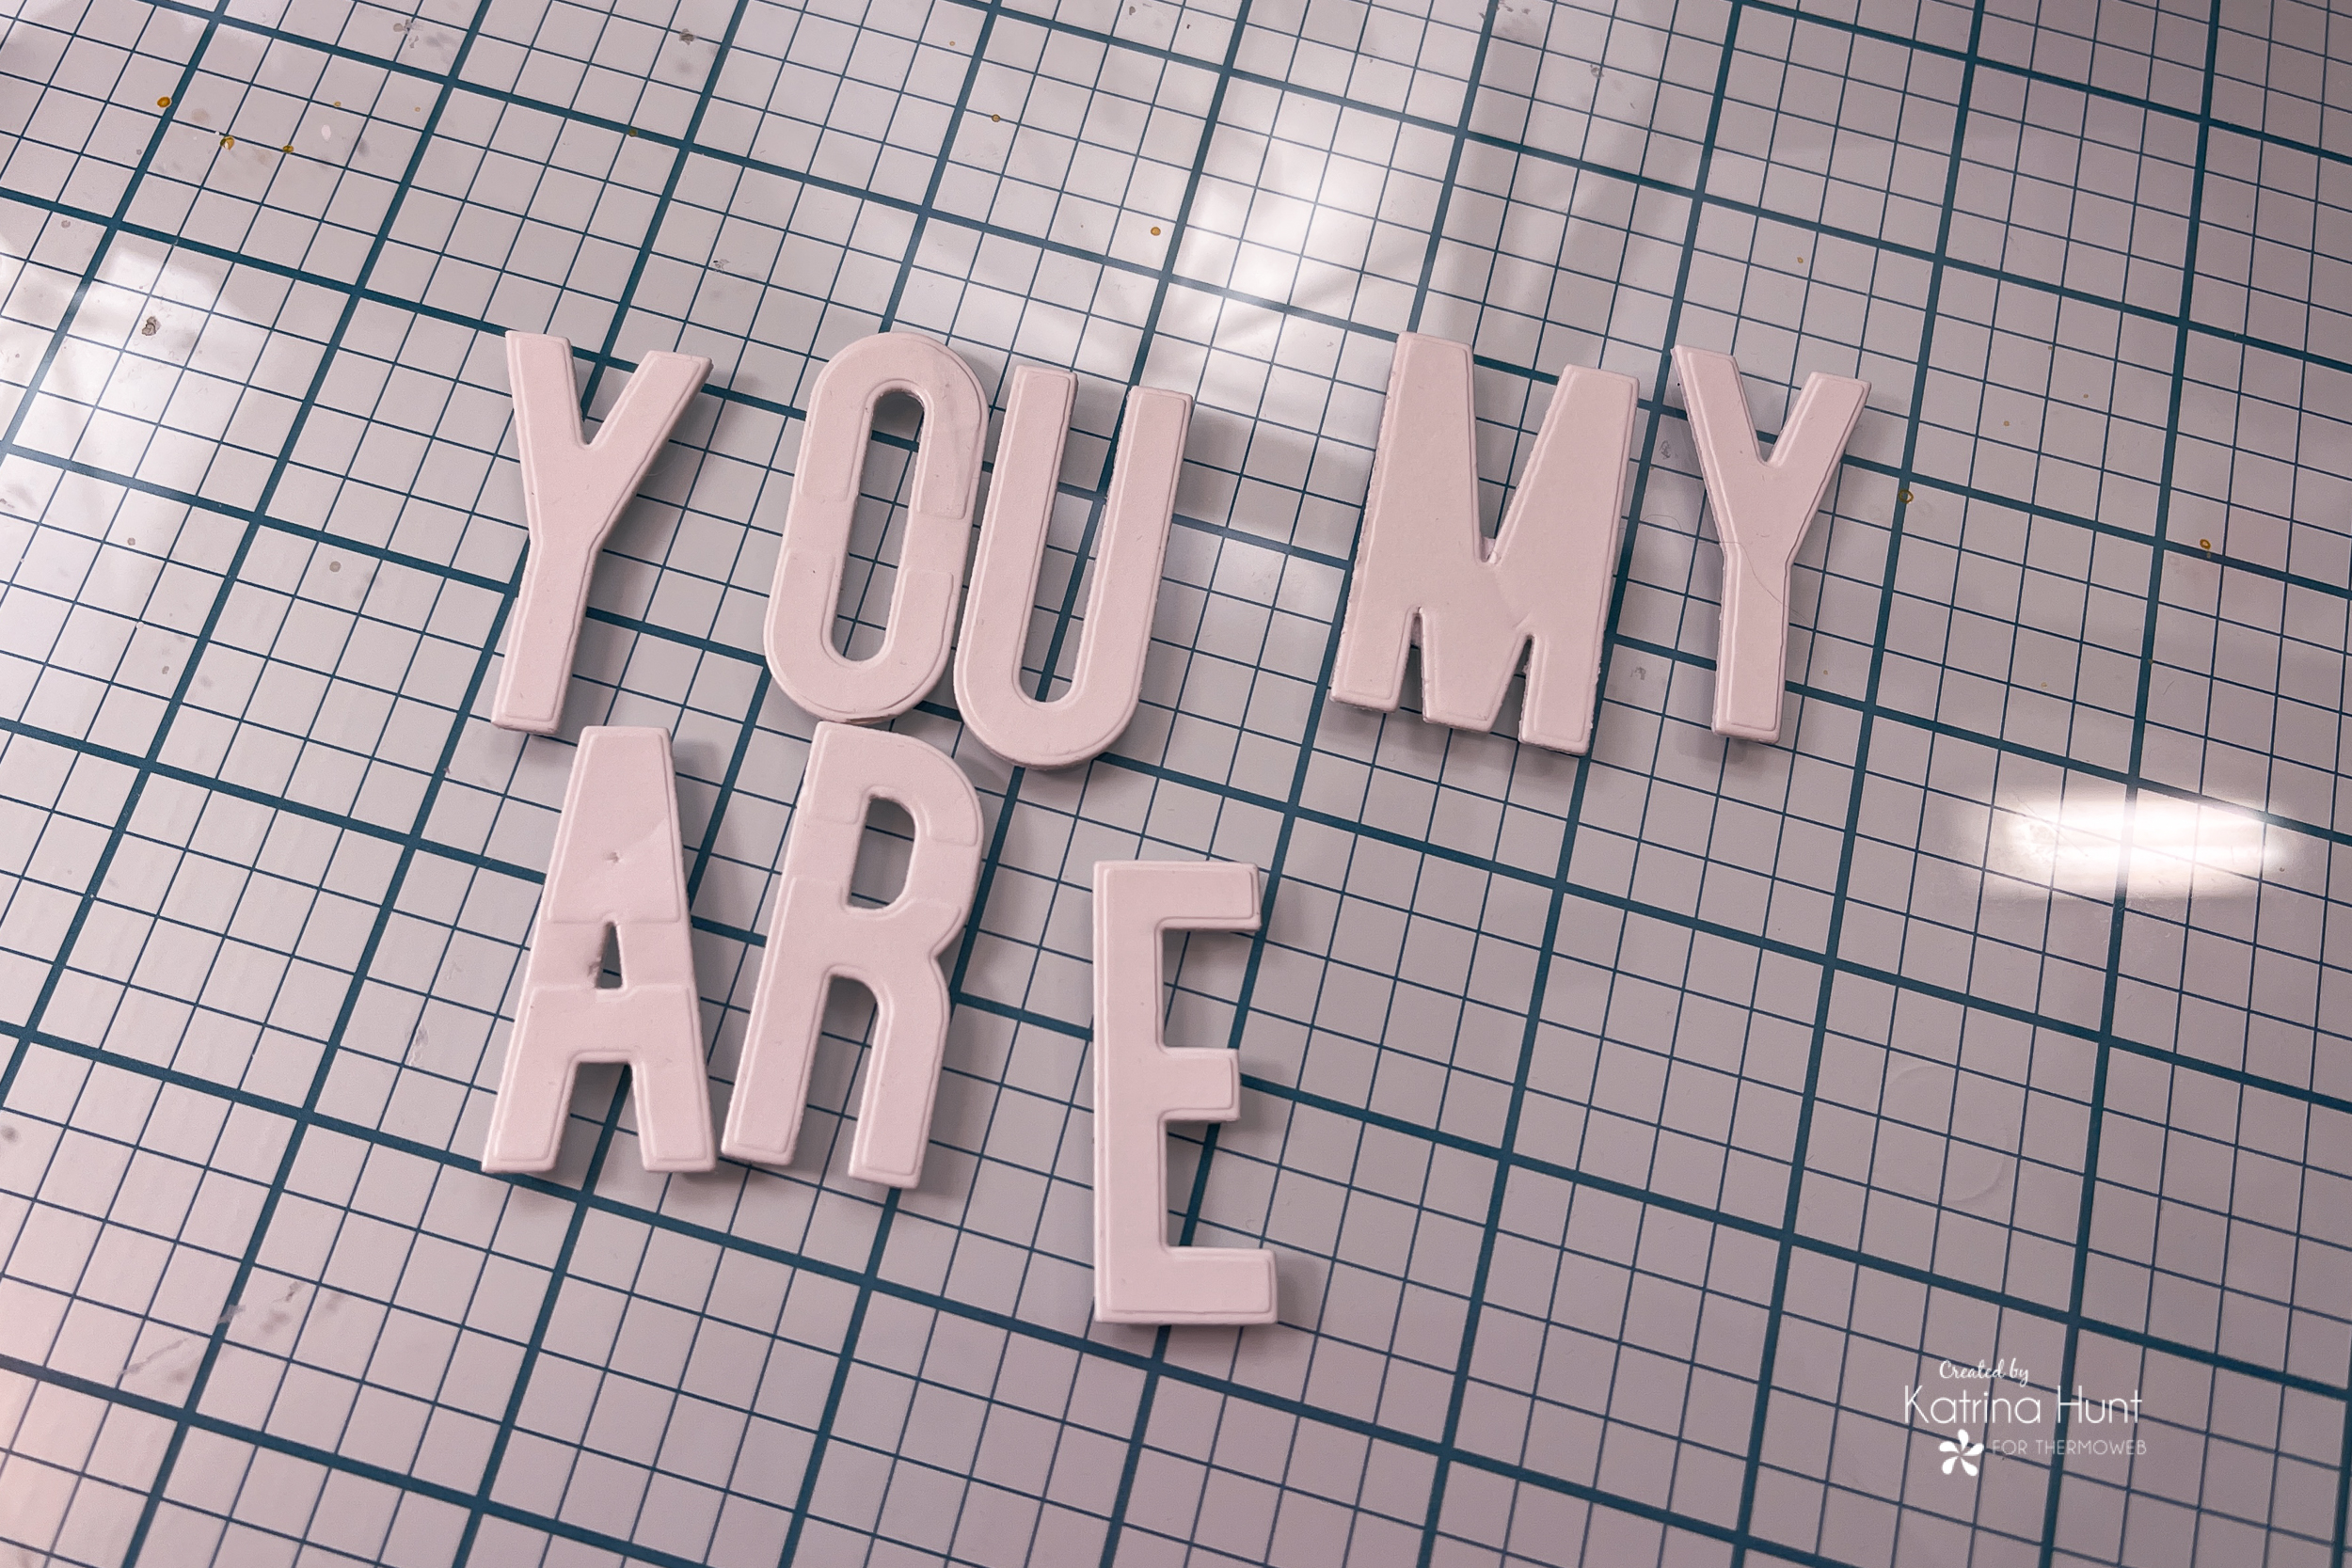
Once your letters are die-cut, carefully peel the protective adhesive covering away from one letter and place one half of the letter sticky side to a color of the flock. I used a line on my glass mat to line up my letters. By doing this it makes sure my halves were the same on all my letters. Once you get the half color of a word done, then pick your other color of the flock and adhere it done, butting it up next to the first color. It will look like this when you are done.
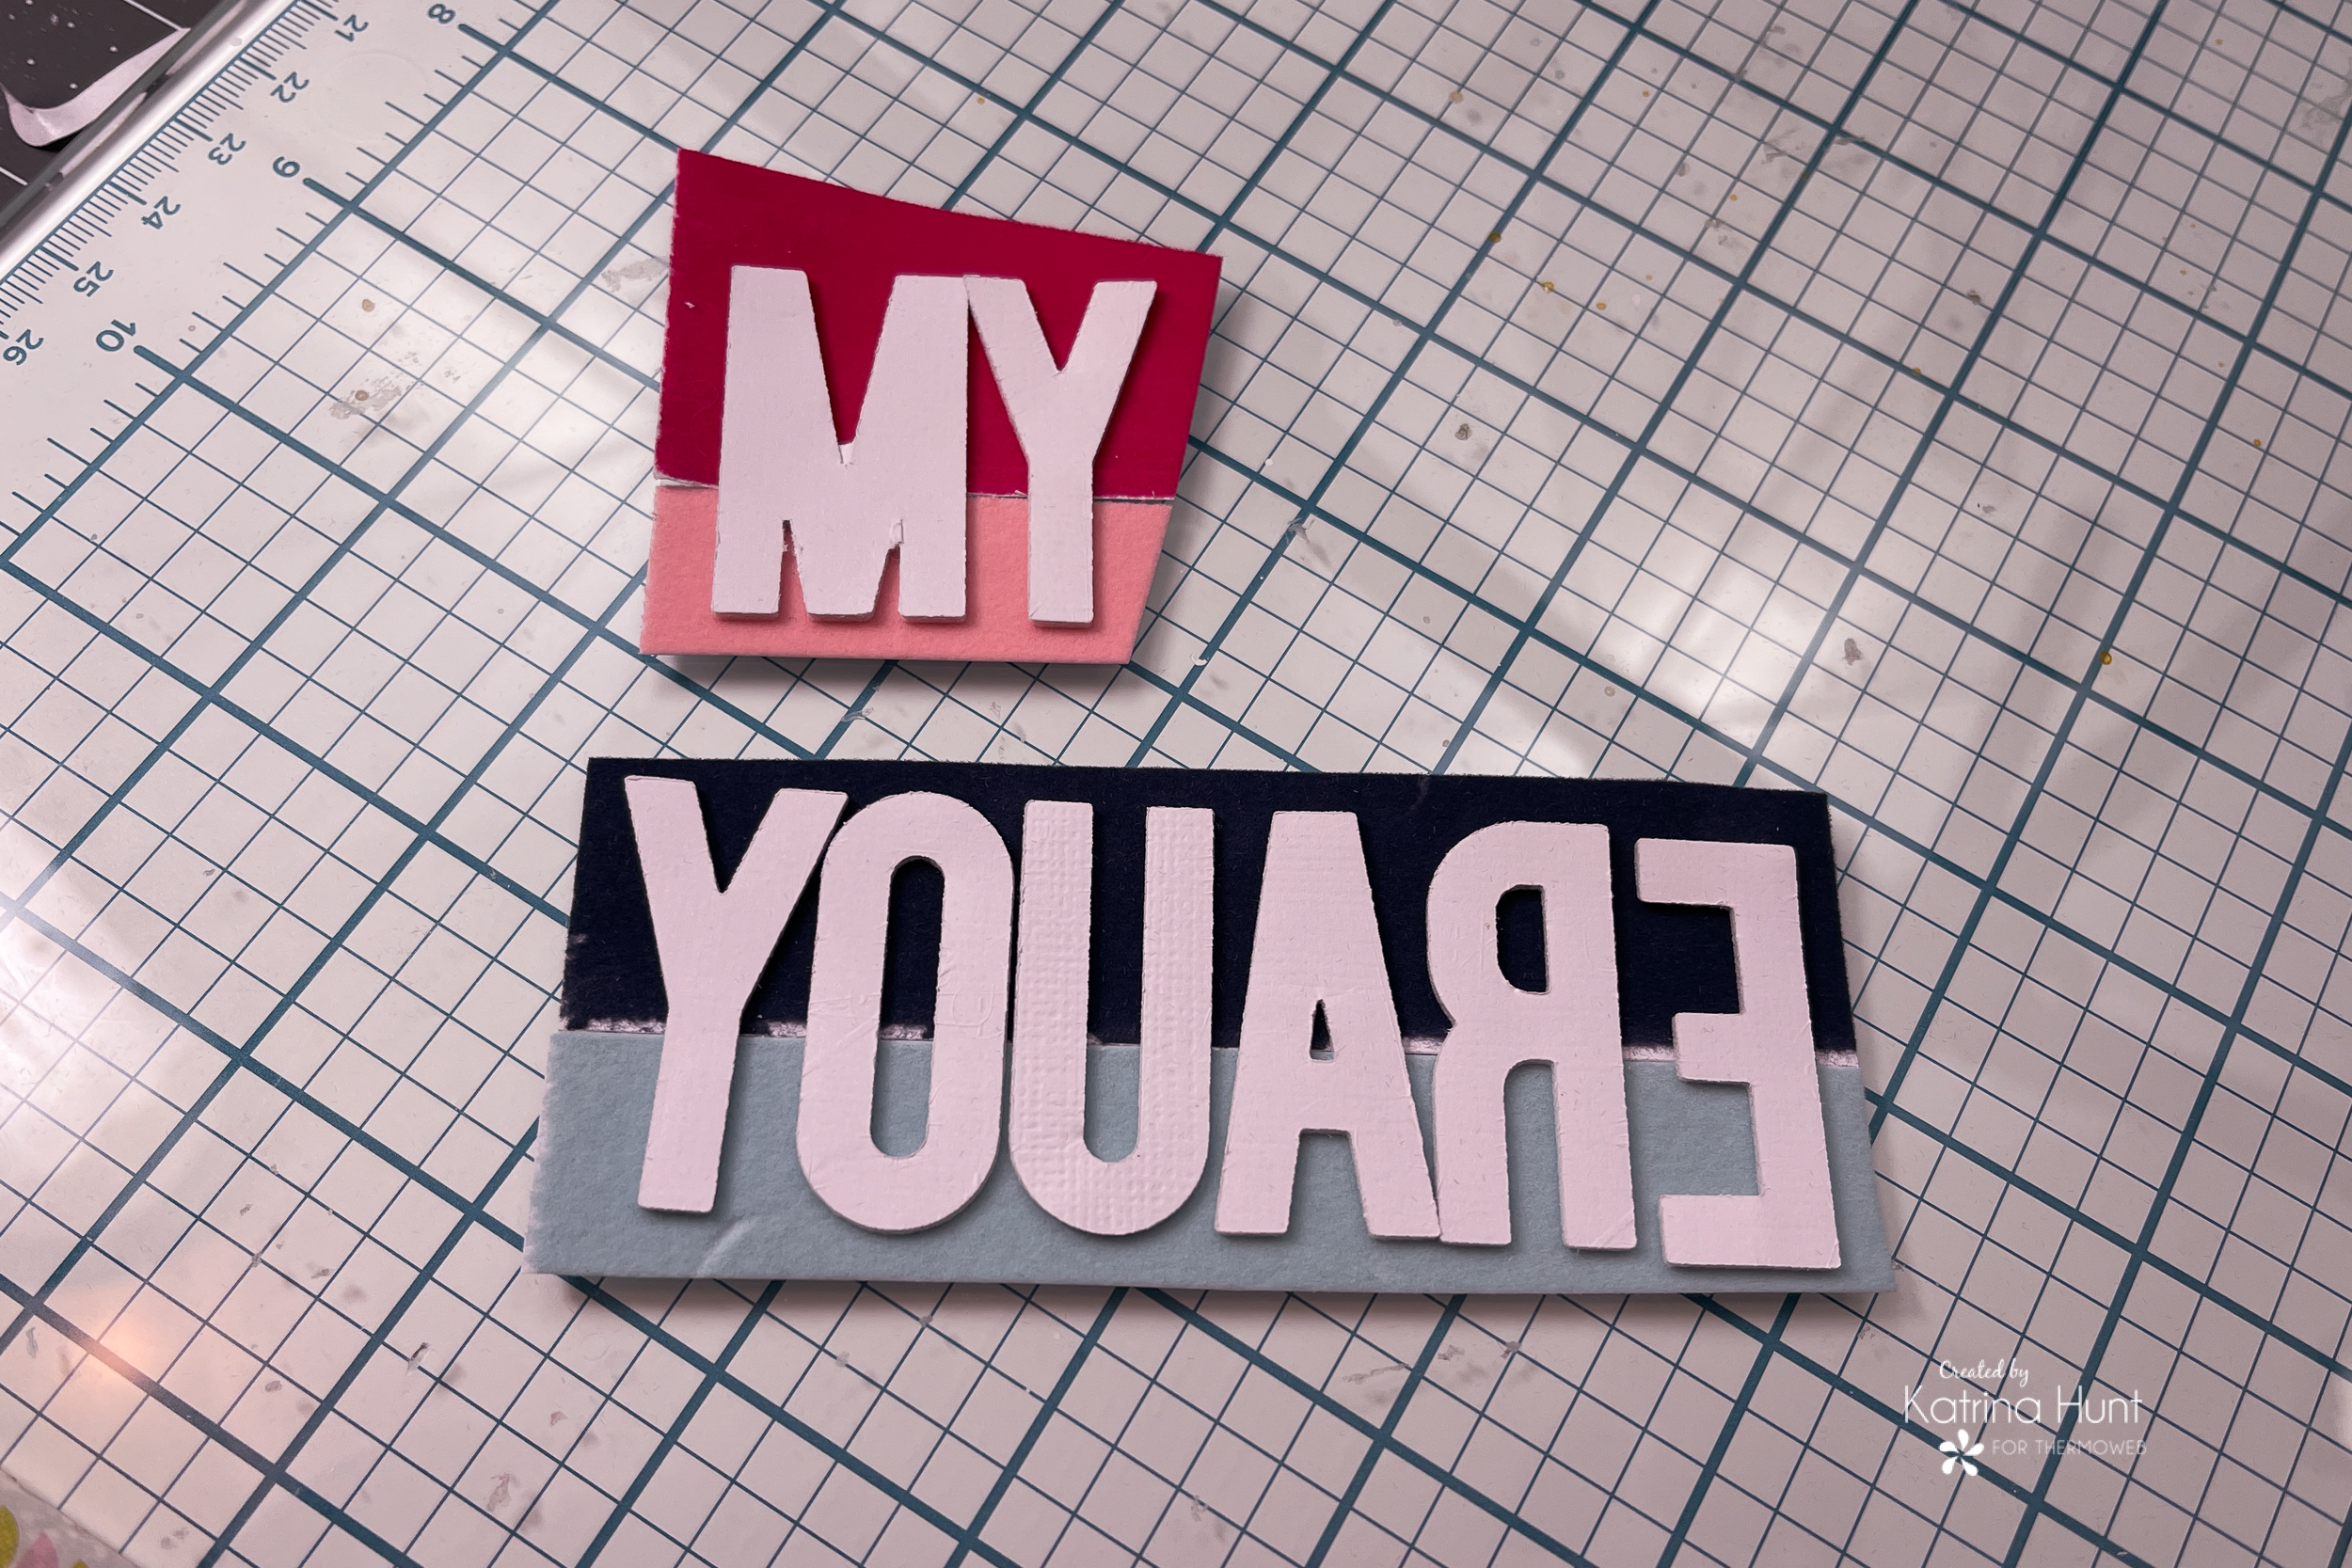 You will run these thru your manual die cutting machine to apply pressure for transferring the flock. Once you have run them thru, then carefully peel off the flock transfer sheet to reveal your letters.
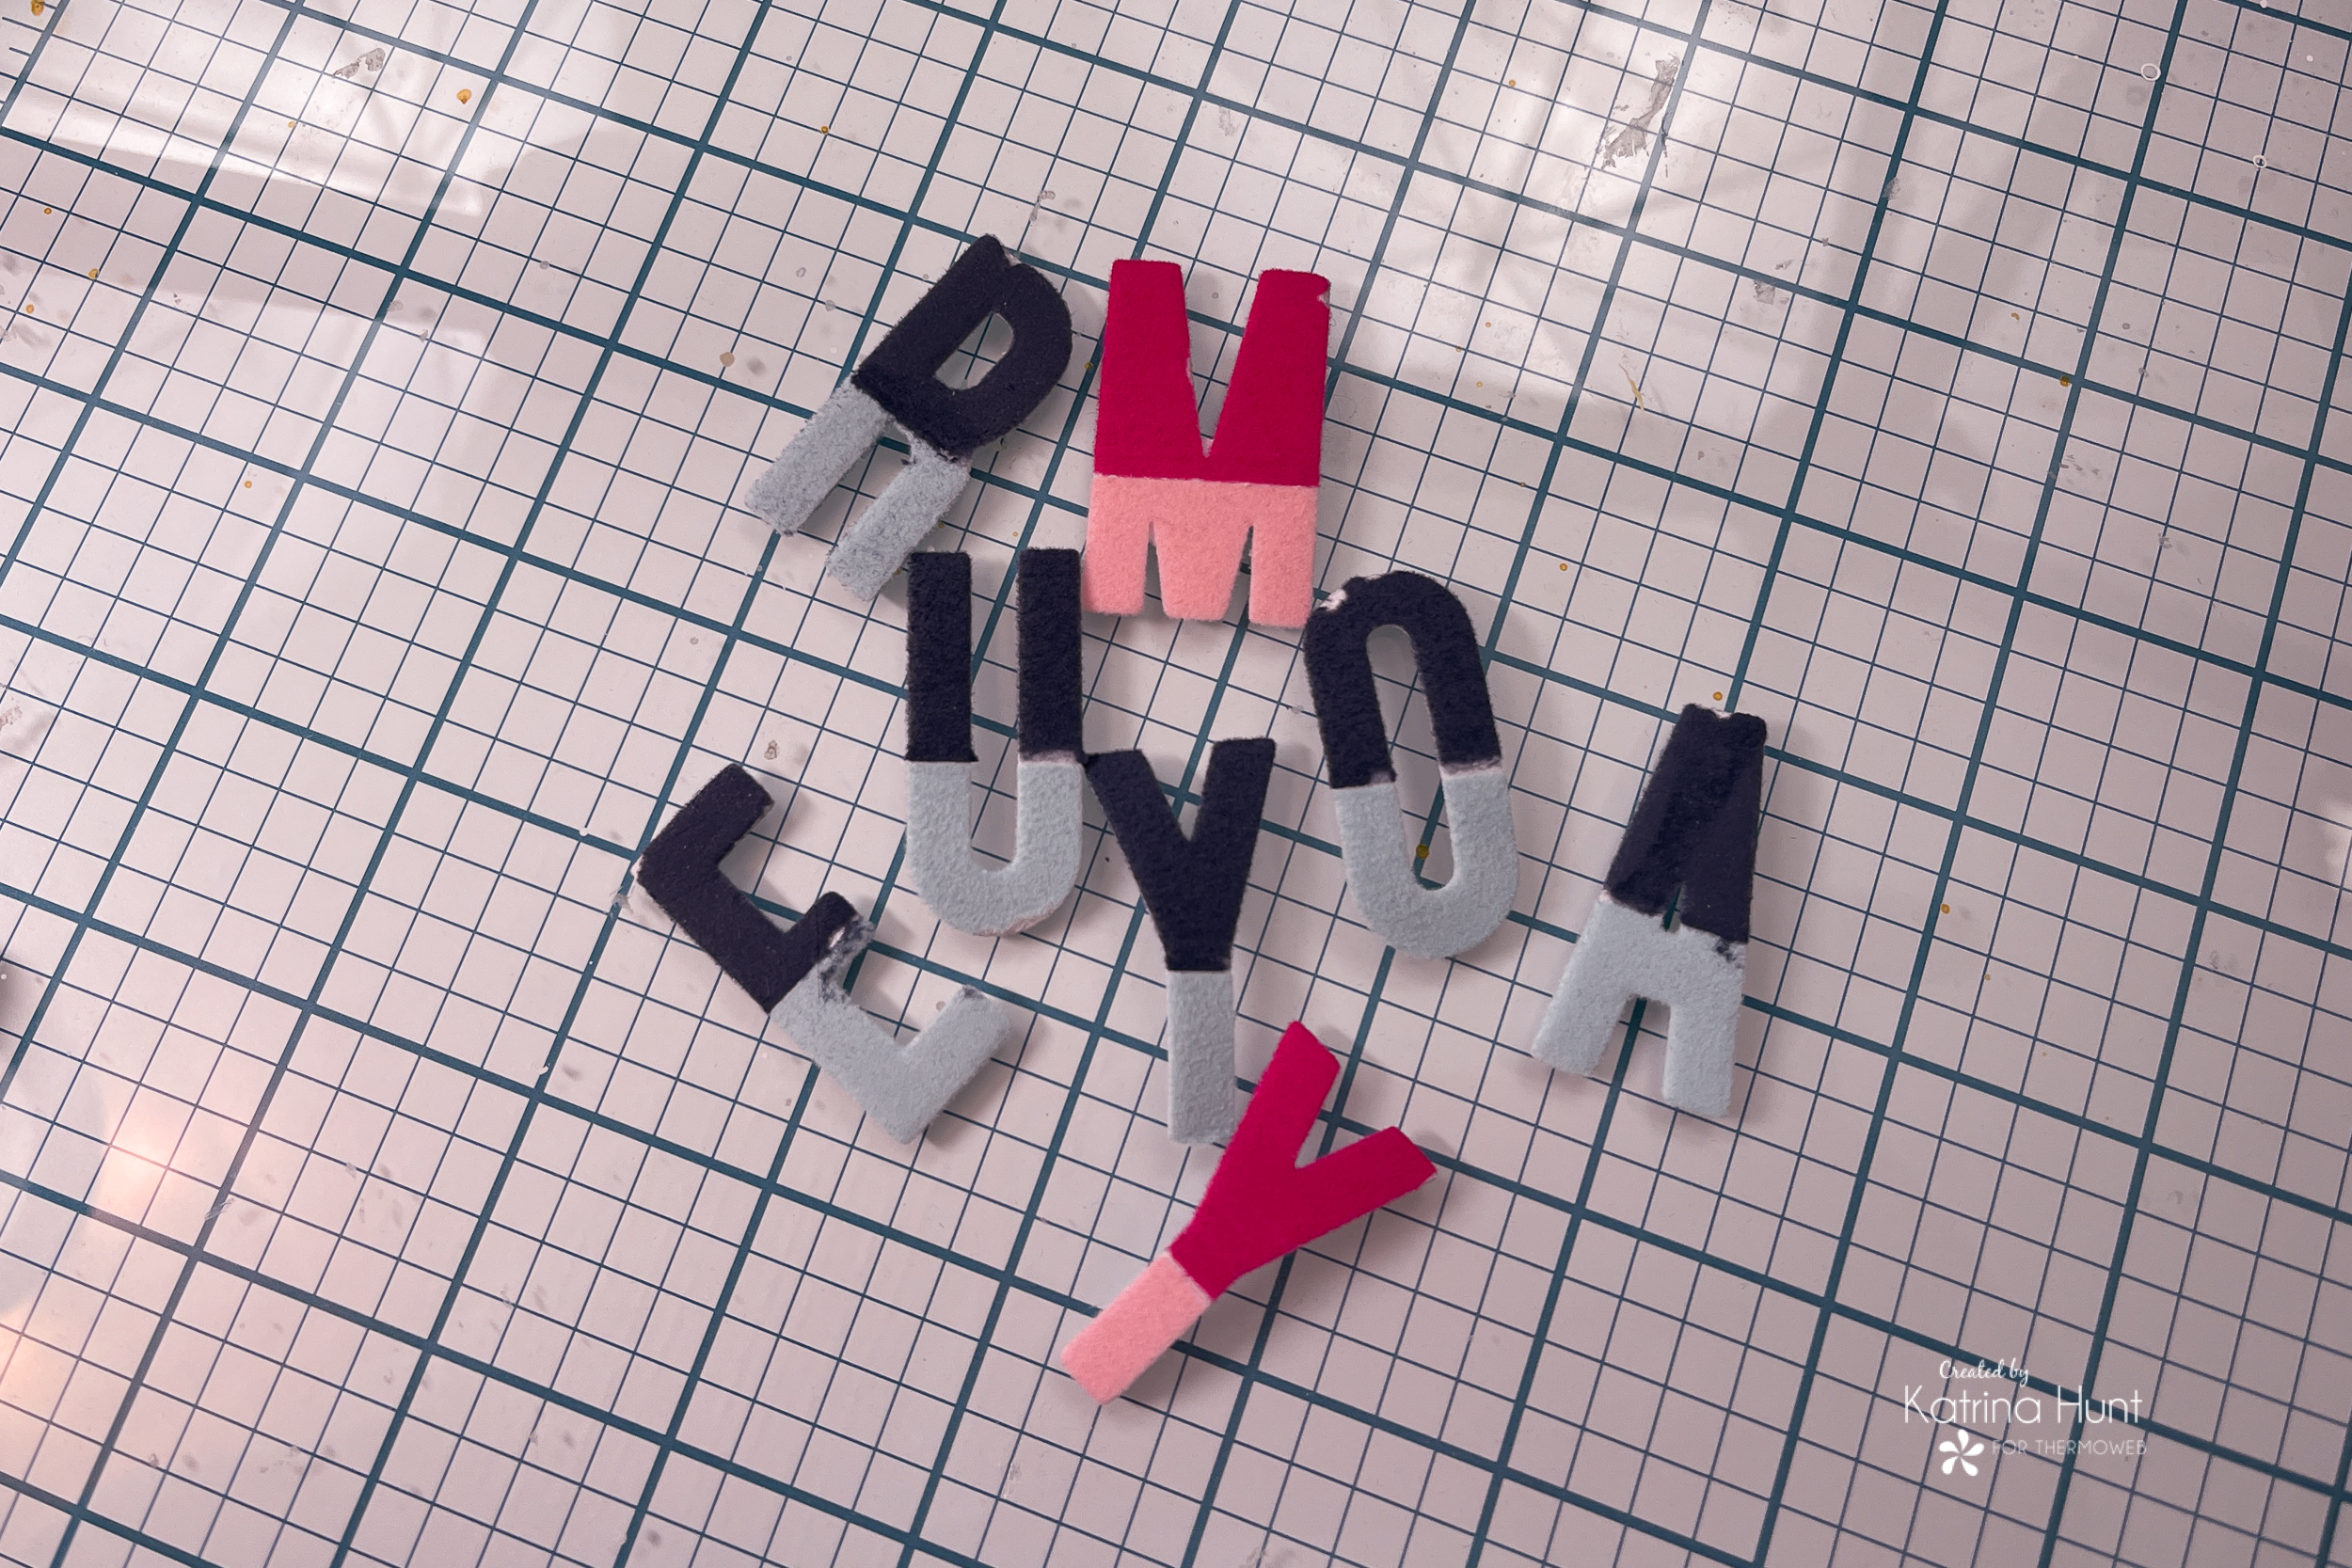
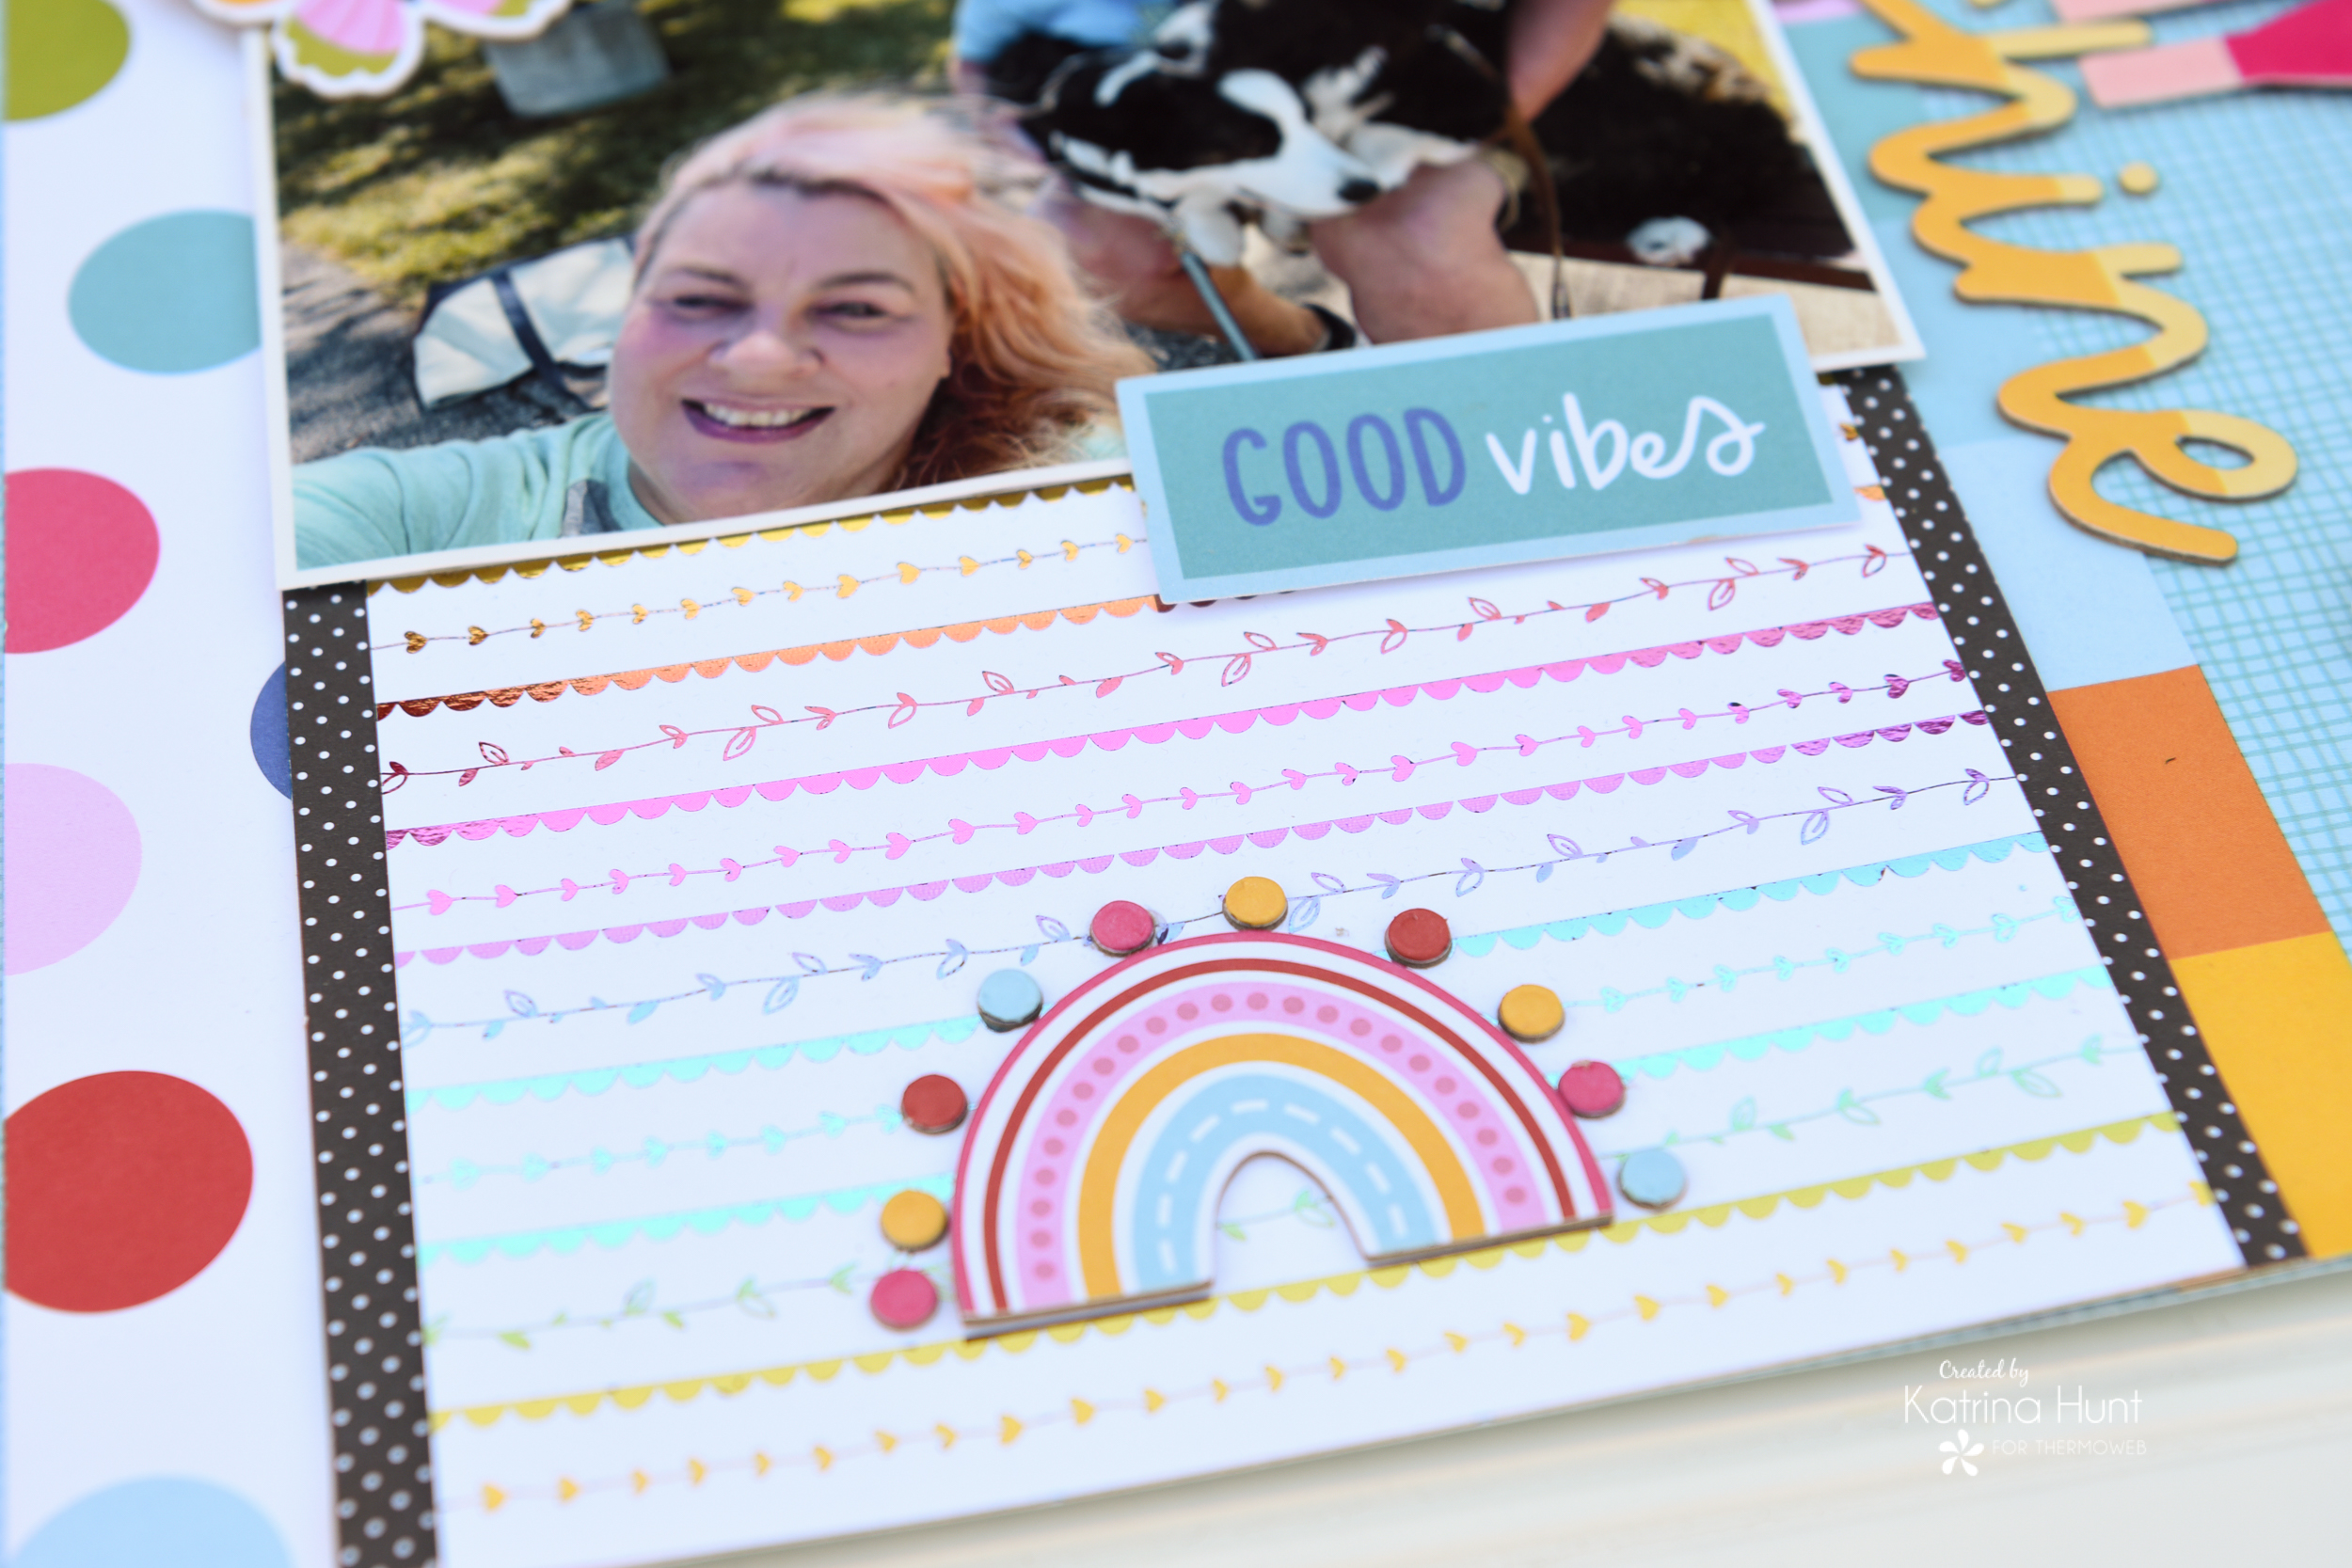
How stinking cute are those?!! I will be doing this more for sure! These would be cute with partially toner sheet detail and then the bottom part foiled! Ohhh…idea for next project!!! After I had all the letters flocked, I used my Gina K Black Foam Tape and trimmed it to fit the back of the letters to pop them up some.
I just love how this turned out. And I am in love with that Midnight blue flock! I hope you try this on one of your projects soon! Thanks for stopping by the blog today! Happy Tuesday!
This post contains affiliate links. For more information, see our disclosure HERE.

So what better way to celebrate our new release than a chance for you to win! We’re giving away a $40 Gift Card to shop with us. Just follow through the entry software to keep adding on more chances to be picked. And join us TODAY at 11 am Central Time over on Instagram for a fun IG Hop and another shot to win there too!