


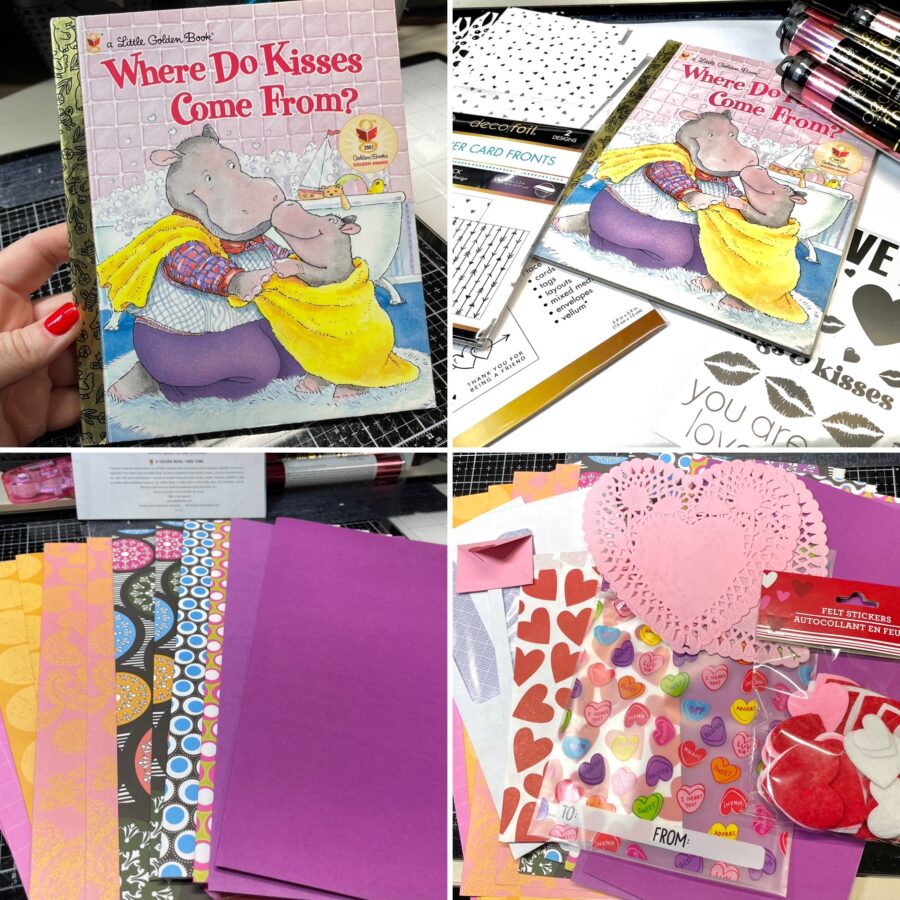
 Hello crafty friends! If you saw my Camping Junk Journal post (CLICK HERE IF YOU DIDN’T) then you will remember that I have a huge tub of Little Golden Books just waiting to become junk journals. In honor of Valentine’s Day, I pulled out this little beauty and went to work.
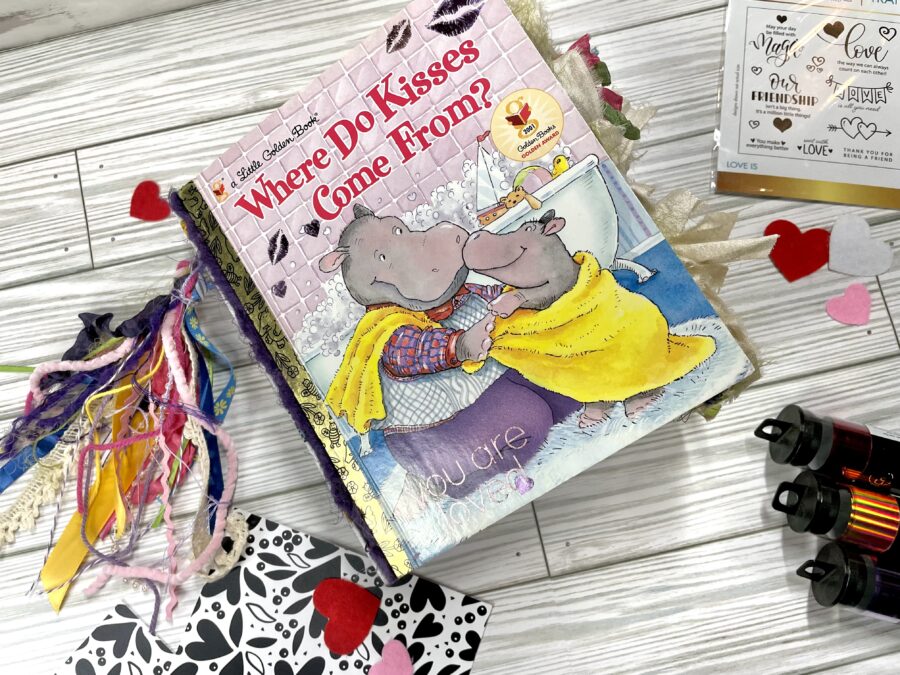
Follow along and see how I turn this Golden Book into a junk journal, keeping the iconic gold binding and without cutting down the pages as so many do when turning these books into journals.
Kisses Junk Journal with Deco Foil
Stay to the very end for a video flip-through!
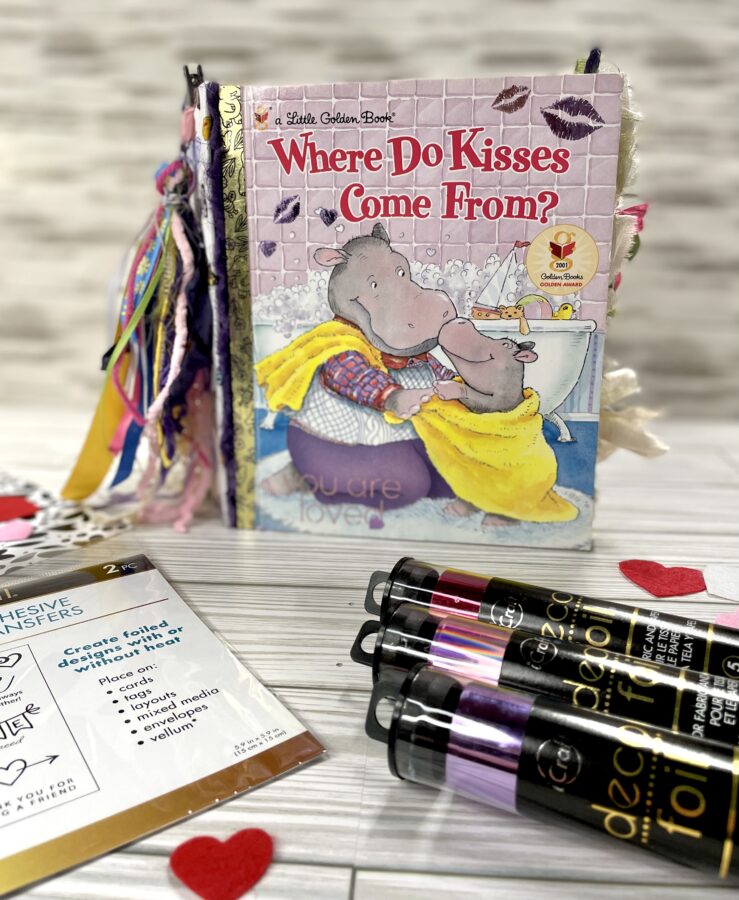
Kisses Junk Journal
Junk Journal Supplies:
iCraft Deco Foil Transfer Sheets – Wild Cherry, Enchanted Rose and Purple
iCraft Ultra Bond Liquid Adhesive
iCraft 3D Foam Tape Jumbo Roll

Other Supplies: Little Golden Book, cardstock, patterned paper, dies and die-cutting machine, scissors, mini stapler, heat gun, fabric, ribbon, embossing folder, Oliso iron, and lightweight chipboard.
Kisses Junk Journal Step One:
To begin, pull together some supplies including a paper that coordinates with your book, some envelopes/pockets, doilies, stickers and of course, your Deco FoilAdhesive Transfers and Foil Transfer Sheets.
Next, I’m going to refer you back to my Camping Junk Journal which you can find HERE. I went through the exact same steps to dismantle the book and put it back together keeping the gold spine decor.
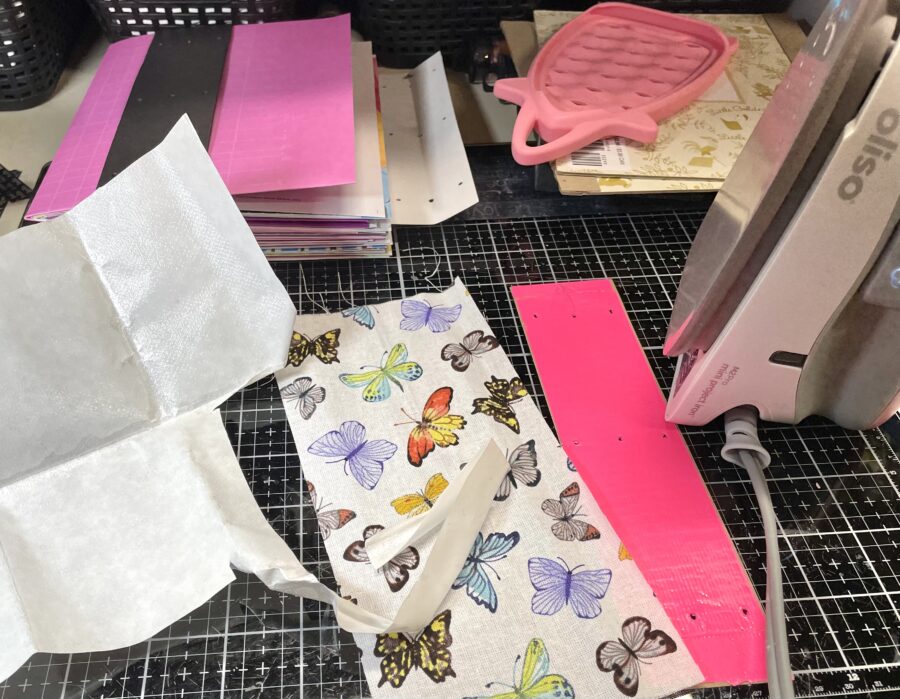
Hint: HeatNBond is the best way to adhere fabric to paper for junk journals. Because it is a dry adhesive, it does not buckle the paper and leaves no wrinkles in the fabric. As you can see below, I used a scrap piece and cut it into strips for this project.
Kisses Junk Journal Step Two:
Continue by separating your book into signatures, adding in the papers and pieces you have gathered. I do three signatures with Golden Books. The books come in two signatures and I add pages to each of them and then create a brand new signature for the center. Below is a picture from the camping journal showing the signatures.
Hint: Creating your cover without cutting off the gold spine pieces allows you to use your full book pages without trimming or folding.

Kisses Junk Journal Step Three:
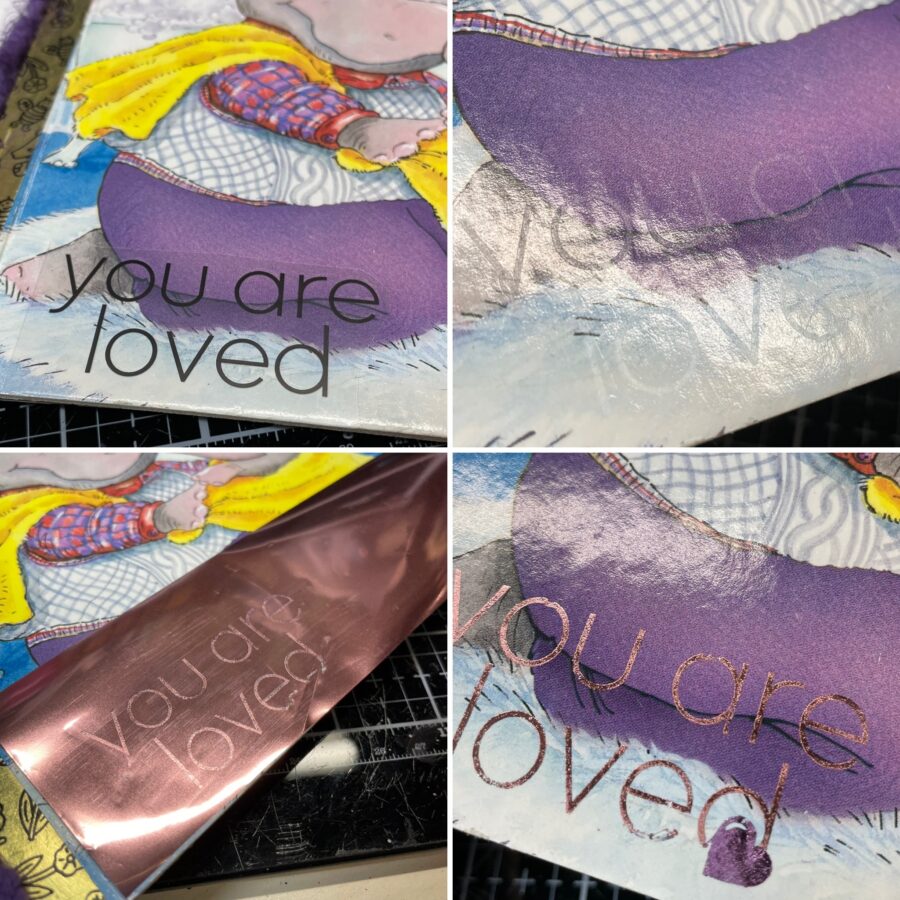
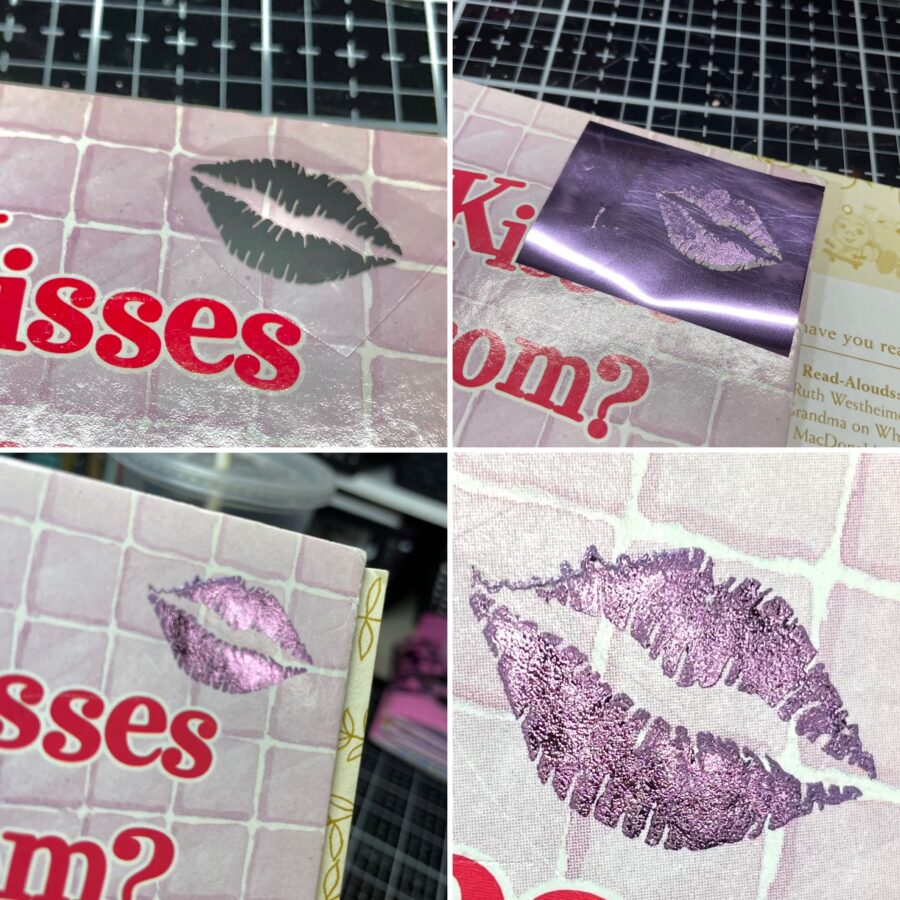
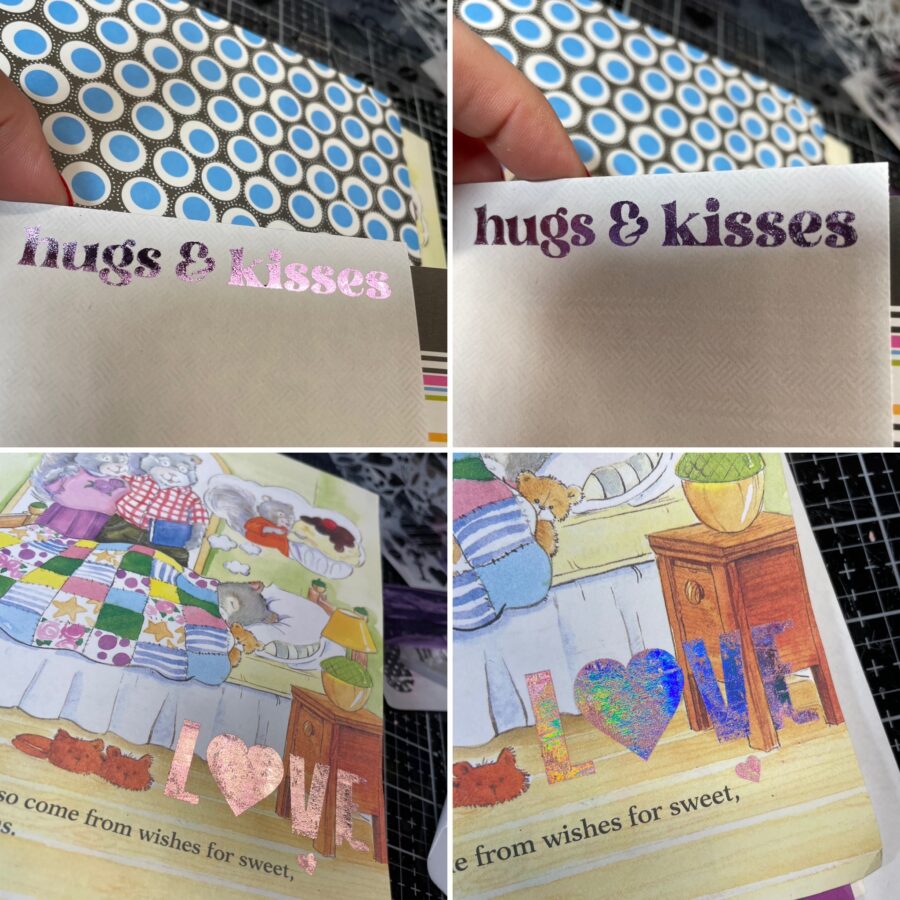
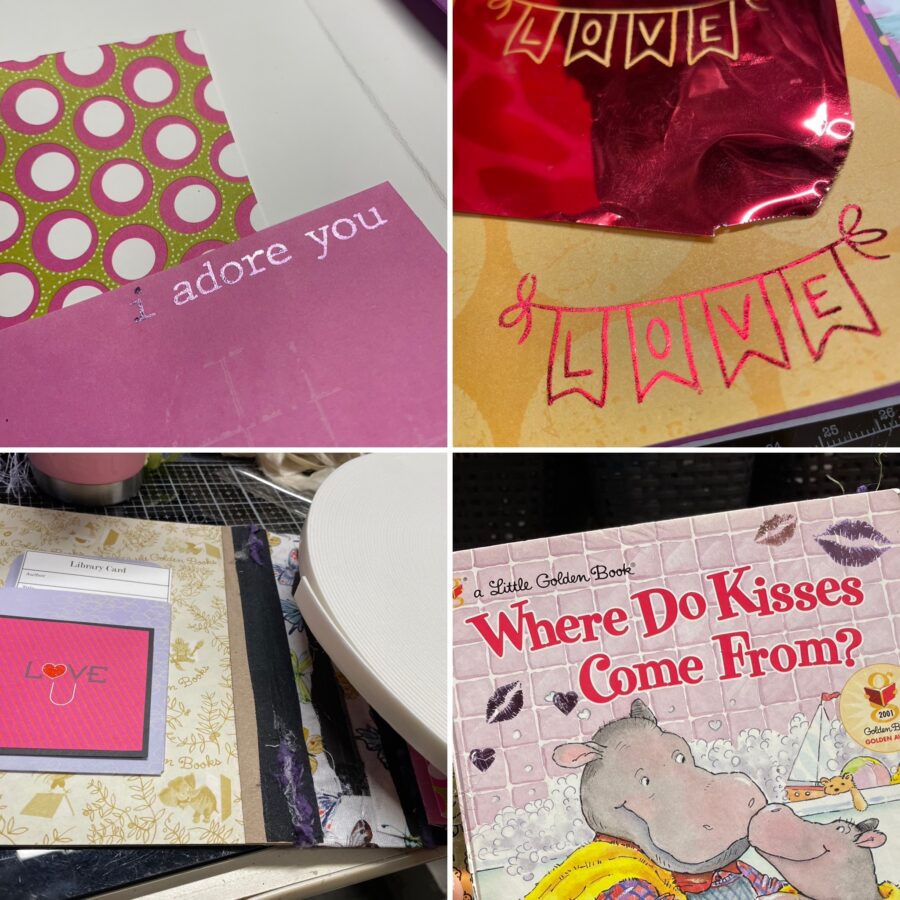
Next, choose where you will apply your Adhesive Transfers, making sure to add a few on the cover. The new Love and Kisses Adhesive Transfers were perfect for this book and paired nicely with a few additions from the Love is set by Gina K. Designs.
Apply your transfers by peeling the release sheet from the back and placing the transfer straight down where you want it (don’t move it around). Hold it in place while you burnish it thoroughly and then carefully peel up the carrier sheet.
As you can see below, the adhesive is clear.
Now place your foil transfer sheet over the adhesive and burnish again. You will know when the foil has transferred completely because you will see the foil remove from the carrier sheet. There are several samples below.
Hint: A Stencil Pal is a great tool for burnishing
Kisses Junk Journal Step Four:
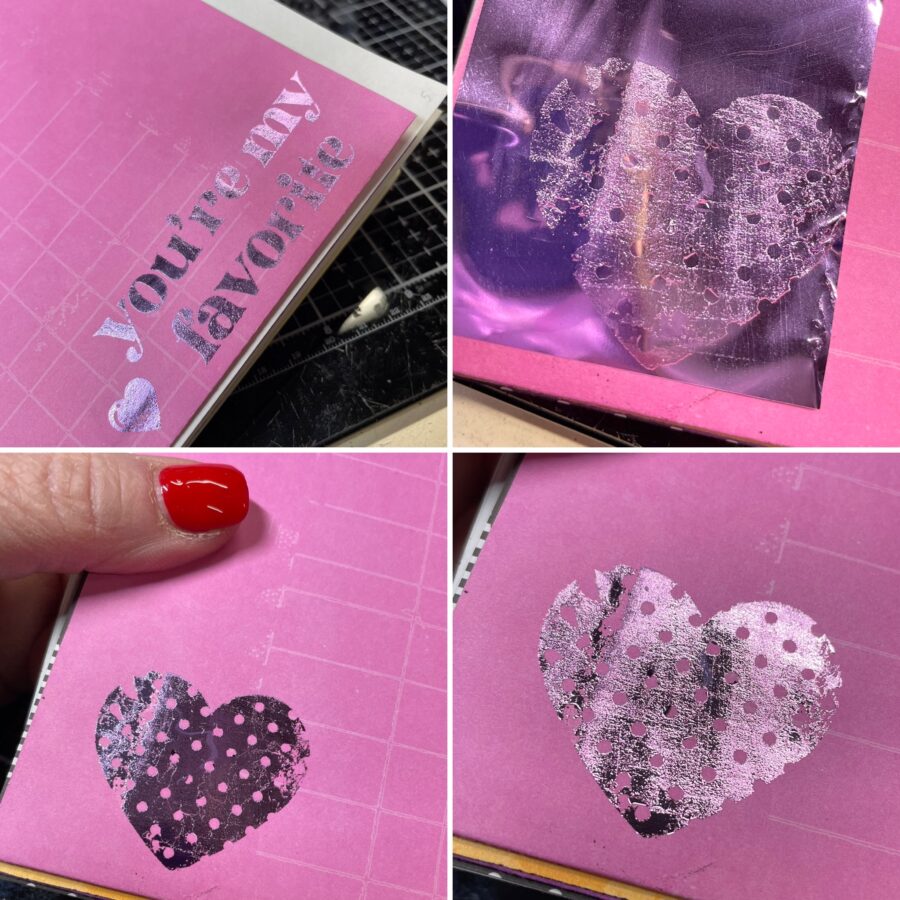
Finish your foil accents by adding some heart toner sheets. I used the Dainty Hearts and Love Blooms toner sheets in my journal.
To use these, place your Foil Transfer Sheet over the Toner Card Front (dull side down) and run it through your foiling machine or laminator per the machine instructions.
Peel off the carrier sheet and you are left with some beautiful “pages” for your journal.
Hint: The slimline card fronts are the perfect size to fold in half and add in to your signatures. I put one card front in each signature.

Kisses Junk Journal Step Five:
Lastly, embellish the heck out of this thing! I sewed ruffles on the pages before I sewed my signatures in and then added a ton of tags, fabric and die-cuts after I put the book together.
You have a few options for adding the signatures to your book. I prefer to sew mine in for stability, but you can use elastic bands or simply tie them in as well. There are so many youtube tutorials on binding junk journals that I won’t bore you with it here.
Hint: If you want a ribbon closure, adhere it inside of the book spine before you attach your signature spine so that the adhered area is hidden.

Time for the video flip through! This little gem has a ton of hours put into it and is going up in my Etsy store. I hope you enjoyed this tutorial and that it inspires you to add a little sparkle to your projects with Adhesive Transfers. They are a great way to get that added touch even if you don’t have a foiling machine!