


 Hi hi!!! Katrina here with some FLOCKED elves for you today!! All it takes is some Deco Foil Flock, some die cut pieces and Easy Cut Adhesive sheets and you are ready to create! Oh..paper too! LOL
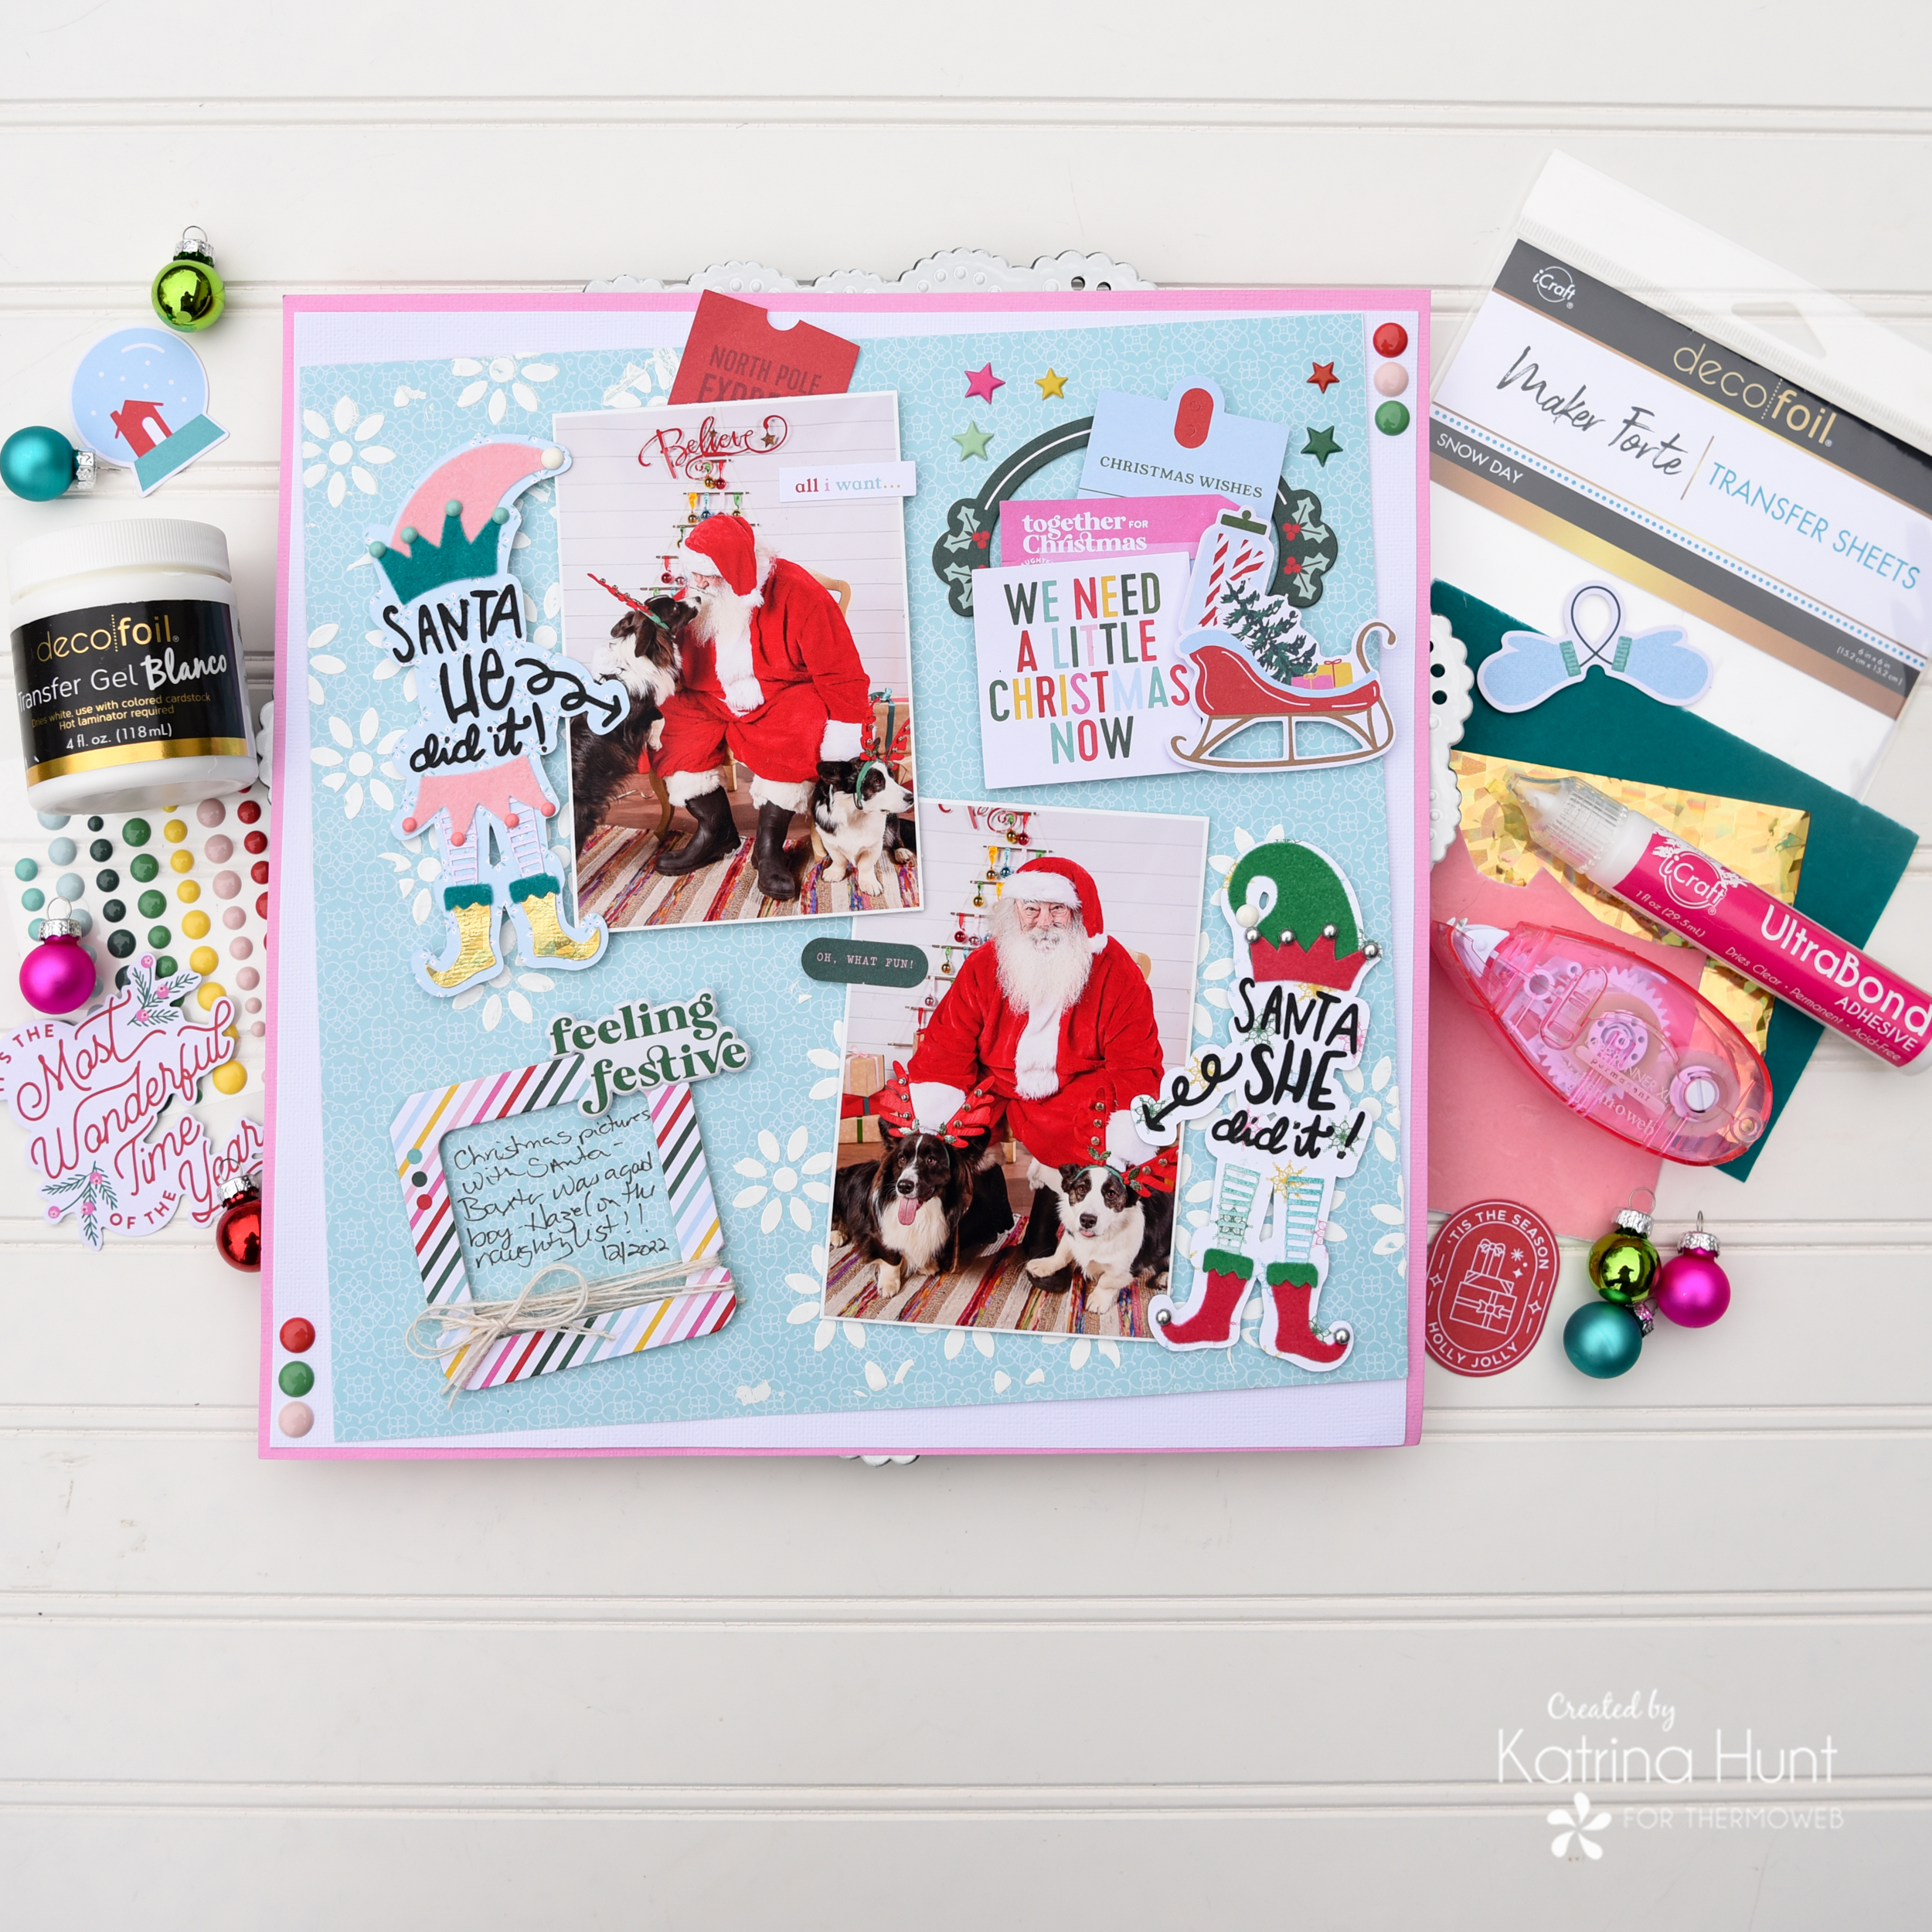
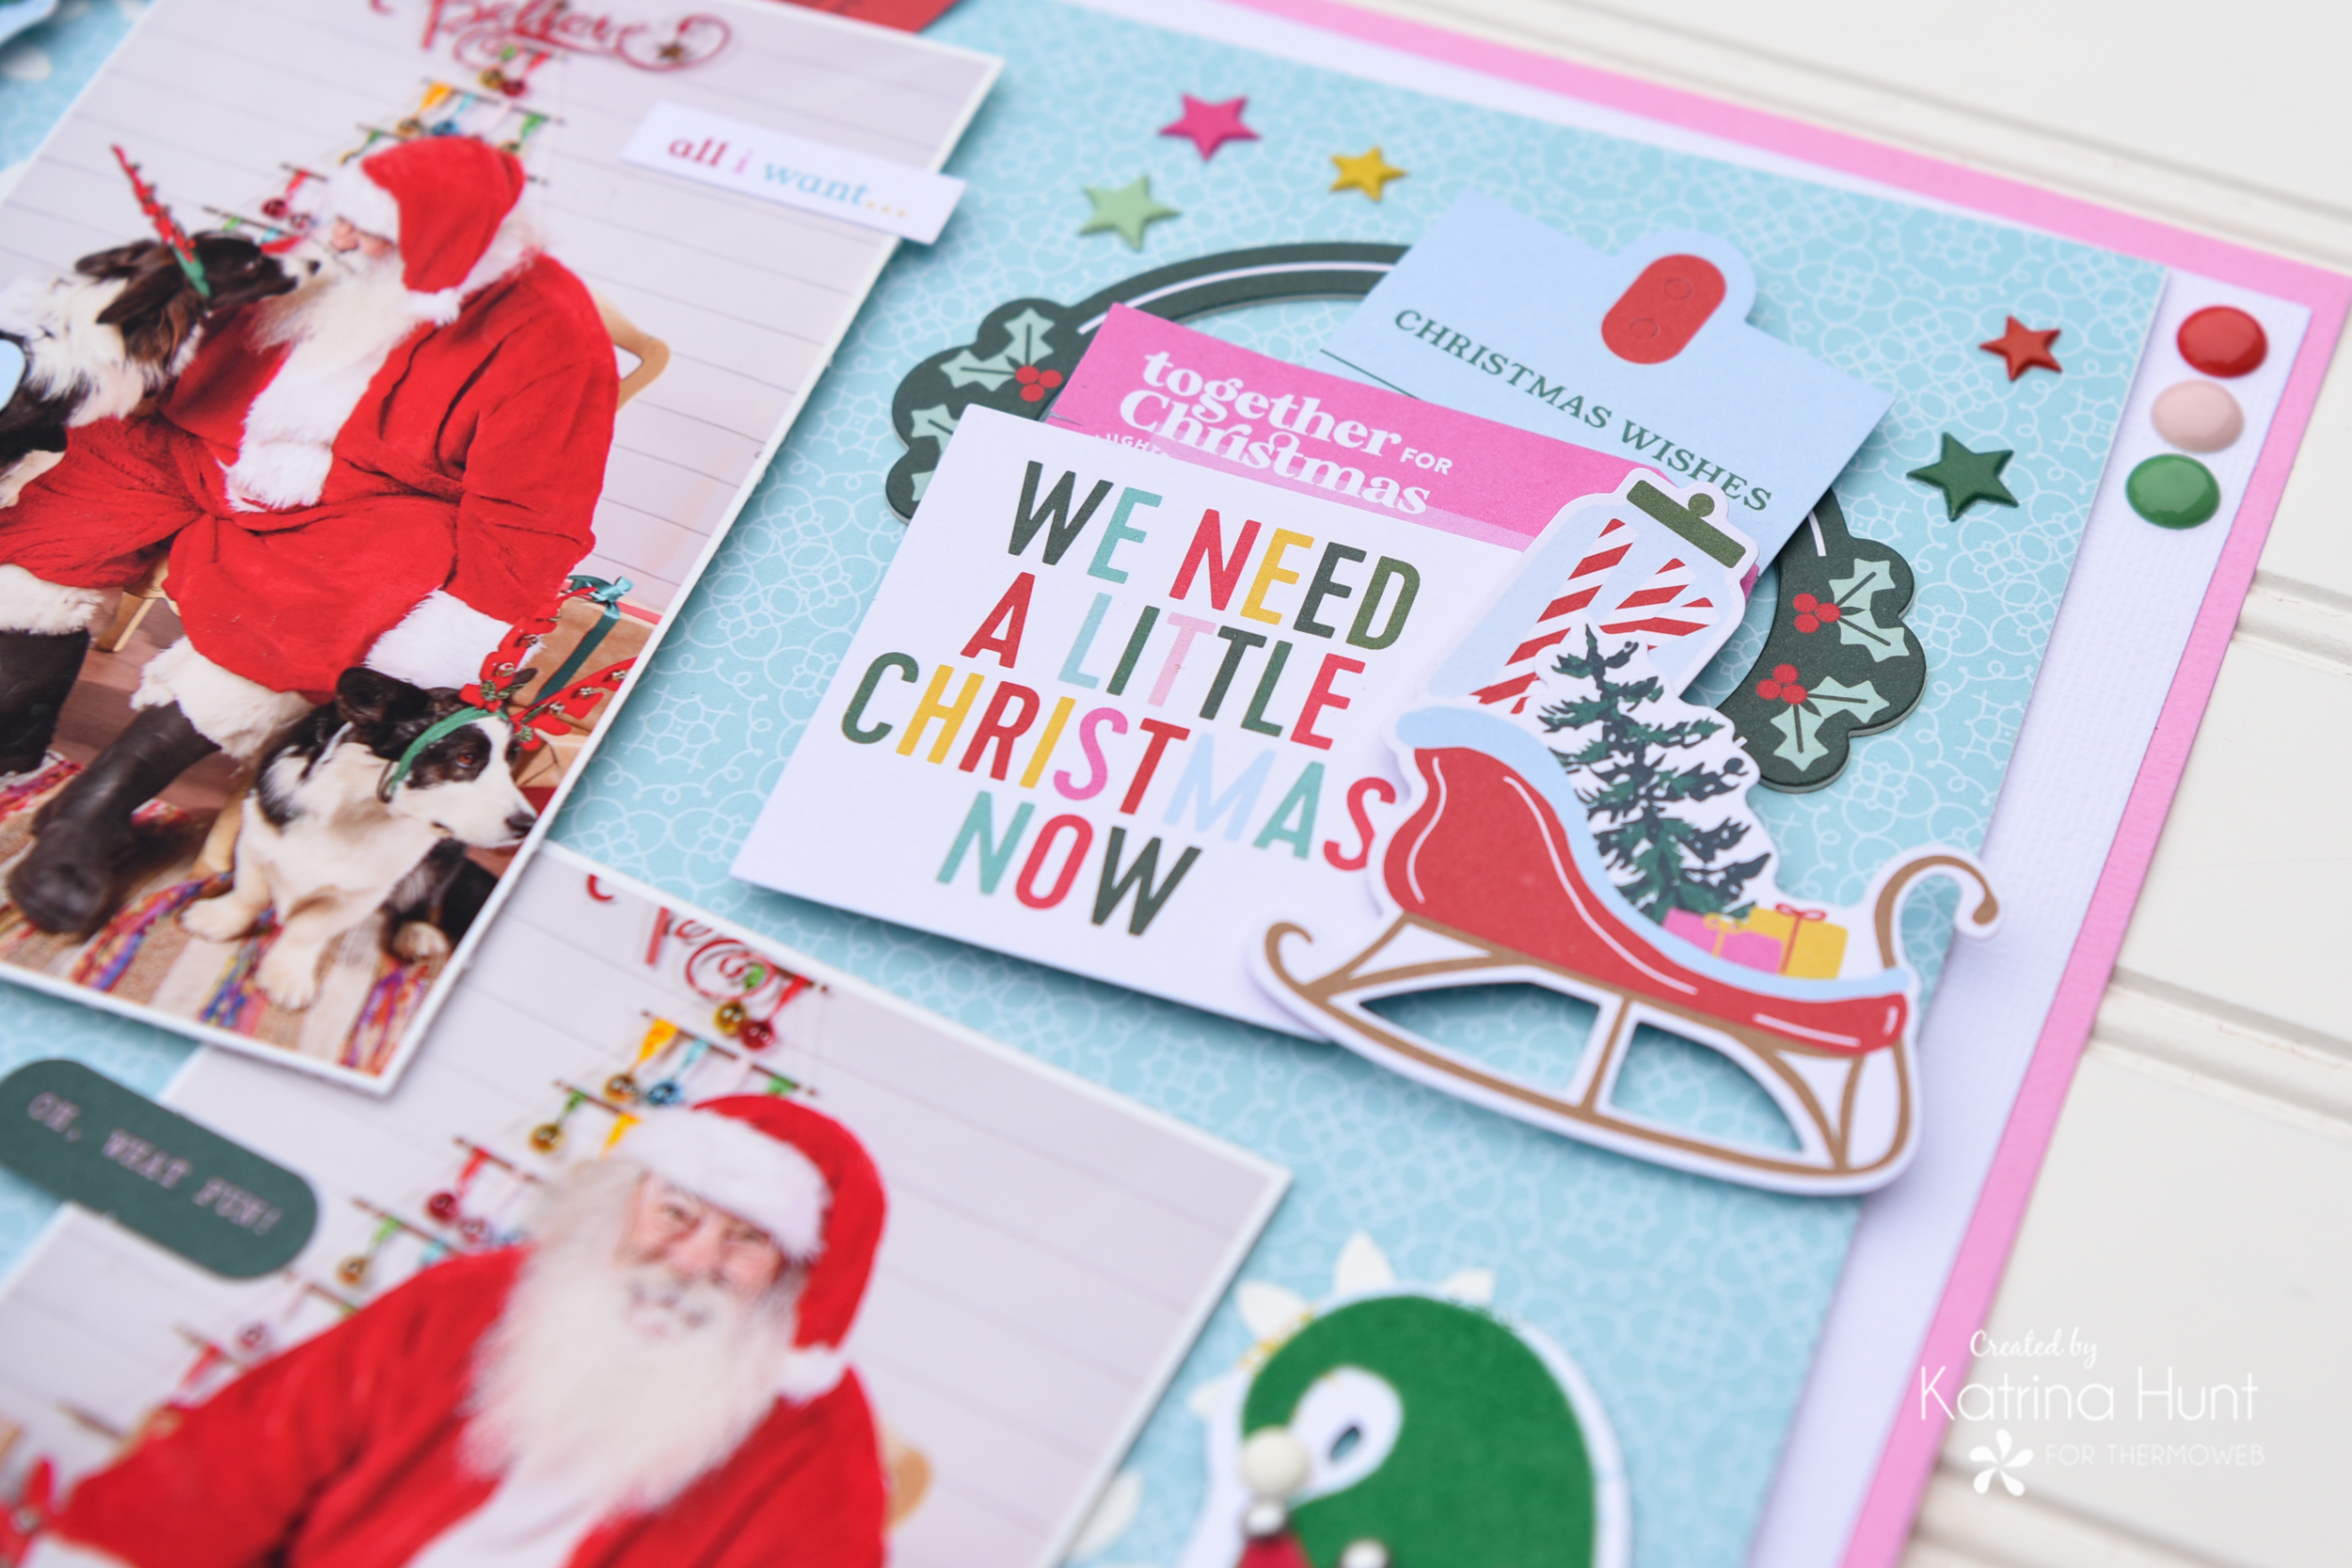
Flocked Elves Scrapbook Page
Therm O Web Supplies Used
Deco Foil Flock Transfer Sheets-Pink Carnation
Deco Foil Flock Transfer Sheets-Teal Waters
Ultra Bond Pixie Tape
Deco Foil Flock Transfer Sheets-Ruby Red
Memory Runner XL
Memory Runner XL Refill
Deco Foil Transfer Gel-Blanco
NEW 3D FOAM TAPE ROLL 1/16
NEW 3D FOAM TAPE ROLL 1/8
iCraft 3D Foam Squares Box – White
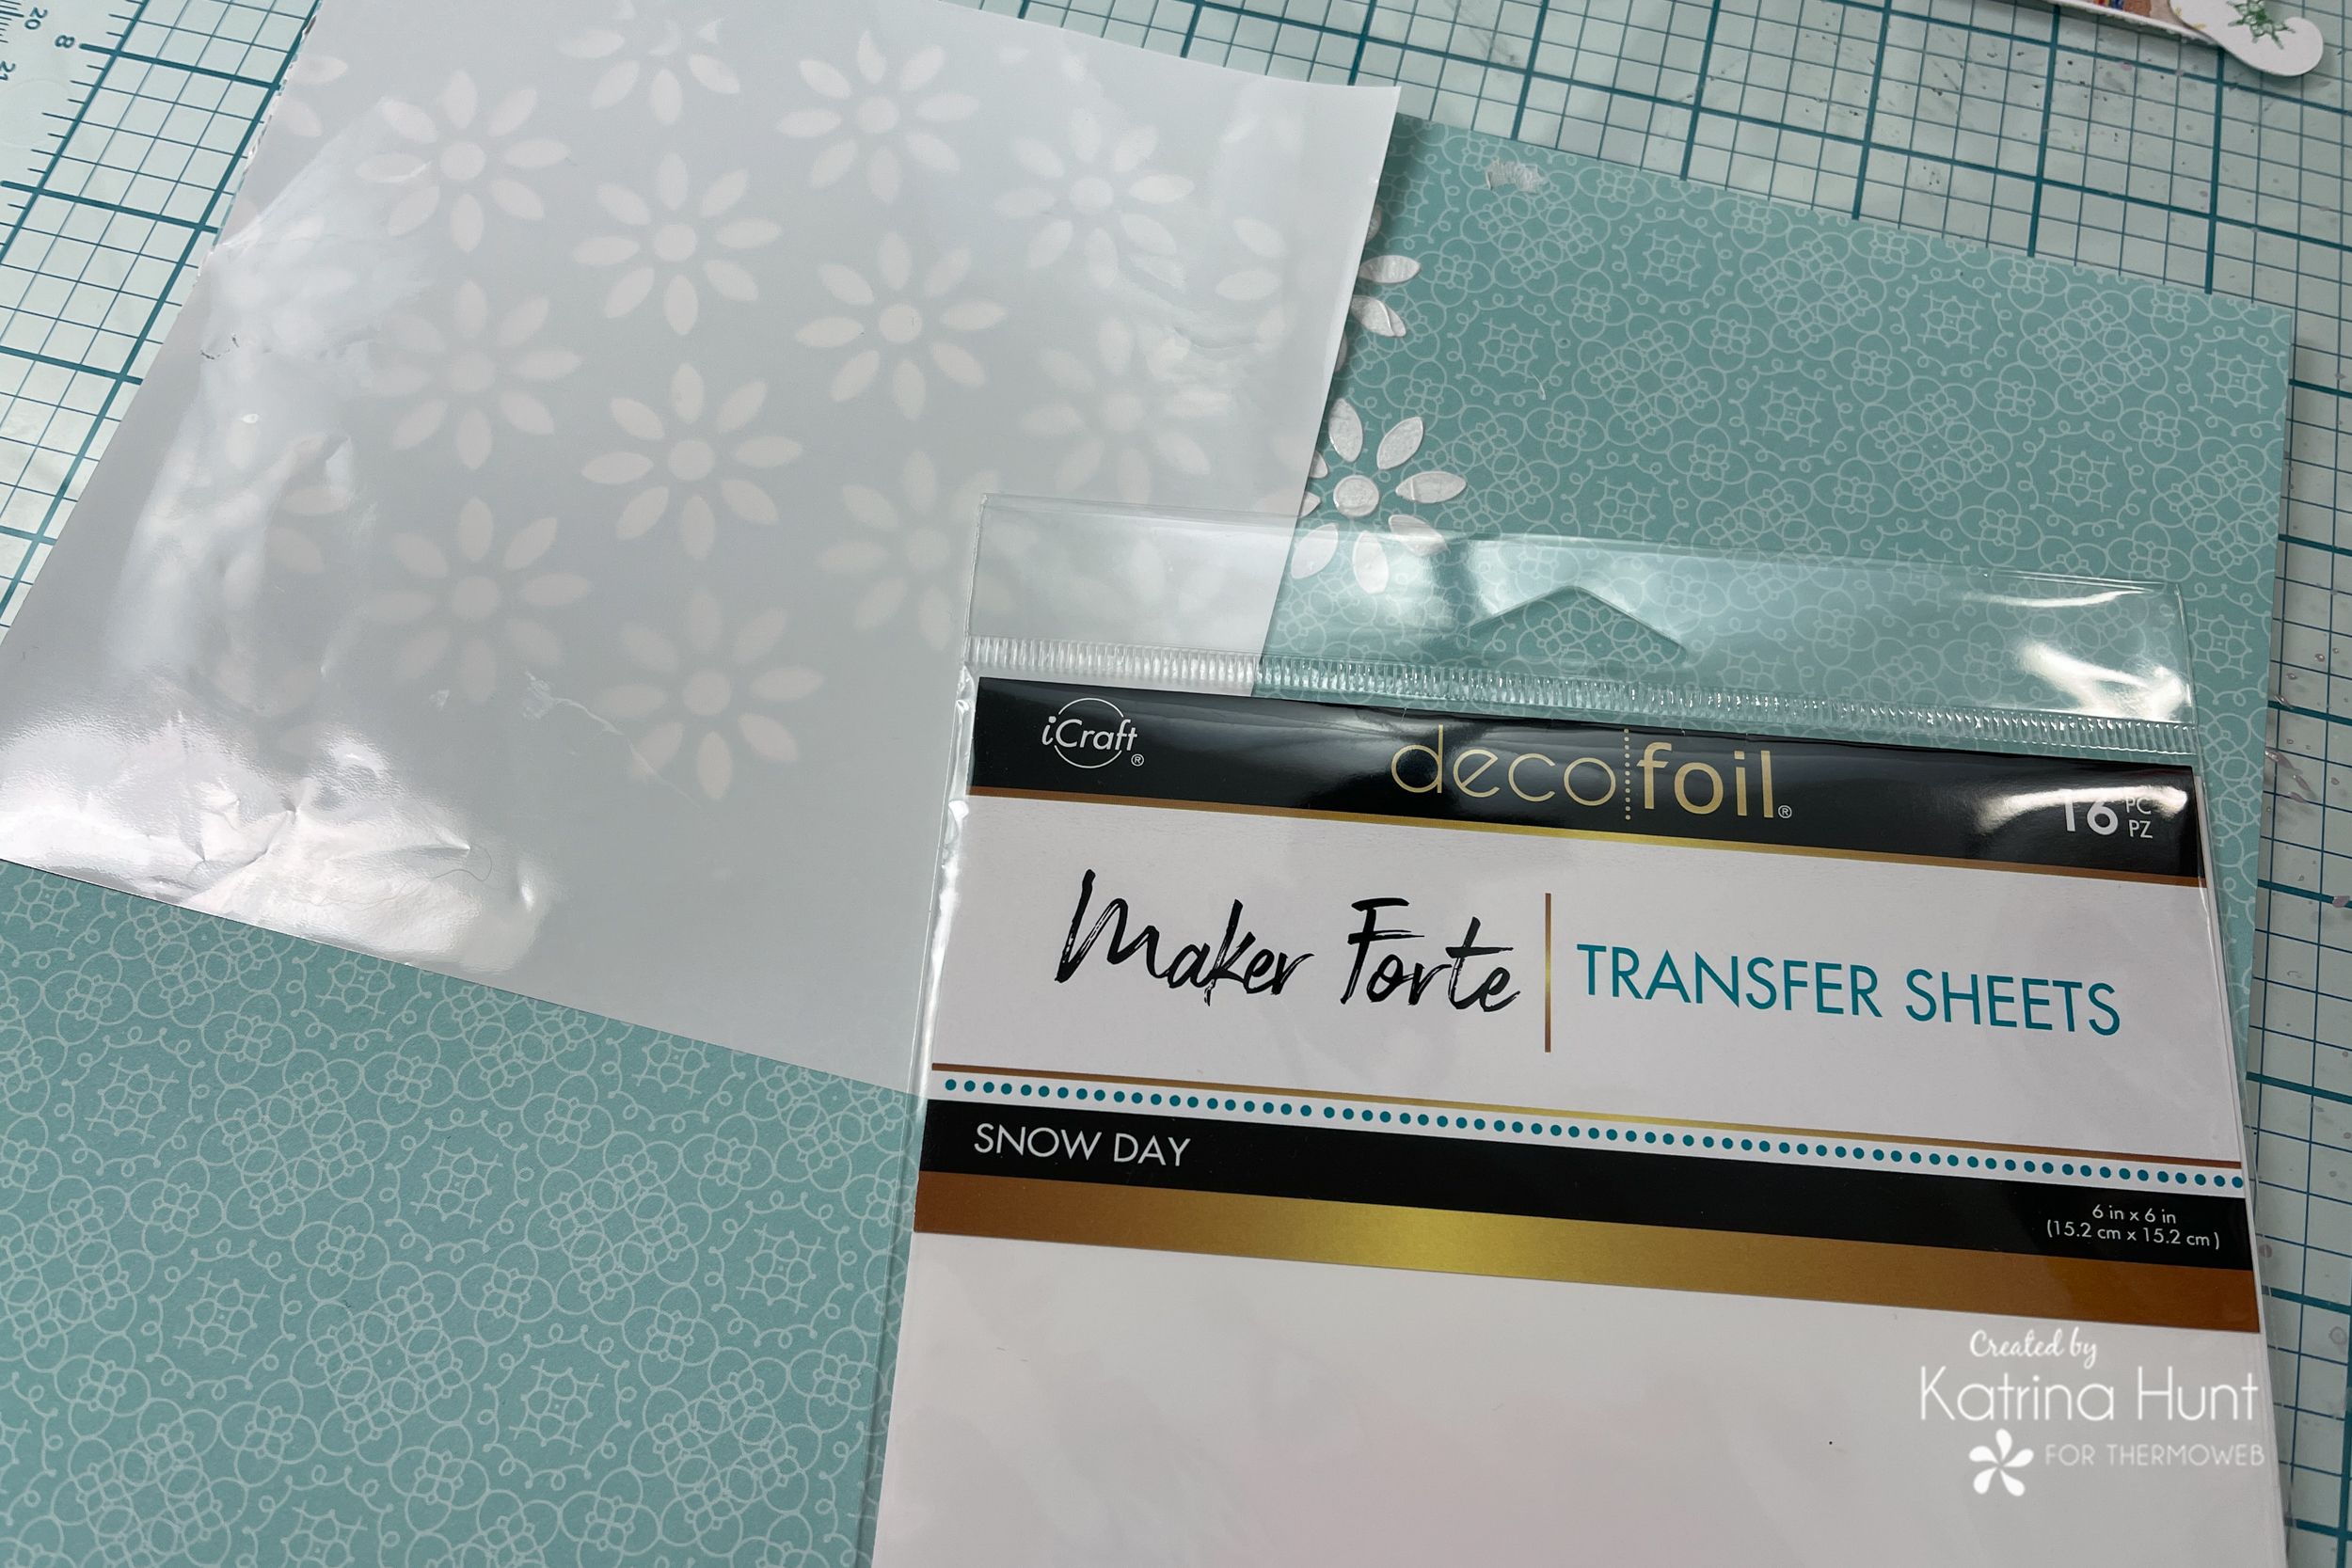
Maker Forte Deco Foil Transfer Sheets-Snow Day
iCraft Easy Cut Adhesive Sheets
Deco Foil Flock Transfer Sheets-Emerald Green
iCraft Ultra Bold Liquid Adhesive
Deco Foil Foil Transfer Sheets-Gold Shattered Glass
iCraft Easy Tear Tape-1/2 inch
Other Supplies Used
PinkFresh Studio-Holiday Magic
PinkFresh Studio Inks
Vicki Boutin PrintShop Stencil
White and Pink Cardstock
Enamel Dots
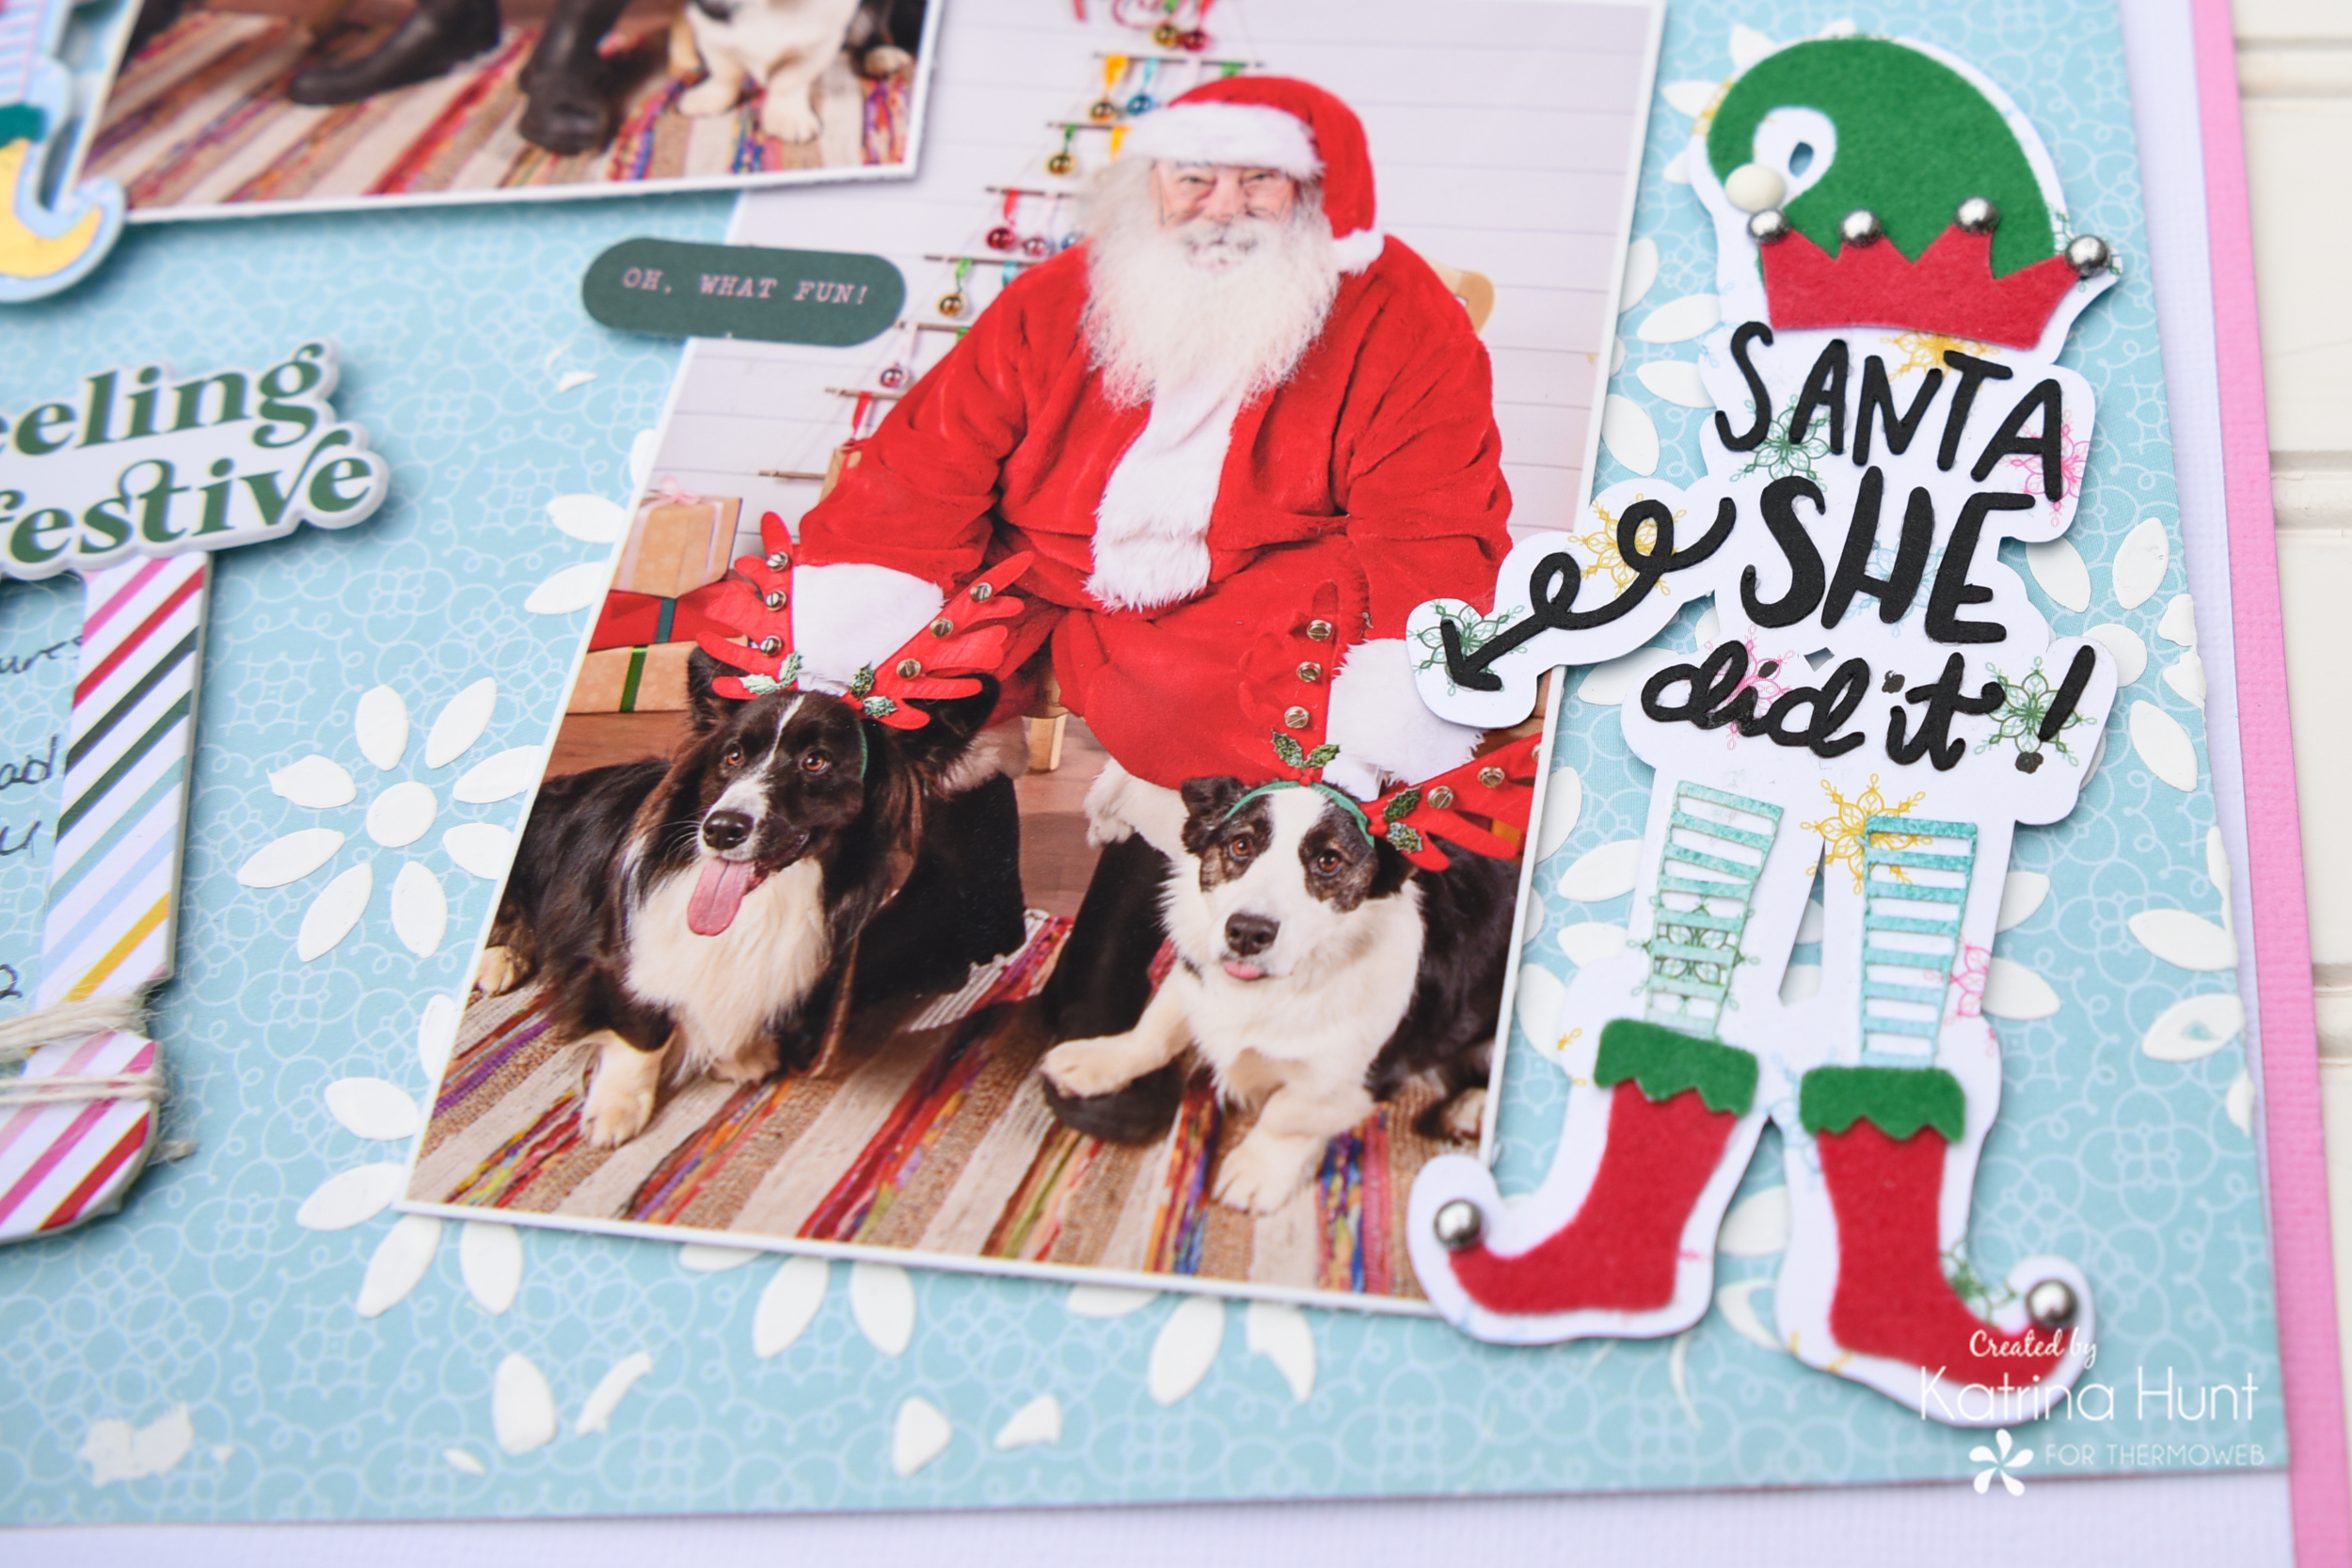
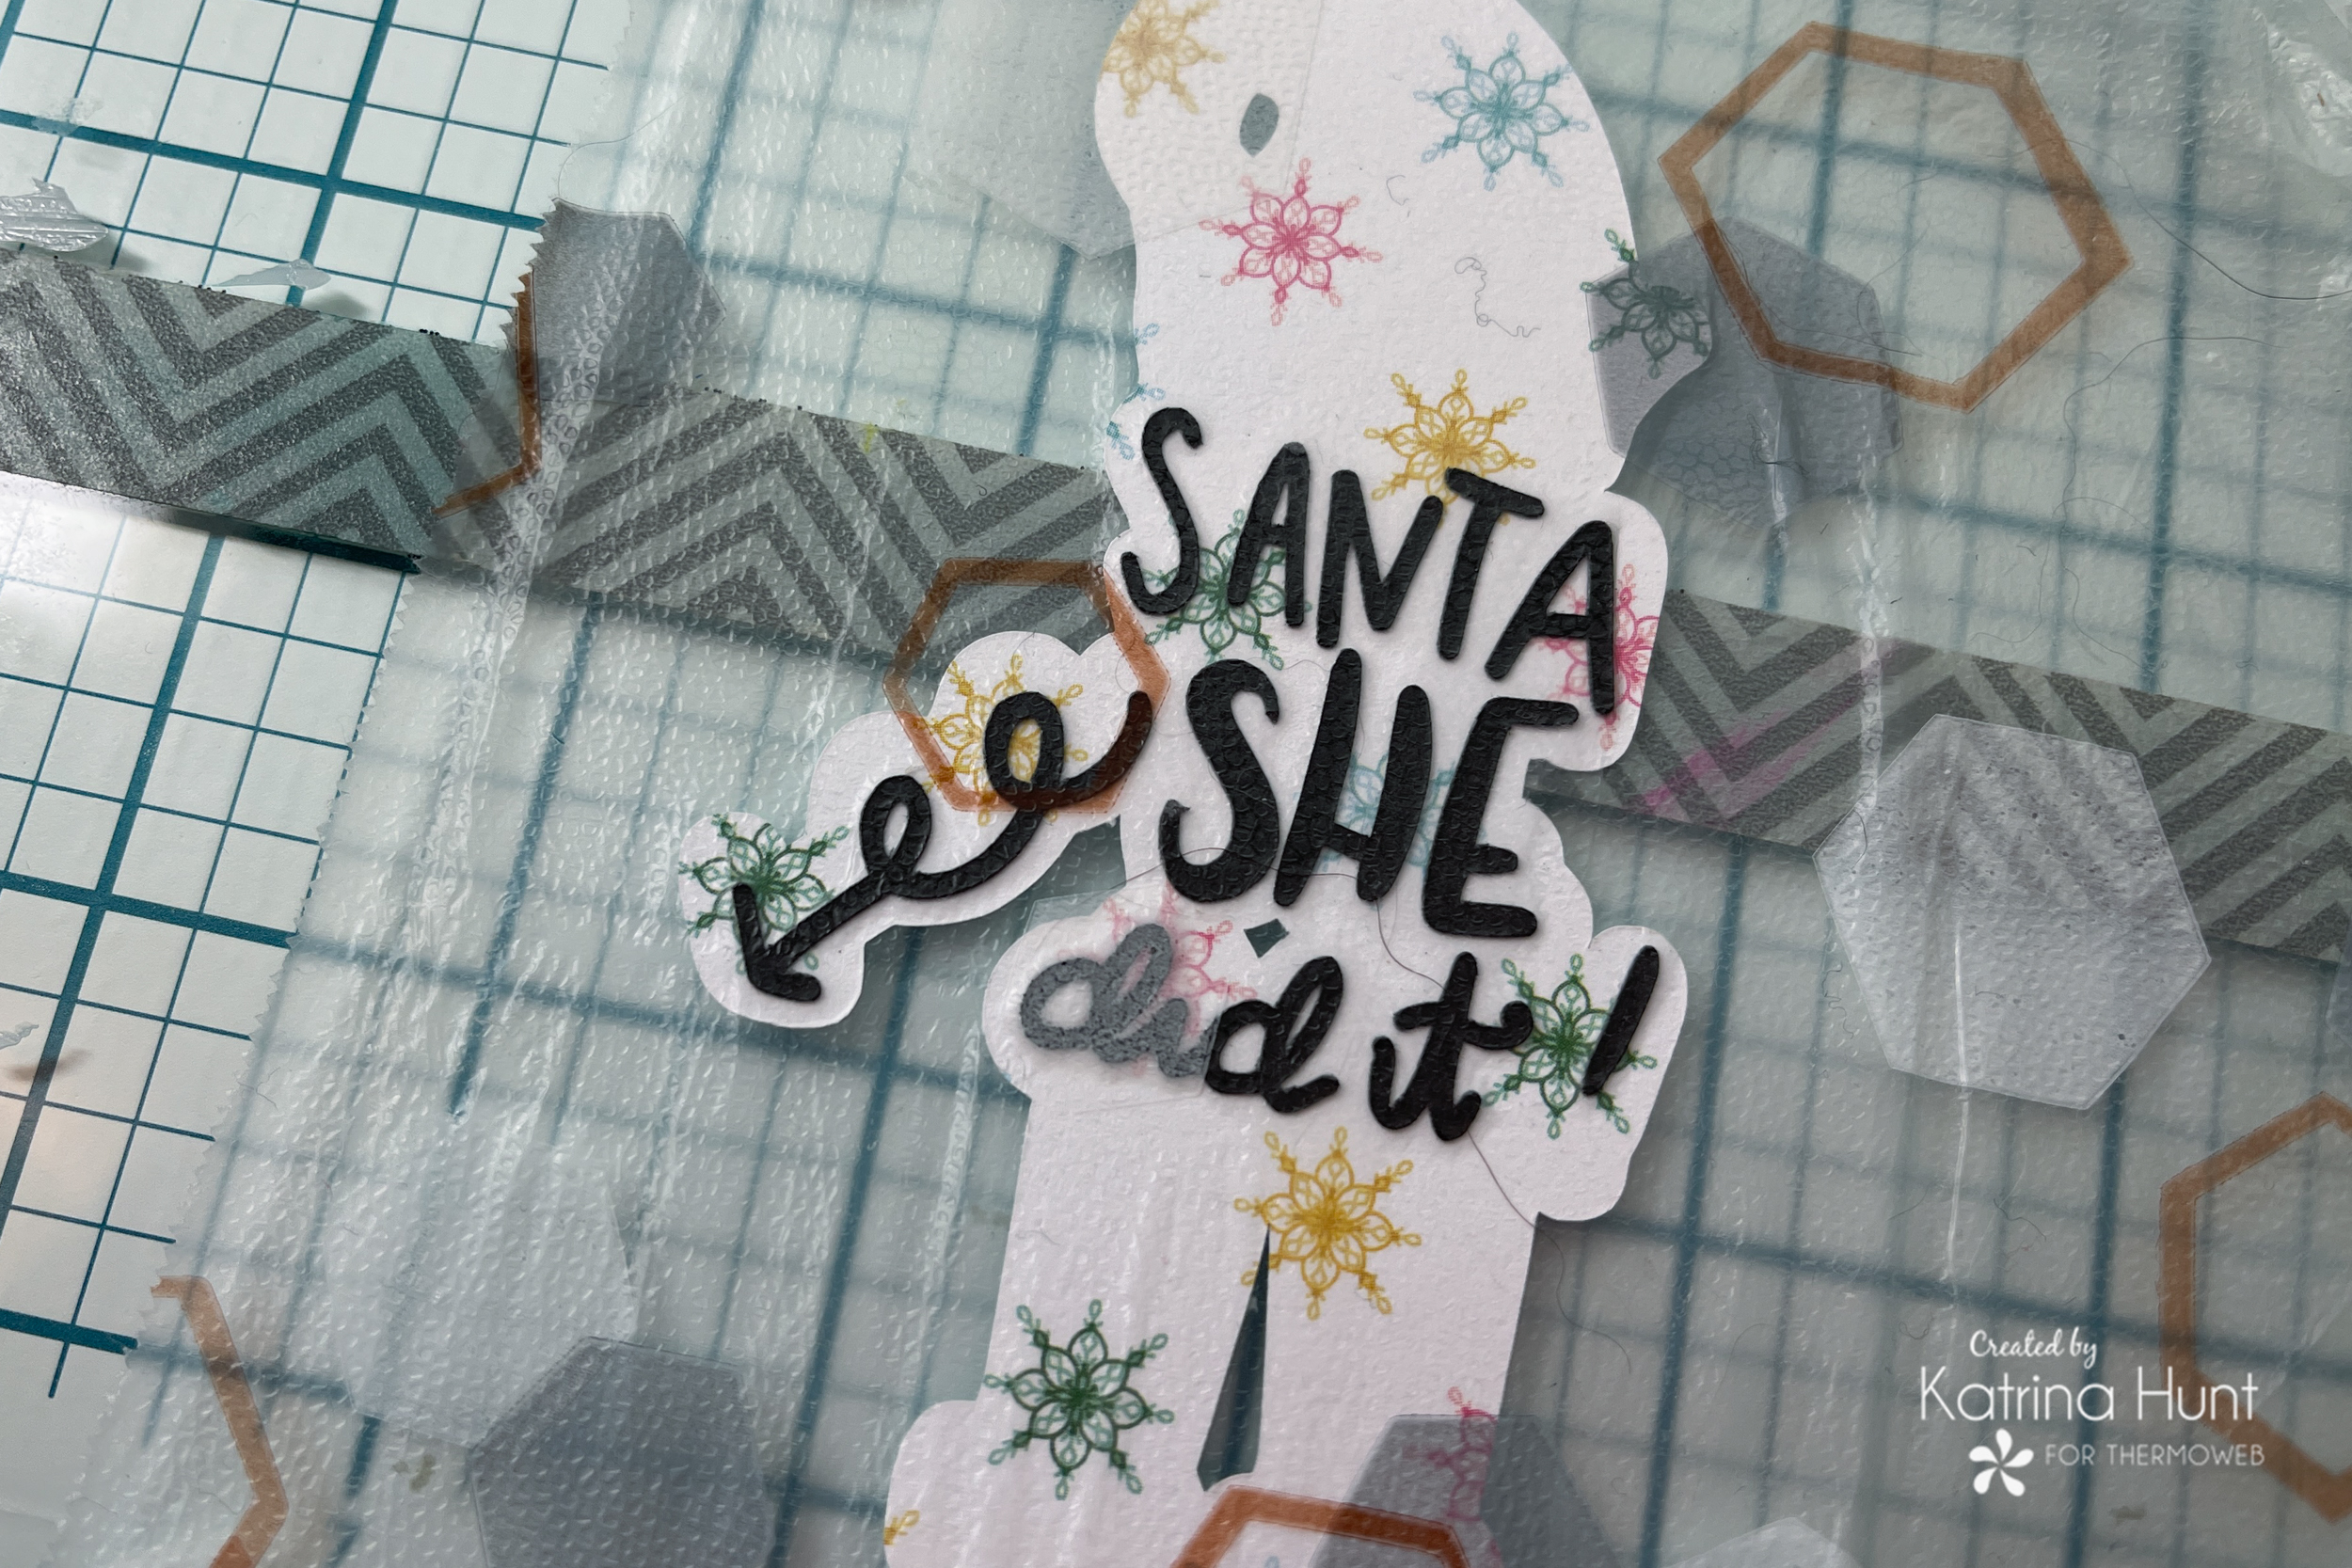
Silhouette Cut File-Santa, She Did It
Silhouette Cut File-Santa He Did It
Layout Details
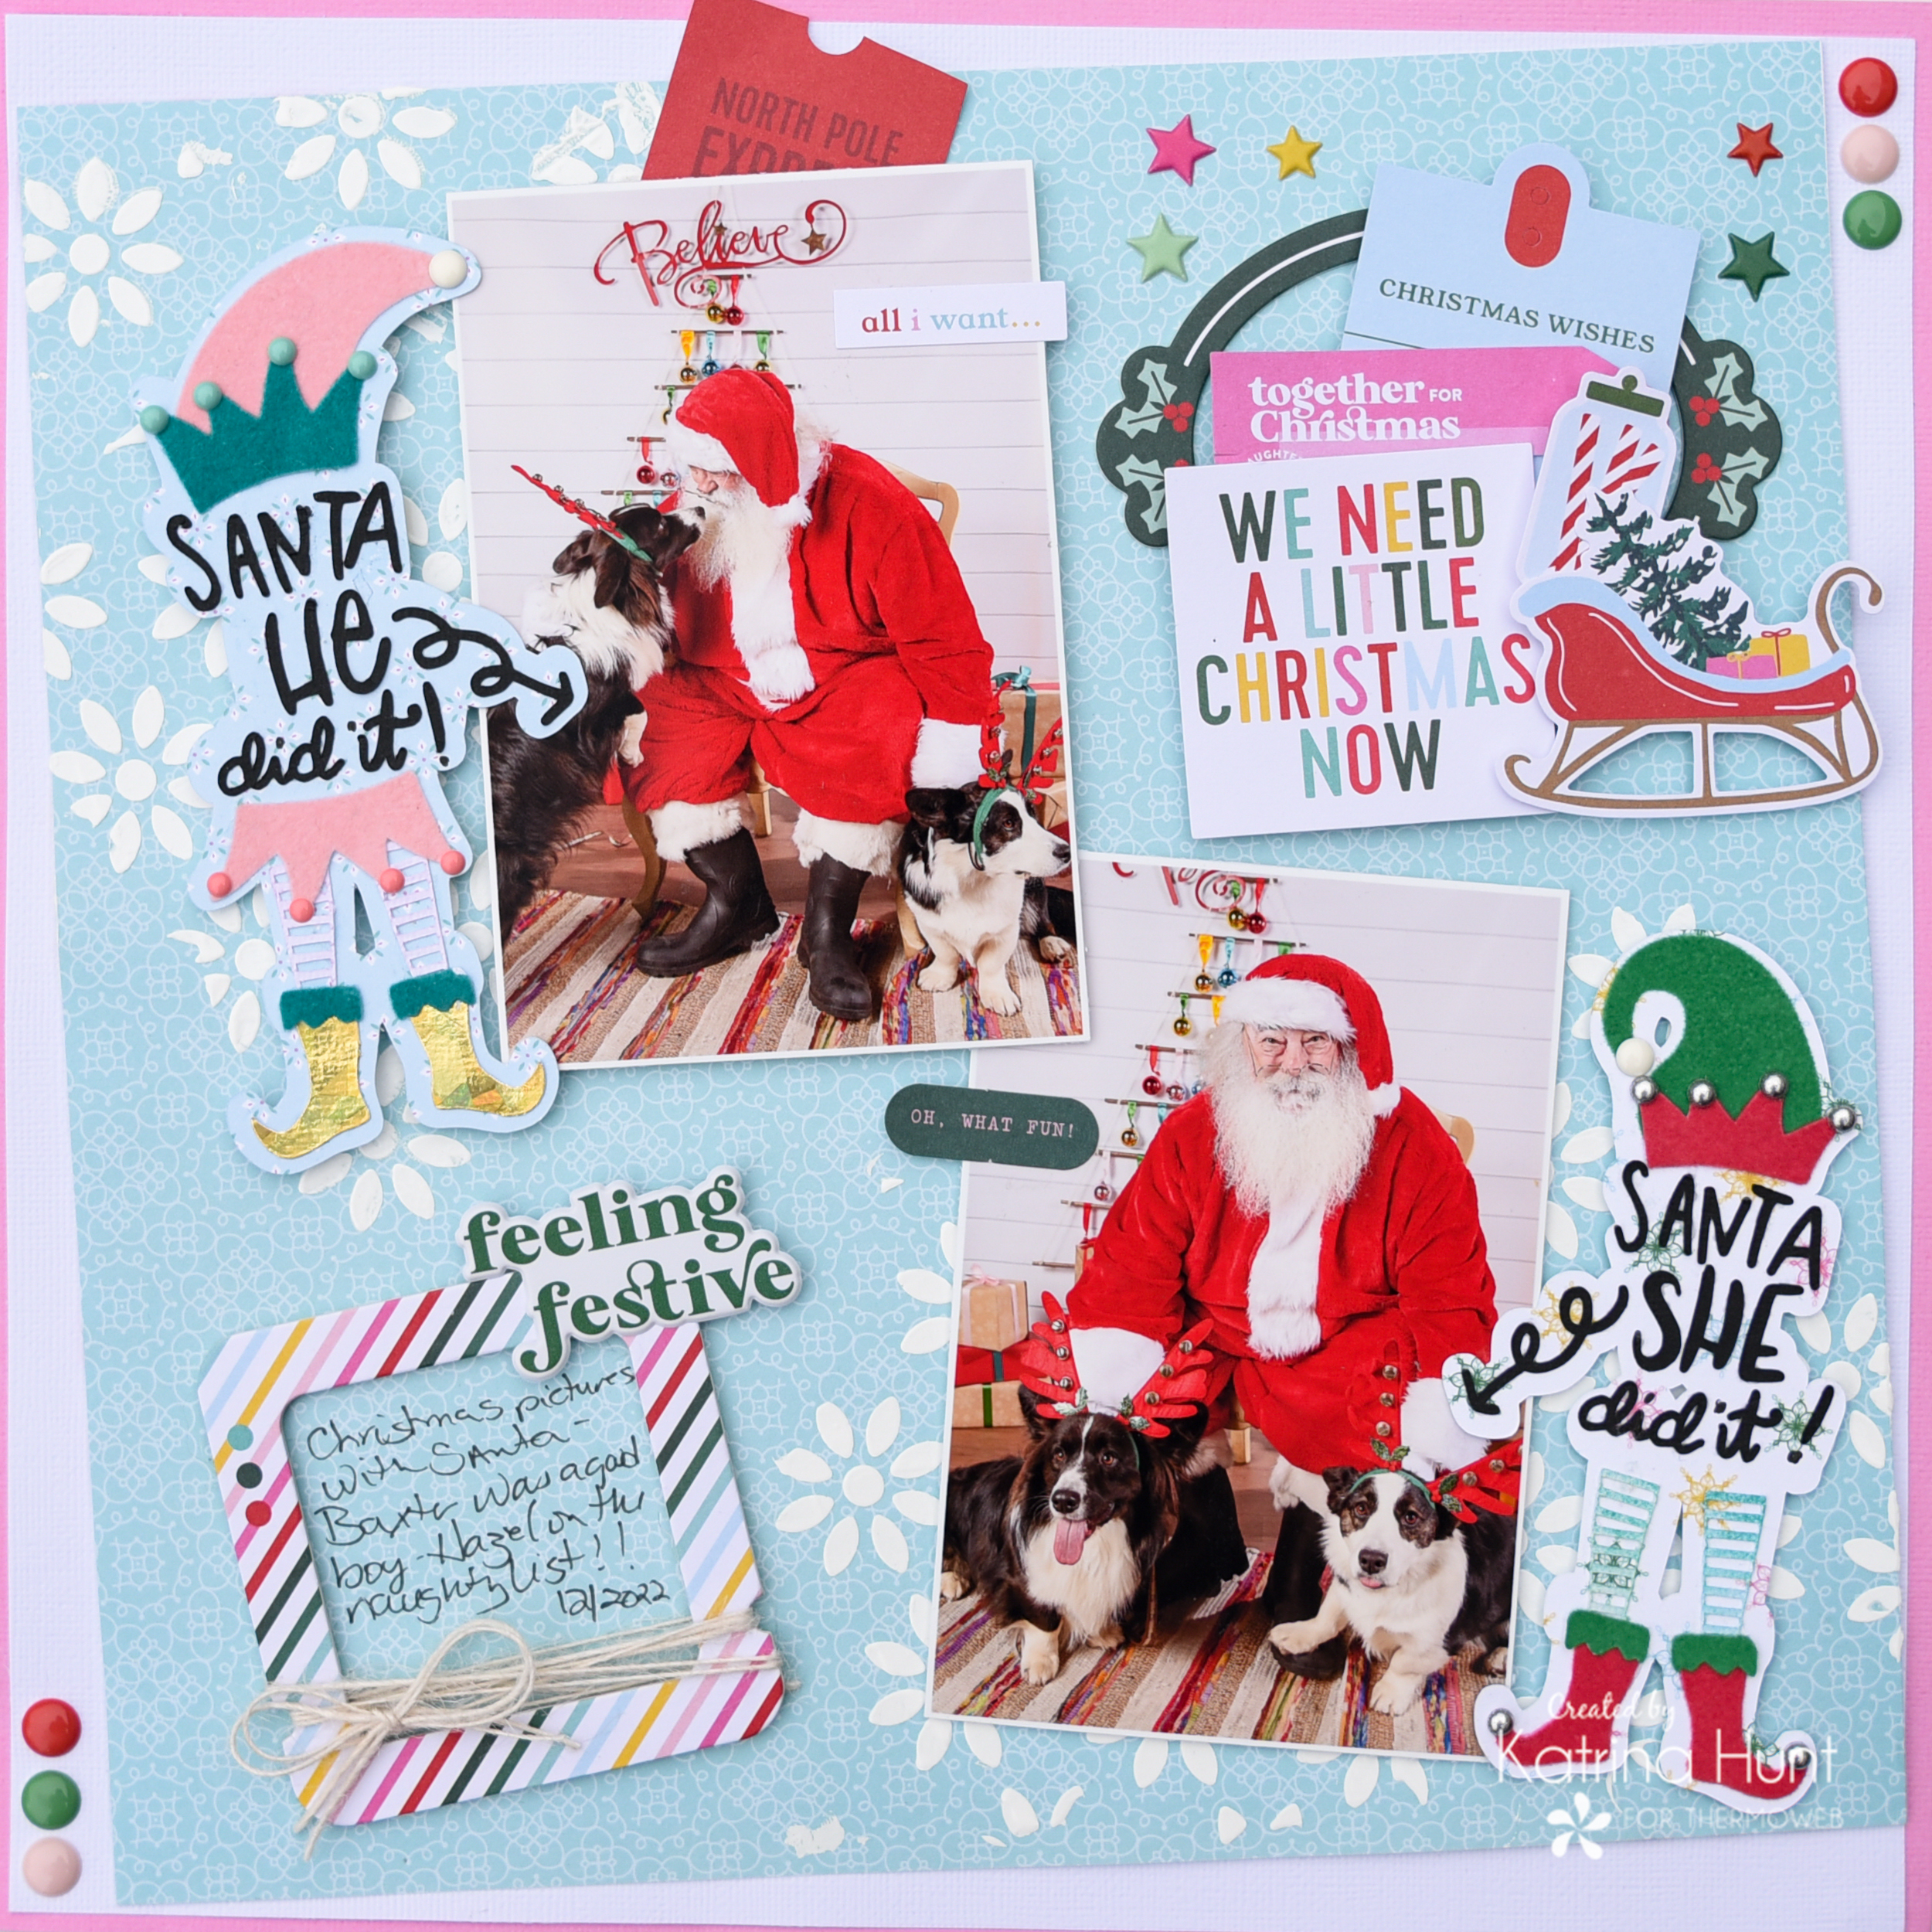
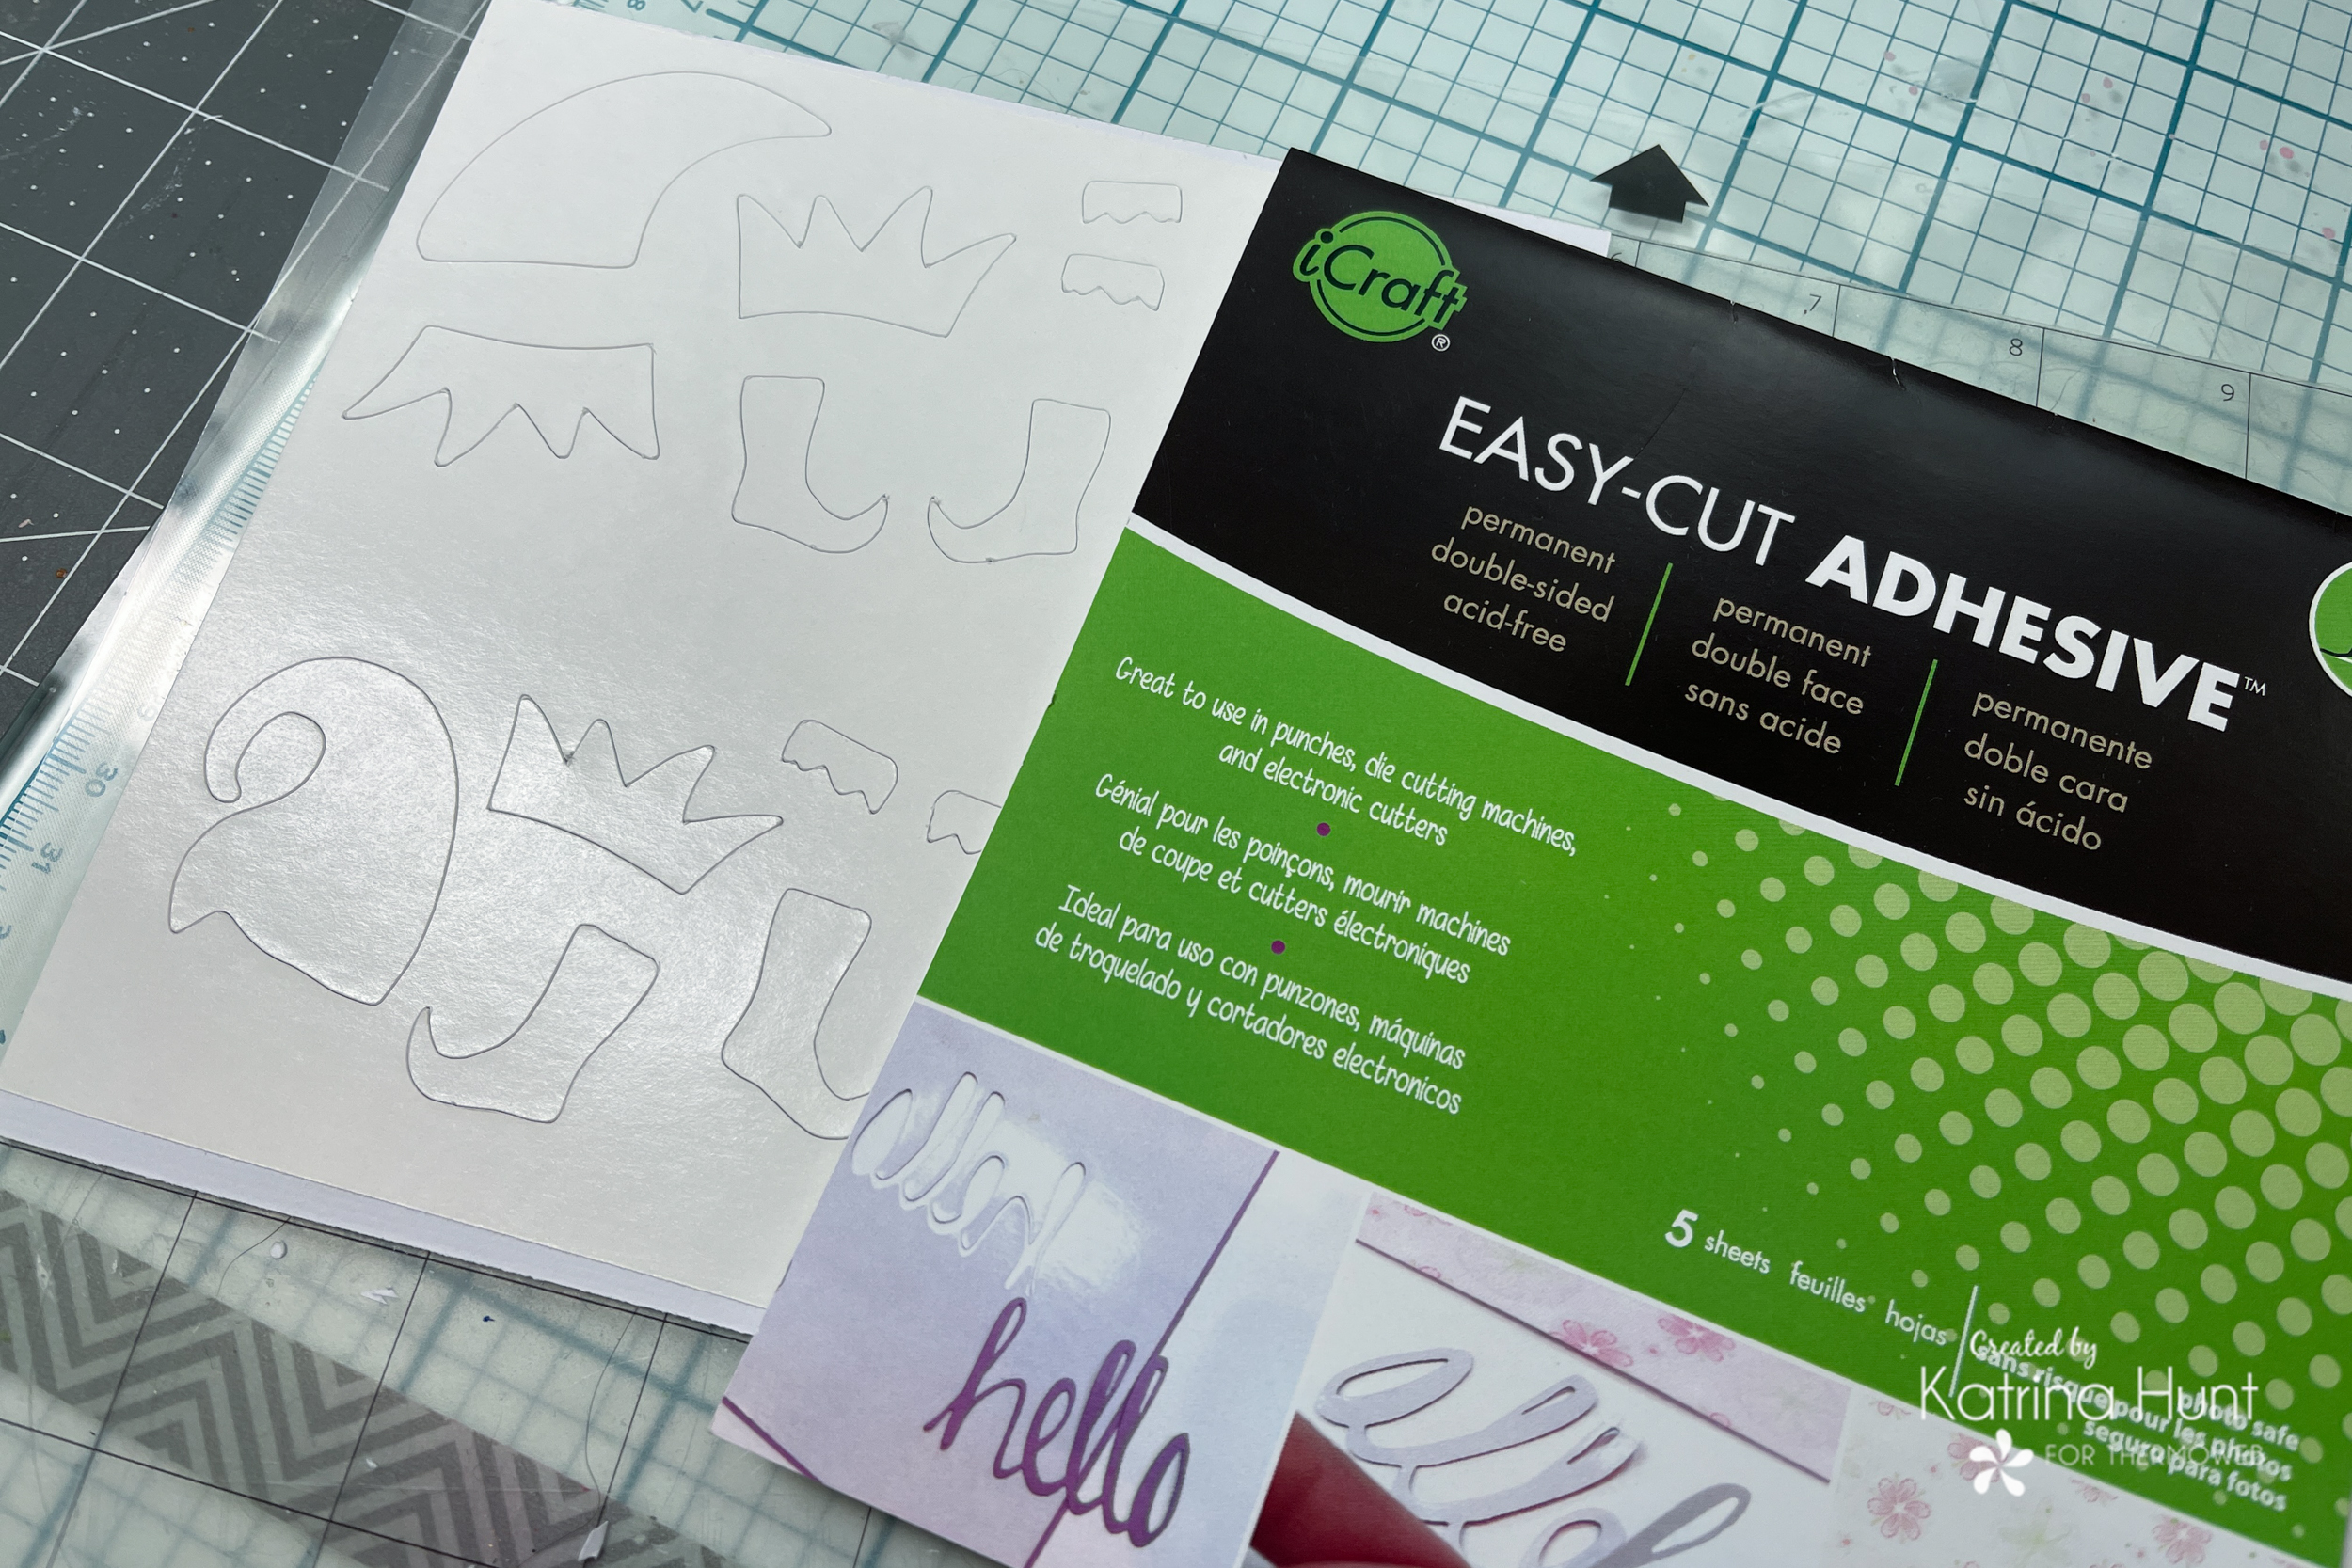
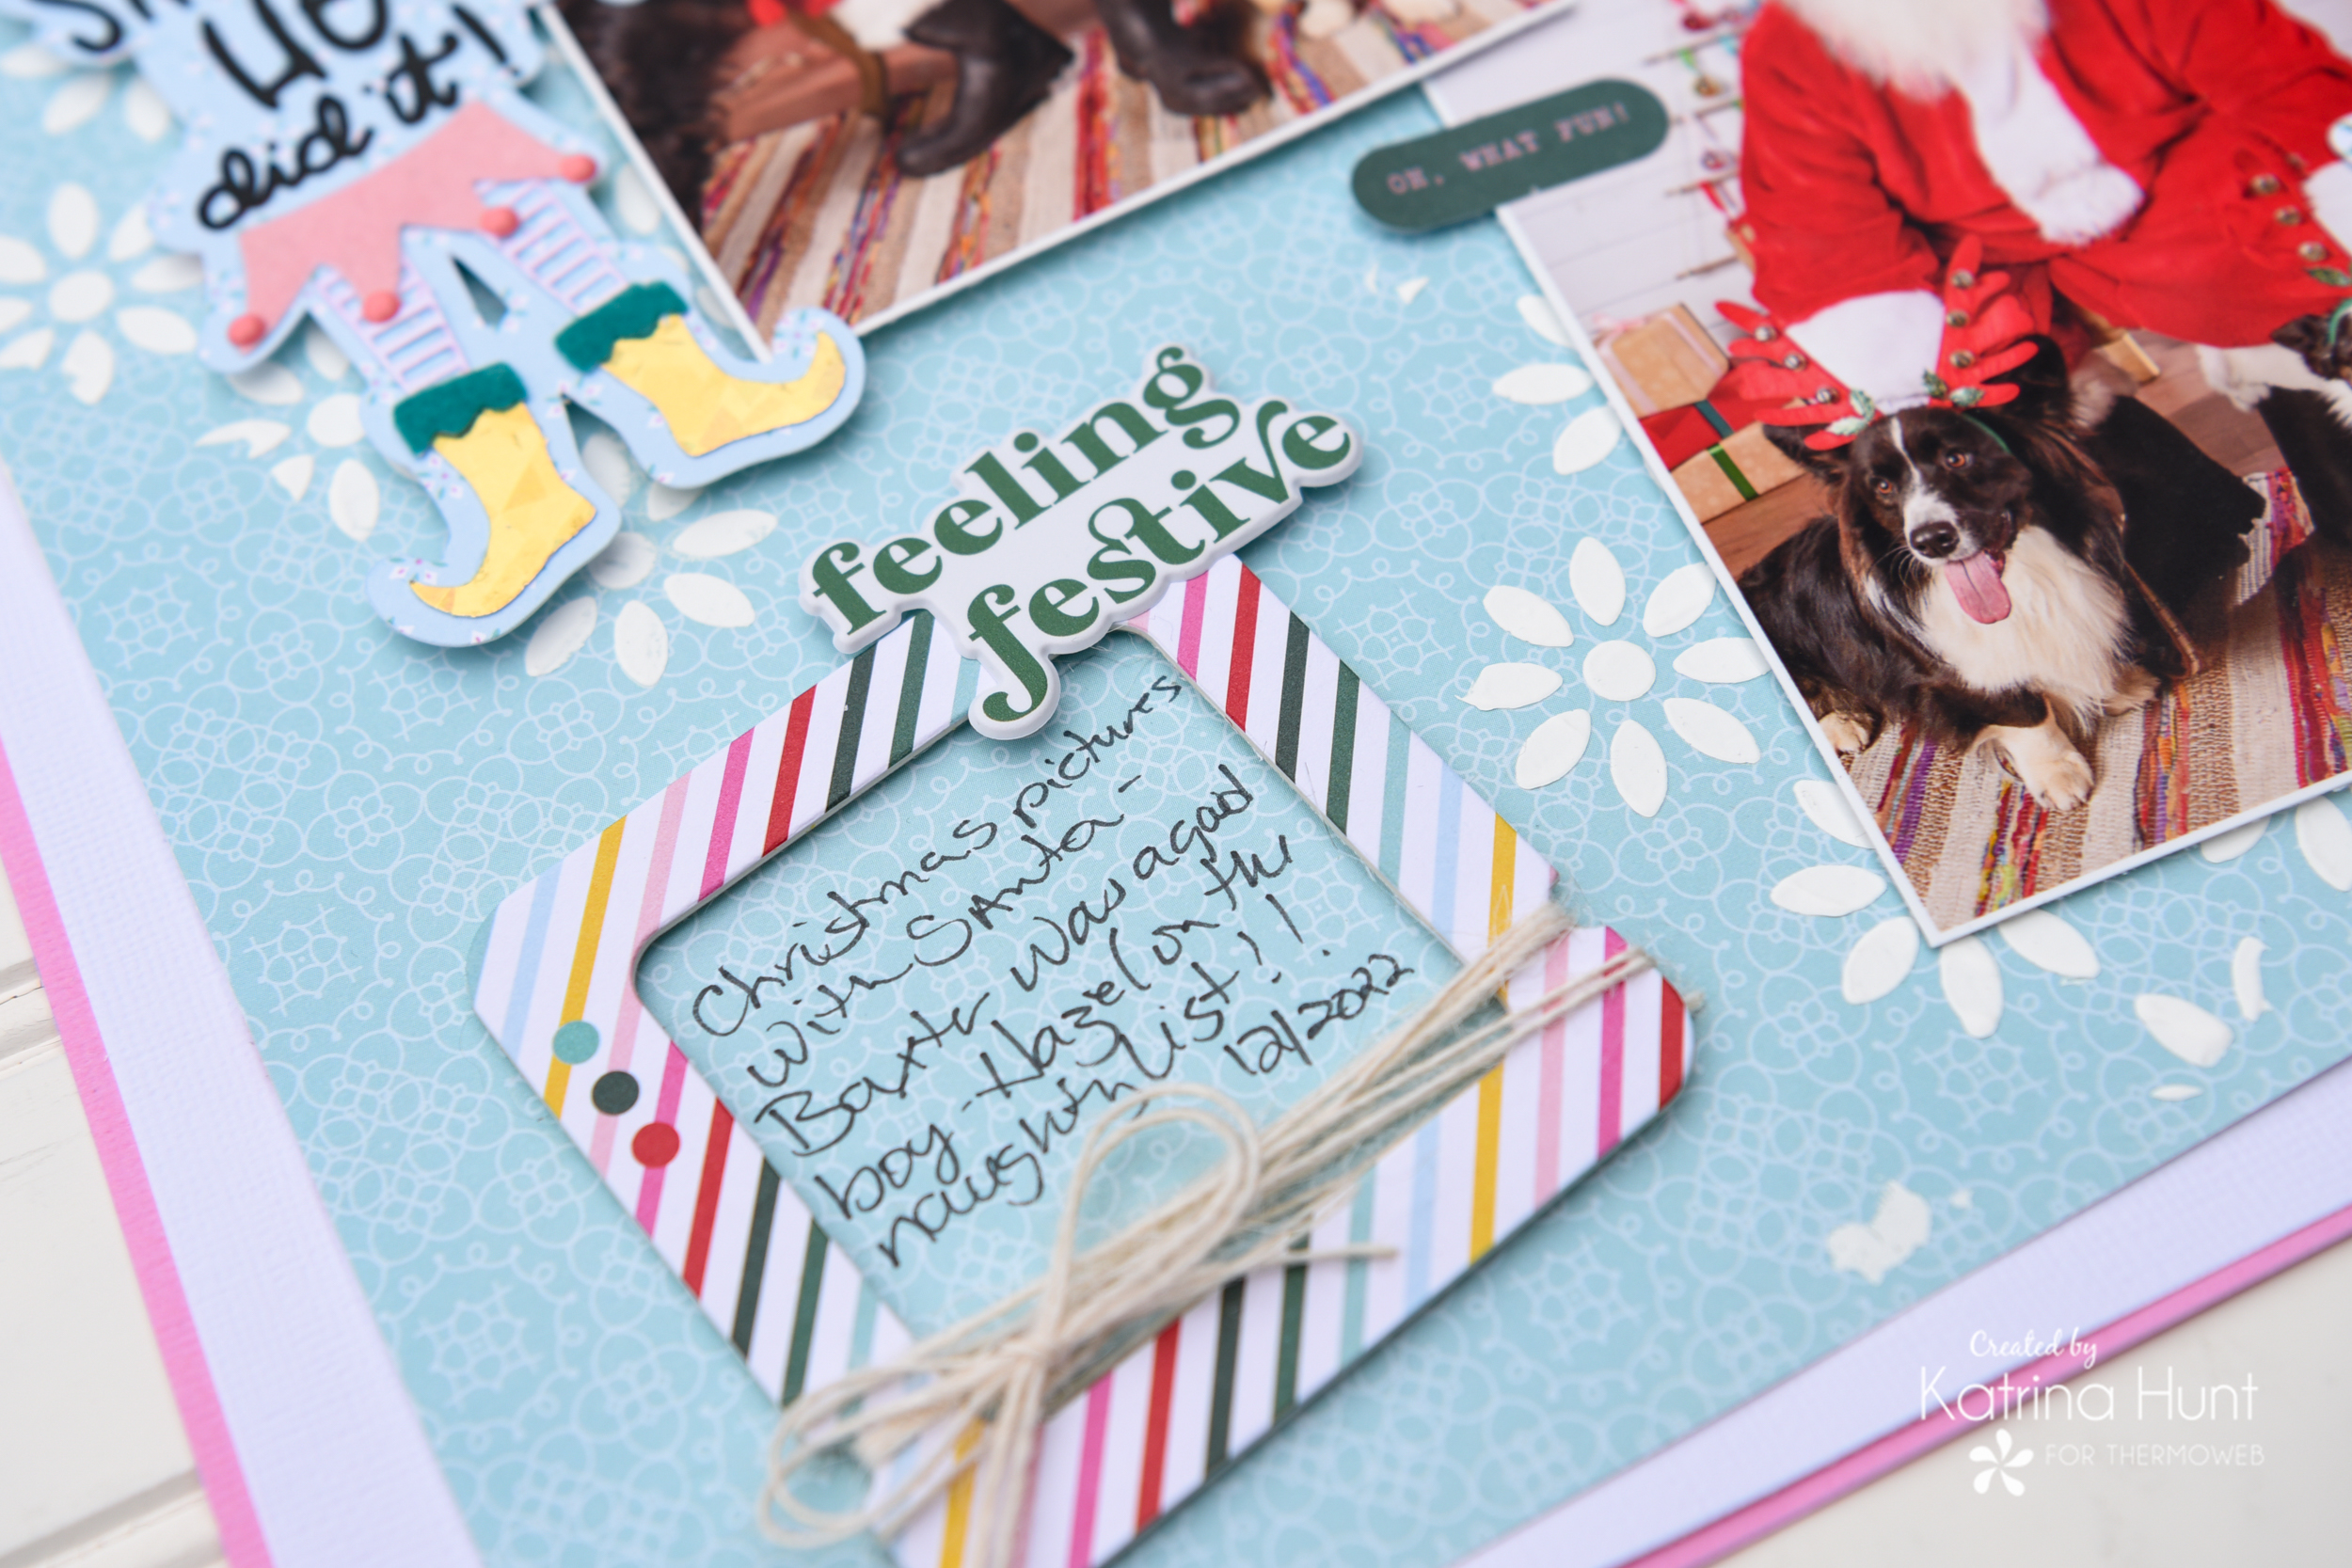
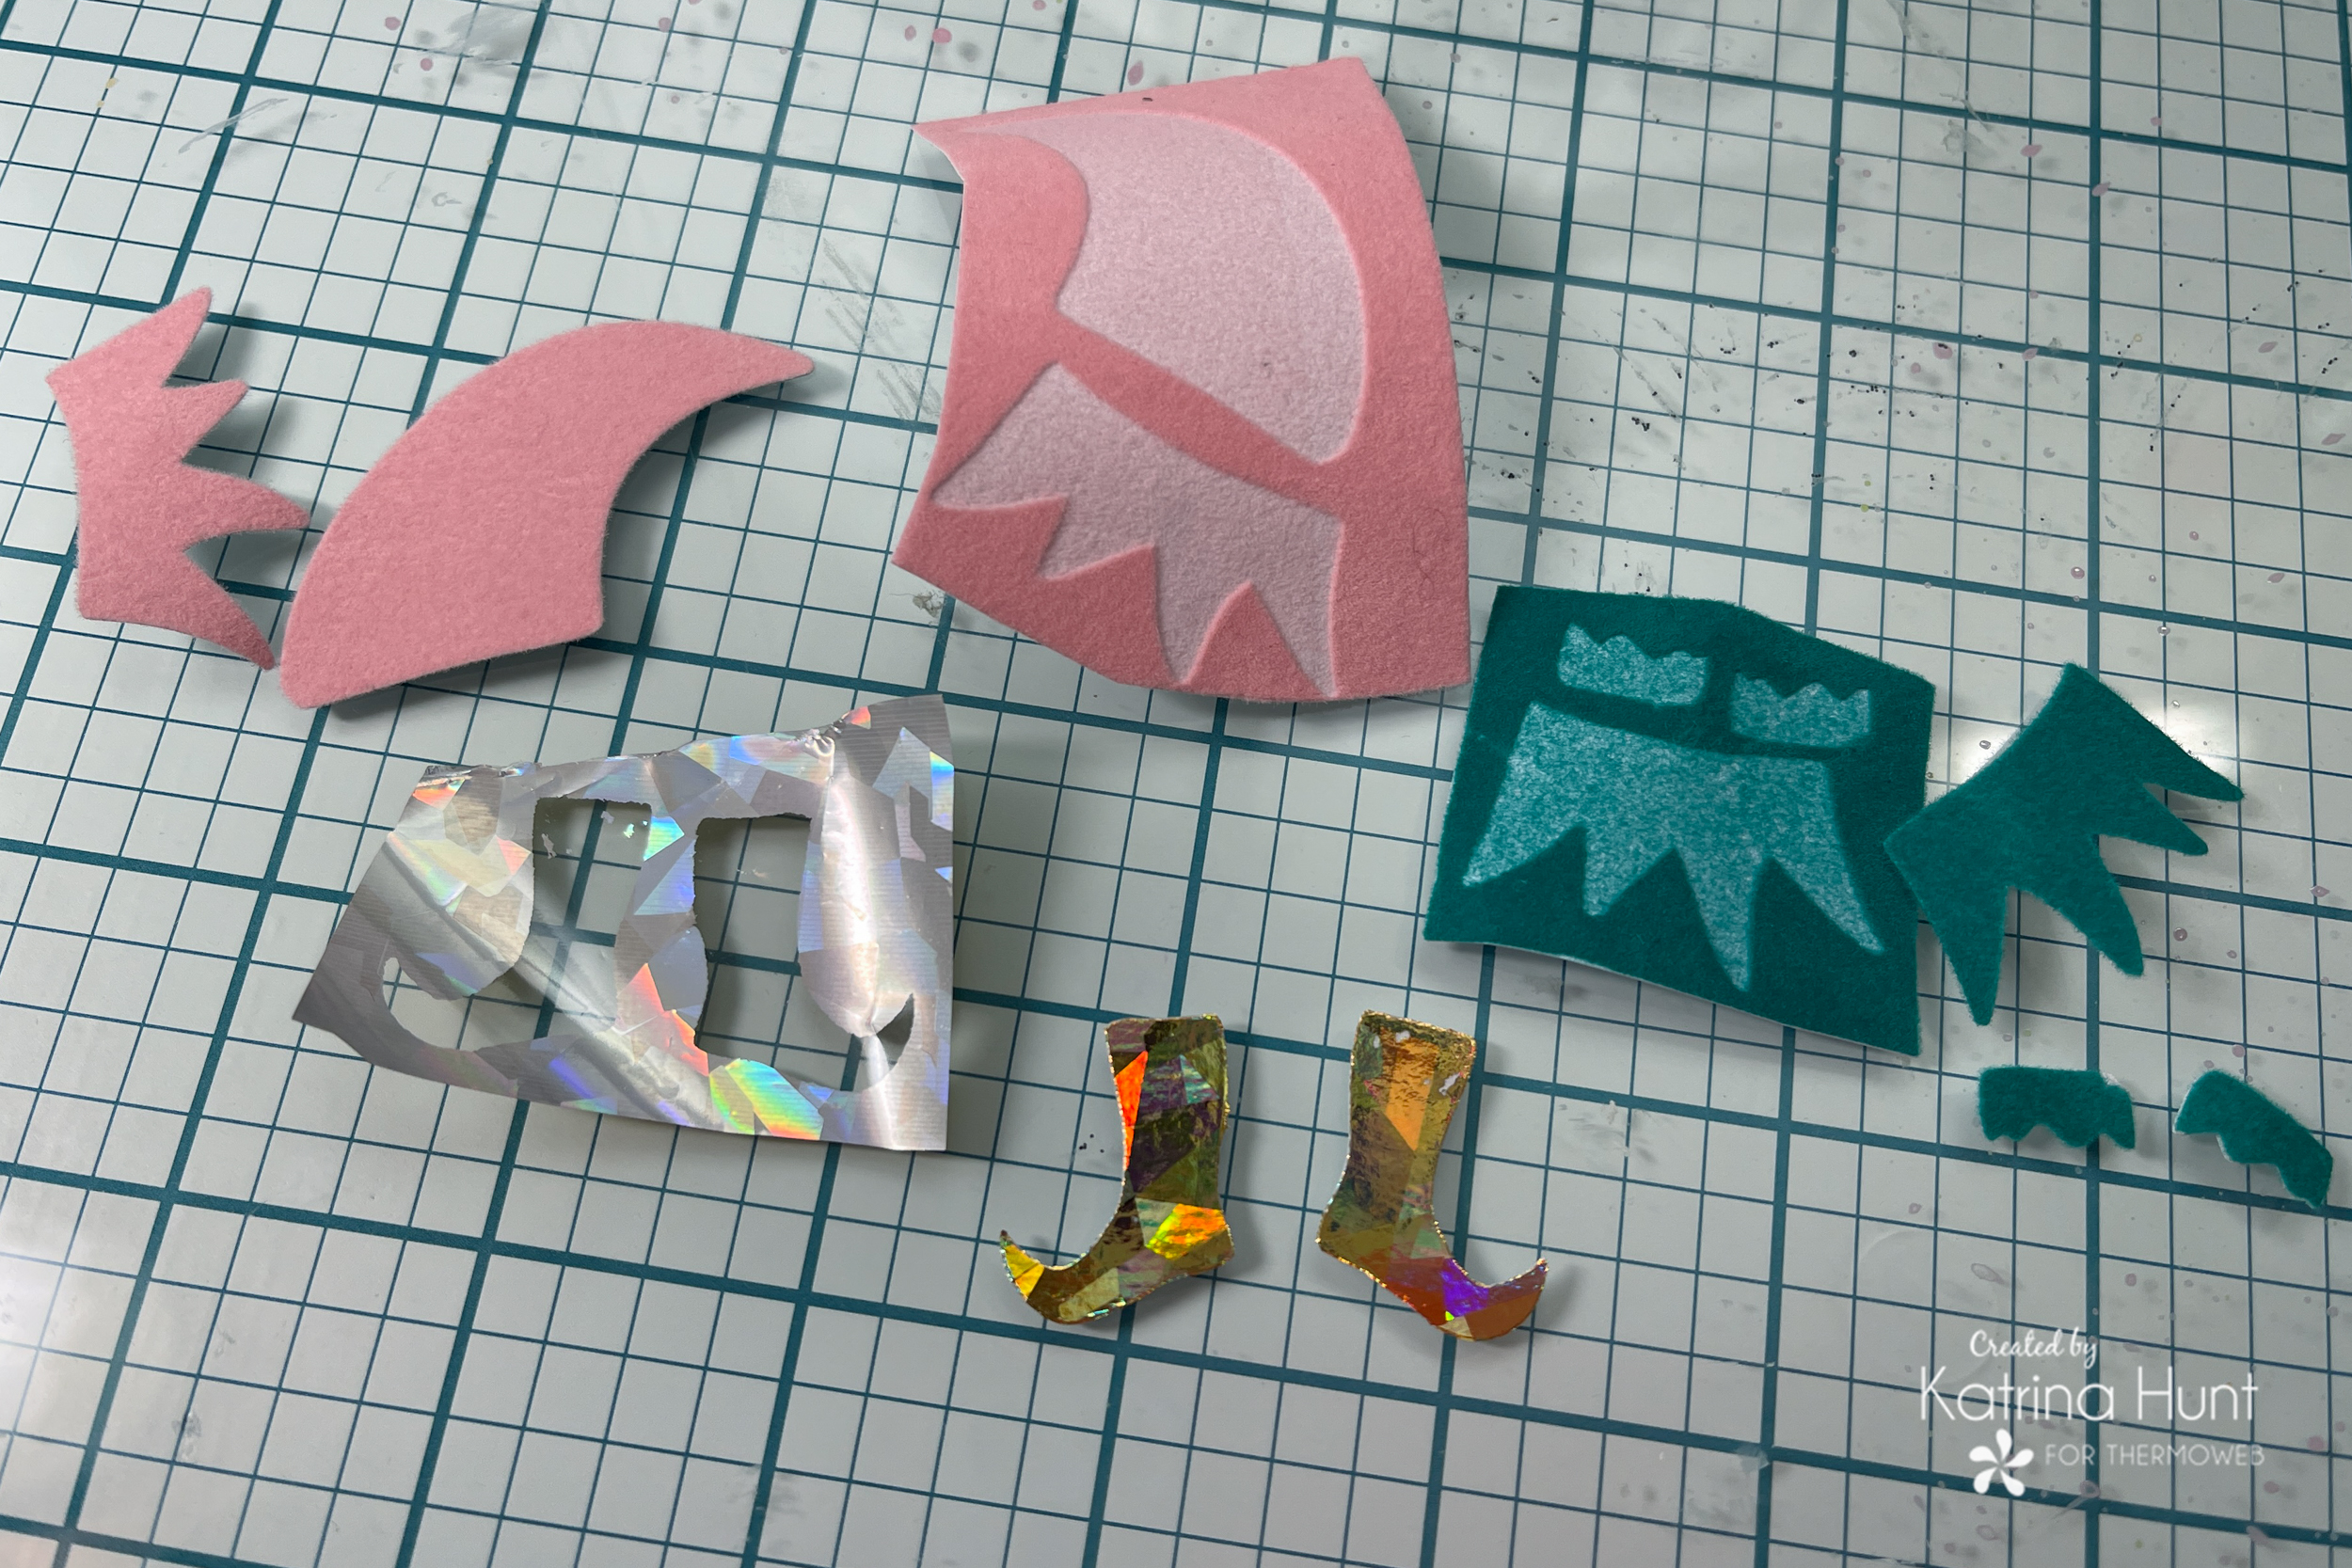
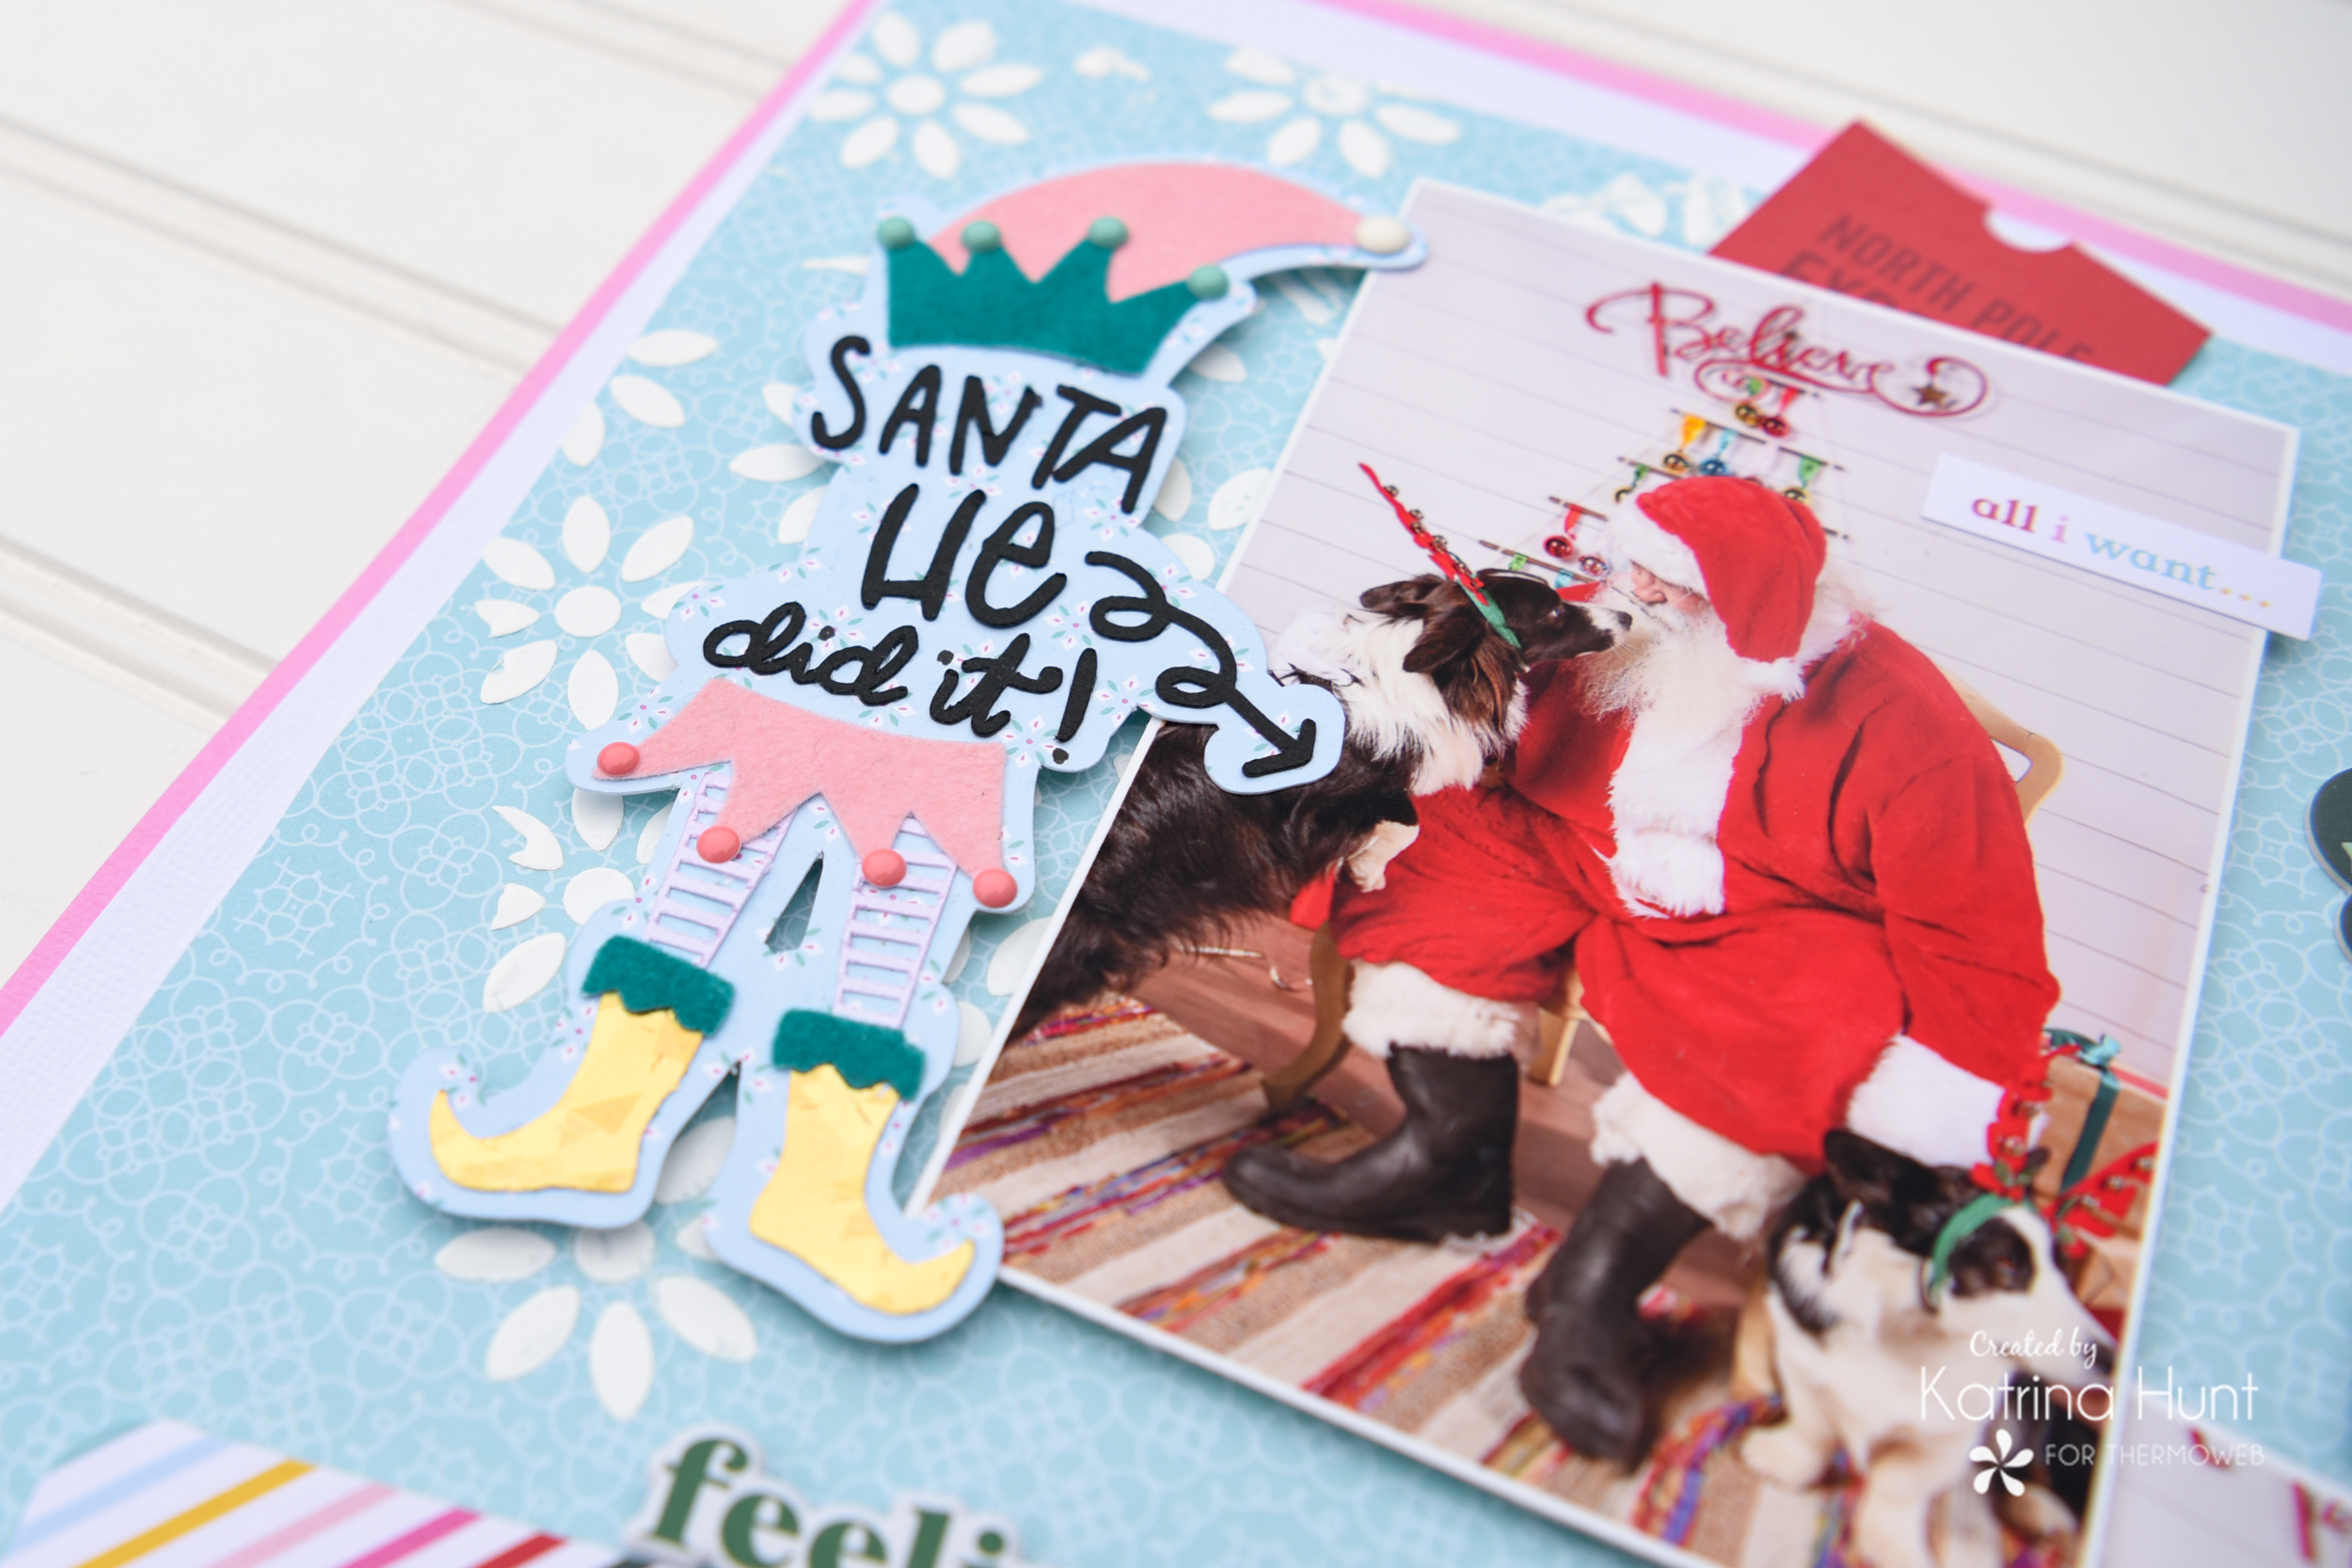
I started by finding the two cut files (He Did It and She Did It) in the Silhouette Design store. Luckily these worked after I sized them down. Next, I adhered a piece of the iCraft Easy Cut Adhesive to a 6×6 piece of cardstock, leaving one side of the protective backing on. It was easy to cut out the boots, hats, skirts and fluffs from this by running thru my Cameo 4. I sat these to the side to work on the background next.
Using the Transfer Gel Blanco and a stencil, I created some “snowy” areas on my layout in opposite corners.
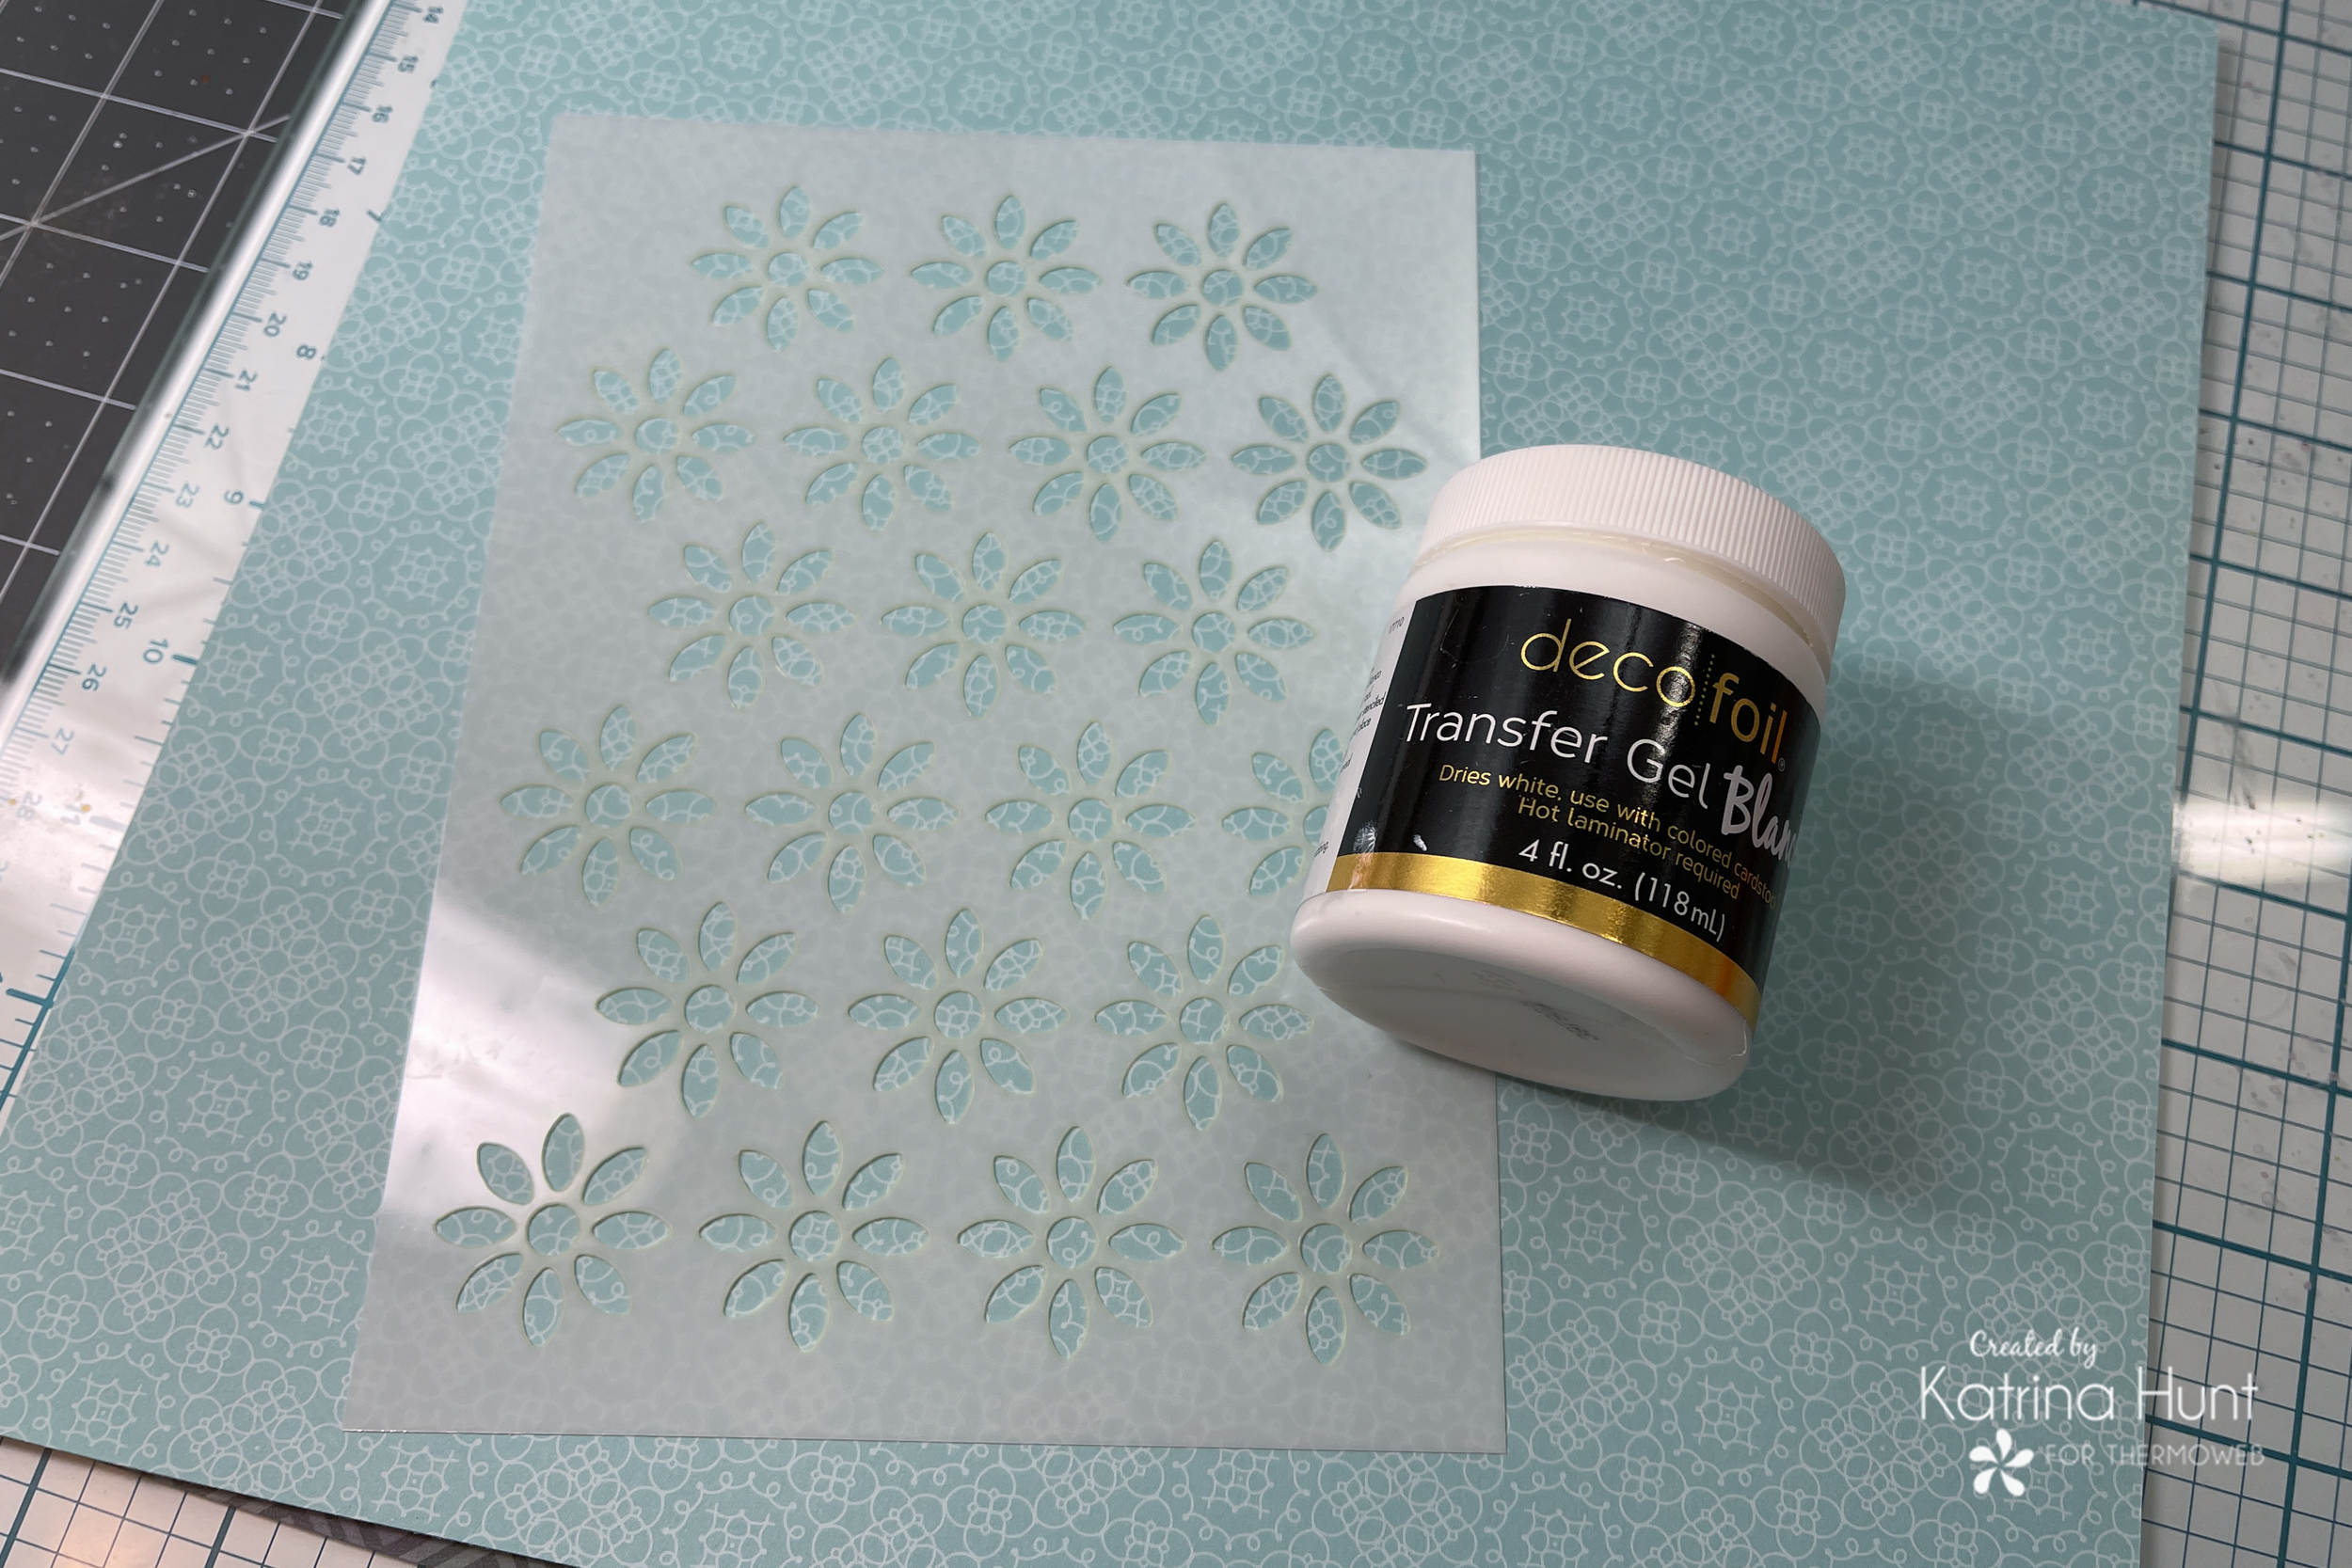
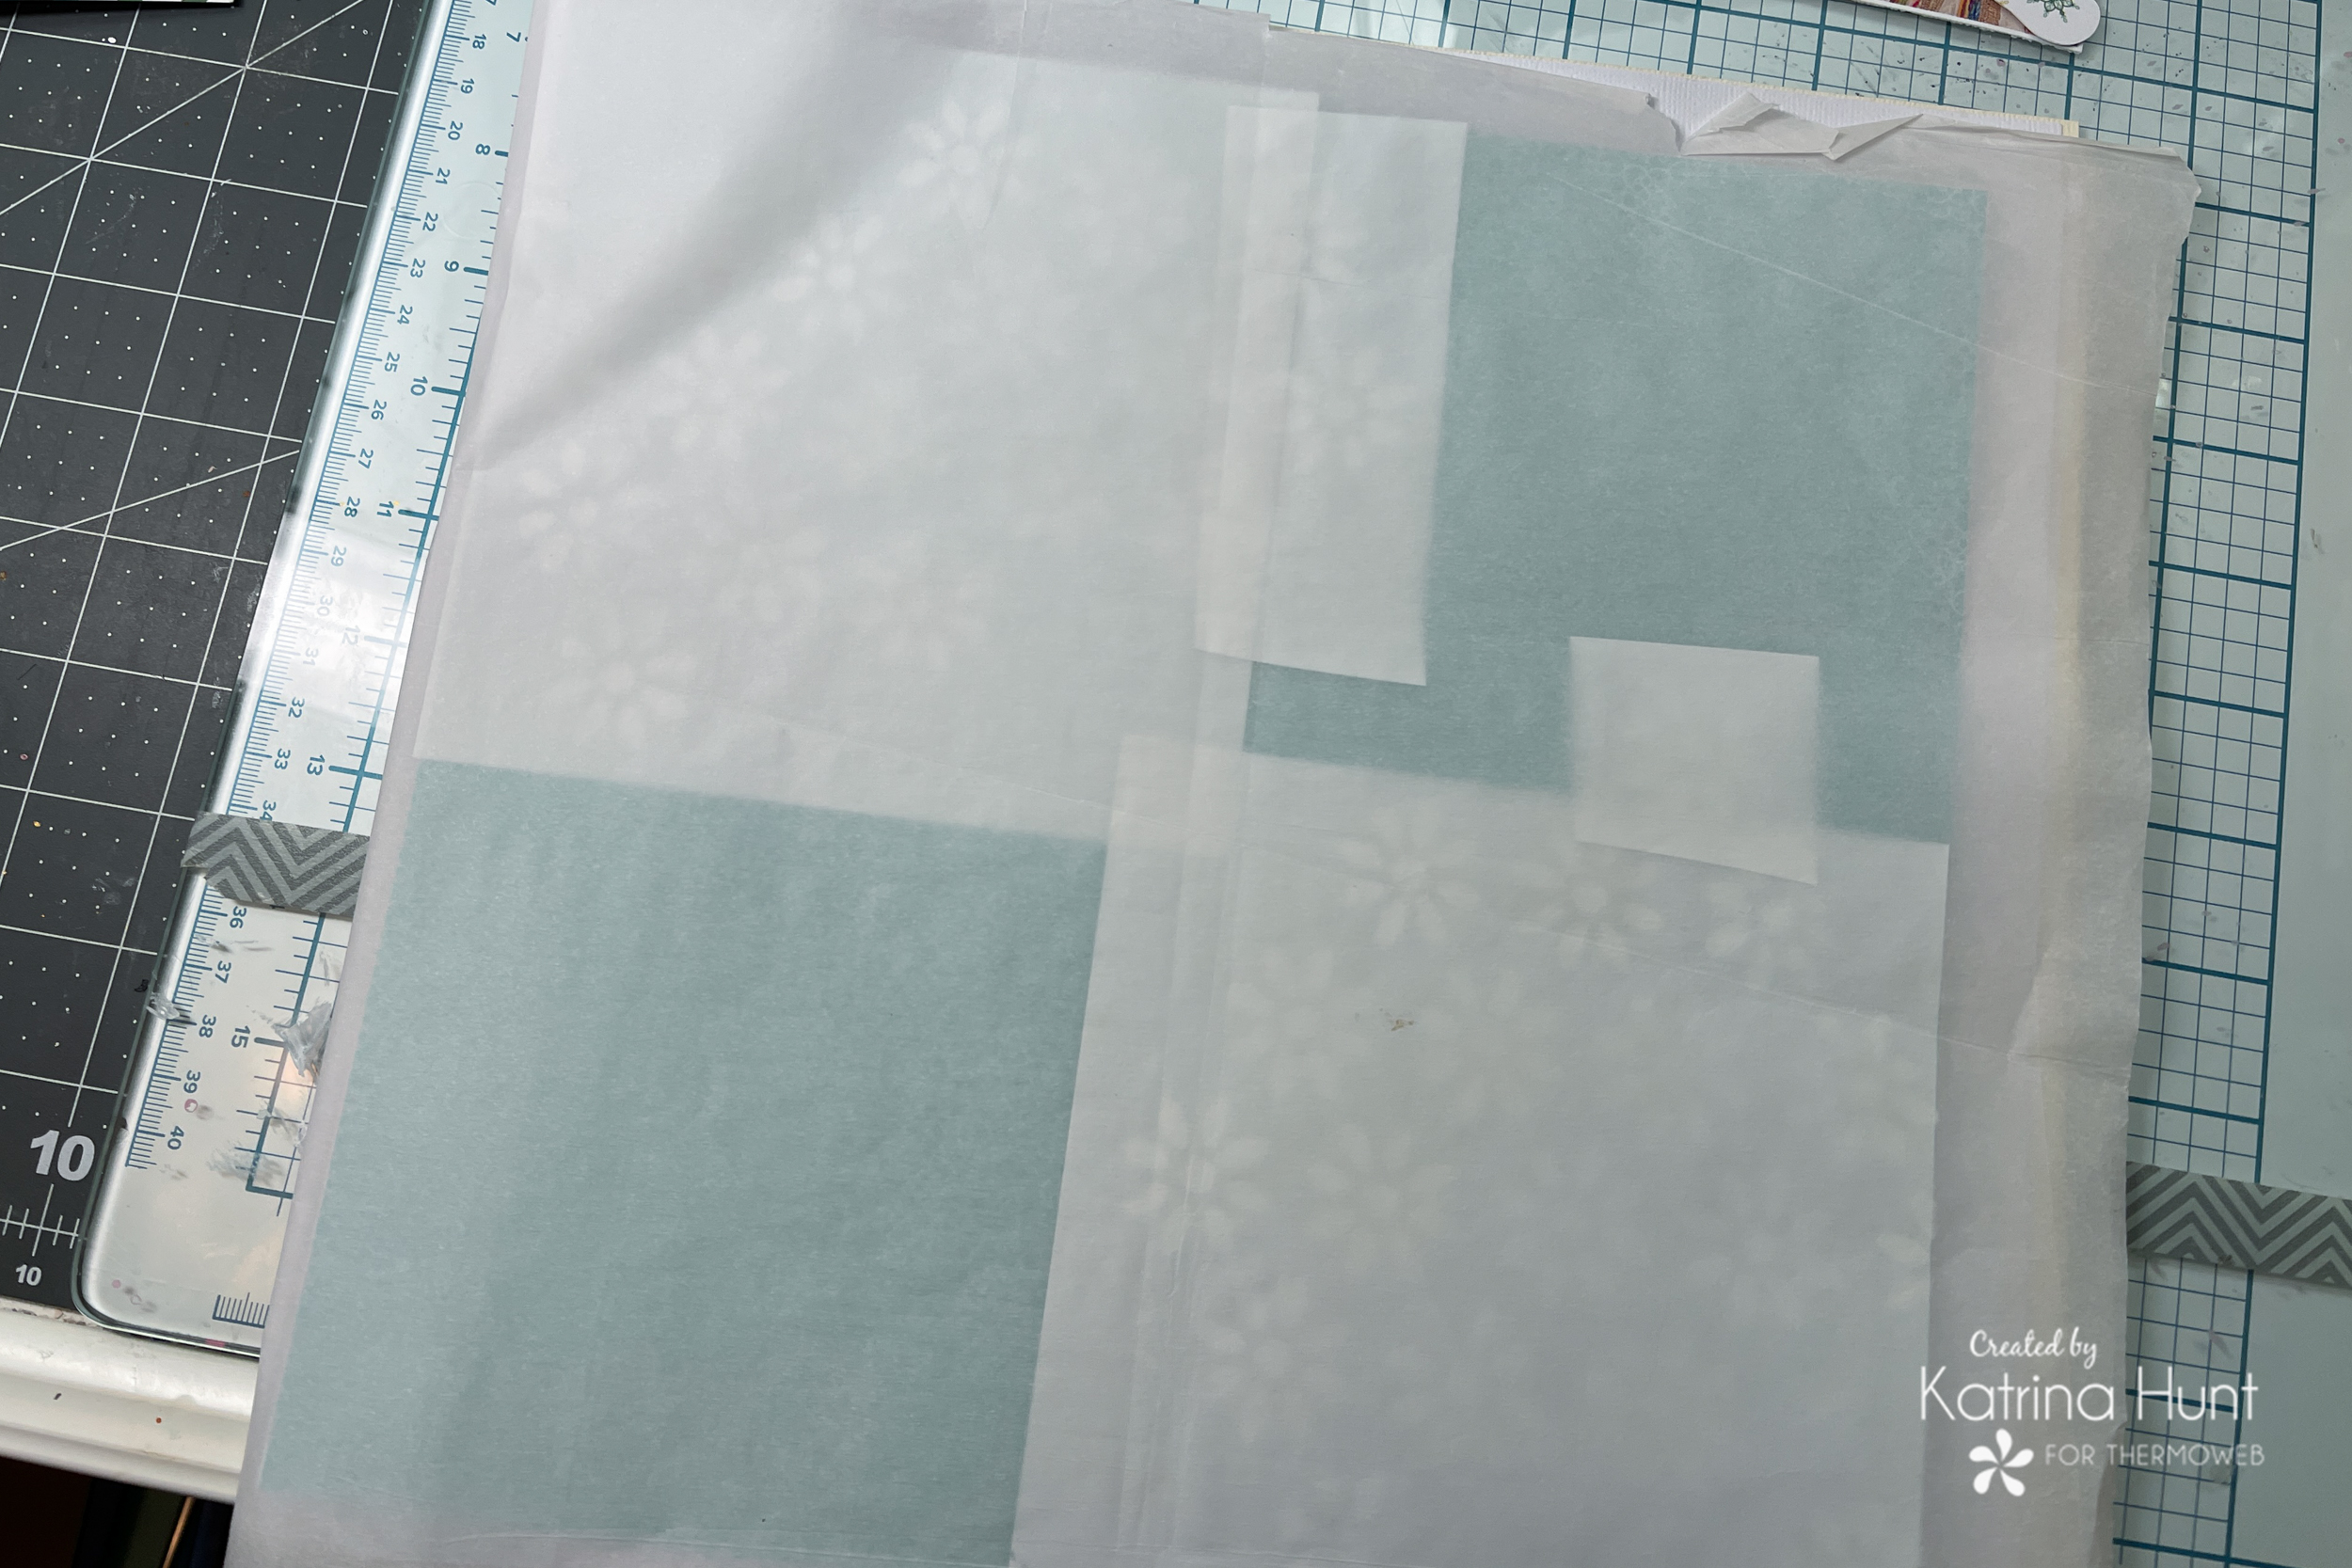
I sat this to the side and actually let it dry overnight. Next step for my background was to use the Maker Forte Snow Day Foil Transfer sheets on the areas I had stenciled.
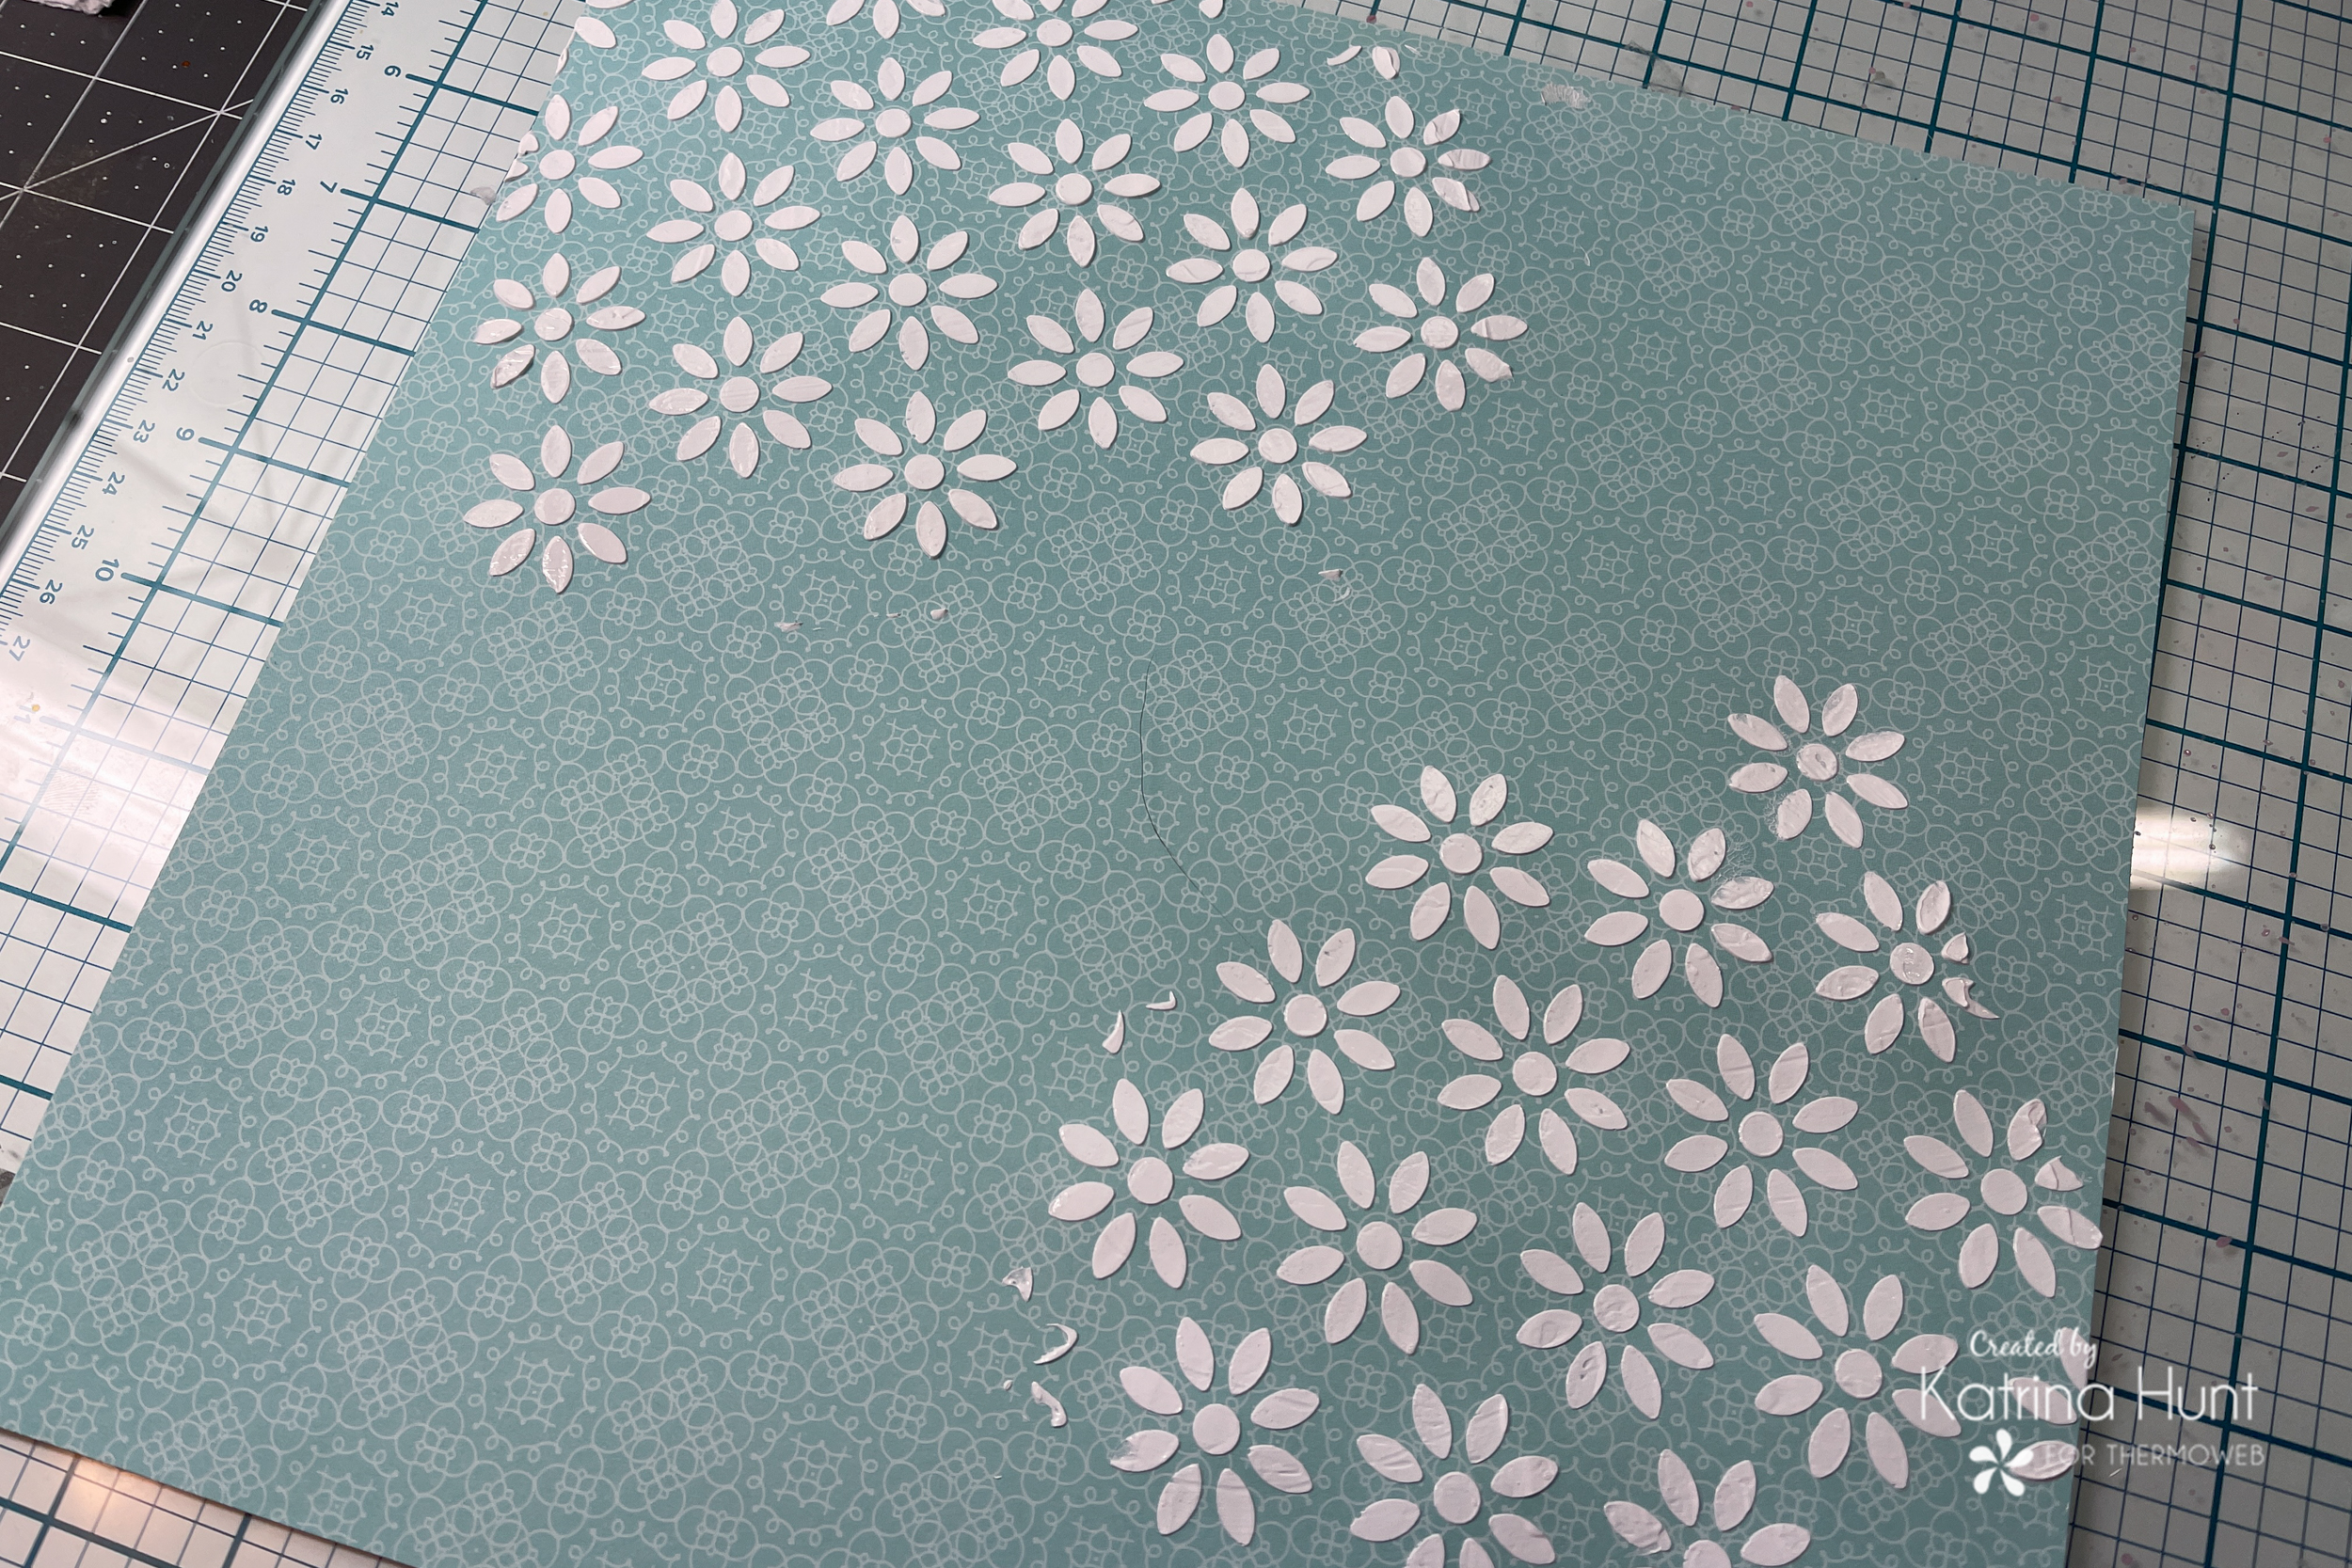
I covered the stenciled areas with the foil transfer sheets and ran the entire background thru my laminator. I just created a carrier sheet 12.5 x 25 inches out of parchment paper, folded in half and used it for full-sized backgrounds.
Now, it’s hard to tell, but these areas are somewhat shiny, but it’s a softer look. I had thought about flocking, but then decided the elves would be more fun to flock and I could use a variety of colors on them!
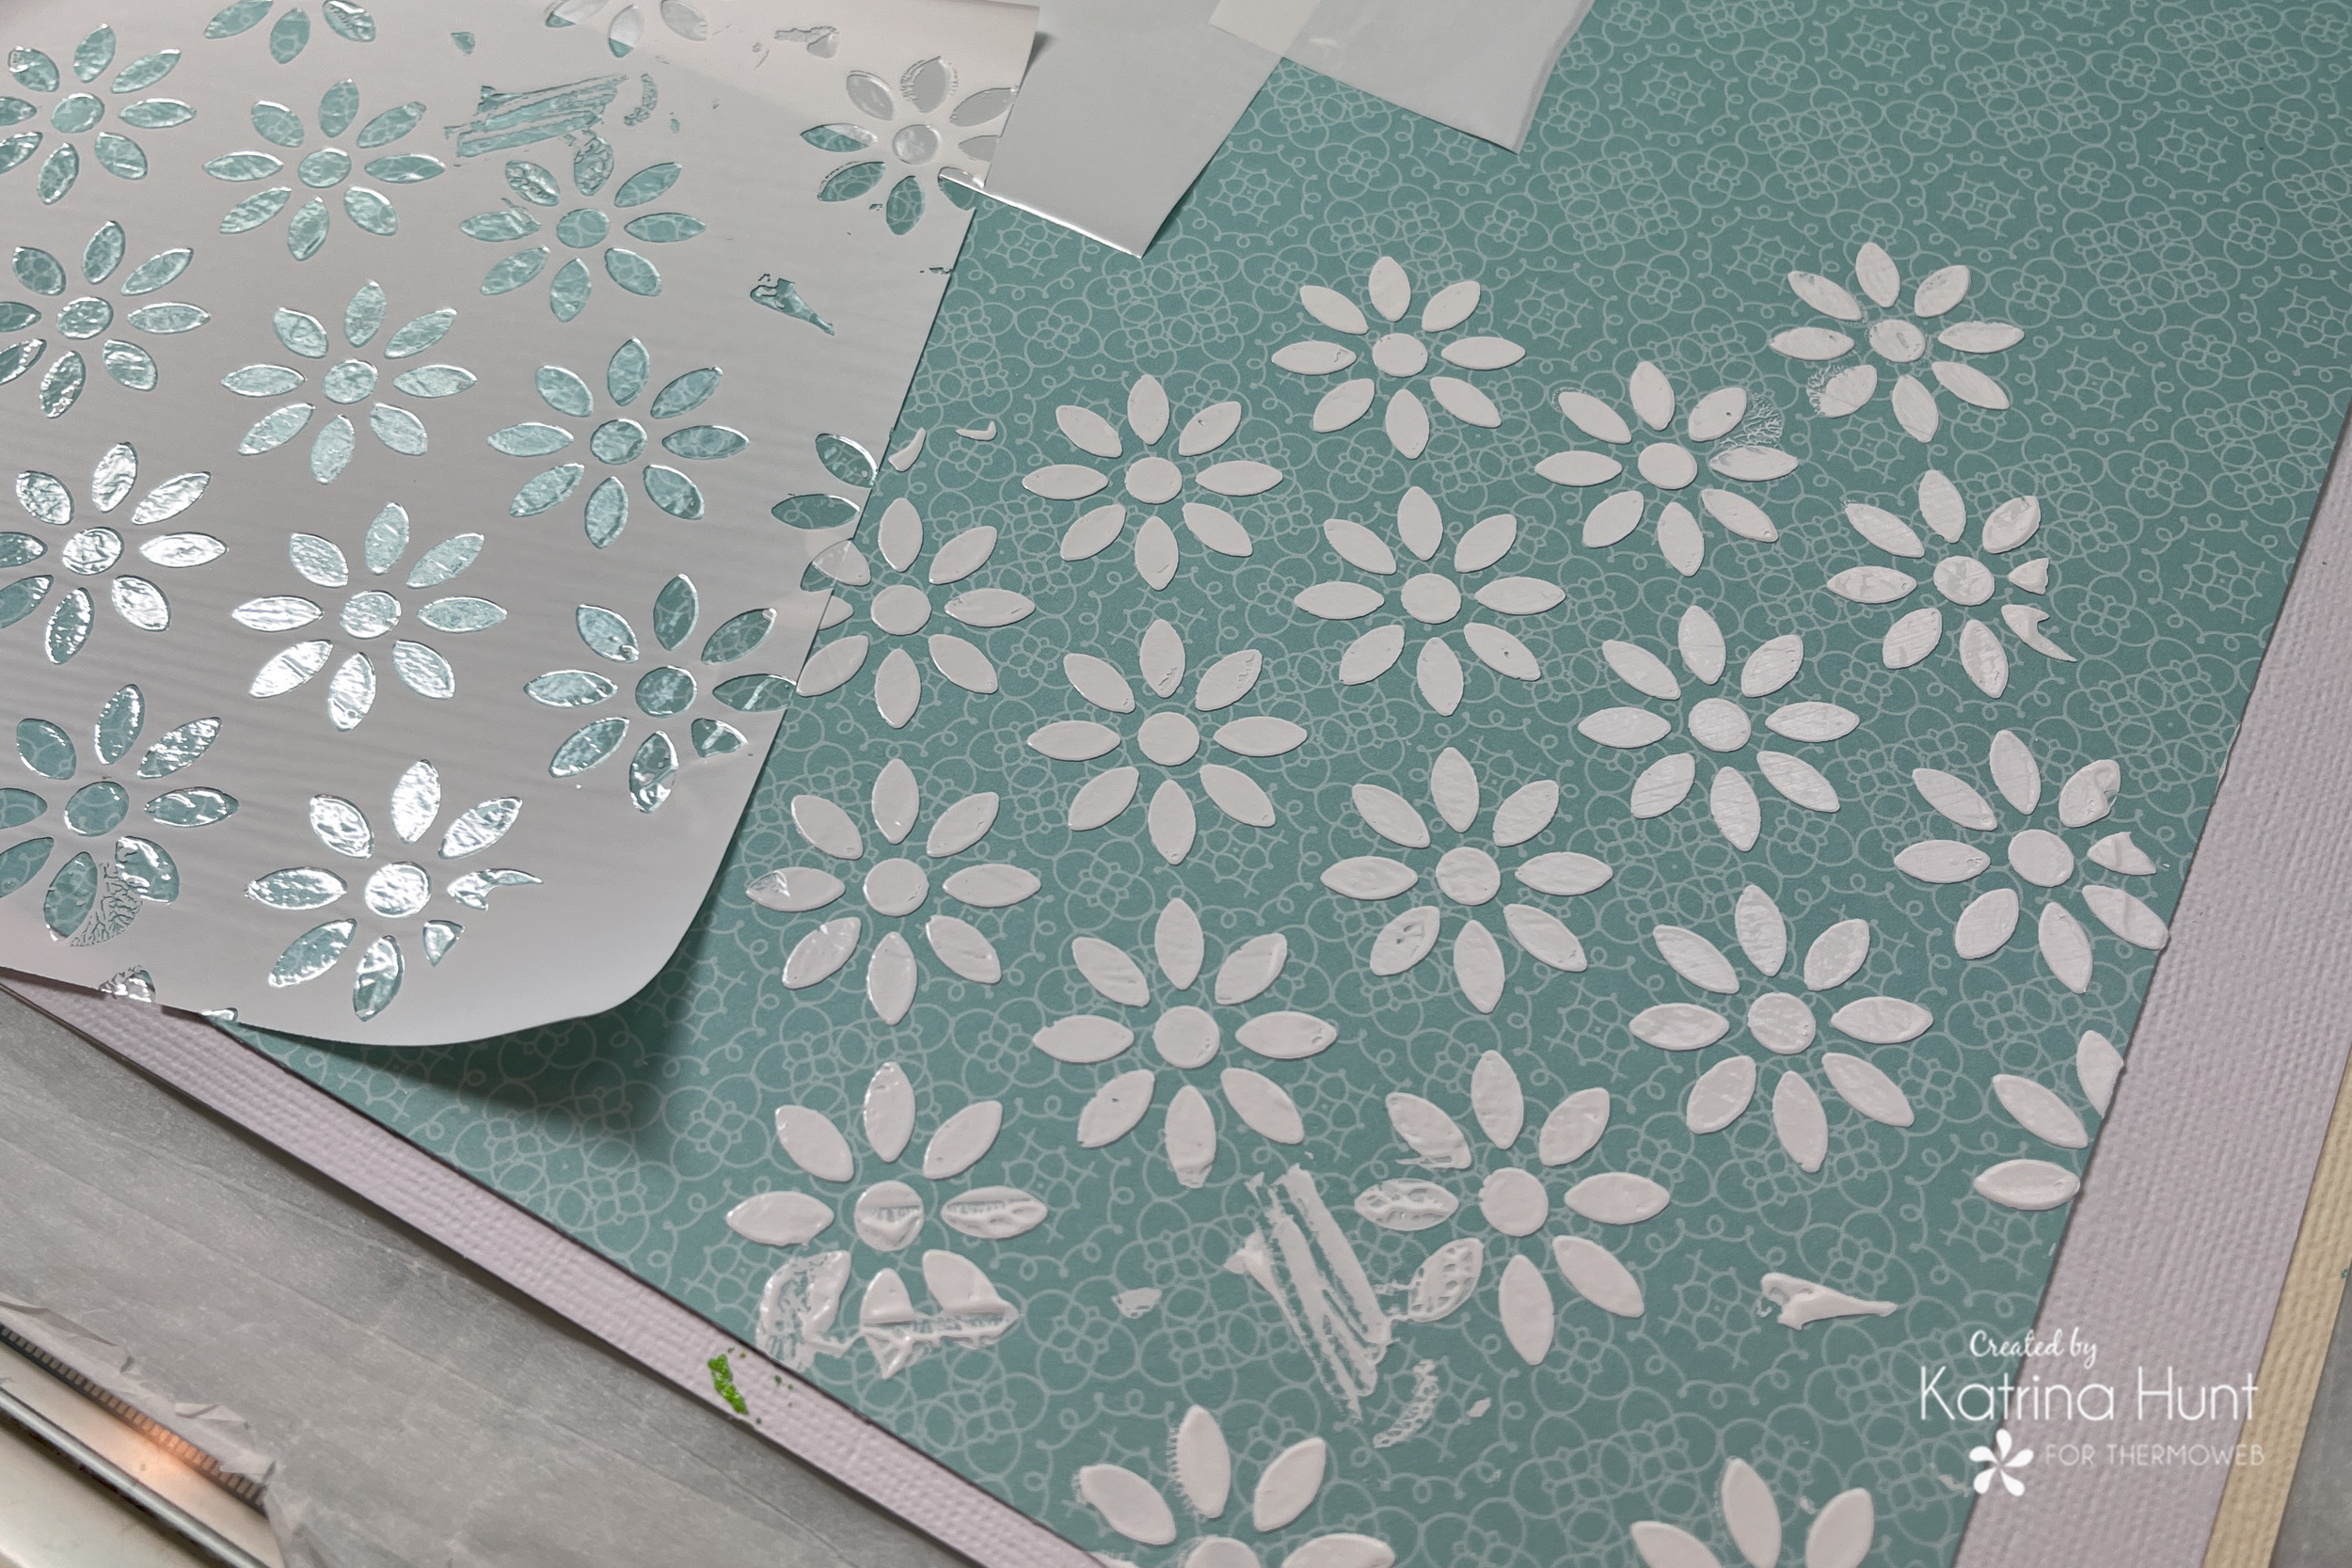
I think this stencil is actually flowers, but I am in the use what you have mode and I thought they made cute snowflakes!
Elfing Flocking Fun
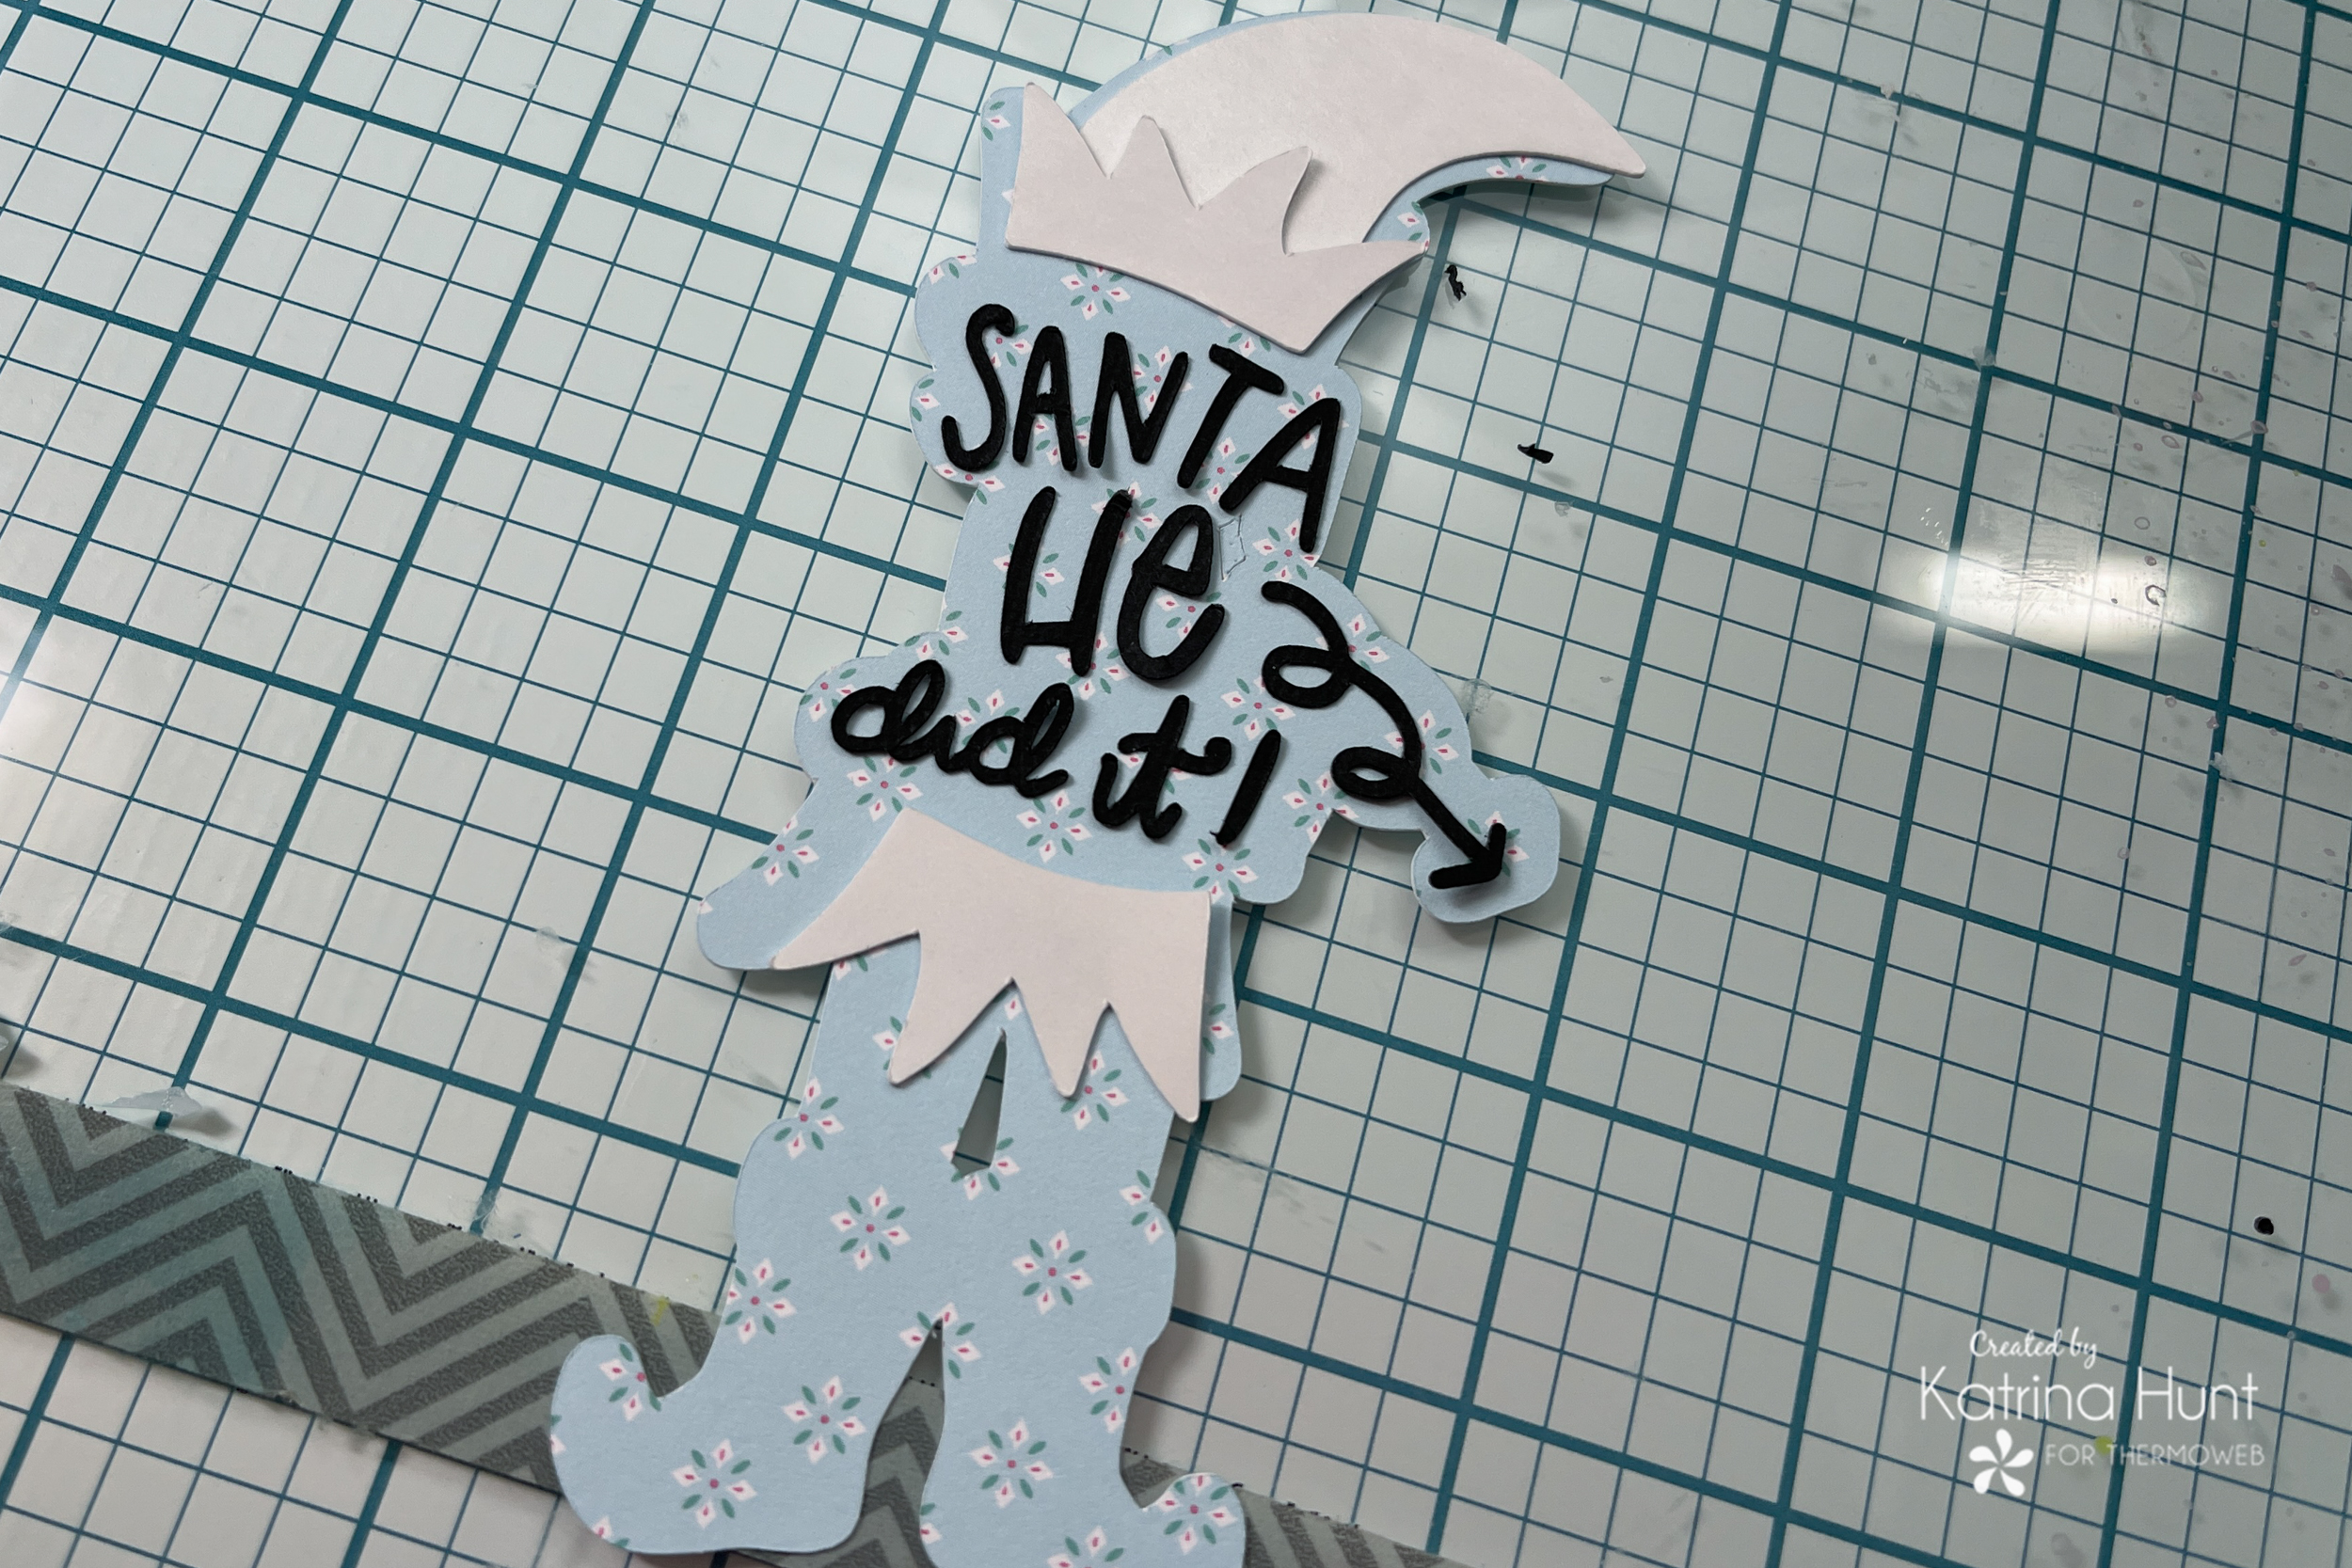
When I was sizing the cut files, I did make offsets so that I would have a background to attached to. I think these cut files are actually for vinyl for t-shirts, but I made them work for paper! Once I had my pieces cut out with the cardstock/Easy Cut Adhesive combo, it was time to flock them!
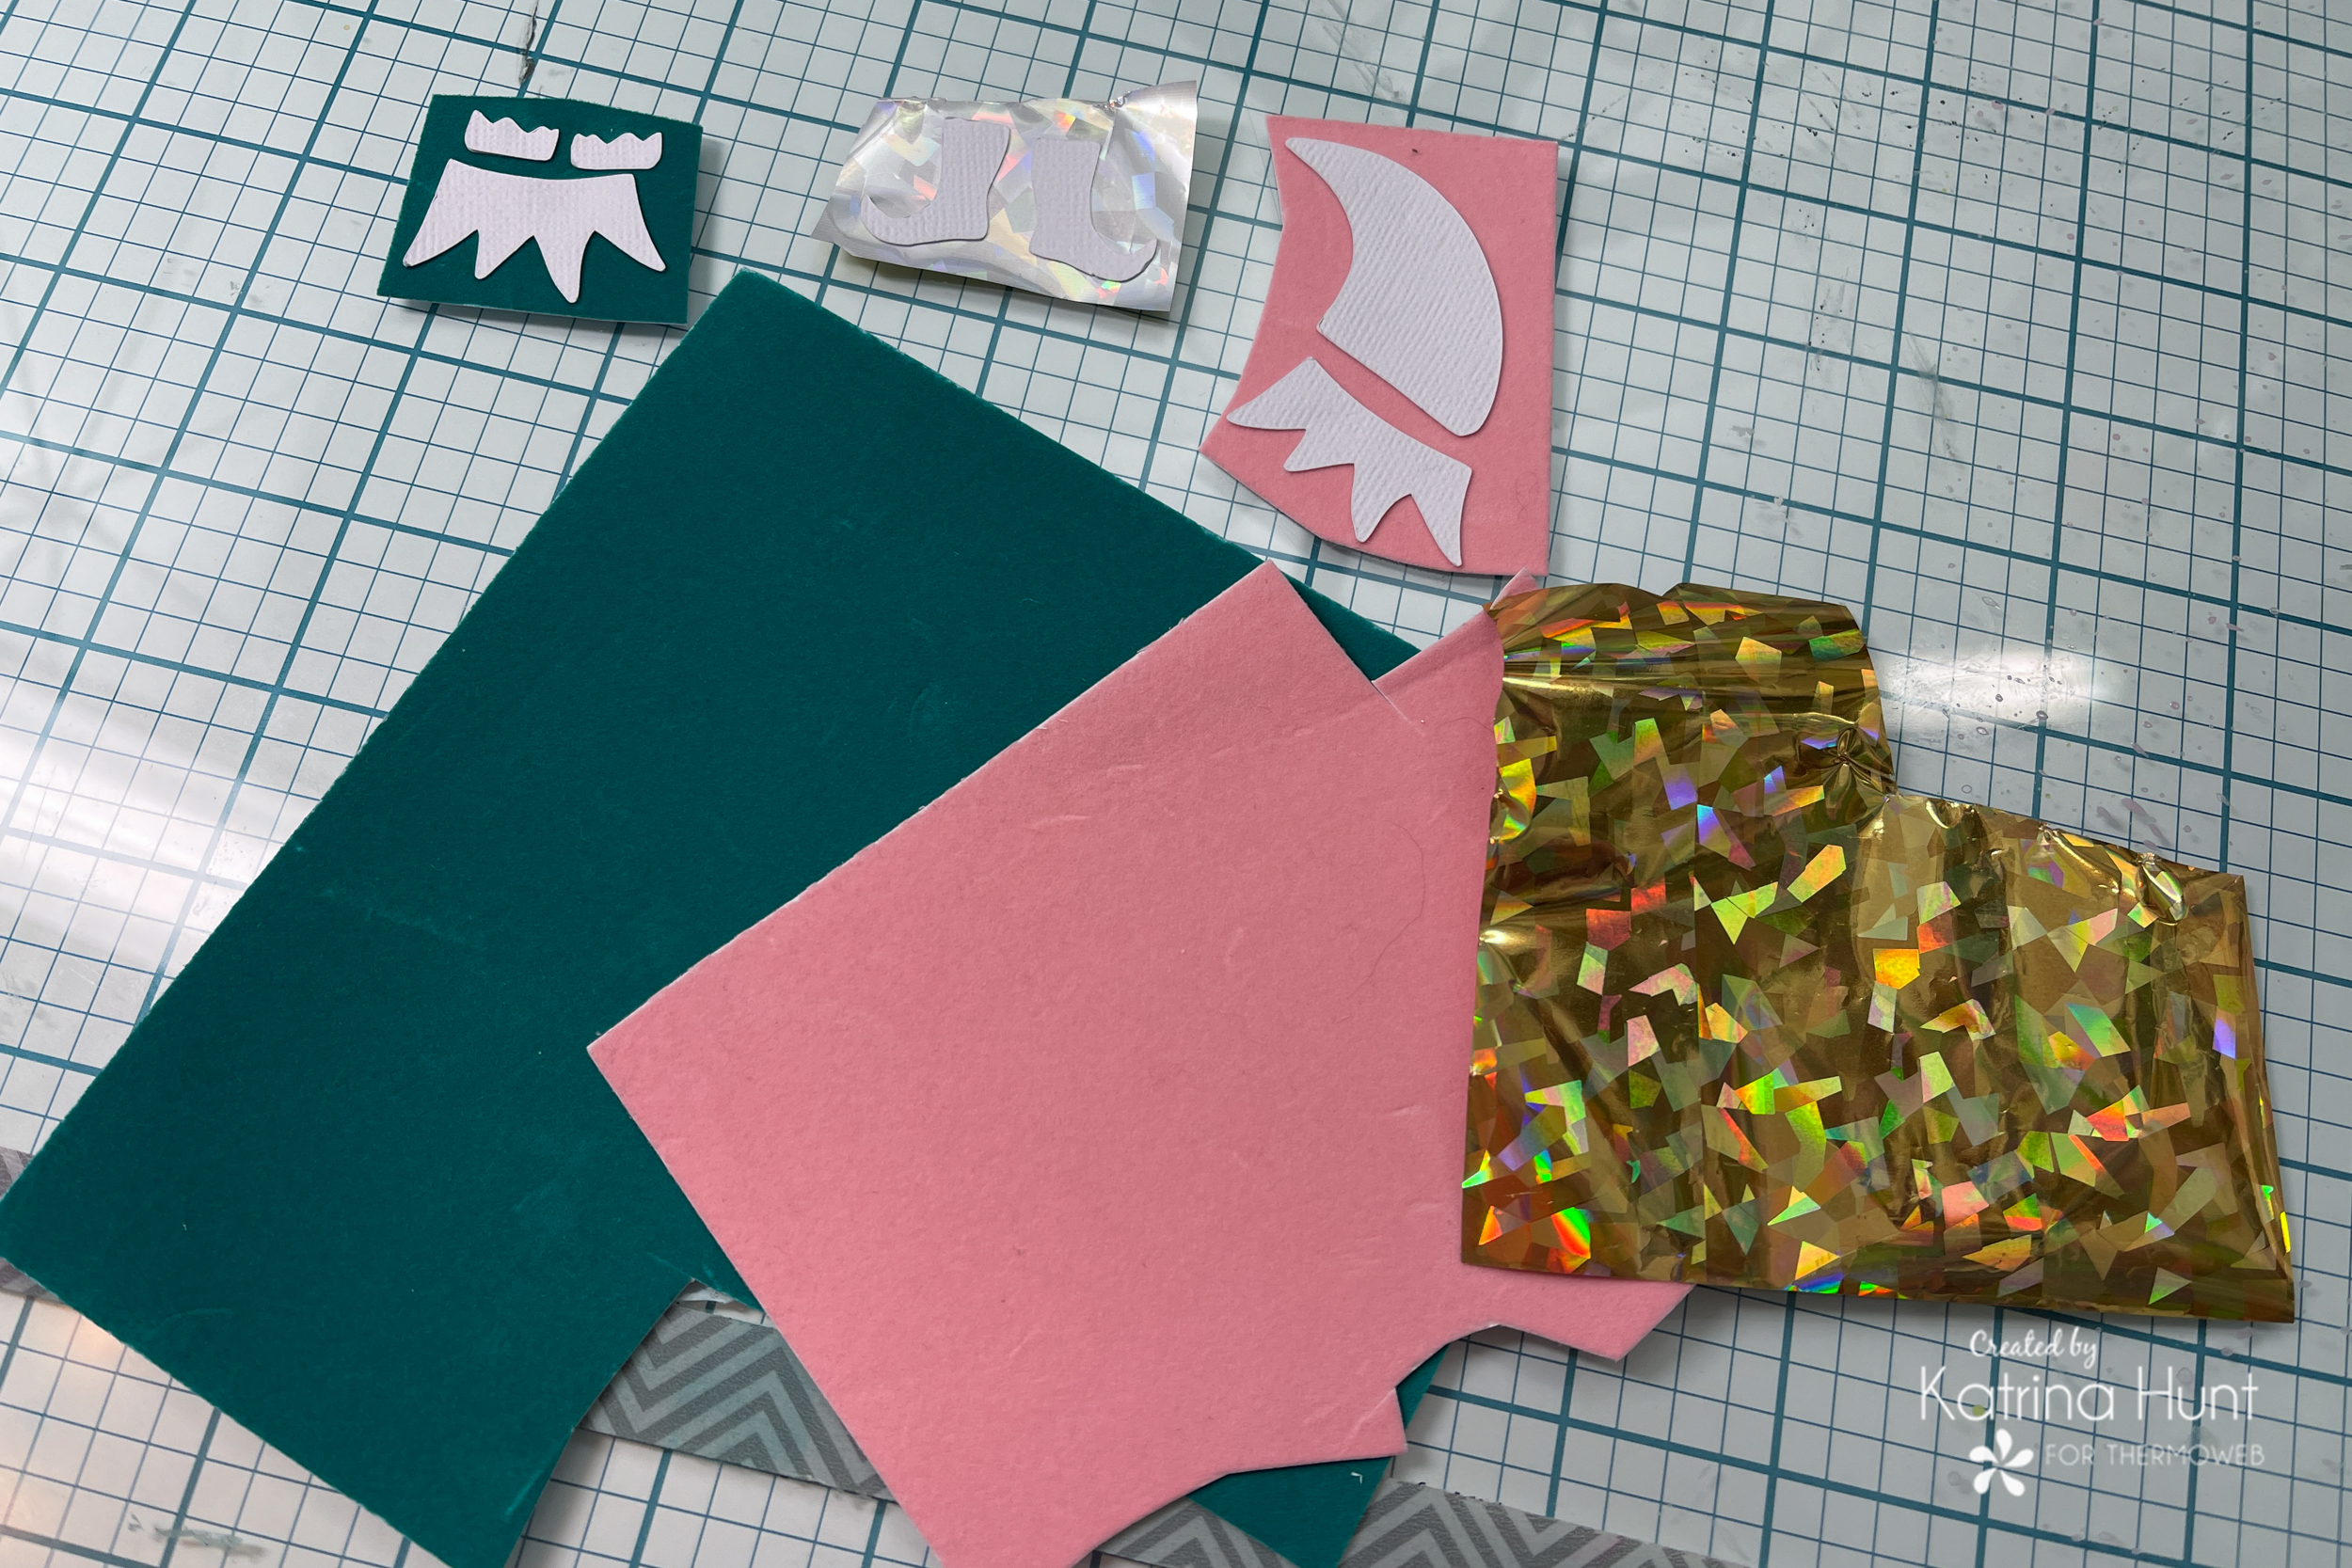
All you have to do is remove the protective covering, apply the sticky side down on the flock or the ugly side of the foil and run thru a manual die-cut machine to apply the pressure to transfer the flock or foil! Carefully peel back and you have flocked or foiled die-cut pieces! How easy and FUN!!!
Now it was time for the tiny letters! I placed the letters where I wanted them on the die cut background and then applied Press and Seal over them to keep them in place and pull them up. Then I used Ultra Bond Liquid Adhesive to the backs of the letters.
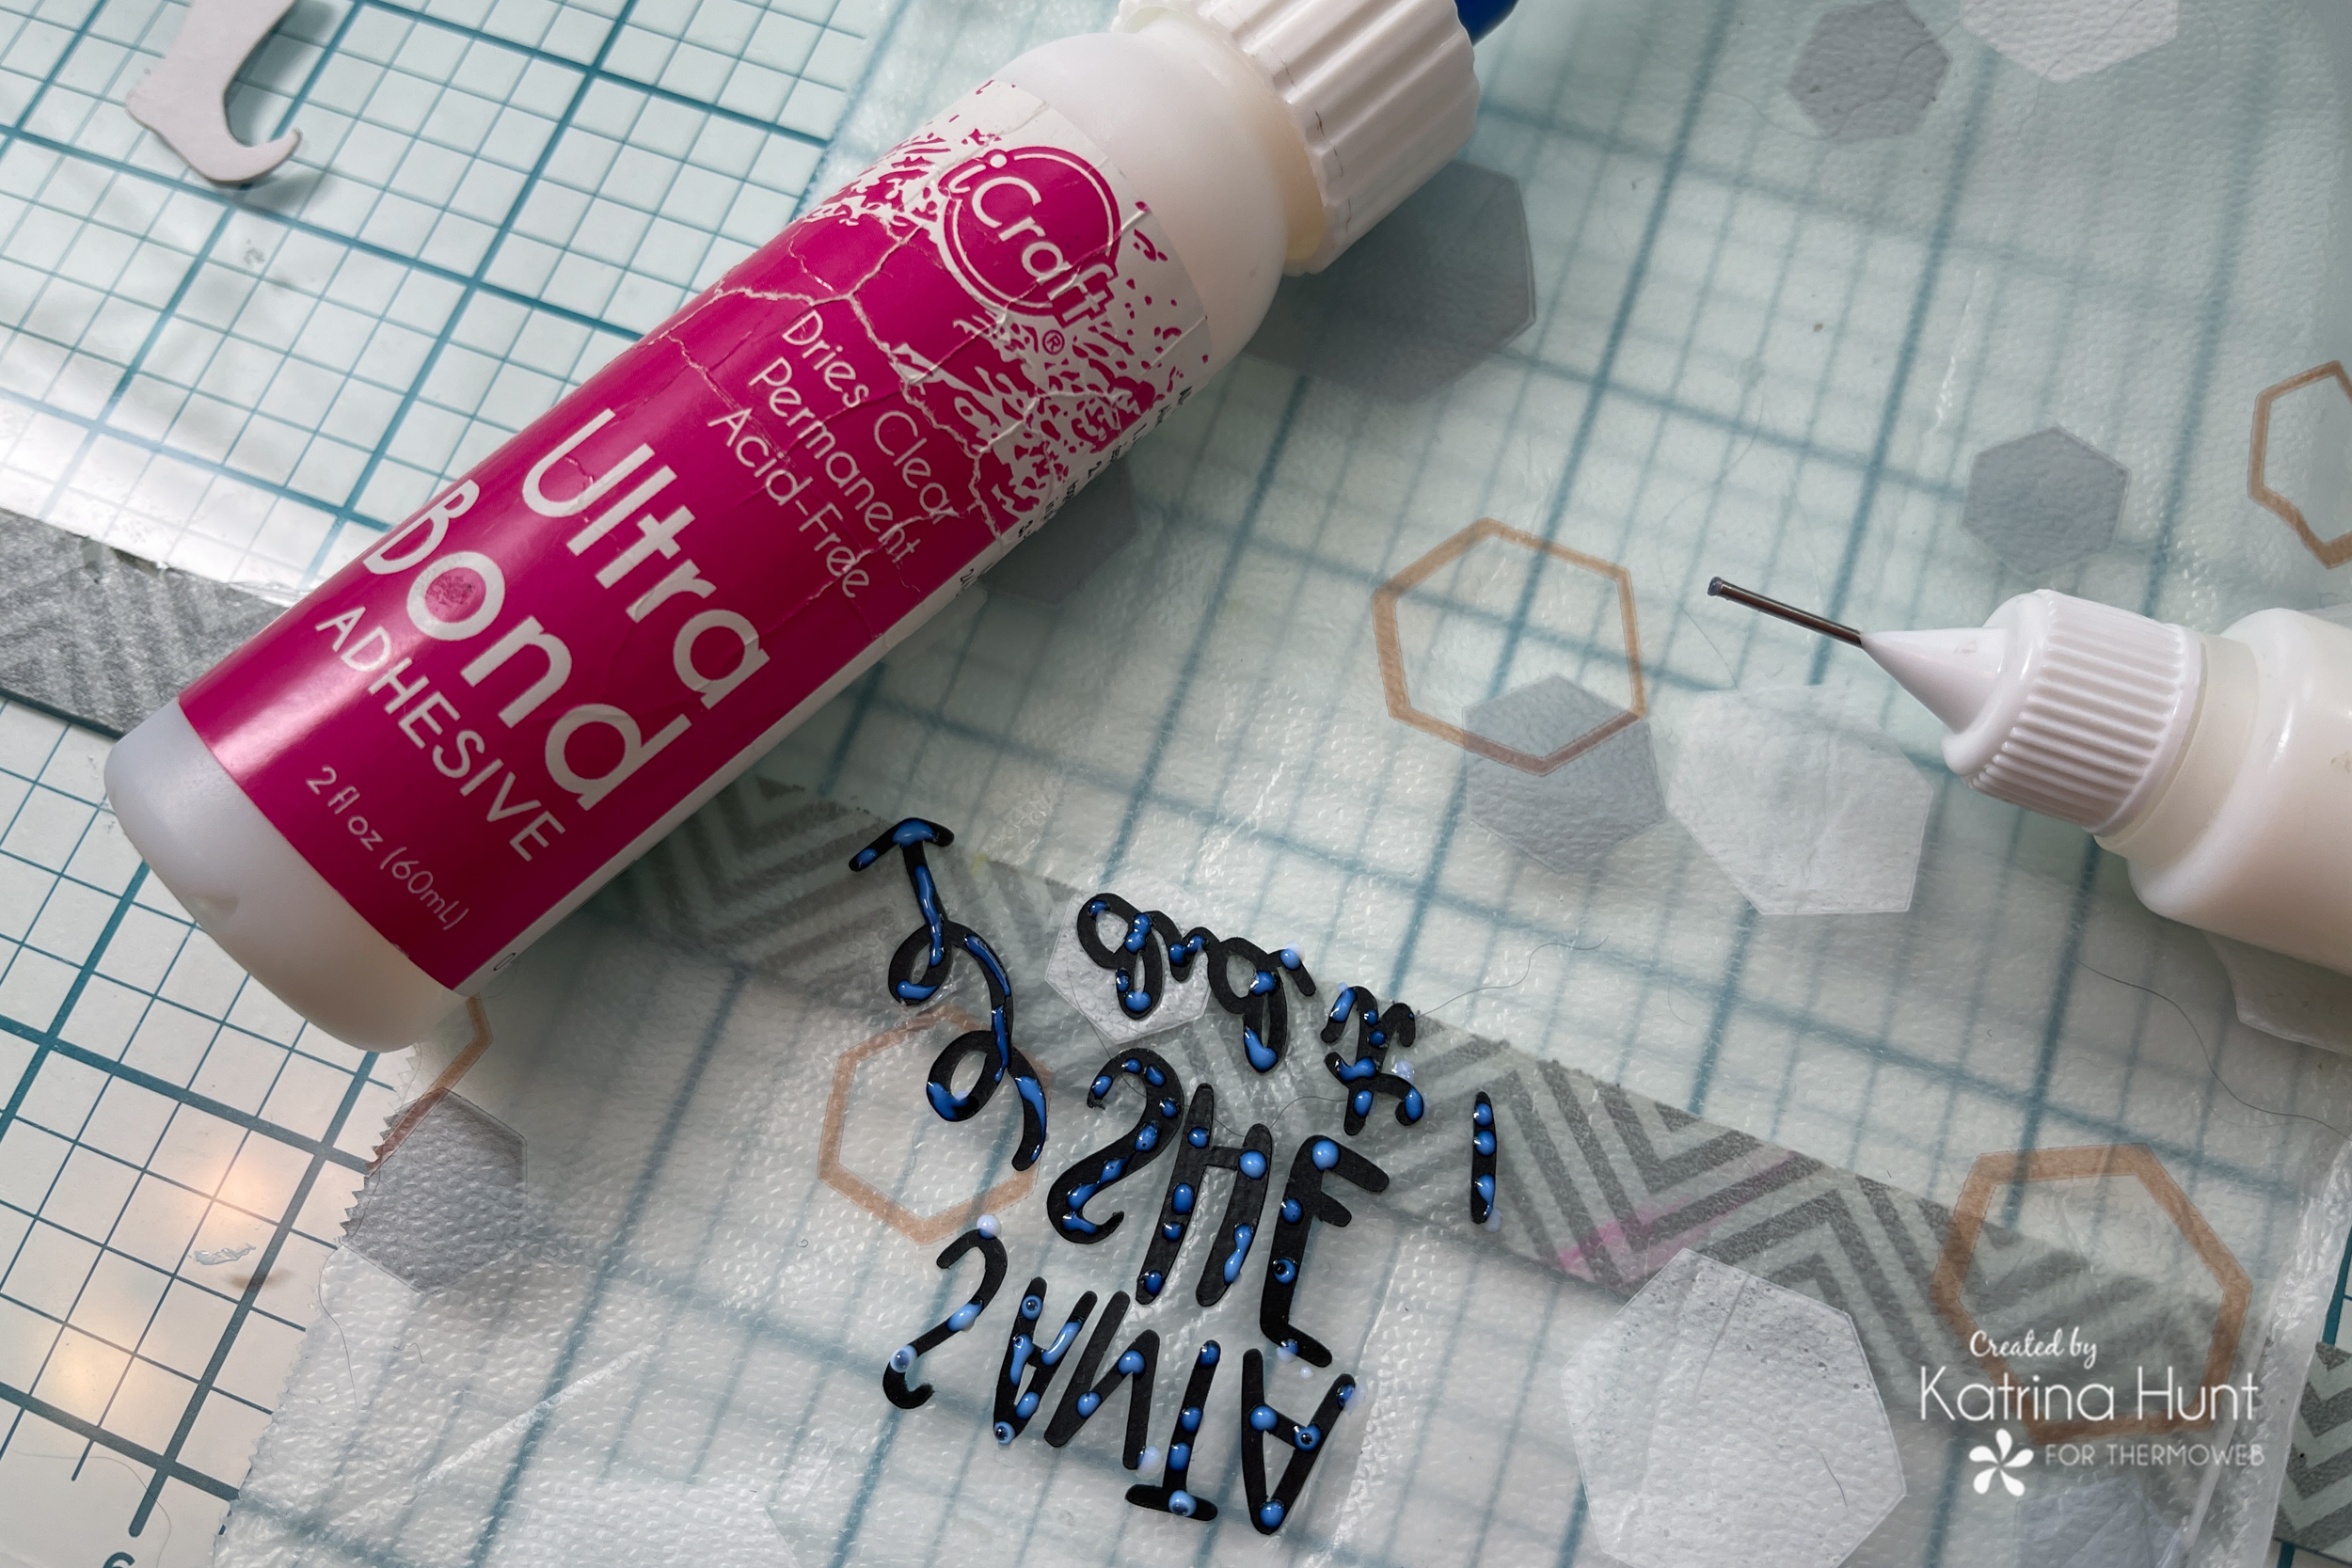
I then carefully placed this back over the die cut and rubbed it to transfer the adhesive and letters to the die cut. Once I thought they were good and stuck, I carefully peeled the Press and Seal off. Once I had the words down, then I just adhered my flocked and foiled pieces to create my elves!!
I hope you enjoyed these flocked elves! I know I had a lot of fun making them. There are SO many possibilities with the flock and die cuts! Plus I love the texture it gives!
Hope you are on the nice list this year!!! Santa knows either way!