


 Hello! It’s Lisa Ruble from Quilty Zest, and let me start out by saying that I’m a dessert person. Especially chocolate desserts! So when I heard about our Celebrations theme week, I was ALL IN! After all…shouldn’t a celebration involve cake?!
Cake Love Fabric Postcards with HeatnBond Fusible Adhesive
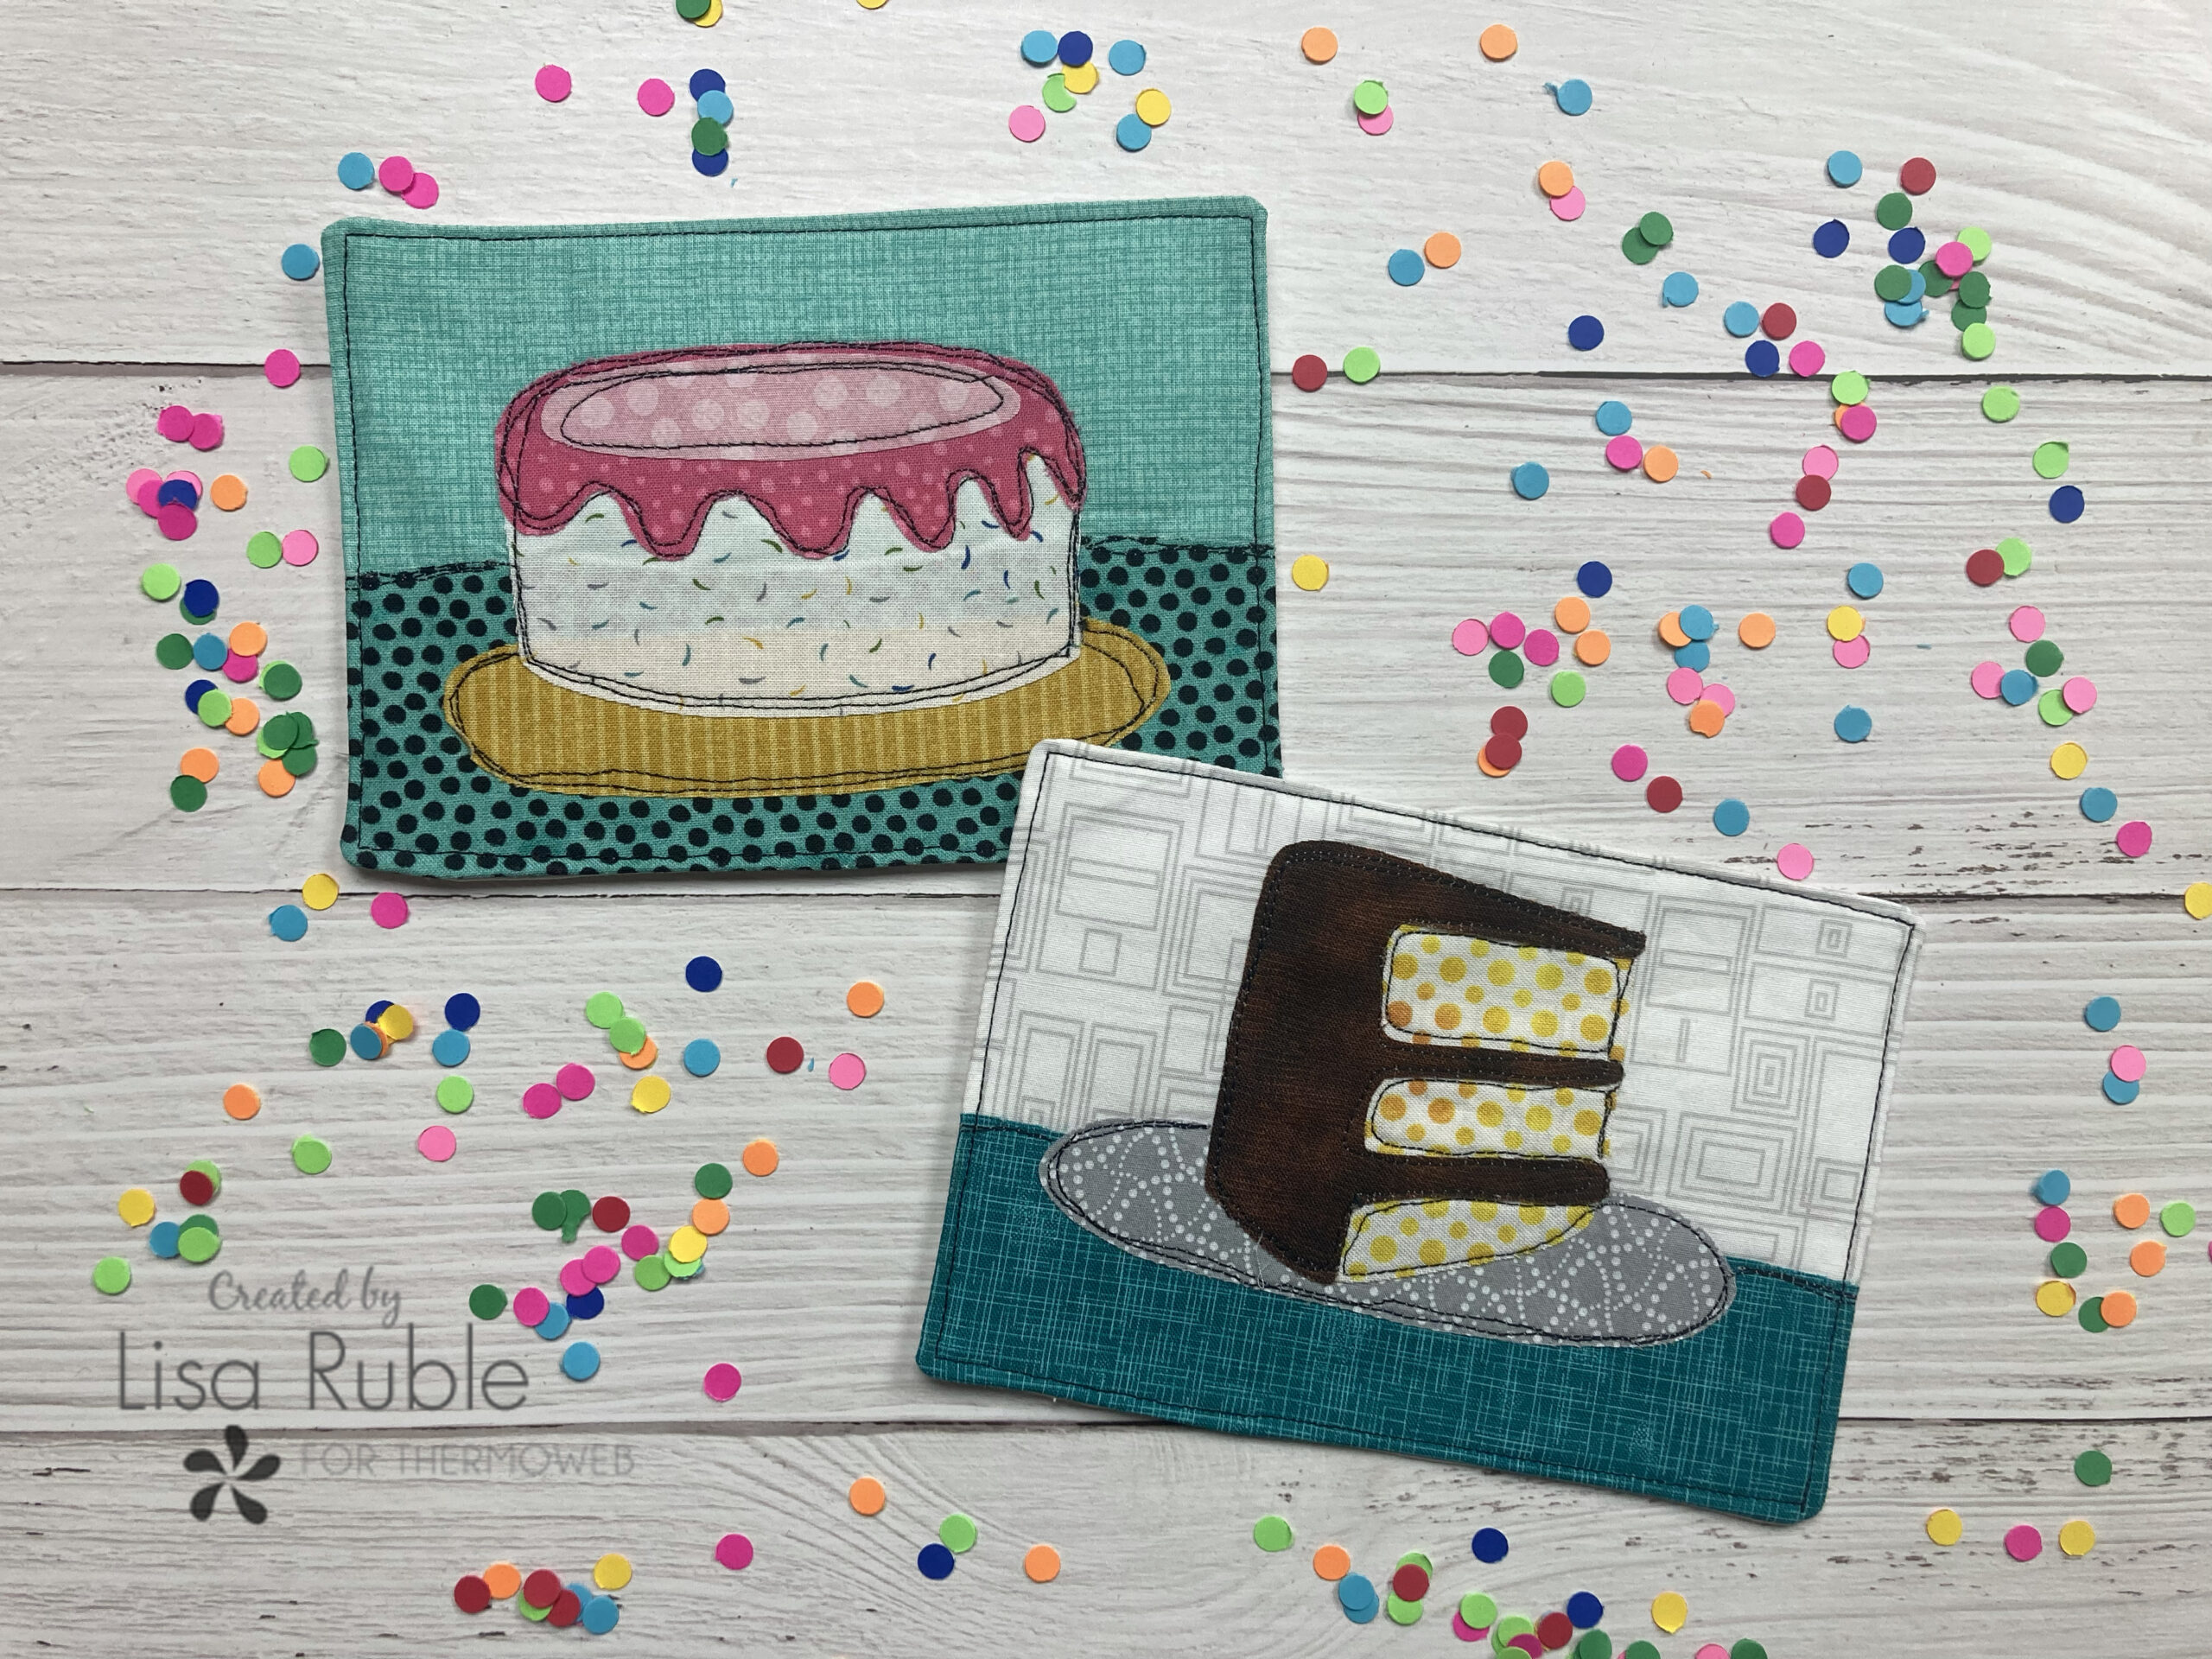
I decided to make appliqued cake postcards. These can be sent as postcards or just given as little quilty gifts. The best part? You can choose your cake “flavors” based simply on your fabric choices! Have fun digging through your stash to find the perfect fabrics for each part of these cute postcards.
You’ll Need
Fabric scraps for “table,” plate, and cake segments
7-1/4″ x 5-1/4″ piece of background fabric
7-1/4” x 5-1/4” white solid for backing
HeatnBond Lite Iron-On Adhesive
HeatnBond EZ Print Transfer Sheets
HeatnBond Lightweight Non-Woven Fusible Interfacing
Cutting
From Fusible Interfacing
(2) 6-1/2″ x 4-1/2″ rectangles (per postcard)
Download the templates here.
Making the Postcard Front
Step 1 Select your postcard of choice (I’m showing the full cake postcard in my step by steps). Trade the templates onto the paper side of Iron-On Adhesive. Cut out past the drawn lines. Select the desired fabrics for each part of your postcard. Fuse the traced shapes to the wrong side of each fabric. In addition, cut (1) 3″ x 7-1/4″ piece of Iron-On Adhesive and fuse to the wrong side of the “table” fabric.
Step 2 Cut along one edge of the fused table fabric, creating a slightly wavy edge. Fuse to the 7-1/4″ x 7-1/4″ background piece.
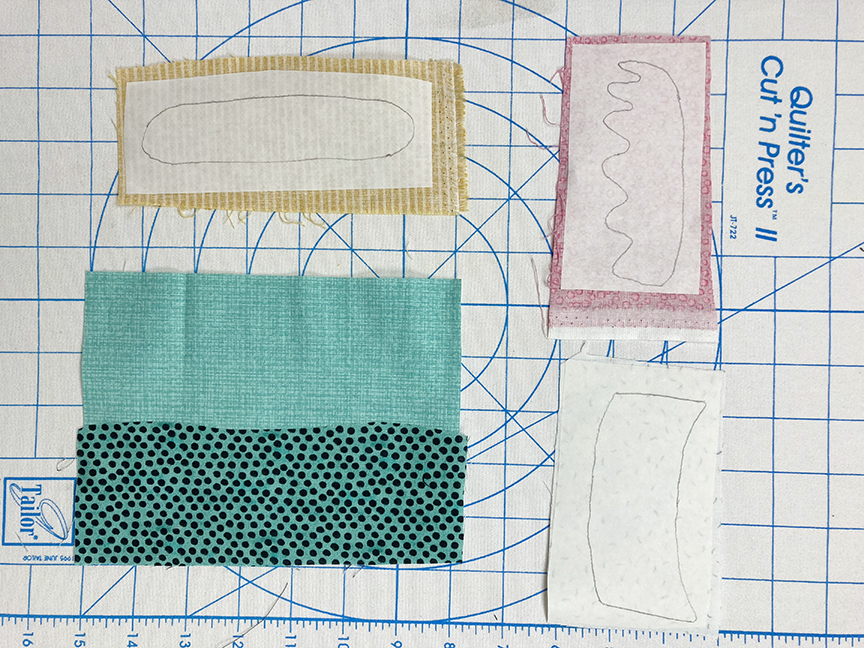
Step 3 Cut out each shape on the drawn lines. Fuse the plate to the background piece.
Tip: Audition your plate and cake pieces on the background before fusing place to decide on the positioning. See this video:

Step 4 Continue fusing pieces in place until all have been added.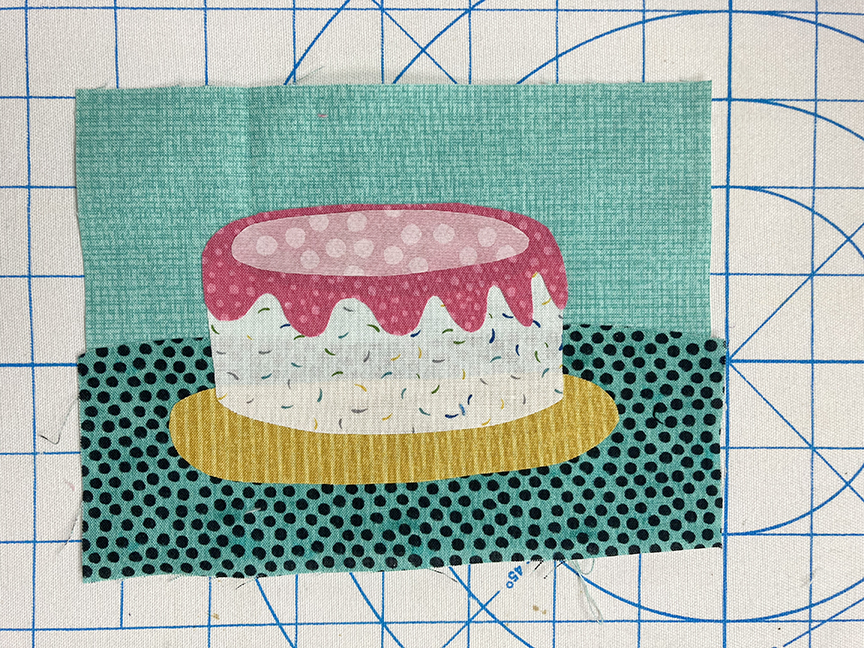
Step 5 Fuse a 6-1/2″ x 4-1/2″ piece to the wrong side of the cake unit, centering the interfacing on the front piece.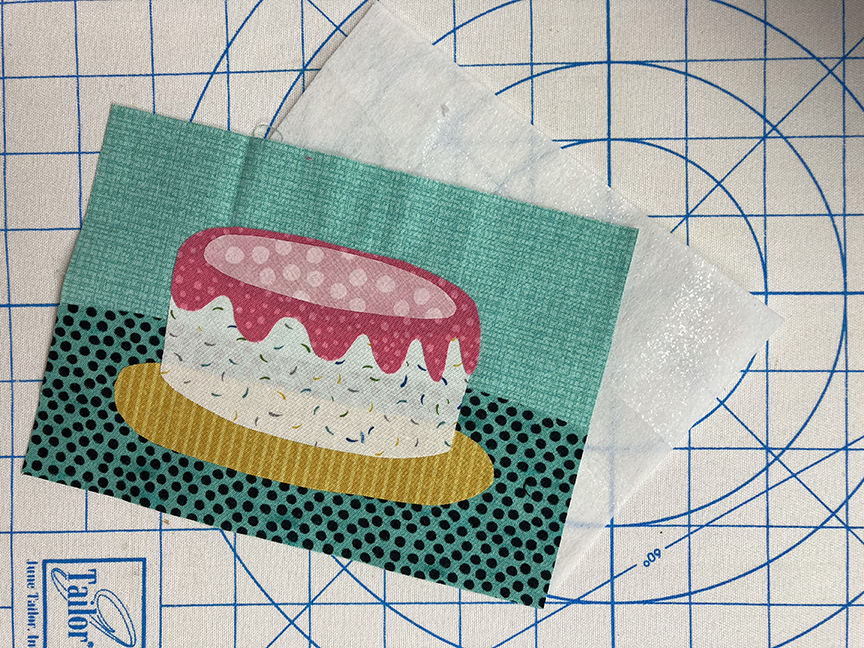
Step 6 Using a free motion foot and black thread, doodle stitch quilting lines along the edges of each applique piece. Don’t worry about perfection!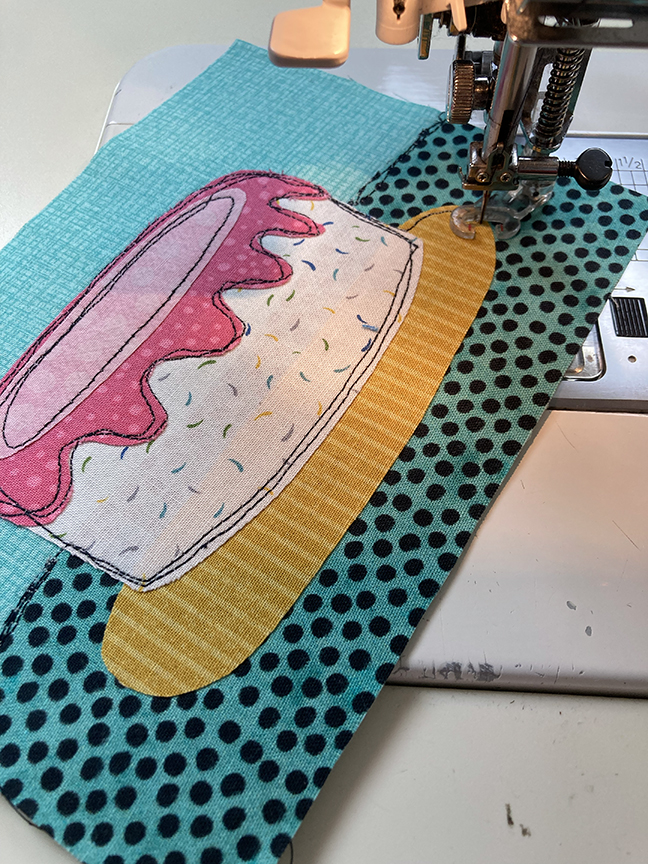
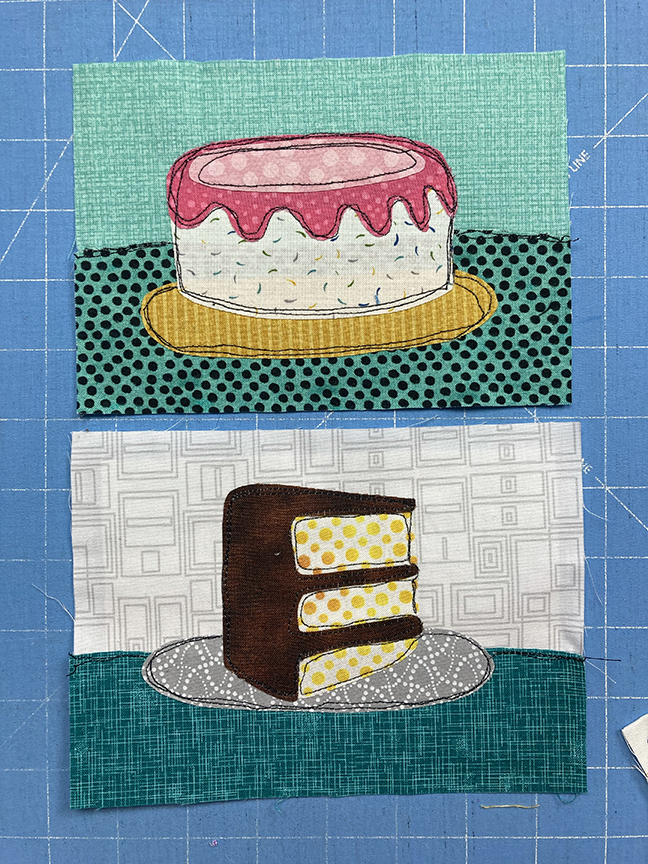
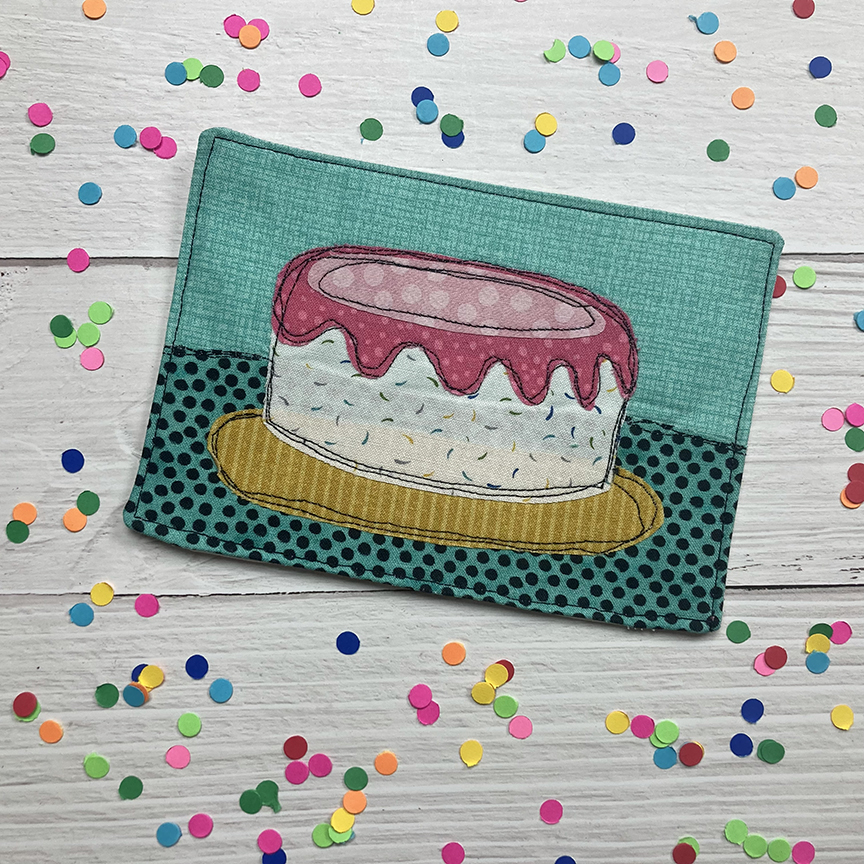
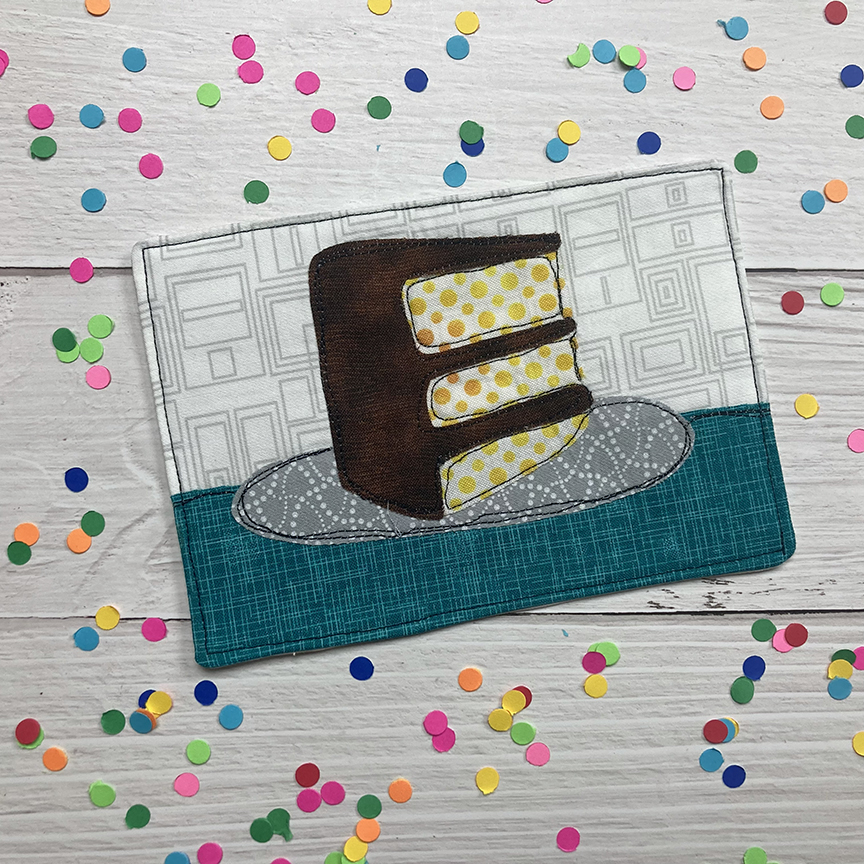
Here are what my postcard fronts for both the full cake and cake slice look like.
Making the Postcard Back
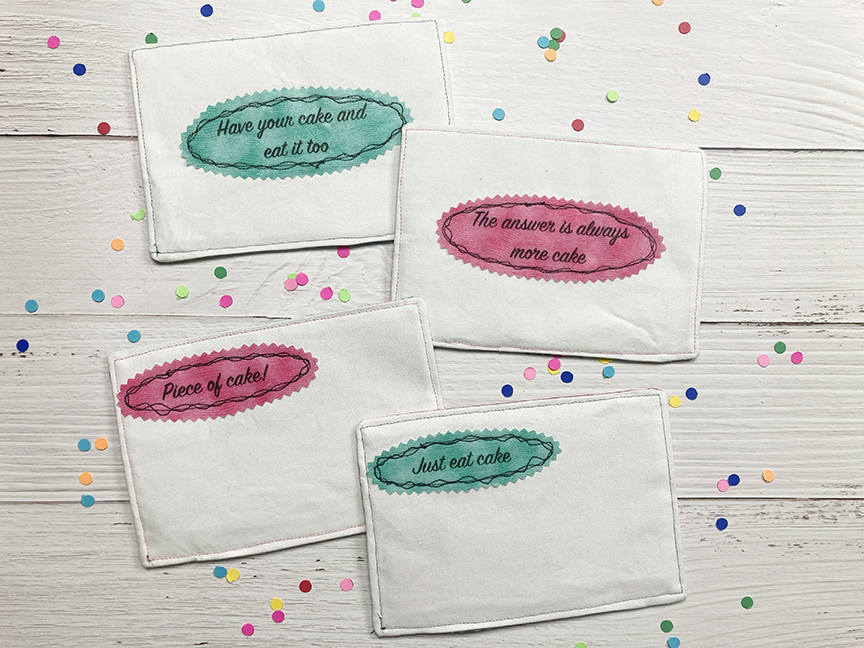
Step 7 Using the second page of the template download, follow the manufacturer’s directions to print the labels onto the correct size of an E-Z Print Transfer Sheet. Select fabrics for transferring (I transferred 3 each to aqua and pink tonal fabric).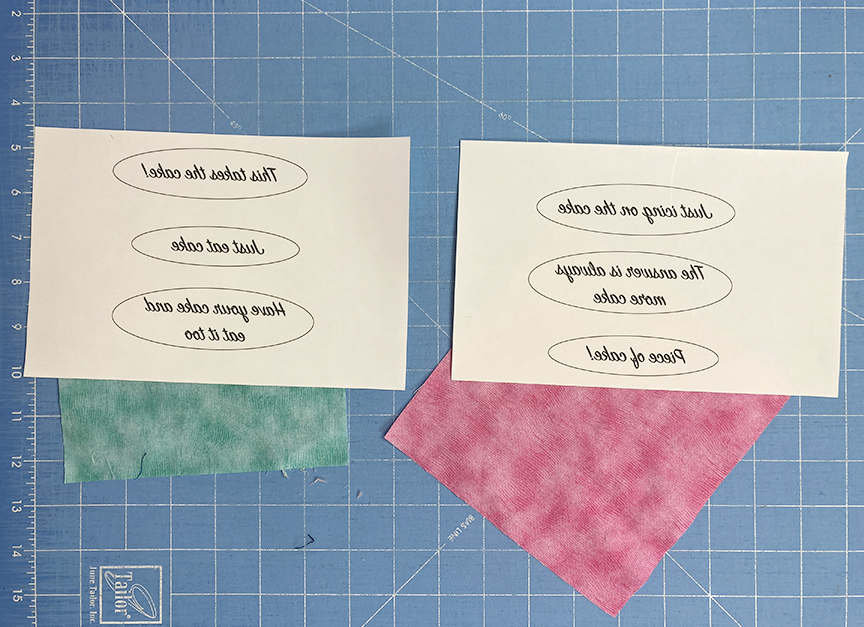
Step 8 After you’ve finished pressing the transfer sheet in place (use LOTS of pressure and be patient!), peel the sheet back to see your words.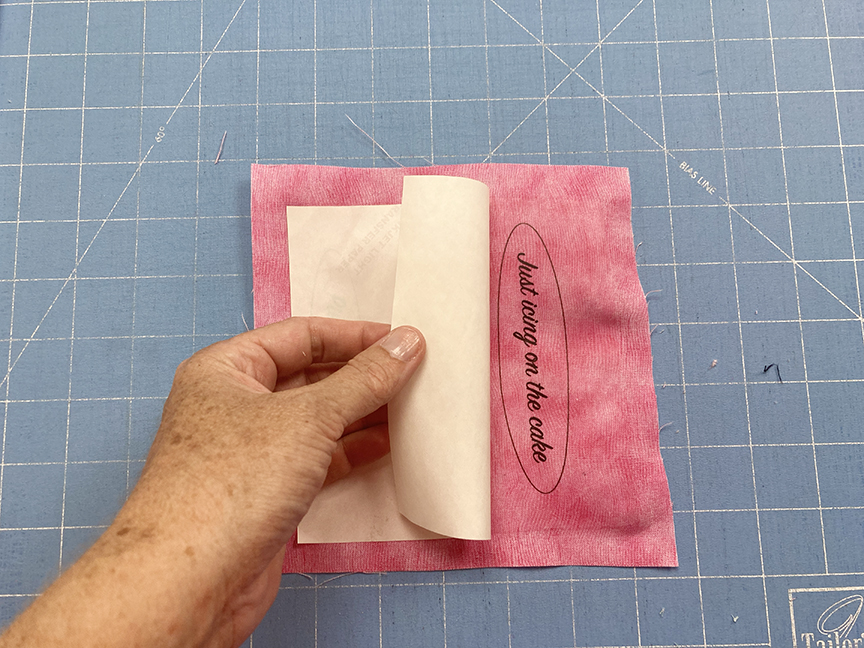
Step 9 Cut out the labels you plan to use. I chose to cut with pinking shears approximately 1/4″ past each oval shape. 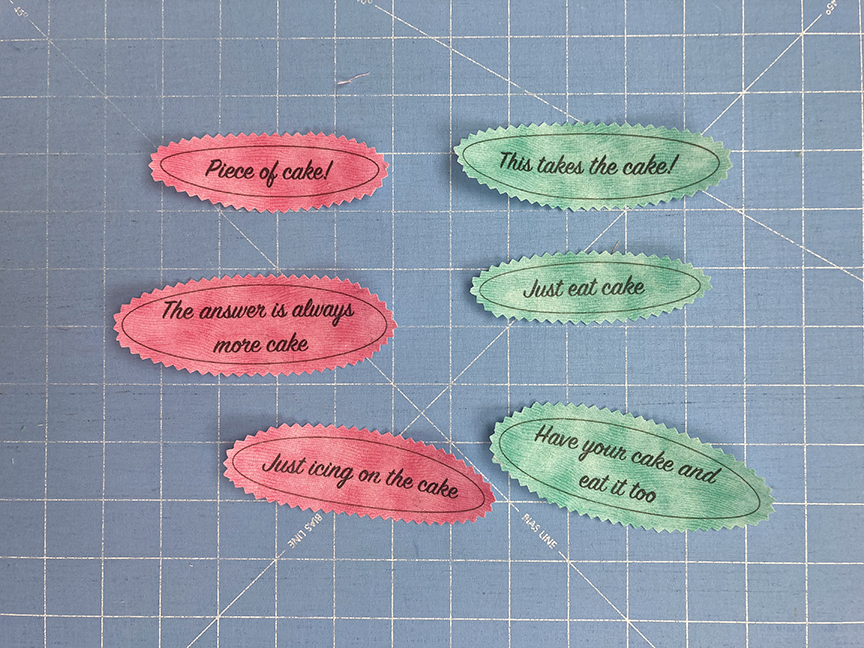
Step 10 Fuse (1) 6-1/2″ x 4-1/2″ interfacing rectangle to the wrong side of (1) 7-1/4″ x 5-1/4″ white backing piece (center interfacing on fabric rectangle). Center the label on top. 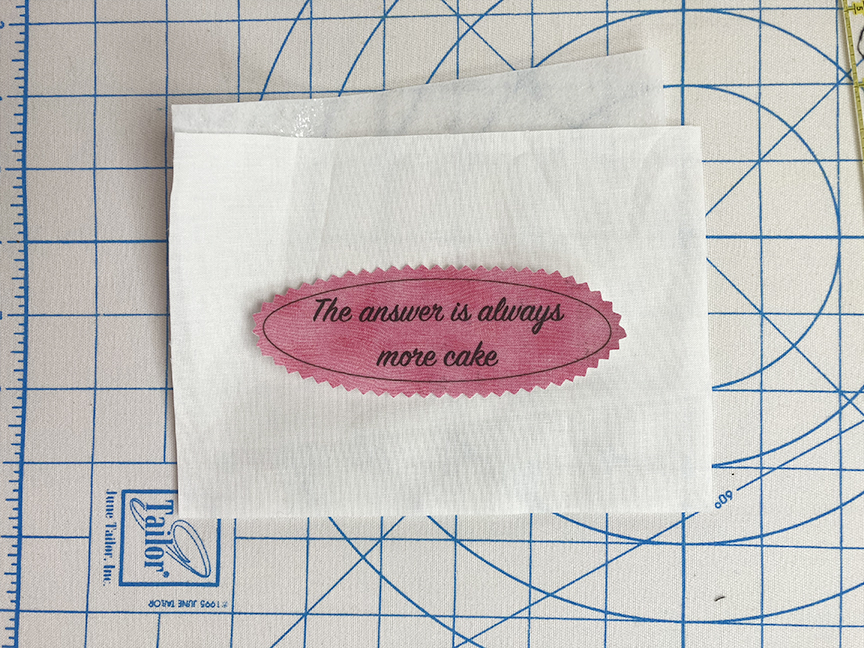
Step 11 Using a free motion fit, stitch around the label twice, staying close to the printed oval line. Your two postcards halves should look like this:

Assembling the Postcard
Step 12 Layer the postcard front and back right sides together, aligning the interfacing rectangles. Stitch around all (4) sides, leaving the majority of the bottom edge open for turning. Tip: Stitch approximately 1/2″ in from each corner along the bottom edge. It will make sewing the opening closed easier. Trim corners to reduce bulk. 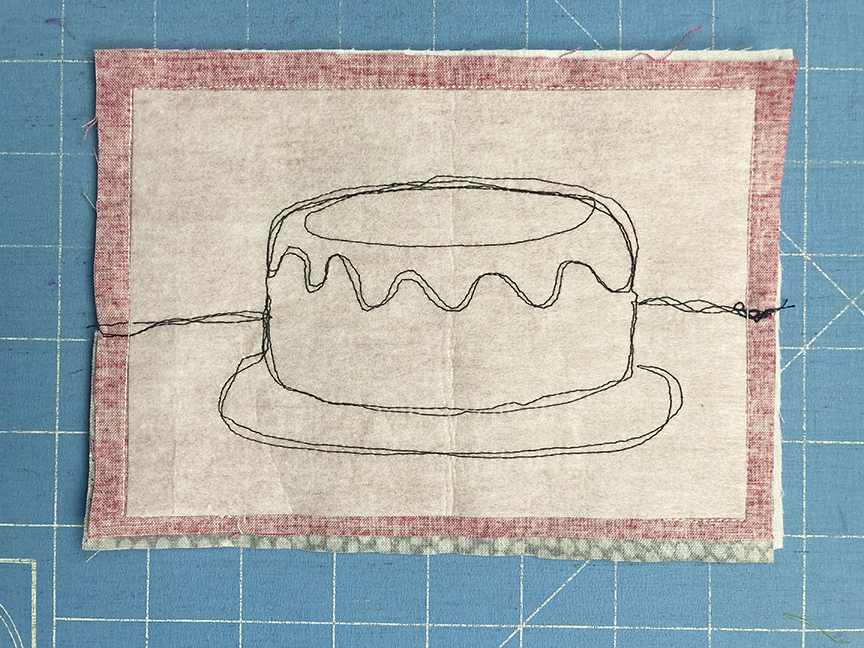
Tip: Before turning the postcard right side out, press the open fabric edges back against the interfacing. This will make it easier to topstitch the opening closed because your folds will be pre-pressed. 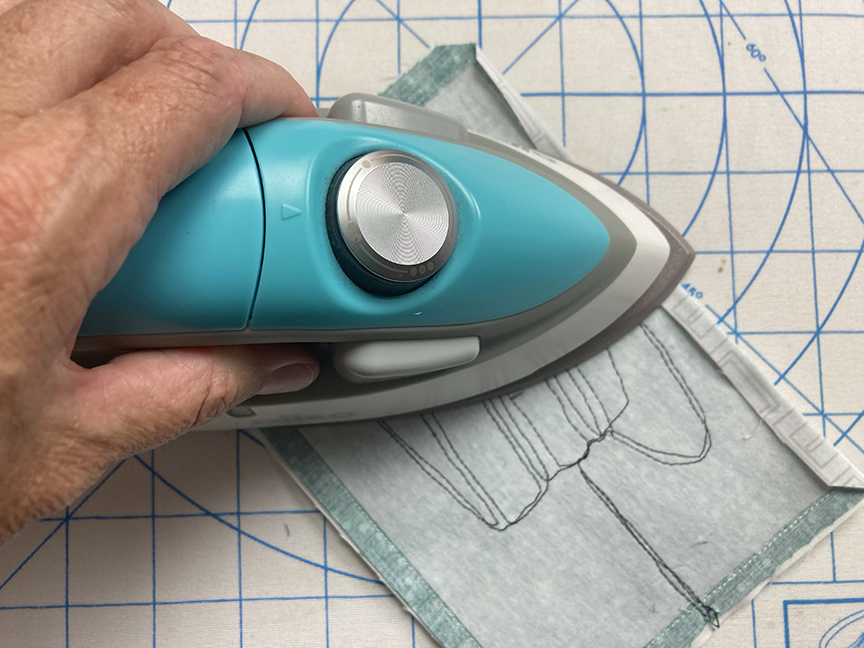
Step 13 Turn the postcard right side out. Very carefully poke corners as much as you can, and press to flatten. Tuck the open fabric edges in and pin them in place. Topstitch around the entire outer edge of the postcard, approximately 1/8″ from the edges.
Here are my finished postcards. Aren’t they cute?! These would make great birthday cards, and with the proper postage, you can even mail them!
Of course, I couldn’t stop with just two! Head over to my blog to see the additional cake postcards I made. I had so much trouble narrowing down which fabrics to use… I may have to make more!