


![]() Hey there!!! I hope everyone is enjoying all the fun things going on with the new releases this week! It’s Katrina from Paper, Scissors, Glue and Hybrid Too sharing a layout I made with the NEW Unity Deco Foil Transfer Adhesive Sheets. There are two new fun sets to play with-Sentiments 1 and Sentiments 2.
Hey there!!! I hope everyone is enjoying all the fun things going on with the new releases this week! It’s Katrina from Paper, Scissors, Glue and Hybrid Too sharing a layout I made with the NEW Unity Deco Foil Transfer Adhesive Sheets. There are two new fun sets to play with-Sentiments 1 and Sentiments 2.
![]()
So, let’s get started and see what all these new products are about!
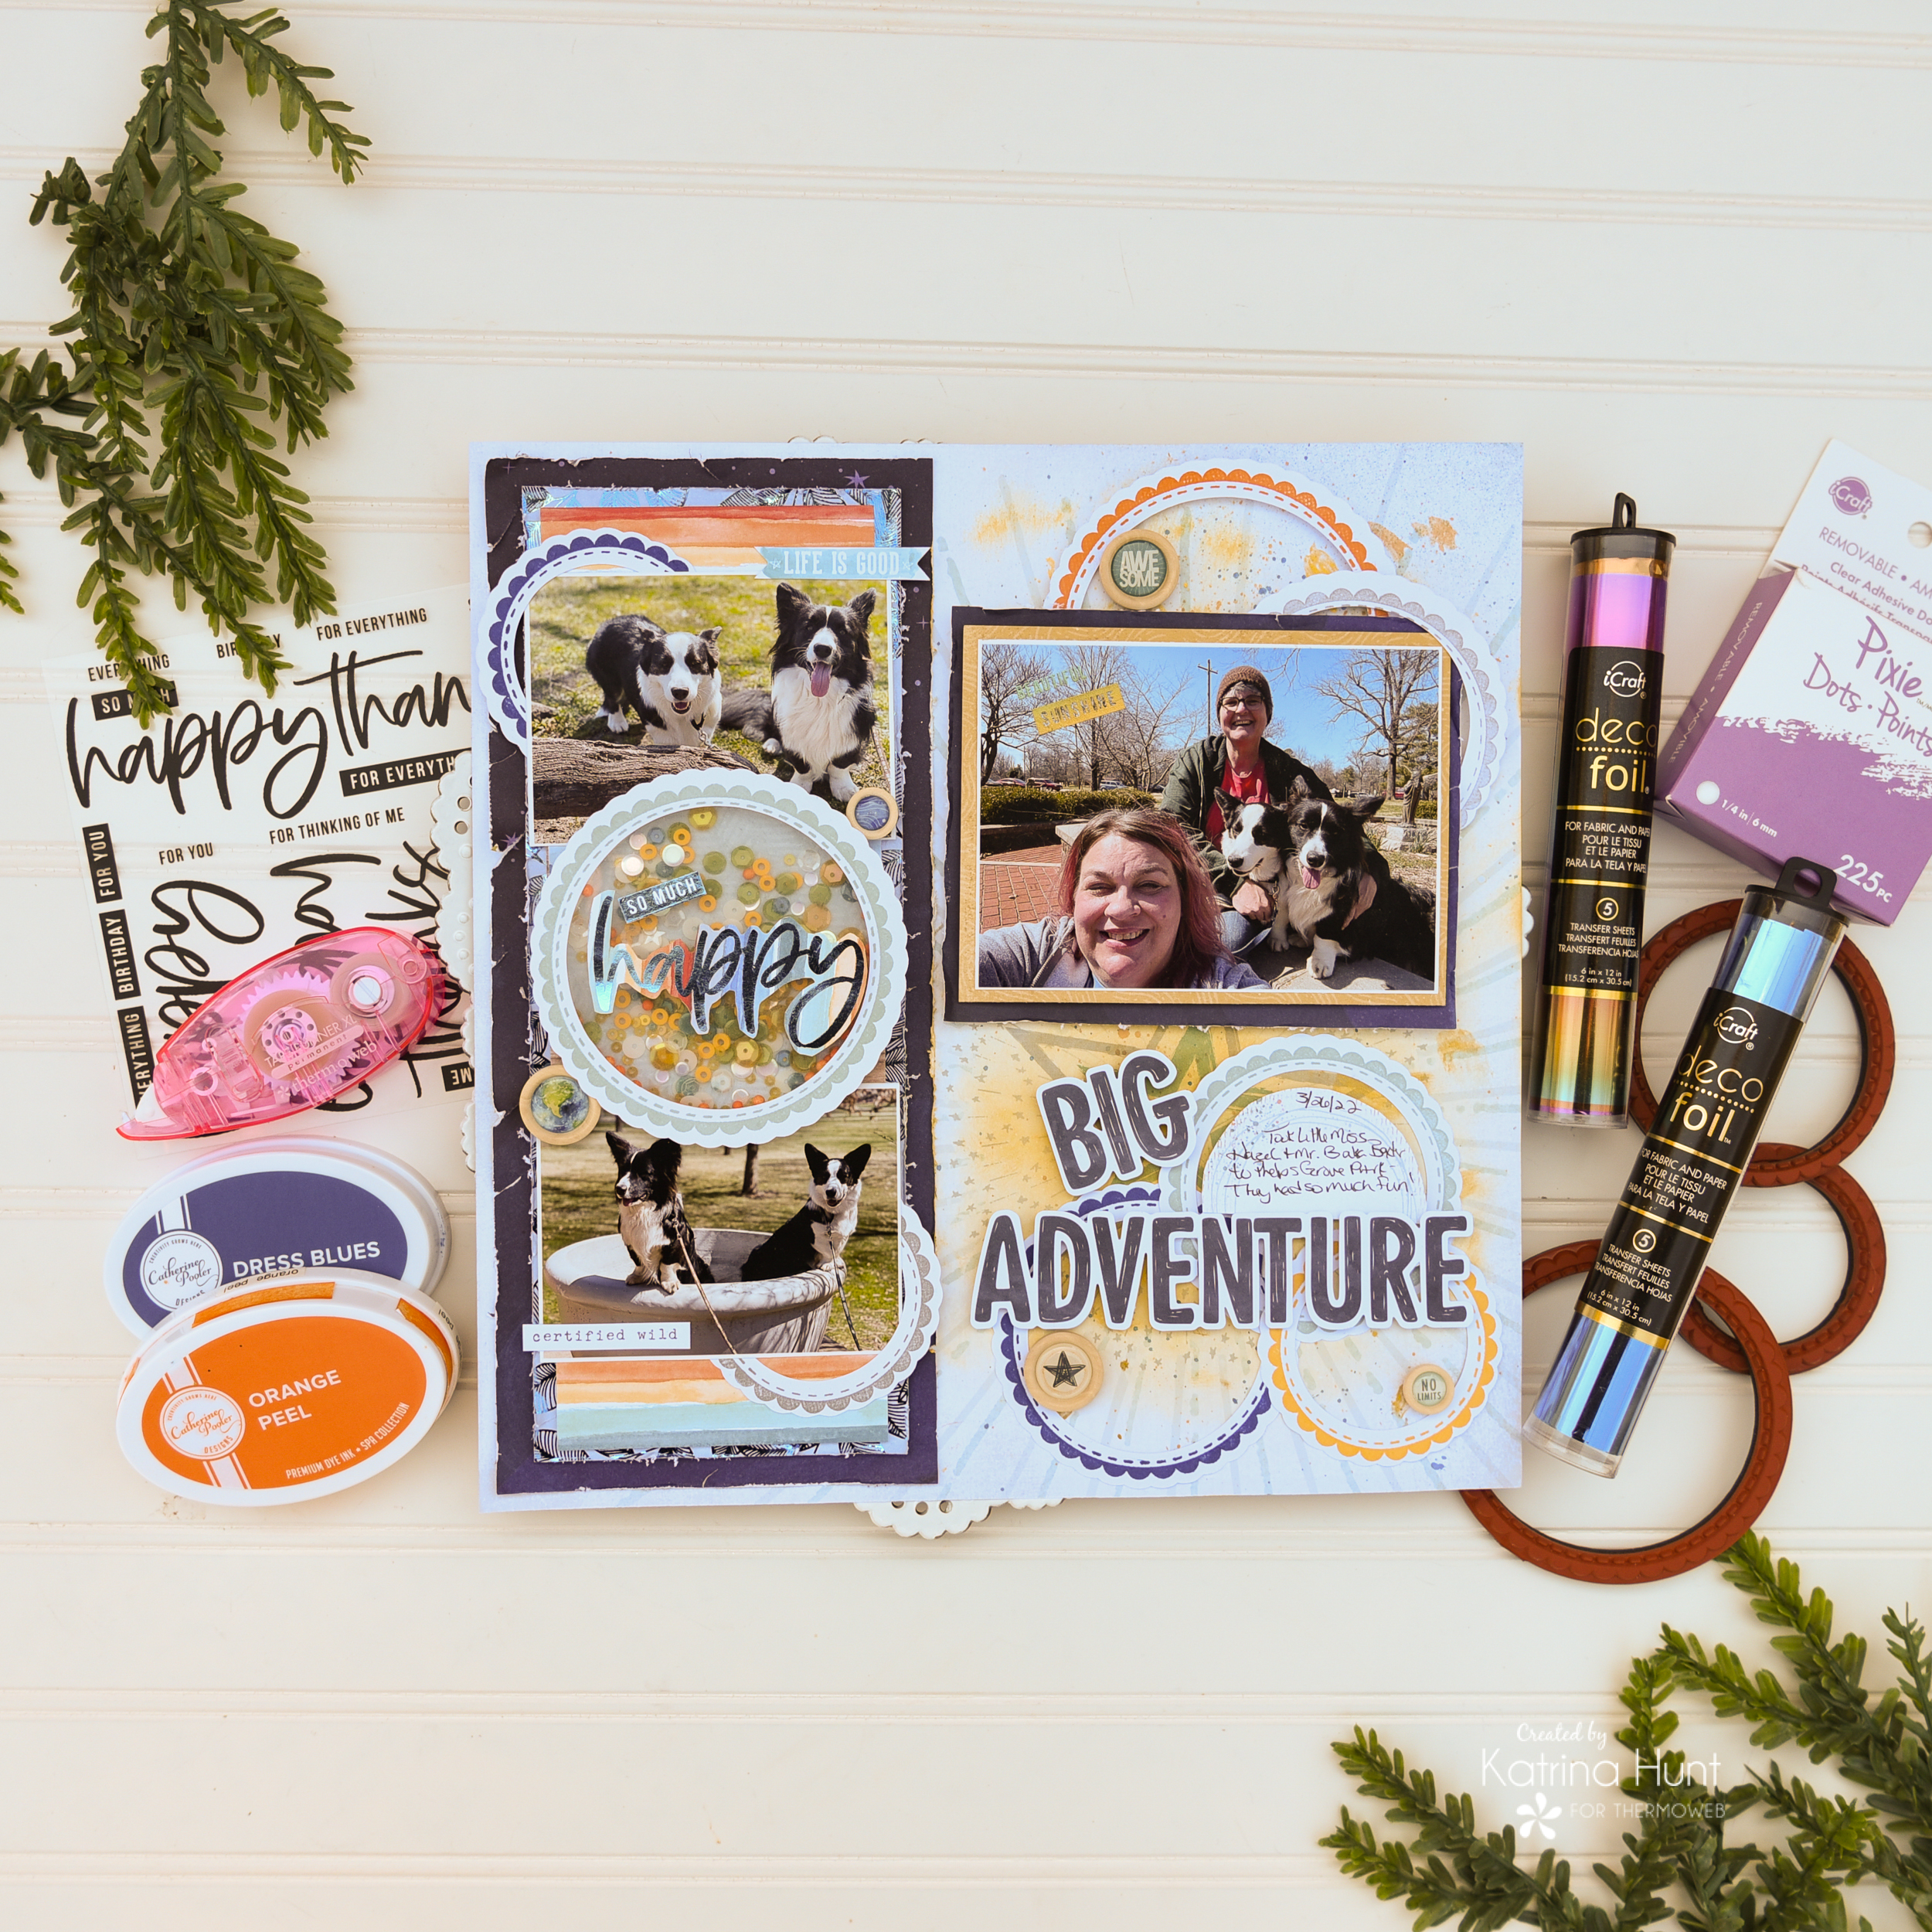
Big Adventure Layout with Unity Adhesive Transfers
Therm O Web Supplies Used
Unity Stamp Co Deco Foil Adhesive Transfer-Sentiment 1 – NEW
Unity Stamp Co Deco Foil Adhesive Transfer-Sentiment 2 – NEW
Memory Runner XL
Memory Runner XL Refill
3D Foam Squares – Combo Pack
3D FOAM SQUARES BOX
NEW 3D FOAM TAPE ROLL 1/16
NEW 3D FOAM TAPE ROLL 1/8
Pixie Tape
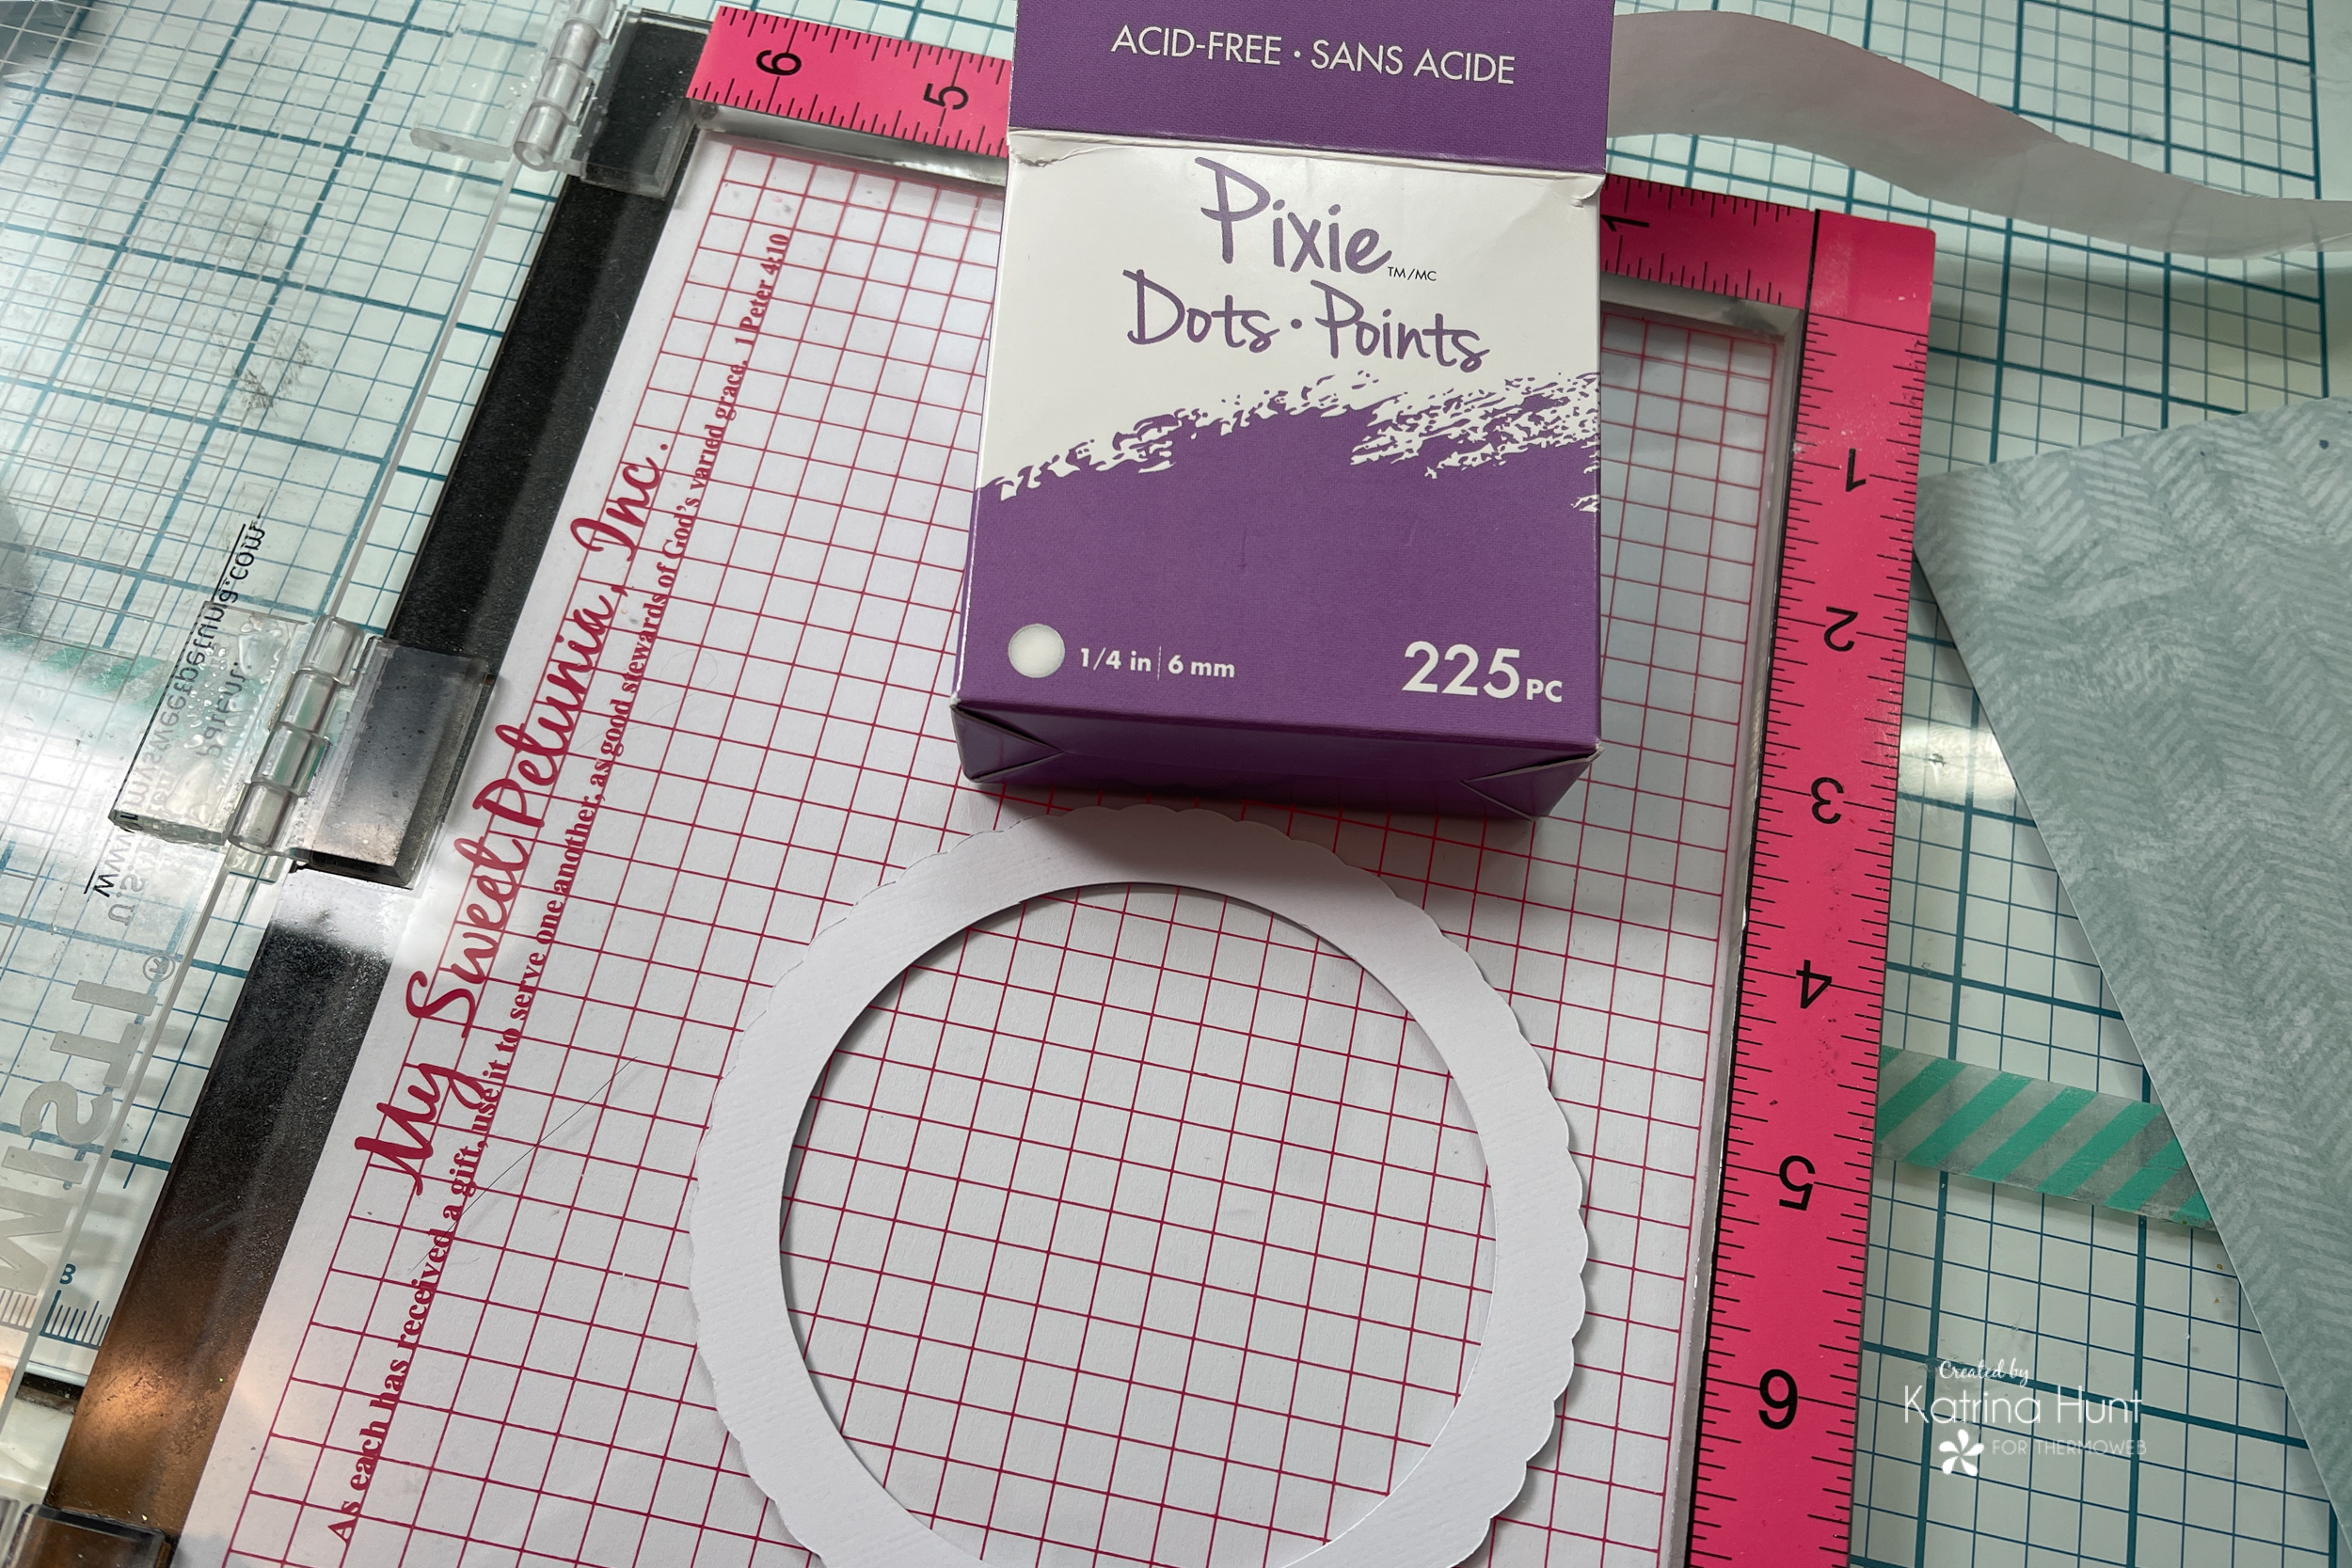
NEW Pixie Dots
Deco Foil Clear Designer Toner Sheets Printable
Deco Foil Craft Carrier Sheets-NEW
Unity Stamp Co. Toner Card Front – Tranquil Leaves
Deco Foil Transfer Sheets – Mystic Rainbow NEW
Deco Foil Transfer Sheets – Denim
Ultra Bond Liquid Adhesive
Other Supplies Used
Cocoa Vanilla No Limits Collection – At Paper Issues (Use code Katrina for 20% off)
White Cardstock
Catherine Pooler Inks
Unity Stamp Co.-Circle Scallop Stamps
Unity Stamp Co.-Circle Scallop Cut File
LAYOUT DETAILS
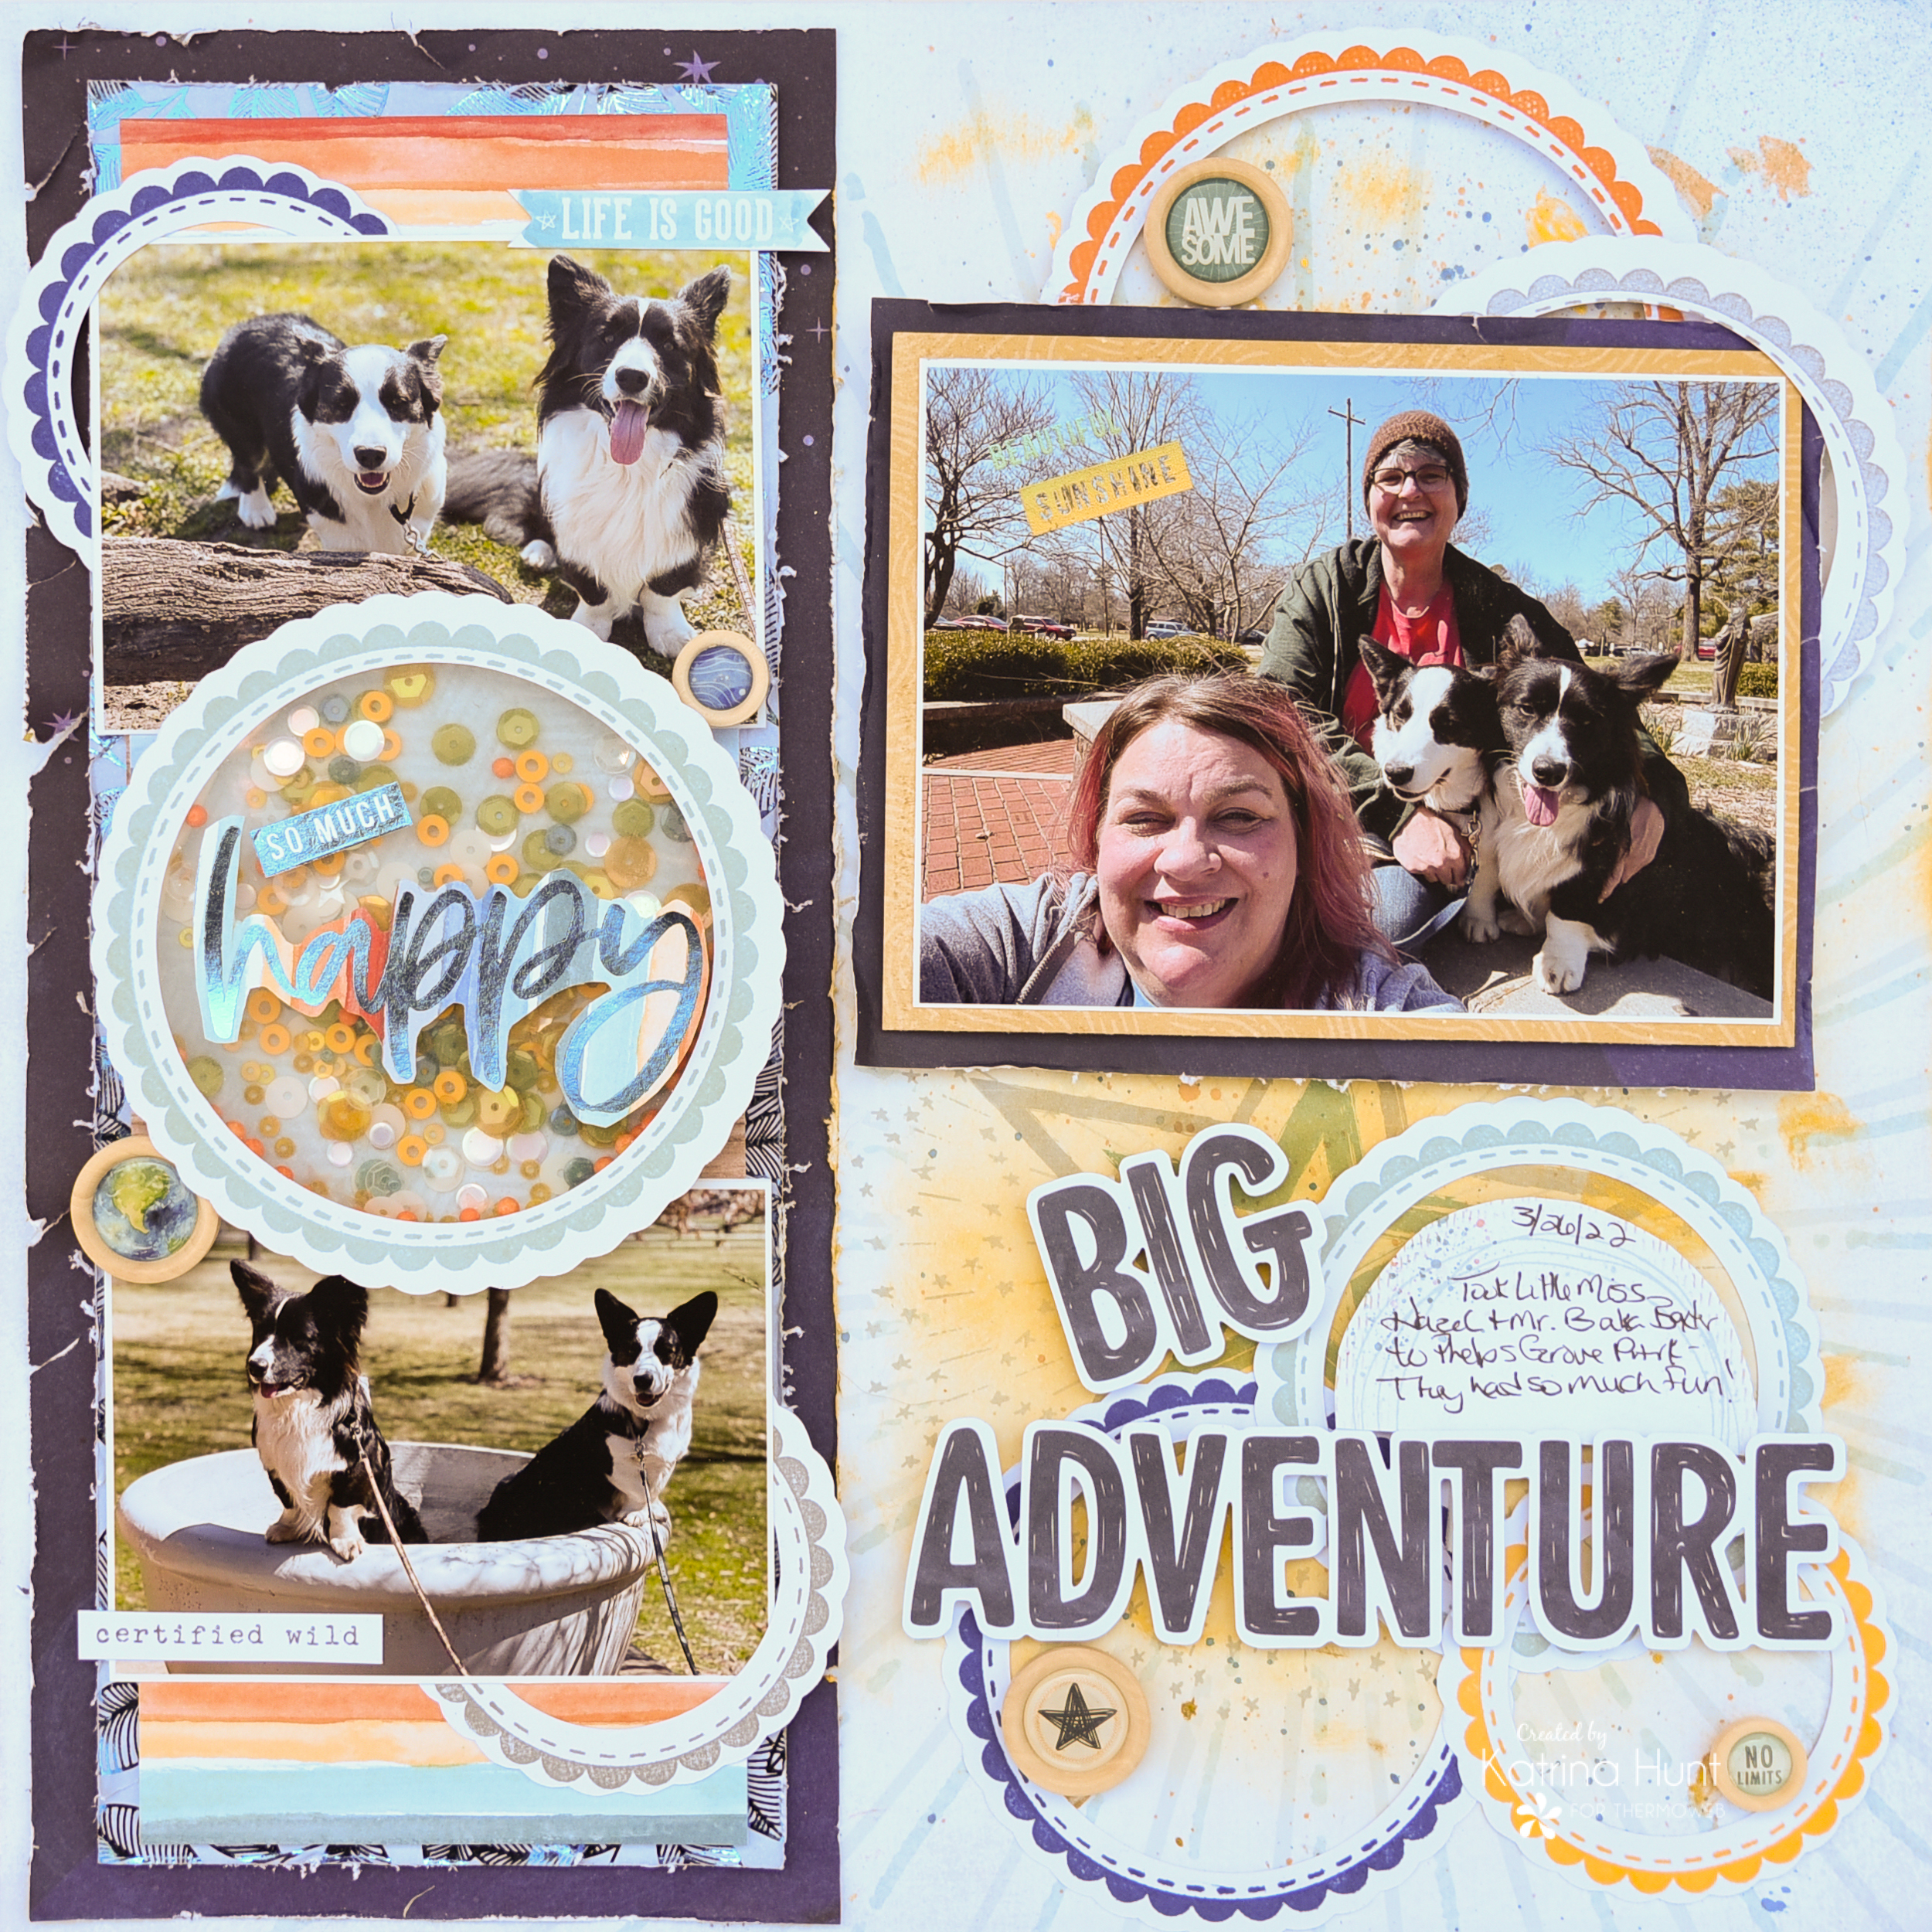
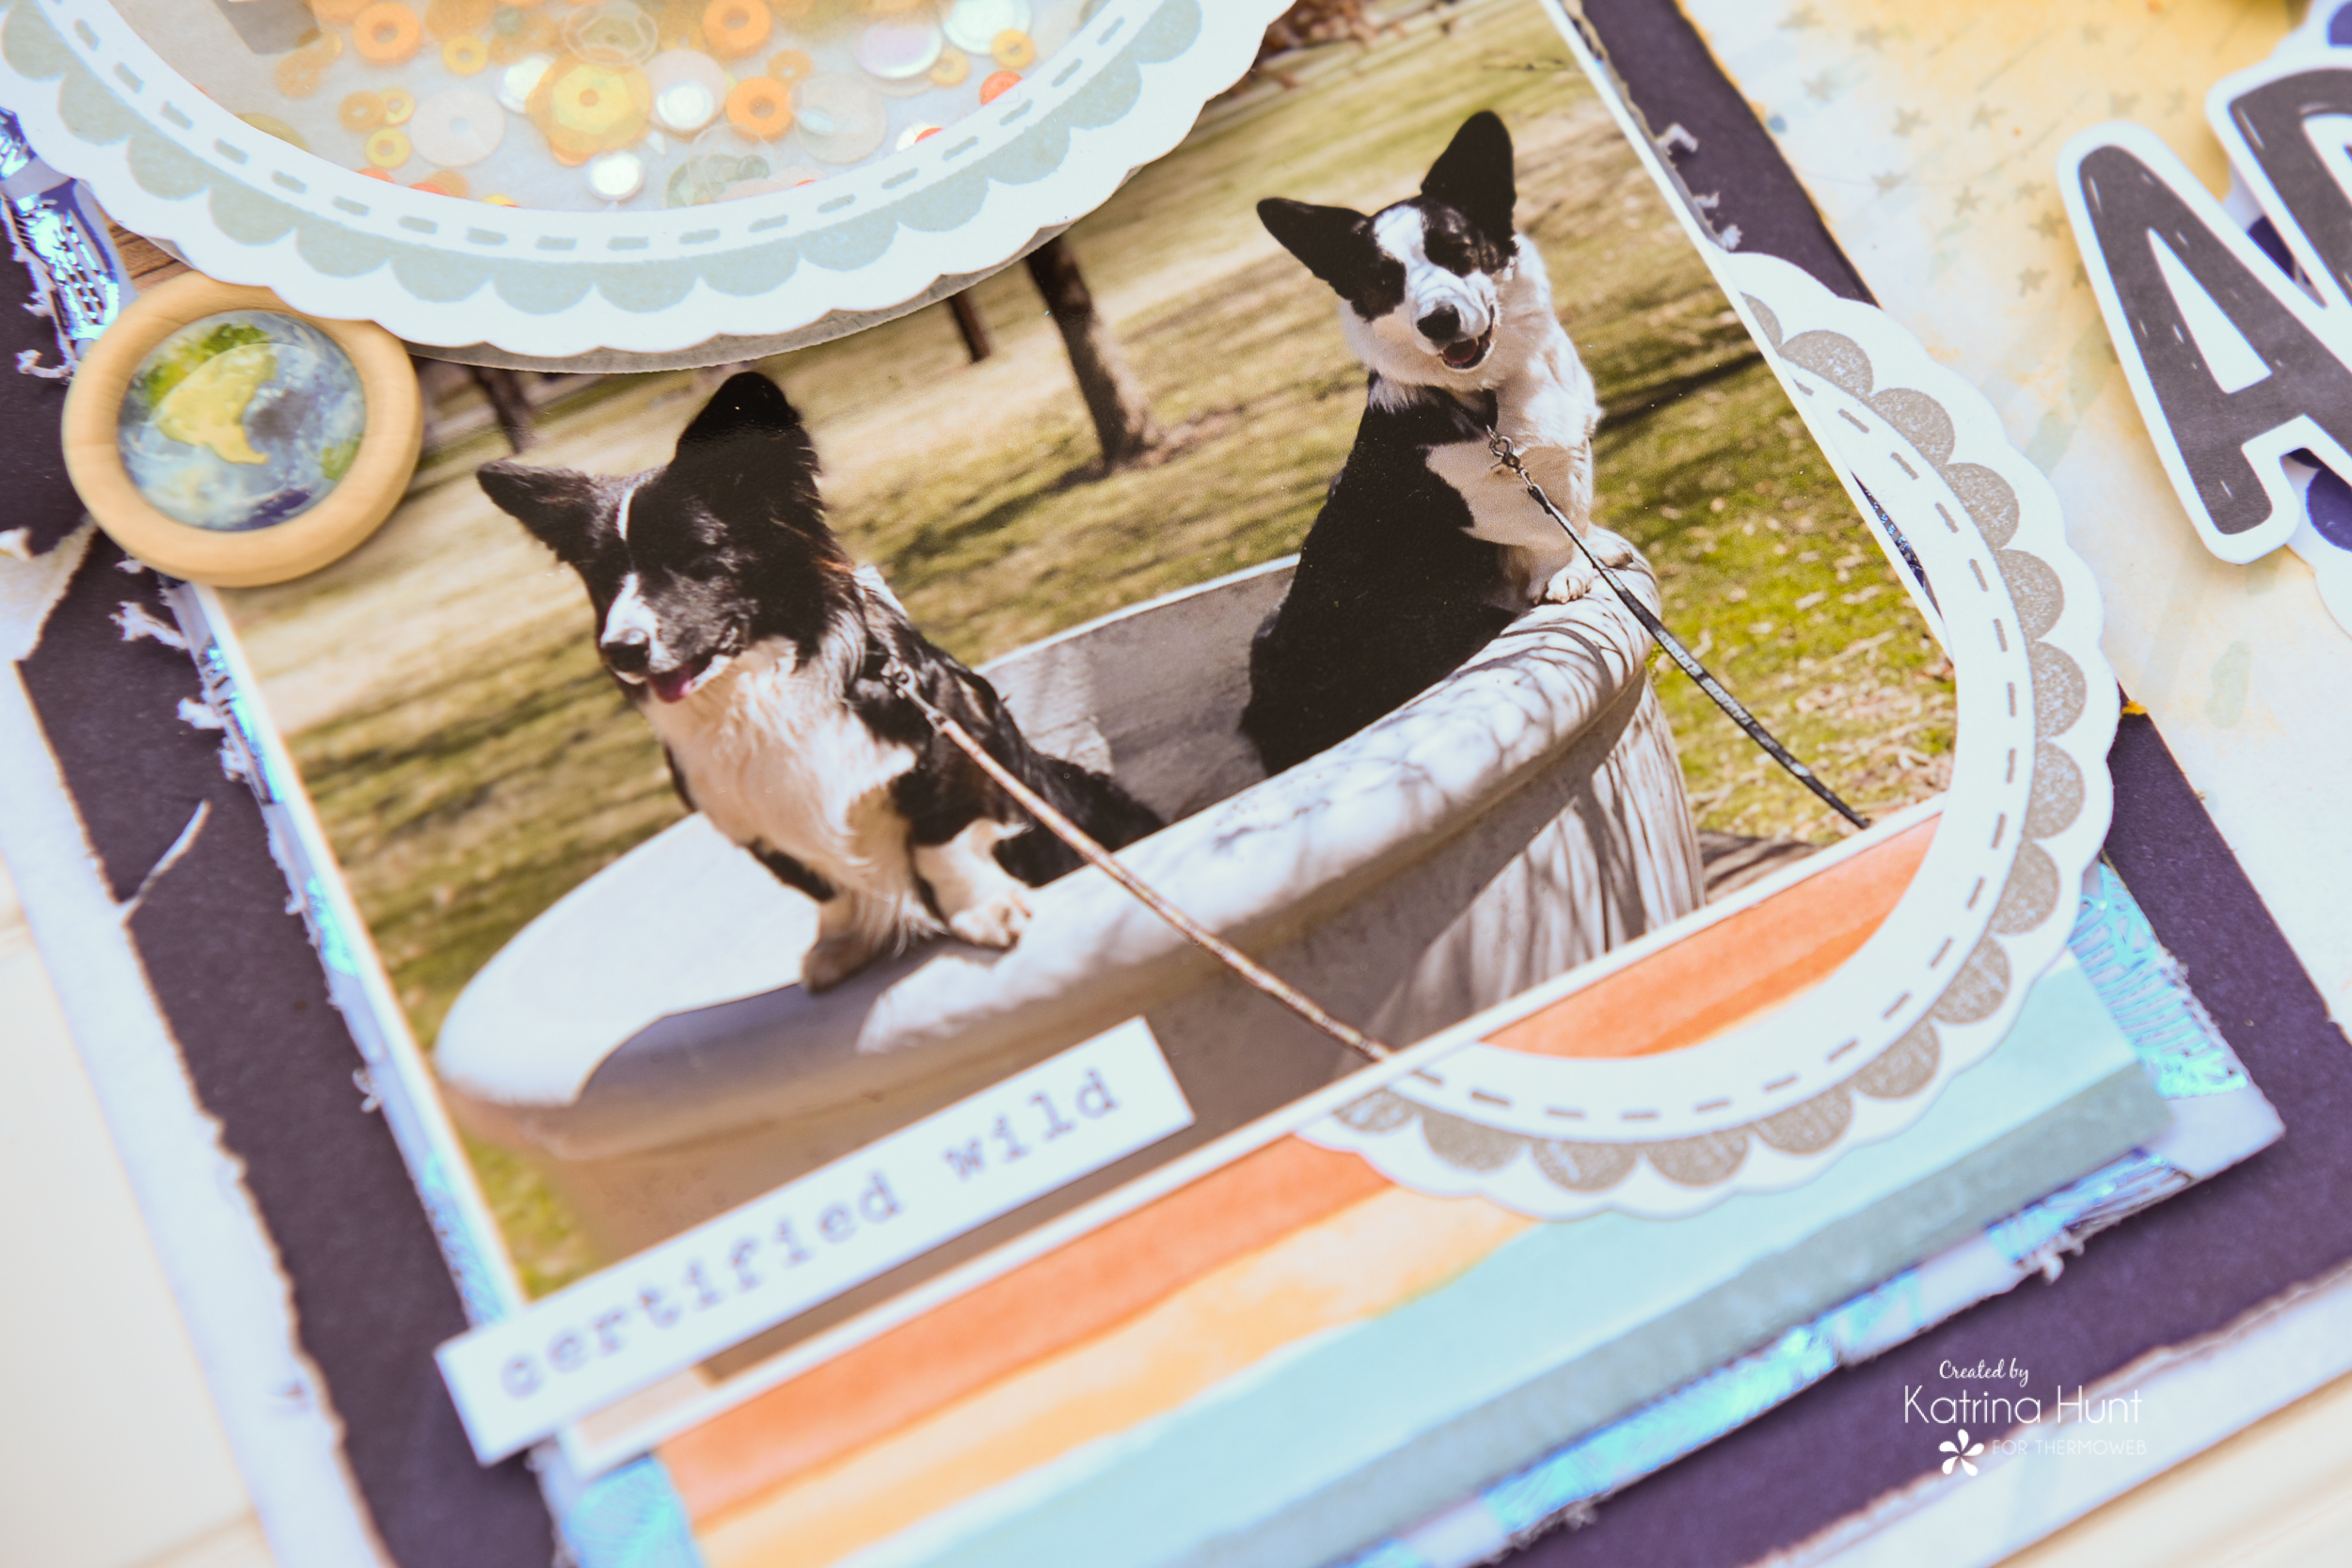
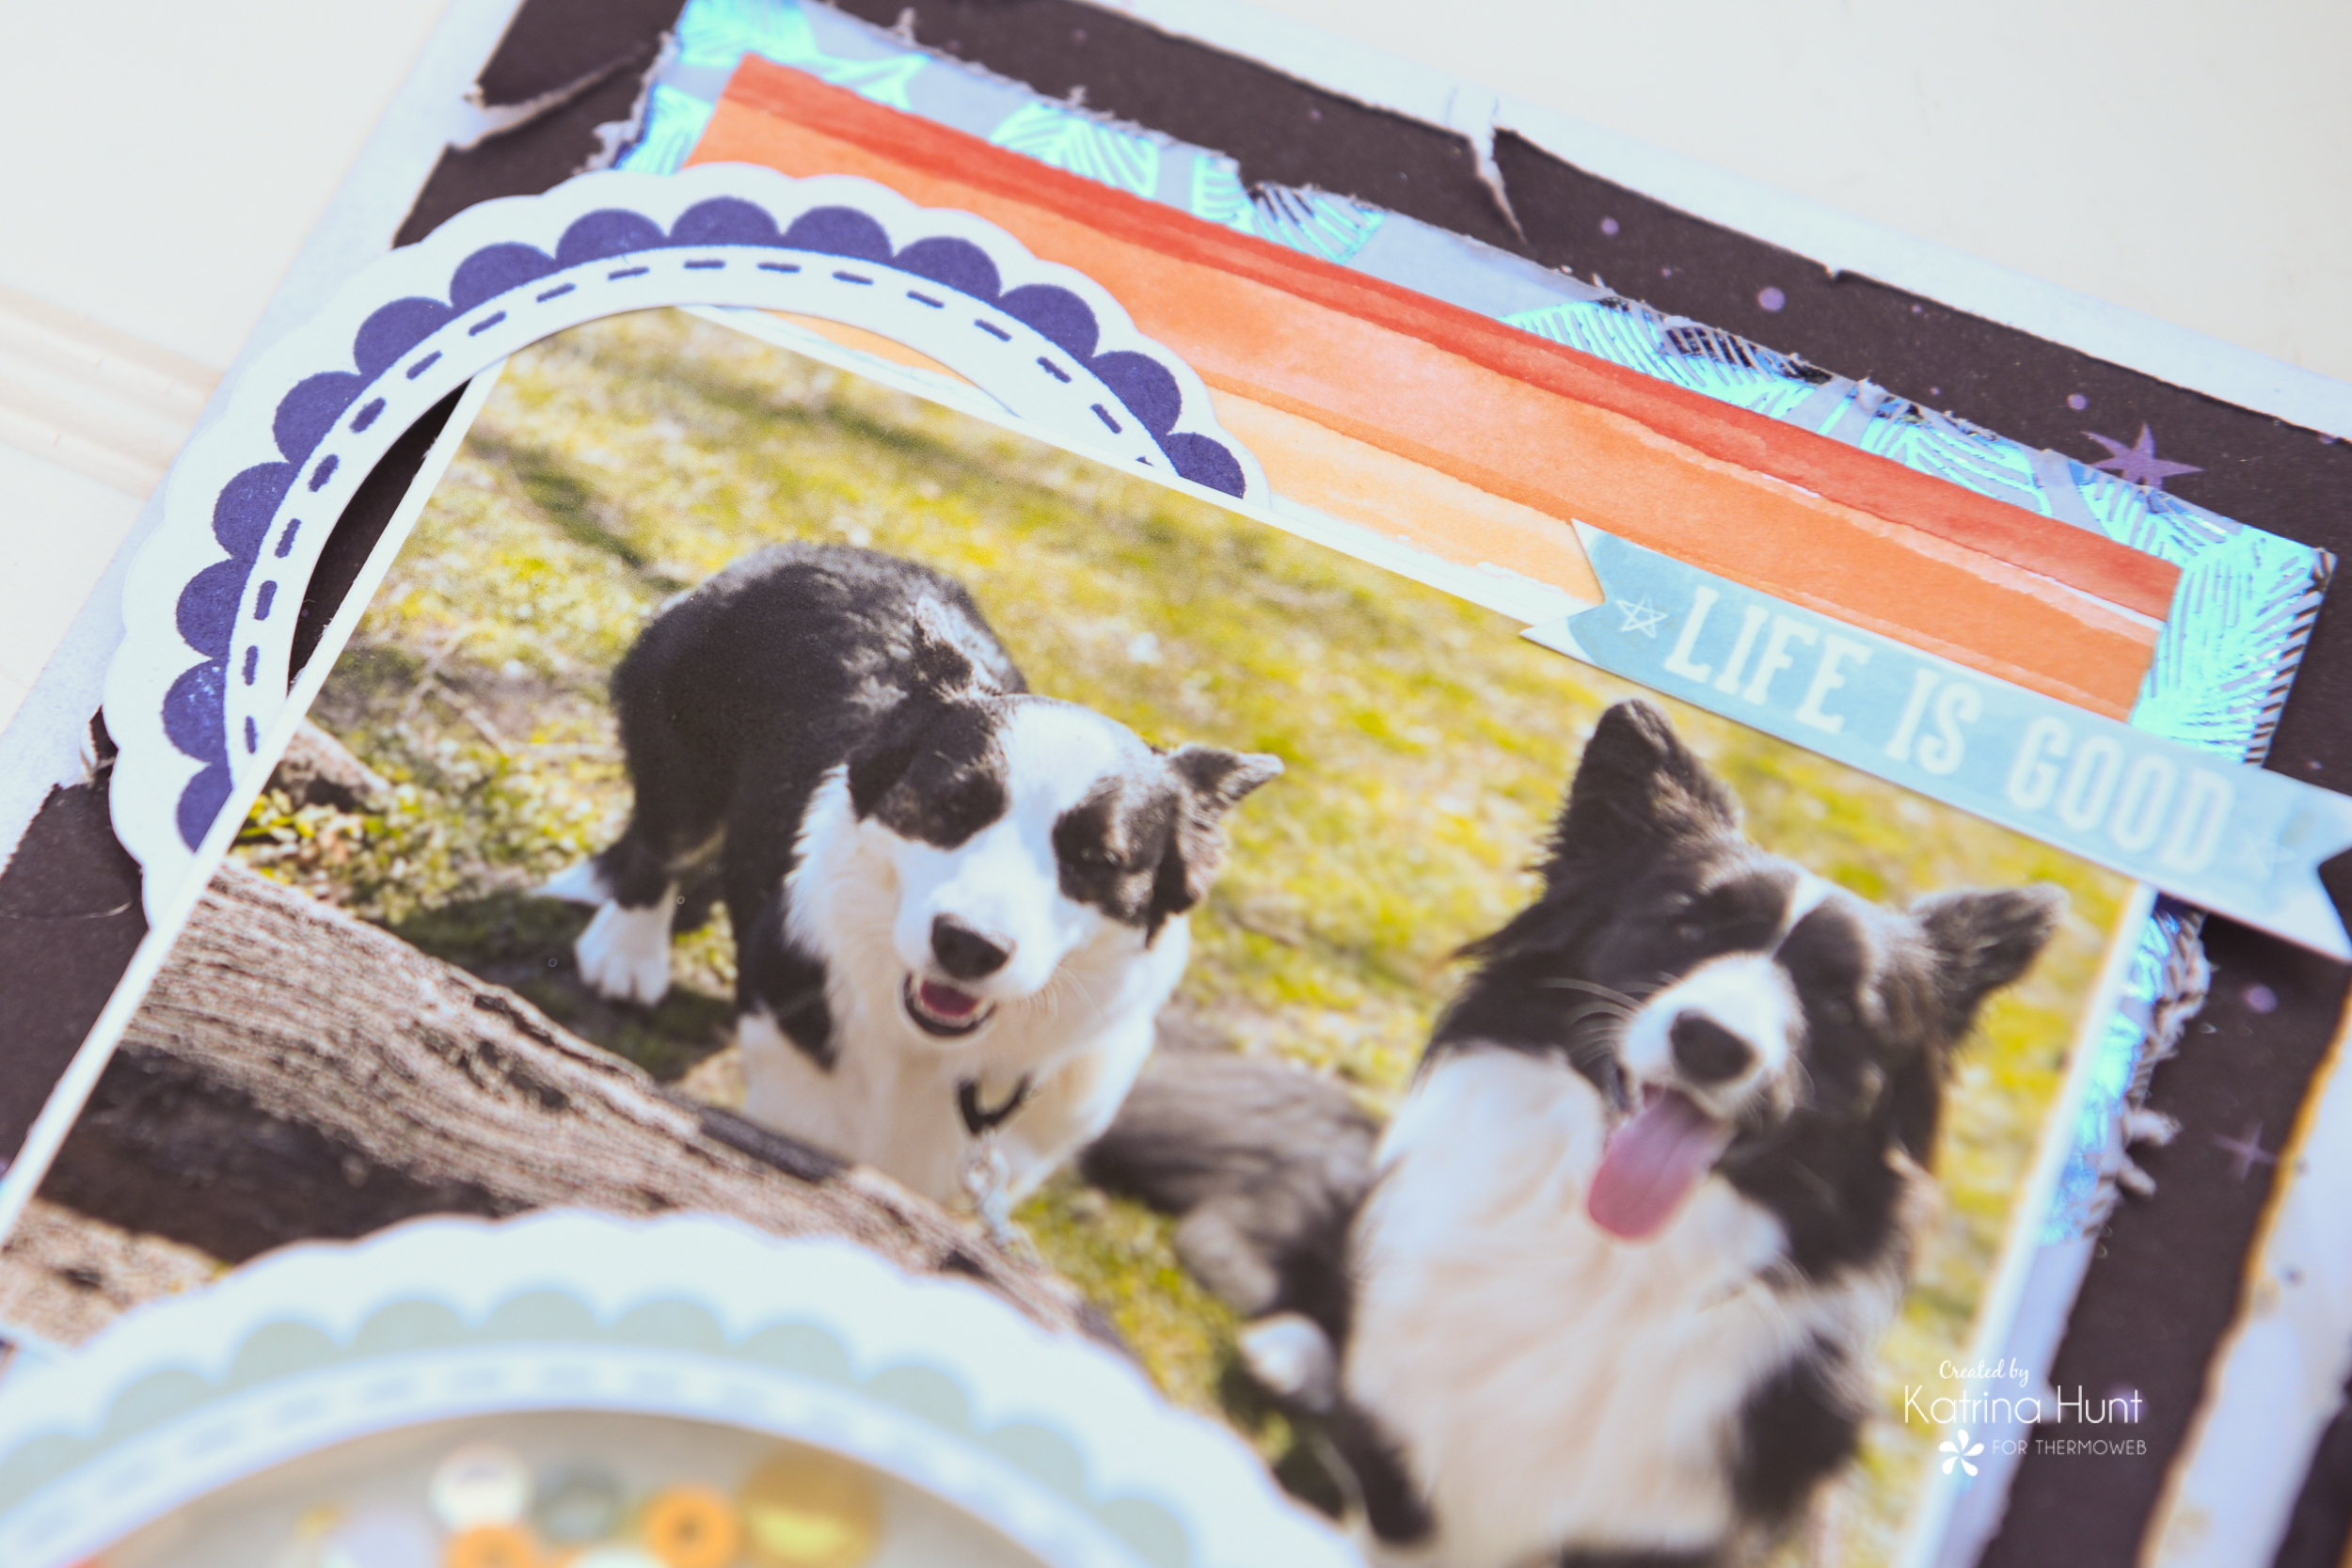
There is so much going on in this layout, I am not sure where to start! So, we will start with the basics and just see where that takes us! How’s that sound?
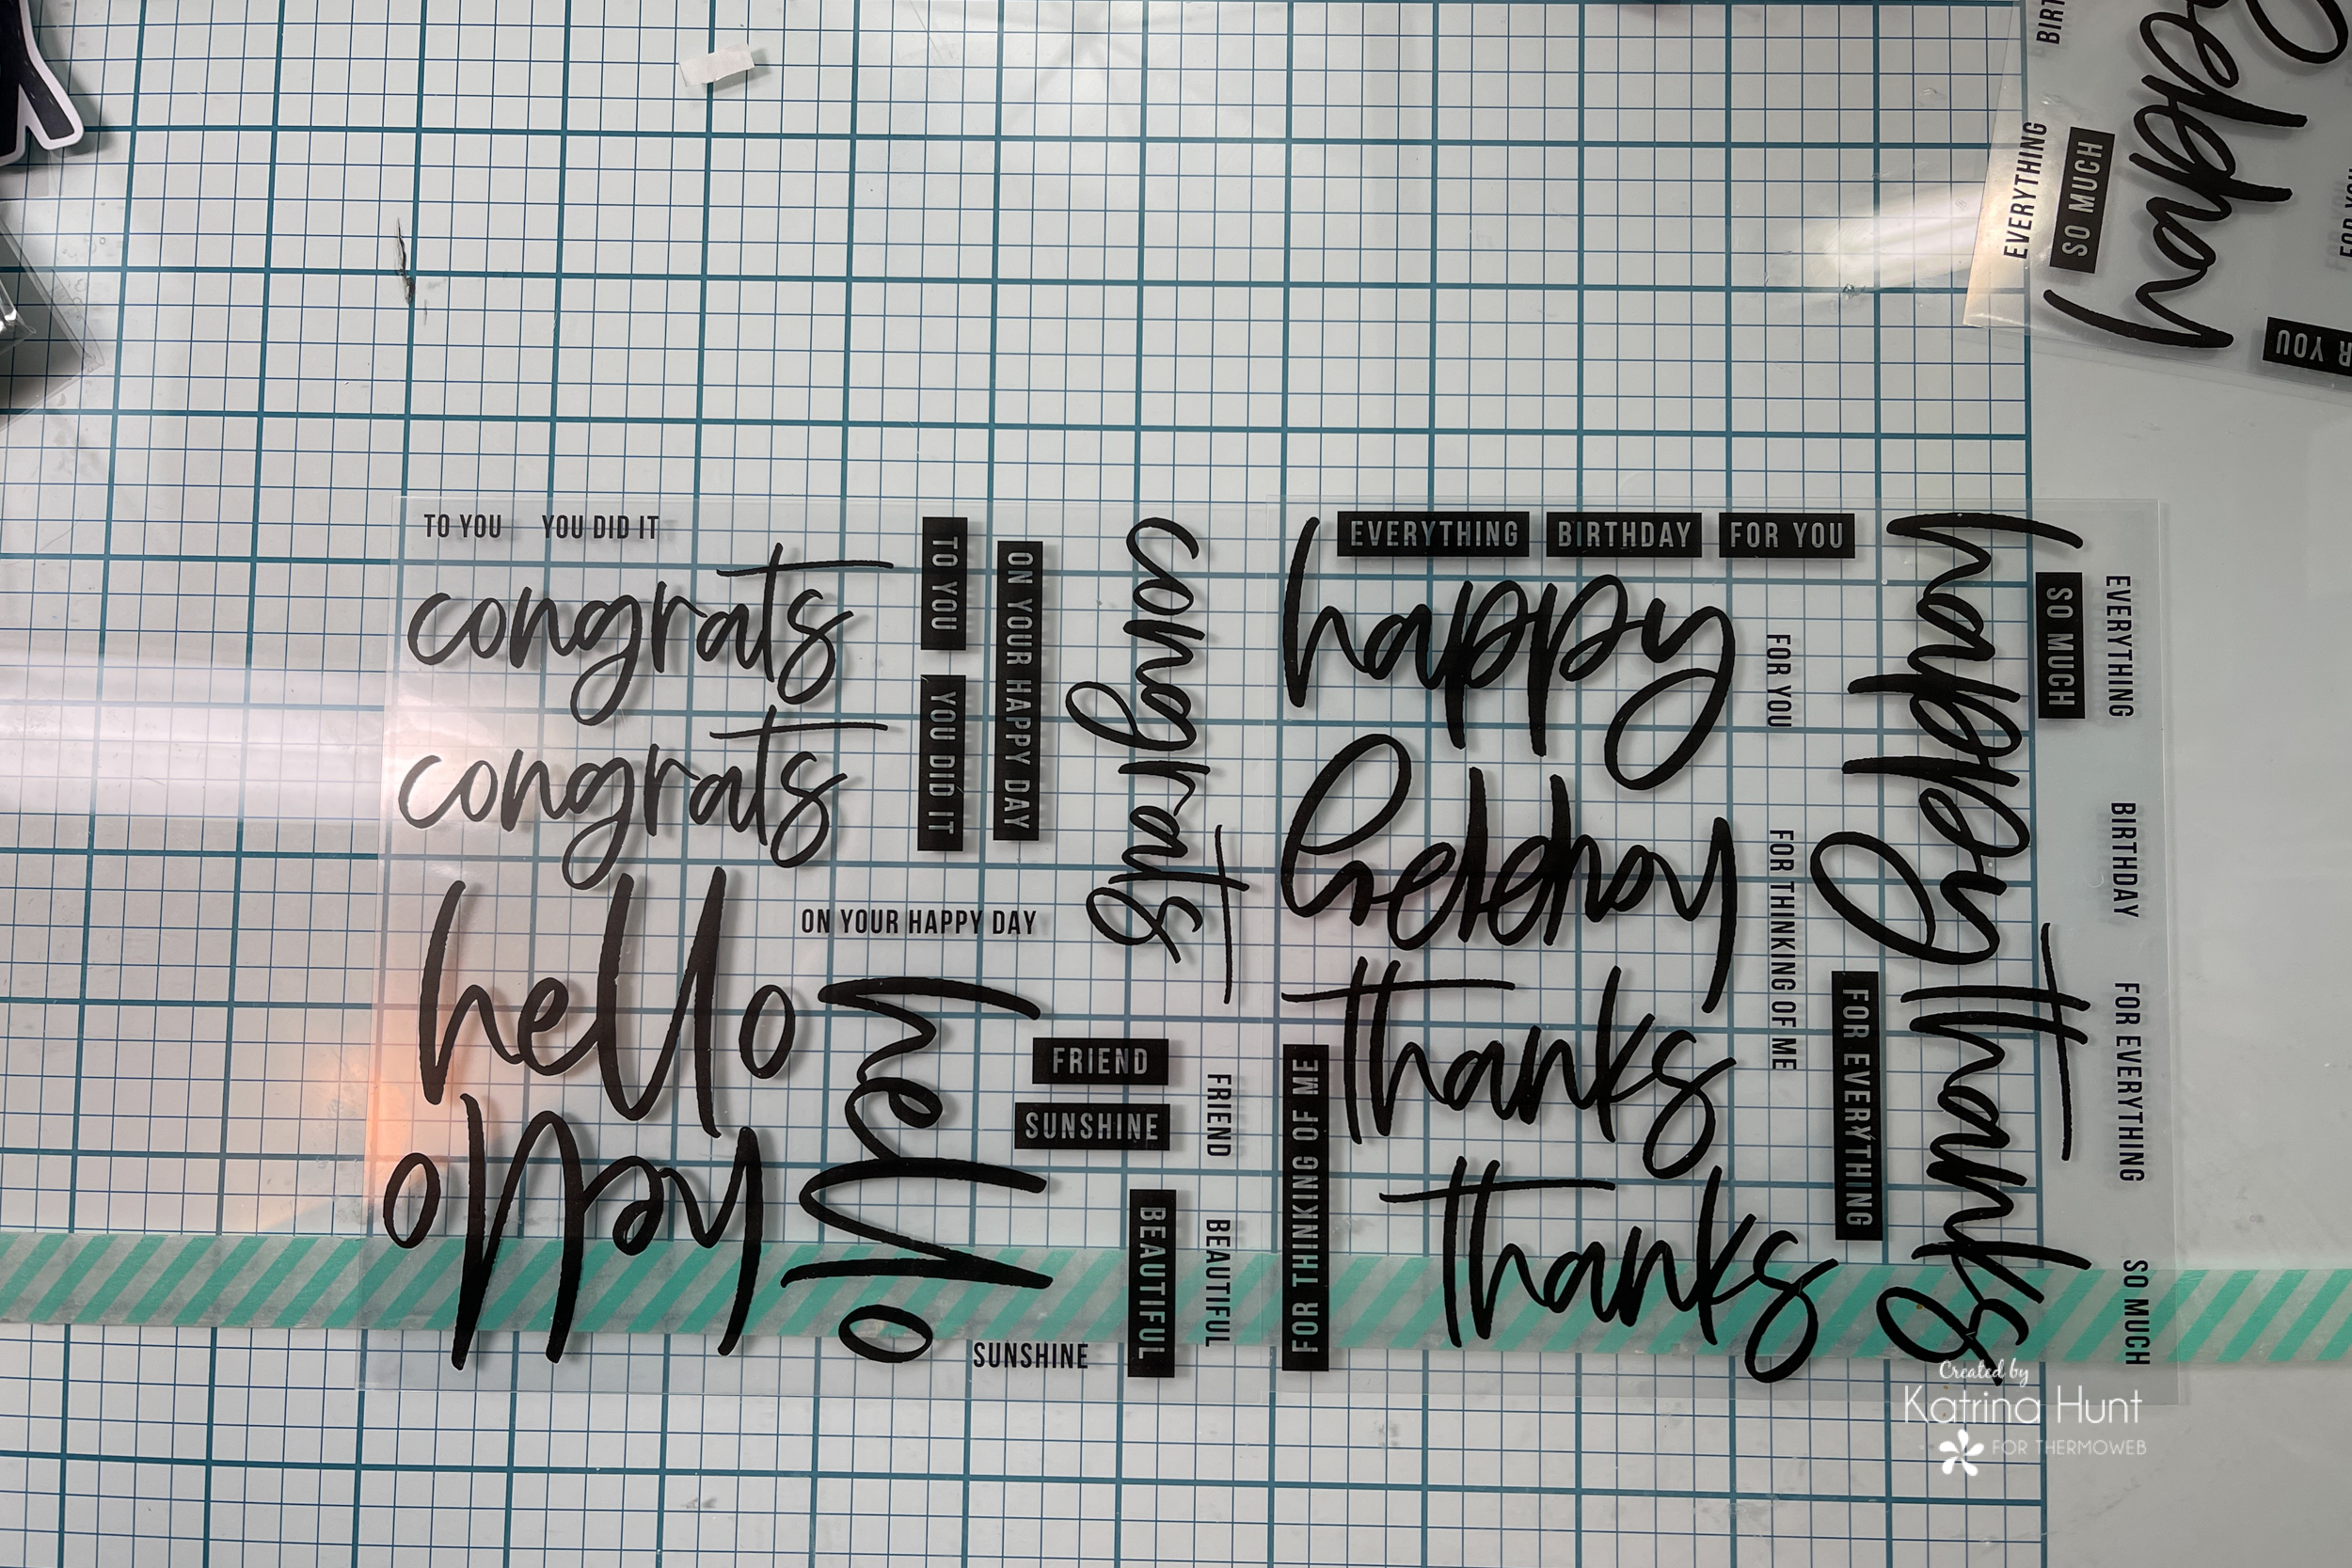
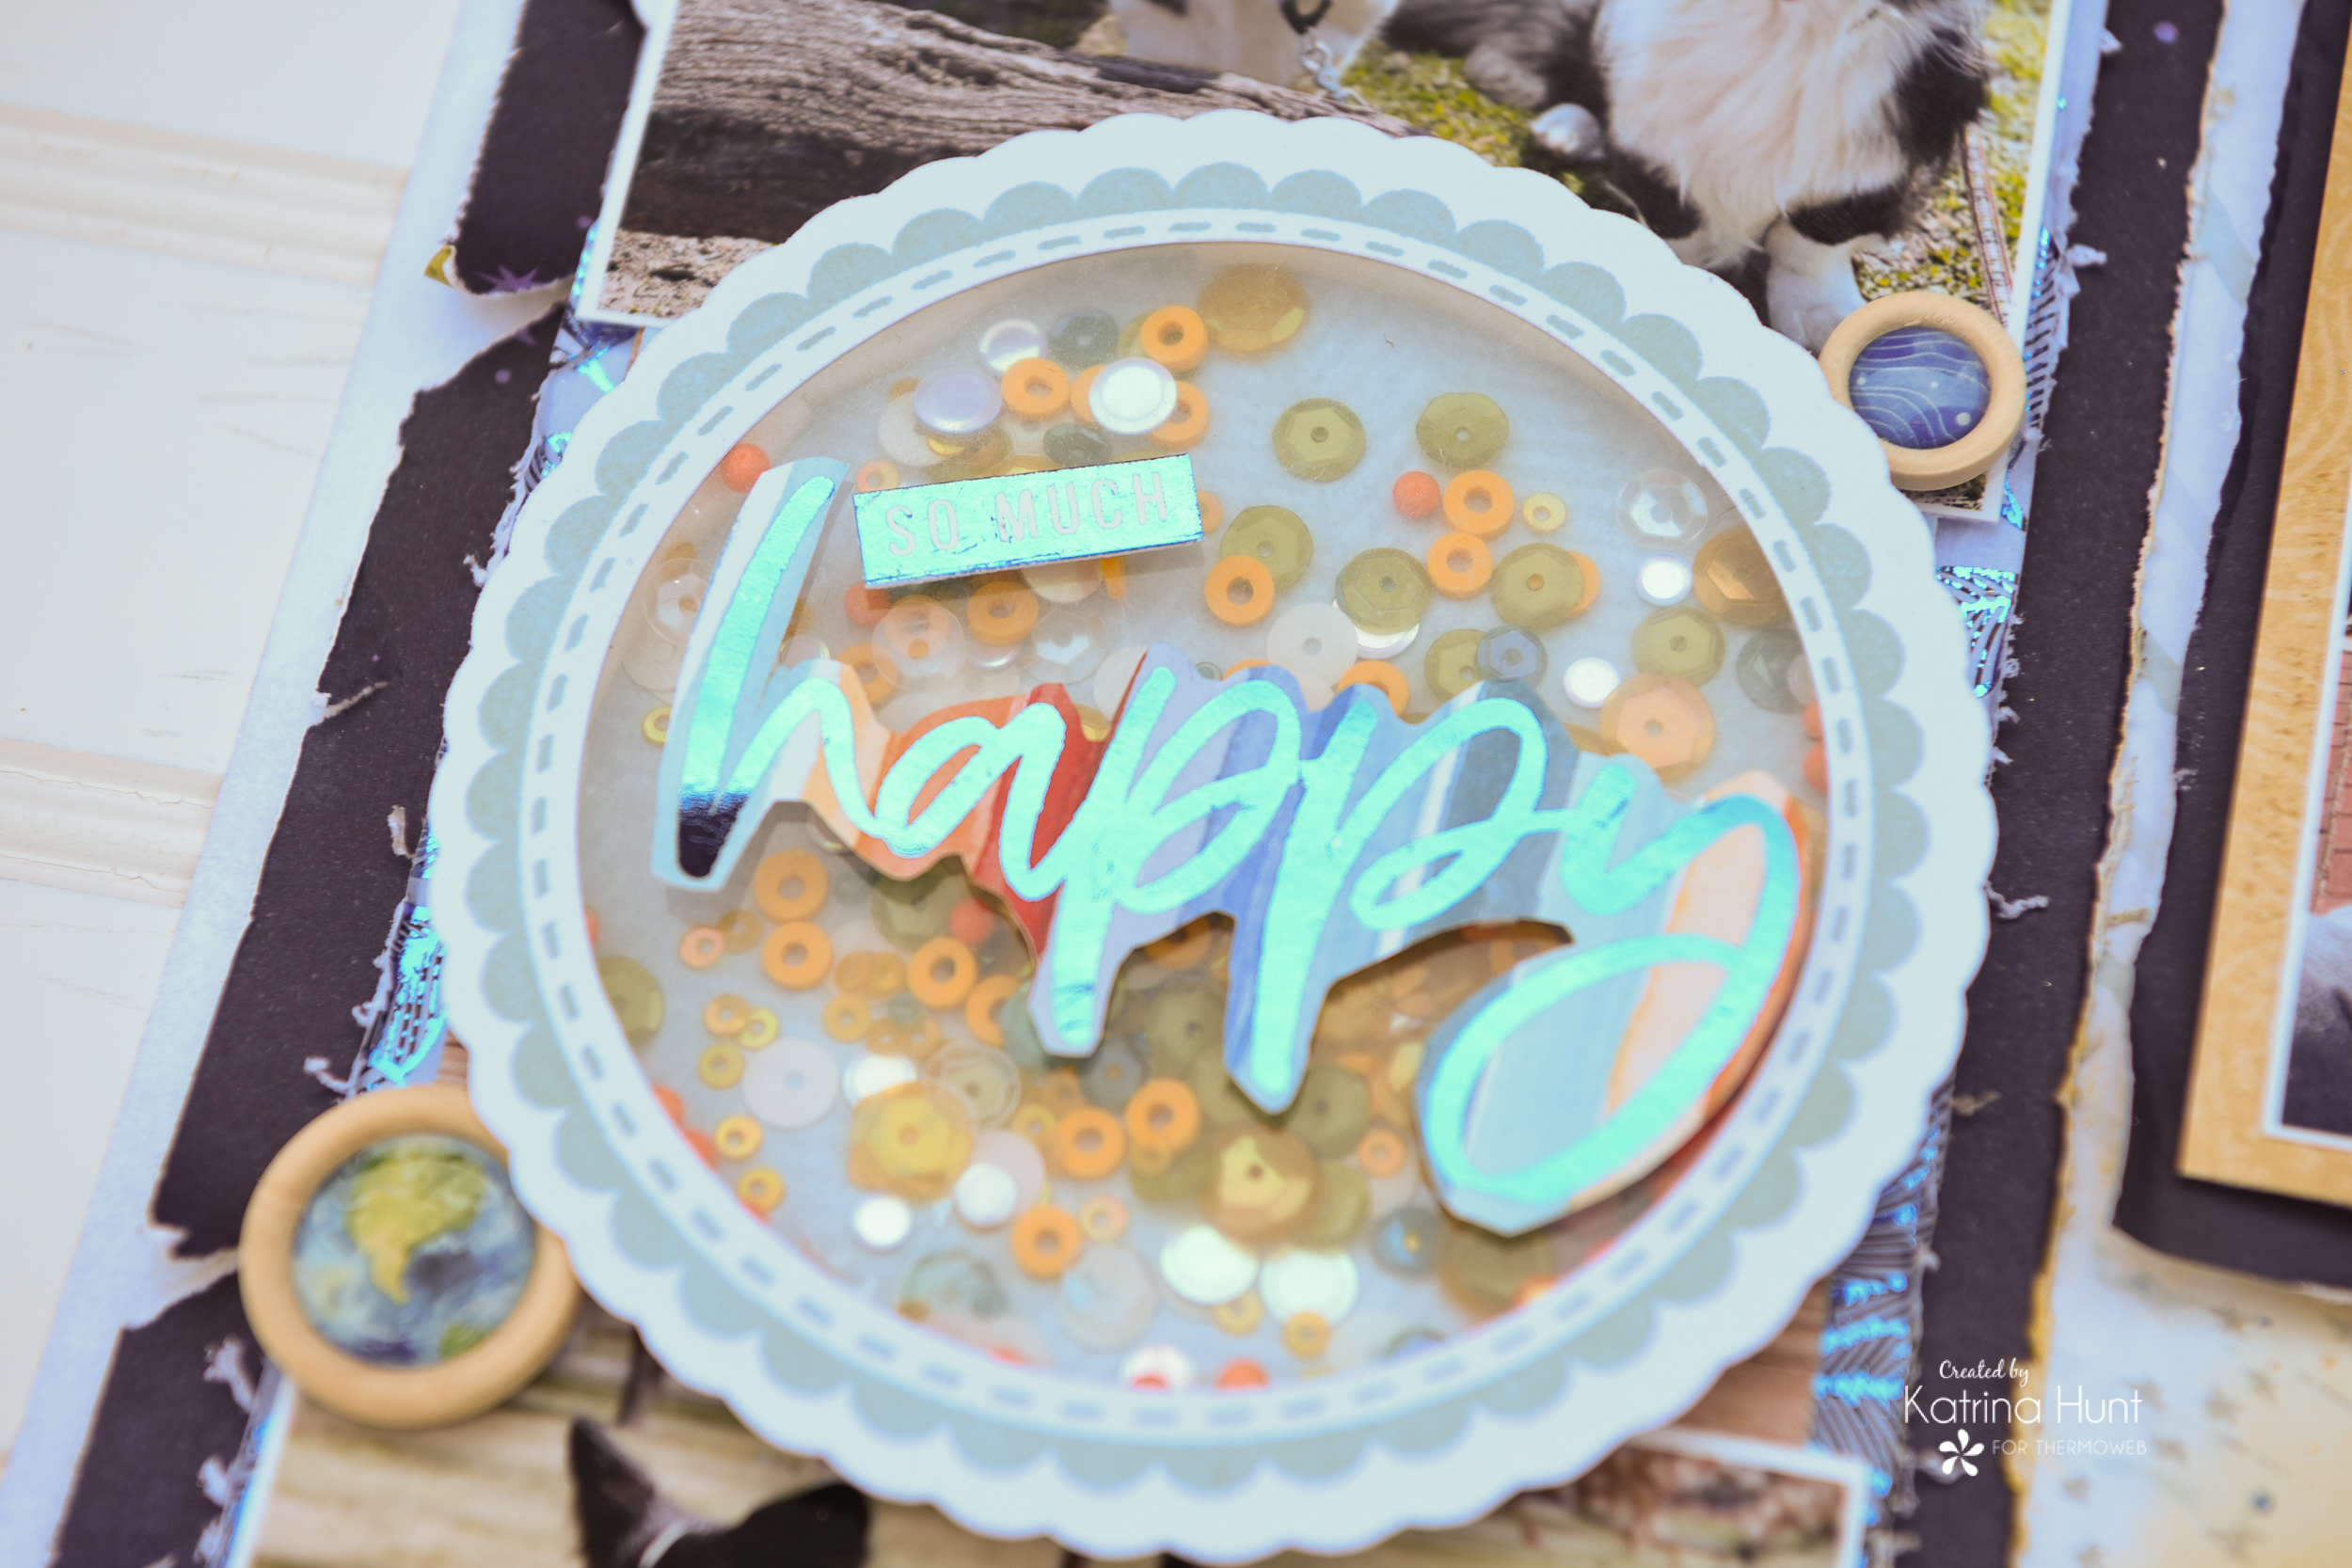
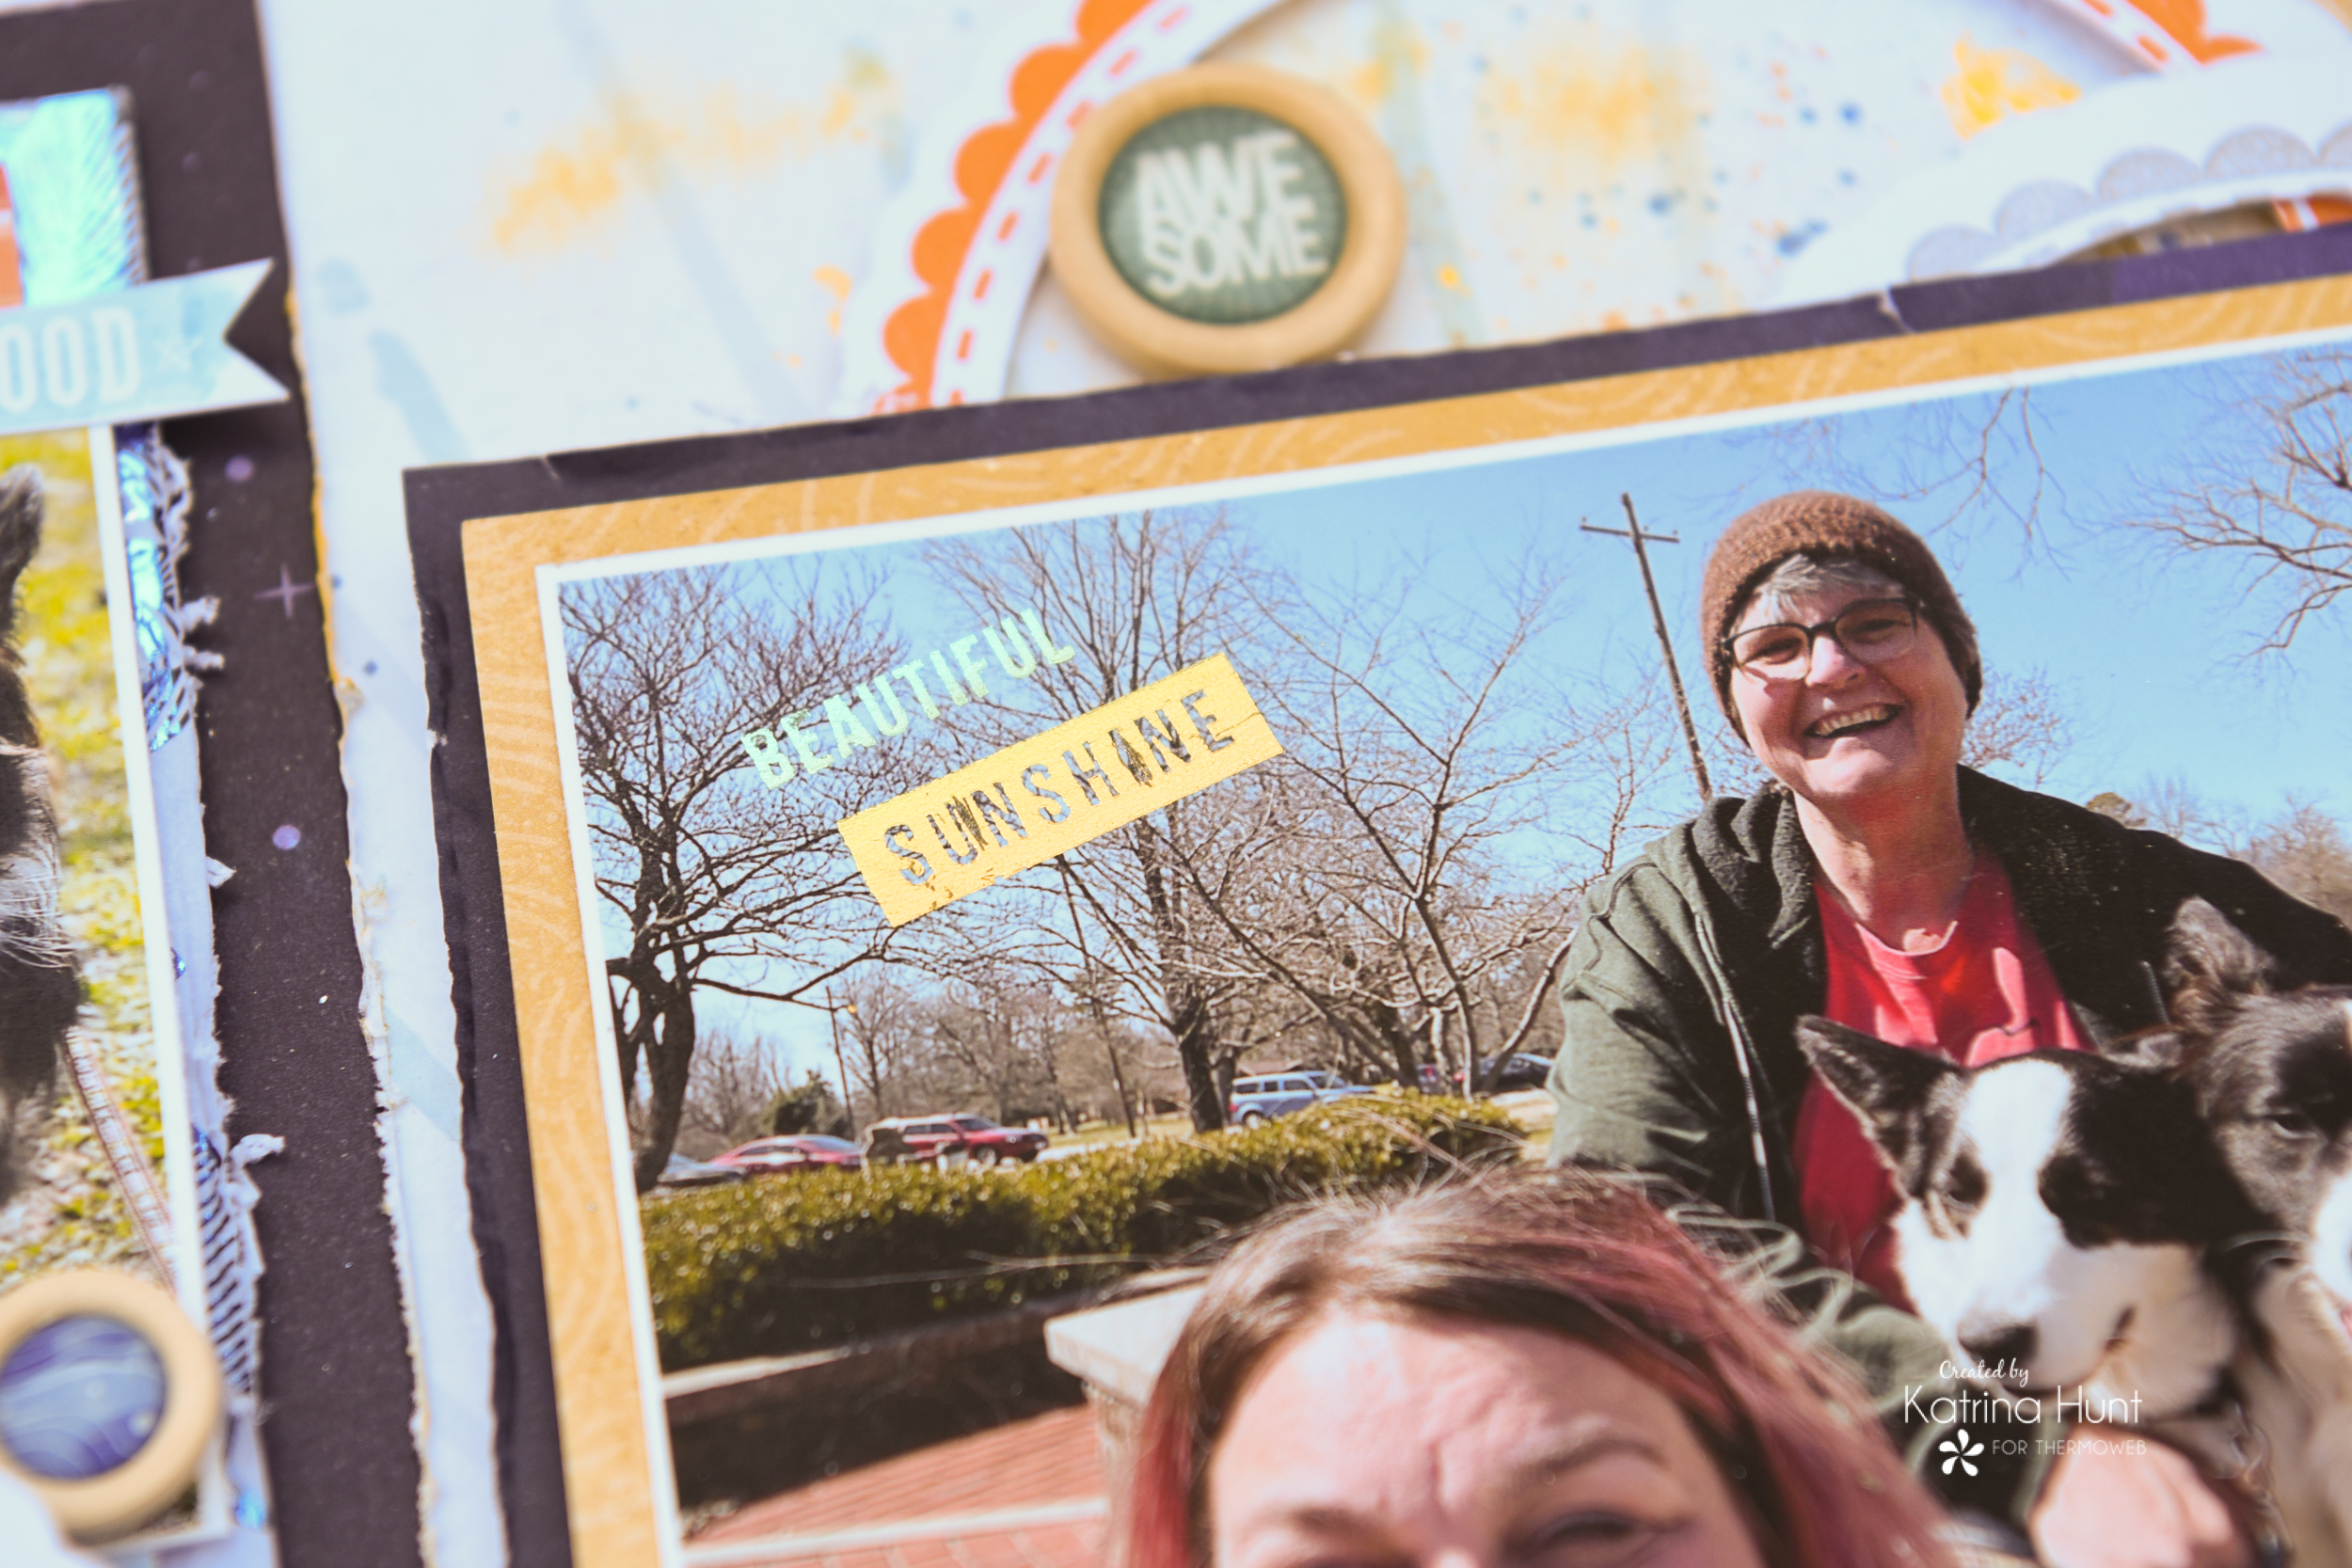
First of all, I decided what I was going to use from the new Unity Sentiments 1 and Sentiments 2 sheets on my layout. These are similar to a rub-on but so fun and you can do a lot with them, but more on that in a minute! I used the “so much” “happy” “beautiful” and “sunshine” sayings on my layout. Who says these transfers are for cards only?
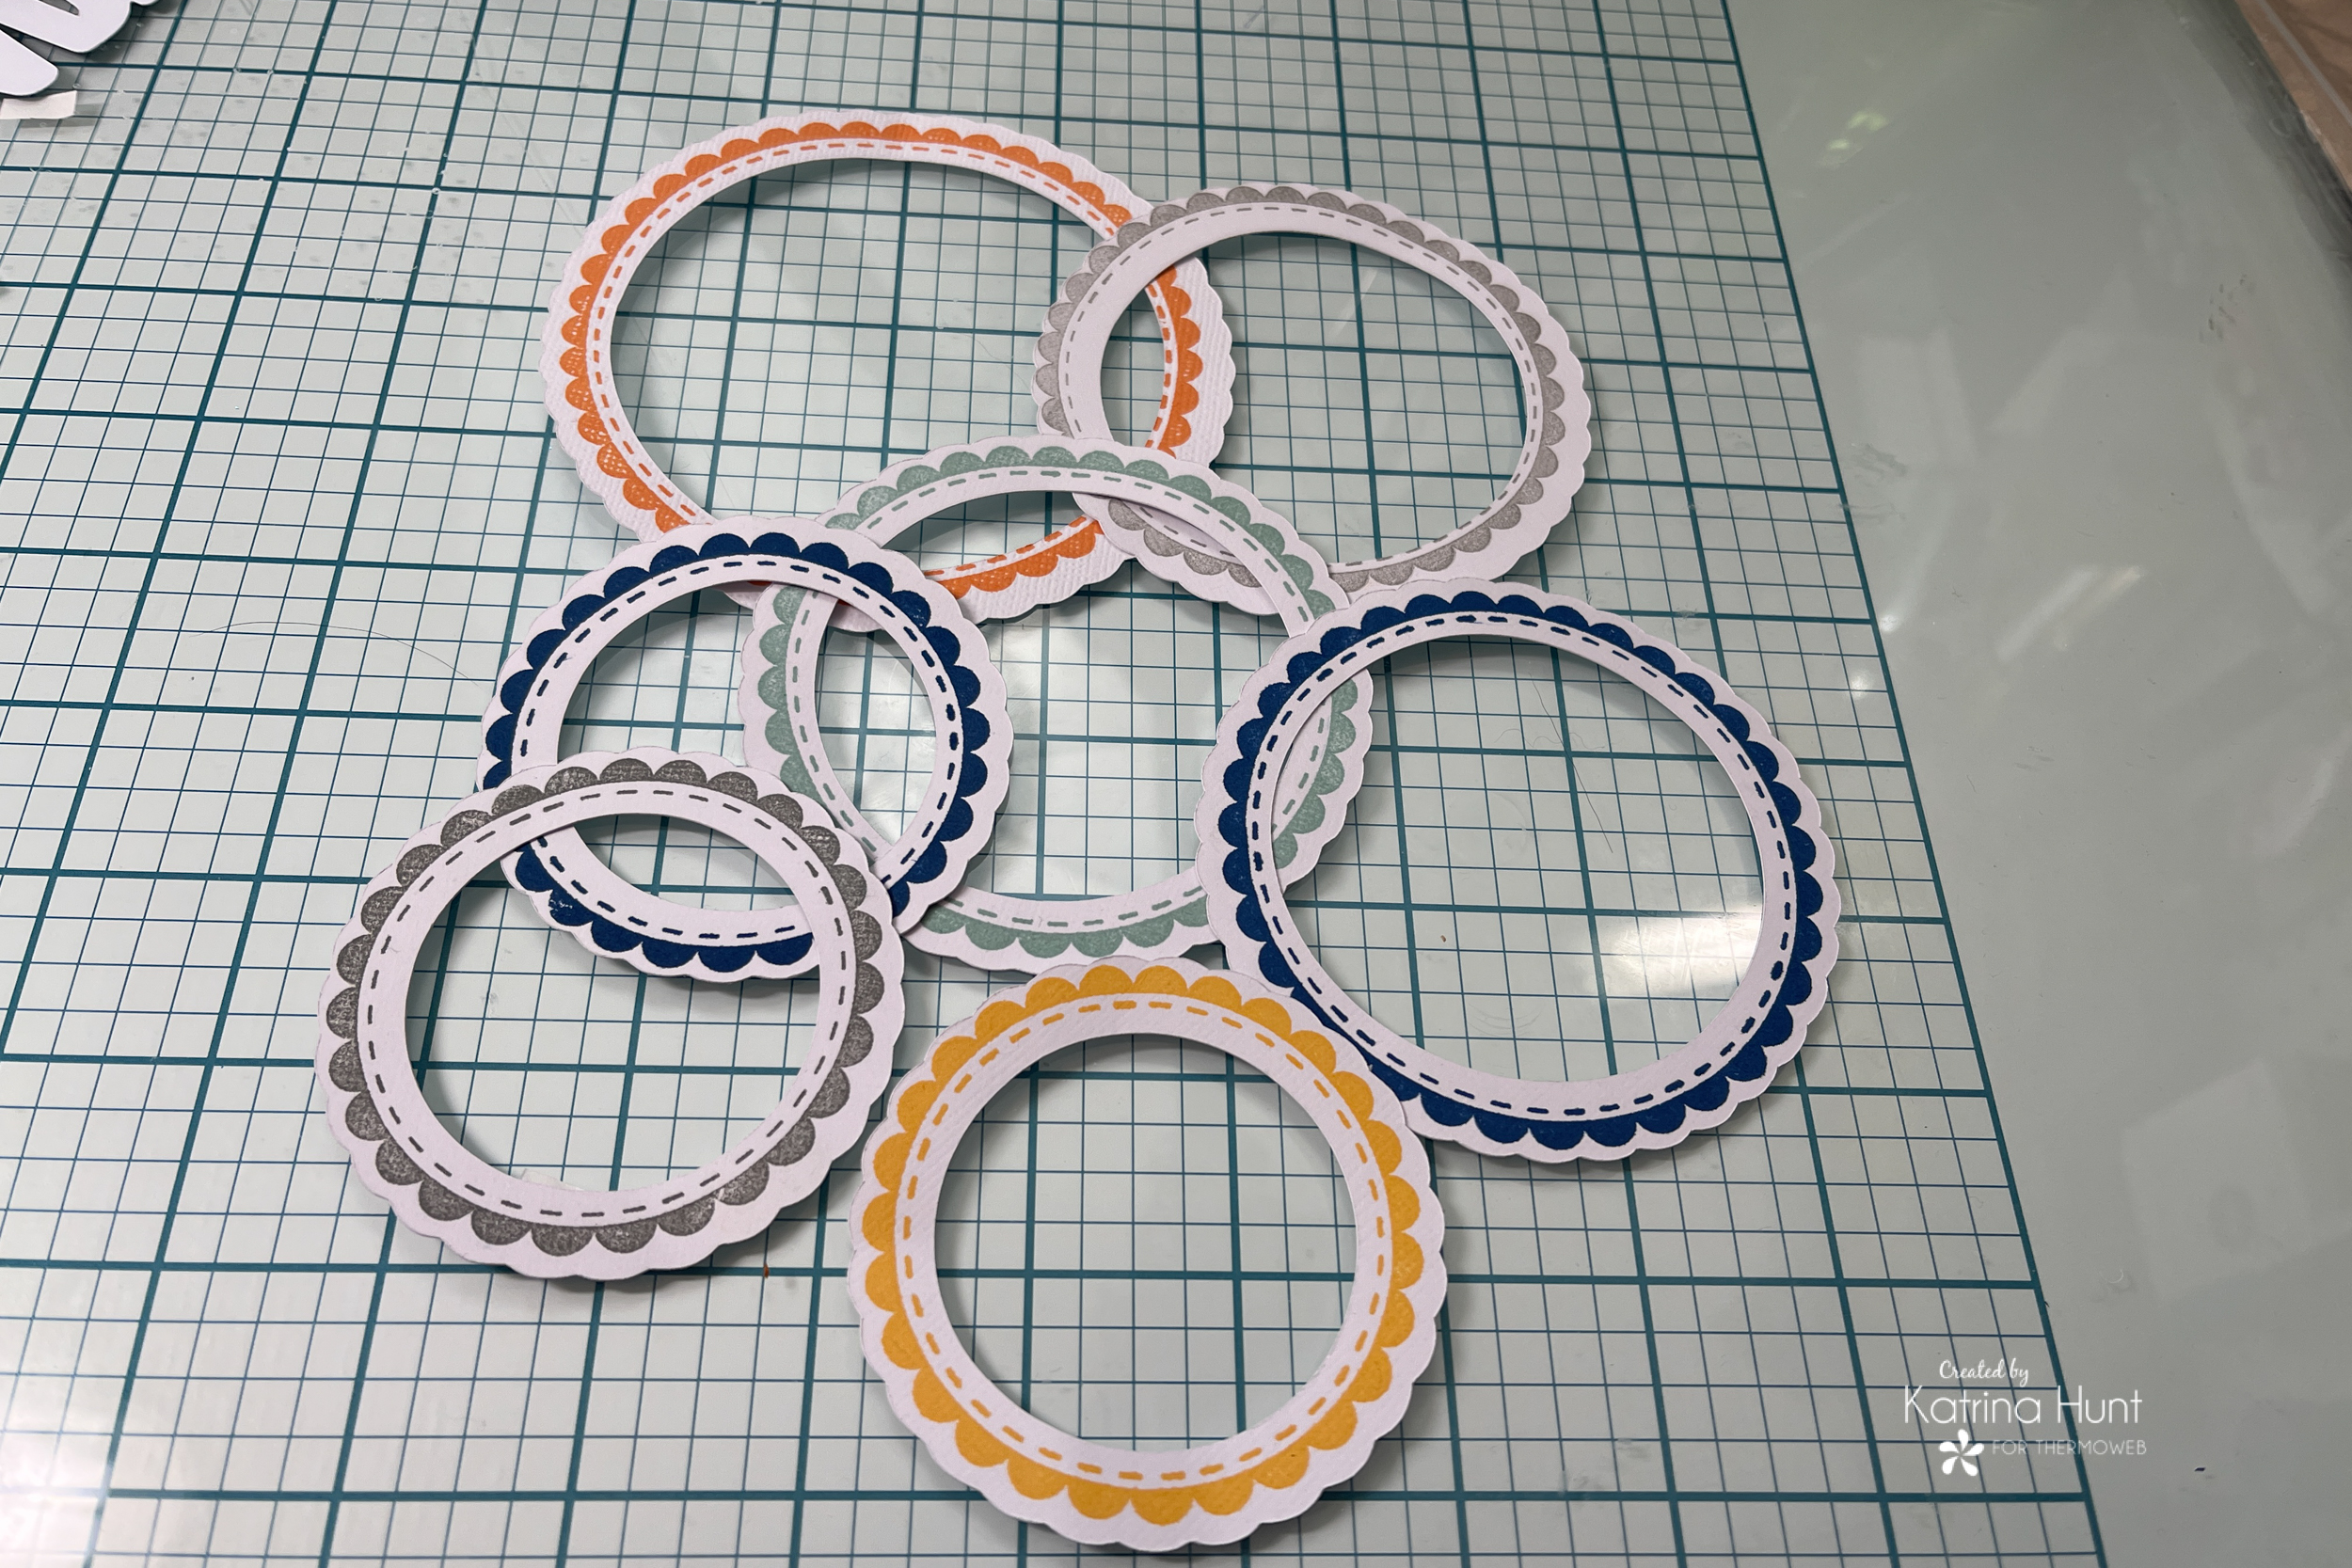
I also knew I want to use those circle scalloped stamps as accents all over my layout. So, I used the cut file for the stamps and cut out a bunch of die cuts with my Cameo. Next, I used my Misti to get the stamps lined up. I attached the die cuts to my Misti with the new Pixie Dots. I used four dots for all of the stamping I did, by reusing them! They work great for multiple stamping like this! I stamped in a few Catherine Pooler ink colors that matched the paper collection!
SHAKER CONSTRUCTION
Once I had the circles stamped, I moved on to design the rest of my layout. I knew I wanted to make a shaker to incorporate into my layout and decided a bigger shaker would be fun. Because of the shaker size, I planned for an area to feature it on one side. I used one of the large stamped circle scallops for the top of my shaker. I used another circle die that was slightly bigger than the inside circle and cut out one from pattern paper and another one from the Deco Foil Clear Toner Sheets-Printables to use as my see-thru shaker cover. 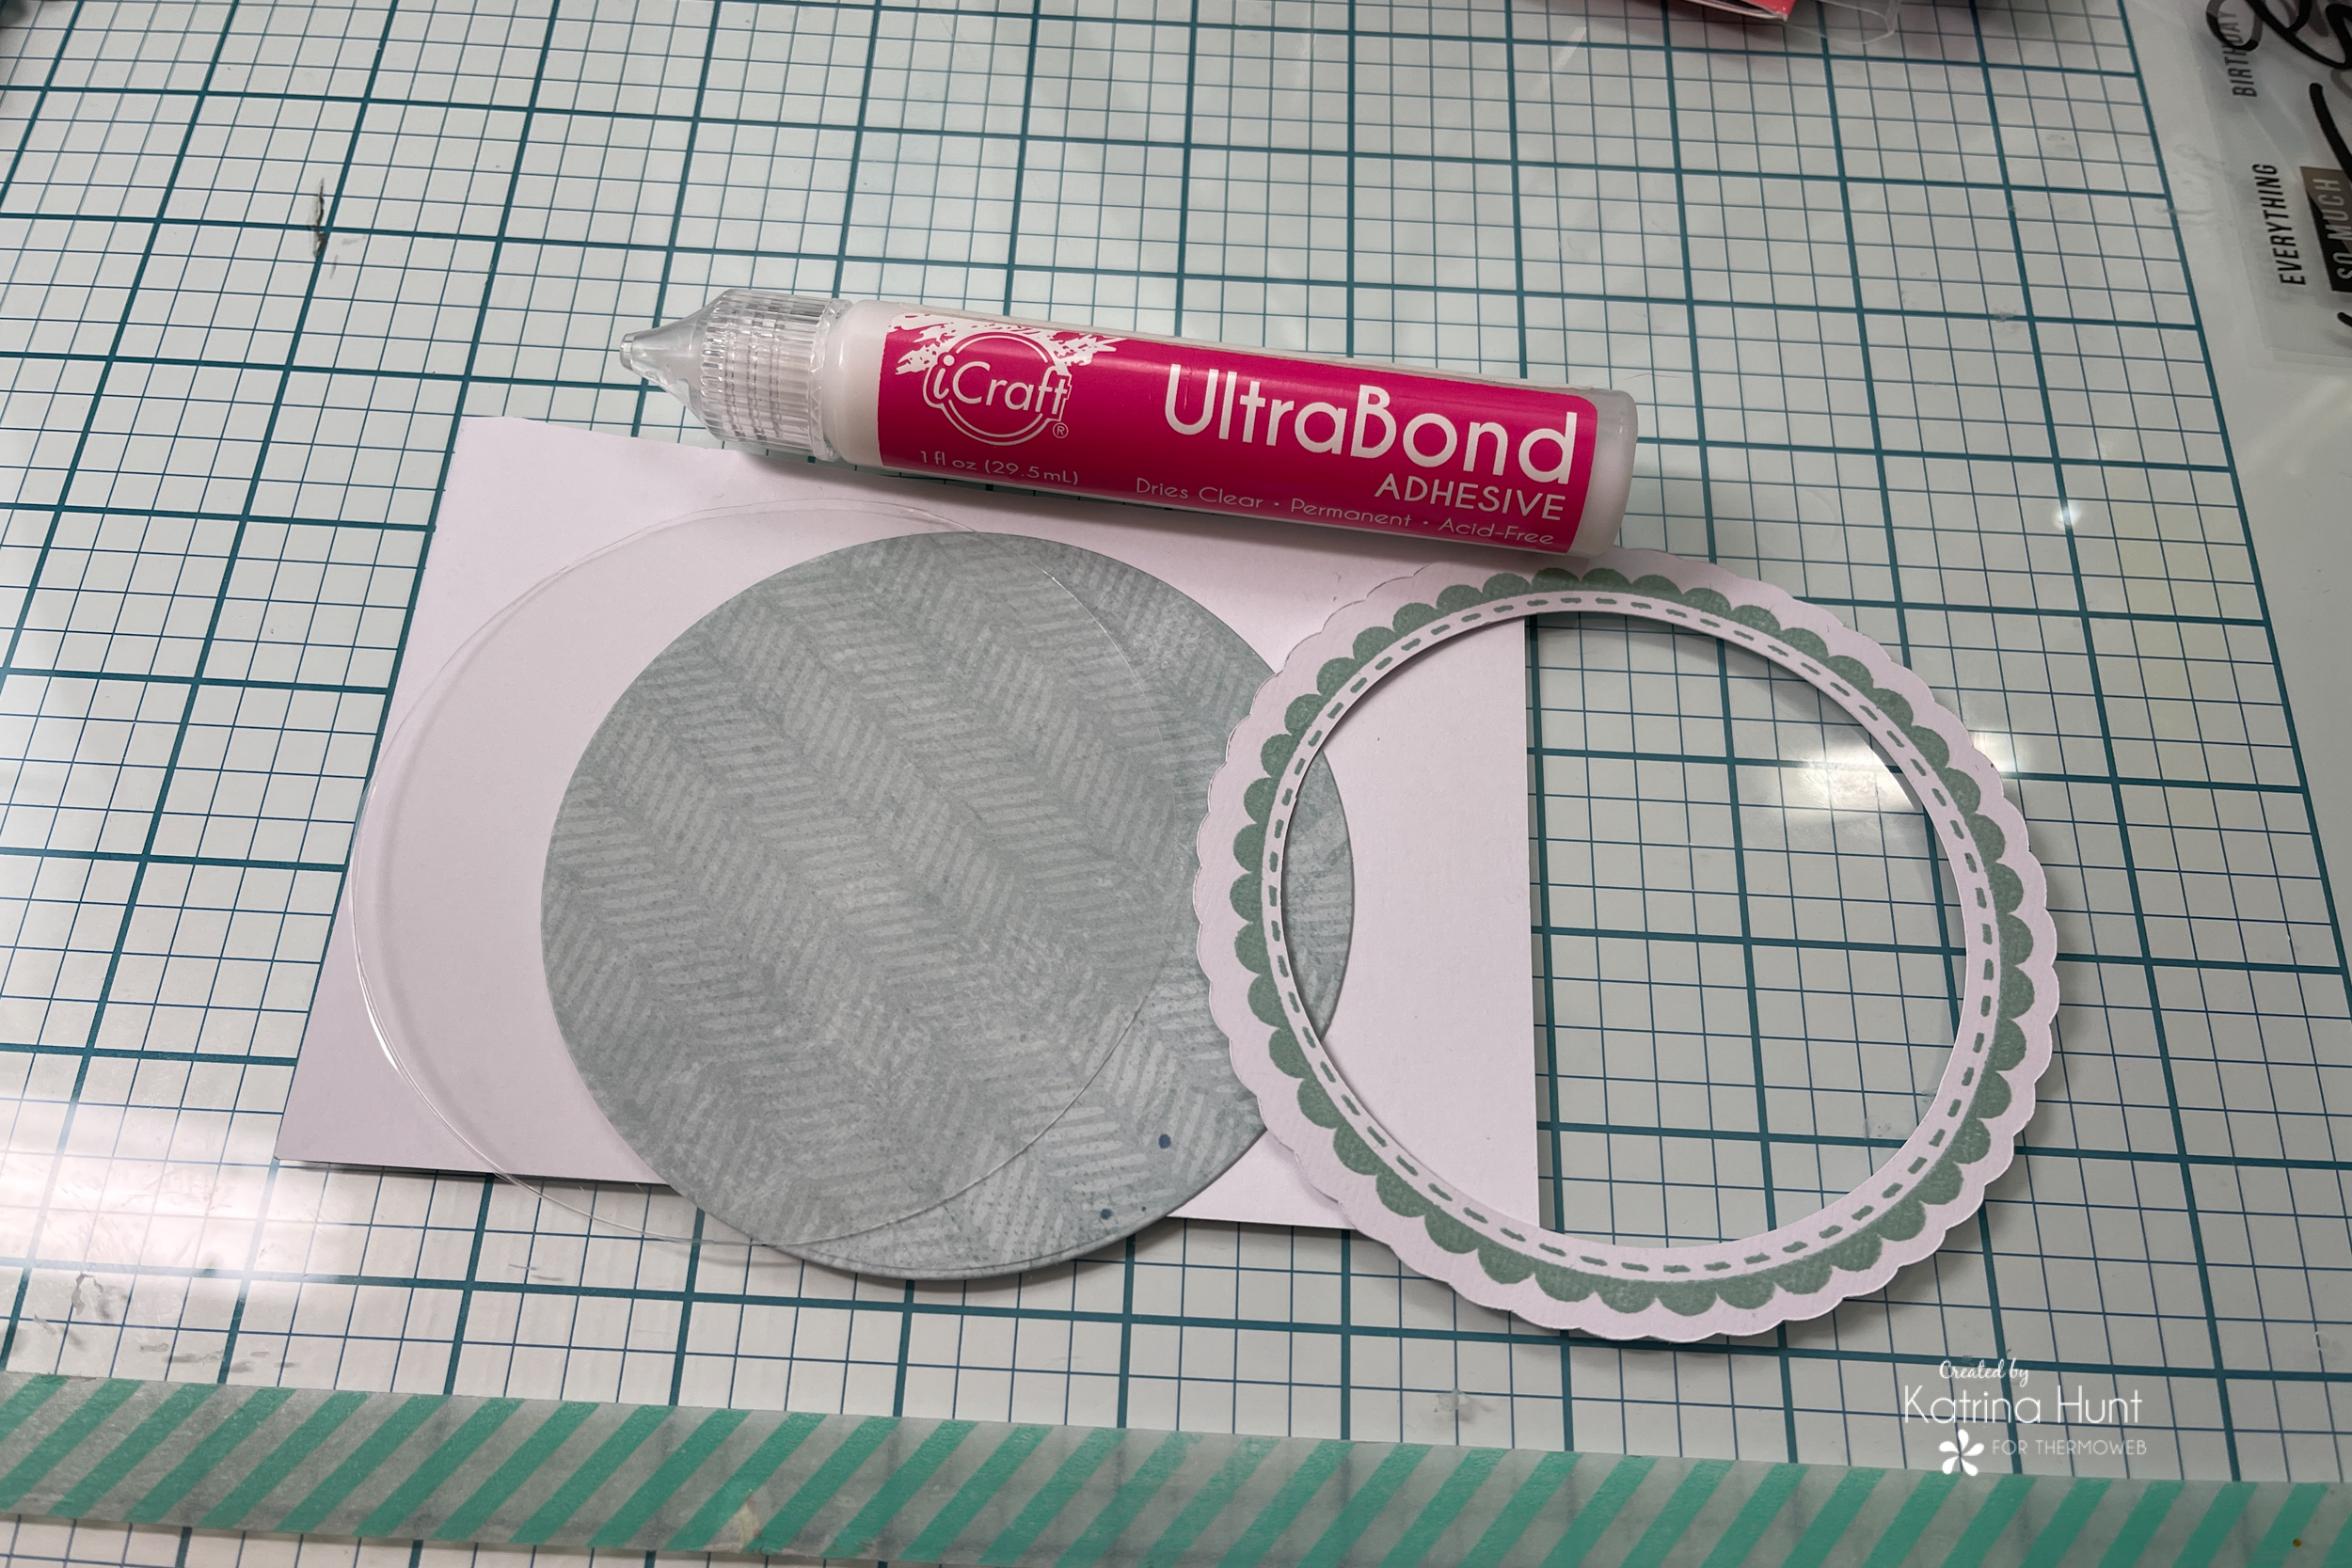
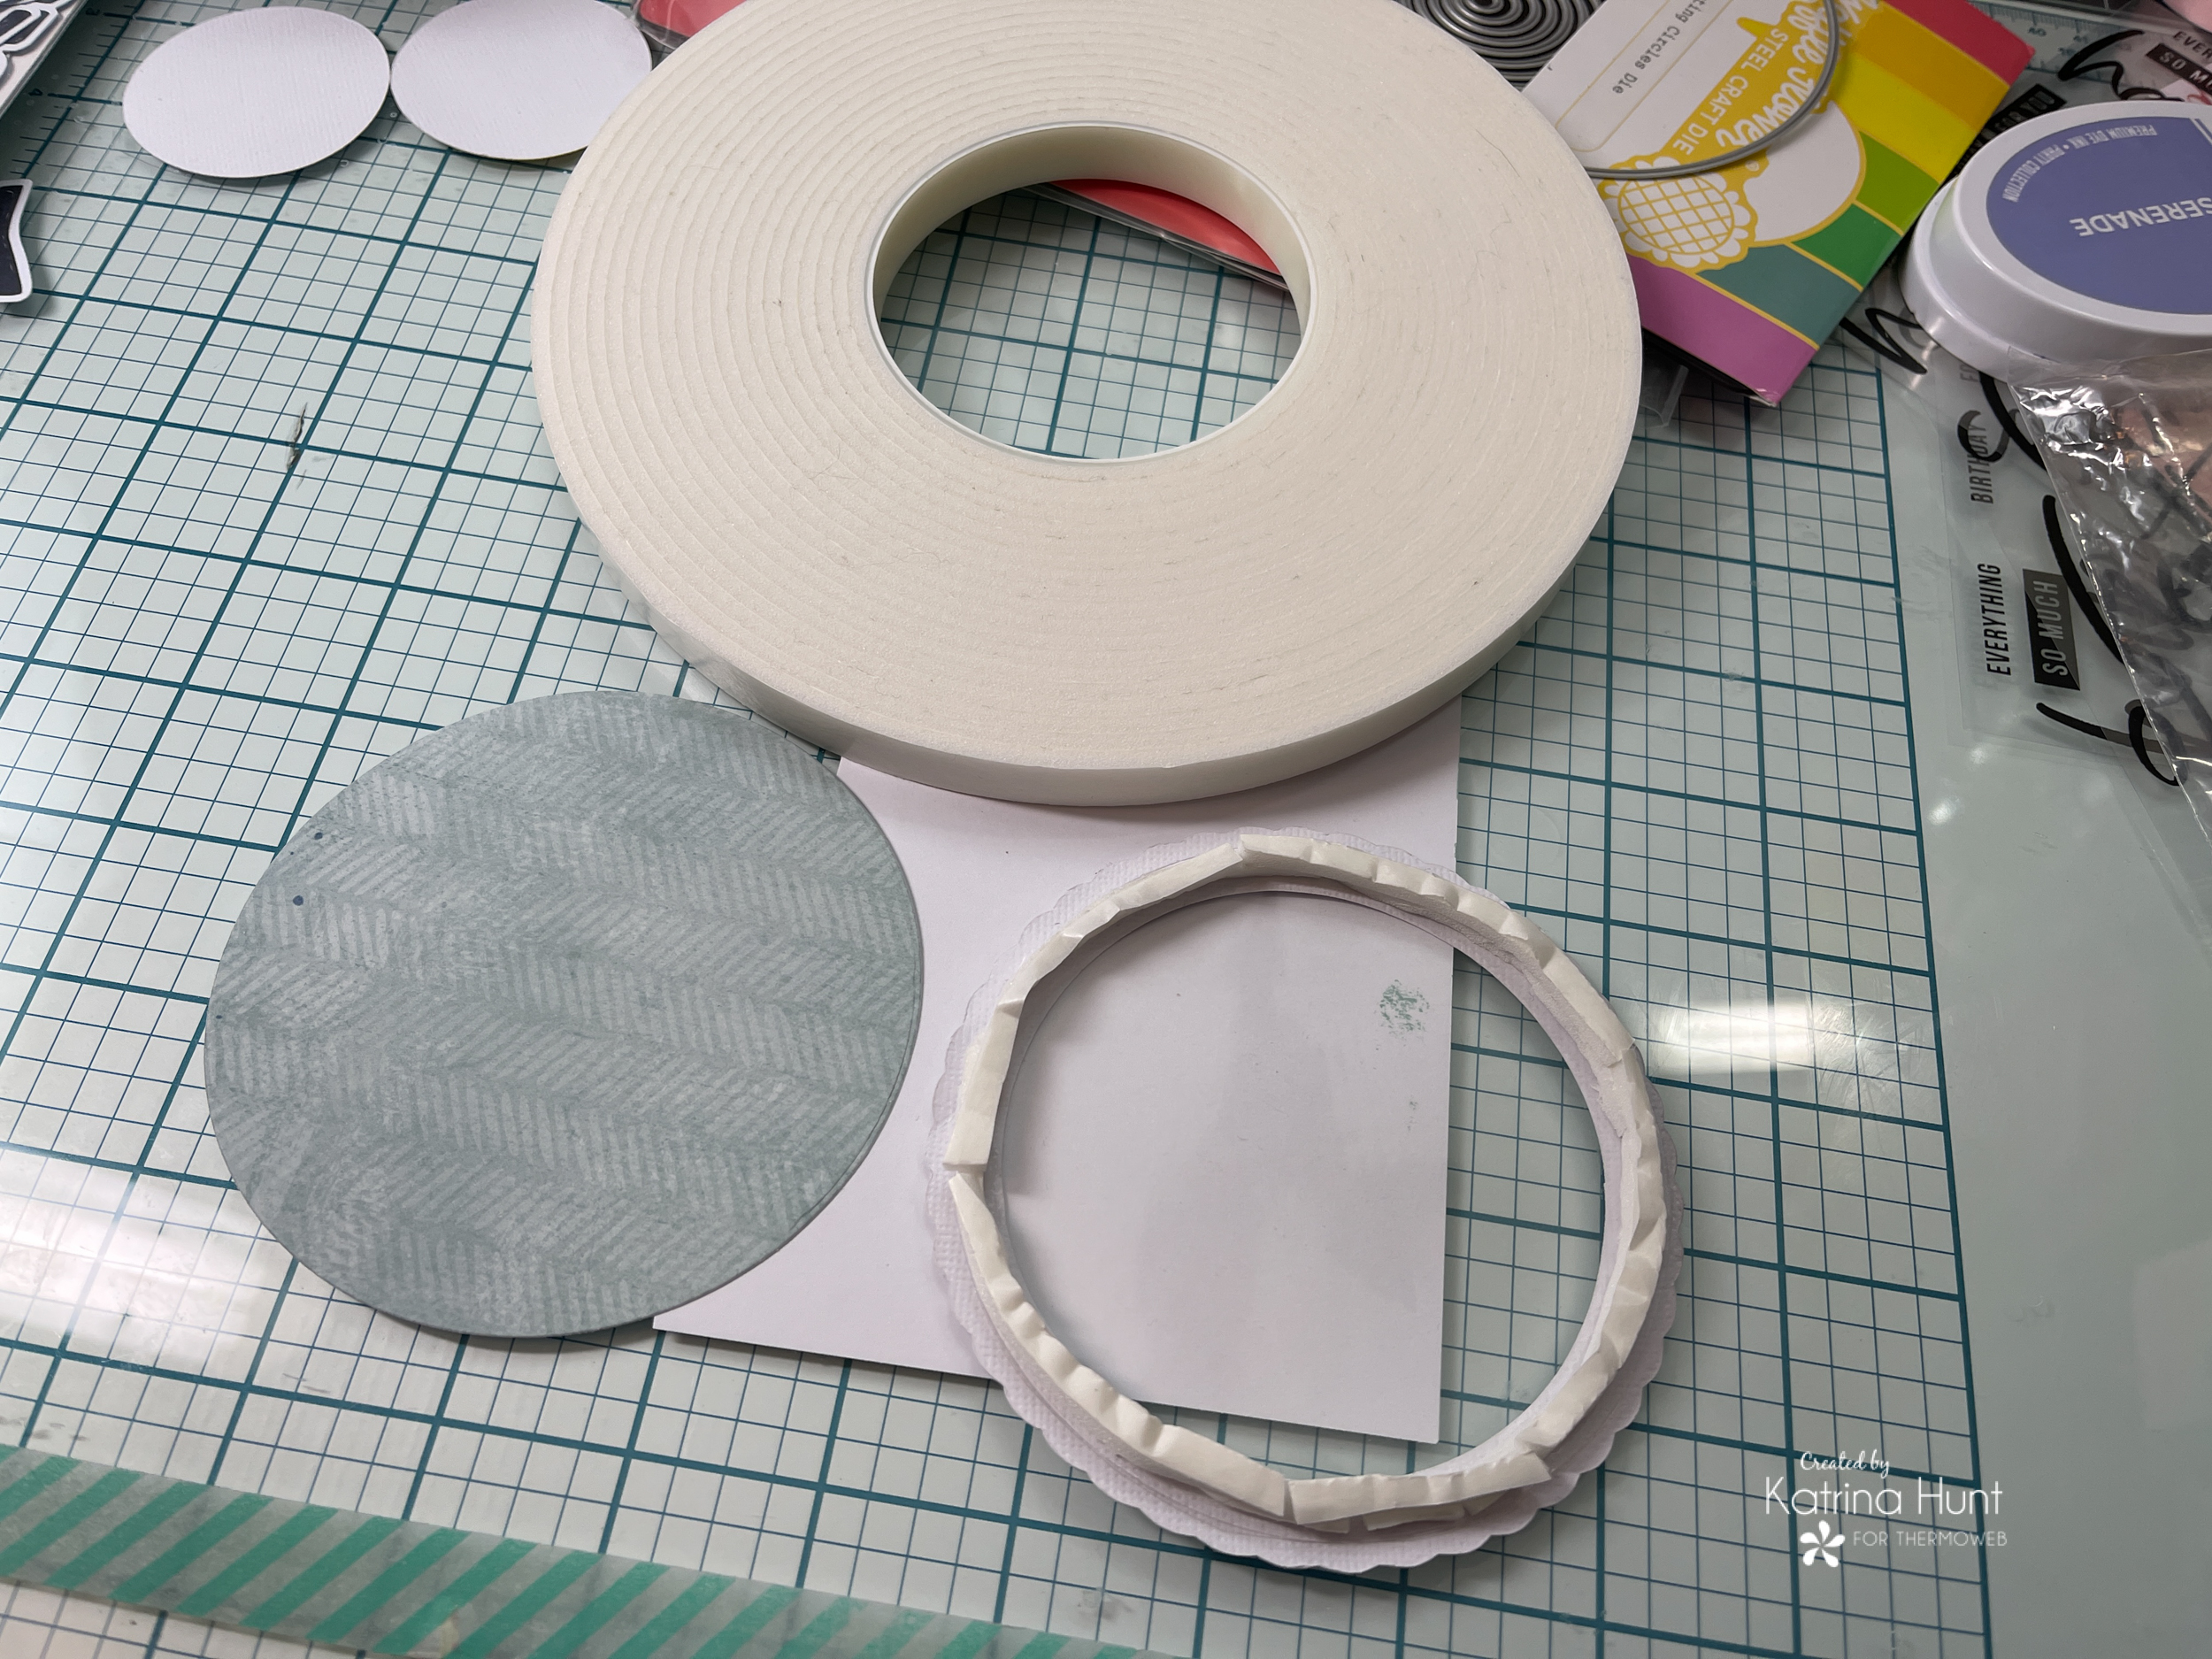
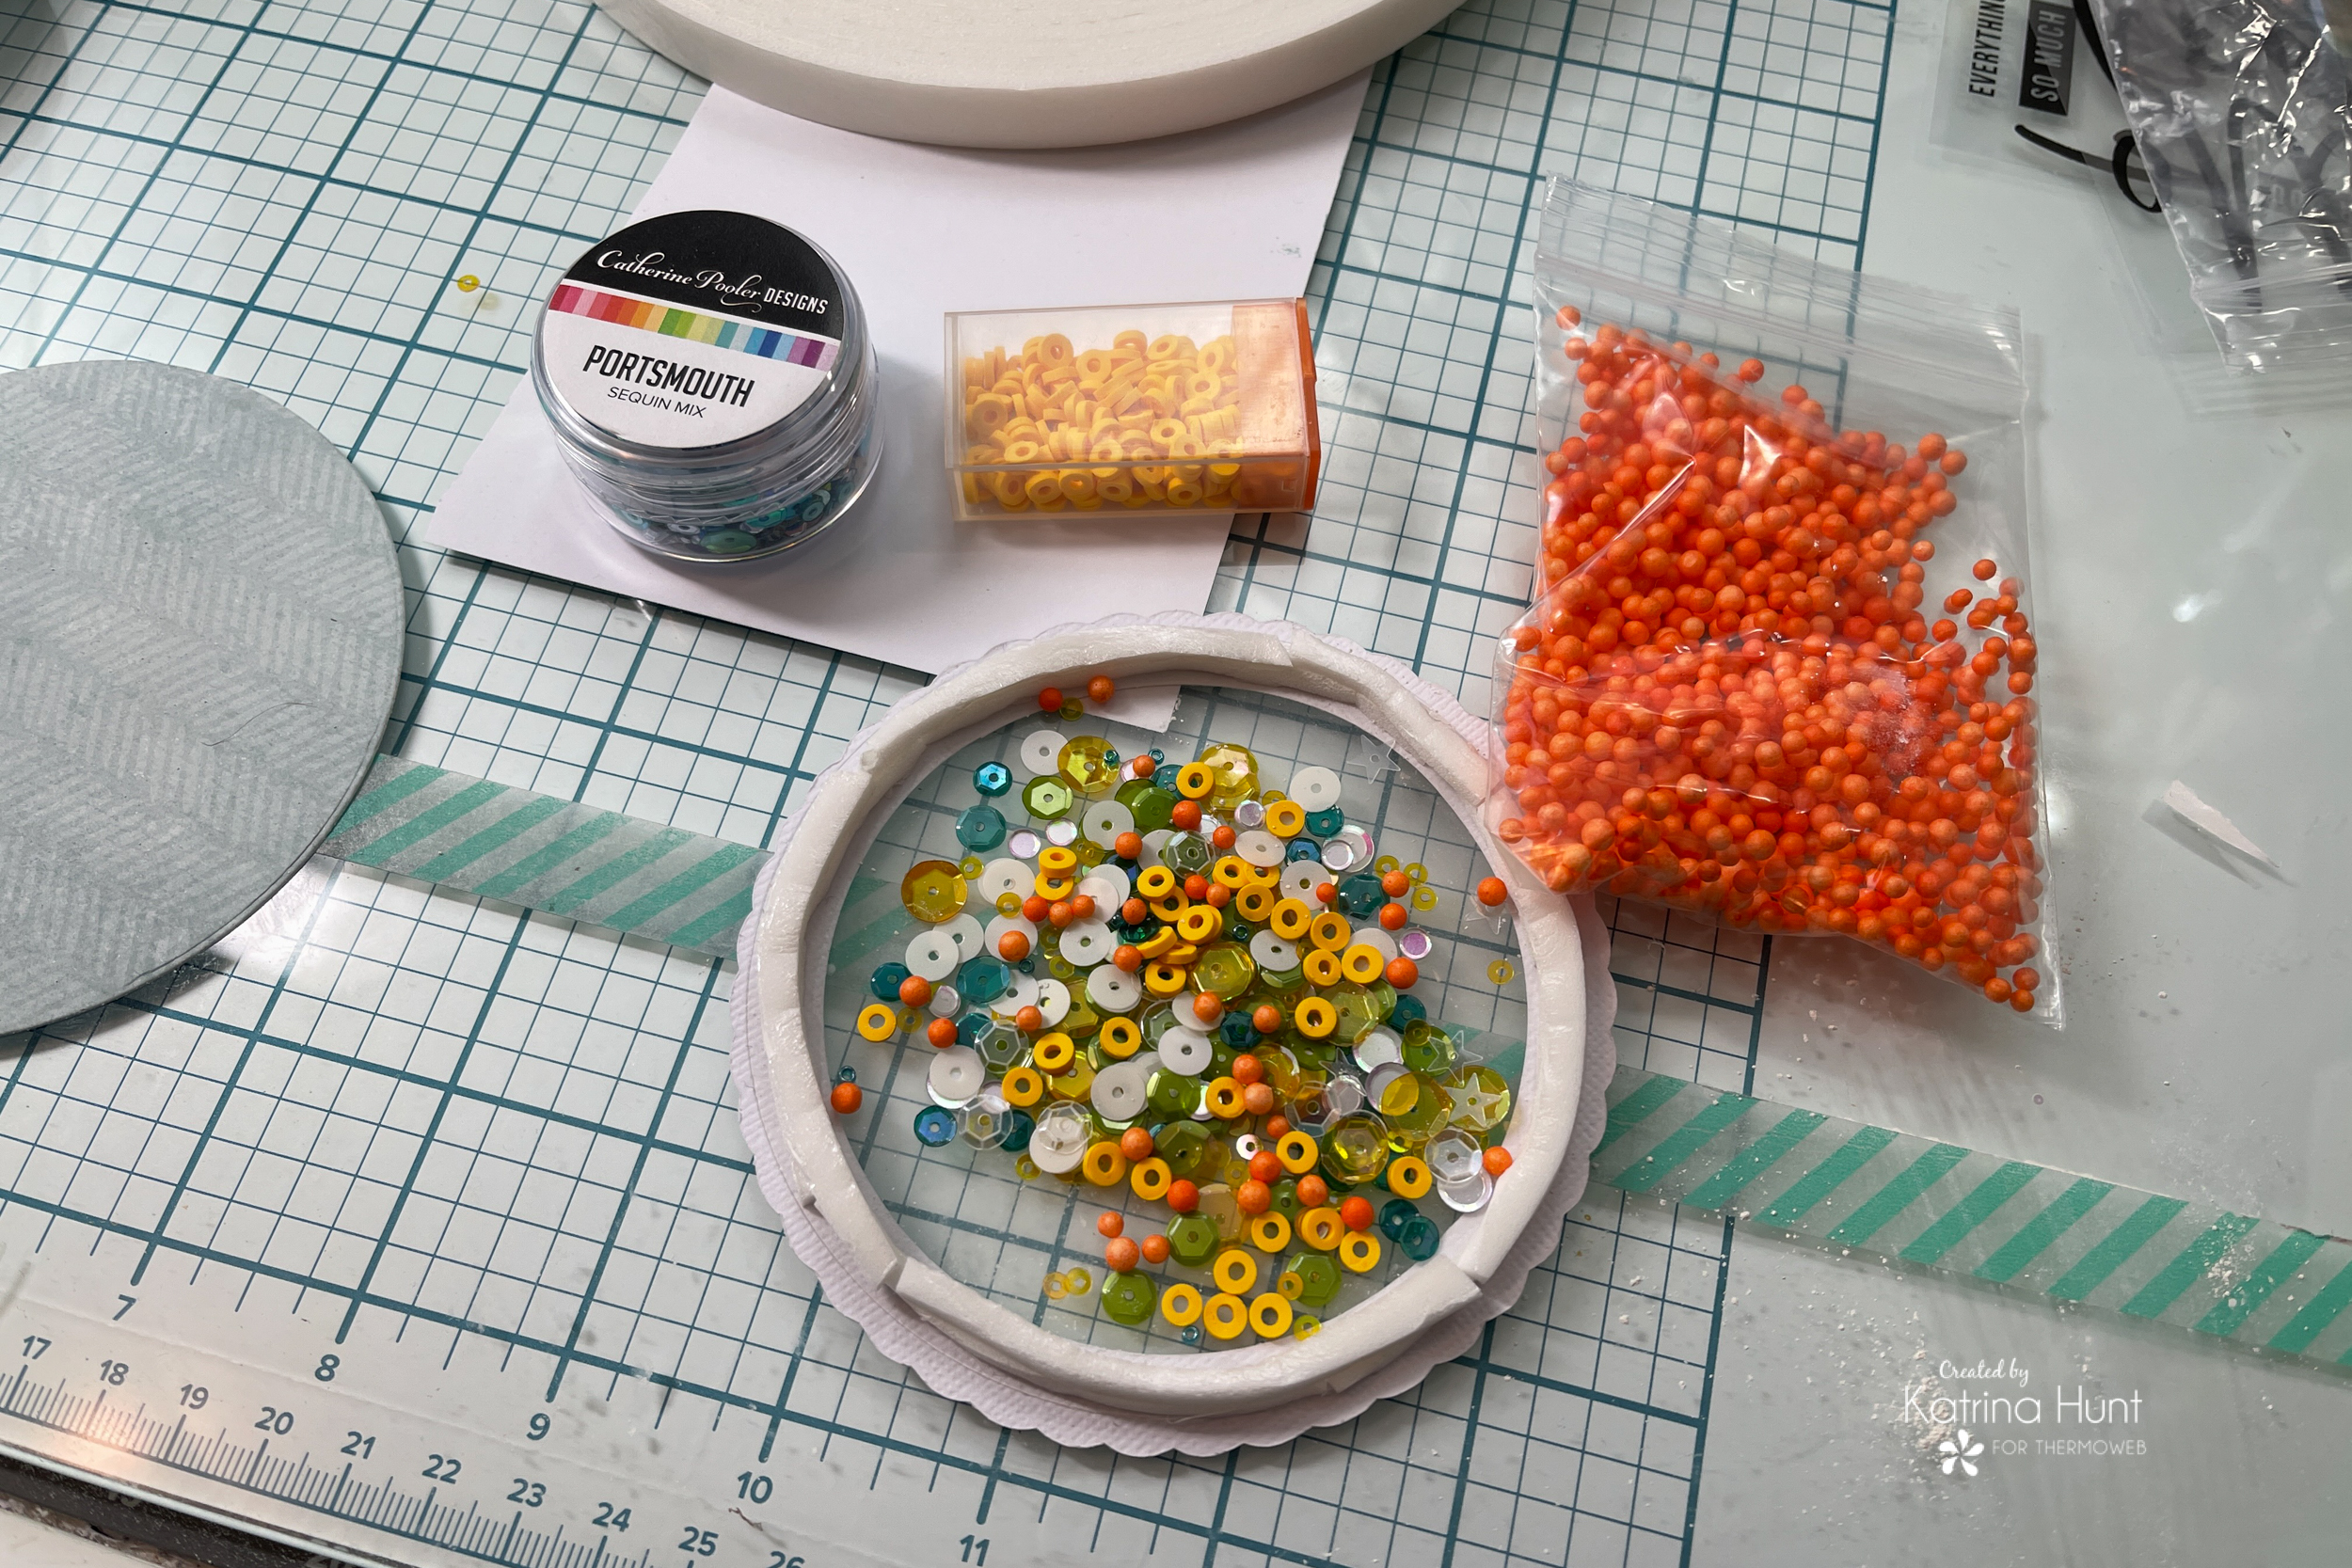
Using the UltraBond Liquid Adhesive I adhered the stamped circle to the front of the clear circle that I had die cut. Once the two die cuts had dried a little, I lined the back outside of the clear piece with our new Tape Foam Adhesive in 1/8th inch. I actually did two layers of this, because I wanted to make sure the shaker bits would move. Also, I am not a shaker pro, so I wasn’t sure one layer would work! Once I had the ring of foam adhesive, I added my shaker bits in there. If anyone has tips on how to know how much to add, let me know in the comments. I was guessing and lucked out here!
After I added the shaker bits, I removed the protective backing on the adhesive and applied my pattern paper background. Now here comes the fun part of decorating the front of the shaker!
USING THE NEW DECO FOIL UNITY ADHESIVE TRANSFER SHEETS
These little adhesive transfers are so much fun. They can be used with or without heat. Check out this helpful video for how to use them!
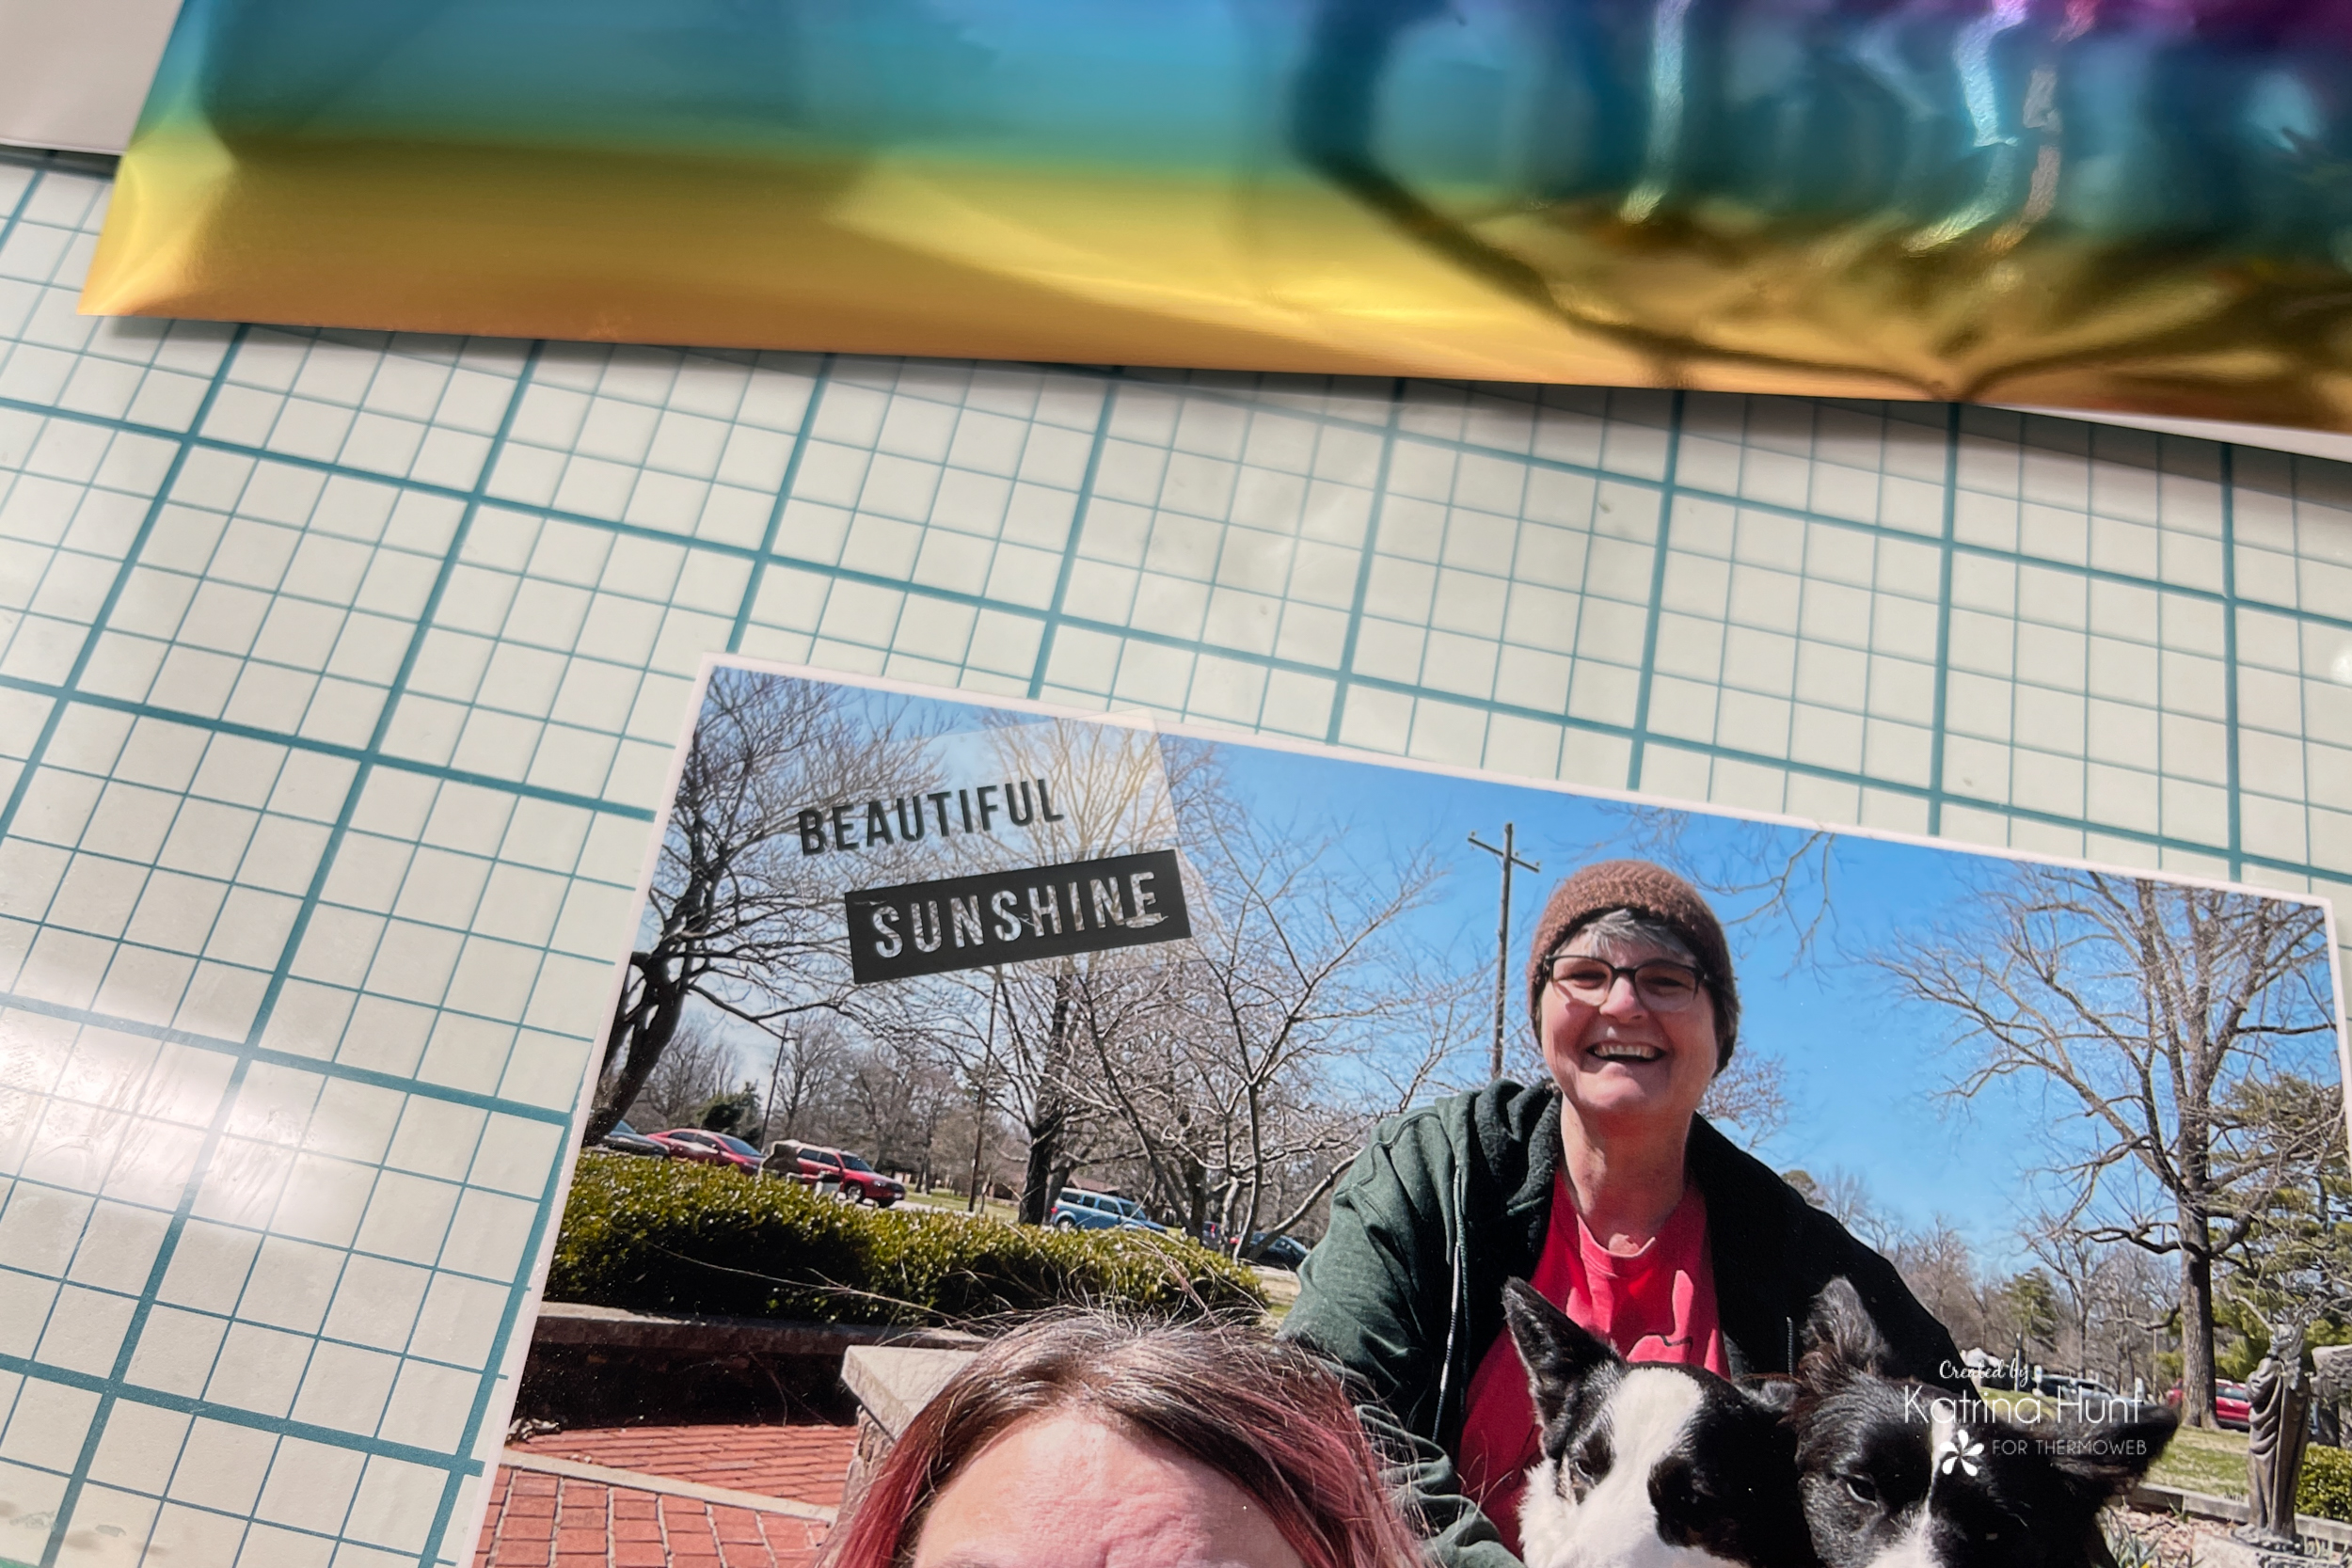
I used mine without heat for this layout, so we are going to go over that process here. To start with, cut out whatever saying you want to use. Be careful as there are actually two layers to the sheet. One is the part that has the adhesive transfer and the other part is the protective covering for that adhesive.
Just like a rub-on has two sheets! Now, carefully remove the backing, making sure not to touch any of the black areas. Lay the sheet on your chosen paper and lightly press it onto the paper. 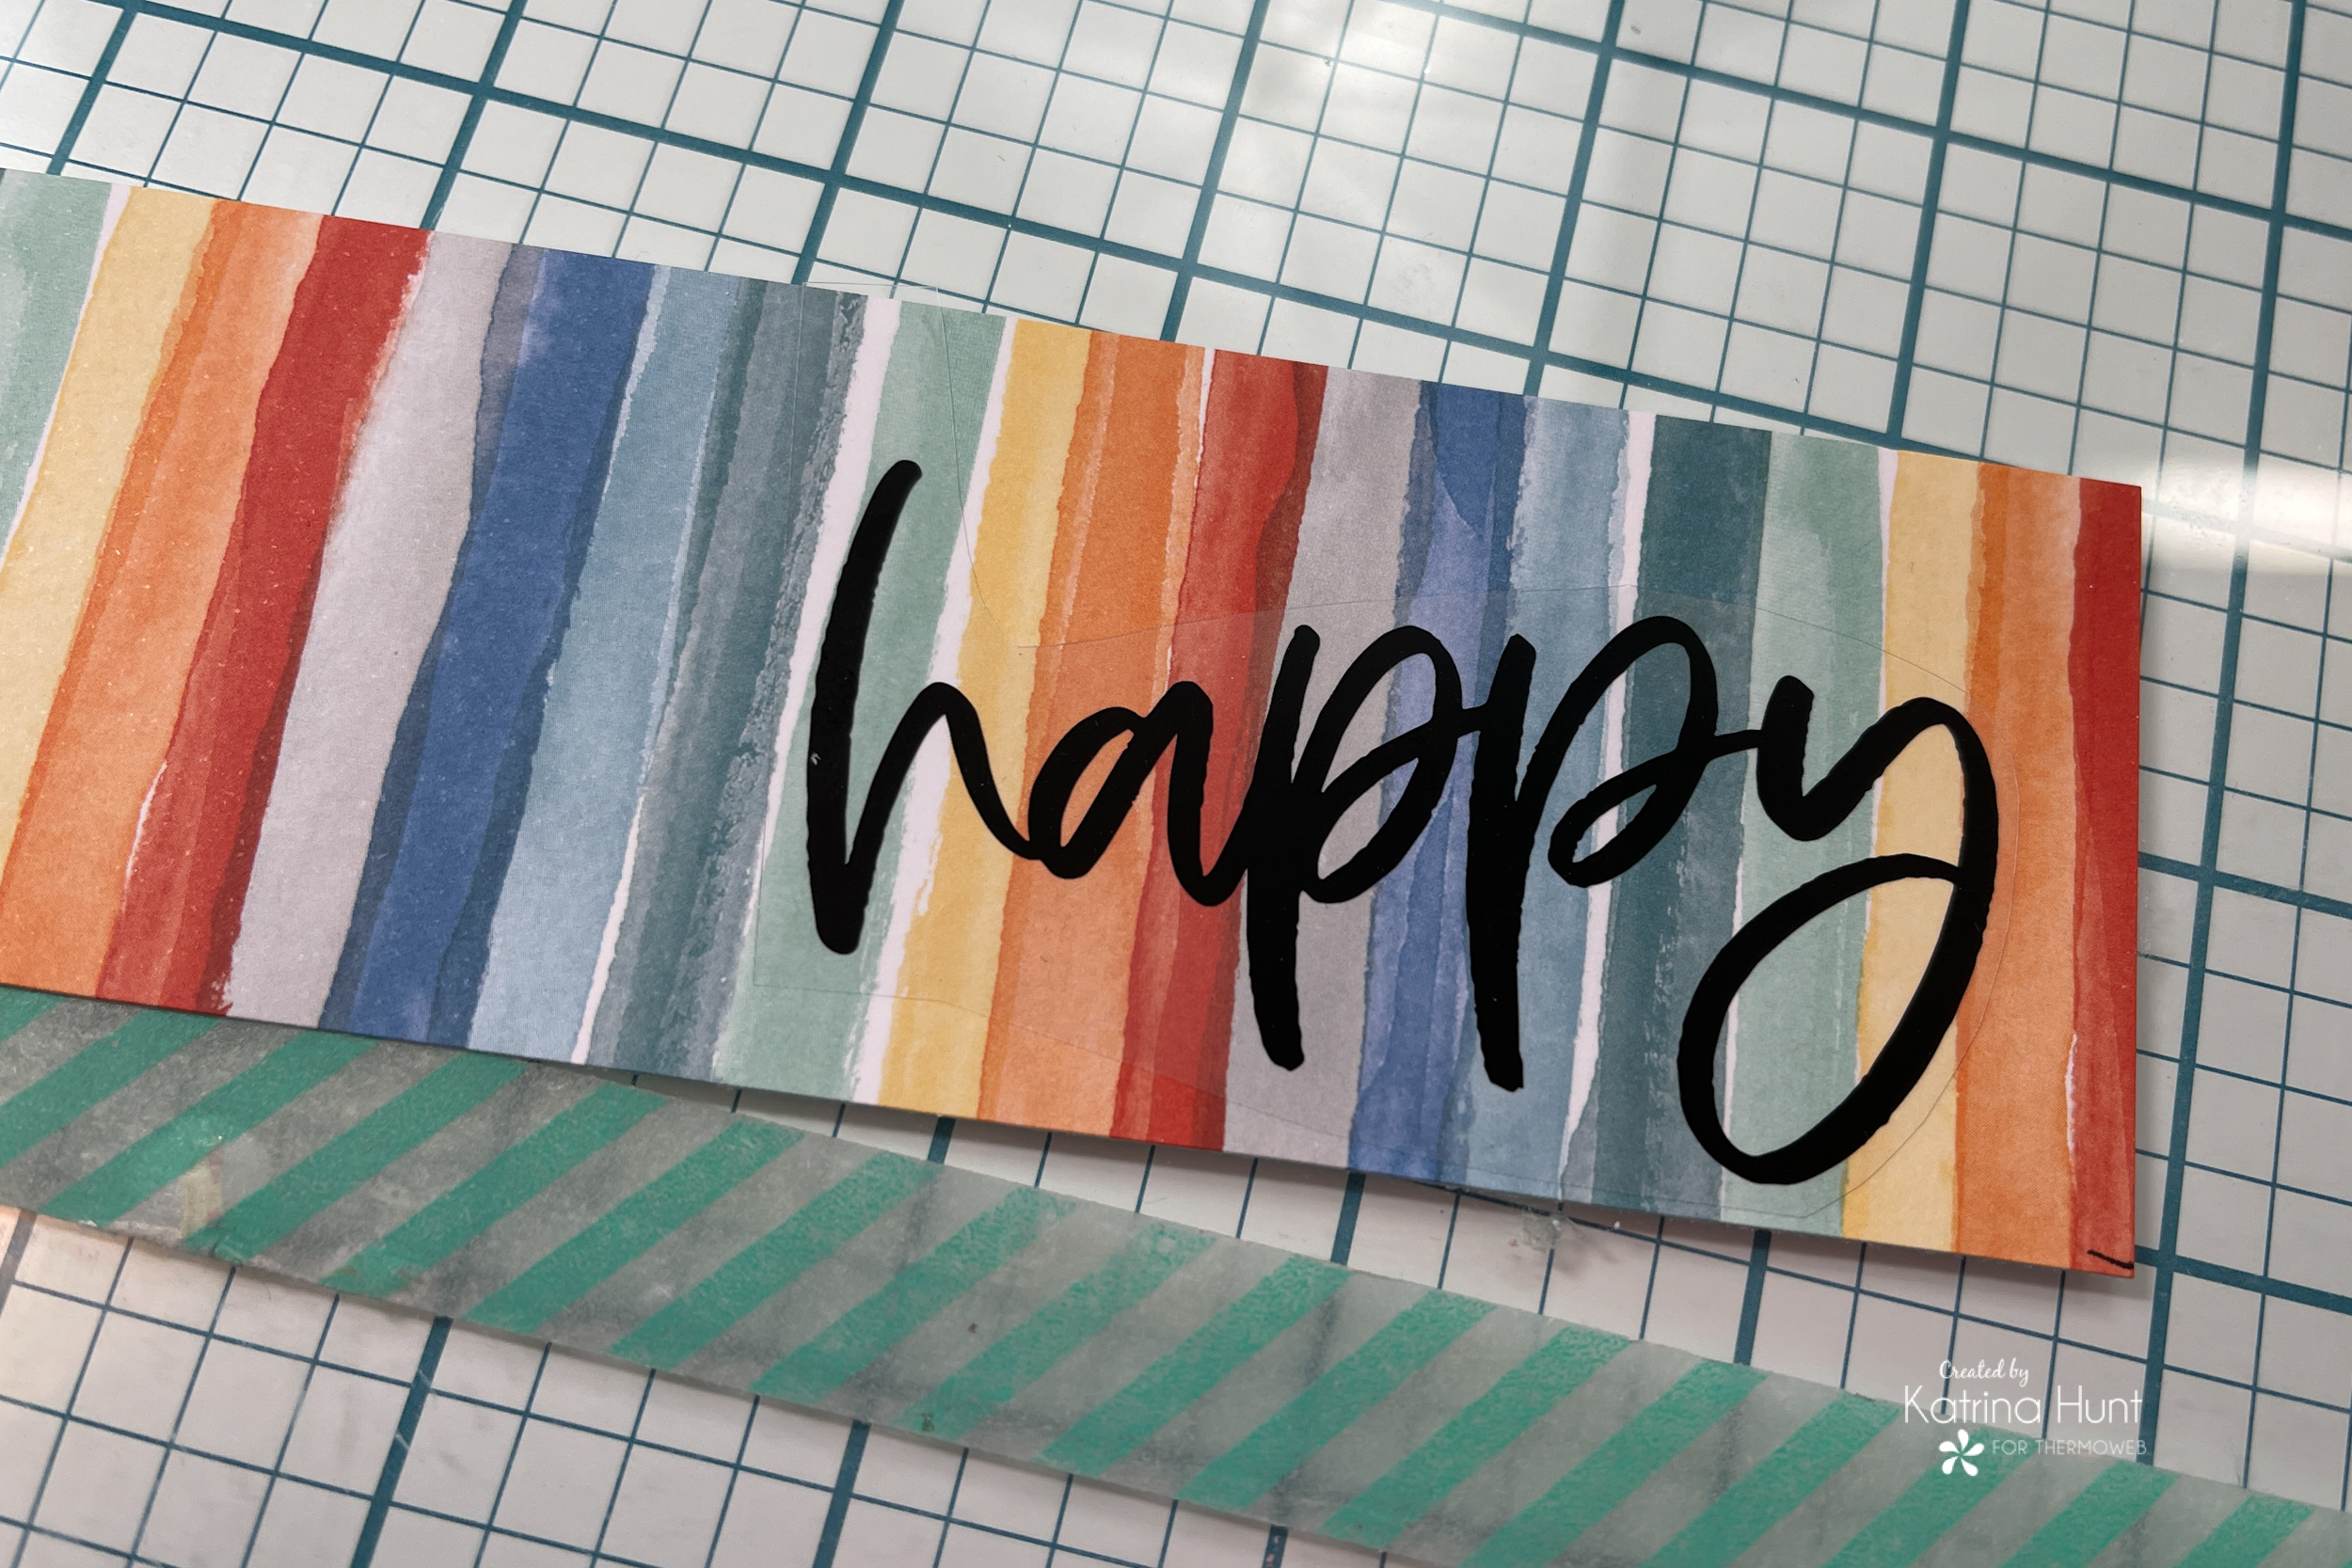
Now is the time you either run it thru your laminator or you run it thru your die-cutting machine. If you shim your dies, go ahead and shim your sandwich for this. You can see I used a piece of scrap cardstock for this.

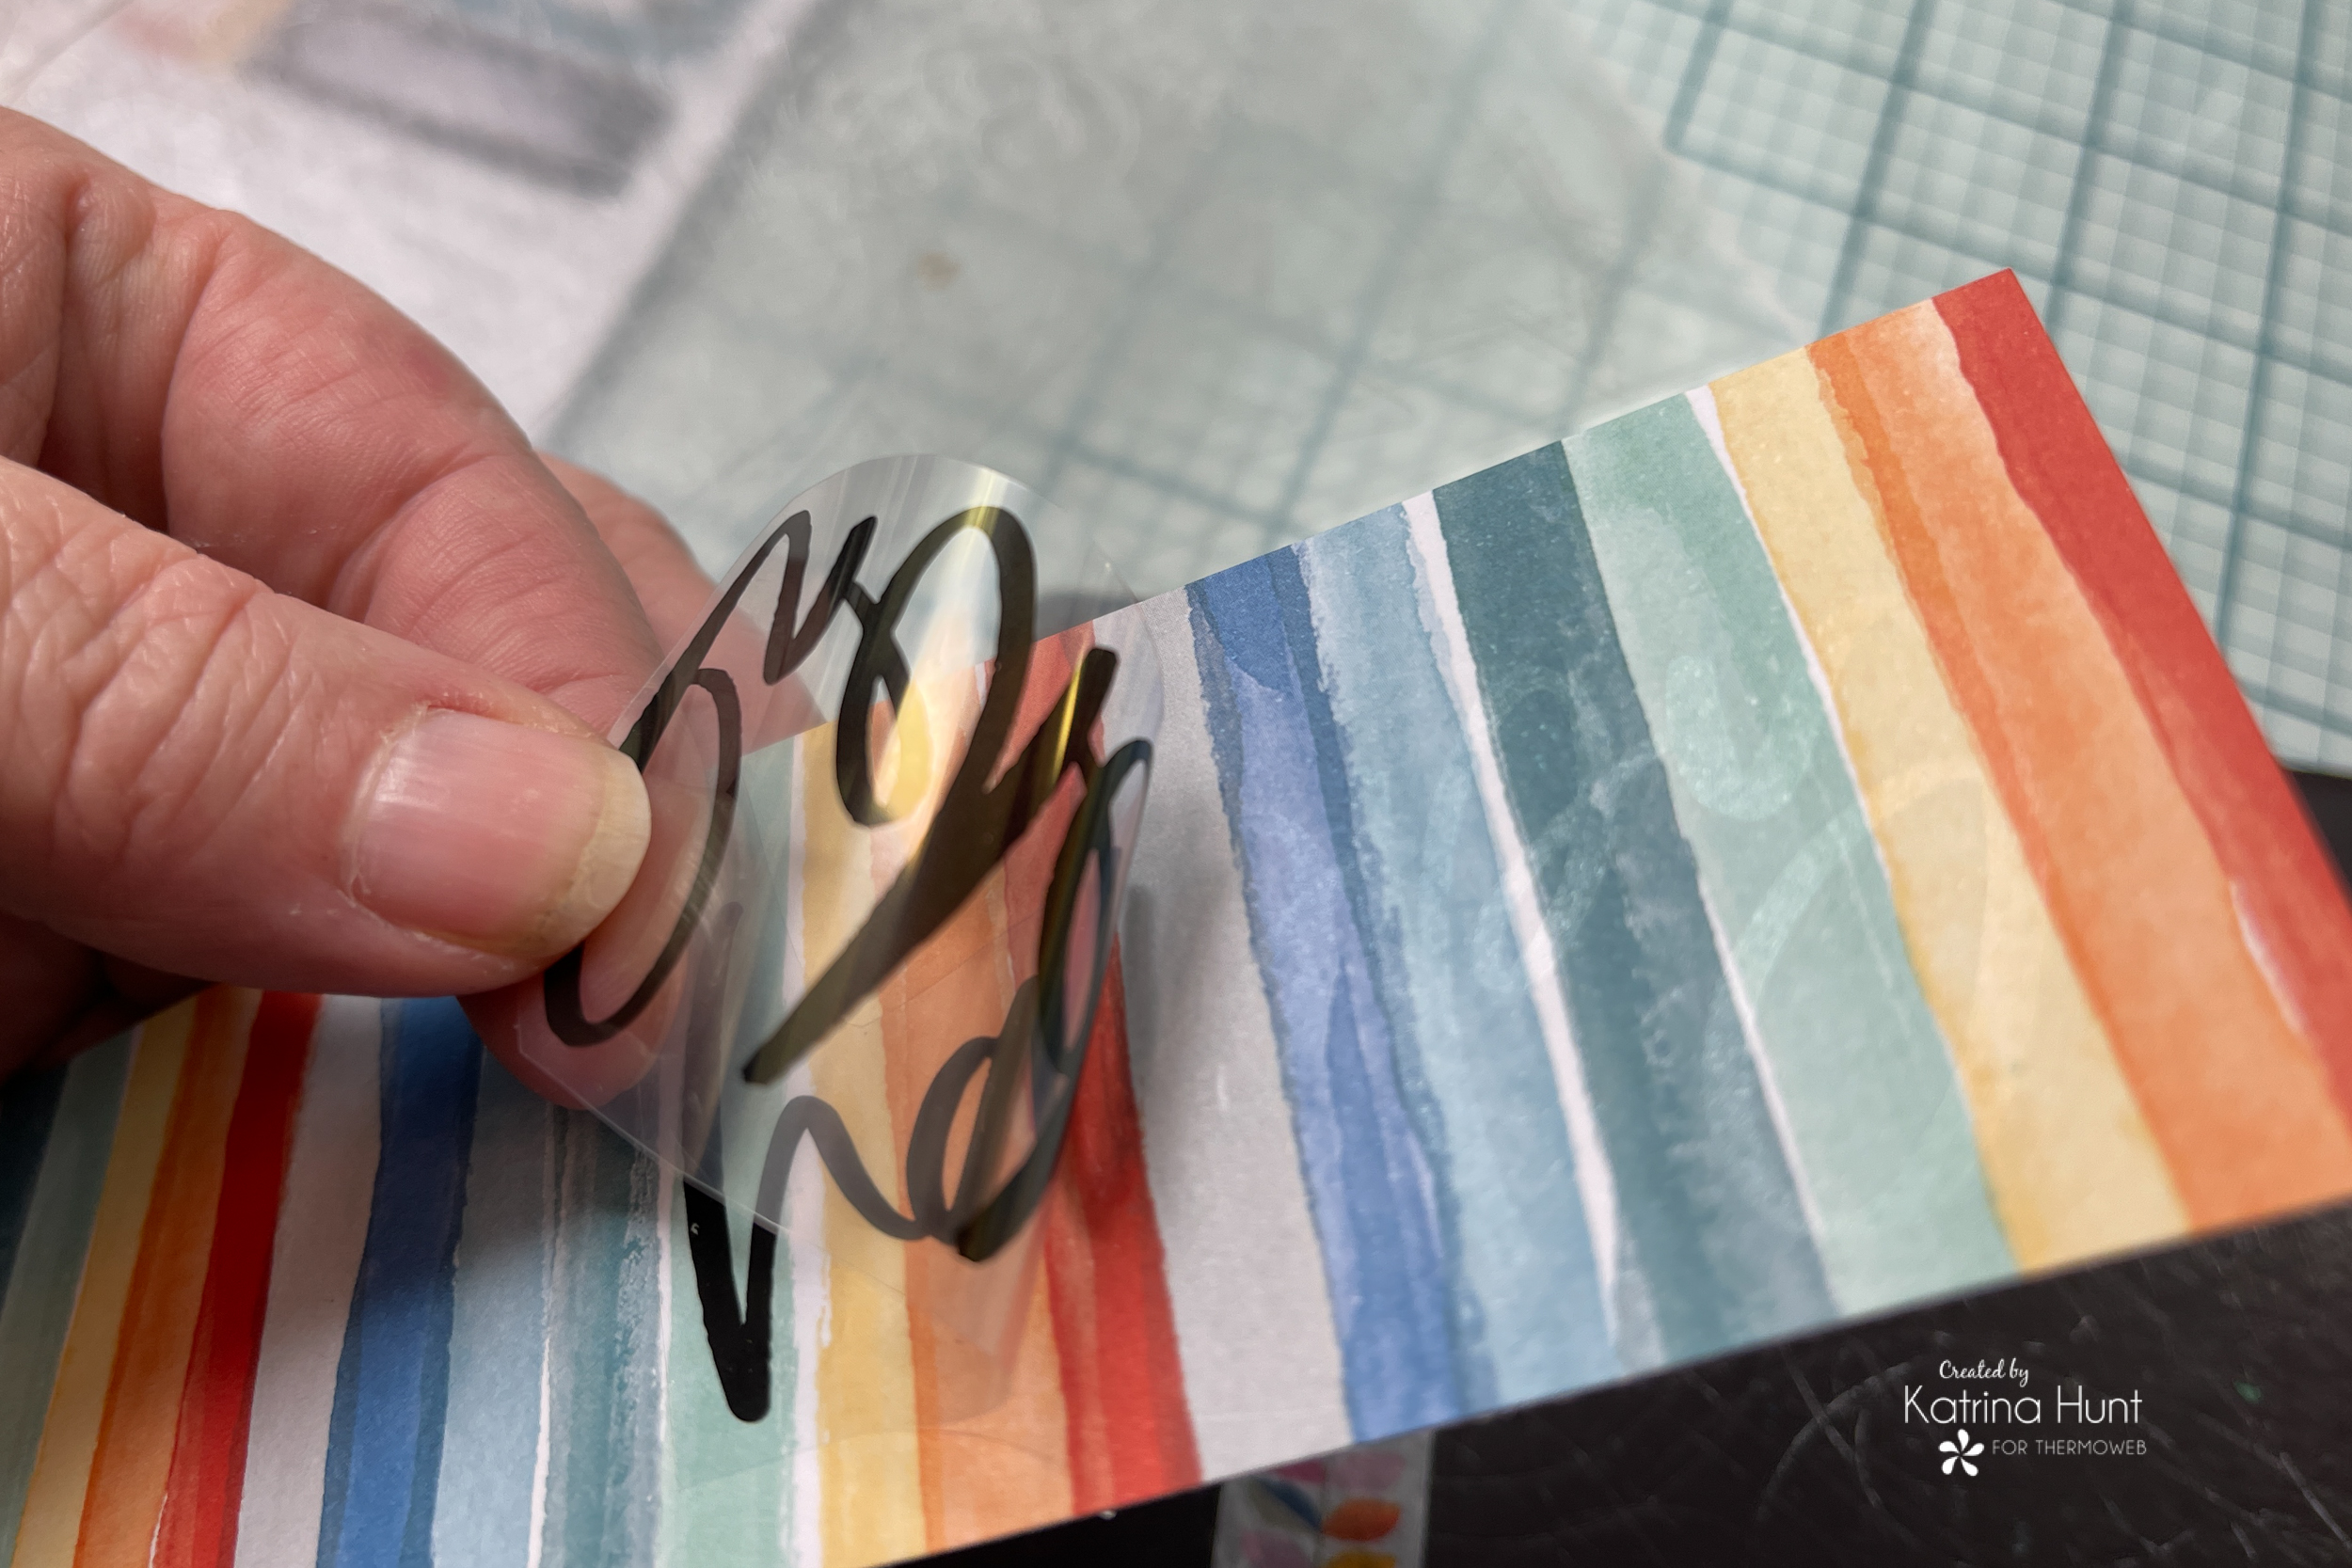
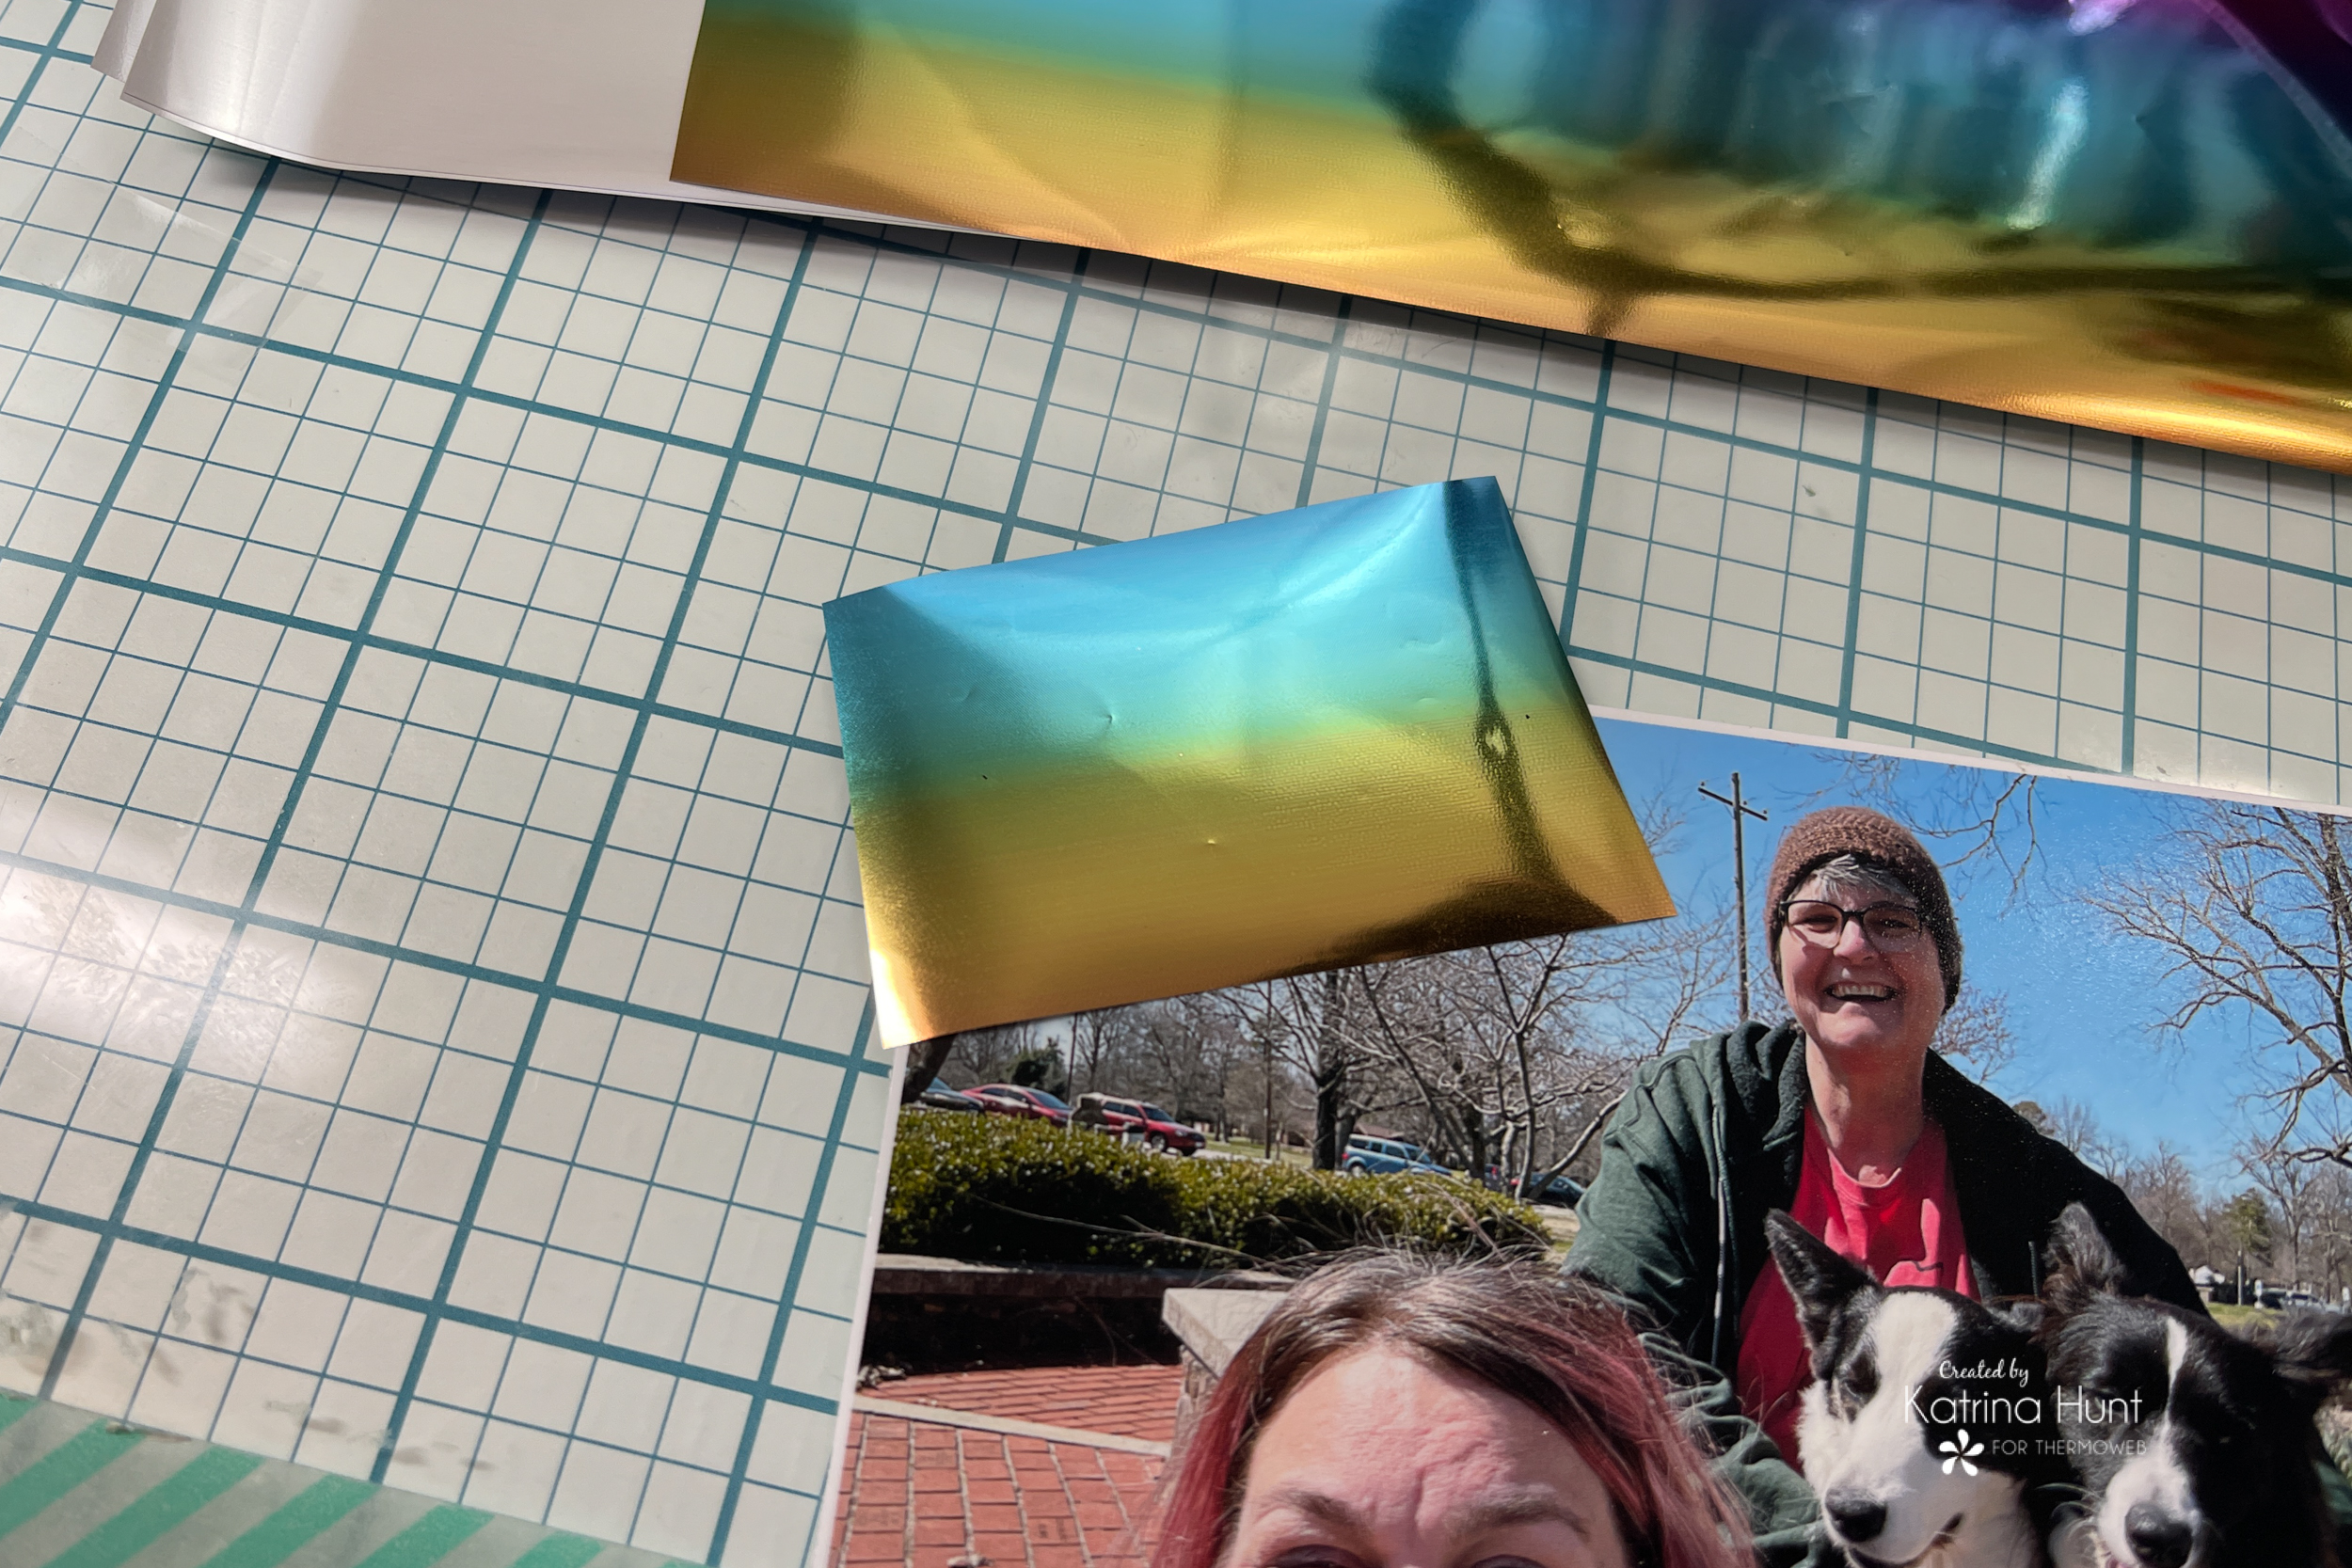
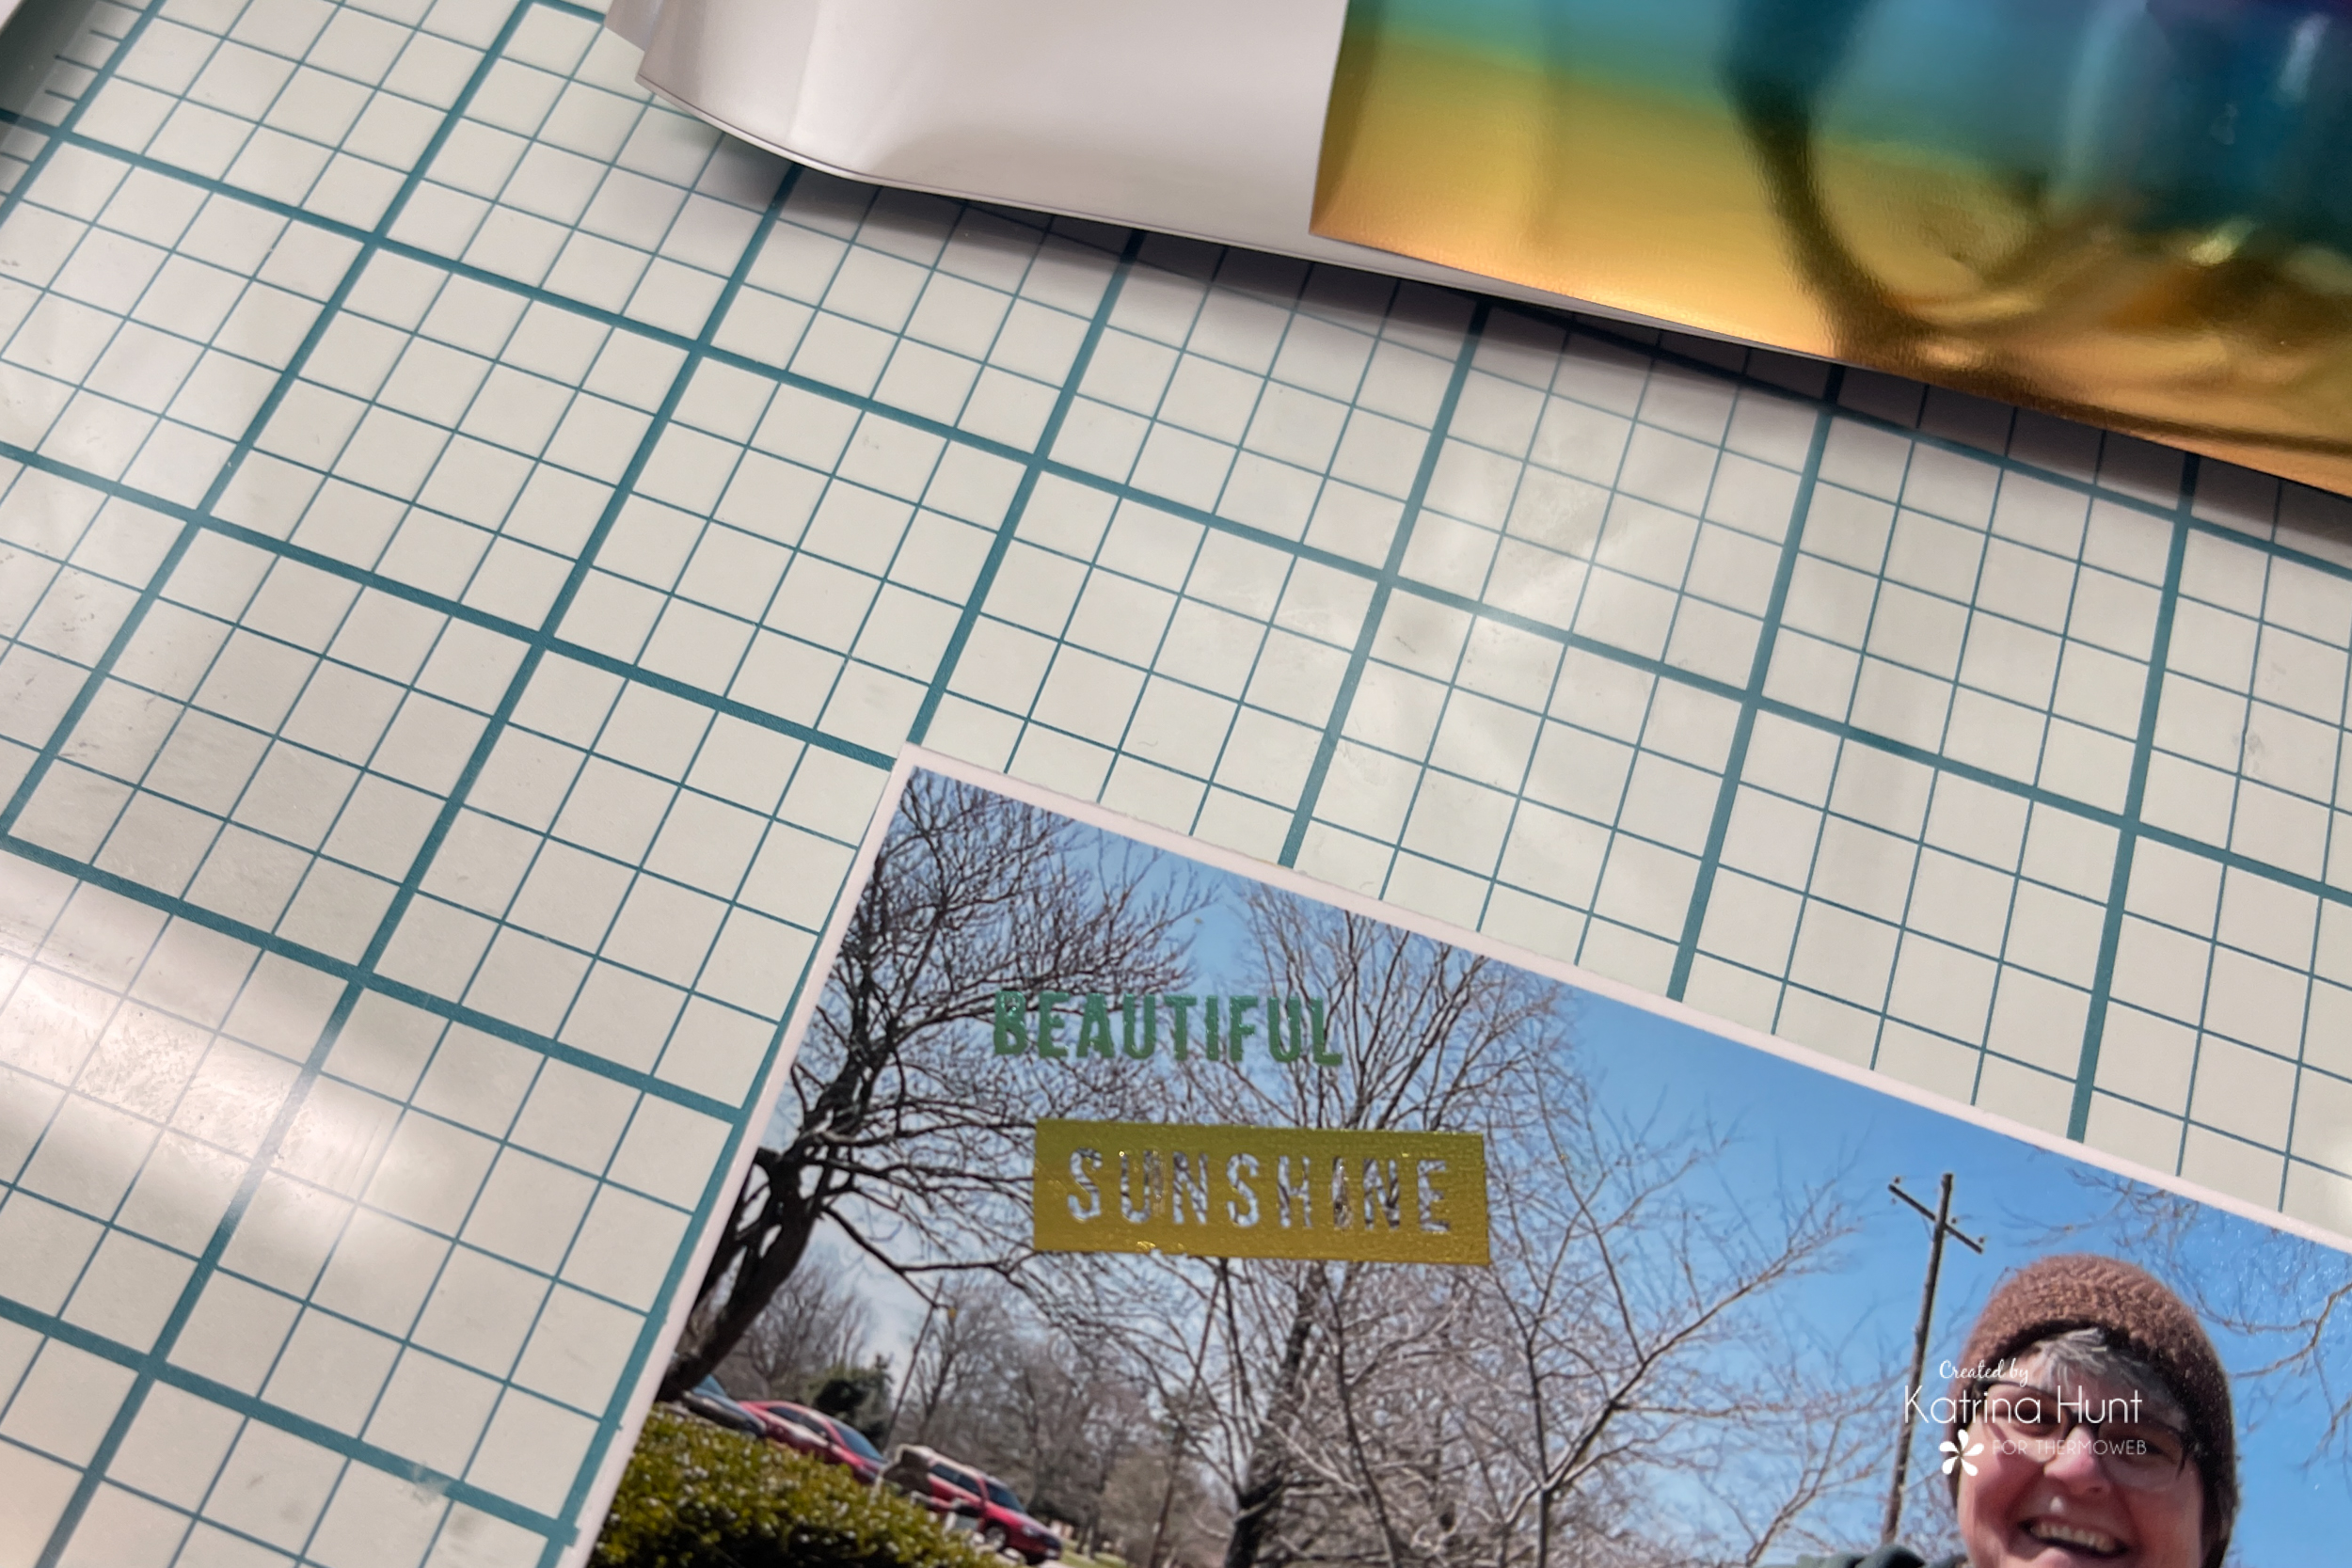
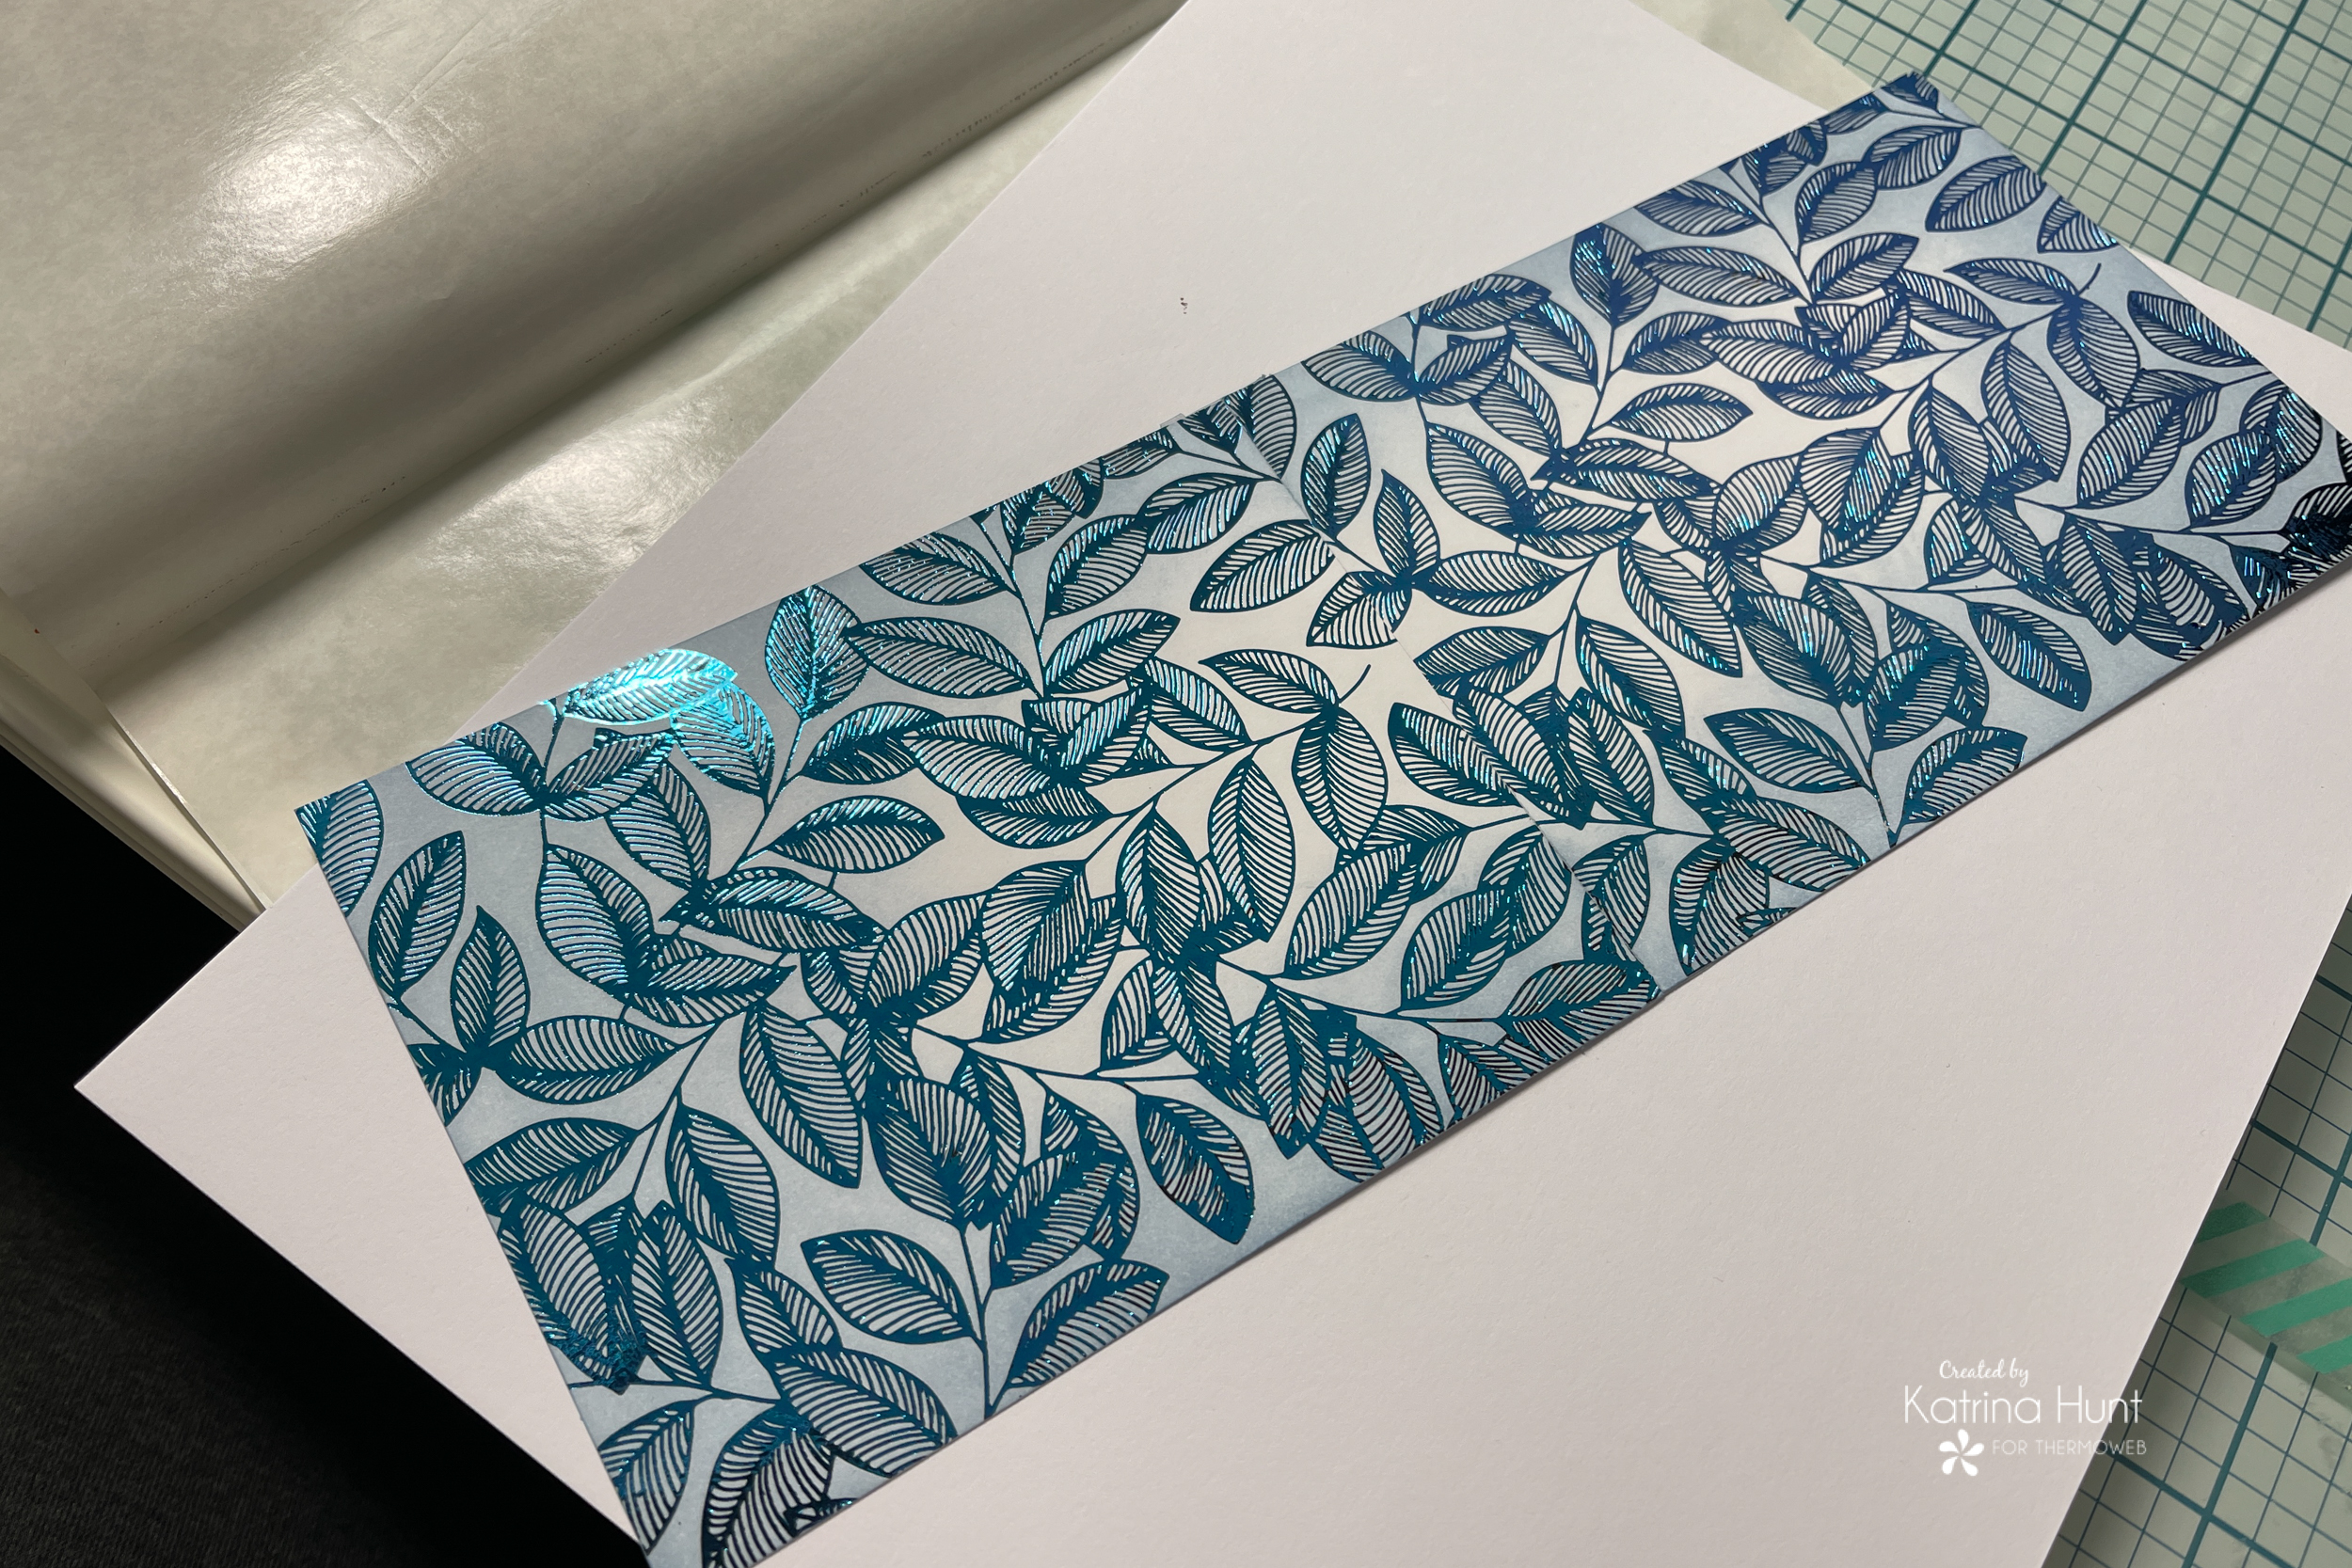
Once you have run thru your choice of machine, you will carefully peel up the sheet that has the black print on it. This will leave the adhesive on your project. If you look closely in the picture below, you can see the adhesive on my pattern paper. It looks like a watermark where I have peeled it back. Once you peel that layer up, you can throw the piece with the wording away, you are done with it.
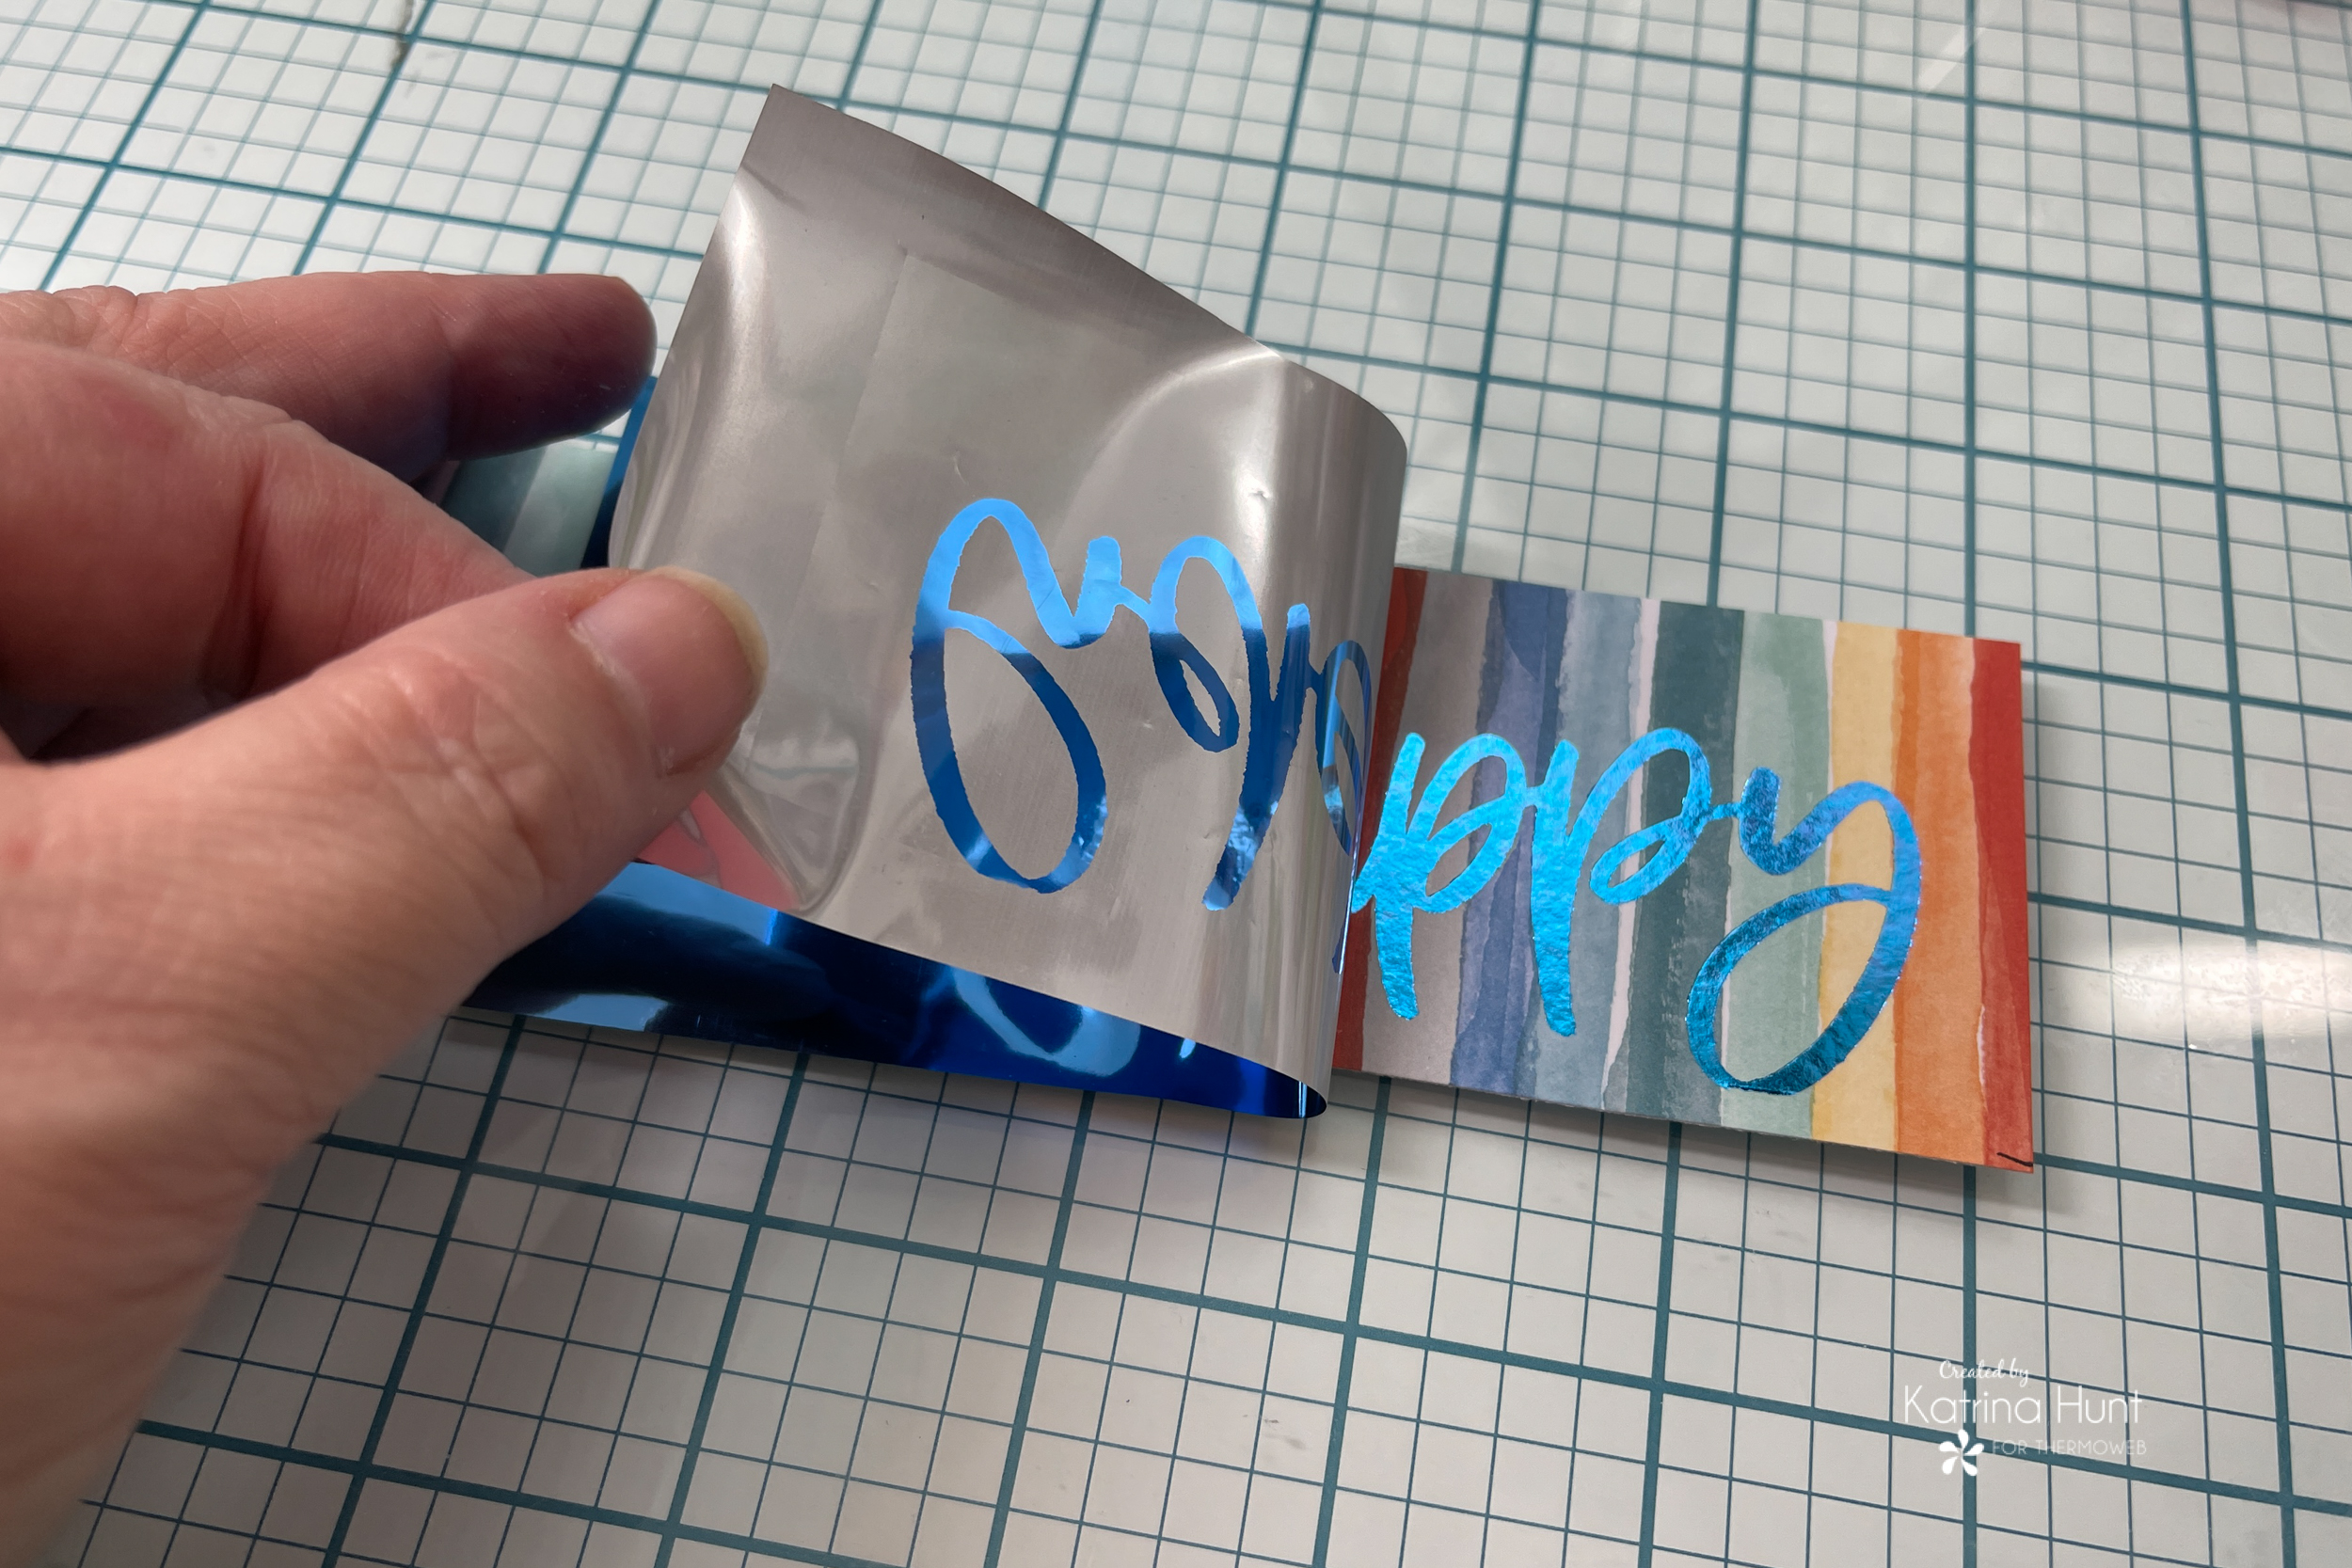
Next, you will run thru your chosen method again, the same way, only applying foil on the top of the adhesive that has transferred. Peel your foil back once your sandwich comes out of the machine and you have pretty!!
These also work on photos!!! The same process as above, although I don’t know about running thru a laminator and what it would do to the picture. I would stick to a die-cutting machine if you want to add to a picture!
FINISHING UP THE LAYOUT
Now we get to finish up the layout! I used two of the Unity Deco Foil Card Fronts in Tranquil Leaves (sorry these aren’t available anymore, but there are quite a few that will work for this HERE) and taped them together with Pixie Tape, matching the front pattern as best as I could. Once I had them taped together I ink blended the edges with Cathrine Pooler ink. I left the middle as it would be covered and not seen. After I ink blended I foiled the sheets with Deco Foil in the Denim color. This did require my laminator to foil the toner fronts! I LOVE how these look together!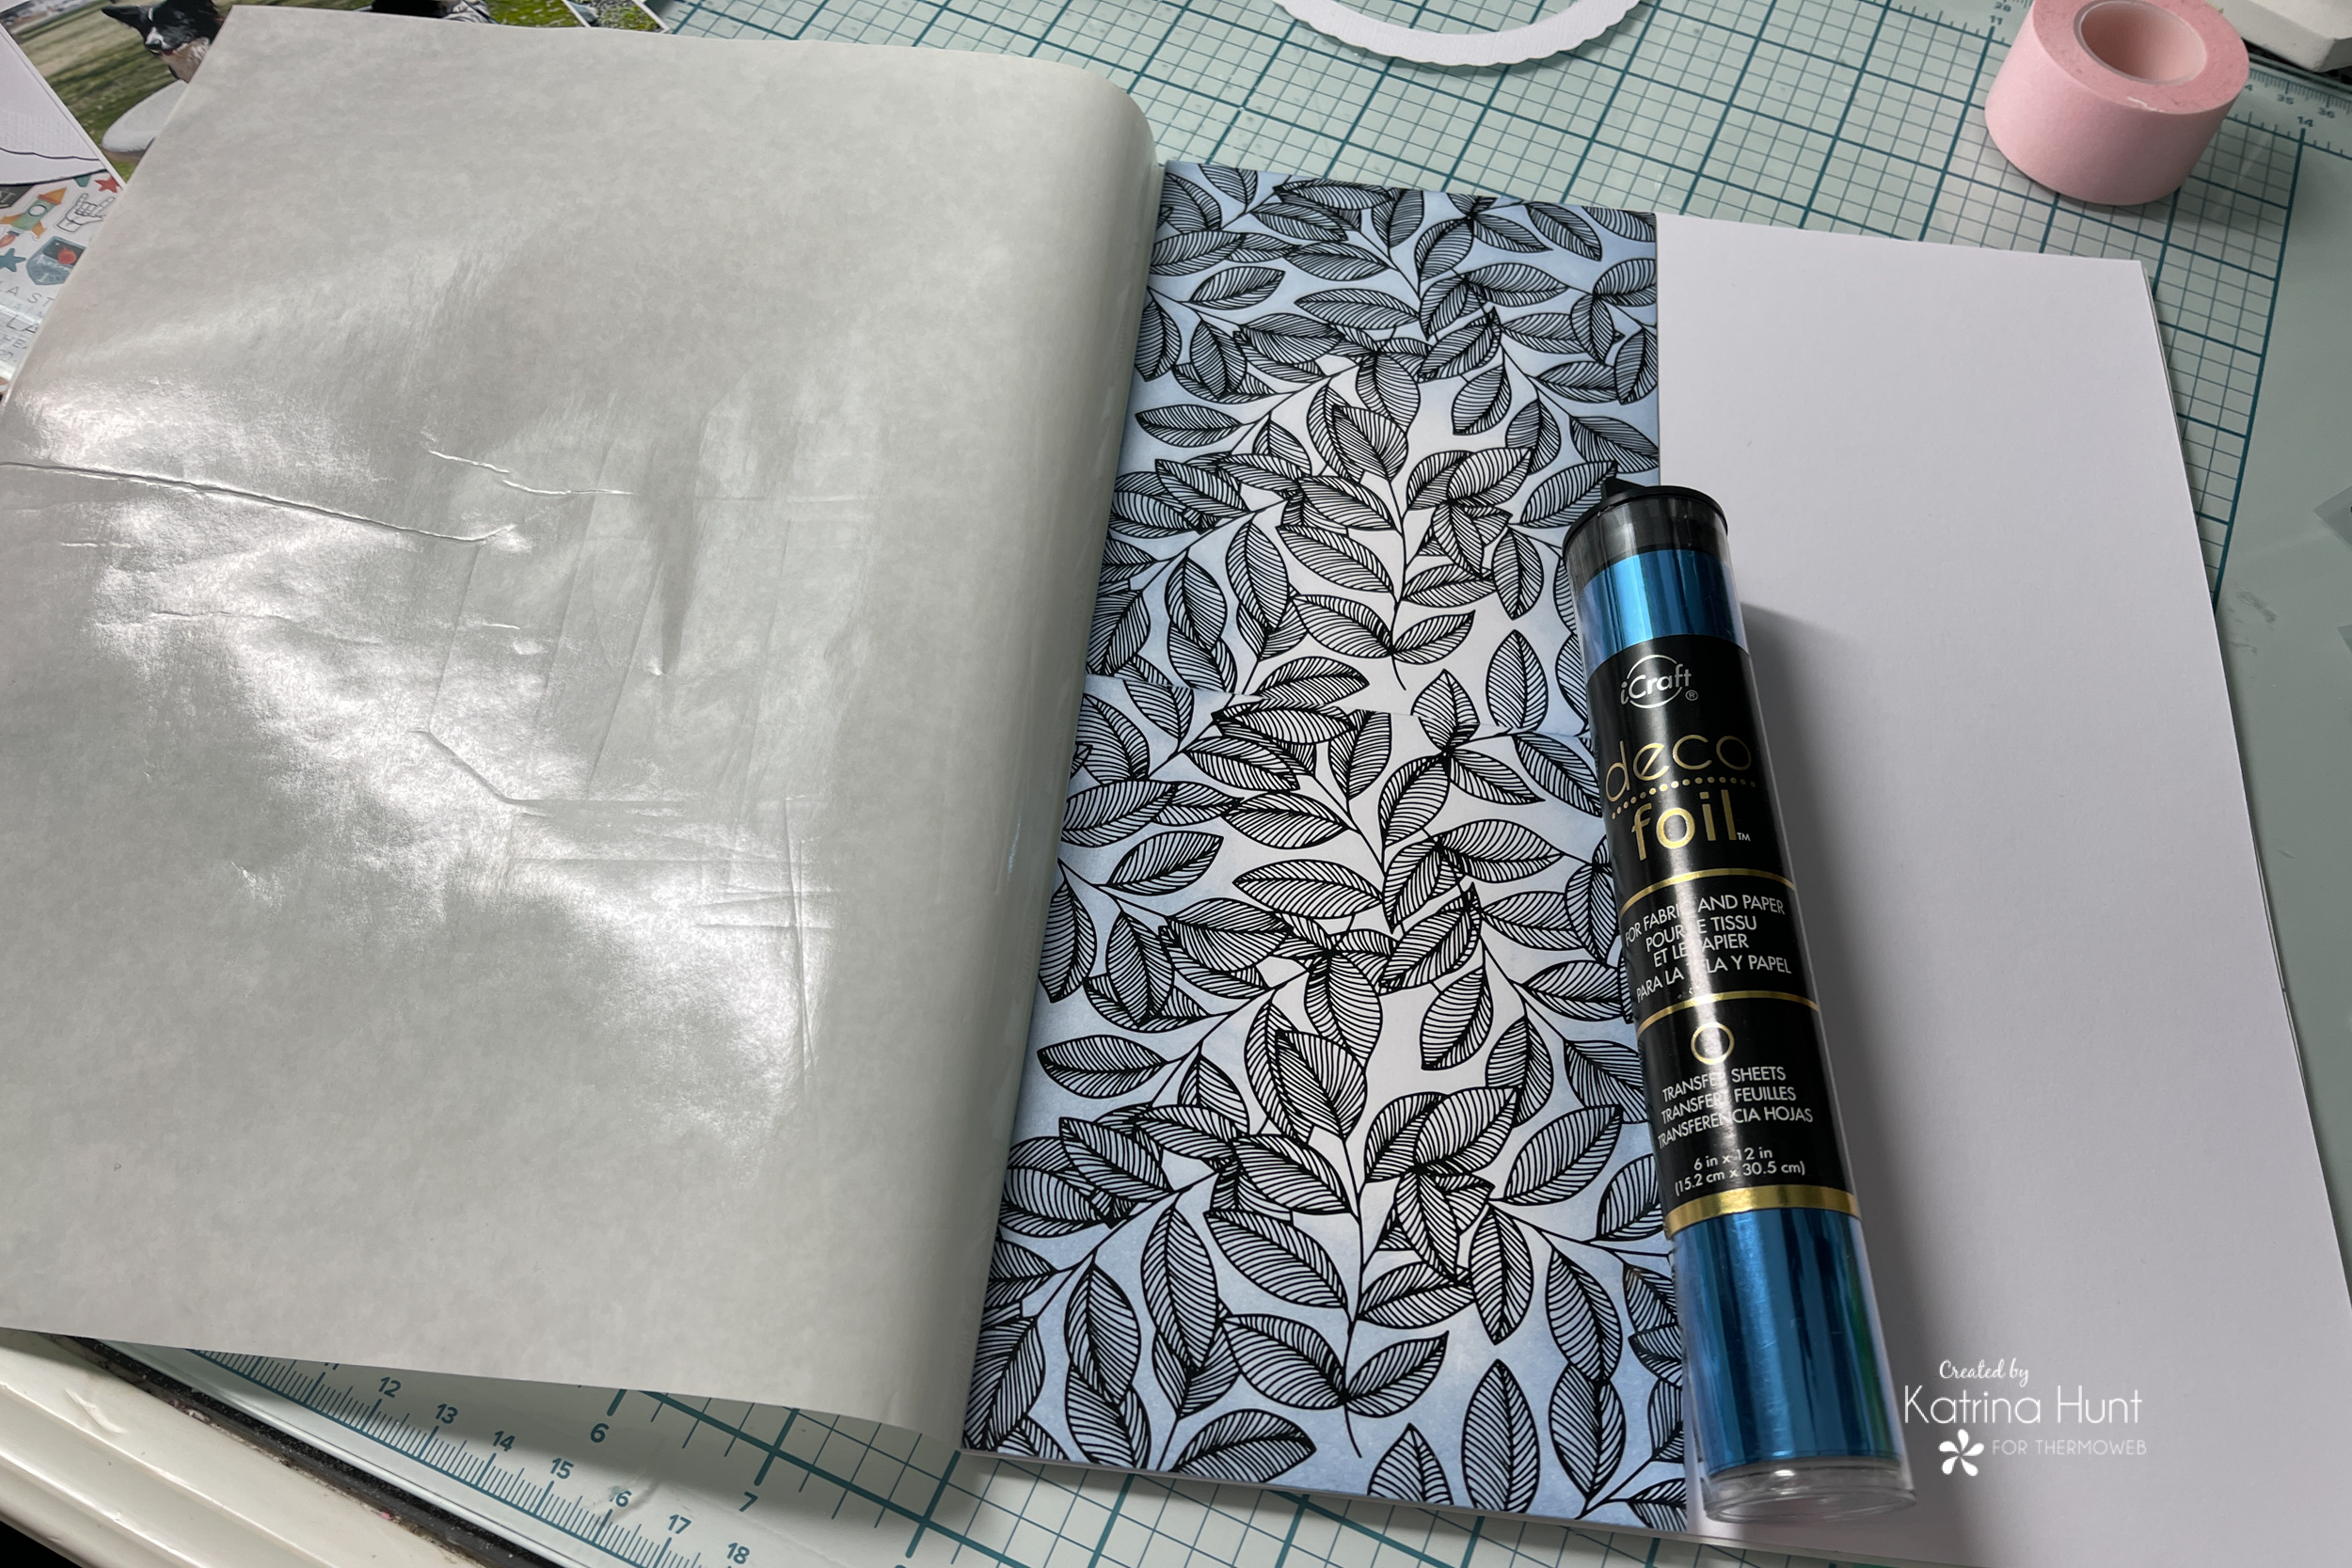 You can see our new Deco Foil Craft Carrier sheets above. These are so much nicer and will hold up a lot longer than parchment paper! The inside is nonstick also! How awesome is that?
And would you want to cover this up? I sure didn’t once I pulled that foil off!! Look how pretty! I used this as a layer on the left side of my layout. I popped it up with some foam tape for more dimension.
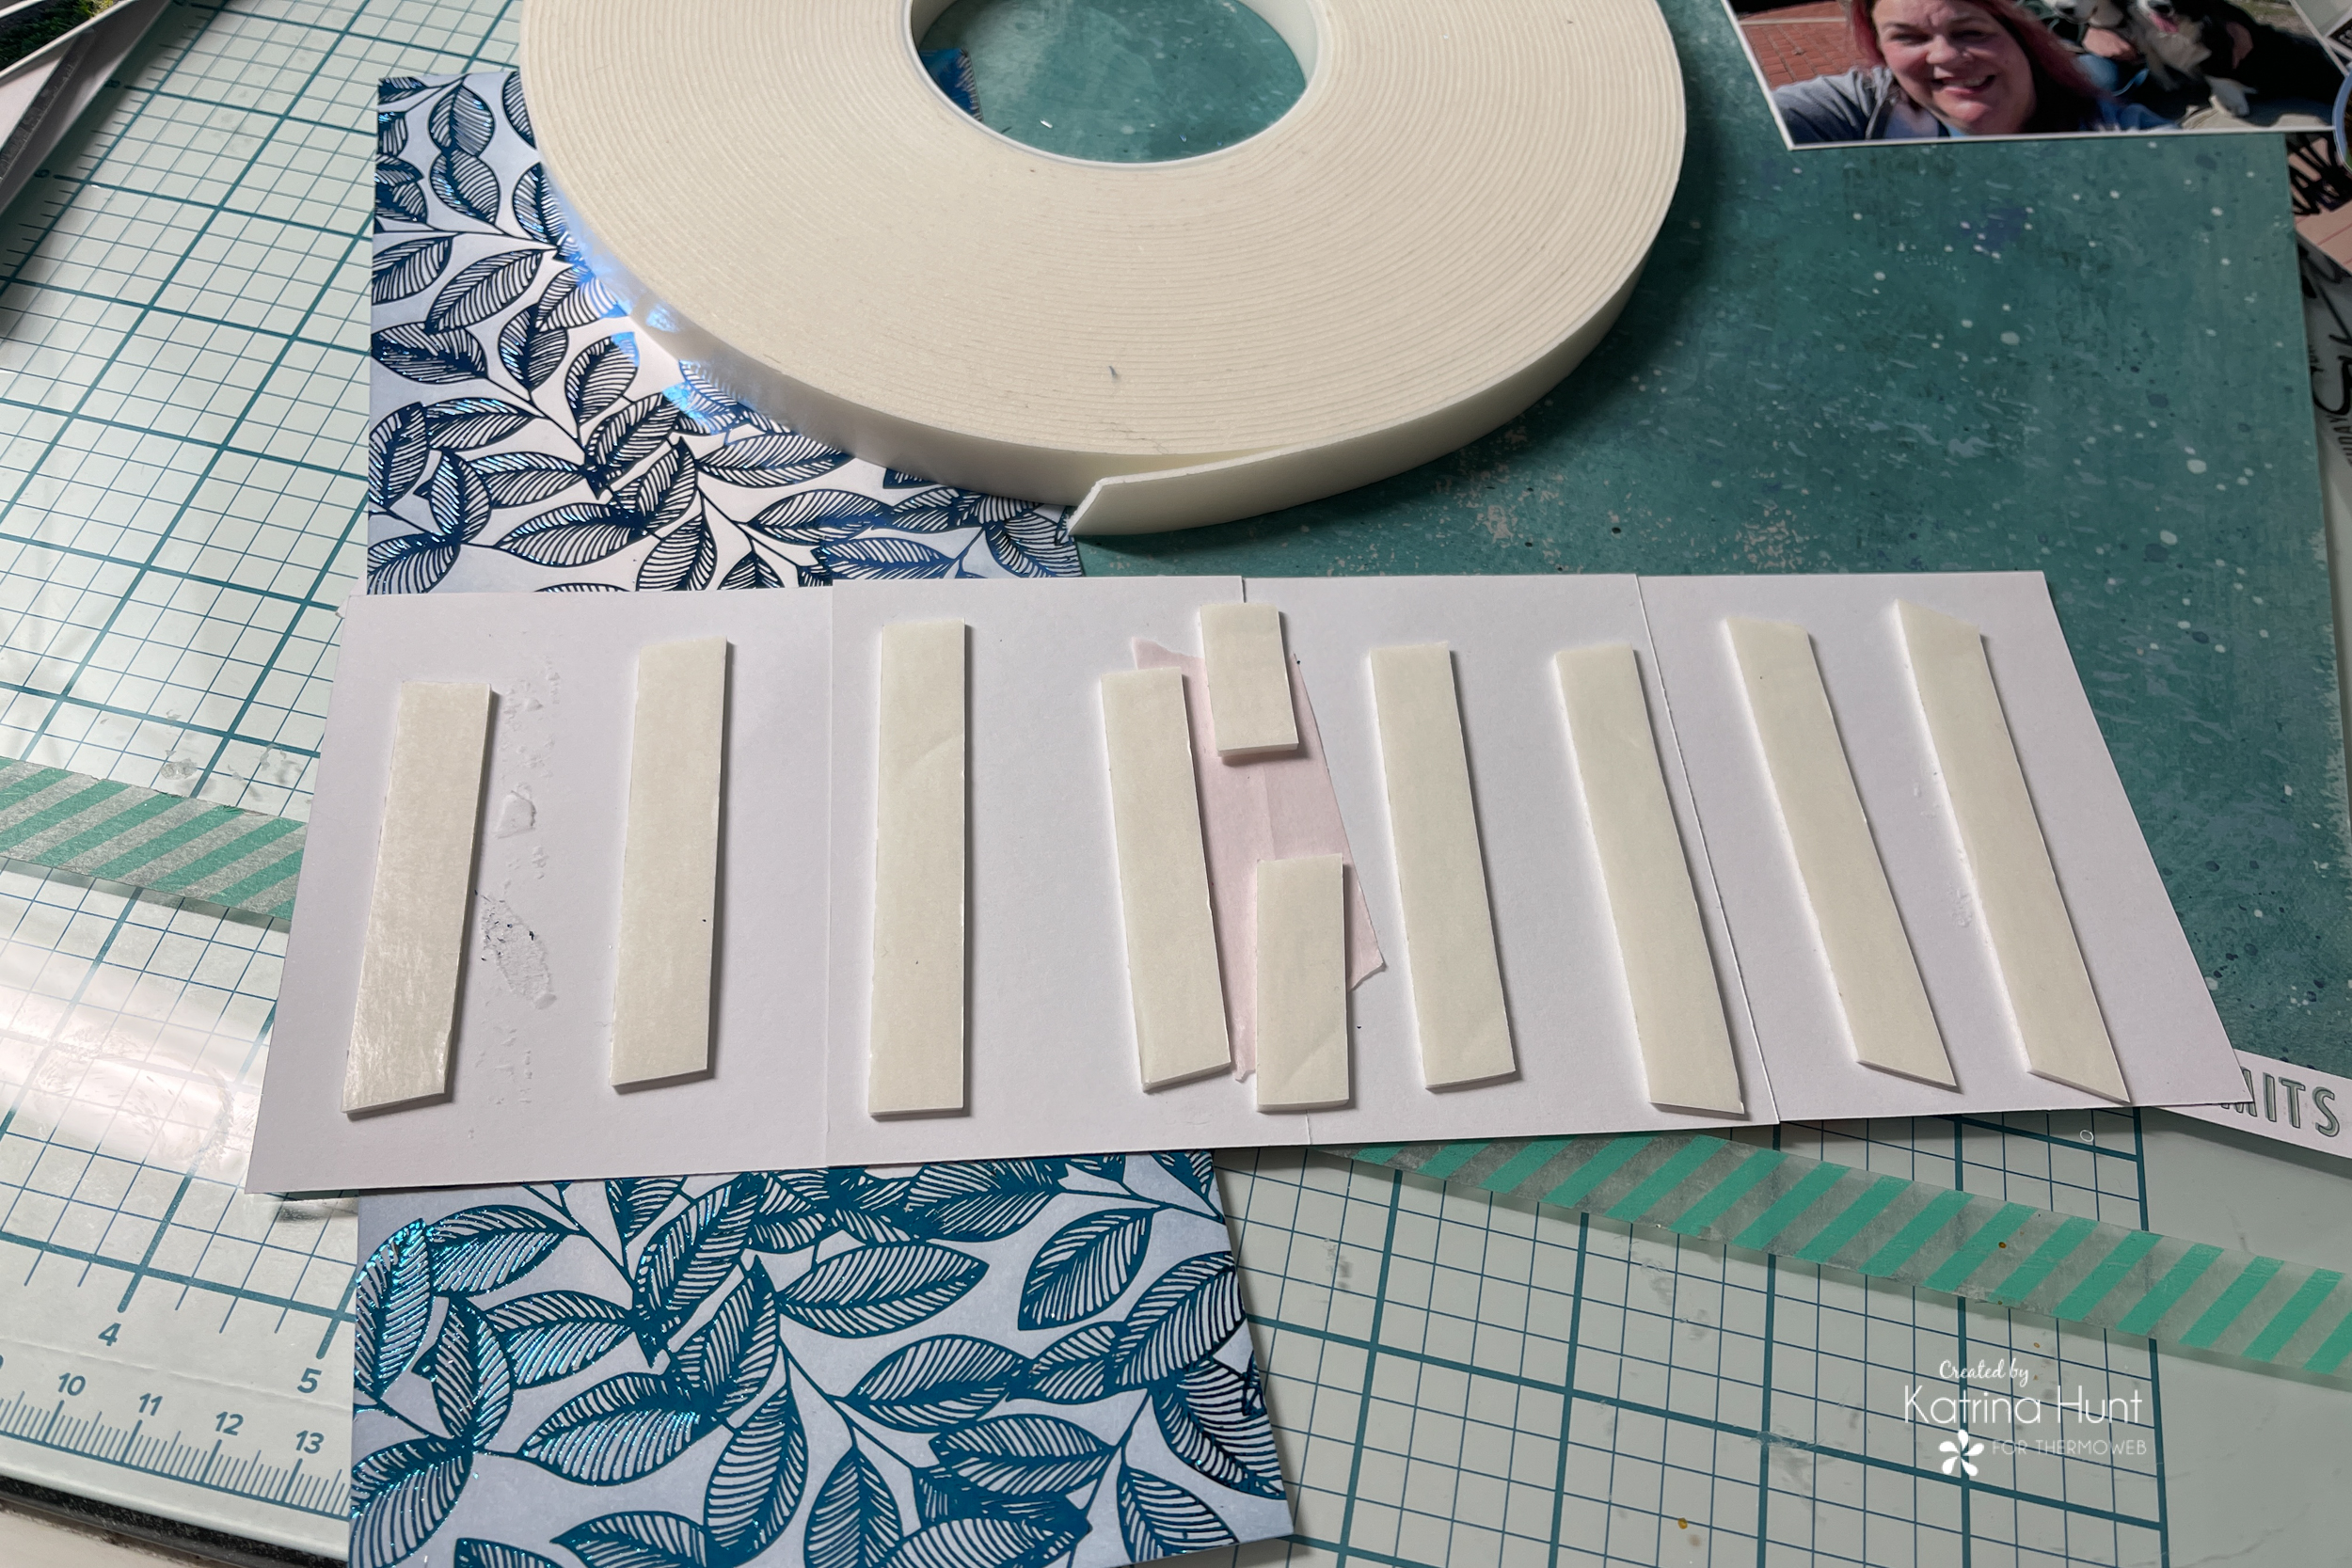
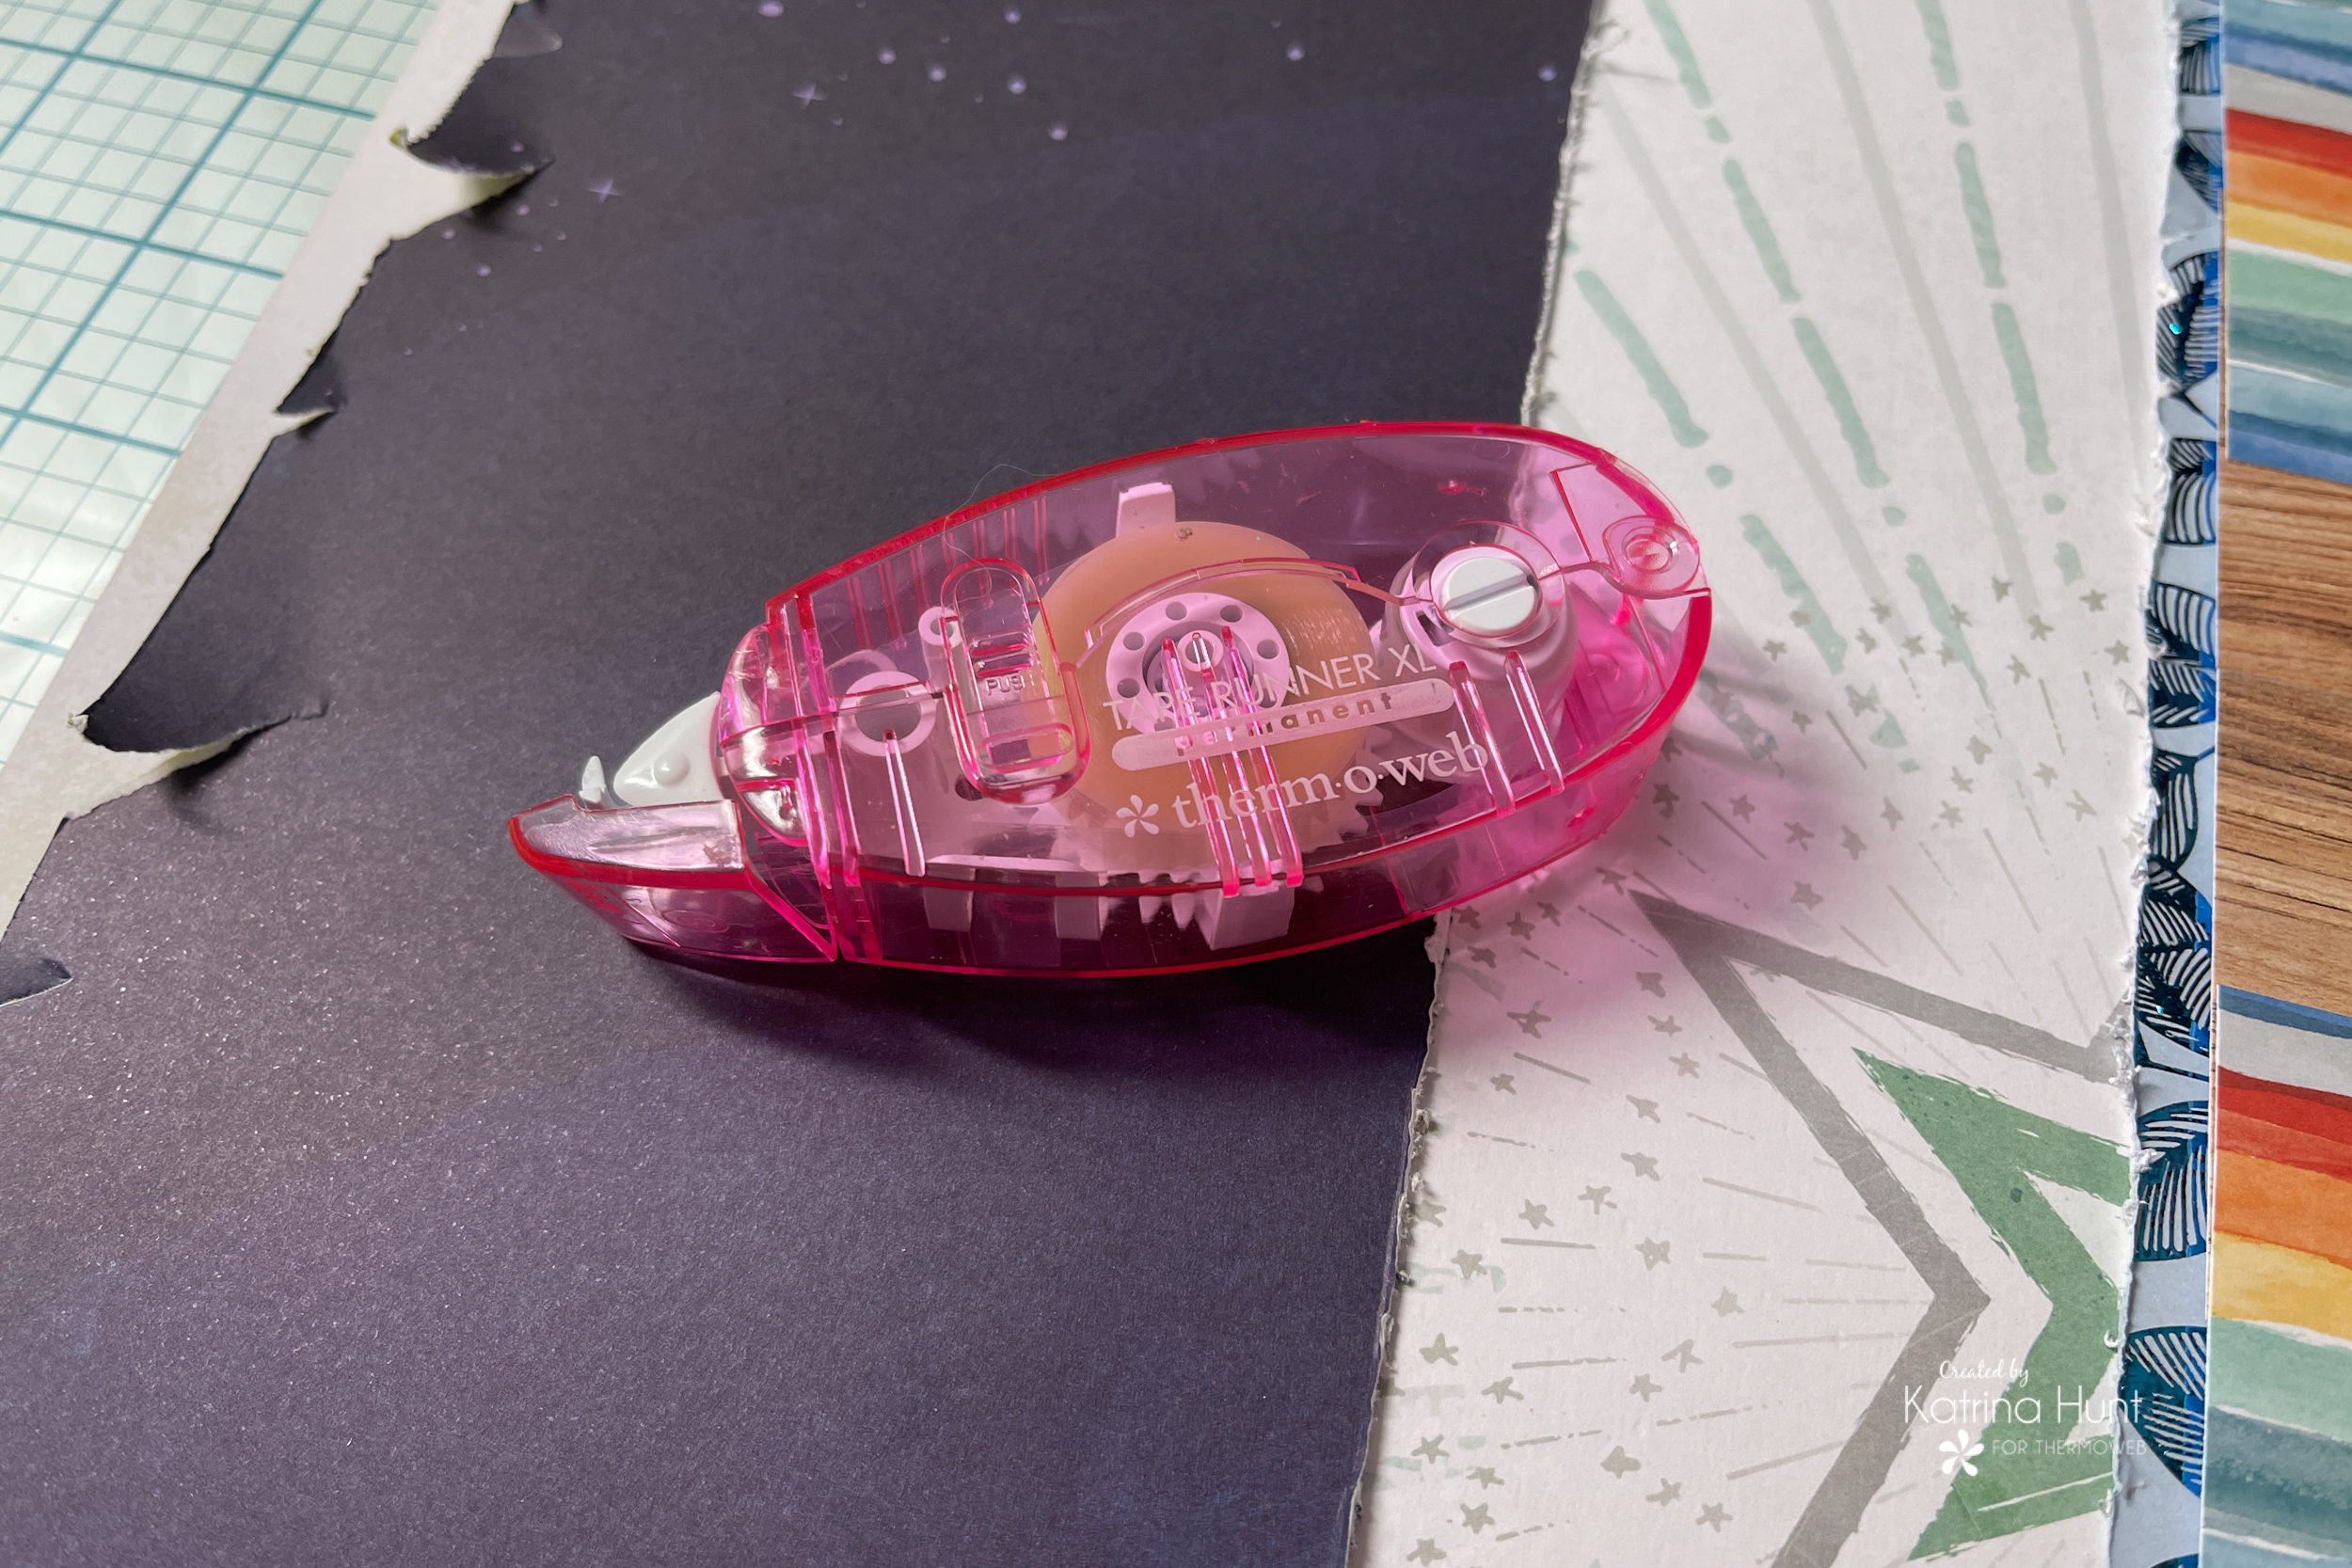
For the rest of my layout I used a combination of the Memory Runner XL tape runner and foam adhesive to put everything together.
On the opposite side of the shaker, I decided a little ink and splatter action would be fun. I wanted a pop of color so yellow it was!
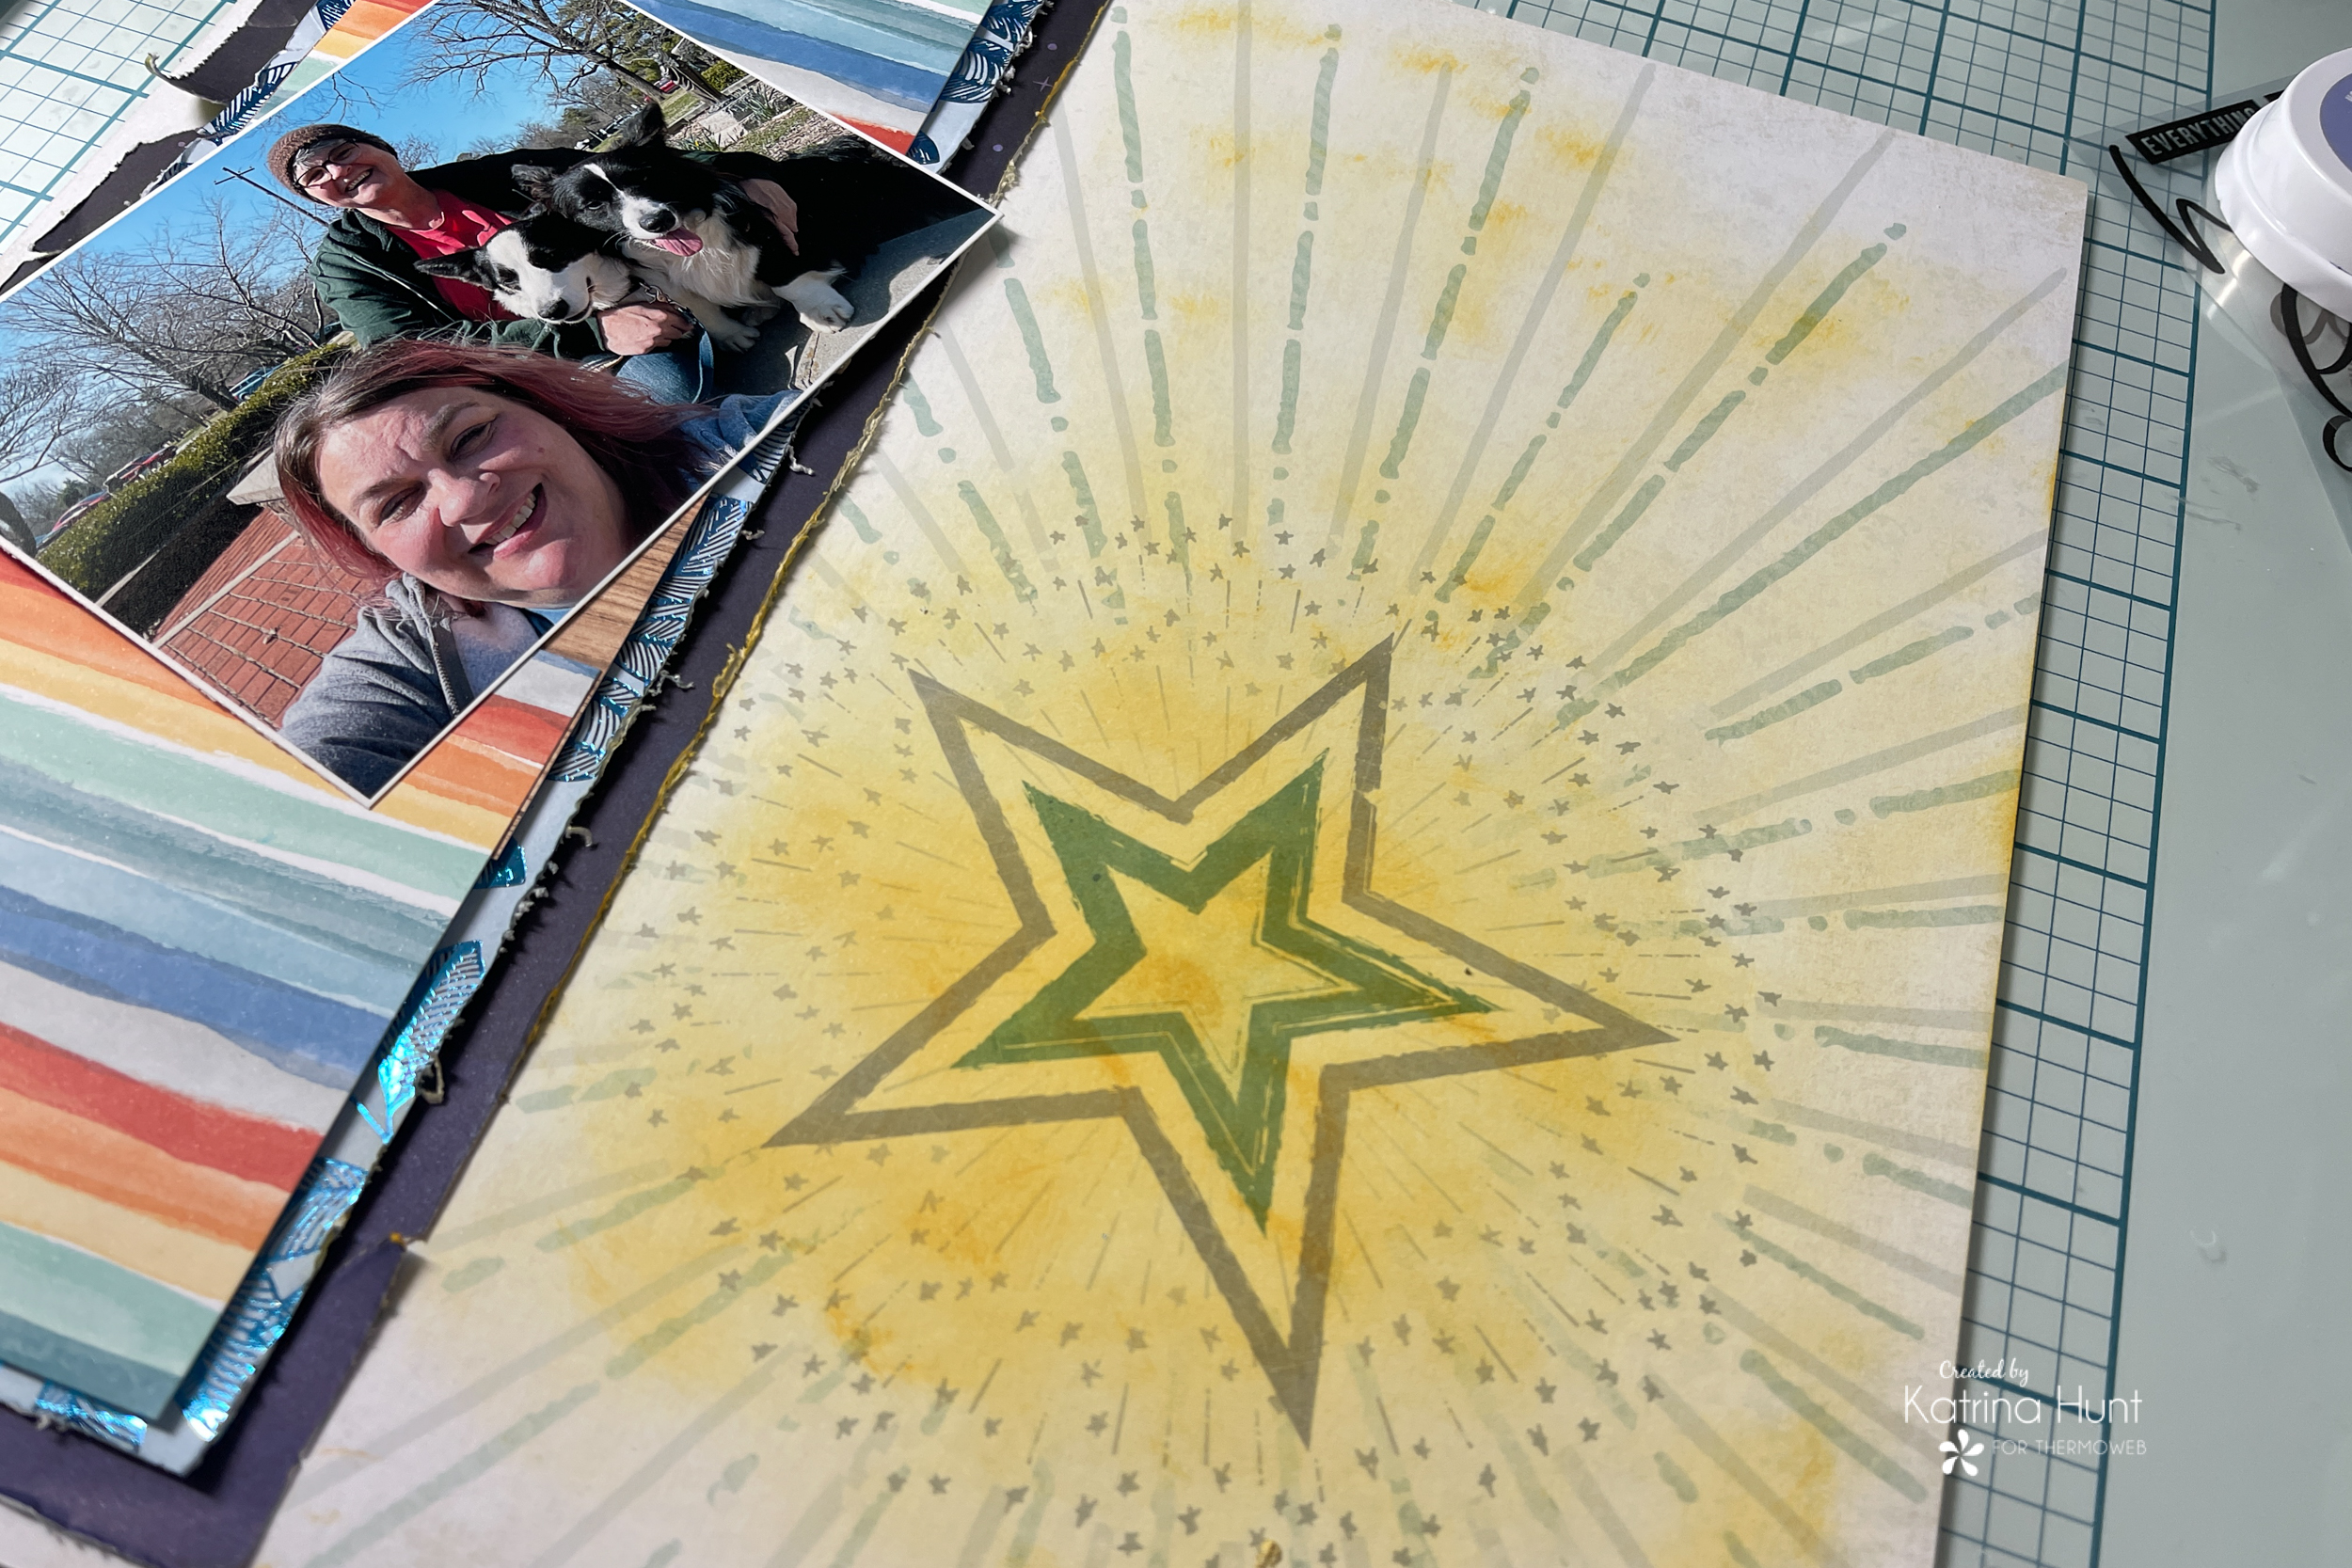
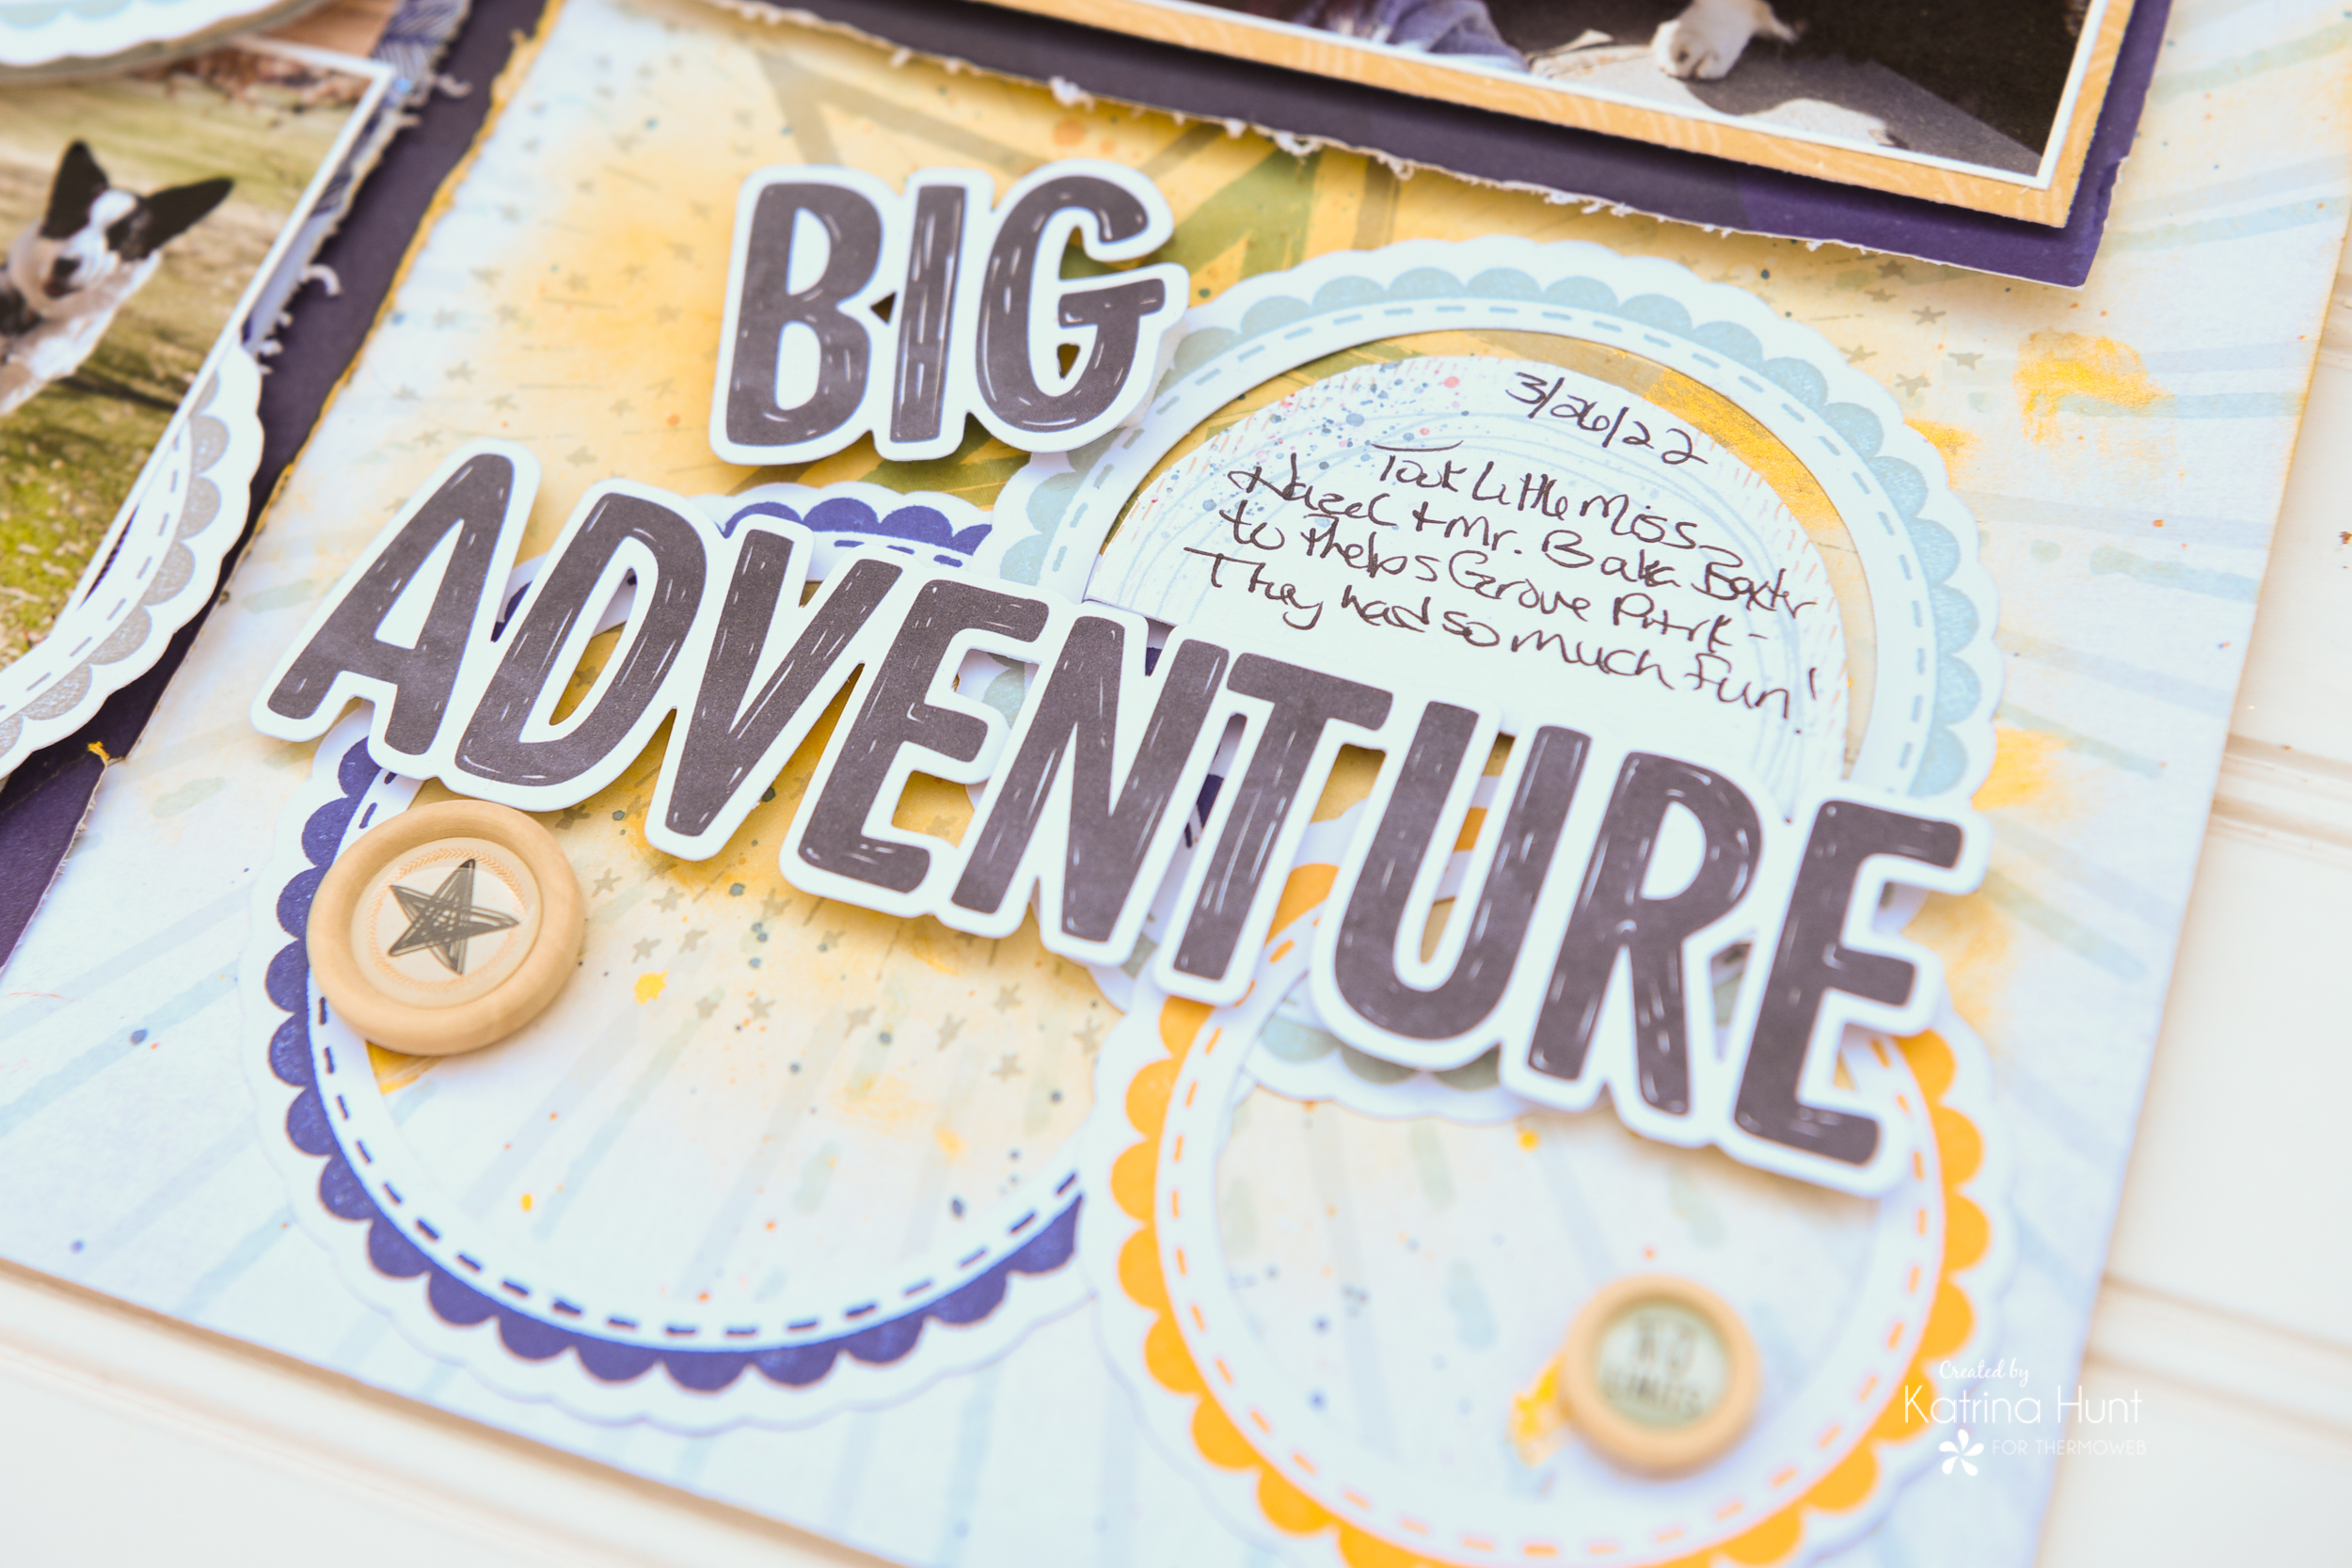
And I just LOVE how my title looks with that yellow behind it. I popped the “Big Adventure” up with some foam tape and then added some journaling to complete my layout.
You need to grab these new Deco Foil Unity Adhesive Transfers and give them a go! I think you would fall in love with them! There are also new ones from Gina K!!! I cannot wait for more to come out.
Have a happy and creative week! Thanks for stopping by today!
This post contains affiliate links. For more information, see our disclosure HERE.
Now we think you know by now it wouldn’t be like us to have a new release and not celebrate it with a Giveaway. In fact…this is a BONUS Giveaway!
We want to first invite you to join in the Instagram Hop that we kicked off yesterday! We think it’s the first time we’ve had a triple-team hop! That’s right…three teams… Gina K. Designs Team, Unity Stamp Co. Team, and our talented team here at Therm O Web! And don’t worry if you couldn’t join in yesterday…you can still hop with us for a chance to win and some incredible inspiration too!
So get entered to win and then join the hop…join us anytime today, tomorrow…this weekend but do JOIN IN!