


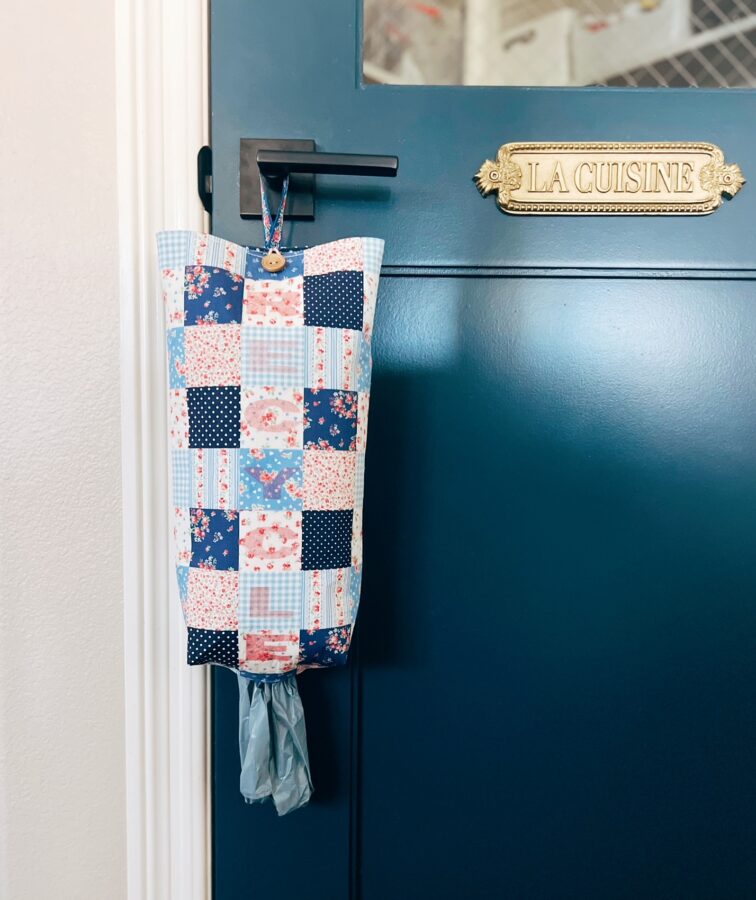
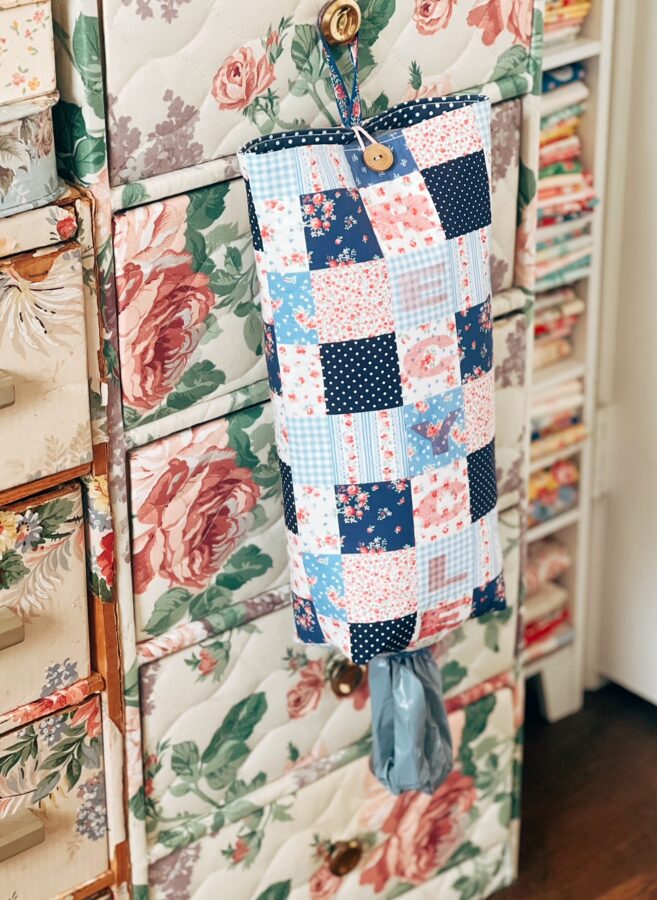
Hello! It’s Karen from Creamcraft Goods. Can you believe we are almost two and a half months away from Christmas?! I better get started on my handmade gifts soon! I’m trying for easy, useful gifts. With that said, here is a cute, fairly easy project – a handy Bag Dispenser. You can make it for Christmas gifts, housewarmings, or if you want to get organized yourself. Perfect for my excessive stash of grocery bags! Let’s get started!
BAG DISPENSER INSTRUCTIONS
MATERIALS
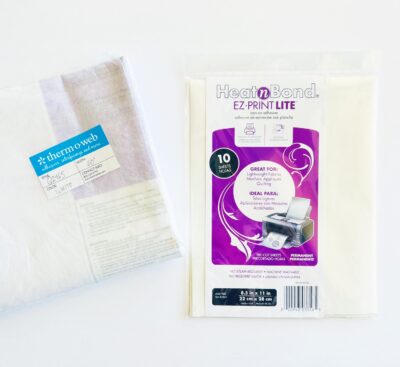
- HeatnBond Lite EZ-Print Iron-On Adhesive Sheet
- HeatnBond Craft Extra Firm Non-Woven Fusible Interfacing
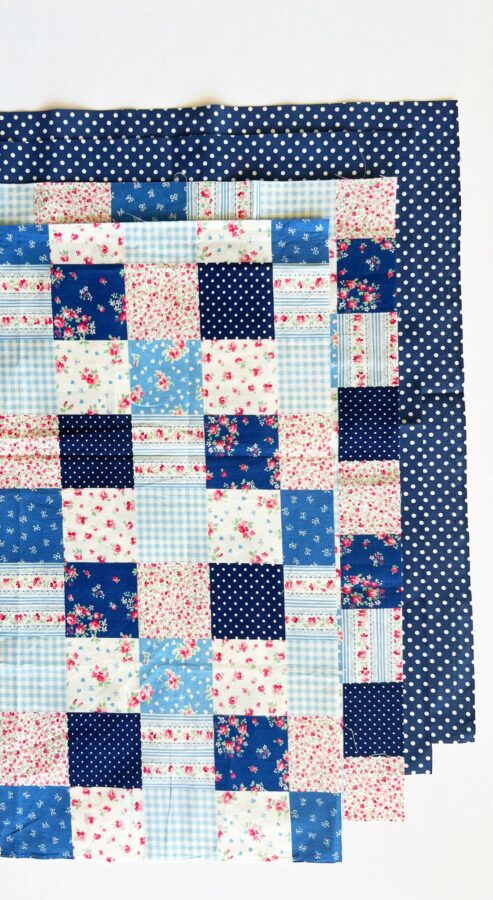
- One yard of fabric (1/2 yard print for outer and 1/2 yard of another print for inner)
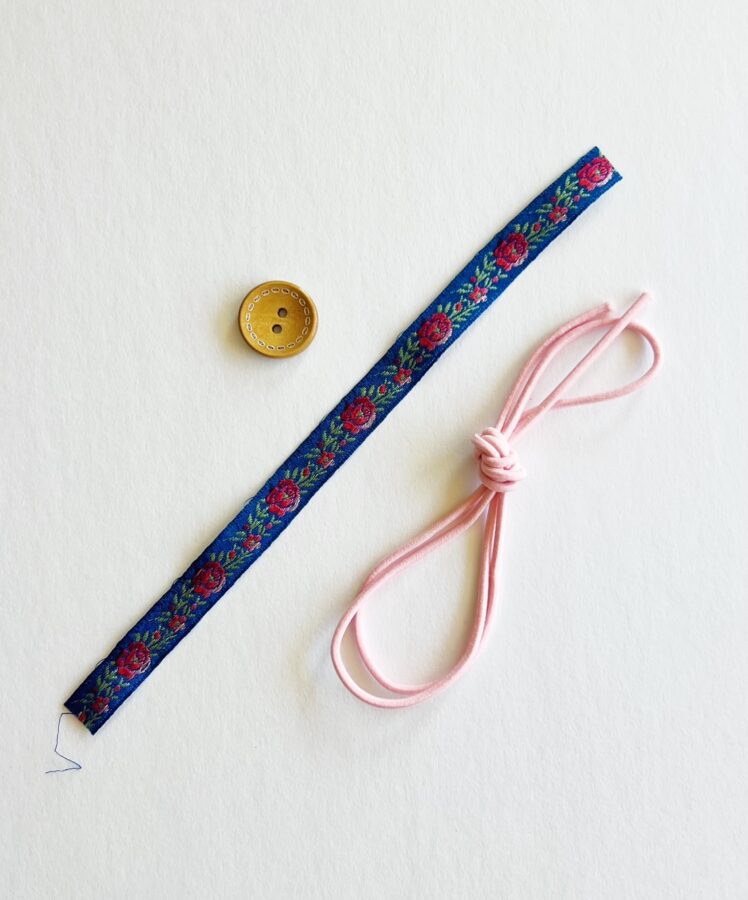
- Elastic – 2″ of elastic for button closure
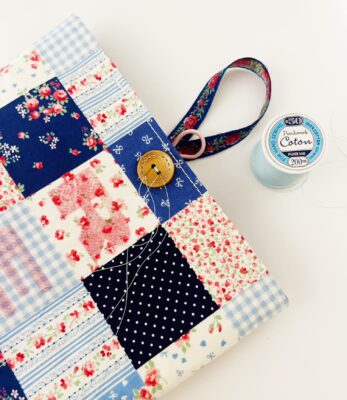
- One decorative button
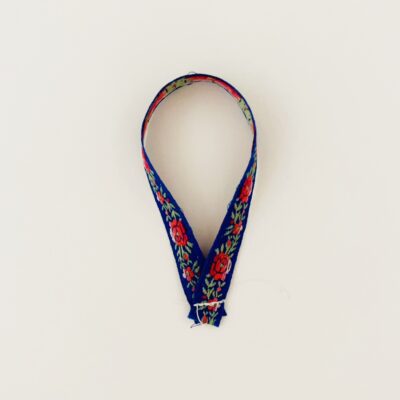
- Decorative ribbon – 9″ of ribbon for loop you place on the door
TOOLS USED
- Turn point tool – such as a stiletto or chopstick (to push seams out)
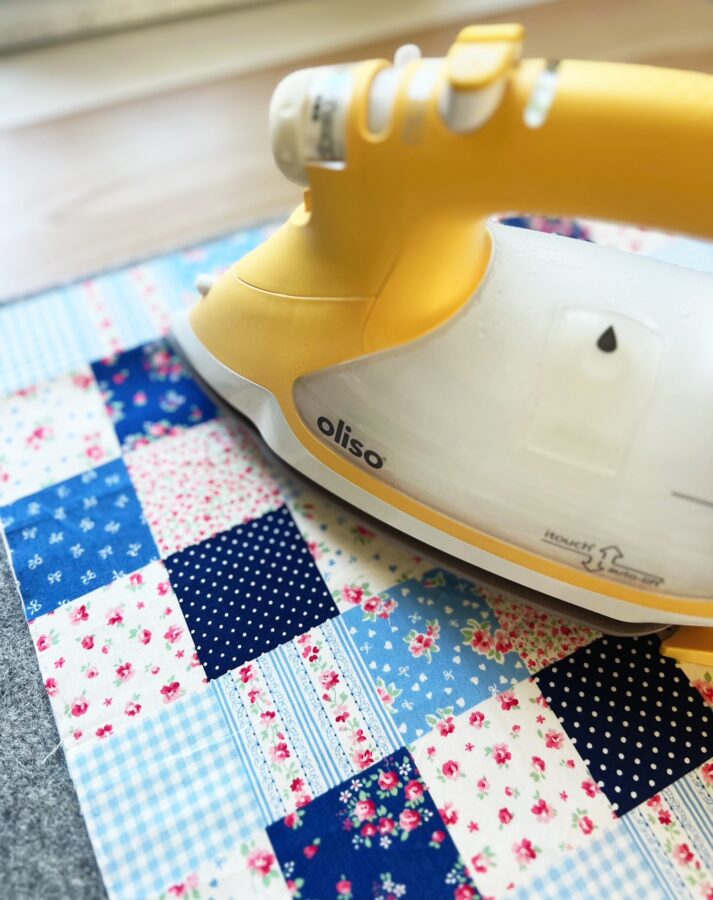
- Iron – I love OLISO!
- Computer and printer – to create and print the letters RECYCLE (you can use wording of choice)
CUTTING
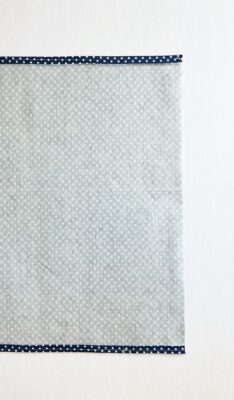
- Four 16 1/2″ x 9″ cotton rectangles (Use the same print for outer and a contrasting printer for inner)
- Four 16 1/2″ x 9″ HeatnBond Craft Extra Firm Non-Woven Fusible Interfacing rectangles
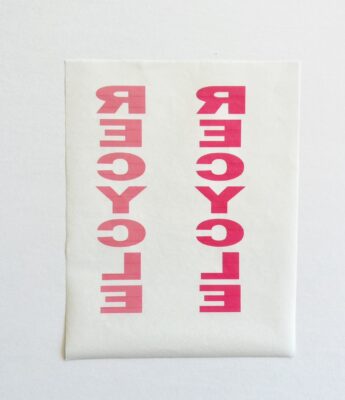
- Using a Word Program or program of choice, create the wording you would like to use for the project. I used Word and selected Word Art to create block style font for my project.
TIPS
- Use a 1/4″ seam allowance unless noted otherwise
- Follow the instructions for the HeatnBond Lite EZ-Print Iron-On Adhesive Sheet and proceed as directed from instructions
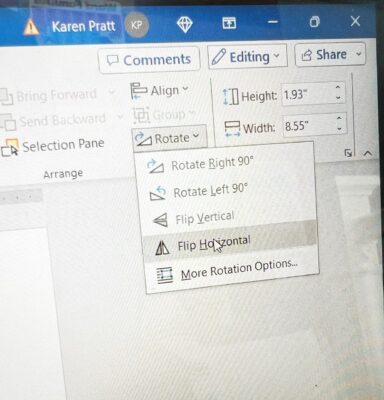
- When creating word blocks on word program, make sure to use the mirror image when creating the word (select Flip Horizontal on Toolbar)
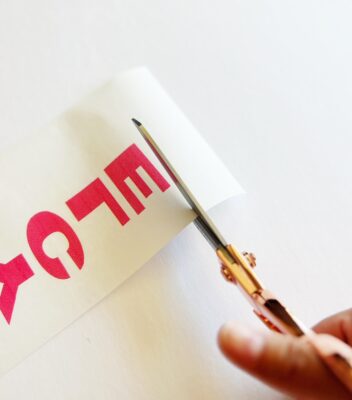
- When handling/cutting the HeatnBond Lite EZ-Print Iron-On Adhesive pieces, I use a tweezer and small scissors to cut small areas
LET’S BEGIN!
PREP YOUR CUT FABRIC PIECES
- Adhere all HeatnBond Craft Extra Firm Non-Woven Fusible Interfacing to all four 16 1/2″ x 9″ cotton pieces.
CREATE, PRINT, CUT AND ADHERE BLOCK WORDING
- Create Block Wording on Word or program of choice.
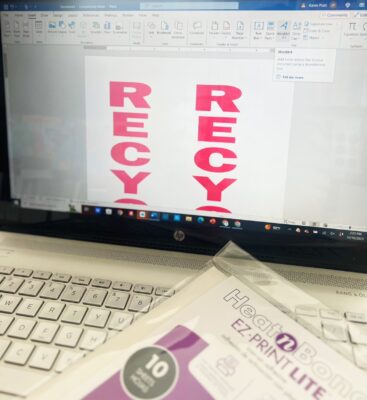
- Print the wording on the HeatnBond Lite EZ-Print Iron-On Adhesive Sheet, making sure to follow the instructions on the package.
- Cut out each letter, using tweezers when handling the cut wording.
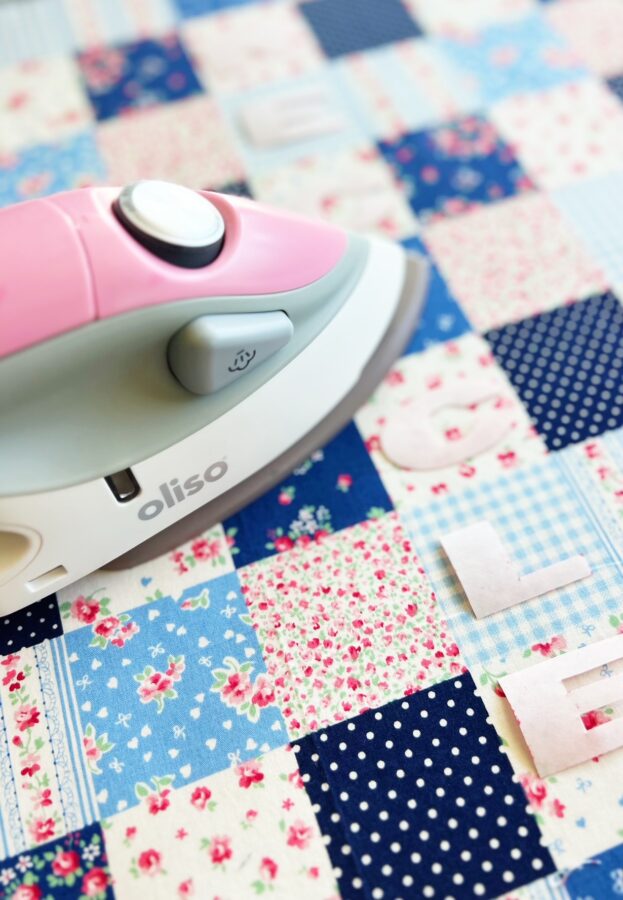
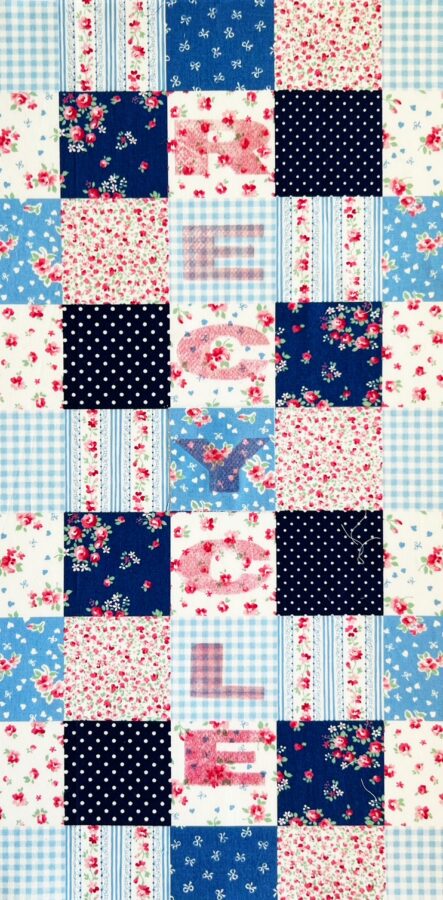
- Once the letters are cut, position on the desired placement towards the middle of one 16 1/2″ x 9″ cotton rectangle ( on the long 16 1/2″ side). Follow the instructions from the HeatnBond Lite EZ-Print Iron-On Adhesive for application.
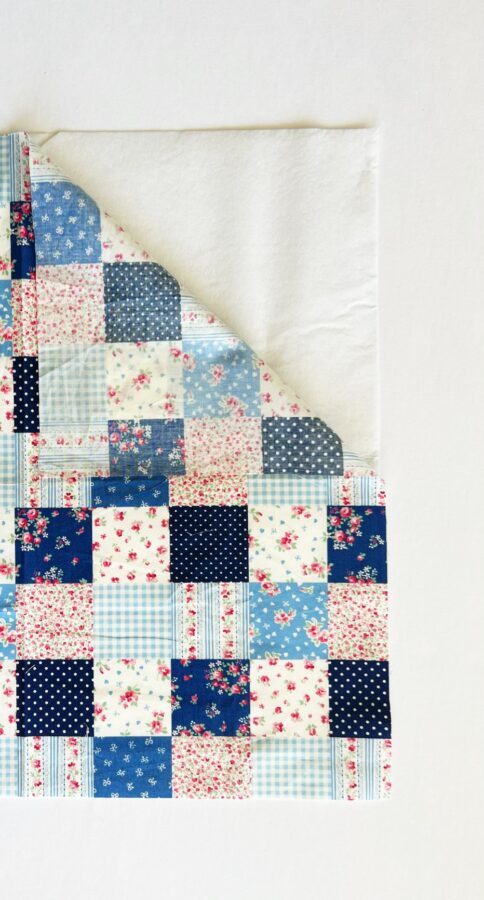
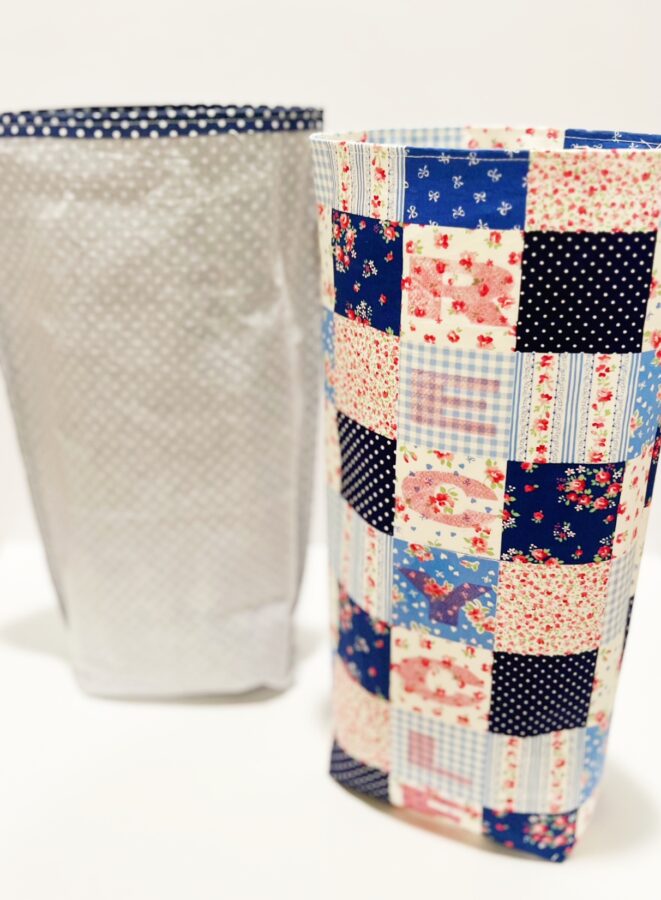
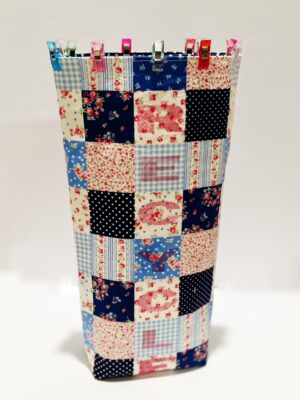
CREATE THE OUTER AND INNER BODY
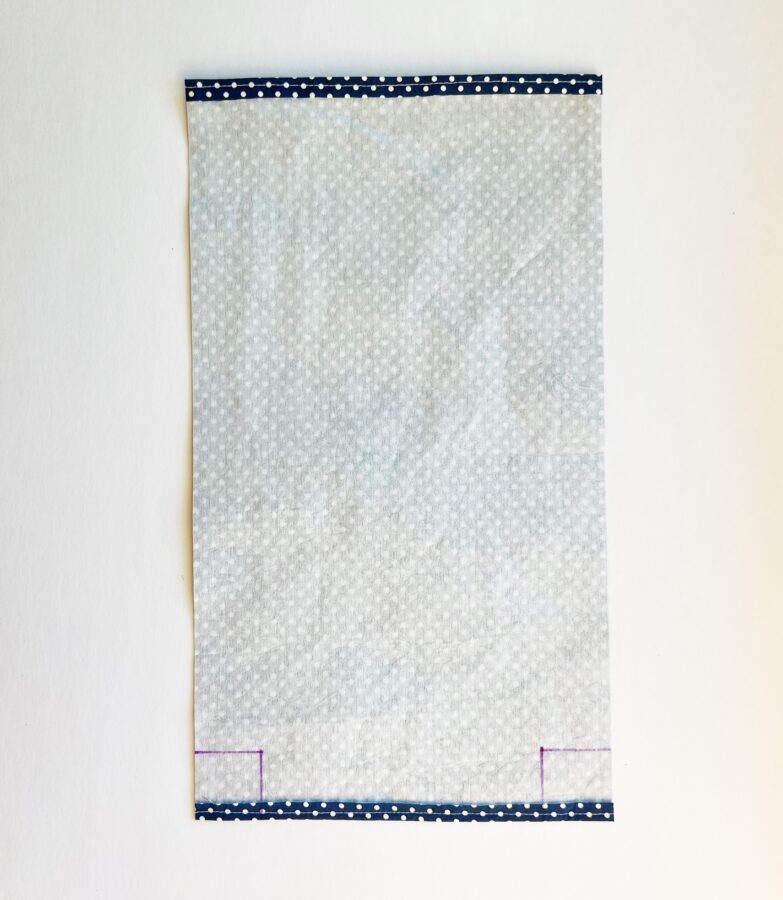
- To make the outer body, with the wrong sides facing out, take one outer 16 1/2″ x 9″ cotton rectangle and fold each top and bottom end in by 1/2″ (fold along the 9″ top and bottom end). Press with an iron and sew close to the seam using a 1/8″ seam allowance. Repeat for the second outer 16 1/2″ x 9″ cotton rectangle.
- Now, take each piece and place together with wrong sides facing out. Pin in place and sew a 1/4″ seam on each open side (along the 16 1/2″ side). The bottoms will be unsewn until the gusset is created.
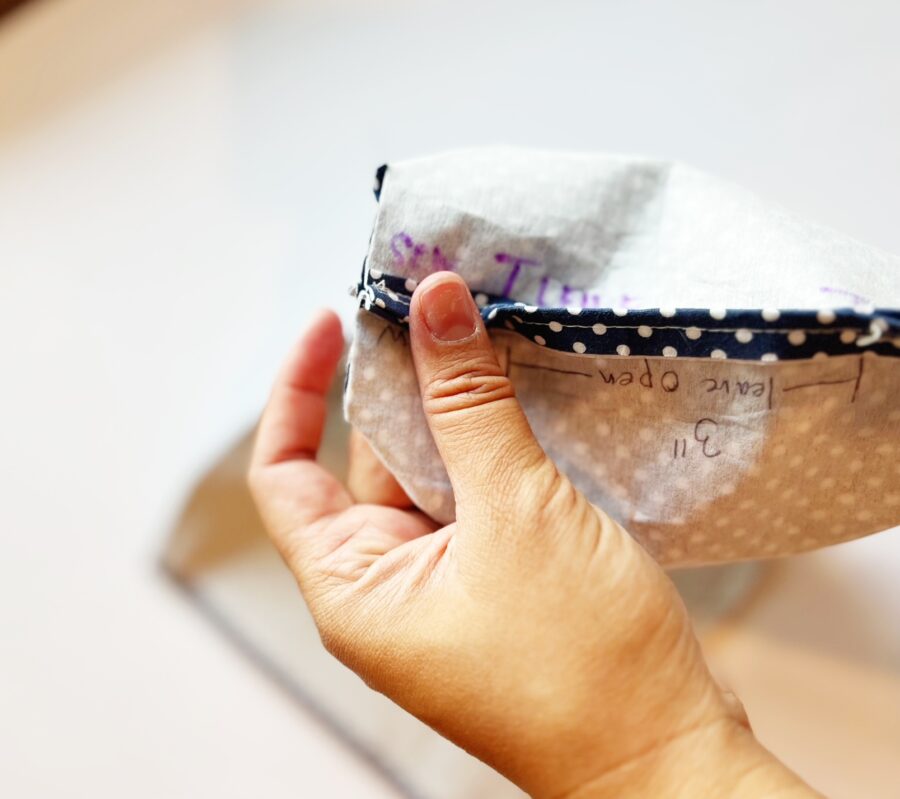
- To create the bottom gusset, draw a 1 1/2″ square on each bottom corner. Cut the squares out. Once the squares are cut out, sew the bottom seam, leaving a 3″ opening in the middle (this will be the bottom opening for the bag dispenser). Make sure to backstitch when sewing from beginning to the middle and from middle to the end. Press the bottom seam open, lining up the open seam (3″ opening) to the rest of the seams.
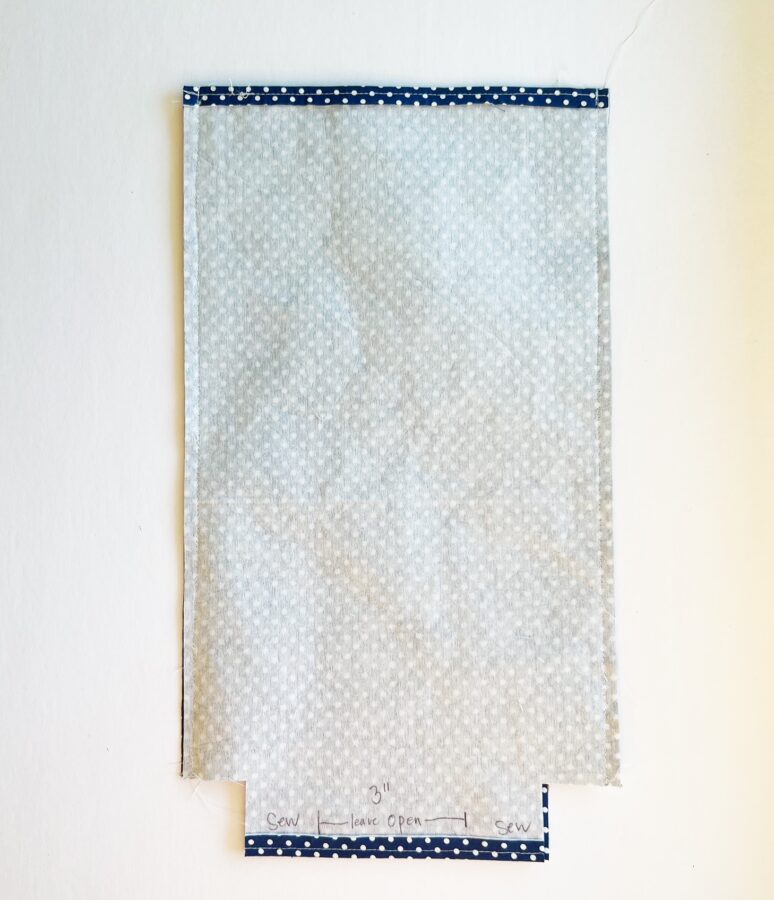
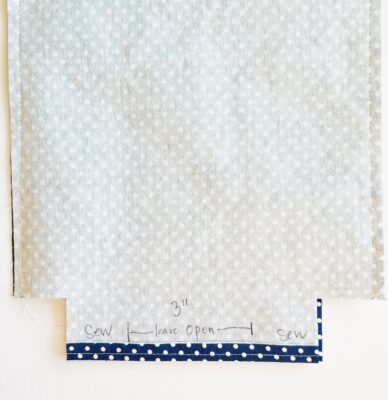
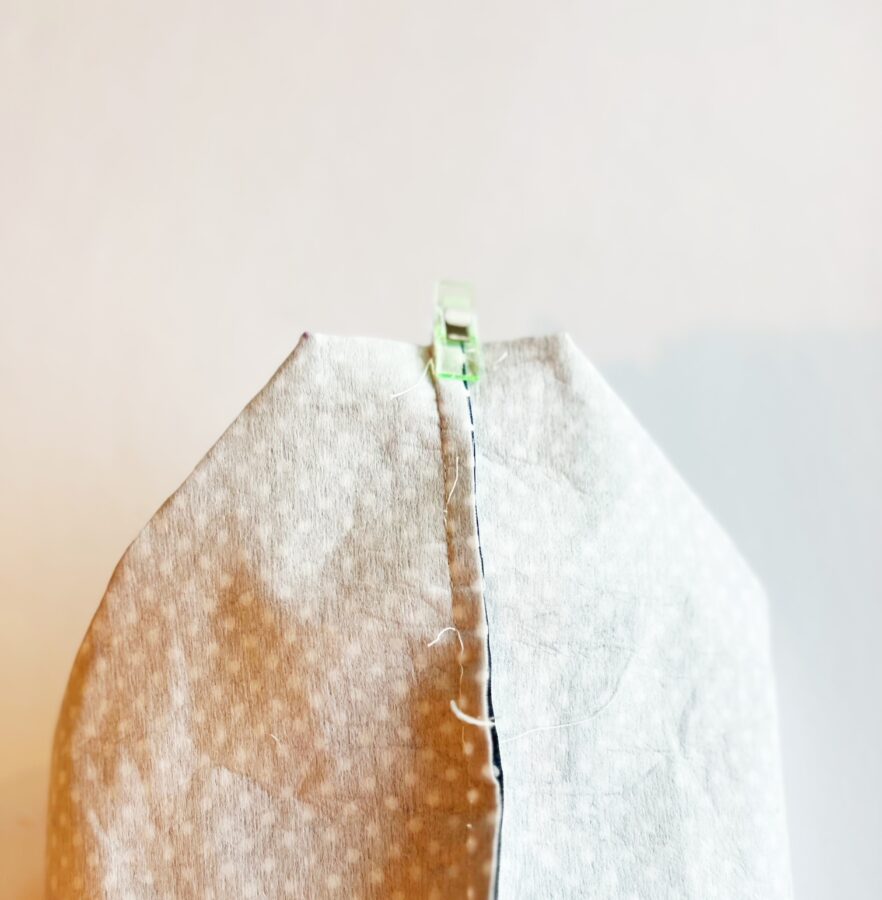
- To assemble the gusset, meet the cut seams together by opening the piece, lining up the seams together (creating a triangle of sorts). Pin or clip in place and sew along the raw edge using a 1/4″ seam allowance. Once done, turn the outer body right side out, using your chopstick or stiletto to smooth out the seams and pop the corners out.
- Repeat steps 1 – 4 for the inner body pieces. Once done, you do not have to turn the piece right side out. It will remain with the wrong sides facing out once assembled.
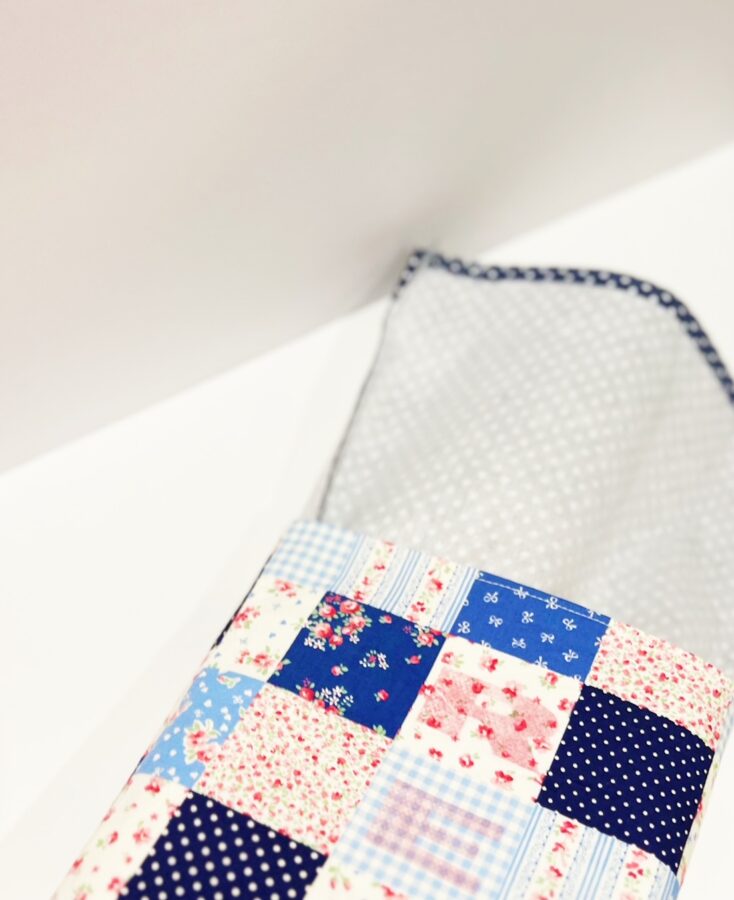
ASSEMBLE THE BAG DISPENSER, ADD THE LOOP, ELASTIC AND BUTTON
- Take the inner body (wrong sides of body should be facing out) and place into the inside of the outer body. Line up the corners and edges and pin the top in place.
- To add the ribbon loop in place, first take the ribbon and fold in half to make a loop. Baste the bottom edges in place. Take out a couple of pins towards the backside of the bag. Take the folded loop and place the raw edges inside the middle area along the inner and outer bag area (from where you took the pins out). Pin the loops raw edges in place (the loop should be facing up), and sew in place using a 1/8″ seam allowance. Repeat for the elastic piece.
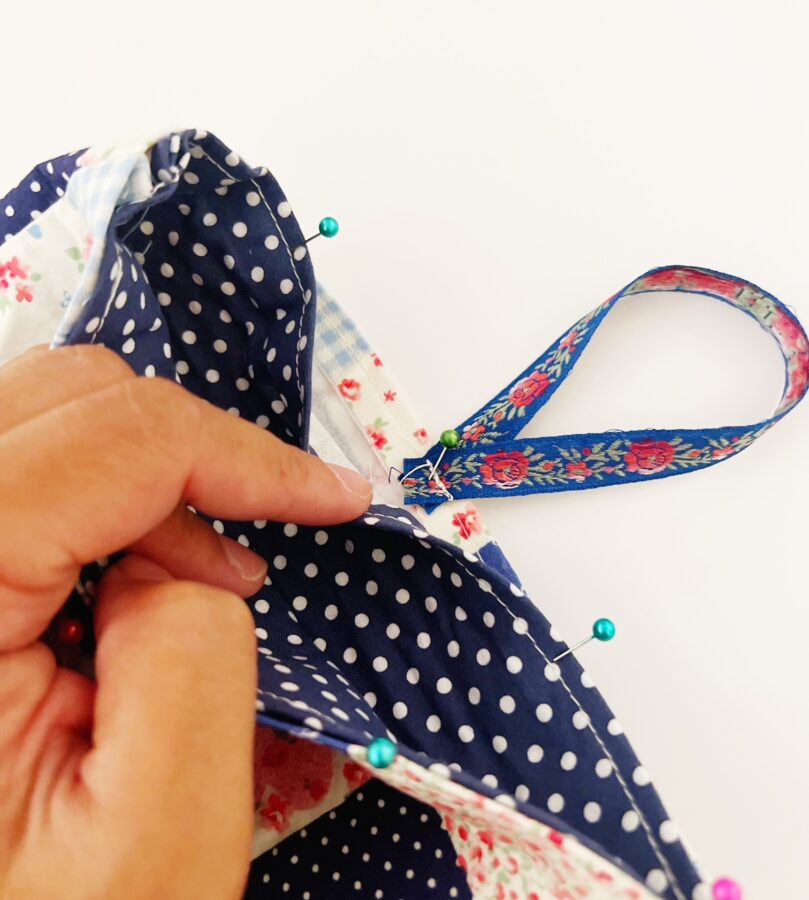
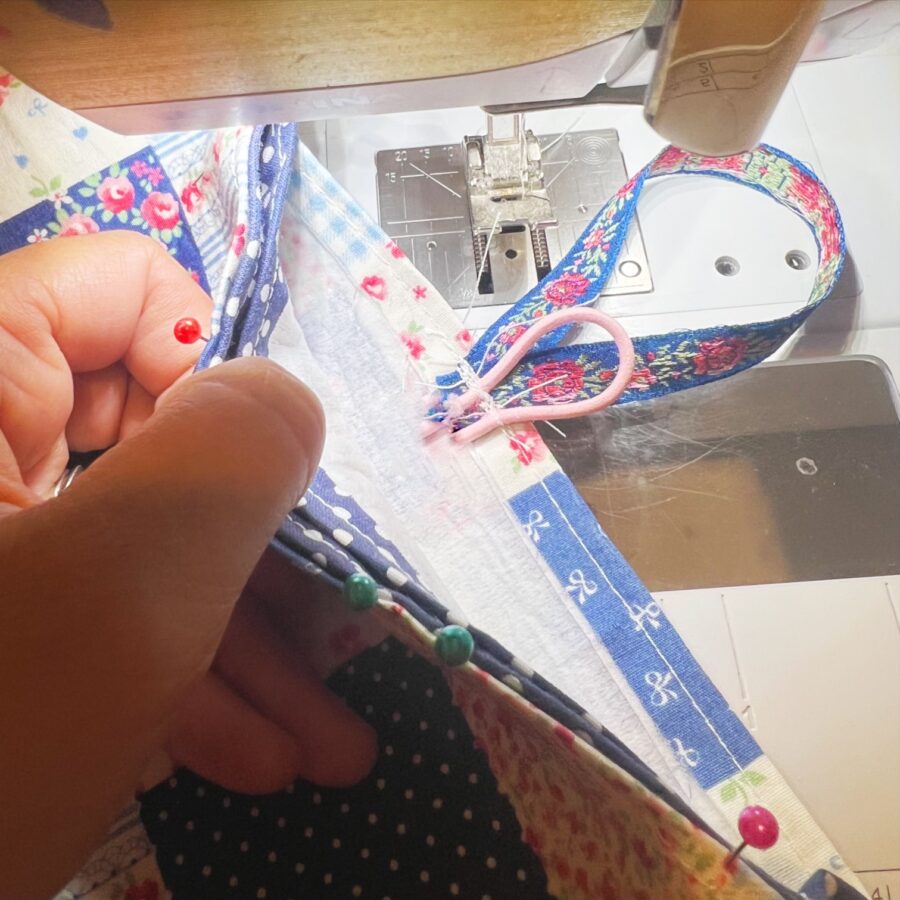
- Once the loop and elastic are in place, re-pin the top area and sew around the entire top edge of the bag, using a 1/8″ seam allowance. TIP: Take off your sewing arm so you can sew around the outer bag top edge of the bag.
- Hand sew the decorative button onto the front of the bag, positioning the button so it lines up with the elastic.
You are now done! You can fill the bag dispenser with grocery bags and close the it shut with the elastic loop and button.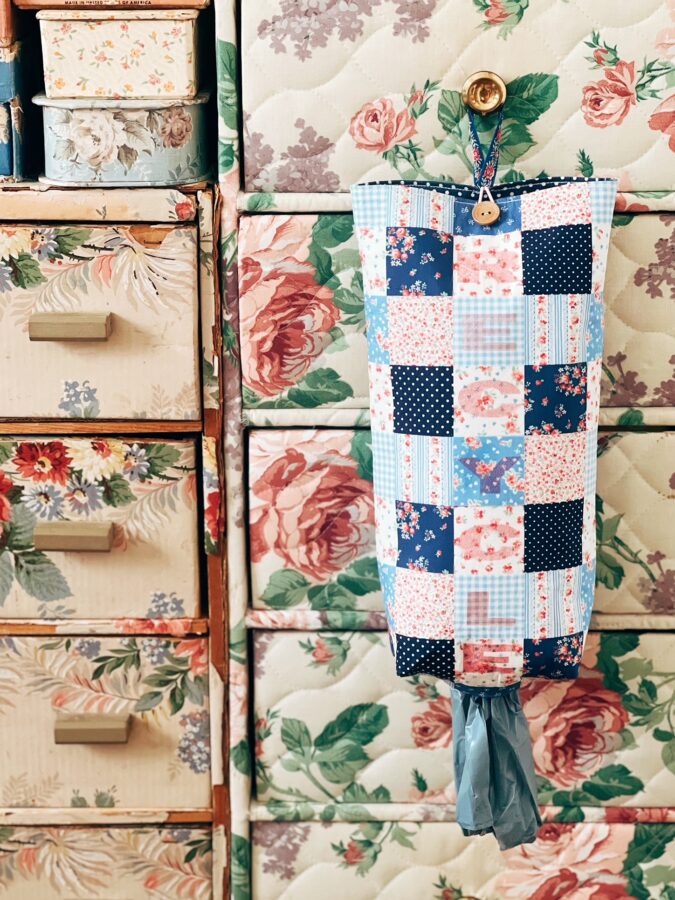
I hope you enjoyed this project and follow me over on Instagram @creamcraftgoods for more inspiration! Thanks!