


It’s Spring Week around here and we hope you’re enjoying all the pretty projects like this sweet mini quilt from Joan. You can pick up Carol’s, Carla’s, and Lisa’s spring minis to make a sweet spring quilt with the designs! We thank our talented team for their creativity and for creating these free spring patterns for your crafting.
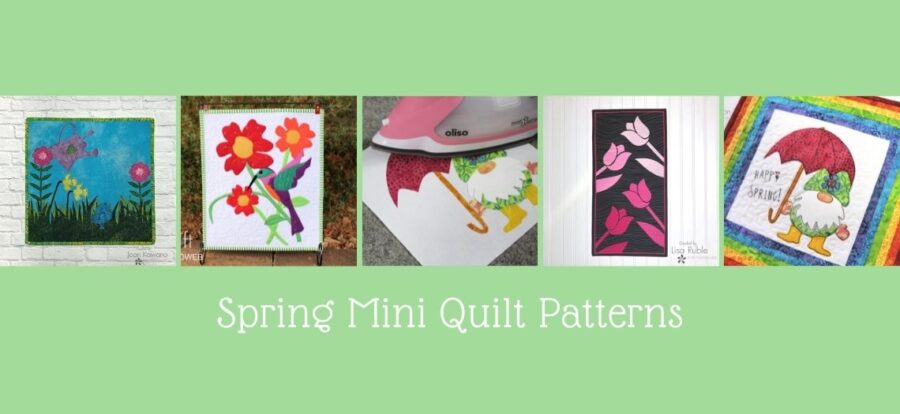
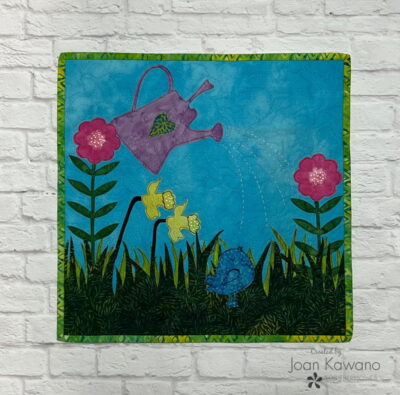
This 15″ x 15″ garden “mini” is sure to make any space feel like springtime.
Start by downloading the free pattern, “Whimsical Spring Mini”
With a few supplies, you will be on your way to sunshine and happiness for the new season.

½ yard fabric for the background and backing fabric.
1 – 16 ½” x 4 ¼” strip light green for short grass
1 – 16 ½ x 6” strip dark green for tall grass
2 – 2 ½” strips of fabric for binding
1 – 6” x 8” piece of HeatnBond Tearaway Stabilizer
Scraps of 2 greens for flower and daffodil stems, 2 pinks for flowers, yellow for daffodils, blue for the bird, purple for watering can, contrasting color for the heart
HeatNBond EZ Print Lite or HeatNBond®Lite fusible web
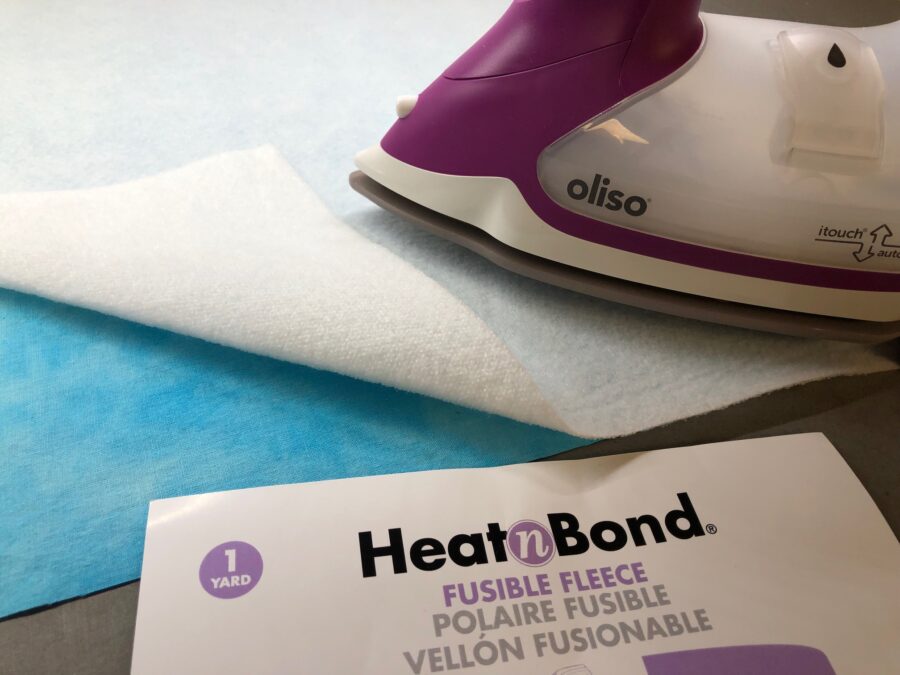
1 – 17” piece of HeatNBond®Fusible Fleece
White acrylic paint and a stylus
Thread to match or contrast
Embroidery thread
Oliso Iron
Spring flower Mini Quilt
 Start by cutting, centering, and fusing your background fabric to the HeatNBond®Fusible Fleece piece, allowing excess fleece around all the edges. Turn over, so the fleece side faces up, and spray the back of your fleece, using SprayNBond®Basting Adhesive. Place background fabric, right side up on the back, and smooth in place allowing excess around all edges.
The fusible fleece is the perfect weight to support stitching and keep your completed project nice and flat. The basting adhesive will keep your mini secure, while you stitch the appliques and quilt your mini. By backing it first, then stitching the appliques down, a majority of your mini will be quilted. I suggest you use a matching thread, in the bobbin
 .
.
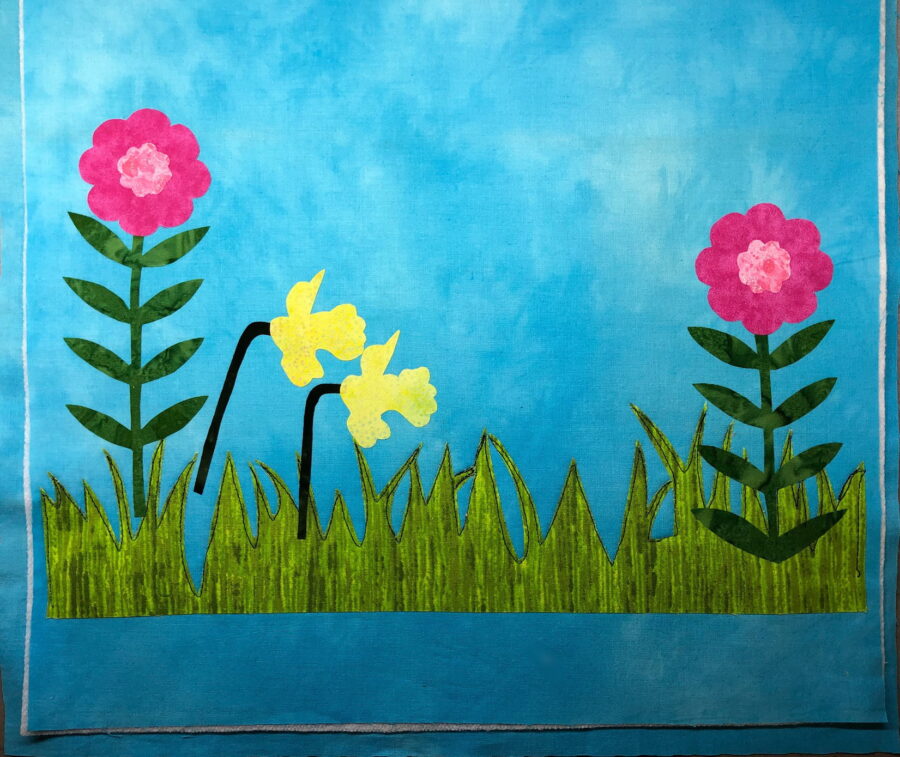
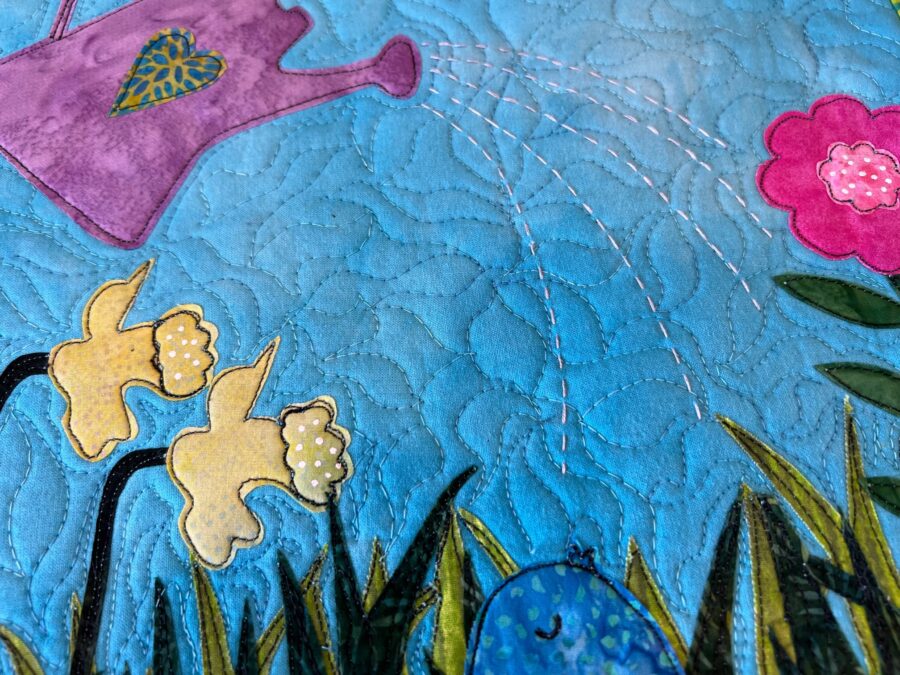
Appliques are stitched from the bottom up and elements are added after each stitching.
Complete instruction and photos are included in the pattern.
Adding whimsical stitching really brings things to life. When finished, quilt the rest as desired.
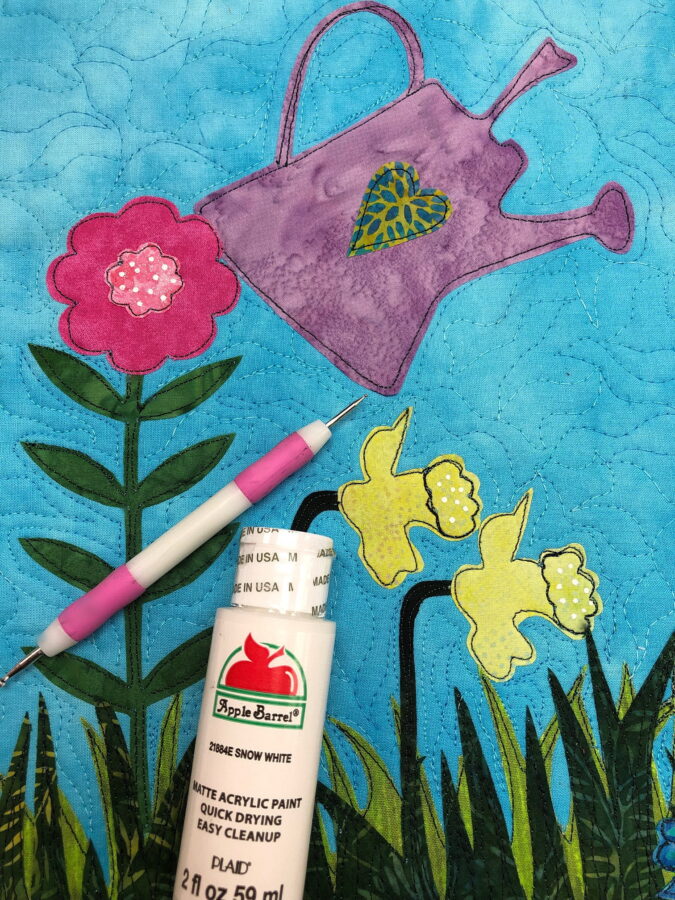
I like to add detail to my flowers, using acrylic paint and a stylus. It’s so easy and once it’s completely dry, you just press to set the paint.
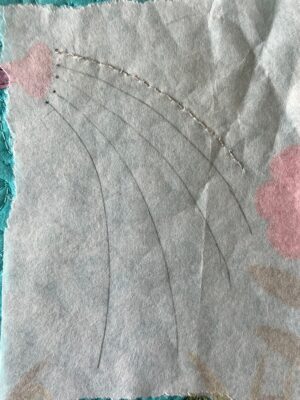
Using SprayNBond®Basting Adhesive, lay a piece of tear-away stabilizer on top your mini. Draw water droplet lines using a pencil. It’s easy to see through and it’s erasable if needed. Once you stitch the droplets, it tears right off. The basting adhesive will not leave any sticky residue.
Bind your mini and you are ready to enjoy!