


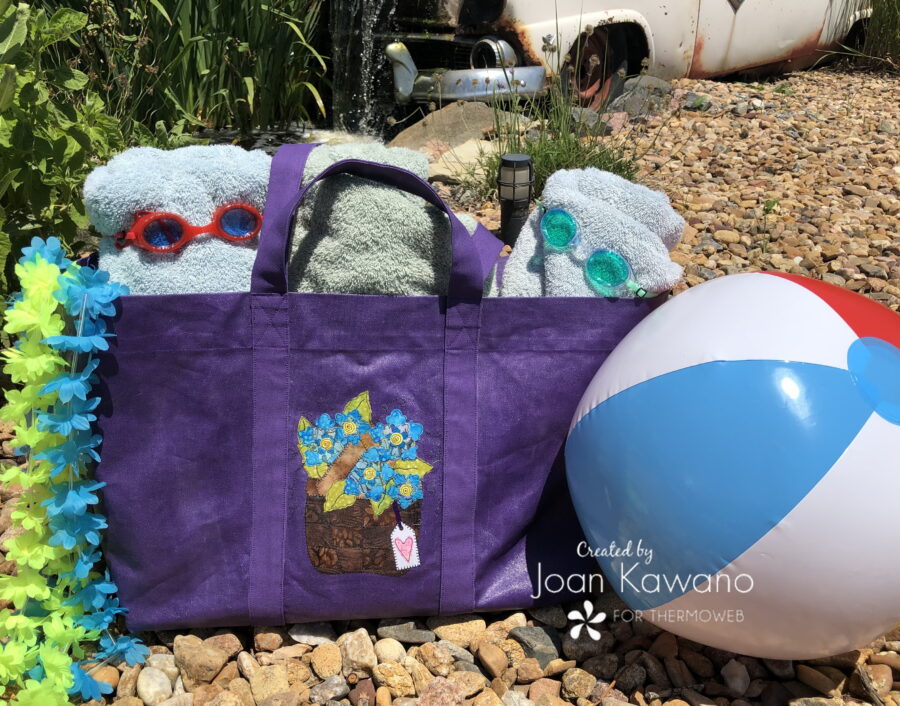
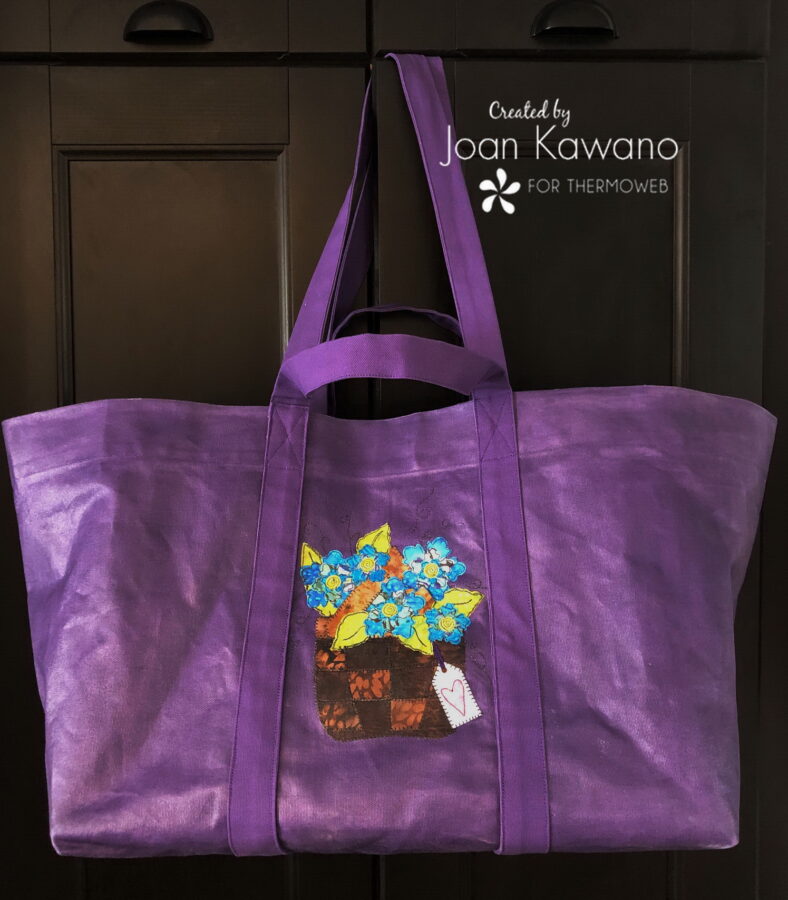
If you’re looking for a giant bag, that’s not only perfect for your biggest shopping trips but great for the beach as well, look no further.
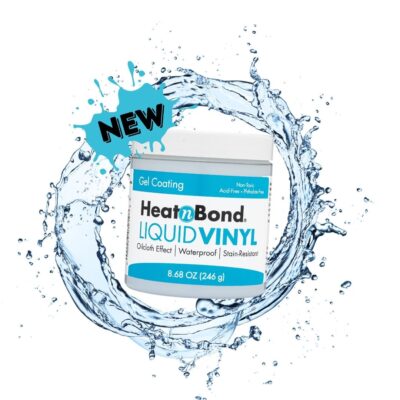
HeatNBond Liquid Vinyl is perfect for the job!
Start by downloading the free pattern
Waterproof “Warehouse Size” Re-usable Shopping Bag
Read through the entire pattern before beginning
Supplies
1 – 1/2 yards 60” wide Canvas Duck cloth
Assorted fabrics for appliques
ThermOWeb Pressing Paper or parchment paper
Applique Pressing sheet
Chalk Marker
Foam brush or fine bristle paintbrush
Fabric clips
Teflon Foot
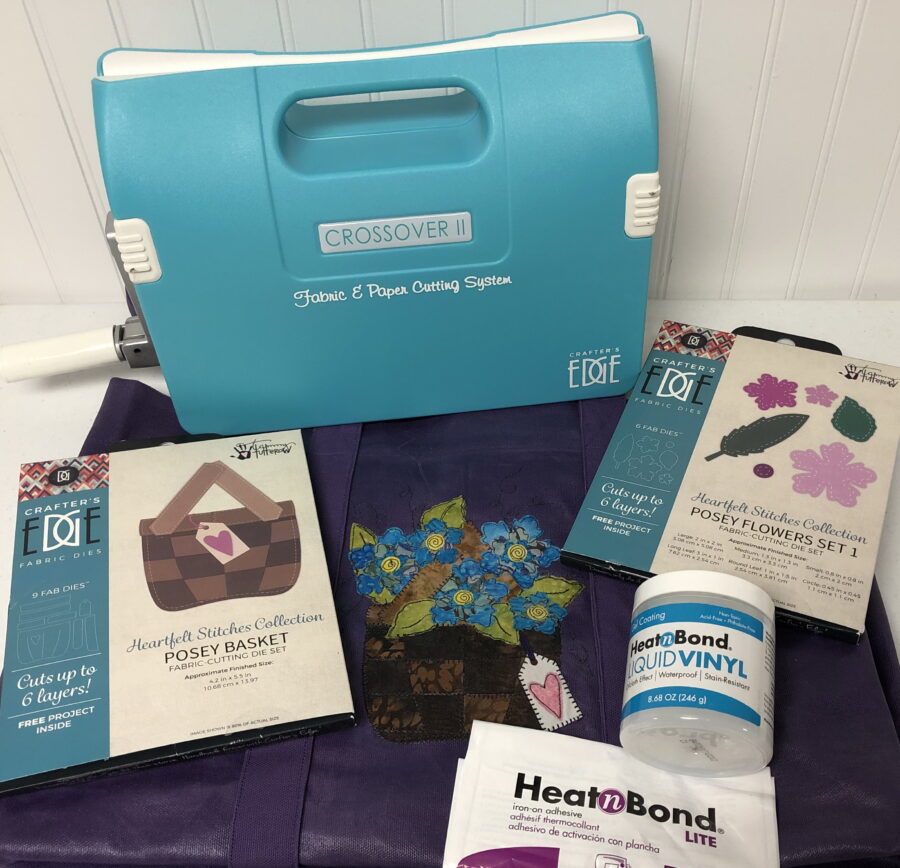
“Crafters Edge” Posey Basket and Posey Flowers Set 1 dies
Crossover II Die Cutting Machine
Foam Core Board
Thread to match
Cutting Instructions
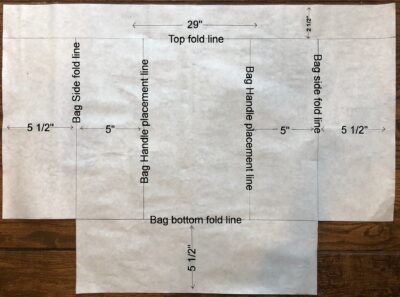
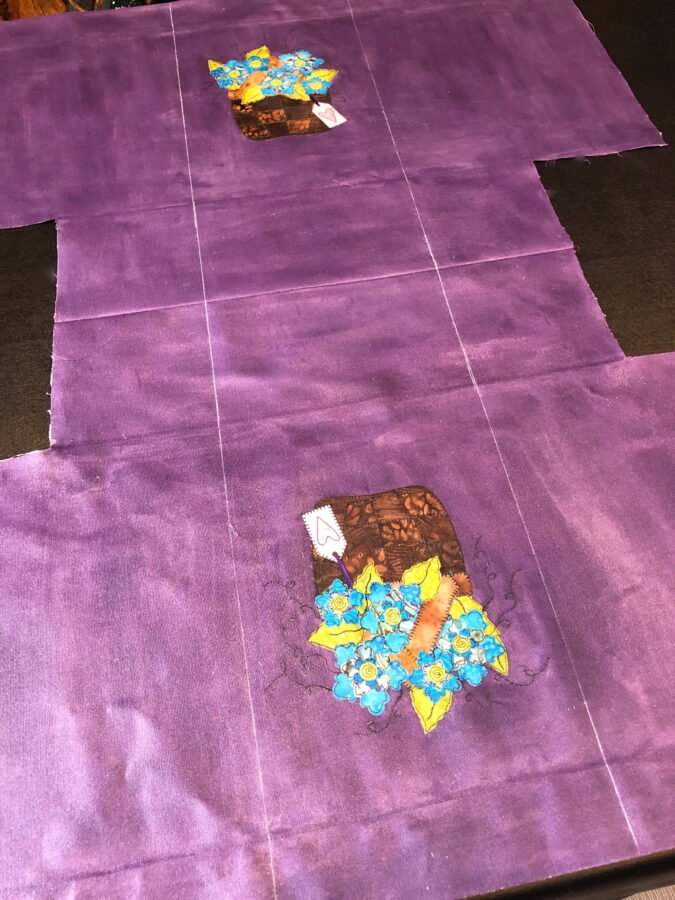
Cut 2 – 29” x 21 1/2″ pieces for bag body aligning bottom on the selvages.
Cut out a 5 1/2″ square from each side of the bottom
Cut 3 – 3 1/2″ x 60” or width of fabric for handles. Use the selvages.
Cut 1 strip in half creating 2 – 3 1/2” X 30” or 31” (depending on width of fabric) handles.
Optional bag bottom:
Cut 1 – 11” x 17” piece of foam core board for the bottom
Cut 1 – 12 1/2” x 35 1/2″ piece of fabric for the bottom cover
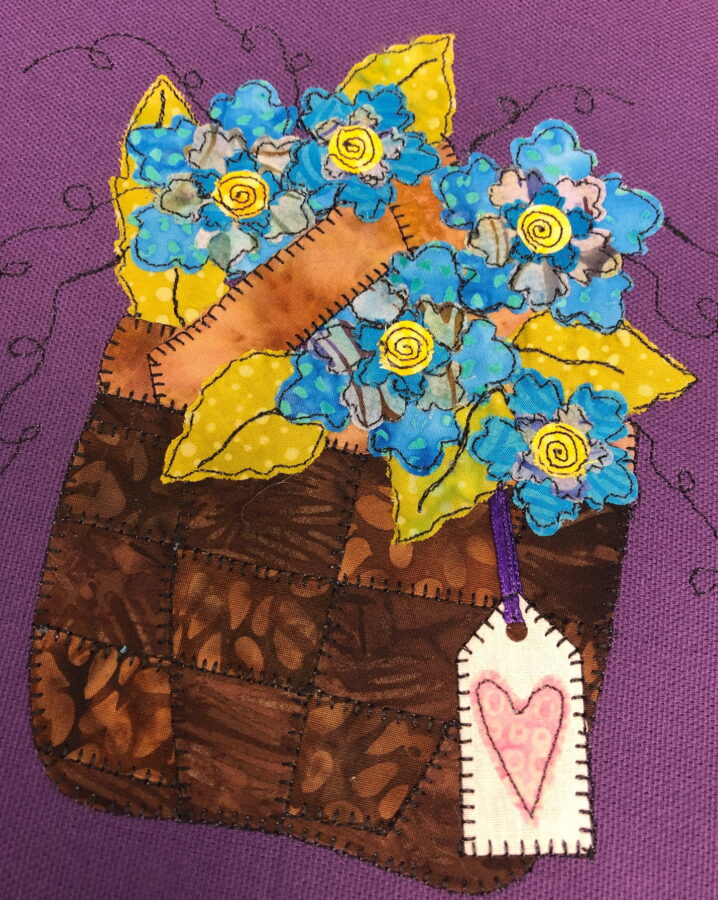
Cut assorted fabrics and “Heat N Bond Lite” fusible web, large enough to accommodate applique shapes. Fuse the fusible web to the backside of fabrics. When cool, cut shapes out using the Crossover II die cutter. You need 2 sets of appliques, one for the front and one for the back of the bag body.
Construction
Remove paper from the back of applique pieces and construct them on an applique pressing sheet. When cool remove and place on center of the bag.
Find the center of your bag, both top and bottom and side to side, on both pieces of your bag body. You have about 5 3/4” width to work with, between the handles.
Fuse appliques to bag and stitch down, using your favorite raw edge applique method.
Place both the bag body pieces on a large piece of Parchment paper to protect your working surface. Following the manufacturer’s recommendations, paint a coat of “HeatNBond Liquid Vinyl” on the front of both bag pieces. I prefer to work with a 2” wide, fine bristle brush when working on large projects. It is just the right size for the jar of vinyl.
Let dry for 30-45 minutes. Cover with another sheet of parchment paper or ThermOWeb Pressing Paper, and using an iron on medium heat and no steam, press for 45 seconds, moving the iron slightly to cover the entire area. Let cool and remove paper. Note: never allow a hot iron to come in direct contact with the vinyl.
Turn body pieces over and again paint, let dry, and press as above.
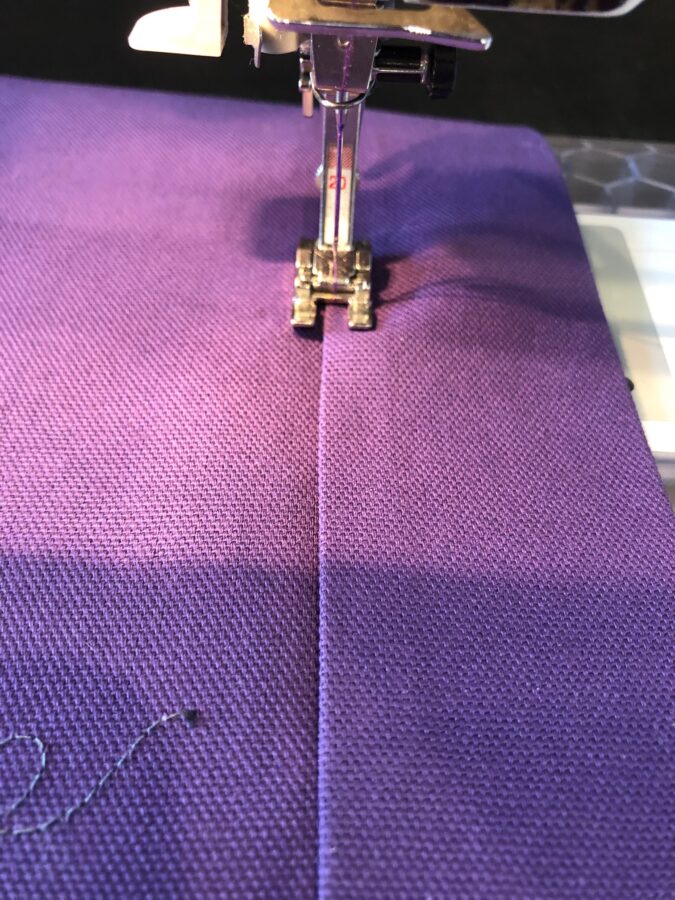
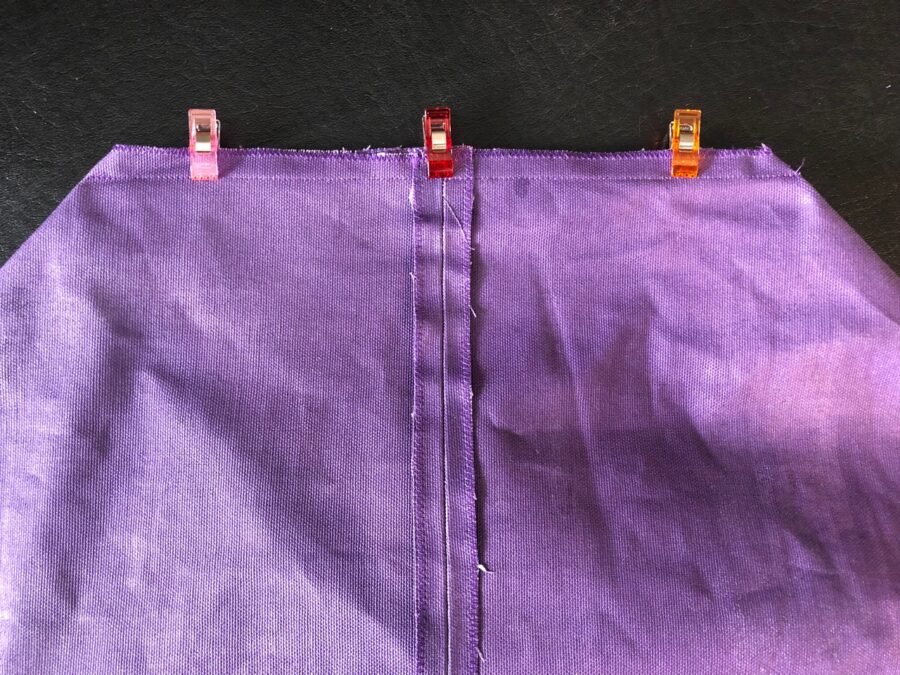
With right sides together, stitch bottom seam of bag body using 1/2” seam. Press open using Parchment paper on both sides.
Chalk a line, 2 1/2” down from the top edge of each end of the bag body. Press towards the back of the bag. Fold under a 1/4″ on raw edge and stitch.
Draw a line 10 1/2″ in, from each side of the bag using a chalk marker. These will be placement lines for the handles.
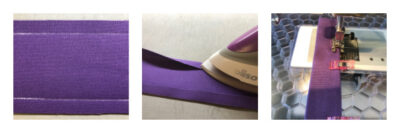
Fold 1/2″ under on both sides of the length of all 4, handle pieces.
If you chalk your half-inch marks it makes it easy to press.
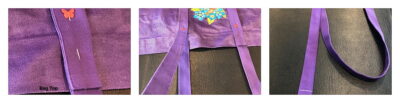
Next fold handles in half wrong sides together matching the folds. Press, pin, and stitch down all sides, as shown.
Dropping down approximately 1” from top of bag, pin and stitch the shorter handles inside the chalk line on each end of the bag, as shown.
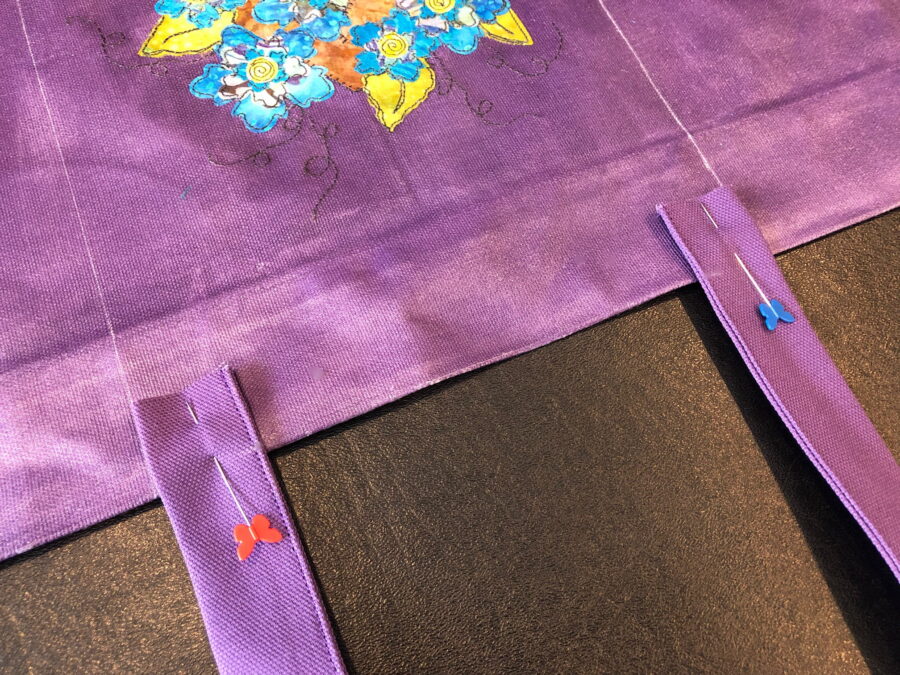
Taking your longer strap, pin on top of the handle we have just attached to the bag. Match edge with bag top and pin down the entire length of the bag. There will be an excess strap.
Do the same with the additional strap, starting at the other end of the bag, so there is an excess strap on each end of the bag.
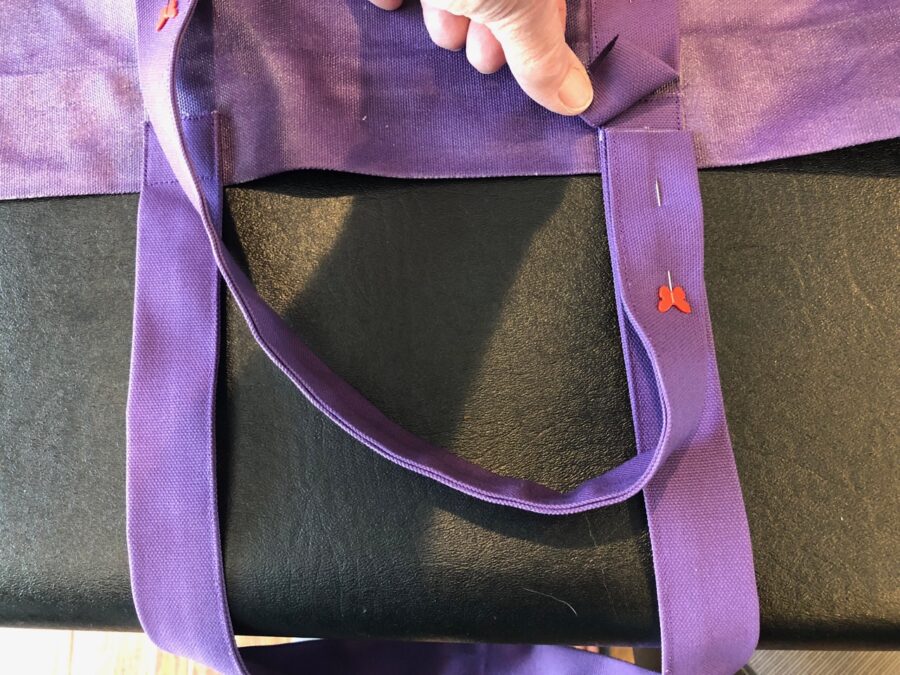
Measure excess strap, 13 1/2” from bag top, mark, and cut on the mark.
Slide the end of the strap underneath the strap across from it, making sure it is not twisted. Pin in place. Do the same on the other end of the bag.
Once you have both sides pinned and the ends slipped under, stitch in place by going down each side of the strap and across the top.
There will be some bulk, especially where there are 3 layers of strapping, but by stitching slowly and carefully, you should not have any problems. Use a heavy-duty or denim needle if needed.
To give the straps a little extra strength, stitch a box with an X in the middle, at the top where the straps meet.
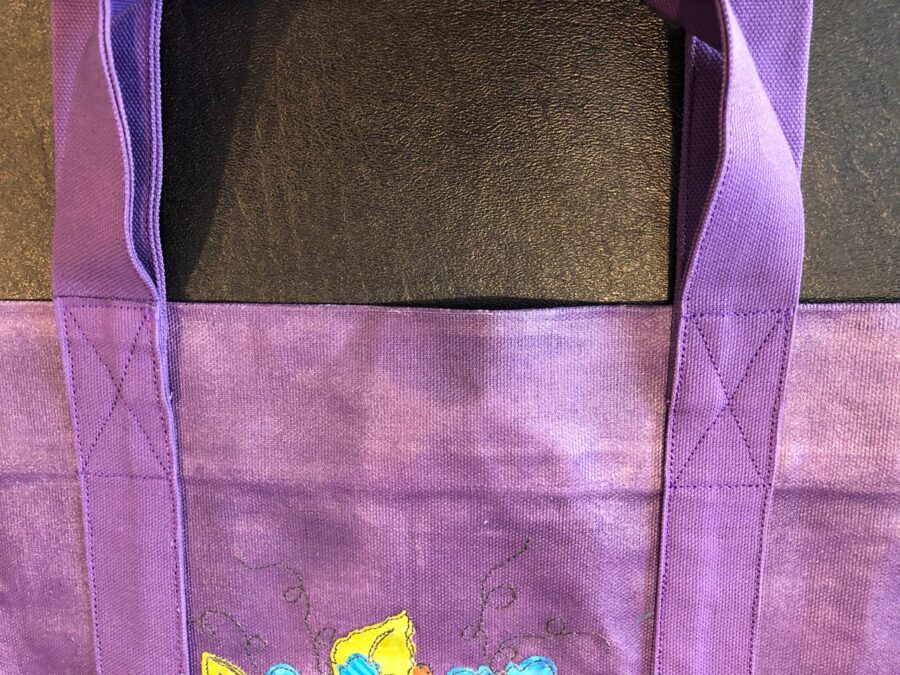
I love the double handles on this bag. The longer straps make it easy to tote on your shoulder. The shorter straps are not only great when you are lifting a heavy bag after a trip to the grocery store, but they also support the bottom as well.
Finish the remaining raw edges of your bag body with a zigzag stitch.
Stitch side seams using a 1/2″ seam and press open.
Pull the raw edges on the bag bottom together, matching the center seams.
Clip or pin together, and stitch across using a 1/2” seam. Turn right side out.
This bag is the perfect size for warehouse grocery shopping. Adding a foam core bottom to it, makes it even stronger.
Paint 1 side of the bottom cover fabric with liquid vinyl. Let dry and press as before. Zigzag the edges to prevent raveling.
Turn under 1/2″ on each of the short ends and stitch.
Fold piece in half creating a 12 1/2″ x 17 3/4″ pocket. Stitch down each of the 17 3/4″ sides and turn the right side out. Slip foam core board into the pocket.
Slide into the bottom of the bag.
Did you know you can add more coats of Liquid Vinyl, depending on what you are looking for?
1 coat – water and stain resistant
2 coats – waterproof and stain resistant
3 coats – waterproof and stain-resistant with a semi-gloss oilcloth finish.
One jar will cover all the pieces for this tote bag, once.
Having a vinyl-coated market tote bag, allows you to just wipe it out with a disinfecting wipe when you have messy spills.
As a beach tote, it keeps water out as well as wet gear contained.
Enjoy!
This post contains affiliate links. For more information, see our disclosure HERE.
Helen Bowie
July 22, 2021 at 4:41 am (3 years ago)I’m not sure what I would use this liquid waterproof for, so interesting but I would not take long to use it on a creative project. Thanks for this info.
travelingro
July 22, 2021 at 10:25 am (3 years ago)Unable to download the waterproof bag … at all. I never have problems downloading patterns from her so wondering what the issue is. Great bag, btw. I would like the pattern. Thanks …
cwknitnut
July 22, 2021 at 12:04 pm (3 years ago)I would definitely make myself a bag like this with the Liquid Vinyl!