Sweet Treat Mini Stocking featuring HeatnBond
Greetings creative friends! It’s Belinda Karls-Nace from Blue Ribbon Designs, here today with a brand new project tutorial featuring an assortment of my favorite Therm O Web products. Today, I am excited to share my “Sweet Treat Mini Stocking” with you.
 This is a quick and easy project, perfect for holiday decorating and gift giving. If you think sewing a stocking may be a bit complex, then this is the project for you; these simple, step-by-step instructions will have you making your own stocking(s) in no time! These are the perfect size to tie on a package, hang on a tree, or hold a gift card and/or holiday treats.
Let’s get started! Simply gather the materials/supplies listed below, then download the pattern with PDF templates.
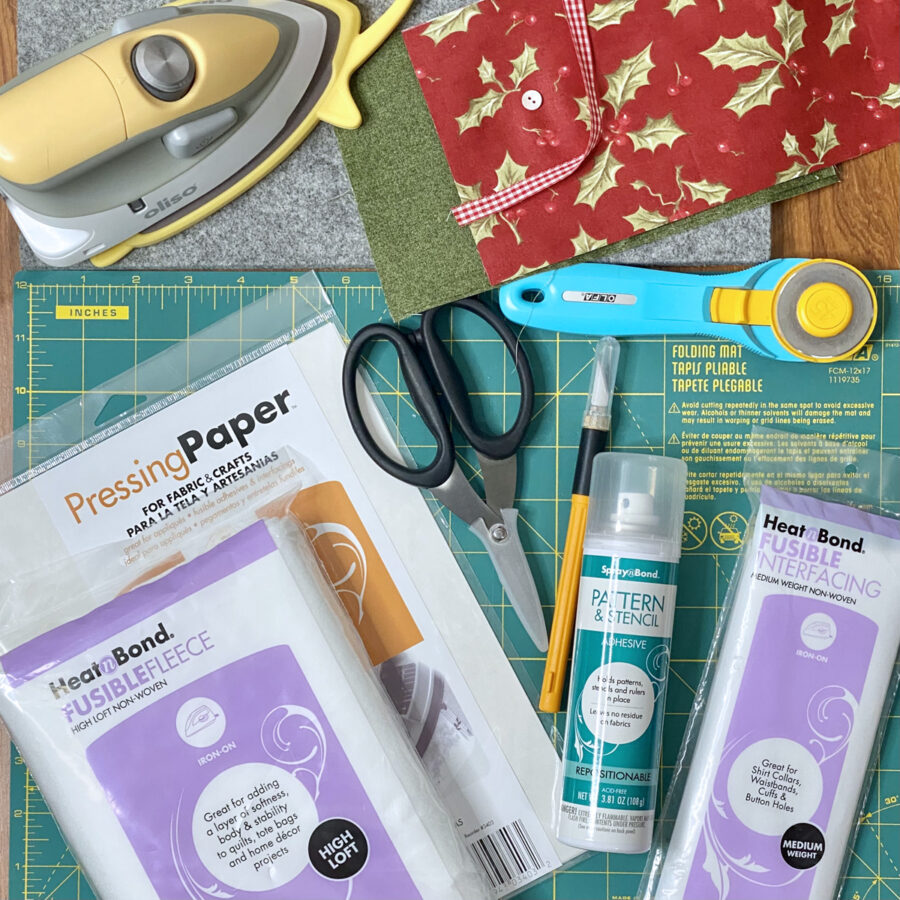
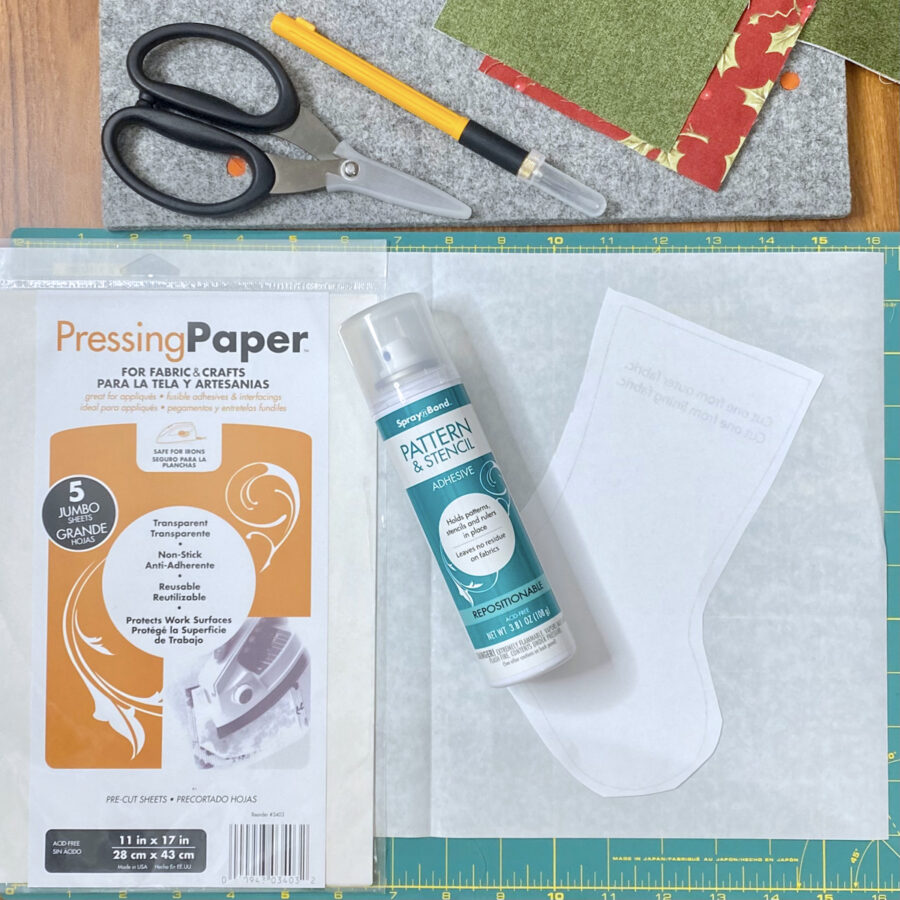
What you need (for one mini stocking):
- HeatnBond Fusible Fleece
- 2 – 5” x 9”
- HeatnBond Medium Weight Non-Woven Fusible Interfacing
- 2 – 5” x 9”
- SpraynBond Pattern & Stencil Spray
- Pressing Paper Fabric and Craft Sheets
- 1 Sheet
- Cotton Fabrics: model uses Glacѐ by 3 Sisters for Moda (note, this is an older collection, but this project is perfect for scraps and small pieces of holiday fabrics you have on hand) – I encourage you to use your favorite fabrics!
- Outer Stocking fabric
- 2 – 5” x 9”
- Lining fabric
- 2 – 5” x 9”
- Outer Stocking fabric
- Twill Tape or Ribbon (model used red and white gingham ribbon)
- 1 – 6” pieces (hanging tab)
- Small Button
- Oliso Iron
- Olfa Cutting Tools (cutting mat, rotary cutter)
- Sewing Machine
- Basic Sewing Supplies/Tools (small sharp scissors, rulers, sewing thread, wonder clips/pins, pencil, tape, etc.)
How to Make a Sweet Treat Mini Stocking (4.5” x 8.25”)
1. Download and print the Sweet Treat Mini Stocking Pattern PDF.
Sweet Treat Mini Stocking – A Project for the ThermOWeb Blog
Print actual size on regular printer paper (do NOT “fit to page” or “shrink to fit”).
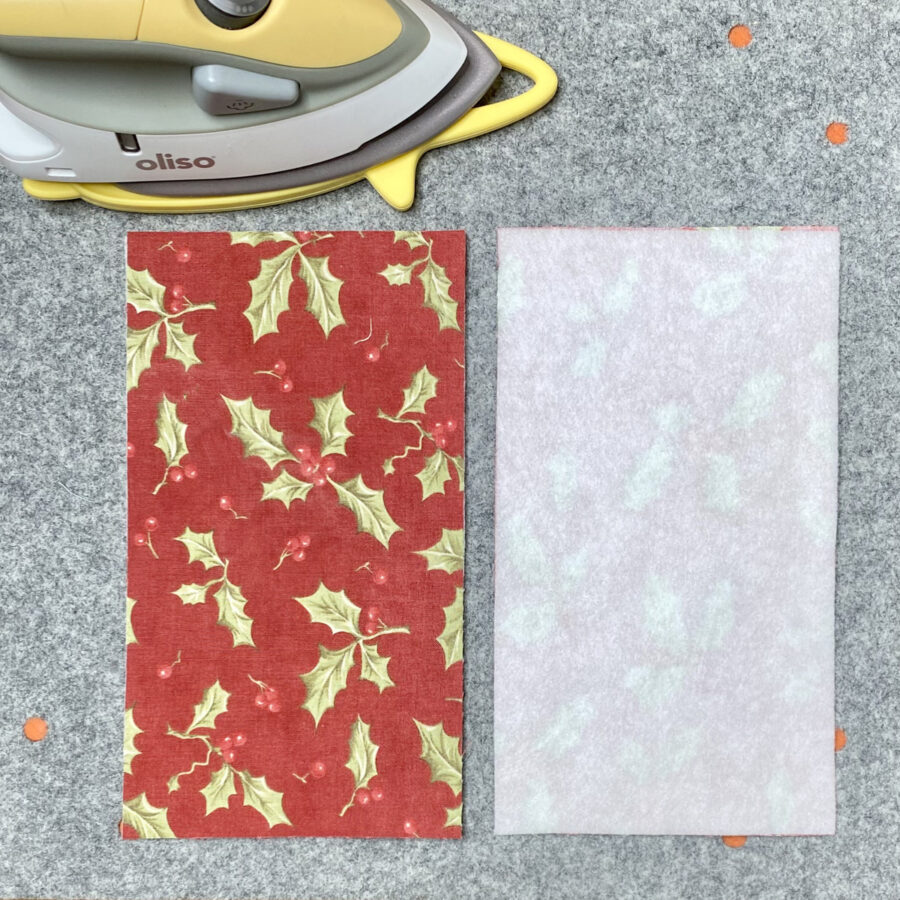
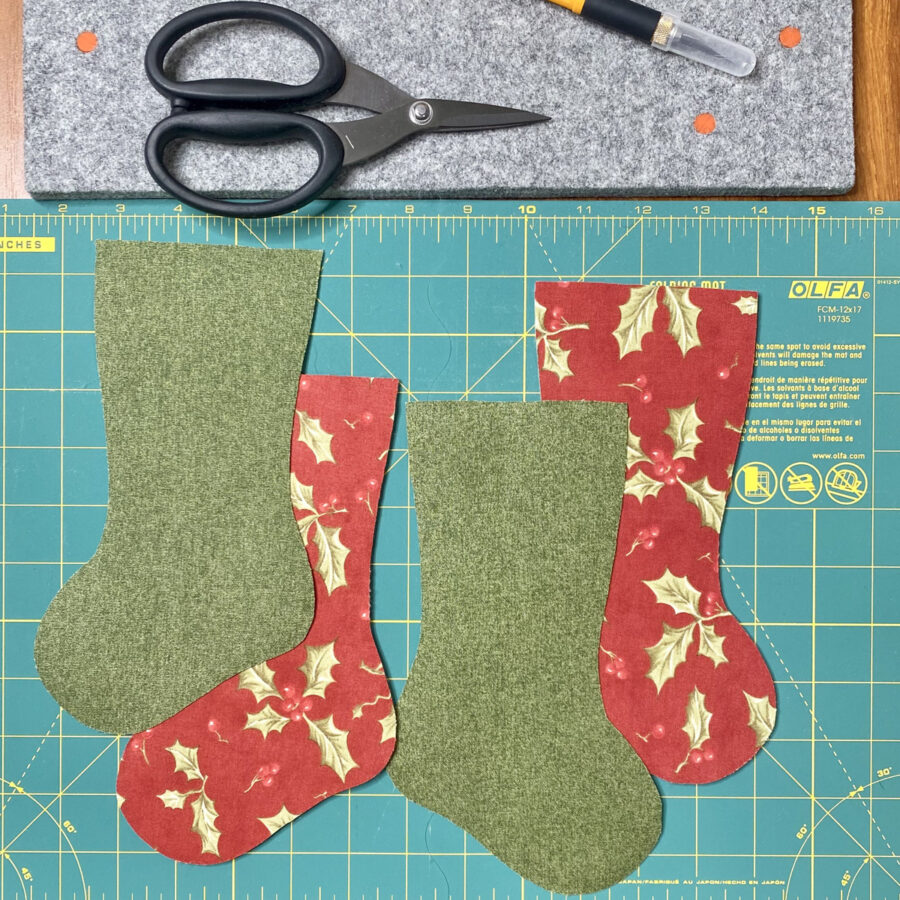
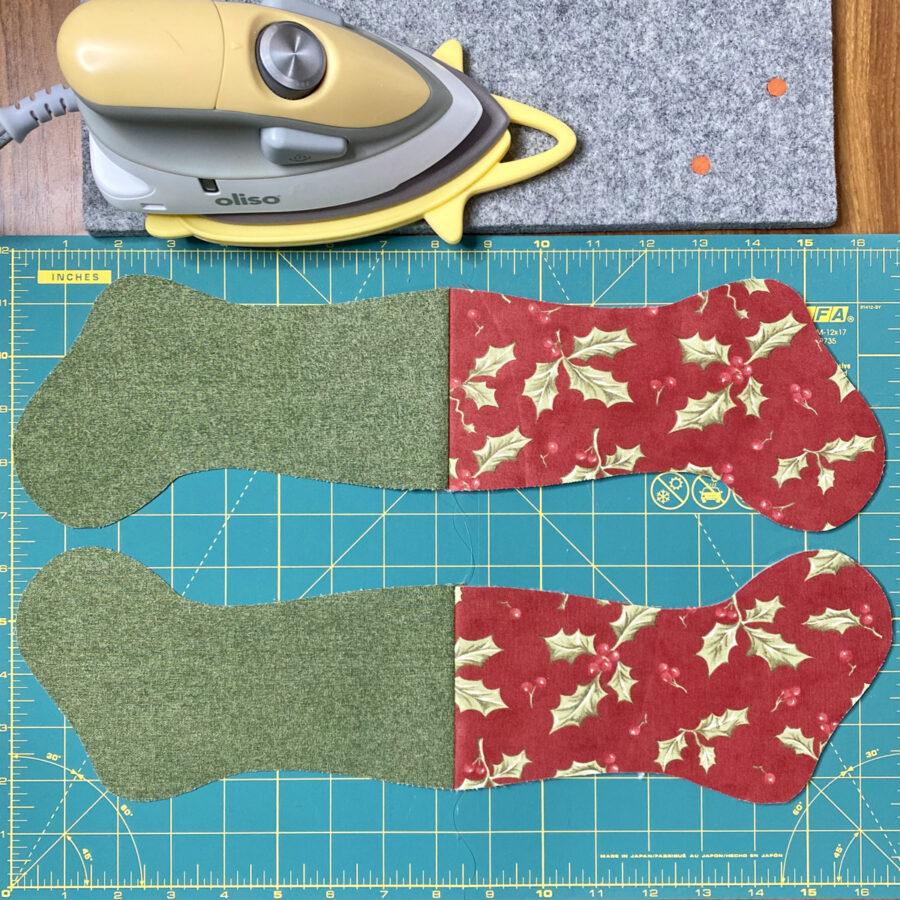
2. Prepare the fabrics.
- Fuse a 5” x 9” piece of HeatnBond Fusible Fleece to the wrong side of each 5” x 9” outer stocking fabric, following the package instructions.
-
- Pre-heat iron to a medium setting, no steam.
- Place the rough side of the fusible fleece against the wrong side of the outer stocking fabric.
- Cover with a lightweight, dry pressing cloth.
- Press and hold iron with medium pressure for 10-15 seconds. Repeat by lifting iron to new area, slightly overlapping previous area until the entire surface is bonded.
- Allow it to cool.
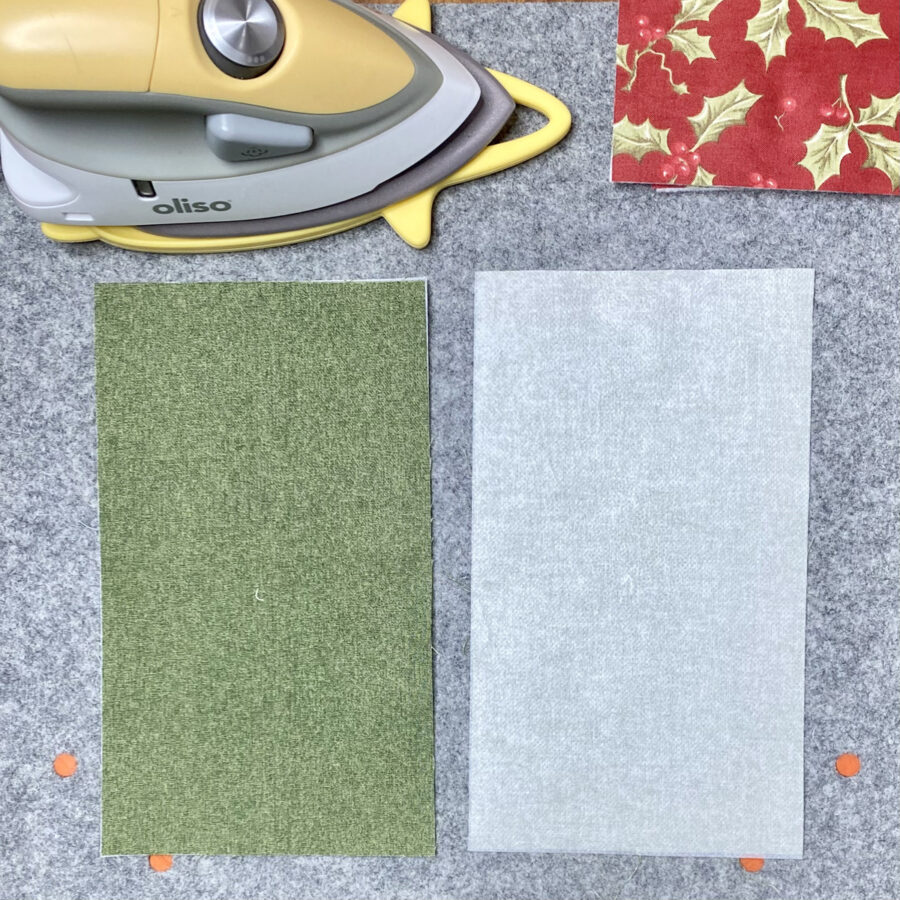
- Fuse a 5” x 9” piece of HeatnBond Medium Weight Non-Woven Fusible Interfacing to the wrong side of each 5” x 9” lining fabric.
-
- Pre-heat iron to a high setting, no steam.
- Place the rough side of the fusible interfacing against the wrong side of the outer stocking fabric.
- Cover with a lightweight, dry pressing cloth.
- Press and hold iron with medium pressure for 10-15 seconds. Repeat by lifting iron to new area, slightly overlapping previous area until the entire surface is bonded.
- Allow it to cool.
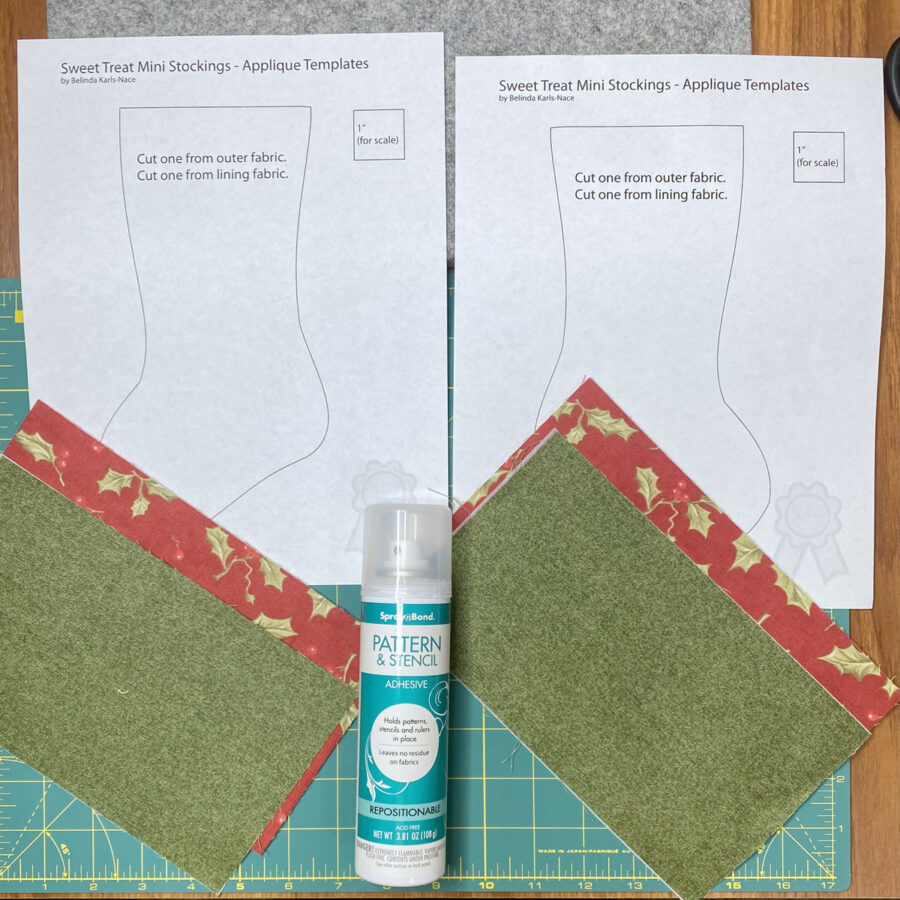
3. Cut stocking shapes.
- Loosely cut out the stocking templates printed on regular printer paper. Apply to fabrics using SpraynBond Pattern & Stencil Spray.
-
- Place a Pressing Paper Fabric and Craft Sheet under pattern pieces to protect your work surface from the adhesive spray.
- Shake can well. Hold can upright, 12” from paper template(s). Press nozzle and apply adhesive using a sweeping motion to lightly cover paper template(s).
- Let dry for 1 minute then press paper template to cotton fabric.
- Pattern & Stencil Spray is repositionable, and the same template can be used for the outer and lining fabric cuts; reapply, if necessary.
- Cut out stocking templates.
-
- Cut one outer stocking fabric and one lining fabric with the toe on the right side (Page 2).
- Cut one outer stocking fabric and one lining fabric with the toe on the left side (Page 3).
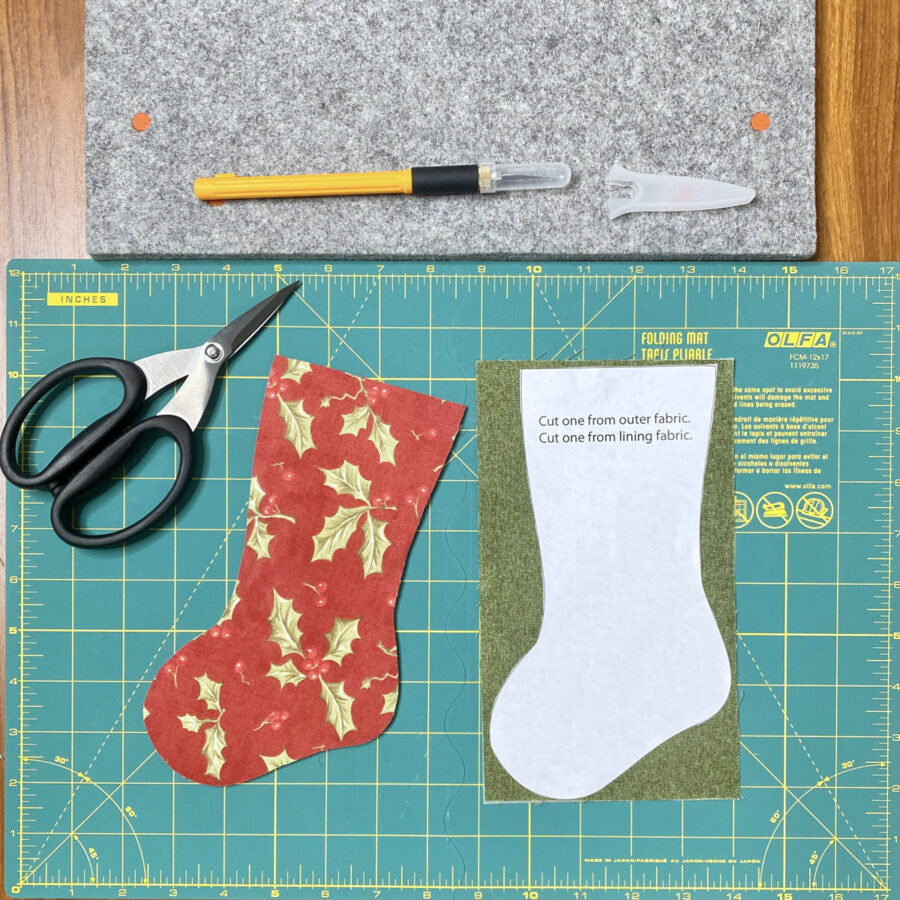
- Remove template papers.
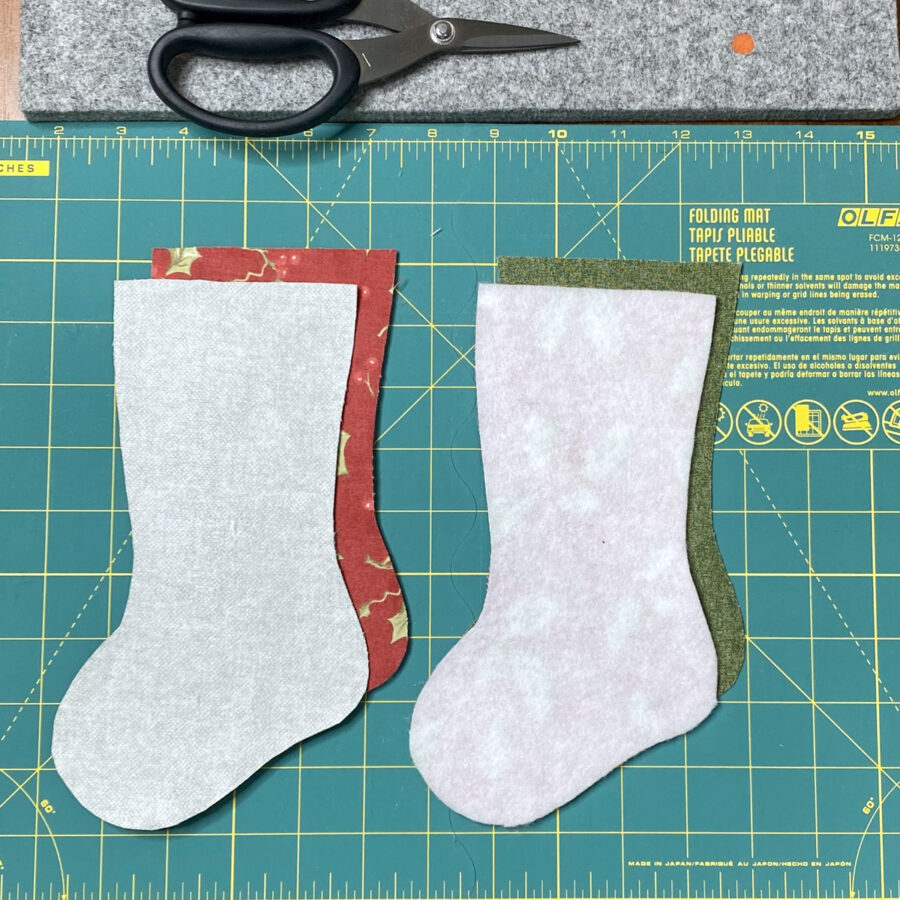
4. Create mini stocking.
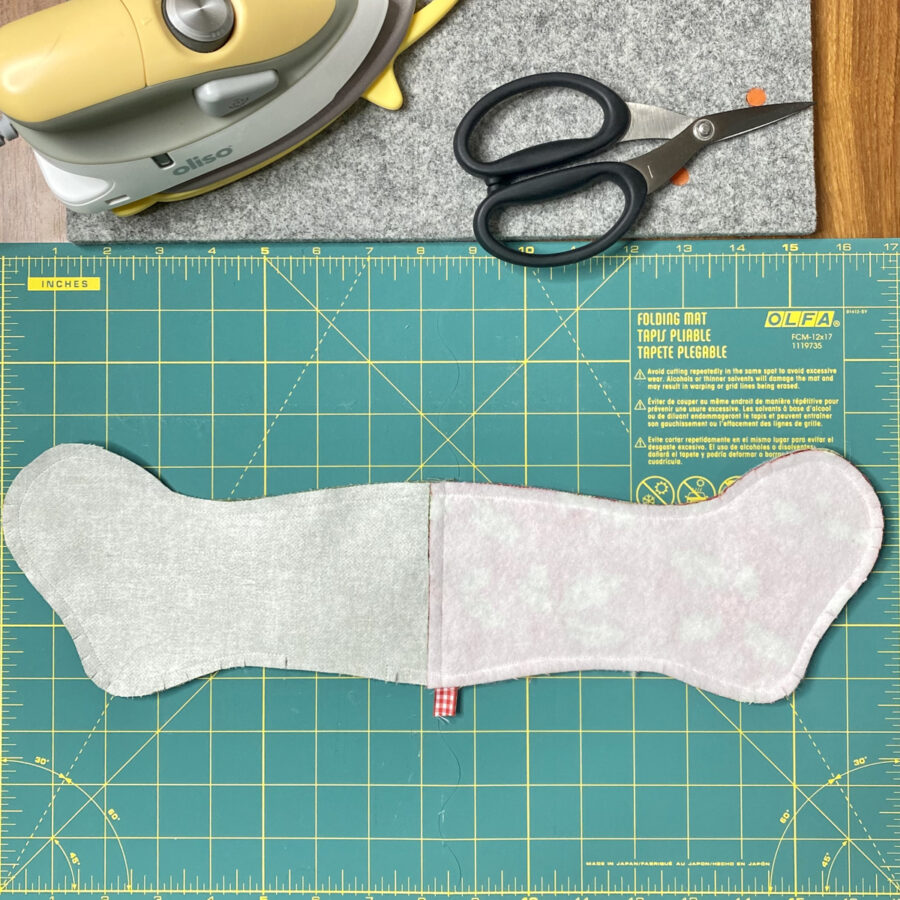
- Place one outer stocking piece and one lining piece right sides together. Line up all sides. Stitch a ¼” seam allowance across the top of the stocking. Repeat for second set of outer and lining fabric.
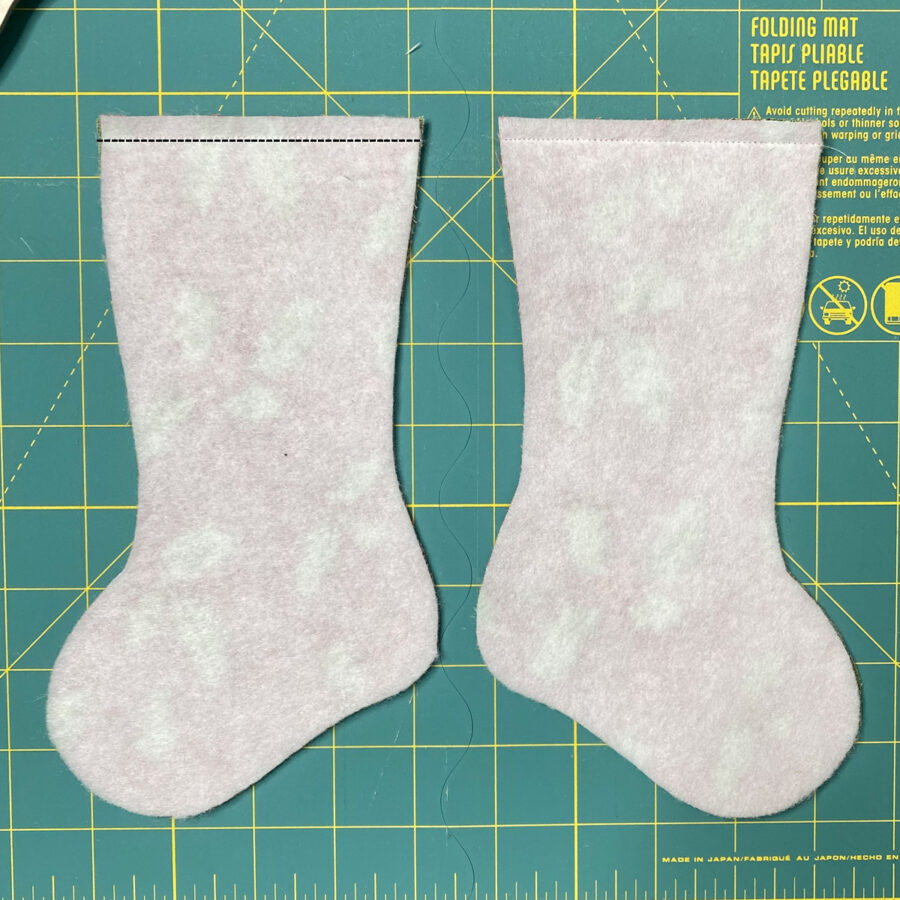
- Press seams open or press in opposite direction for each unit.
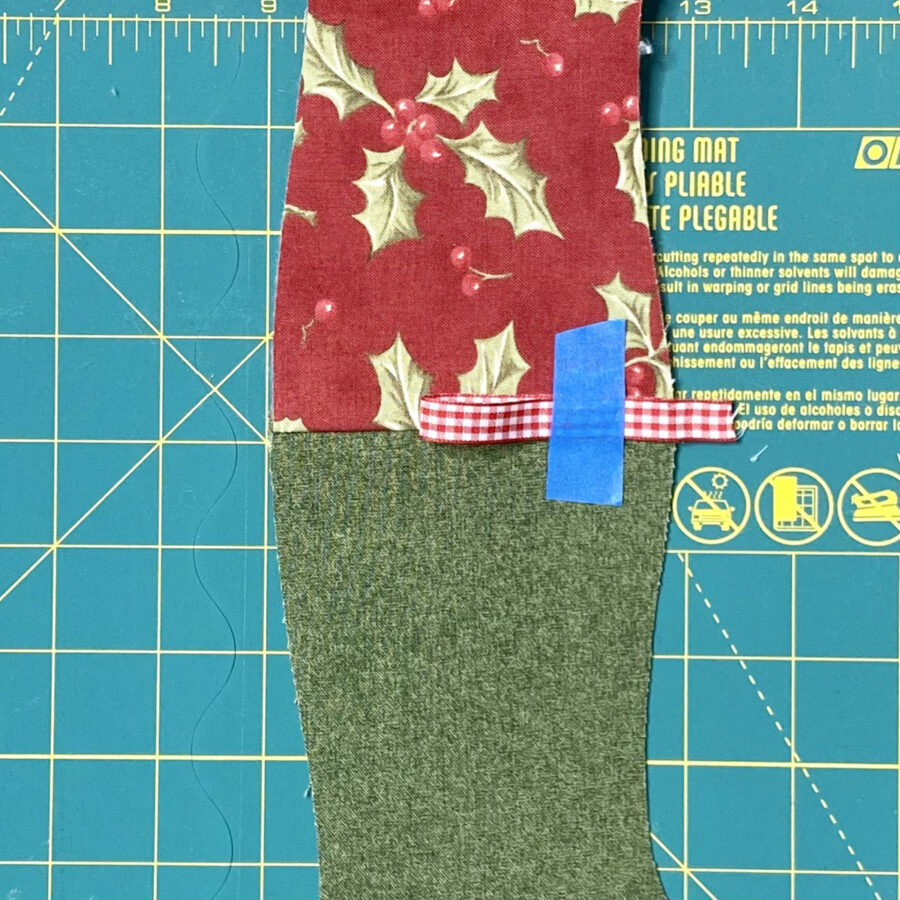
- Place one unit right side up on a table.
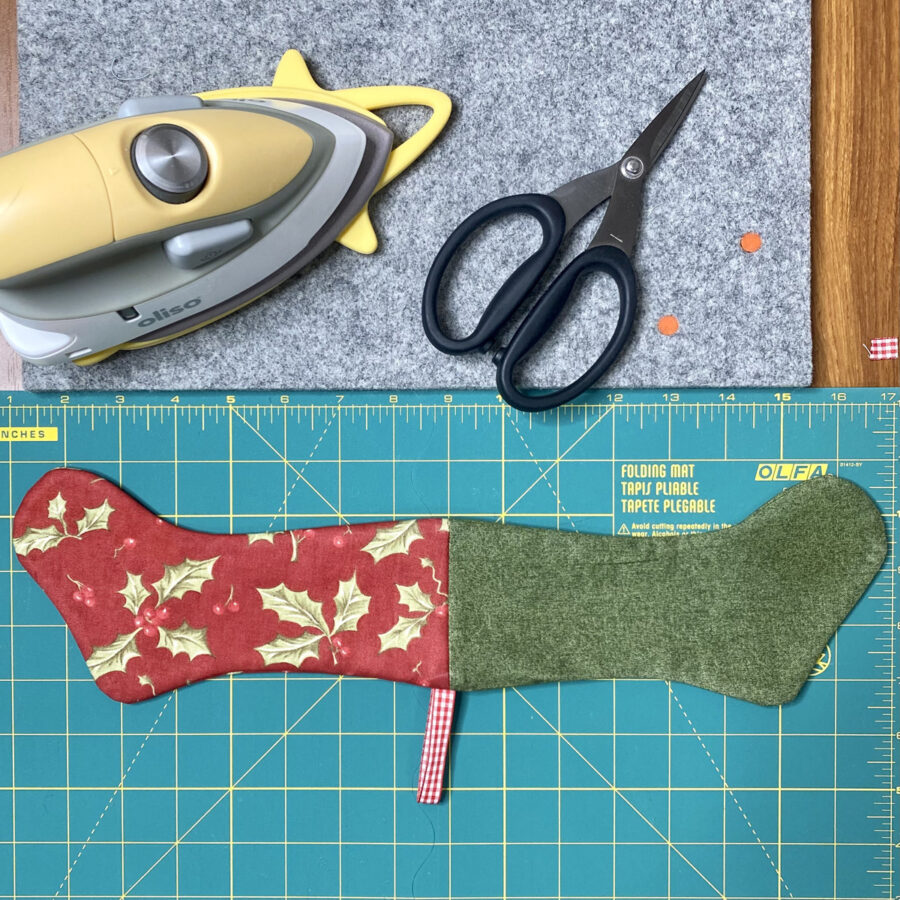
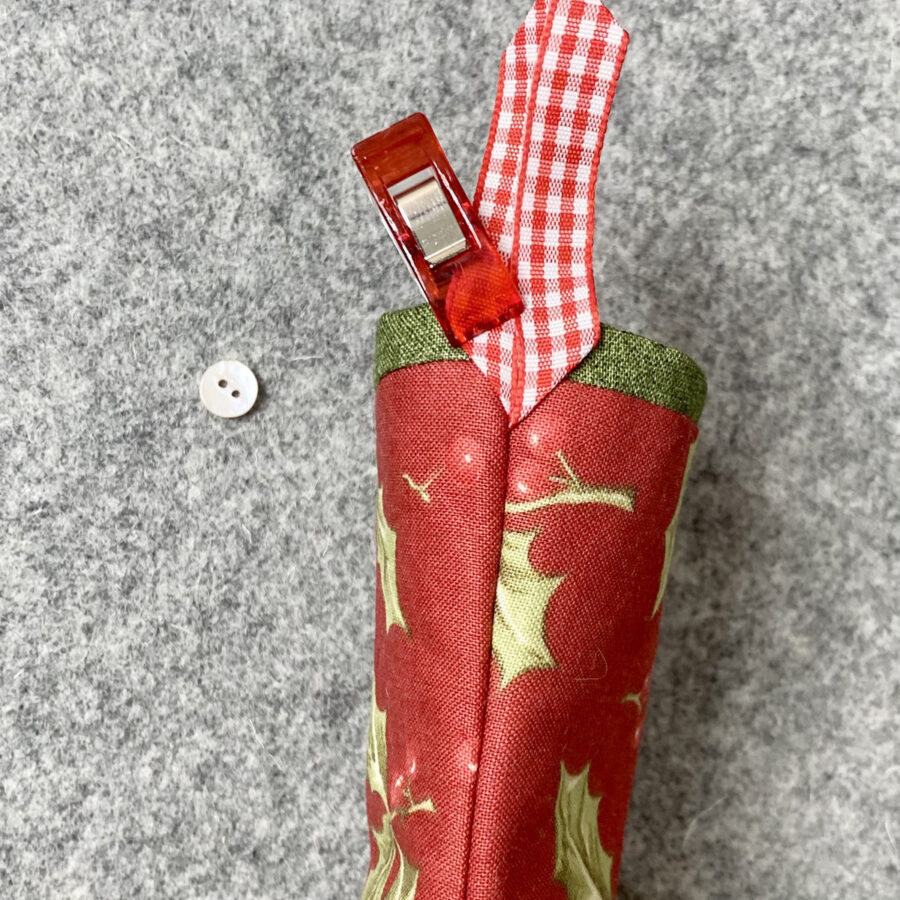
- Fold a 6” piece of ribbon or twill tape in half and place on the seam line of stocking unit. Make sure it is on the correct side for hanging your stocking (heel side) – raw edges should be slightly past the outer edge; fold should be on the inside of the stocking. Tape or pin in place.
- Place other stocking unit on top right sides together. Line up all edges and seams. Pin or clip in place.
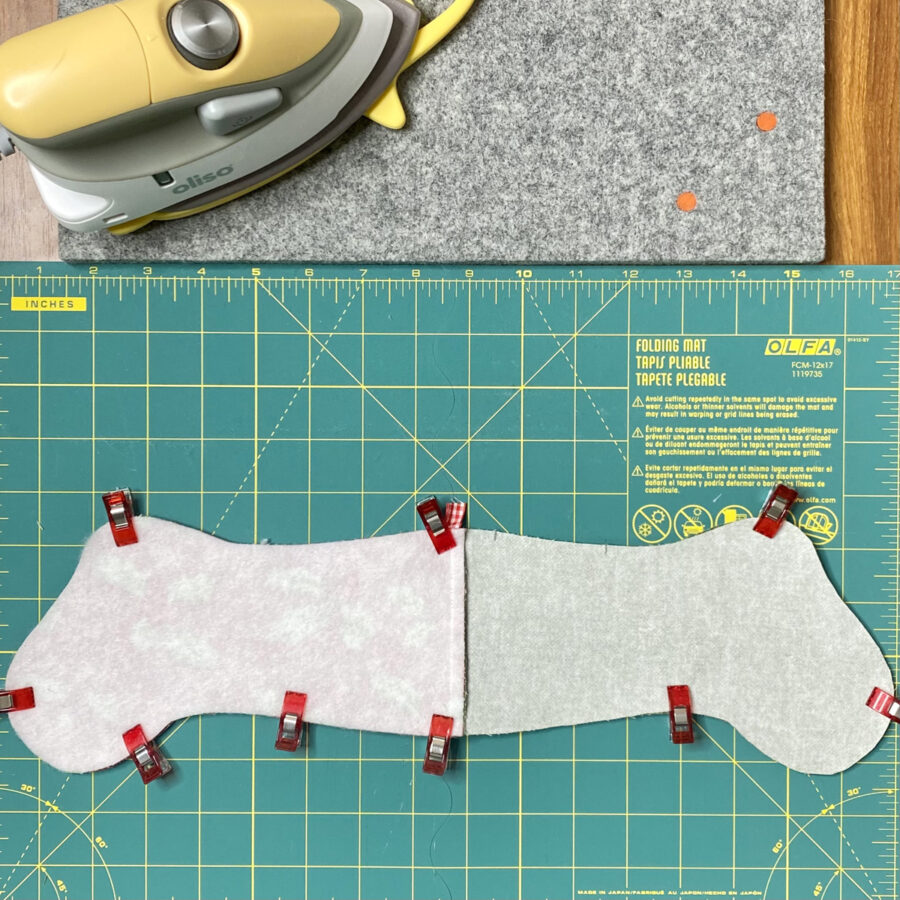
- Sew a ¼” seam allowance around the entire perimeter, leaving an opening in the lining for turning (see image below for marks where I left the opening. It is easiest to leave the opening on a flat side of the lining. Sew slowly around the curves.
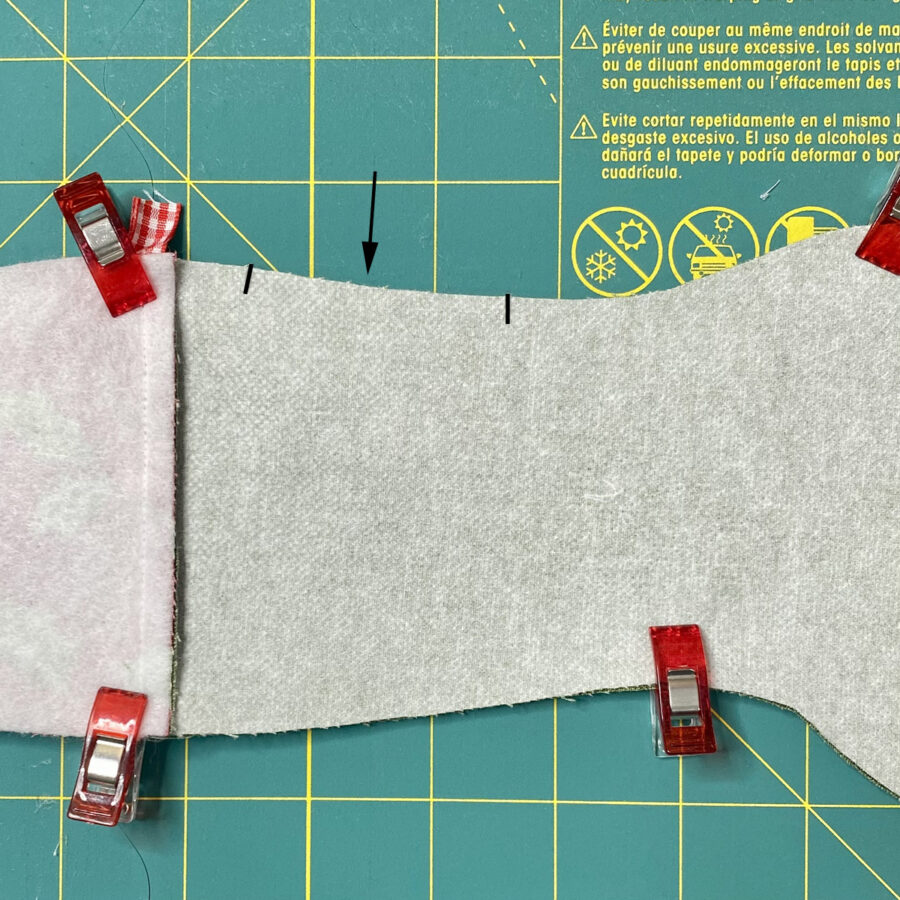
- To make your curved seams lie flat, clip the seam allowance around the curves. Put short snips along the curve almost up to the stitch line. Careful not to cut through the stitching. I prefer using small sharp embroidery scissors for this step.
- Turn the stocking right side out using the opening left for turning. Push both the outer and lining both completely out – a chopstick or pencil (erasure end) work well for this step. Give the unit a good press.
- Stitch the opening closed (with machine or by hand).
- Push the lining into the stocking. Again, a chopstick, pencil, or turning tool will help with the step. I like to leave about a ¼” of the lining visible at the top of the stocking.
- Press.
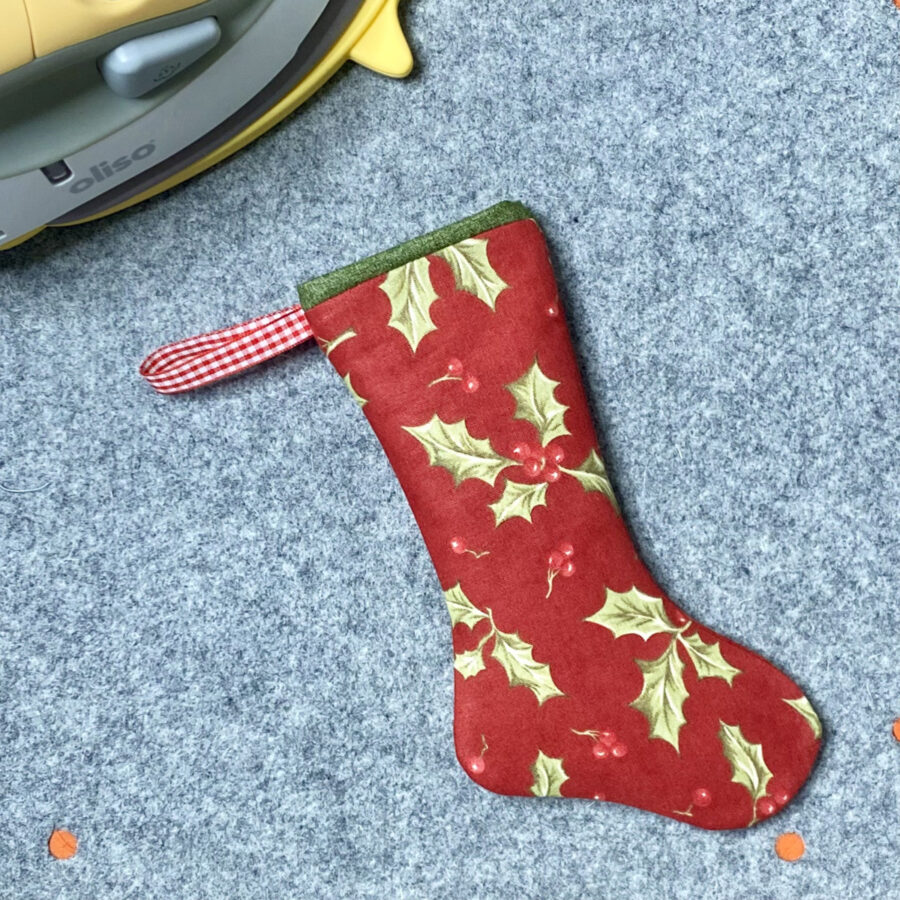
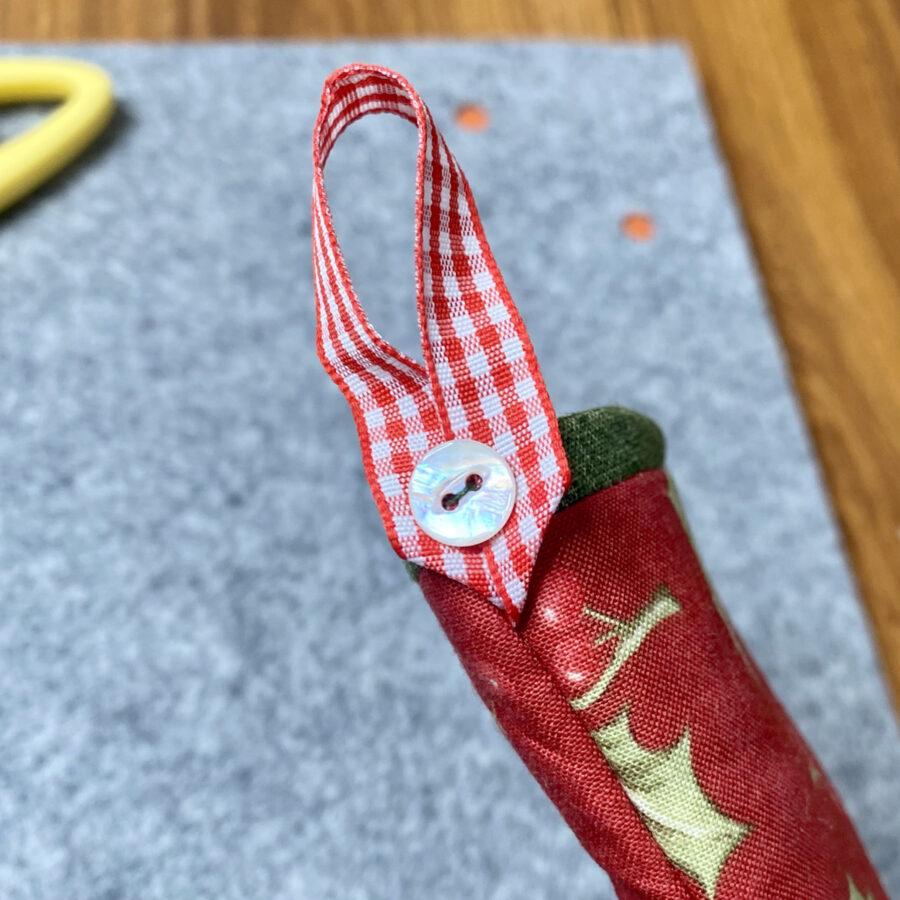
- Fold the ribbon hanging tab upwards.
- Attach a small button by hand as a final finishing touch and to hold the tab up. I like to use sewing thread the same color as my lining fabric and a sharp hand sewing needle.

Your Sweet Treat Mini Stocking is complete. Wasn’t that fun and easy?! Hang on a Christmas tree or garland or tie on a holiday present. These are great for gift giving; fill your mini stocking with tiny treats and goodies or a gift card for a lovely handmade present. Enjoy!

Thank you for joining me today for my Therm O Web blog tutorial. I hope this post inspires you to create several mini stockings, using materials your favorite holiday fabrics. To see more of my projects and patterns, stop by my blog, website, and/or Instagram – I would love to visit with you and see what you create!