


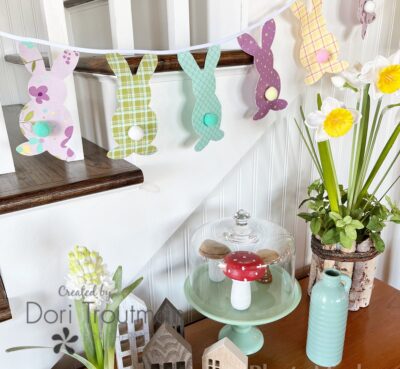
Happy spring my friends! This is Dori again from @redfeedack. And I’m so excited that spring is here!!! I’ve really been enjoying sewing with the sweet fabric line called Hello Spring by Riley Blake Designs. This fabric just called to be made into a super fun little Bunny Bunting and that is what I’m here to share with you today! This project is SO fast and so much fun. You can have a bunting finished in under an hour! Lets get started.
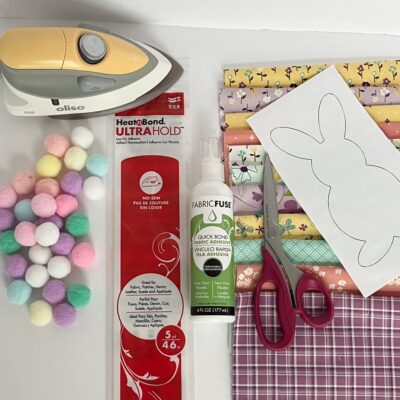
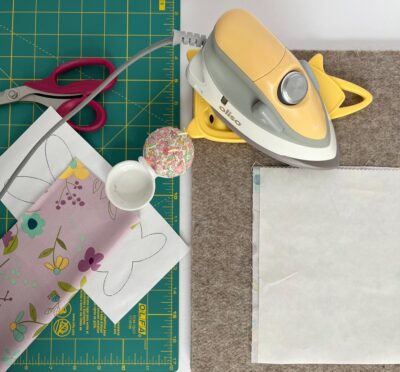
Bunny Bunting Supplies
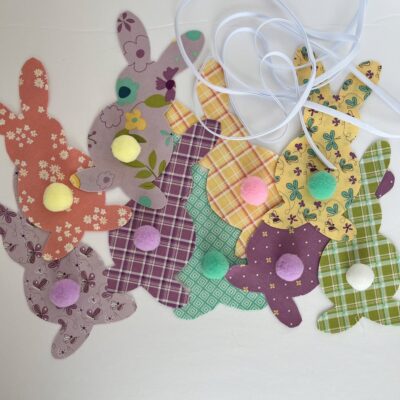
- Fabric of different colors and prints (I used nine prints for nine bunnies)
- One inch Pompoms to match fabric
- Heat n Bond Ultra Hold
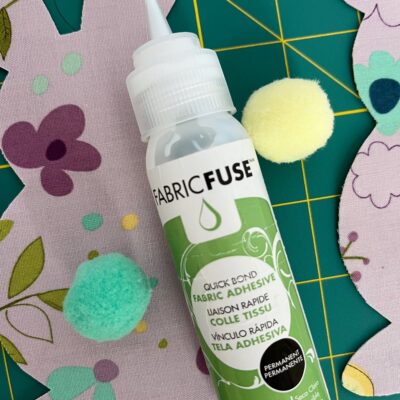
- Heat n Bond Quick Bond Fabric Adhesive
- Double Fold 1/4 inch Bias Tape
- Scissors
- Pattern (you can download one here, or draw your own)
- Iron
- Sewing Machine
Step By Step Instructions:
Step One: Print your bunny pattern by clicking the link here: Bunny Pattern and roughly cut around the edge. Set aside for now. (You can adjust the size of the bunny to your liking by custom scaling it in the print selection. Actual size is approximately 6.5 inches tall by 3.5 inches wide.)
Step Two: Take two pieces of the same fabric and cut them approximately 8 x 5 inches each. Cut a piece of Heat n Bond Ultra Hold the same size.
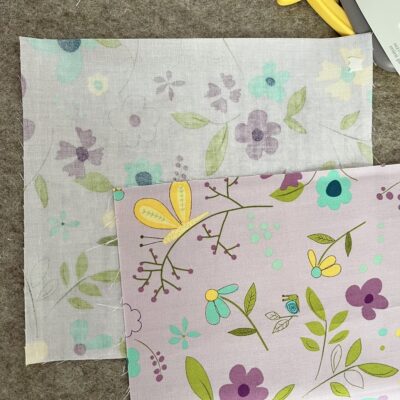
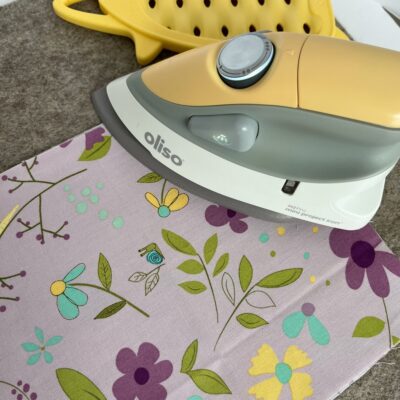
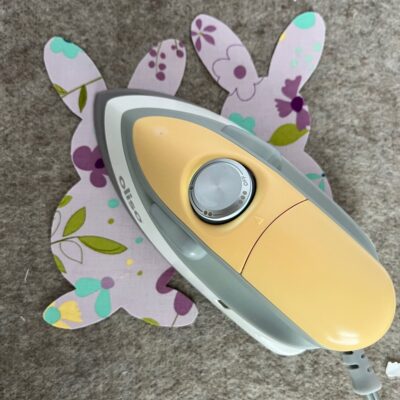
Step Three: Fuse the Heat n Bond Ultra to the wrong side of one of the fabric pieces. This bonds super quick so it doesn’t require holding the iron in place for long!
Step Four: Once fused, use your scissors to score a small part of the paper backing and use that to peel the paper off.
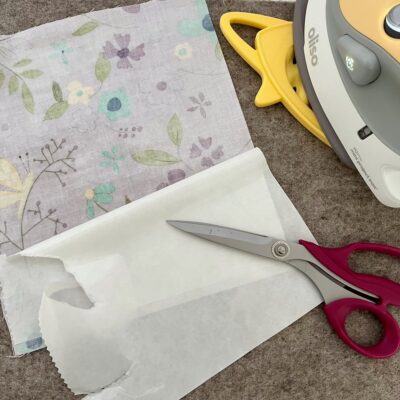
Step Five: Now iron your two fabric pieces wrong sides together fusing them firmly.
Step Six: Pin the pattern piece to the fused fabric. Cut around the pattern.
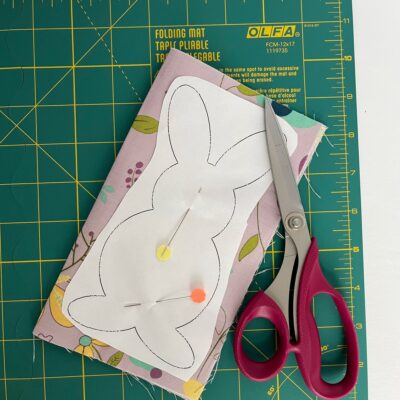
Step Seven: After cutting, I like to give my bunny another press of the iron, making sure the two fabric pieces are completely fused together.
Step Eight: Lets glue the sweet little bunny tail on the bunny! Use the Quick Bond Fabric Adhesive and squeeze just a bit onto the pompom; this glue works AMAZING and it only takes a little. Place it onto the bunny and hold it in place for a few seconds. Set it aside and let it completely adhere (this only takes minutes).
Repeat all the above steps for nine different bunnies! Tip: I usually work in an assembly line style, making all the bunnies at the same time. You can get nine of them made in a flash! I actually made two complete Bunny Buntings, with them all in assembly line style.
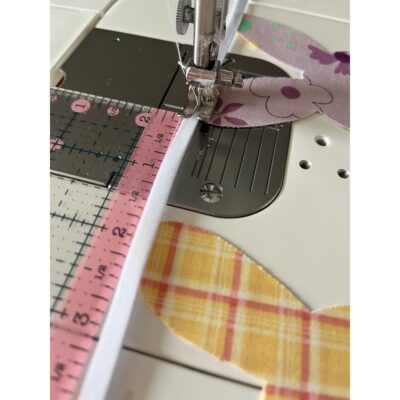
Step Nine: Once your bunny tails are completely dry, lay out your nine fabric bunnies in the order that you want them to hang on the bunting. Cut approximately 7 feet of 1/4 inch double fold binding. I used white, you could use a color that goes with your fabric colors. You could also use ribbon. I just happen to prefer the binding but there would be so many options.
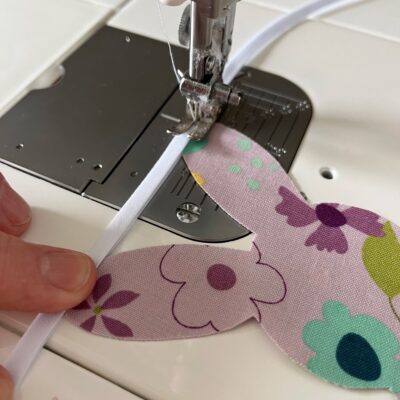
Step Ten: Leave about 10-12 inches of binding free (for hanging) and then mark where your first bunny will go. Sew close to the edge of the binding front the beginning up to the point where your mark is. Place the tops of your bunny ears inside the binding and hold it carefully as you sew. This part is a little tricky because there isn’t much ear that will go inside the binding. I don’t bother pinning or clipping, I just hold it with my fingers and that worked well. Sew both ears in place. (Double check that you’ve attached the ears. This can be a little tricky the first time.)
Step Eleven: Leave about 2 inches and then sew the next bunny. Repeat until all bunnies are sewn to the binding and then continue sewing all the way to the end of the binding.
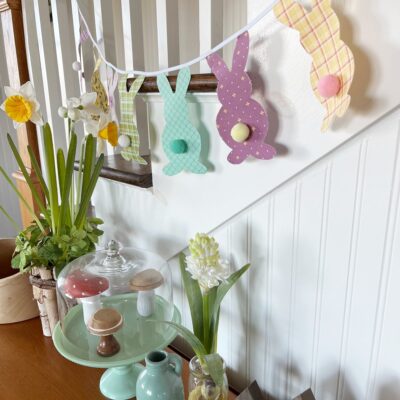
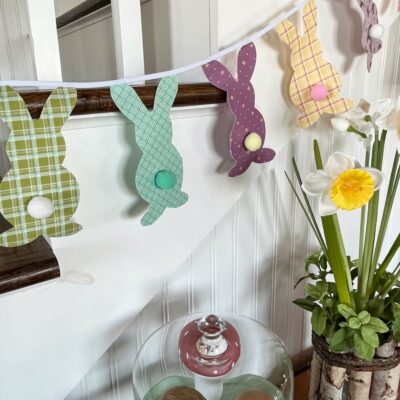
Your Bunny Bunting is now complete! Hang it and smile!!!
If you have any questions about making this bunting, or have pictures to share, be sure to reach out to me on my IG @redfeedsack!
Thank you for following along! Happy spring!
~ Dori ~