


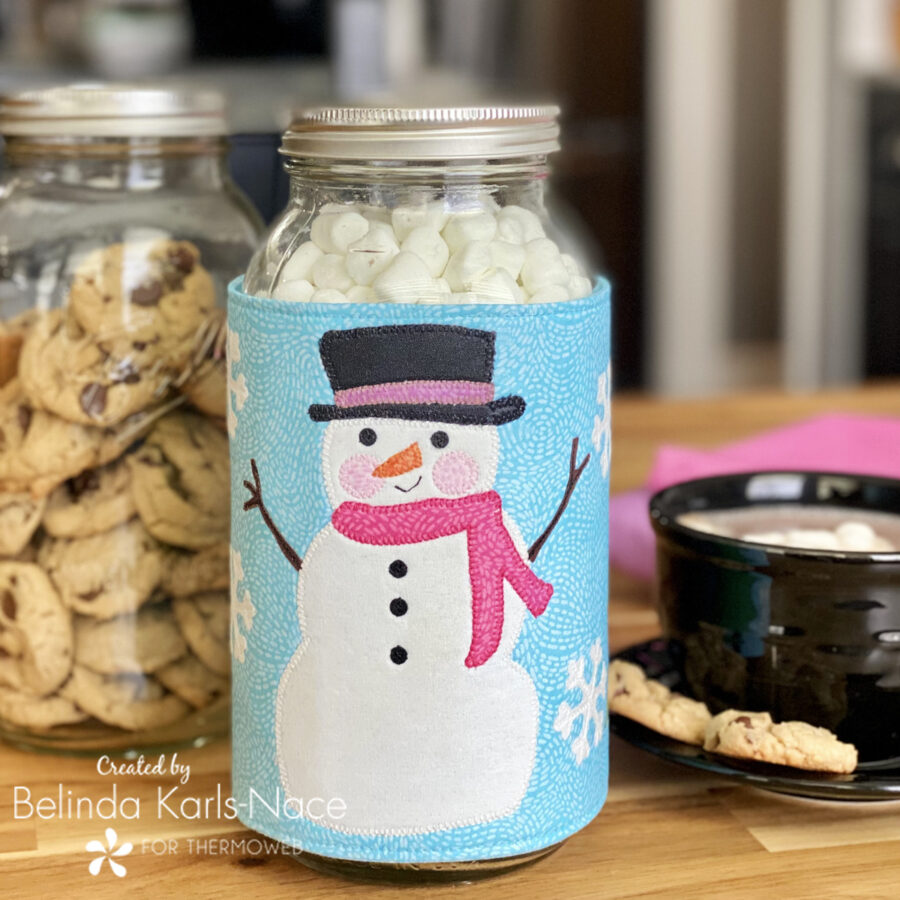
Hot Cocoa Jar Wrap featuring HeatnBond Products
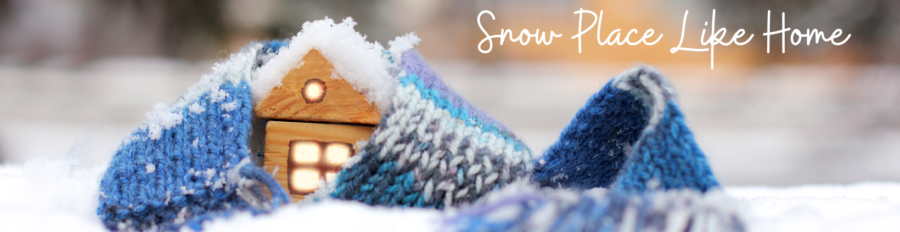
Greetings all – it’s Belinda Karls-Nace from Blue Ribbon Designs, here today with a brand new project tutorial. It is Winter Vacay Week on the ThermOWeb Blog, and I am excited to share my “Snow Place Like Home Cocoa Jar Wrap” with you.
You might wonder what a cocoa jar has to do with a winter vacation but stick with me. Growing up in Iowa, our family was never able to take a winter vacation – a winter vacation for us was an elusive “snow day” (our school rarely closed). We were those kids that watched the scrolling school closures across the bottom of the television screen, just waiting for our school to be listed. On the very rare occasion when school was canceled due to snow, my sister and I would take that opportunity to build a snowman. We would spend our time off outside (for as long as we could handle the cold) playing in the snow. Afterward, we would enjoy hot cocoa with lots of marshmallows. My winter vacation project combines those happy childhood memories.
Let’s get creative! Just gather the materials/supplies listed below, then download the PDF with the appliqué templates, placement guides, and cocoa recipe.
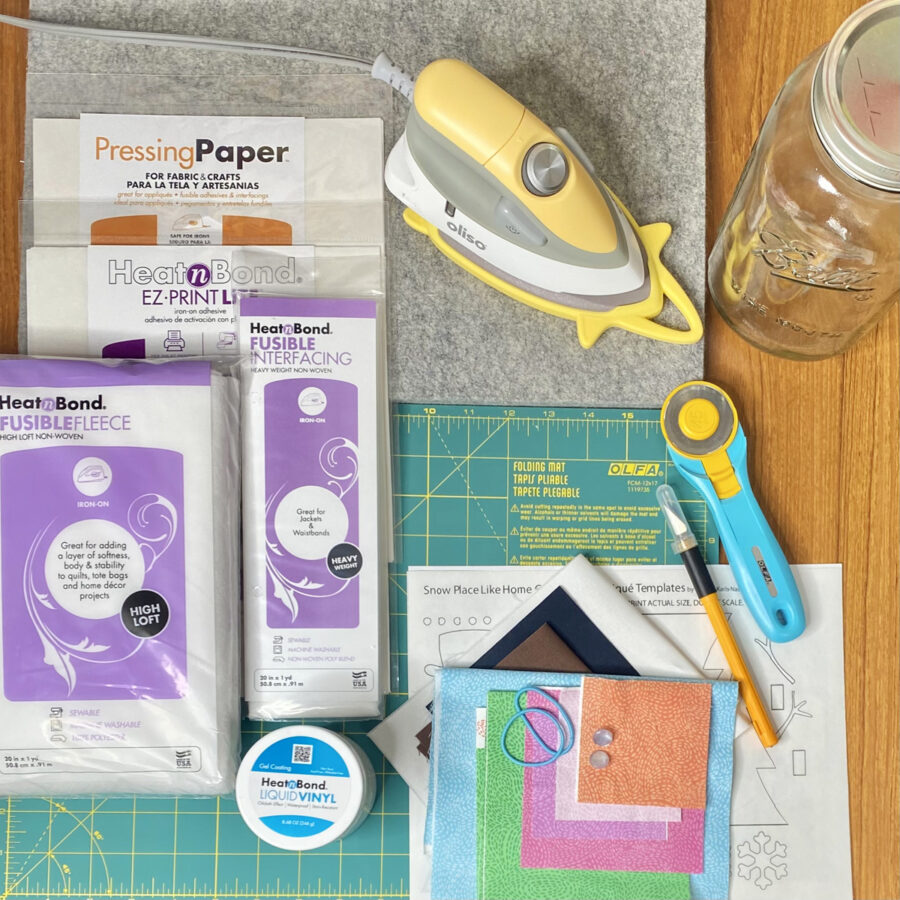
What you need:
- HeatnBond Lite EZ-Print Iron-On Adhesive Sheets
1 Sheet - HeatnBond Heavy Weight Non-Woven Fusible Interfacing
6 ½” x 14 ½” (plus optional 8” x 8” for back of white cotton fabric) - HeatnBond Fusible Fleece
6 ½” x 14 ½” - HeatnBond Liquid Vinyl Gel Coating
- Pressing Paper Fabric and Craft Sheets
1 Sheet - Cotton Fabrics (model uses Waved by Erin Borja for PBS Fabrics and Painter’s Palette Solids by PBS Fabrics) – scraps will work great!
Front fabric – 7” x 15” (WAVED – AQUA – 22146)
Backing fabric – 7” x 15” (WAVED – AQUA – 22146)
Snowman, Snowflakes – 8” x 8” (SOLID – SNOW – 121-091)
Trees – 6” x 6” (WAVED – LEAF – 22162)
Tree Trunks, Snowman Arms – 3” x 3” (SOLID – PRALINE – 121-081)
Snowman Hat, Eyes, Buttons – 3” x 3” (SOLID – EBONY – 121-004)
Snowman Carrot Nose – 1” x 1” (WAVED – CORAL – 22155)
Snowman Cheeks – 1” x 1” (WAVED – BALLET – 22149)
Snowman Scarf – 4” x 3” (WAVED – FUCHSIA – 22158)
Snowman Hat Band – 3” x 1” (WAVED – LAVENDER – 22161) - 2 Coordinating Hair Elastics
- 2 Small Shank Buttons (model used ½”)
- 1 Half Gallon (64 oz) Ball Mason Jar
- Oliso Iron
- Olfa Cutting Tools (cutting mat, rotary cutter, craft knife)
- Sewing Machine
- Basic Sewing Supplies/Tools (small sharp scissors, 2” paint brush, rulers, sewing thread, etc.)
- Hot Cocoa Ingredients (listed in the recipe included in the printable download below)
How to Make a Cocoa Jar Wrap
1. Download and Print the Snow Place Like Home Cocoa Jar Wrap PDF.
Snow Place Like Home Cocoa Jar Wrap – A Project for the ThermOWeb Blog
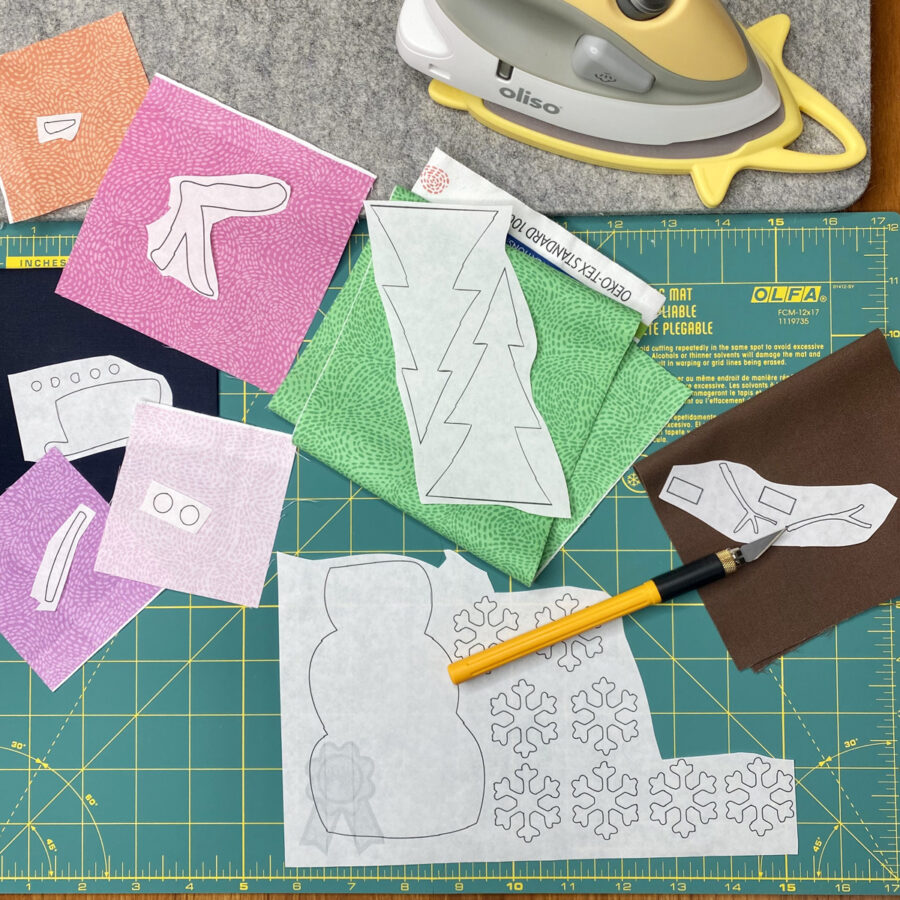
Print actual size – do NOT “fit to page” or “shrink to fit.” Print page one (appliqué templates) on one sheet of HeatnBond Lite EZ-Print Iron-On Adhesive (Inkjet printer friendly – no tracing required). Print pages two and three on regular printer paper.
2. Loosely cut apart the appliqué templates and apply to the backs of desired fabric(s) following the package instructions. Cut out all shapes on the solid lines, leaving the paper in place.
PRO TIP: Fuse HeatnBond Heavy Weight Non-Woven Fusible Interfacing to the back of the white fabric (following package instructions) BEFORE fusing the HeatnBond Lite Iron-On Adhesive in place – this will keep the background fabric from showing through the white fabric.
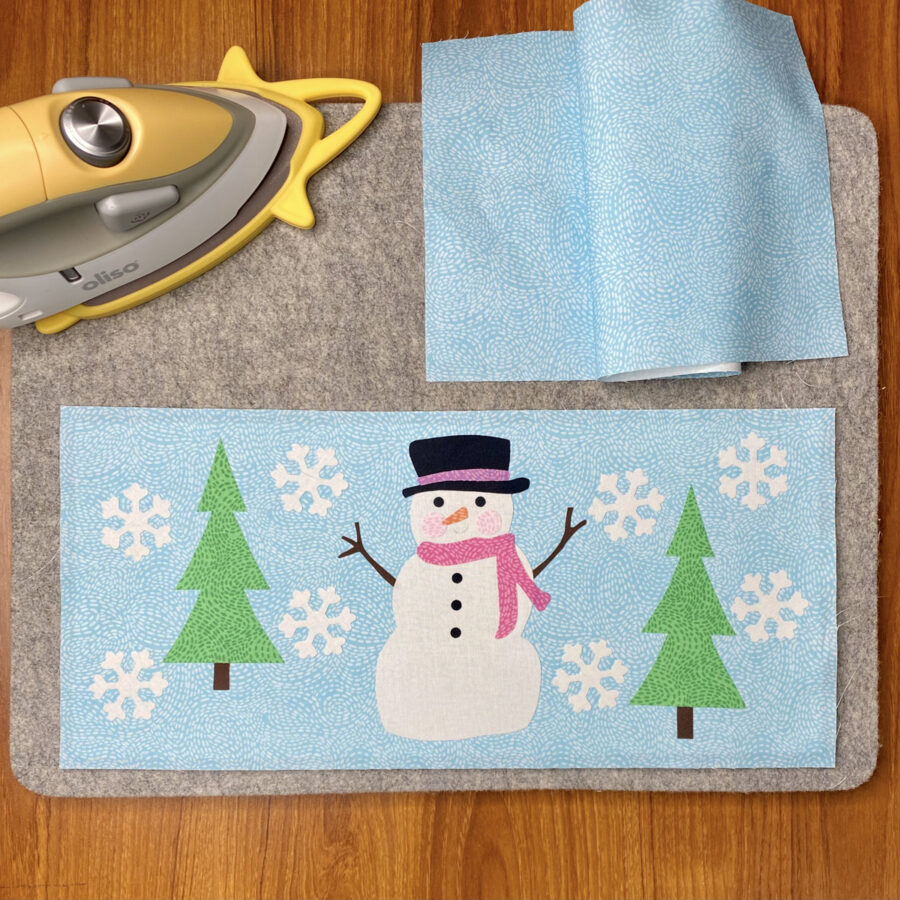
 3. Center and fuse the 6 ½” x 14 ½” piece of HeatnBond Heavy Weight Non-Woven Fusible Interfacing to the wrong side of the 7” x 15” backing fabric, following the package instructions.
4. Center and fuse the 6 ½” x 14 ½” piece of HeatnBond Fusible Fleece to the wrong side of the 7” x 15” front fabric, following the package instructions.
5. Using the Appliqué Placement Guide, remove the paper backs on the cut shapes and fuse into place on the front fabric (with HeatnBond Fusible Fleece on the back). Use a pencil to lightly draw the snowman mouth. Be sure to leave a ½” seam allowance on all sides.
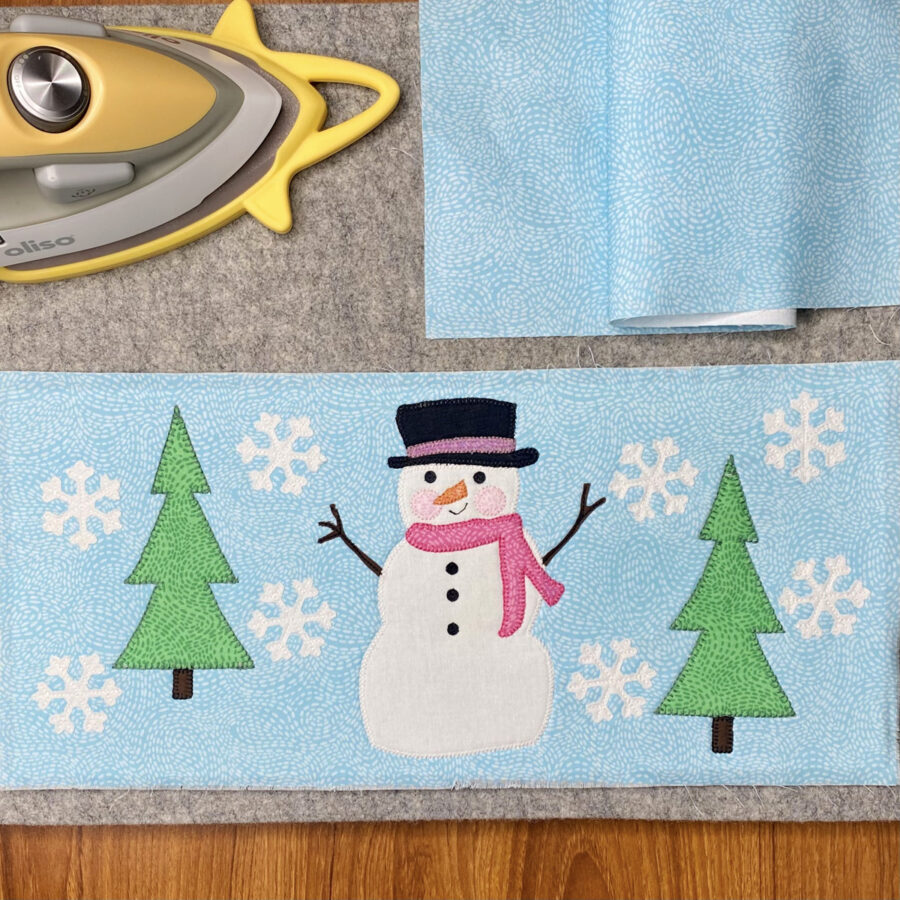
6. Using your favorite sewing machine appliqué stitches and coordinating sewing thread, sew the shapes in place (or leave them without stitching down for a fast project! – the HeatnBond fusible adhesive will hold them in place). I chose to use a blanket stitch for everything except the snowflakes, eyes, buttons and mouth. I used a straight stitch to tack down the snowflakes, eyes, and buttons. I used black sewing thread to straight stitch a mouth, machine-stitching over the pencil line from step 5.
PRO TIP: Place a piece of tear-away stabilizer or muslin under the fusible fleece to keep it from catching on the sewing machine feed dogs, then tear or cut away after appliqué.
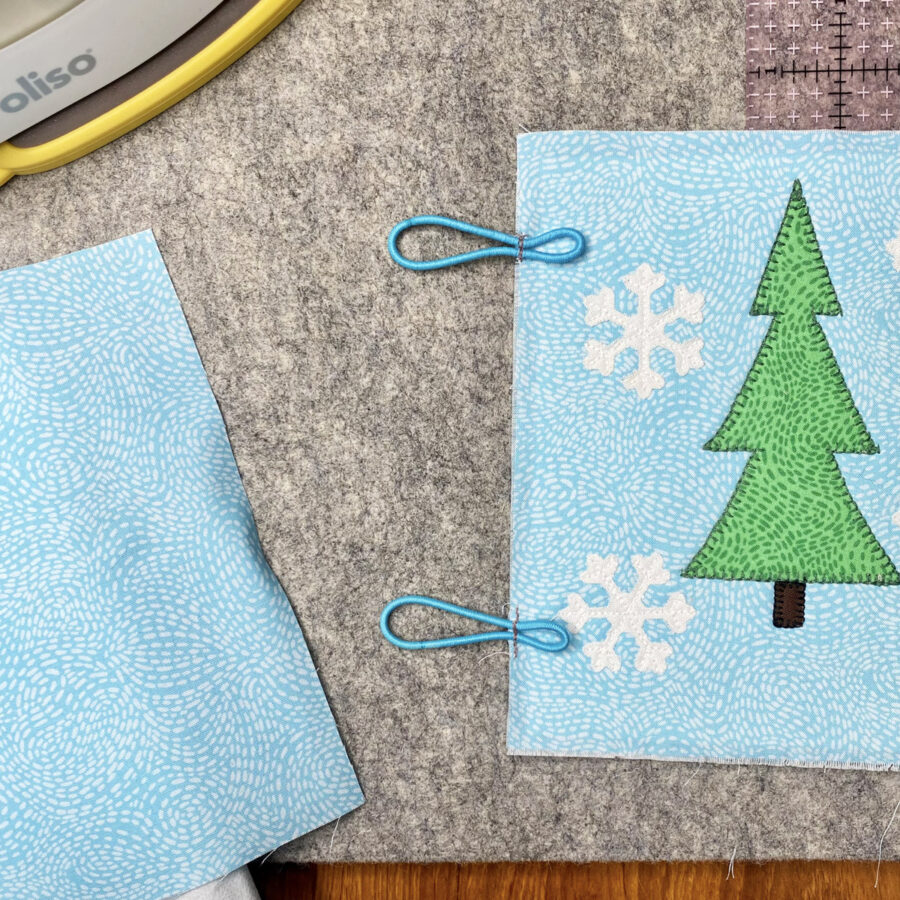
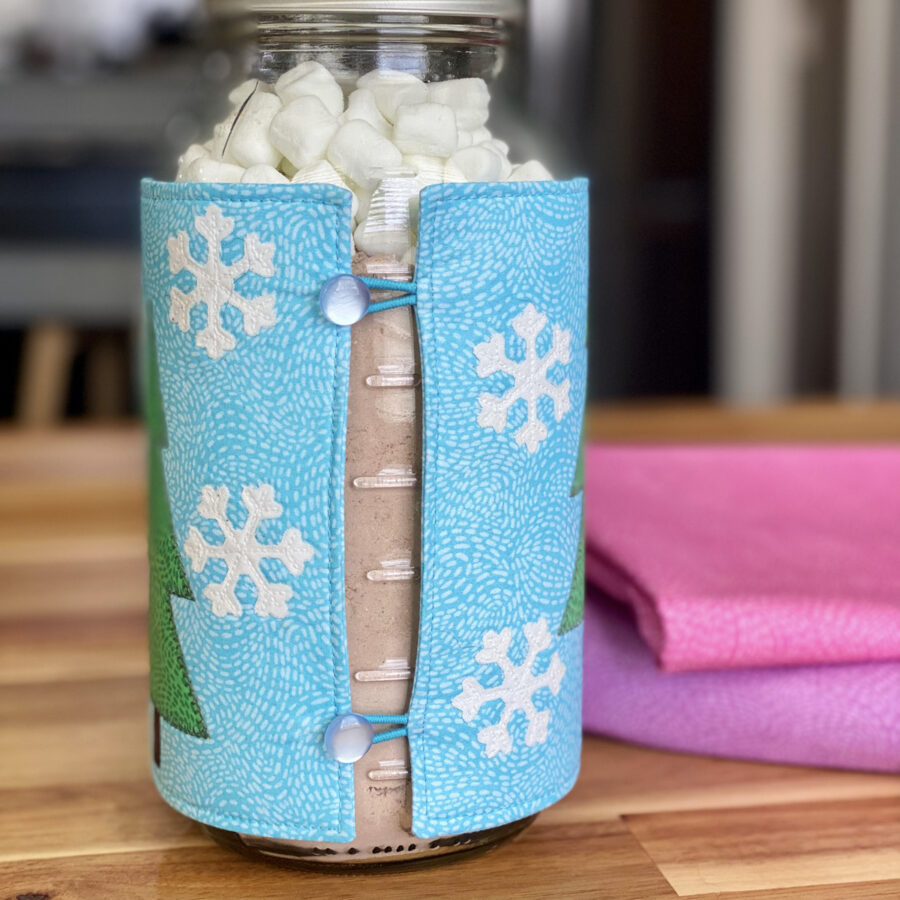
 7. Baste one hair elastic 1 ¼” down from the upper left-hand corner in the seam allowance, as shown. Baste one hair elastic 1 ¼” up from the lower left-hand corner in the seam allowance, as shown.
PRO TIP: Hair elastics work great for any project needing colorful elastic.
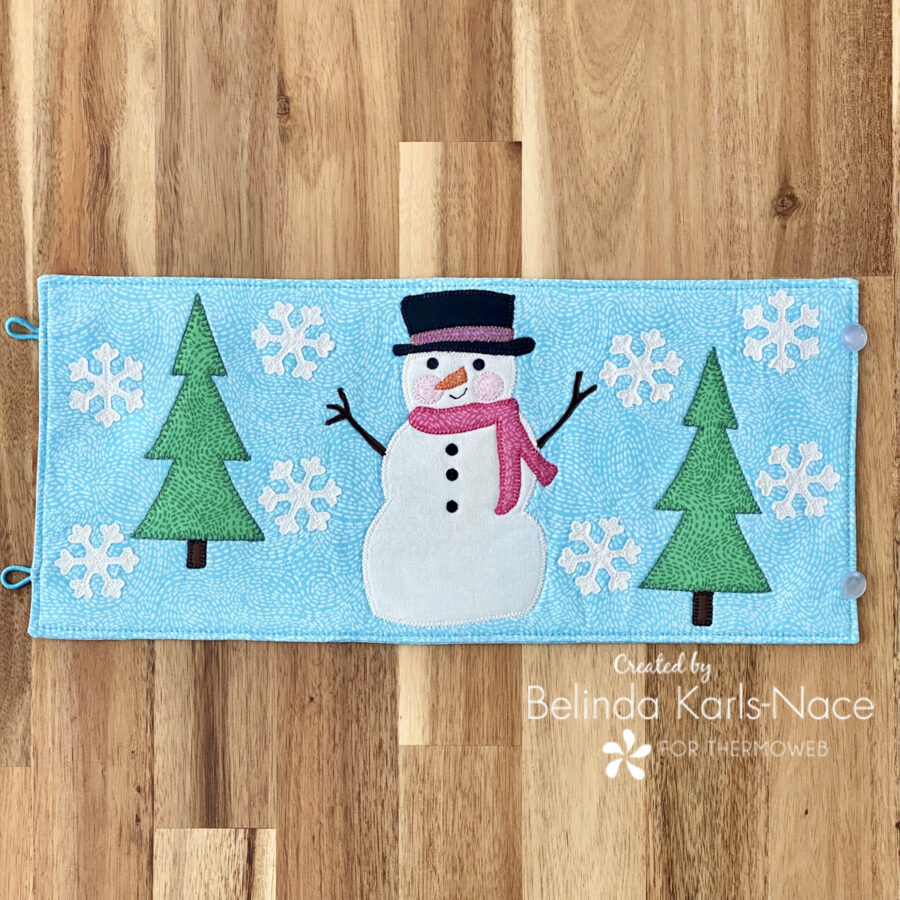
 8. Place the front fabric with appliqué and the backing fabric right sides together and sew around all four sides with a ¼” seam allowance, leaving an opening for turning. Clip corners, trim off excess elastic, turn right side out and press. Top stitch around the entire perimeter, using an 1/8” or 3/16” seam allowance (this will enclose the opening left for turning).
9. Sew one shank button 1” down from the upper right-hand corner, 1/8” from the edge. Sew on shank button 1” up from the lower right-hand corner, 1/8” from the edge.
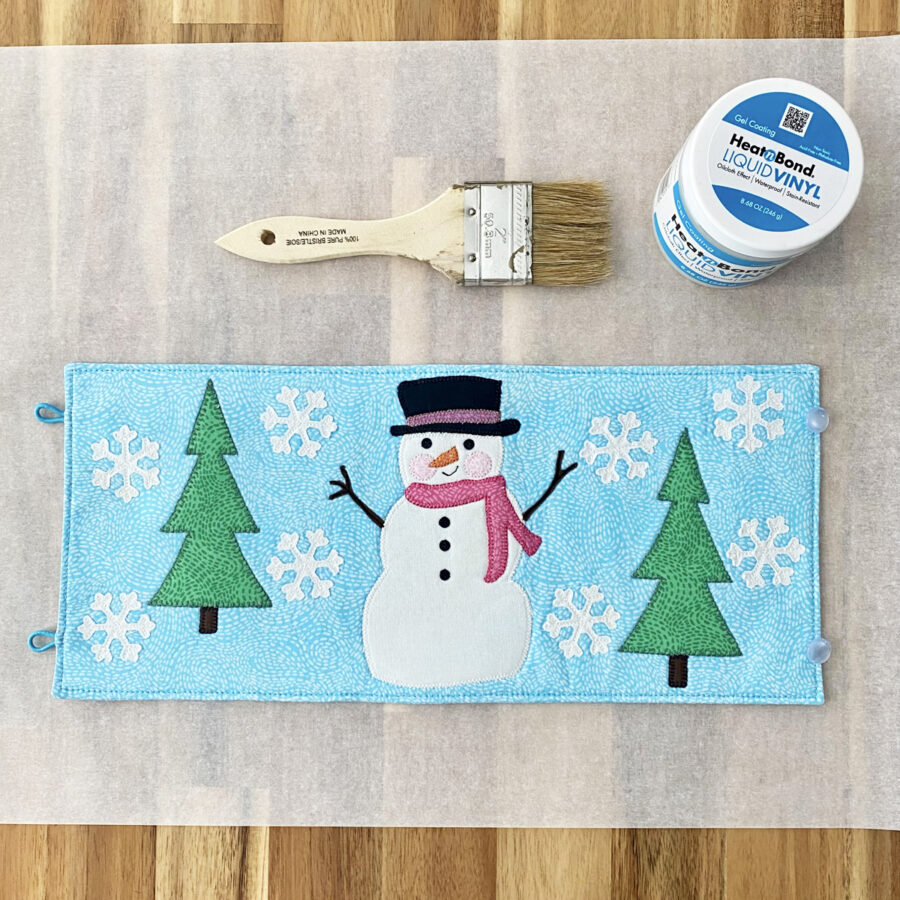
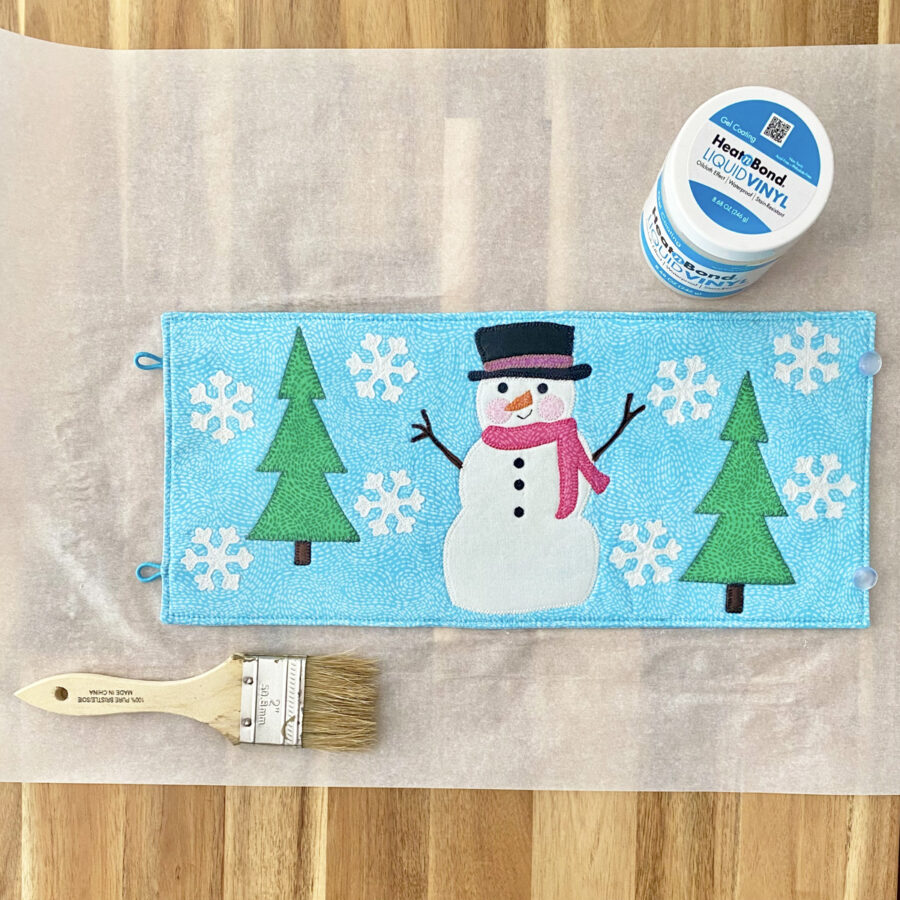
 10. Place completed jar wrap on a protected workspace. Using a 2” soft brush, apply a thin layer of HeatnBond Liquid Vinyl, using the package instructions. This will keep your jar wrap nice and clean. Let fabric dry 30-45 minutes.
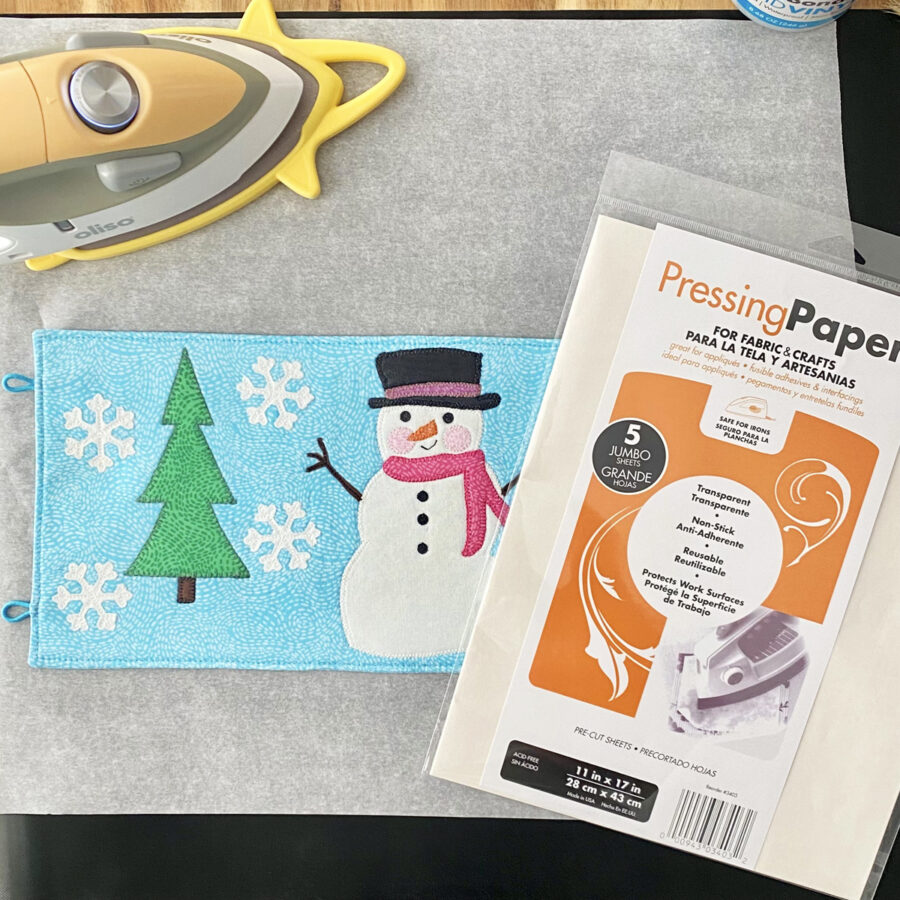
 11. Place the jar wrap on top of parchment paper or non-stick pressing sheet on a firm, heat-proof surface (not an ironing board) and cover with HeatnBond Pressing Paper. Press for 45 seconds, moving iron slightly.
 12. I applied two coats, making the wrap waterproof and stain-resistant.
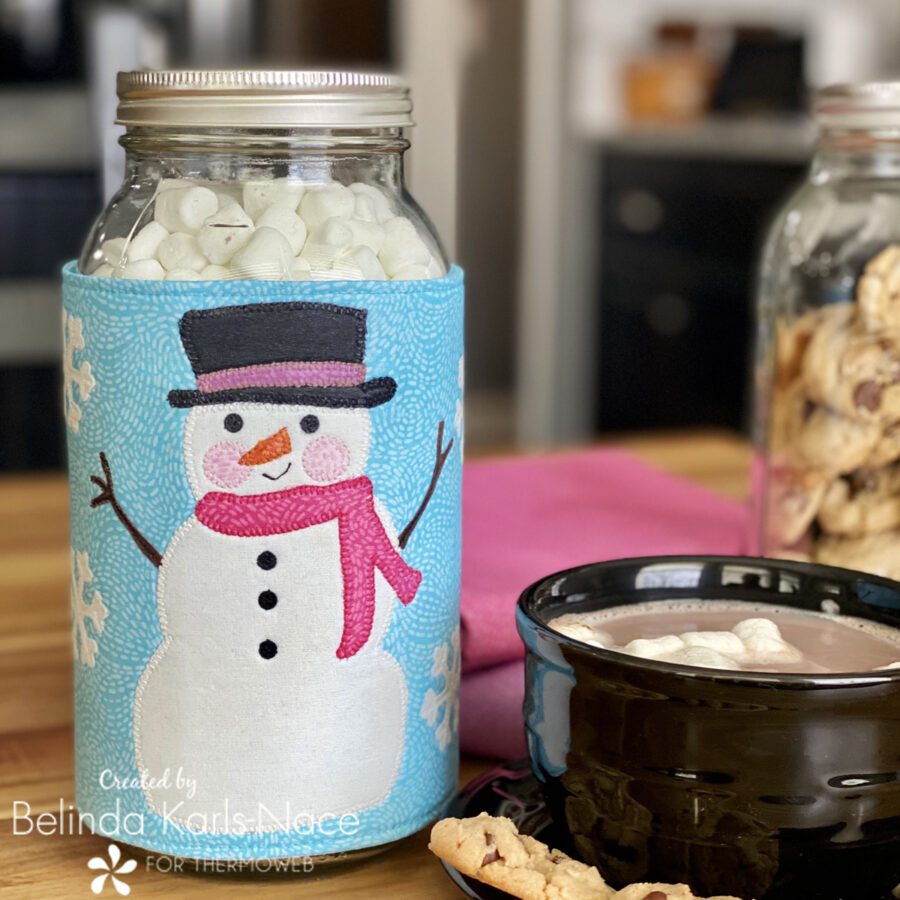
13. Use the included recipe to prepare the cocoa mix and fill the 64oz. Mason Jar.
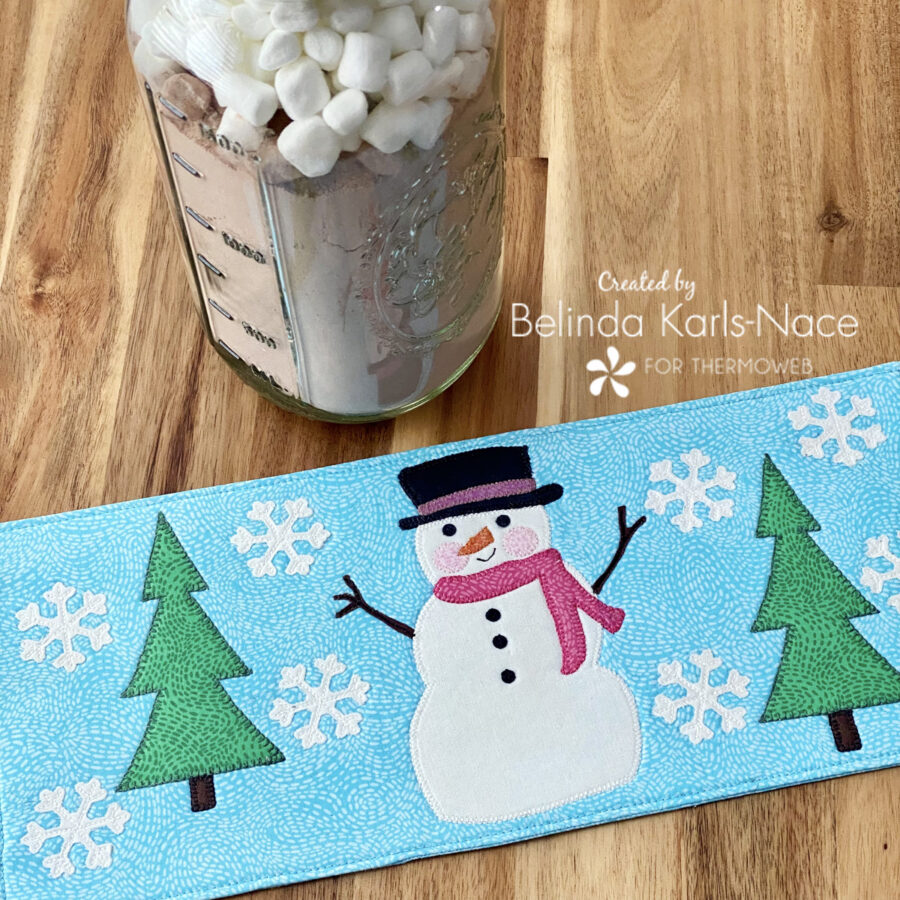 14. Wrap the cover around the jar, using the elastic loops and shank buttons to attach and hold in the jar wrap in place.
 15. Your Snow Place Like Home Cocoa Jar Wrap is now complete. Enjoy!
 Thank you for joining me today for my ThermOWeb Winter Vacay Week project tutorial. I hope this post inspires you to create a hot cocoa jar wrap to brighten up a cold, wintry day. If you like my jar wrap idea and would like to see more wraps in the future, drop me a comment and let me know. To see more of my projects, stop by my blog, website or Instagram – I would love to visit with you!