


Hello and welcome!
It’s Julia from Inflorescence Designs! I’m so joyful you are visiting today. For today’s tutorial, I am going to show you how to make a quilted sleeping bag!
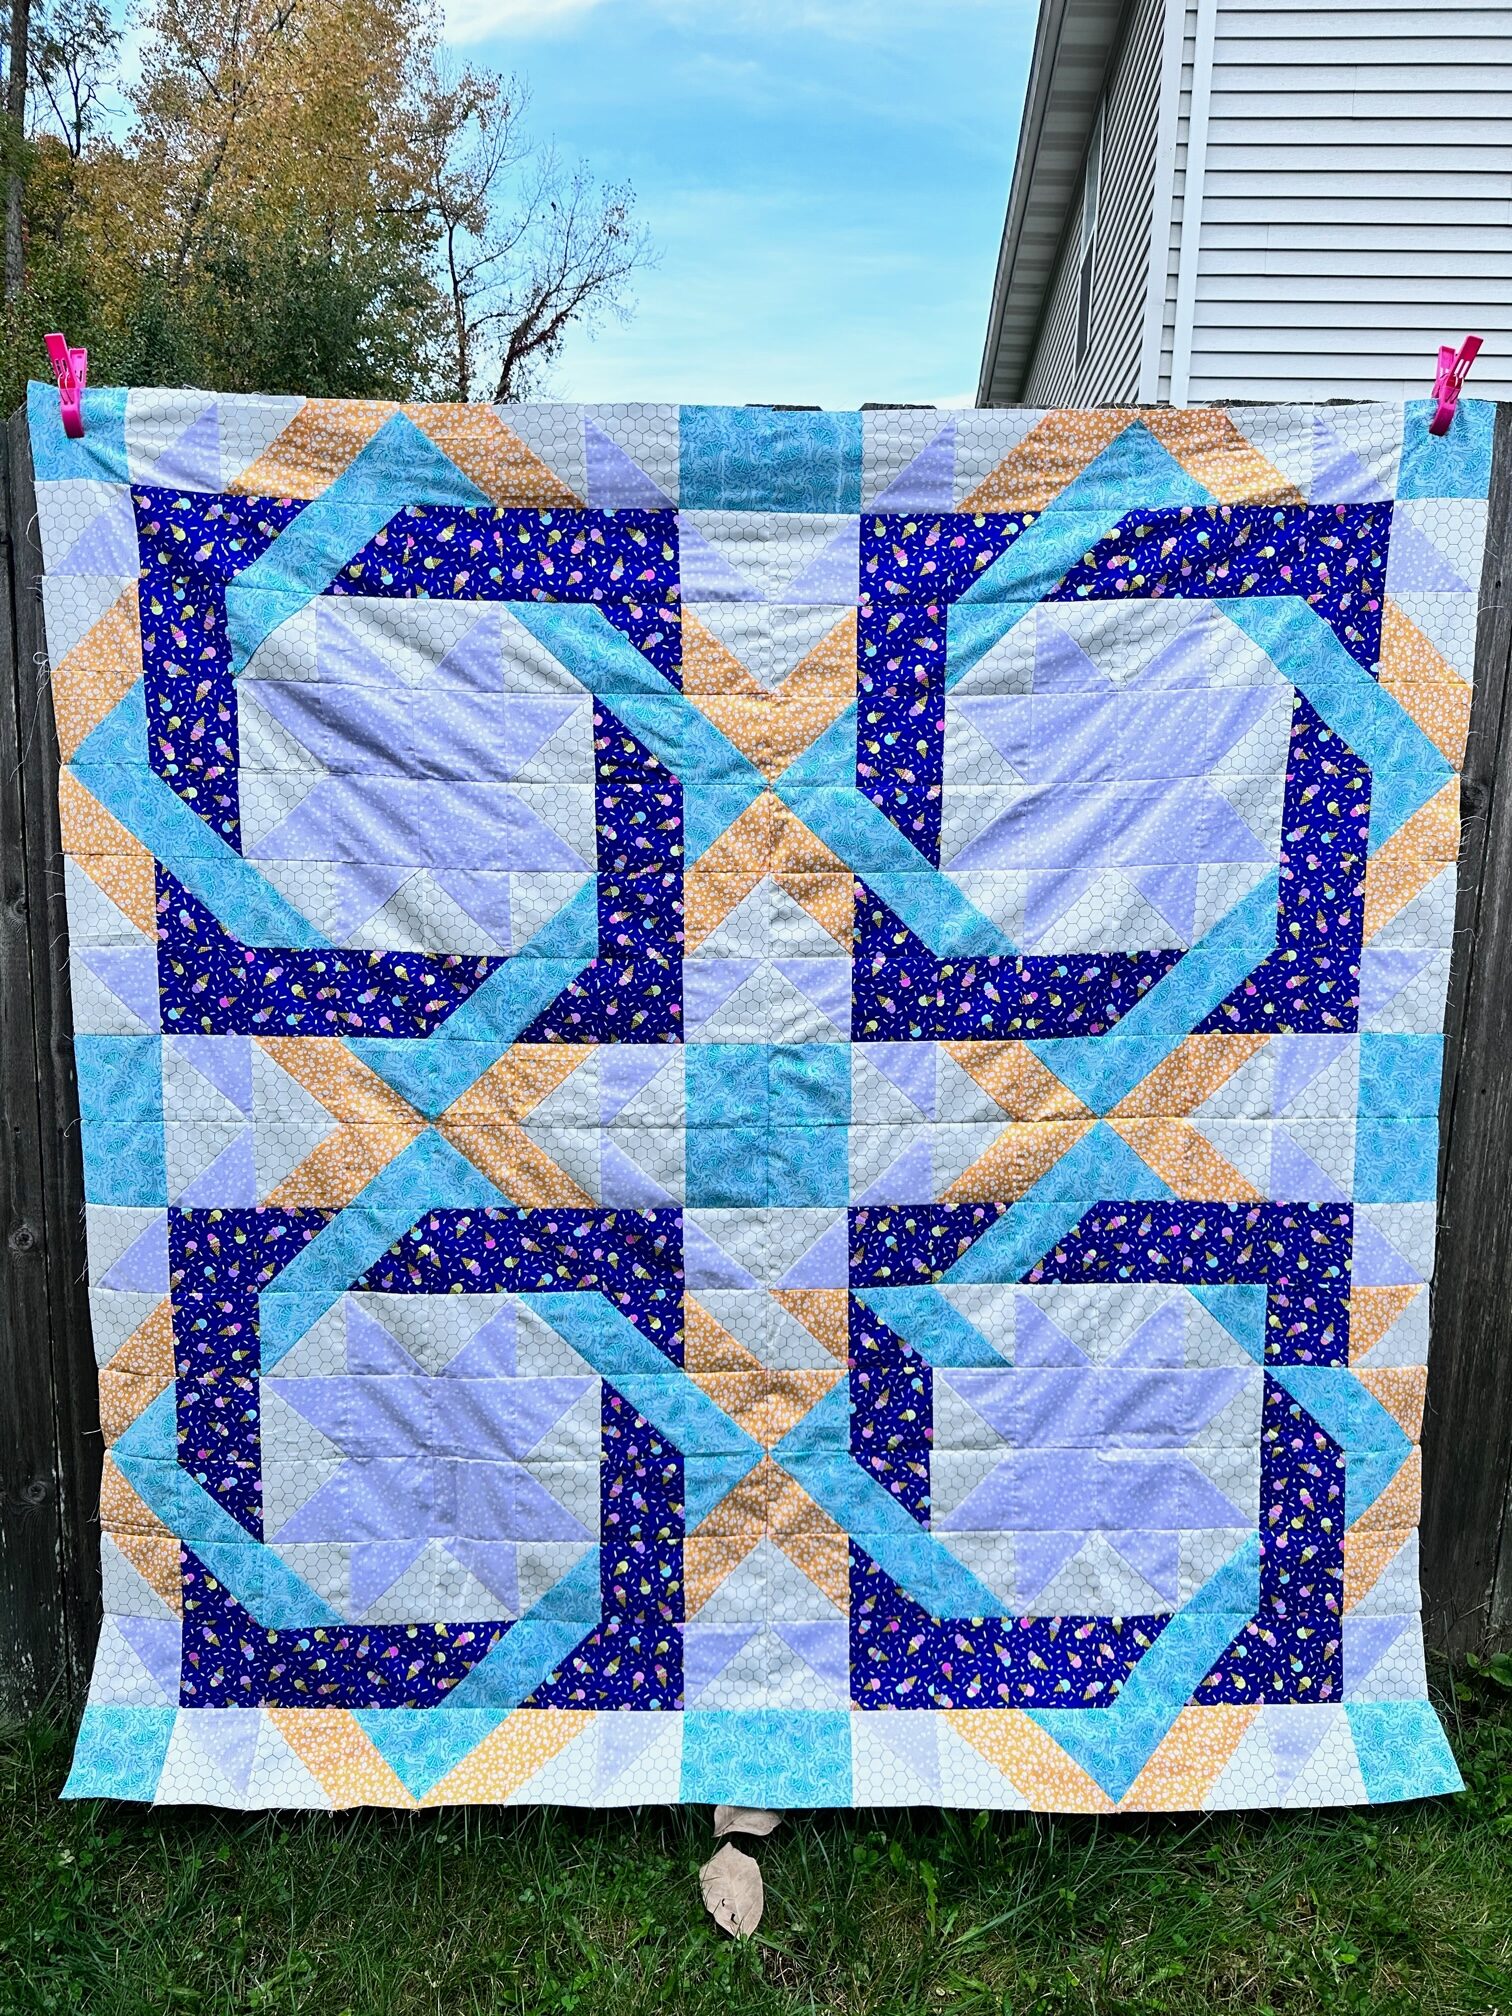
This sleeping bag is made using Thermoweb’s Block of the Month found on their Facebook Craft Room page. The Facebook Craft room is where you can find more than a dozen Blocks of the Month and their coordinating projects! However, you can make your sleeping bag from any quilt block pattern or quilt for that matter!!
Quilted Sleeping Bag
Supplies:
- November Block of the Month Pattern (4)
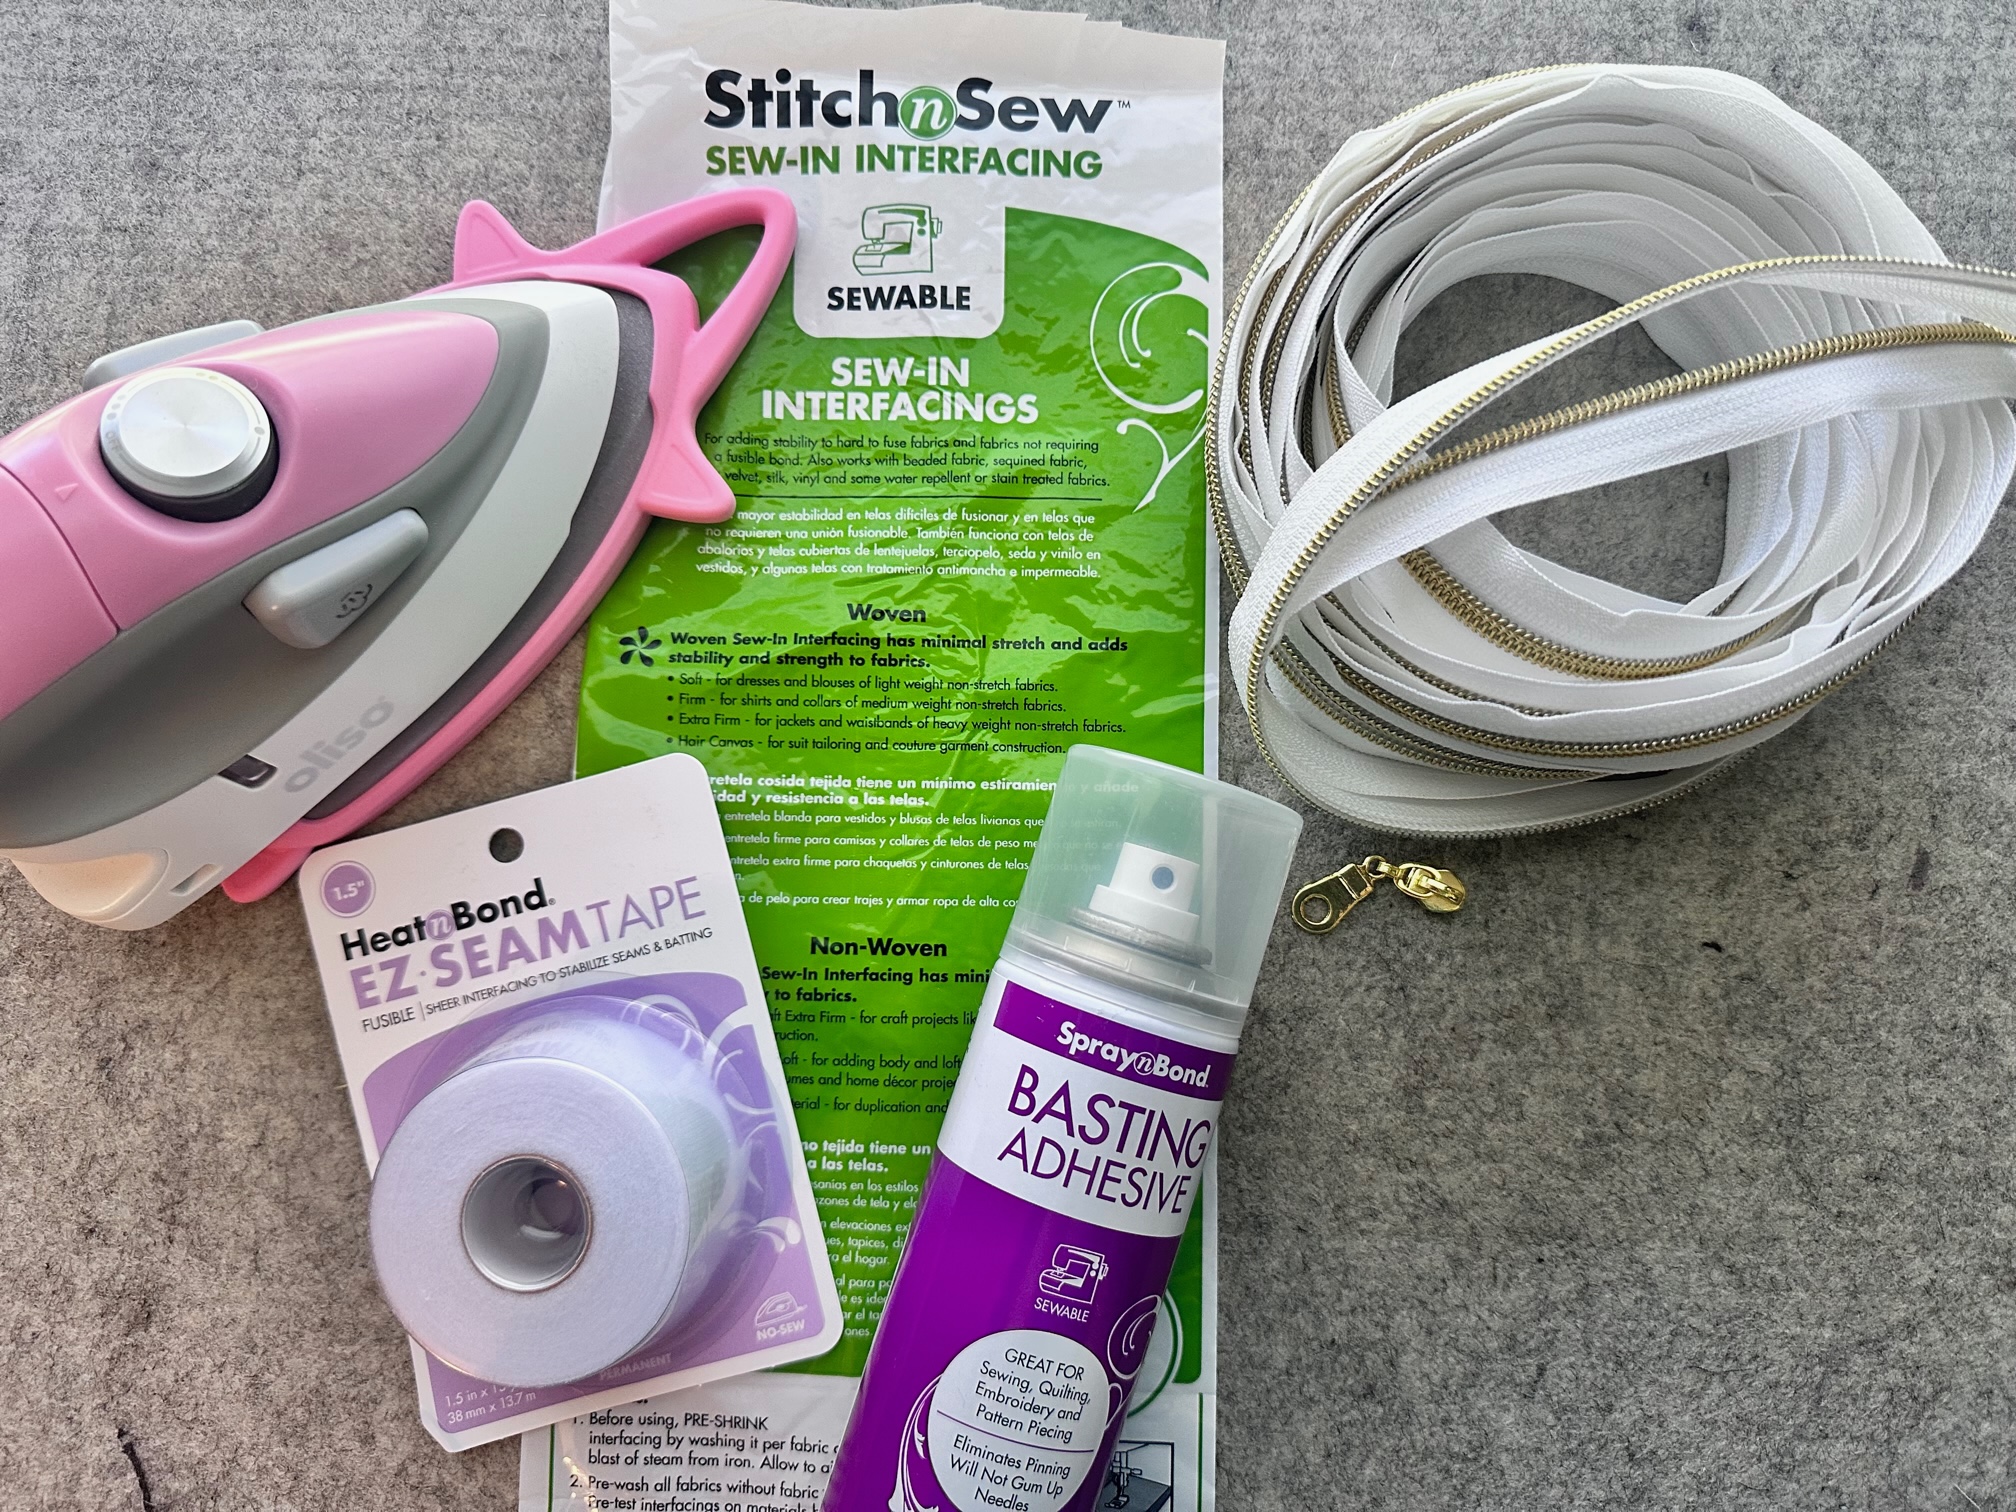
- SpraynBond Basting Spray
- StitchnSew Wide Width Fleece (4 yards)
- This amount can vary depending on the size of your quilt
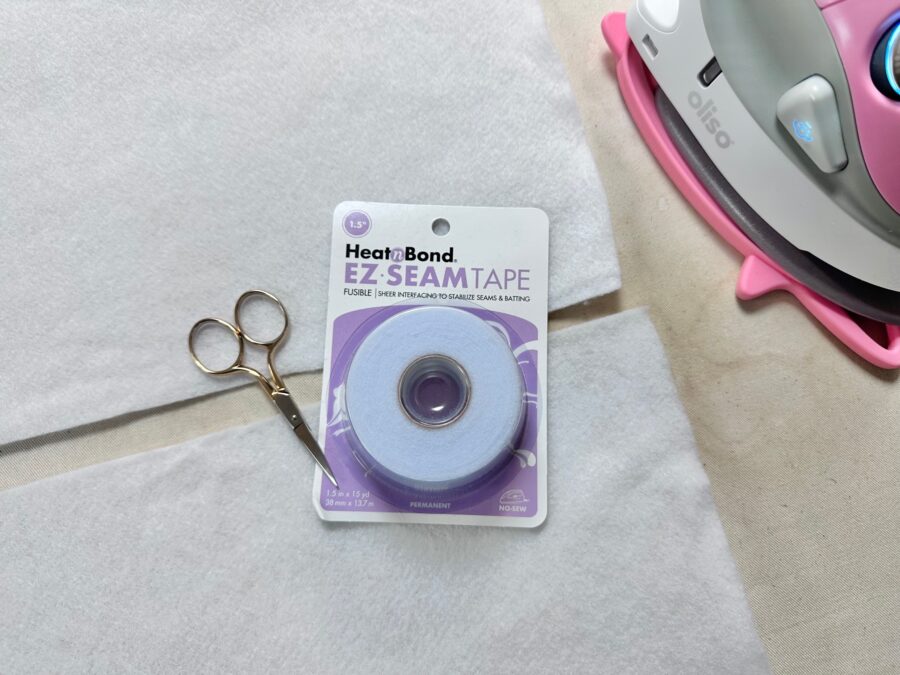
- HeatnBond EZ-Seam Tape
- Fabric or Blanket for Backing
- (3) 4″ x width of fabric for sleeping bag ties
- Zipper by the yard 3 1/2″ yards plus one pull (pull apart into 2 pieces)
- Binding: Enough to go around your quilt size. For the quilt pictured you will need 1/2″ yard if doing 2″ binding. (Depending on your personal preference this amount may be different.)
- Hand Stitching needle and Upholstery Thread
- Basic Sewing Notions
- Olfa Cutting Mat and Rotary Cutter
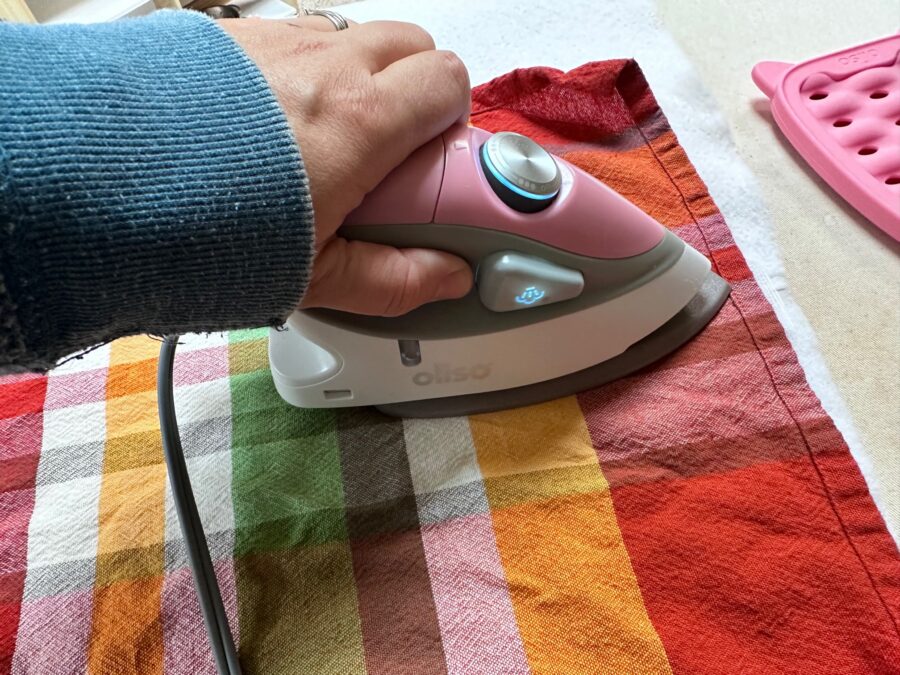
- Oliso Iron
- Pressing cloth for EZ-Seam Tape
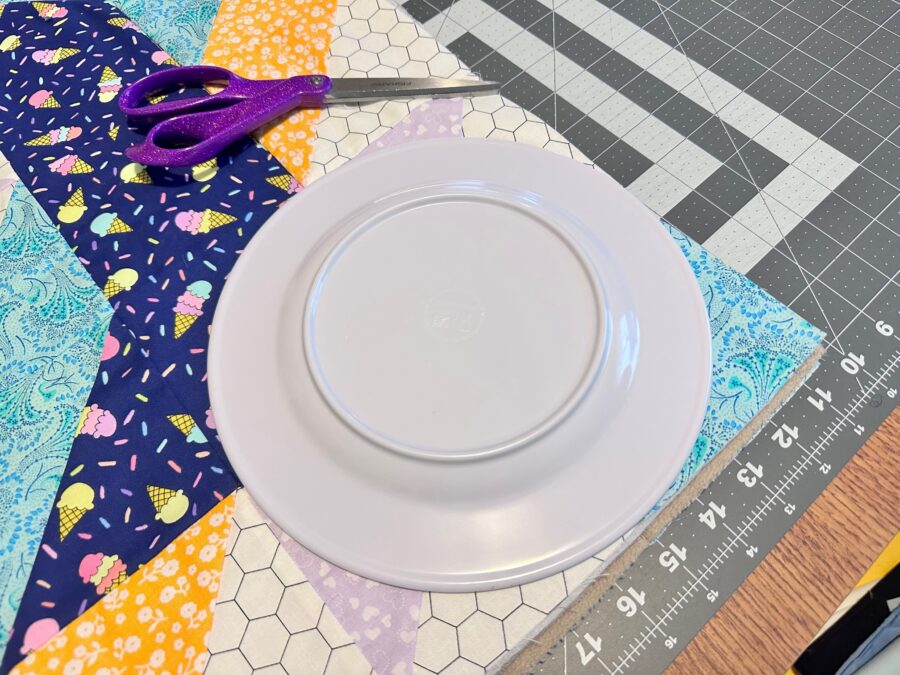
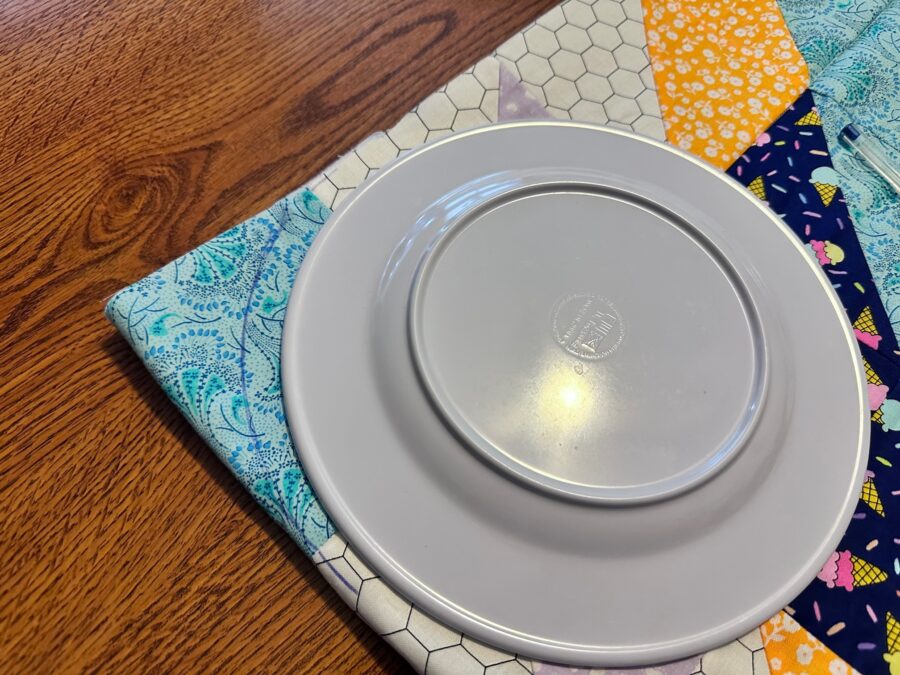
- Round edge like a large plate
Optional Pillow:
- Main fabric: 40″ x 27″
- Cuff Fabric: 40″ x 9″
- Decorative Strip: 40″ x 2 1/2″
Instructions:
Begin by…
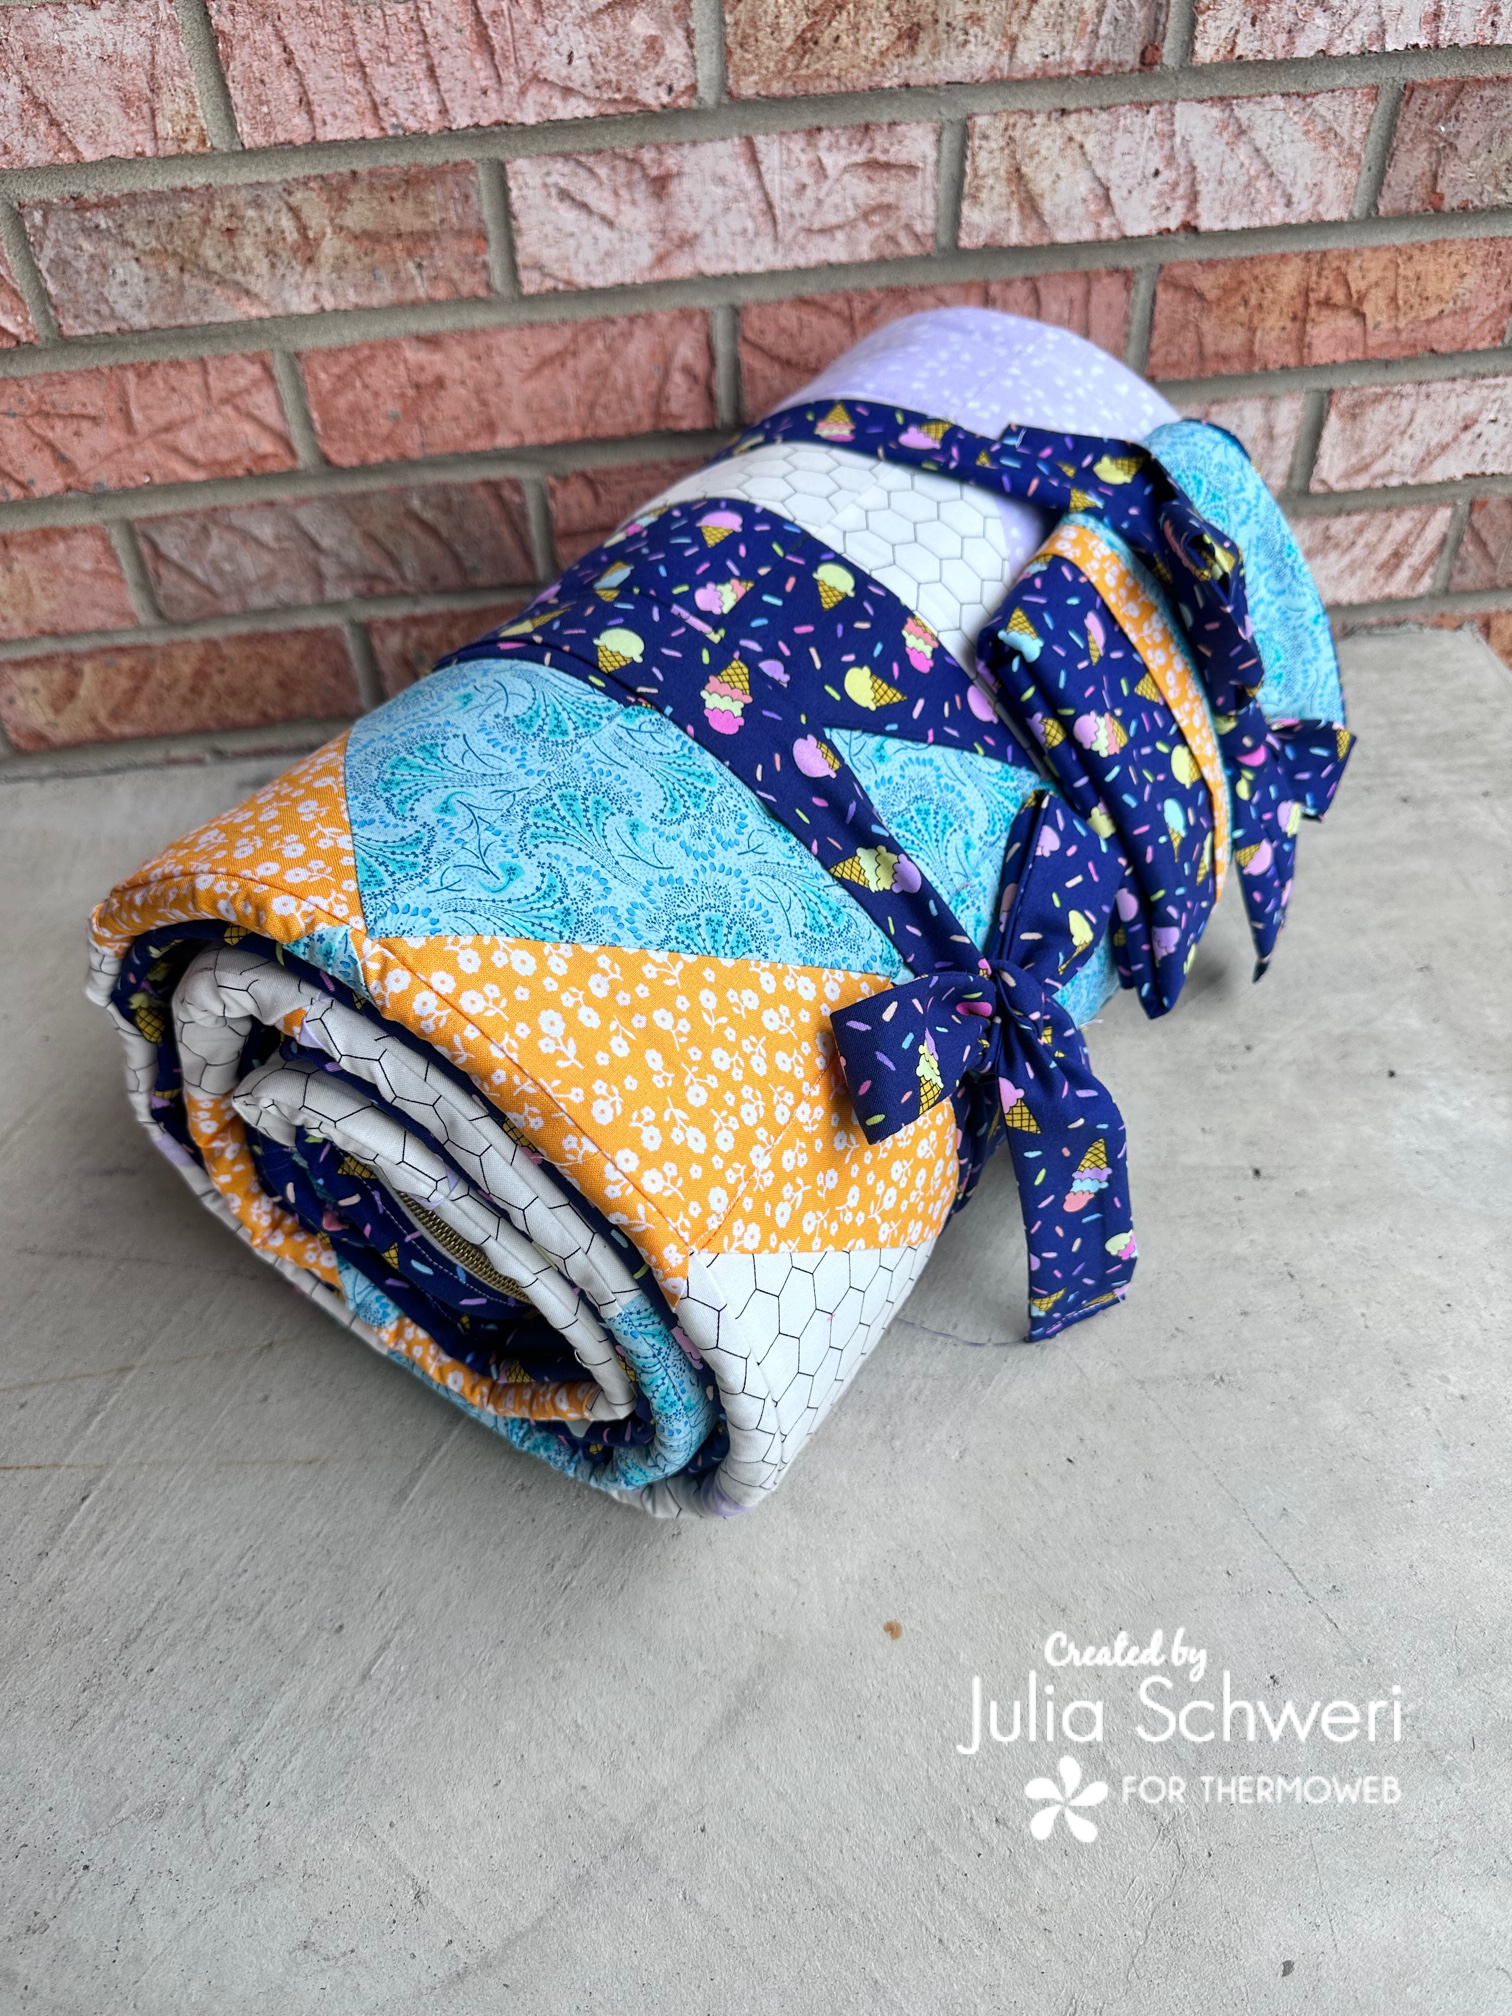
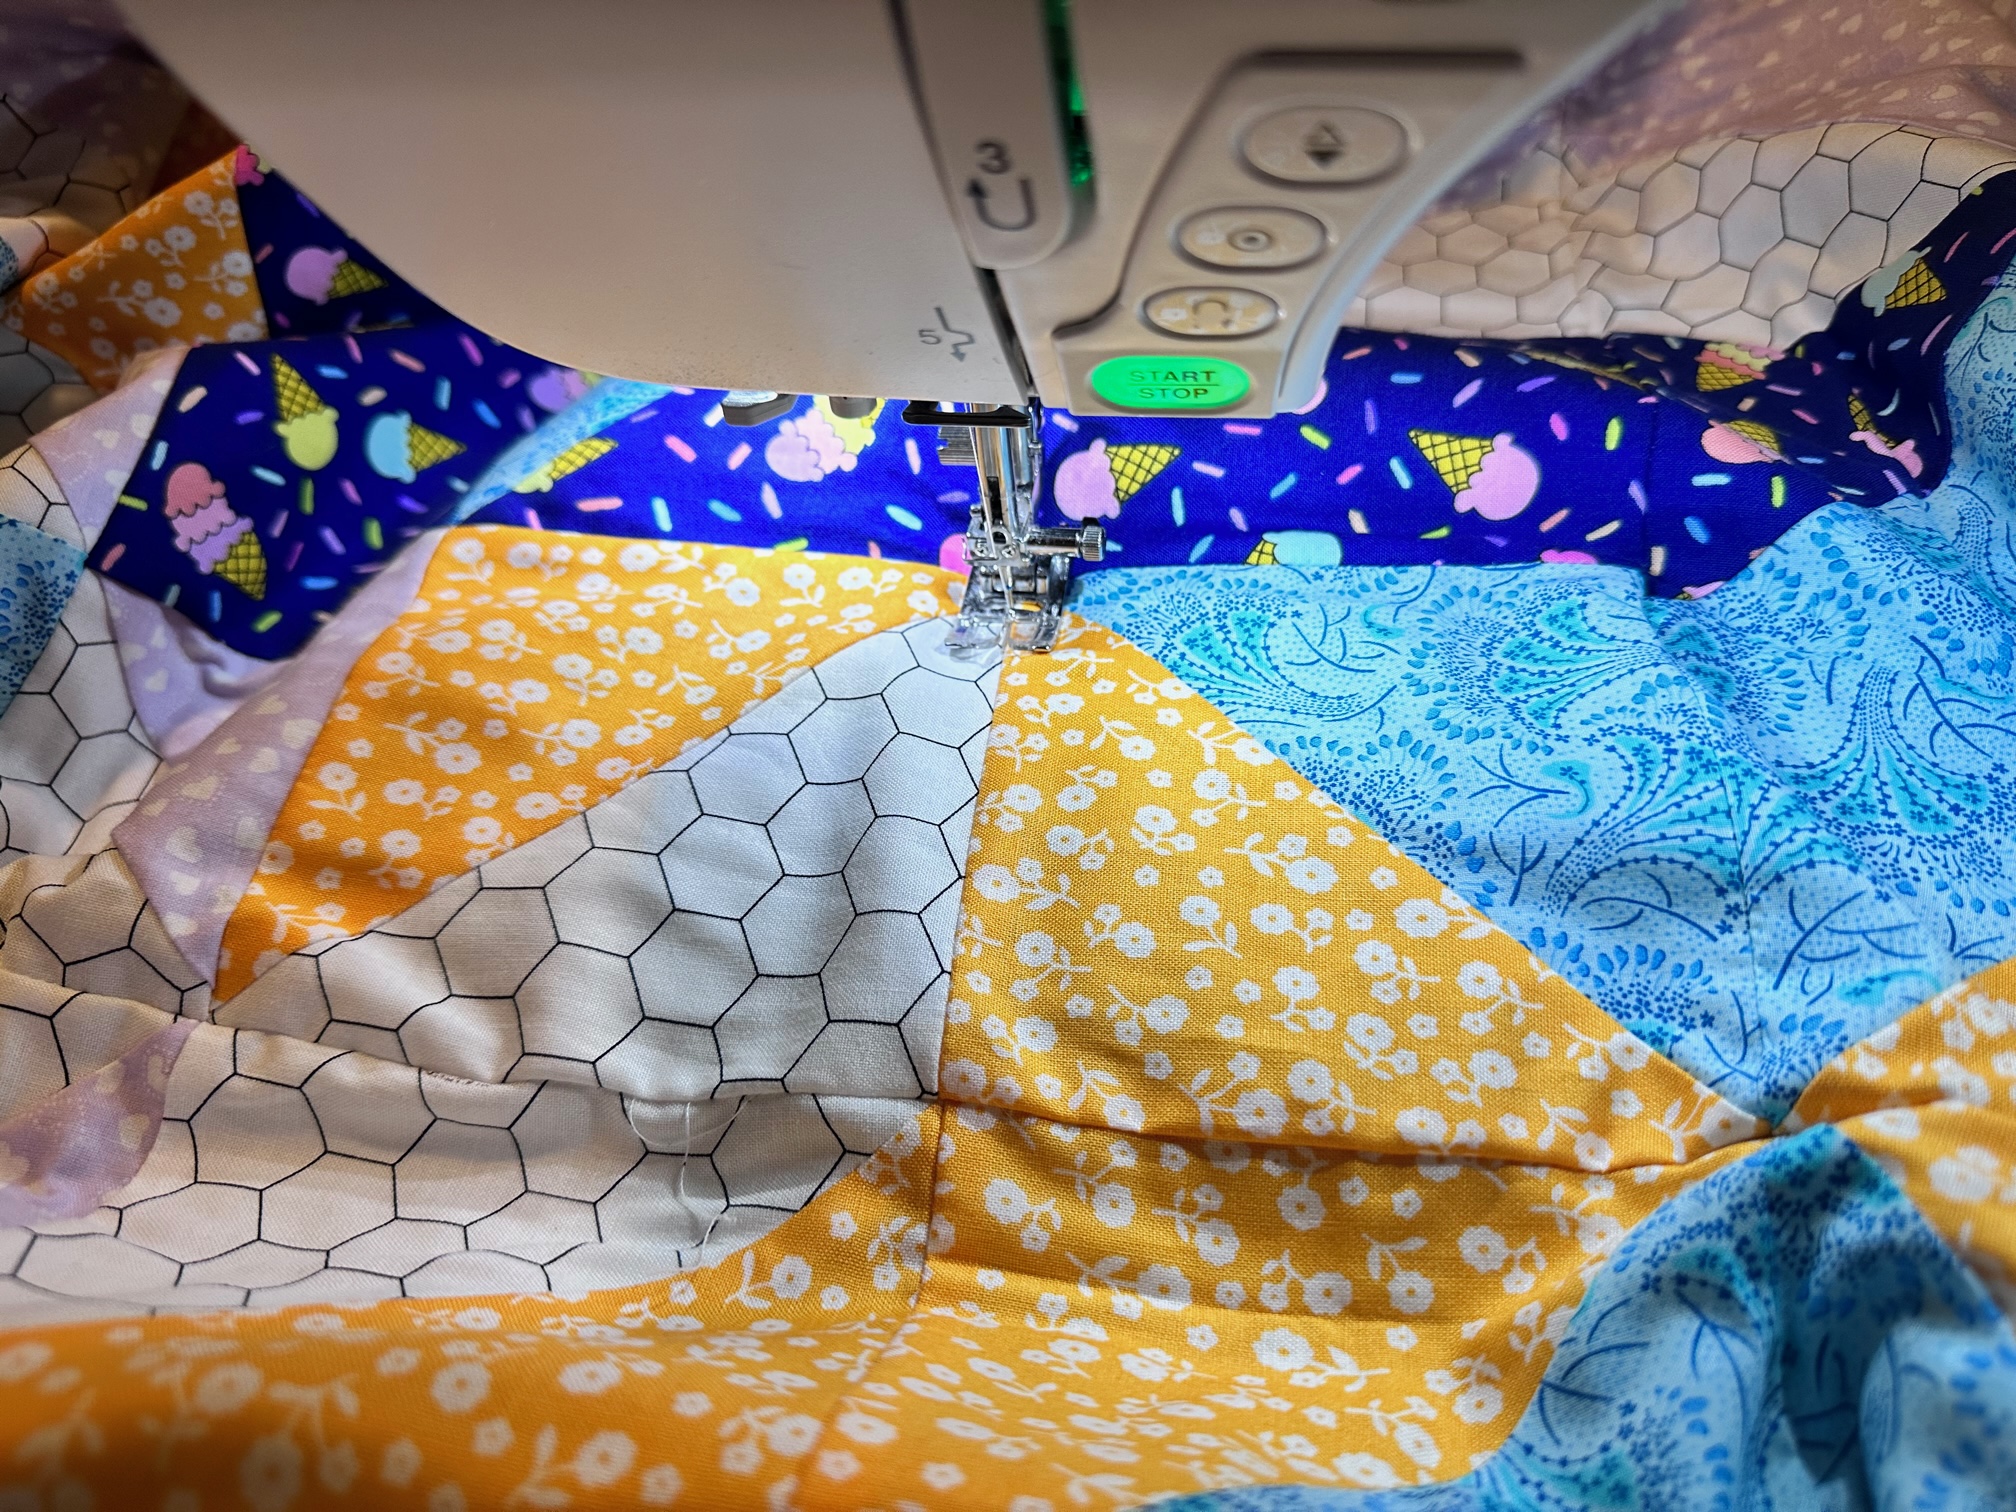
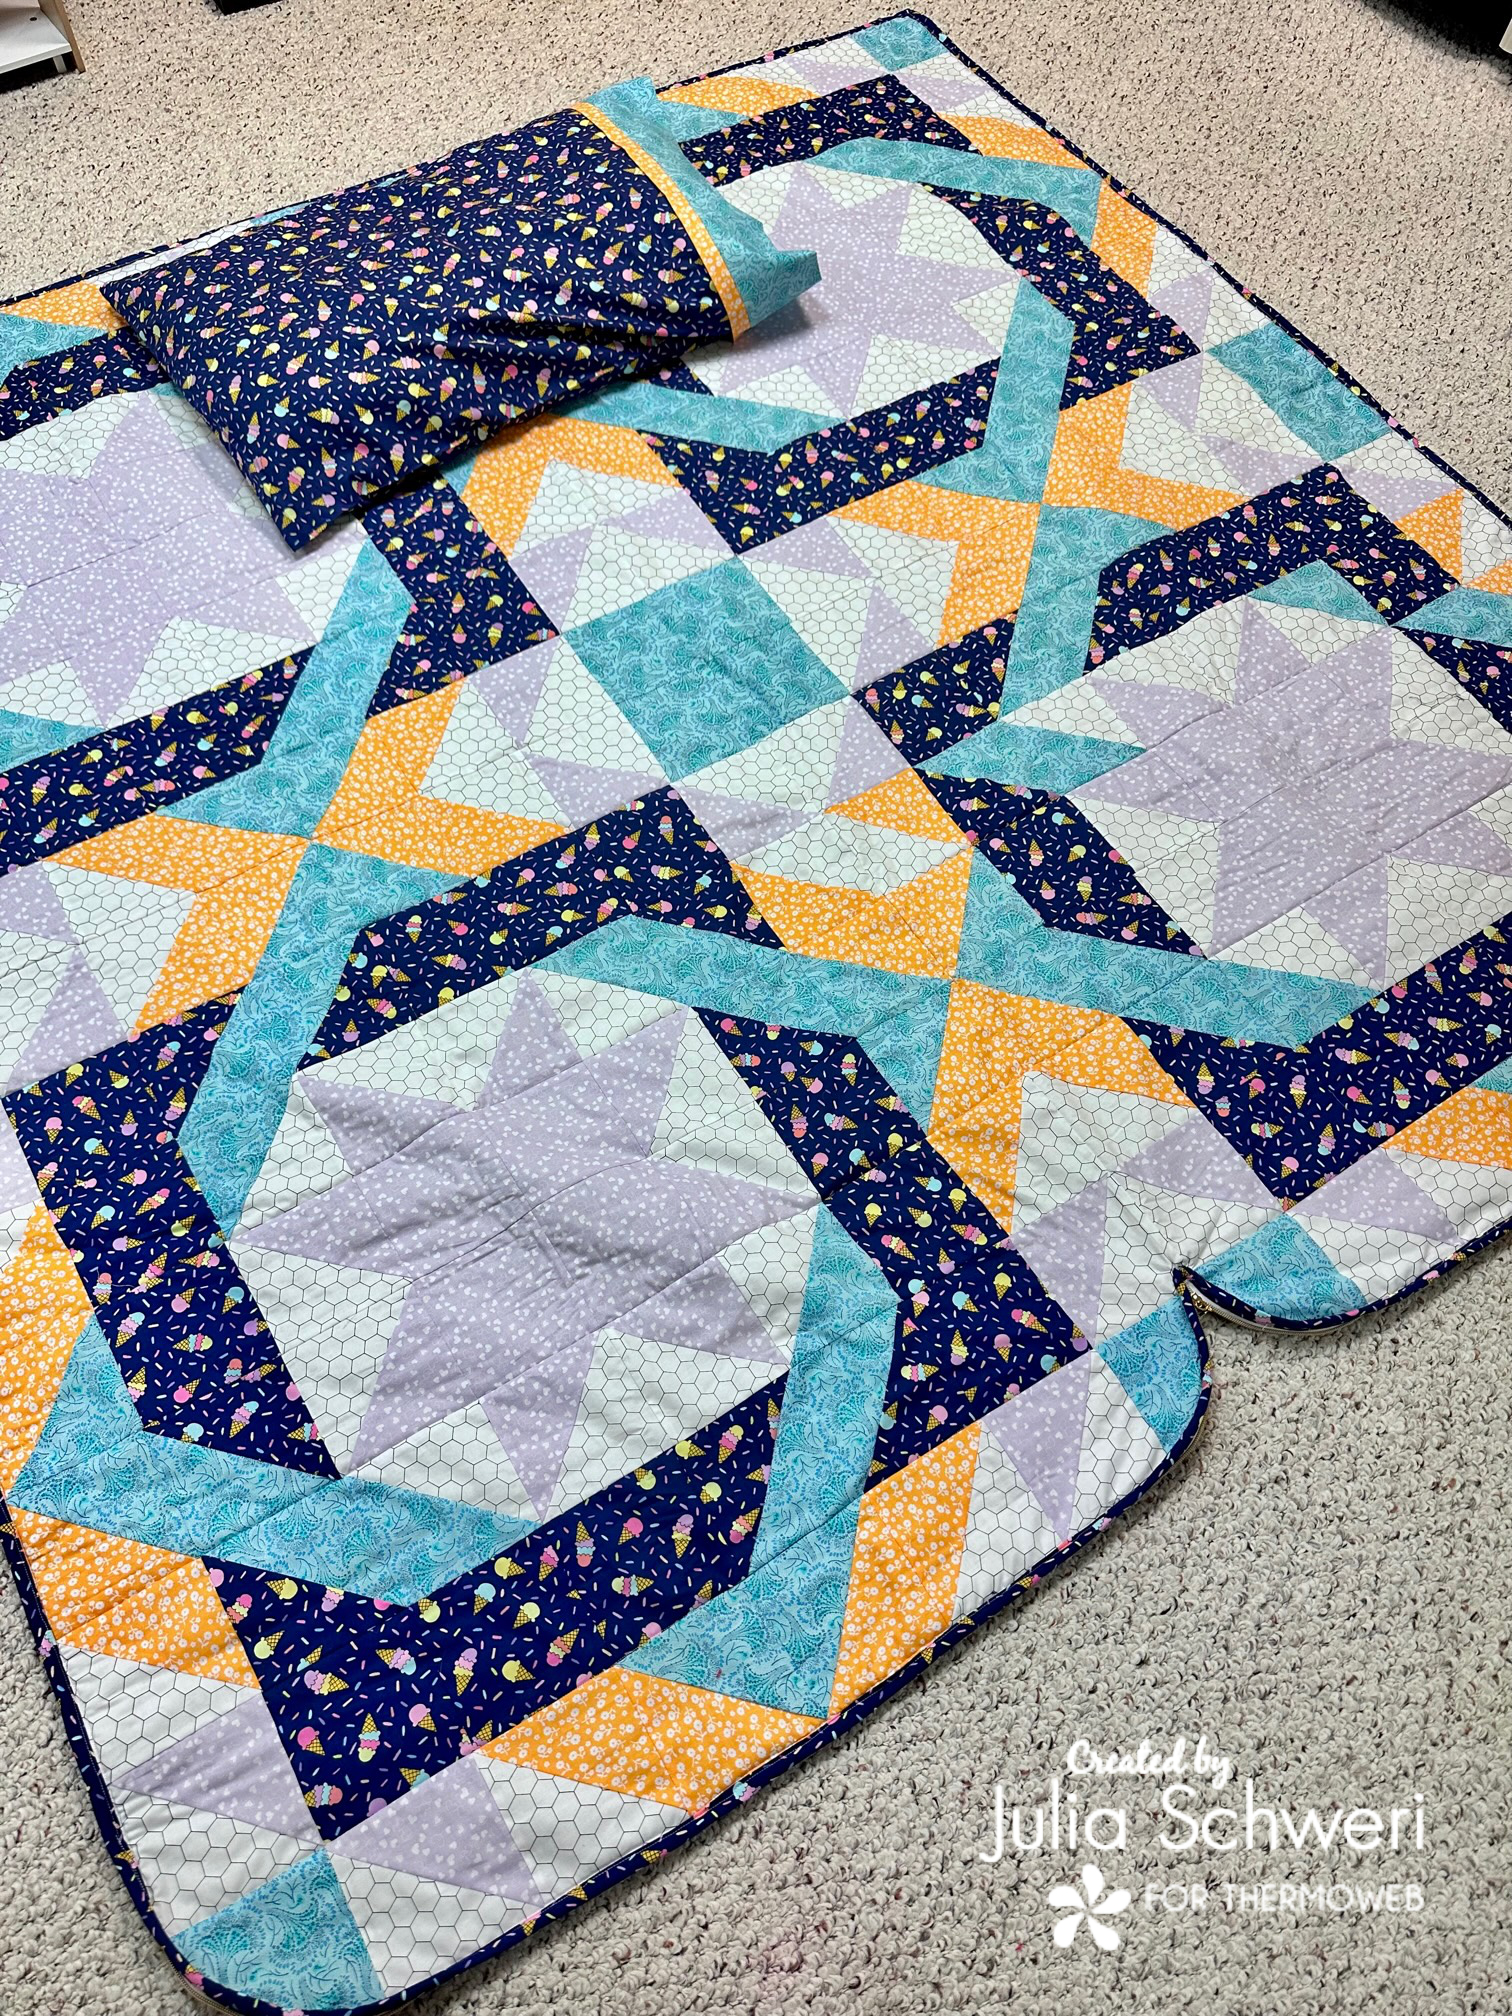
Sew the block of the month together. Make 4 and sew them together 2×2 OR use a quilt top you already have finished. Your quilt size will depend on the size sleeping bag you want. The size sleeping bag/quilt used here is 72″ x 72″.
Next…
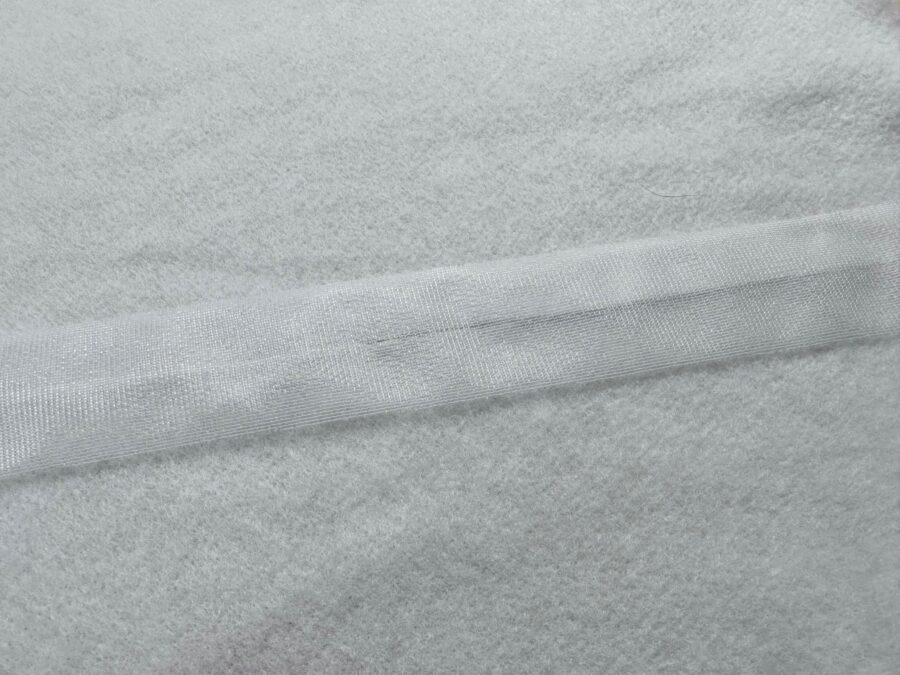
This size quilt is slightly larger than the wide with fleece, so we need to join pieces together. To join 2 pieces together, cut the joining edge straight. But them together and roll out the EZ-Seam tape. Press using a pressing cloth or parchment paper till fused, about 15 seconds. Fuse the entire length of fleece.
Continue by…
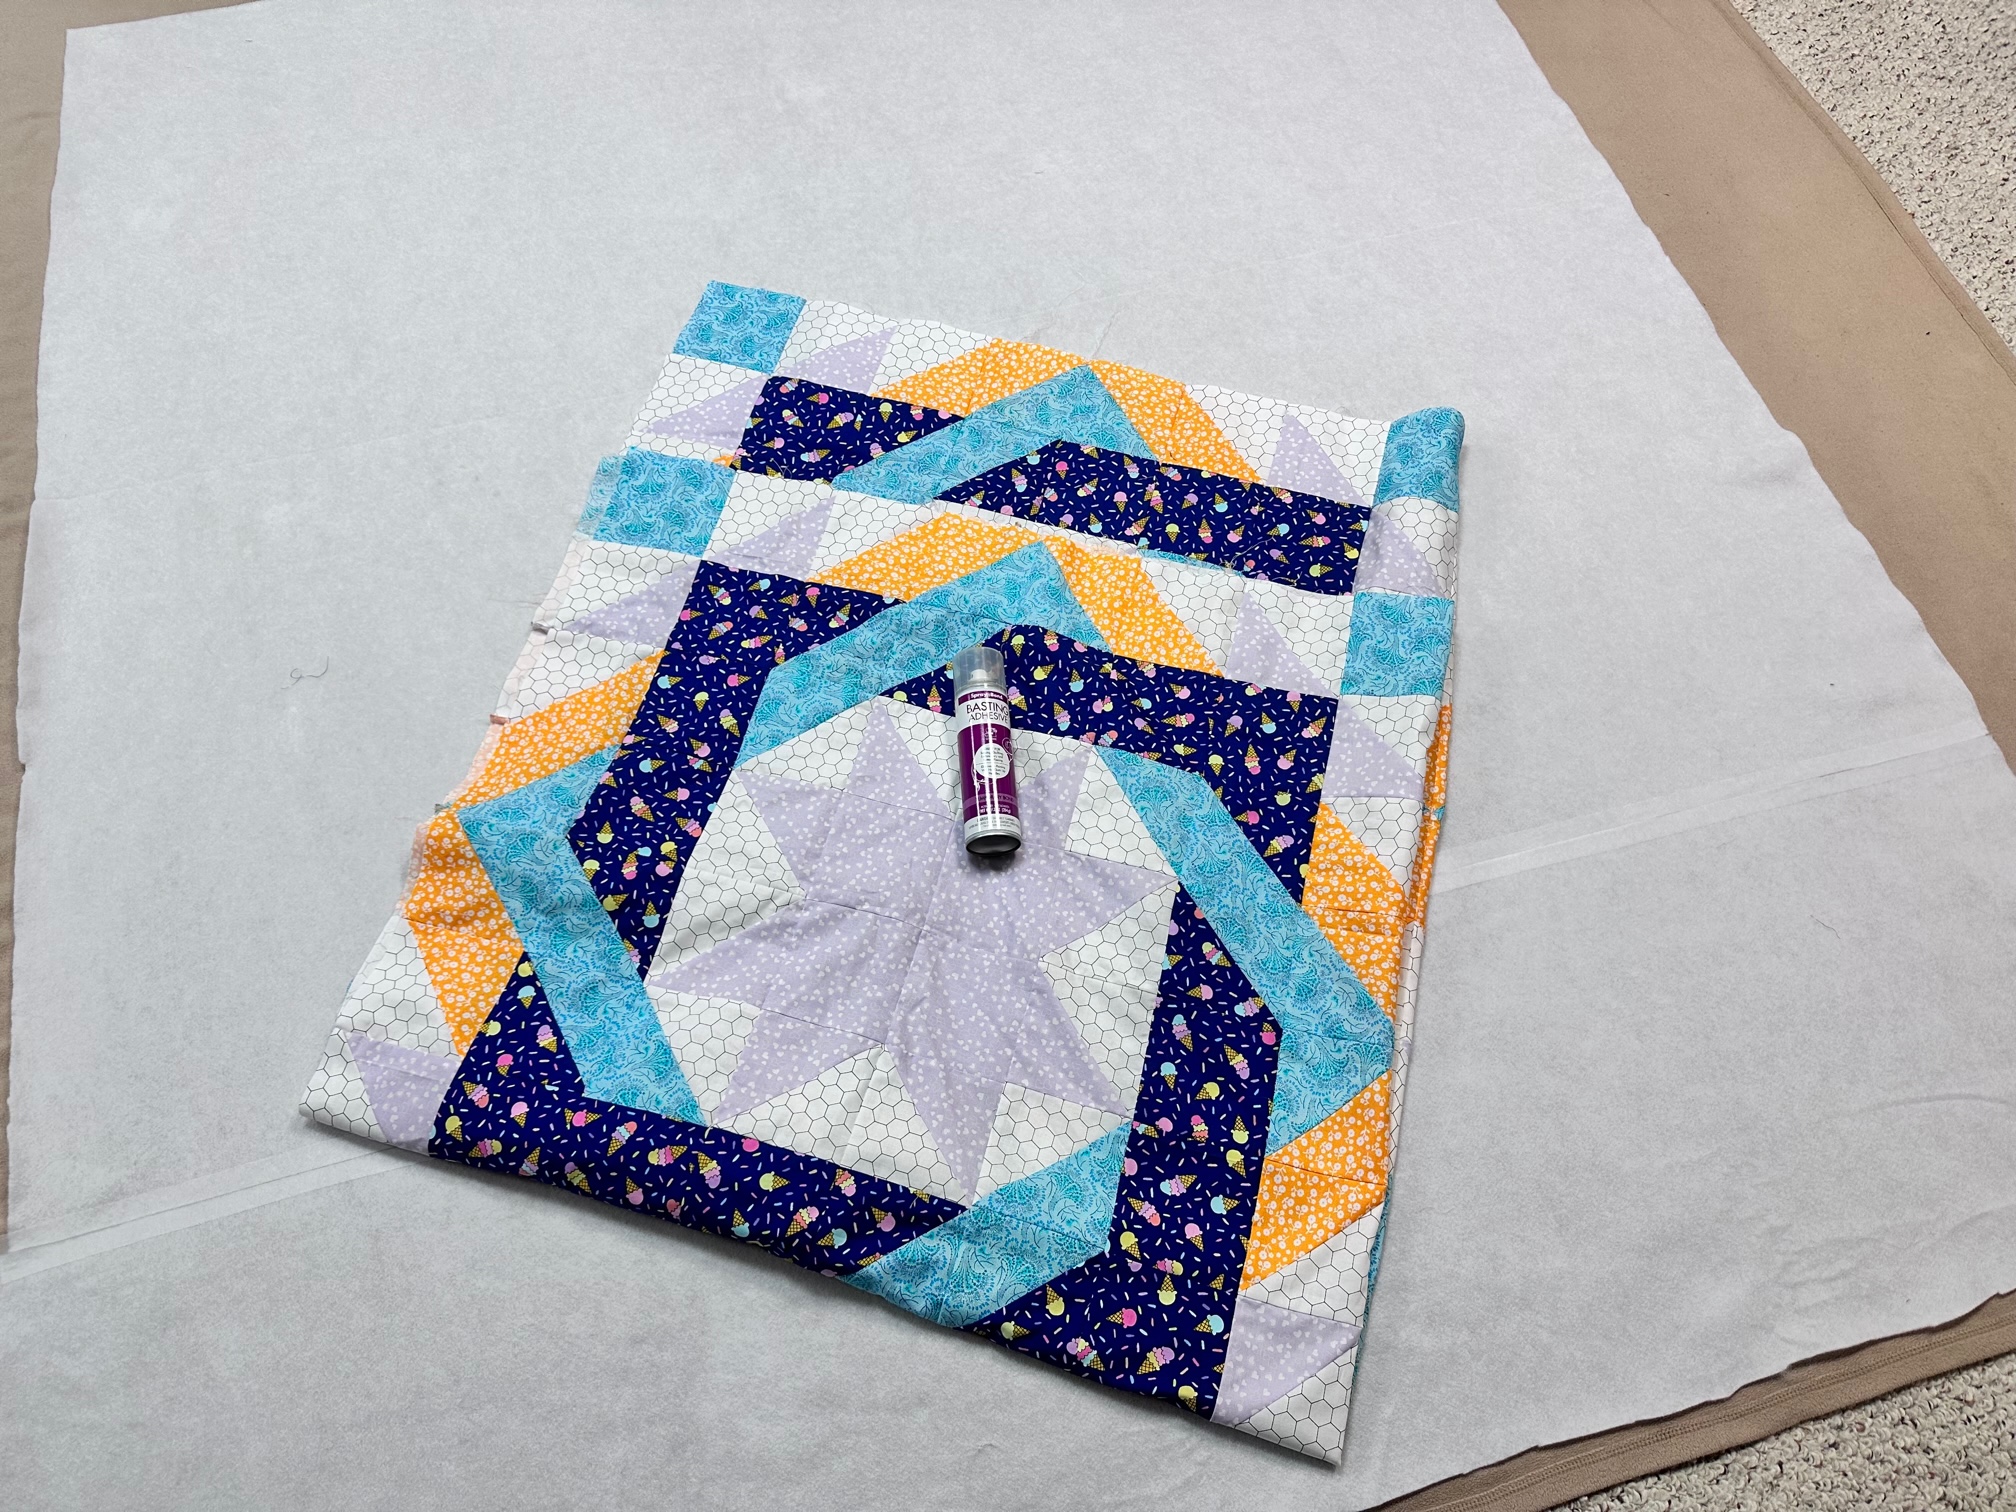
Lay out your backing fabric, fleece and quilt top. Using SpraynBond Basting Spray make your quilt sandwich.
Then…
Quilt your quilt however you desire. I used a blanket I had on hand that was large enough for a backing. Doing so used materials I already had and will make the sleeping bag extra warm. Once quilted, trim the sides.
Next…
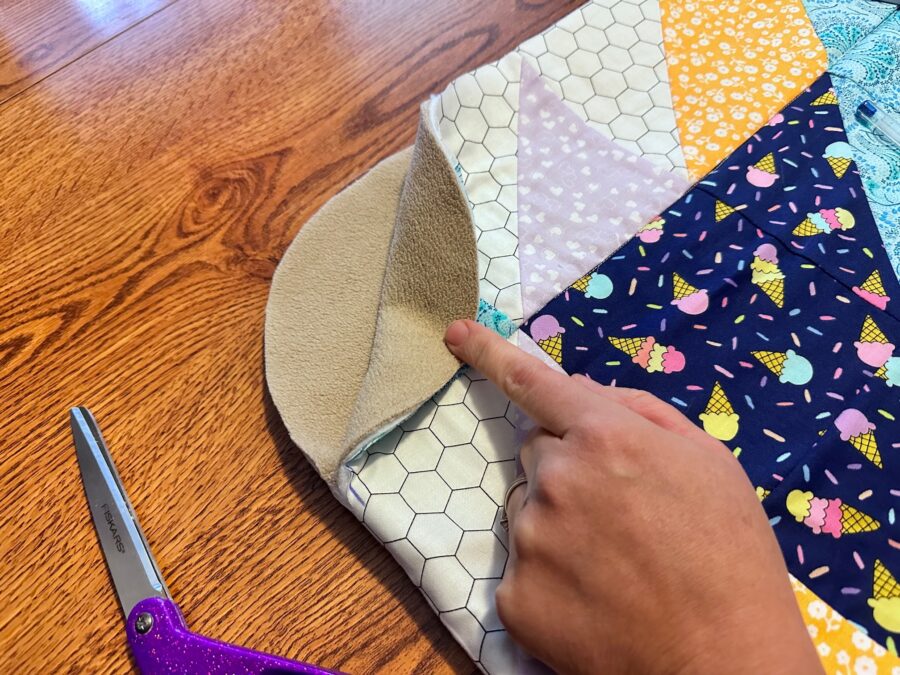
Fold your quilt in half and with a rounded edge mark your two bottom corners. Trim the corners. We are trimming the folded bottom corner as well. This will allow our sleeping bag to be fully open to a blanket.
Then…
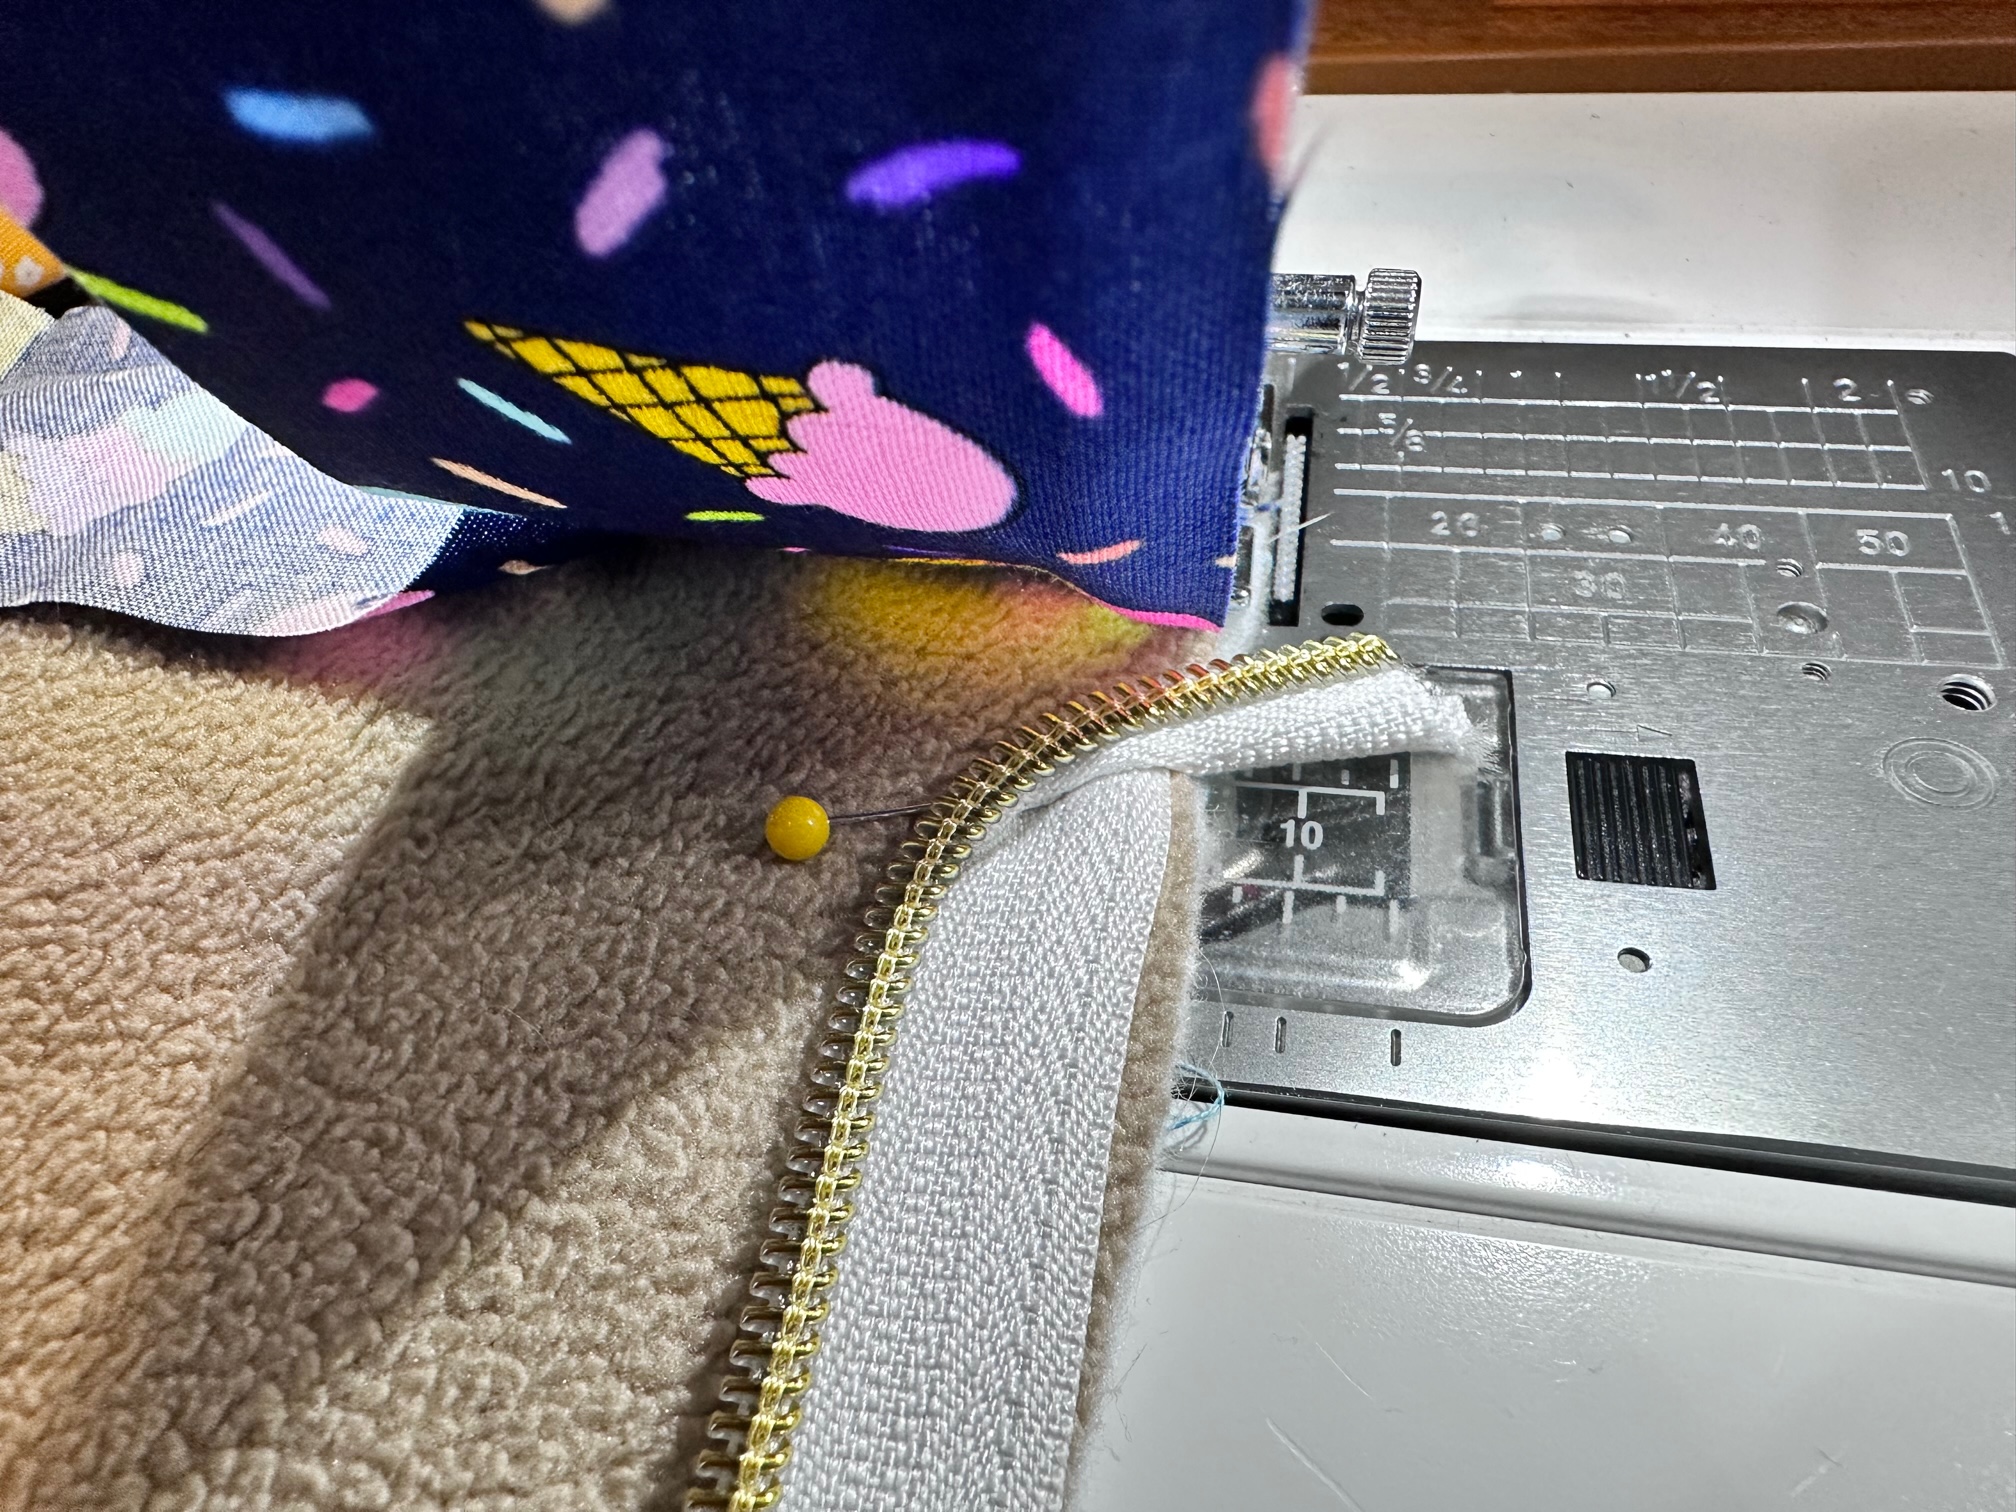
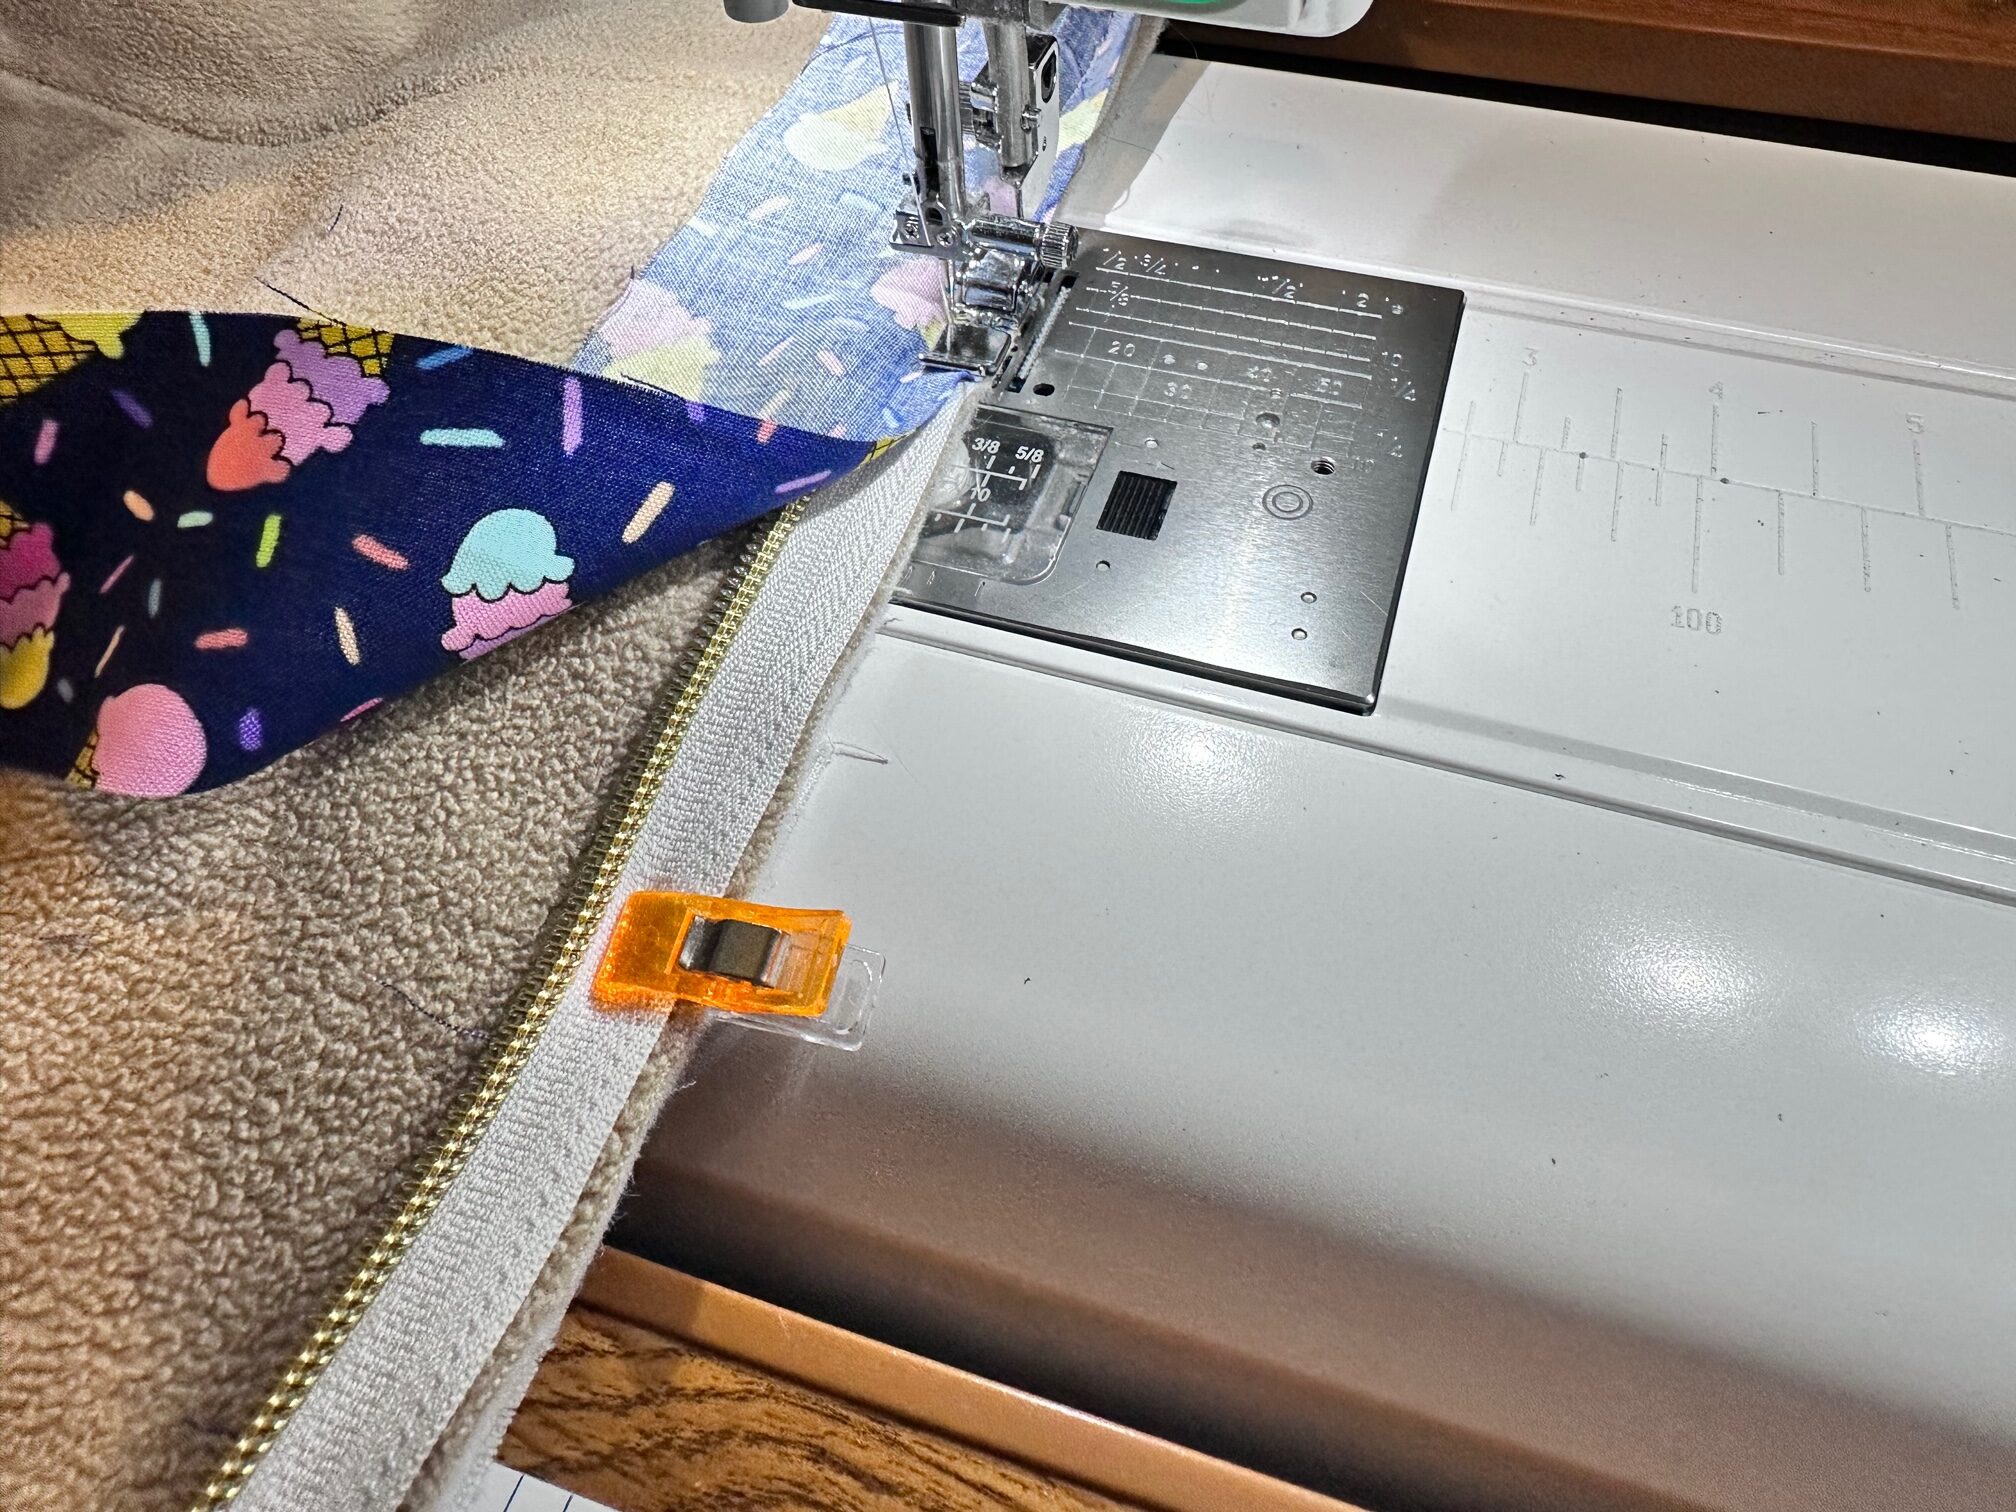
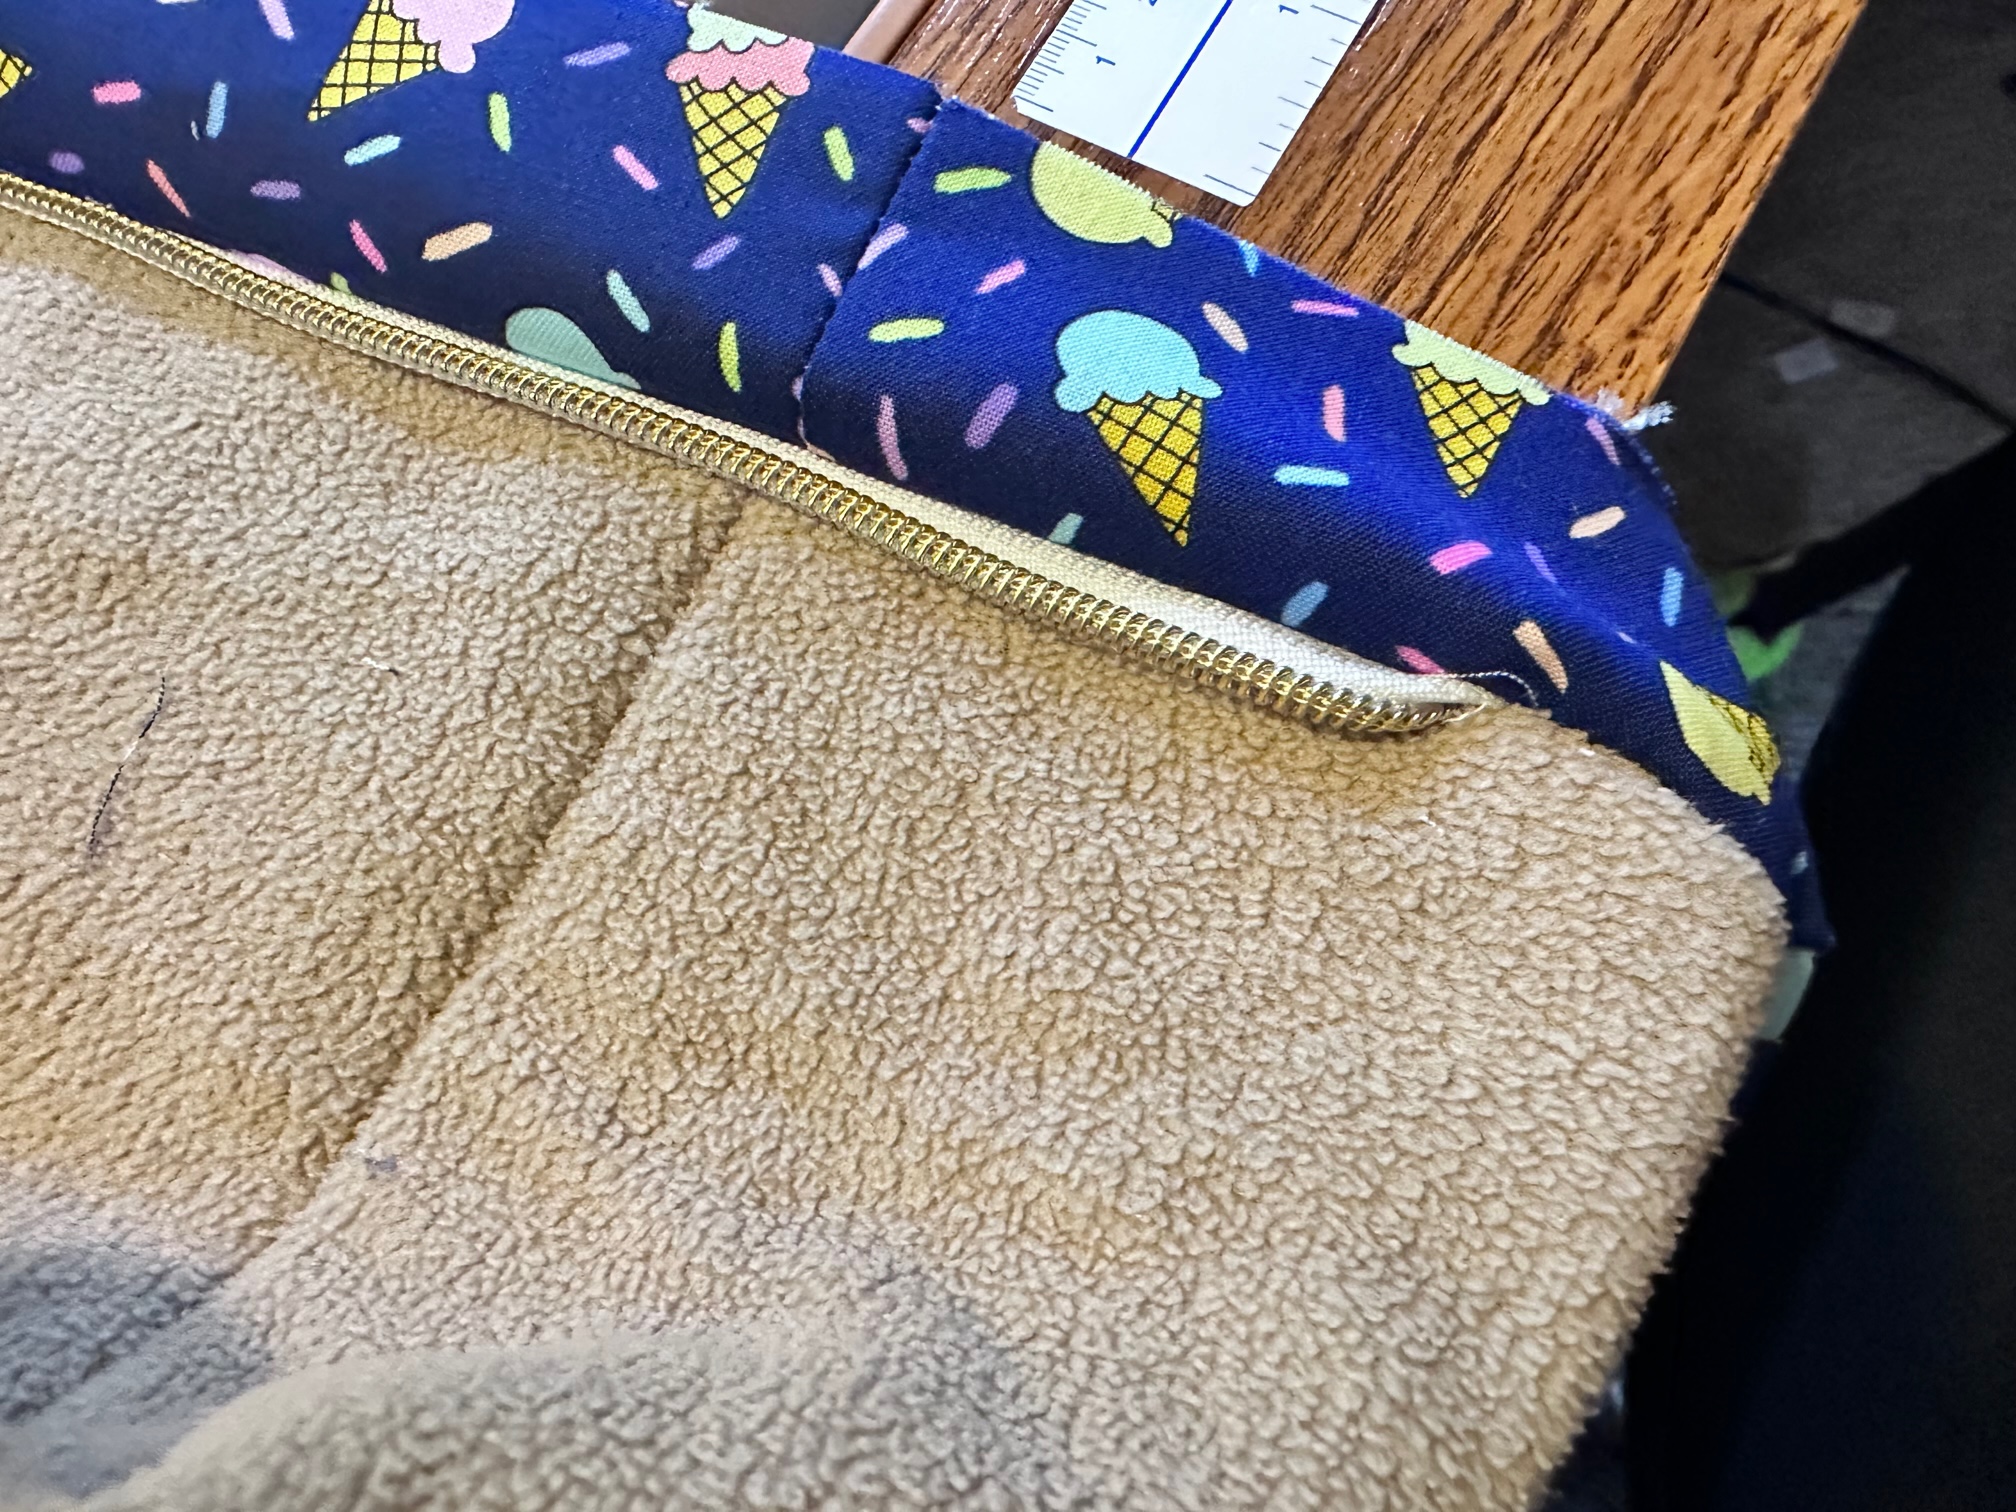
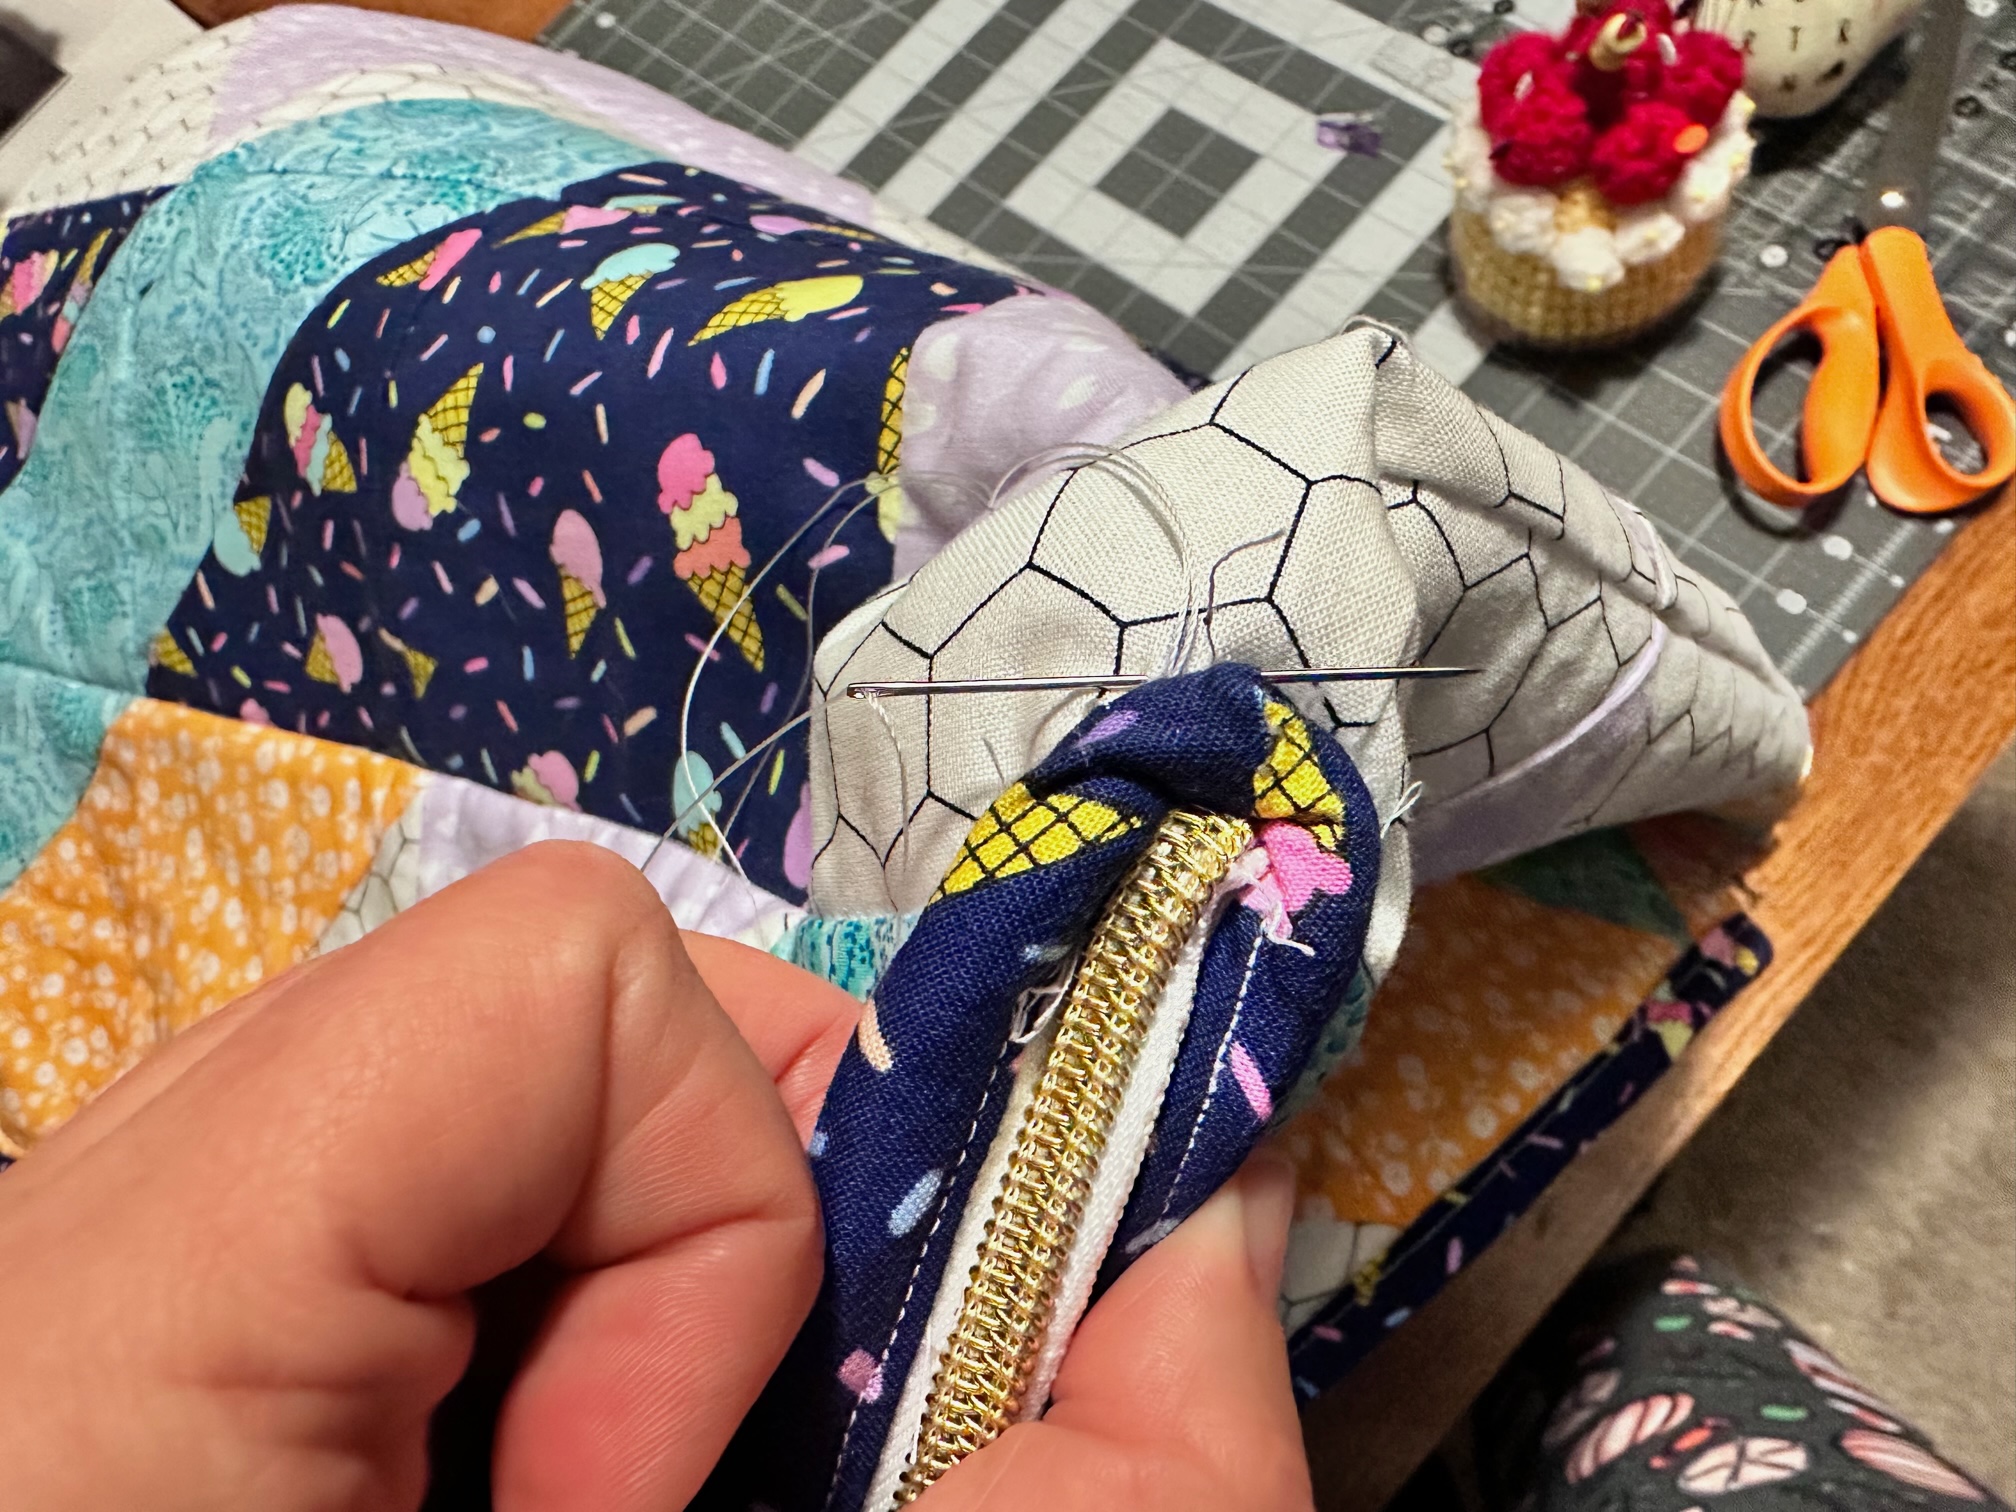
Prep your binding fabric. Begin binding on the top edge of the sleeping bag (where your head would be.) You will be sewing the binding on to the back of the quilt. Turn the corner as you normally would do but then stop about 2″ down. Here you will insert and begin sewing the zipper sandwiched between the binding and the back of the quilt (fold the zipper in from the raw edge of the quilt). Continue sewing the zipper and binding to the quilt. When you get to the folded curved corner stop and reinforce your stitches. Cut the zipper and binding leaving about a 3″ of zipper and binding.
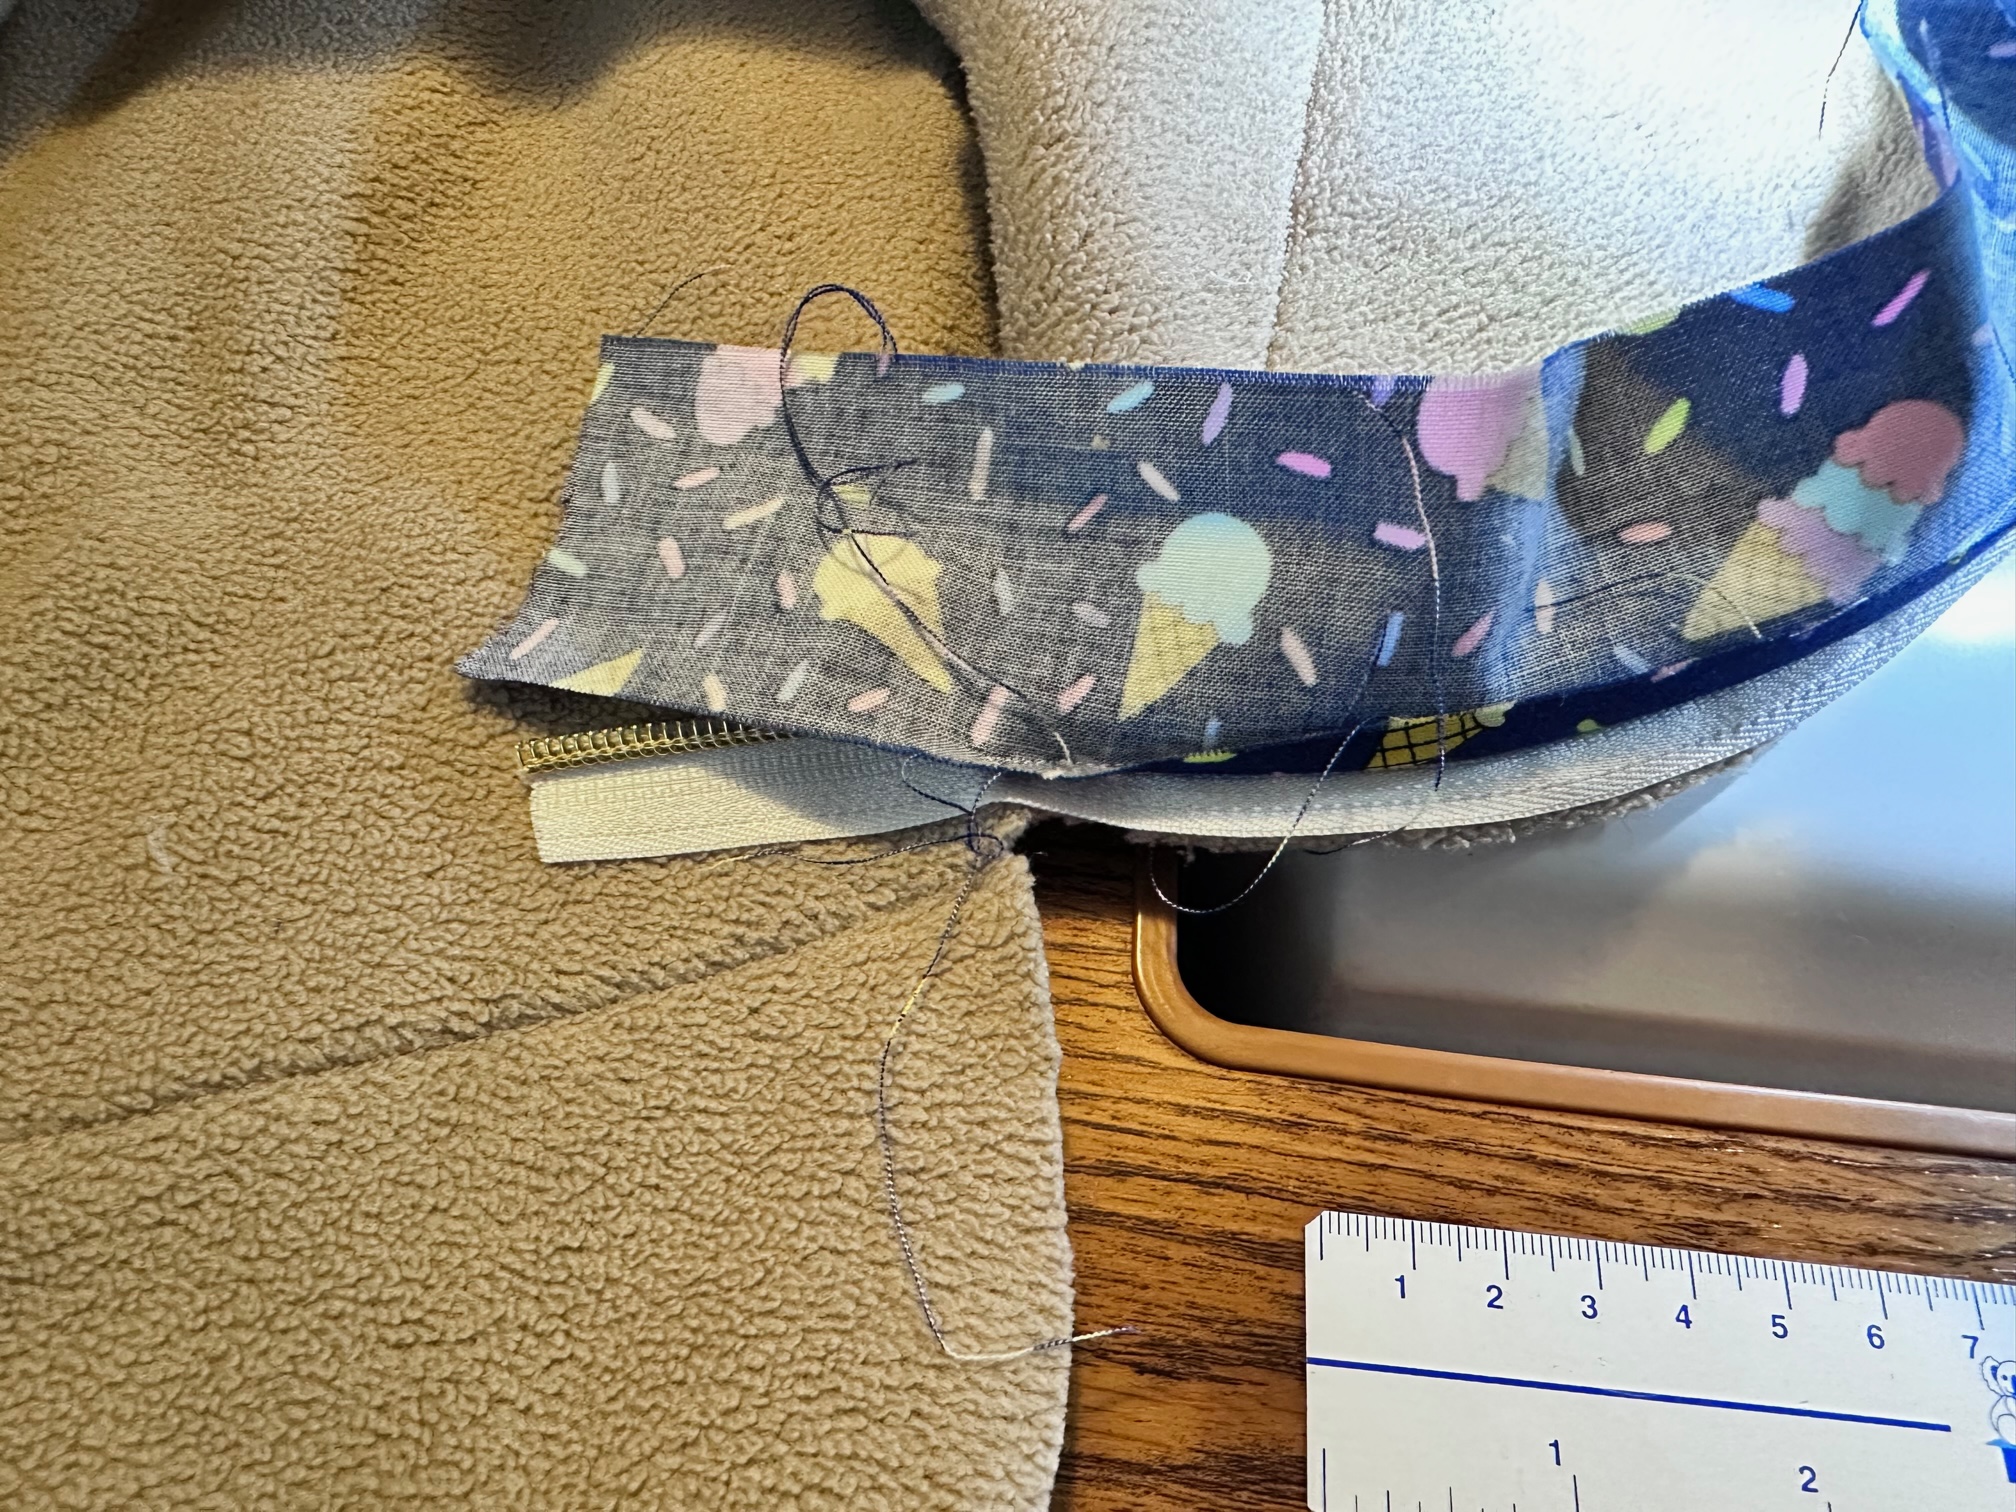
Next…
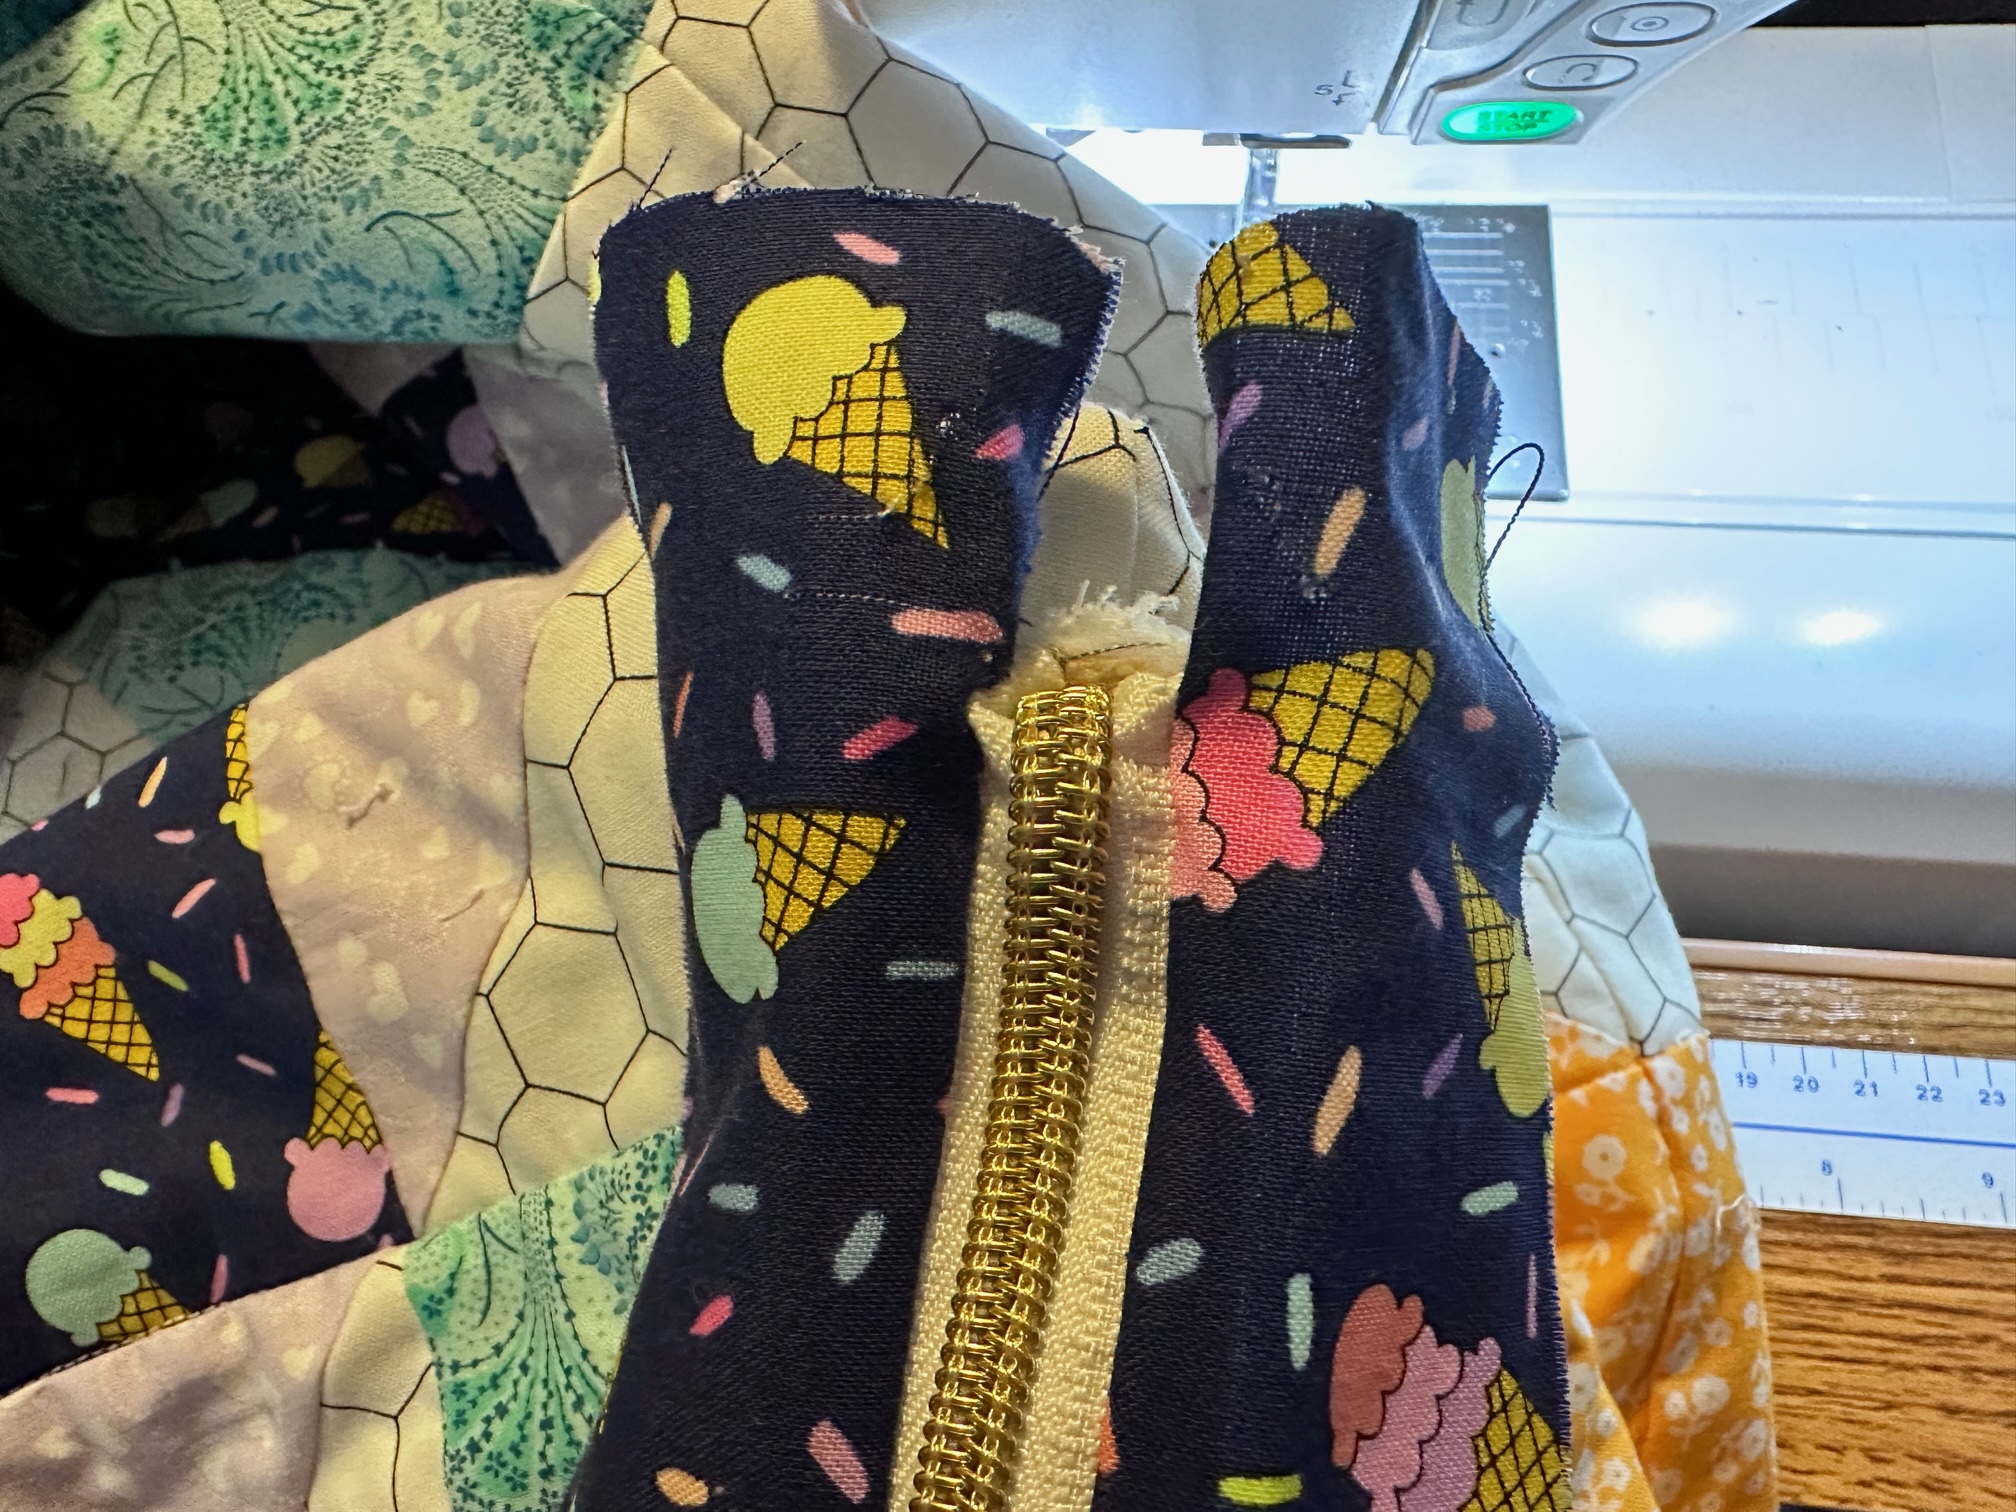
Take the other side of the zipper and align it with the zipper you just sewed. Place the binding on top of the zipper and continue to attach the zipper and binding to the back of the quilt. Once you reach about 2″ from the top corner of the quilt finish off the zipper (turn the zipper into the seam and reinforce) and continue sewing just the binding. Once your reach almost where you began on the top of the quilt, join your binding pieces and finish stitching it to the back of the quilt.
Next…
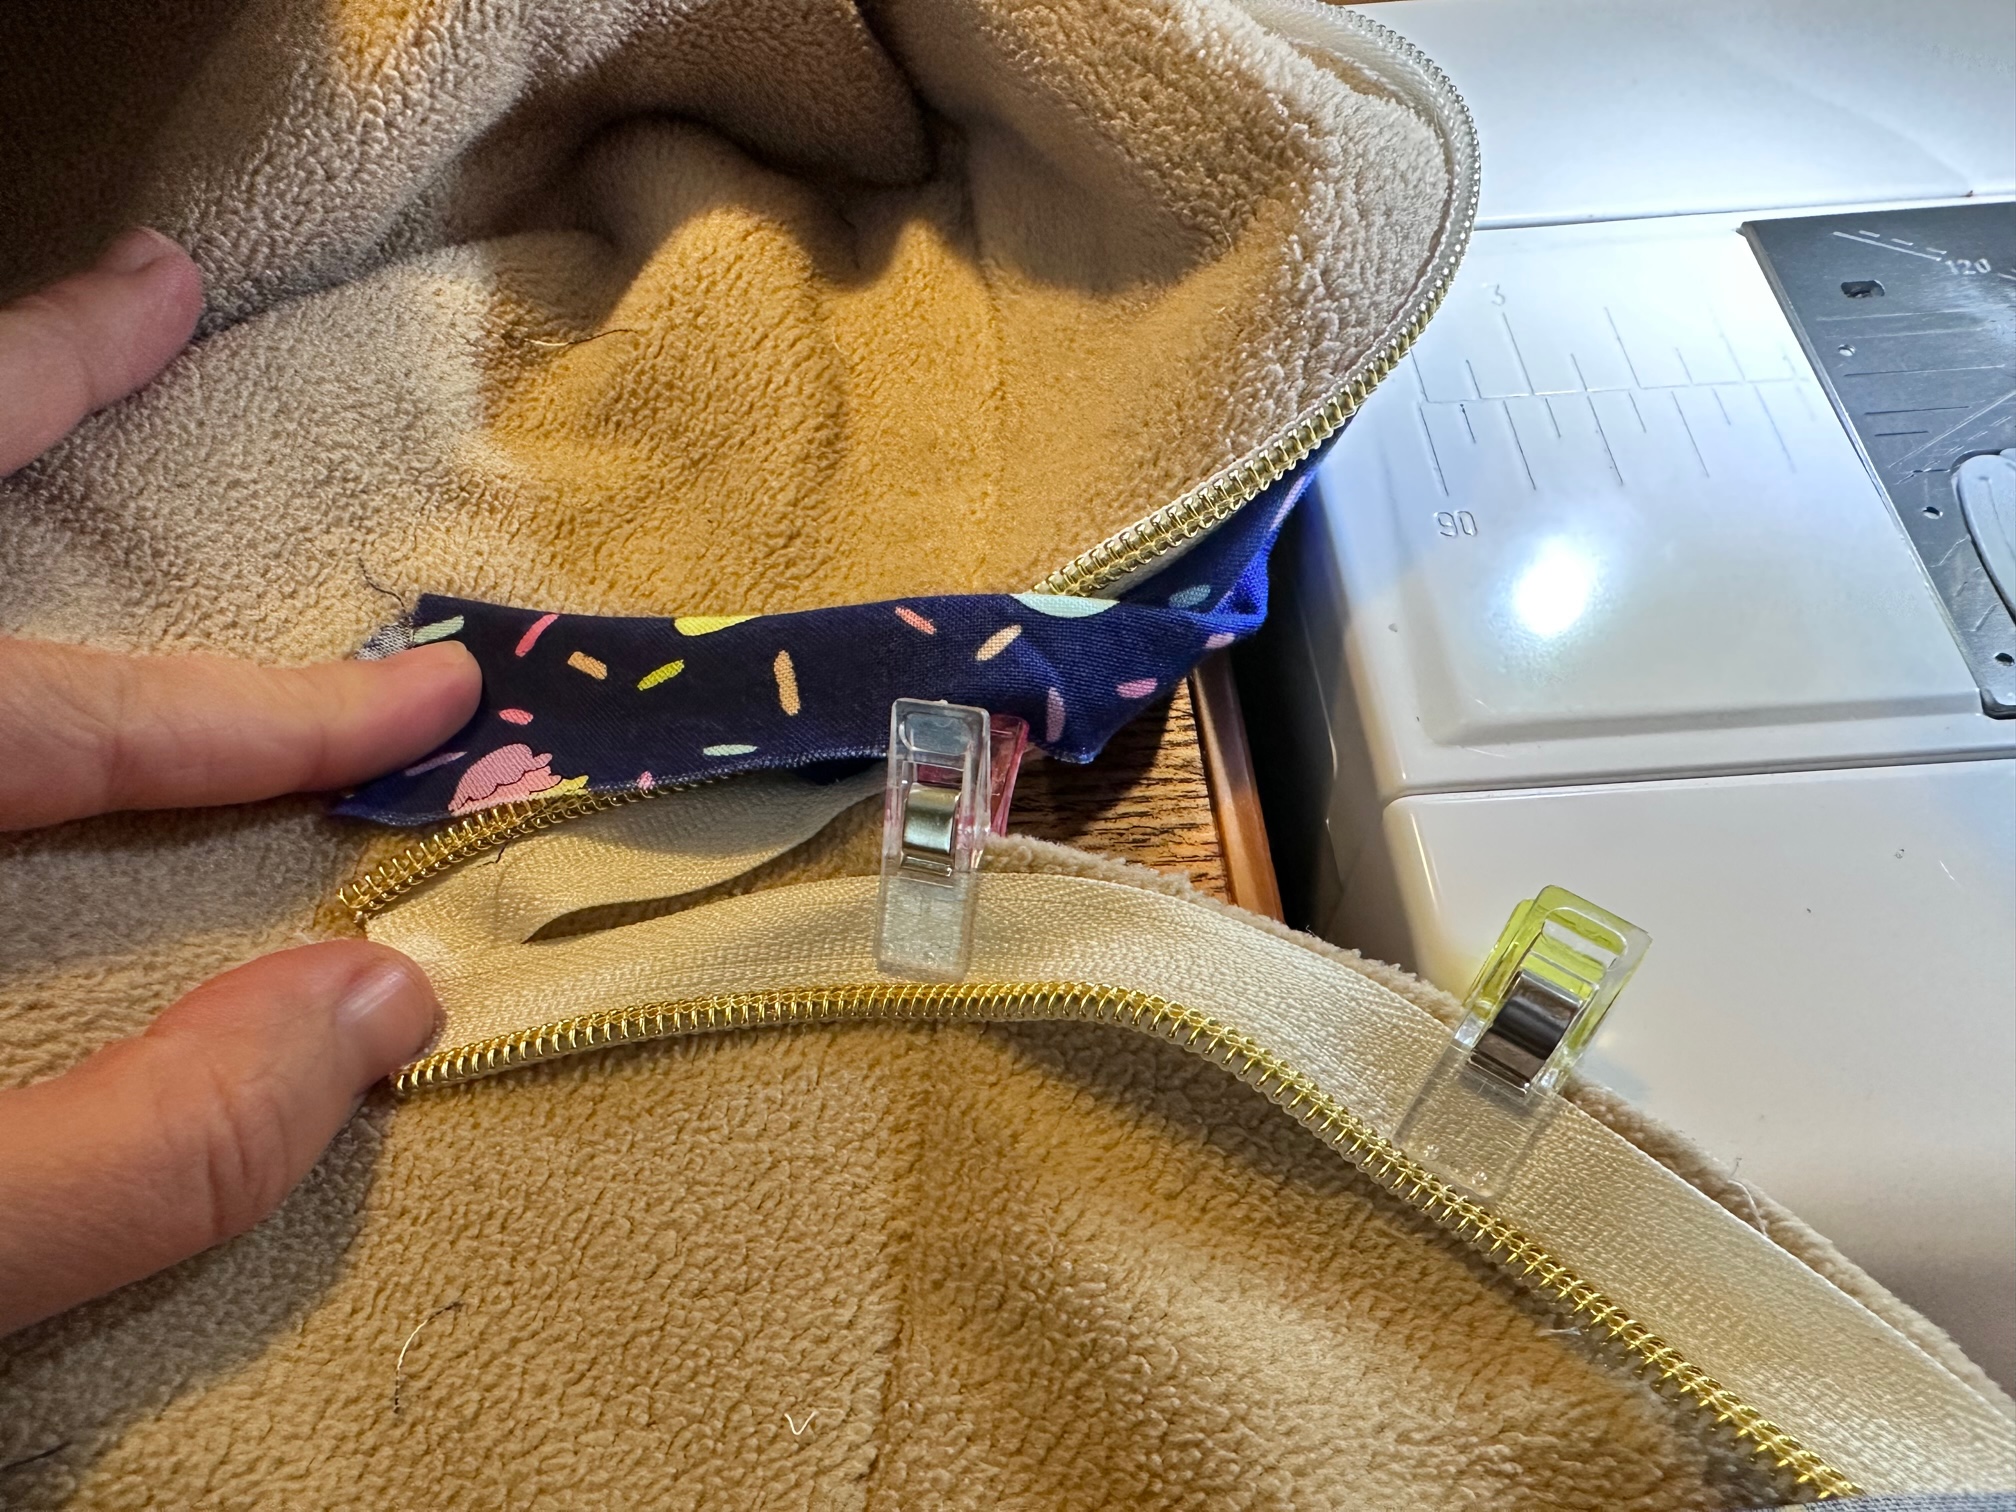
Add the zipper pull. You will add the zipper pull to the bottom folded corner area. Tuck the zipper end into the small opening.
Then…
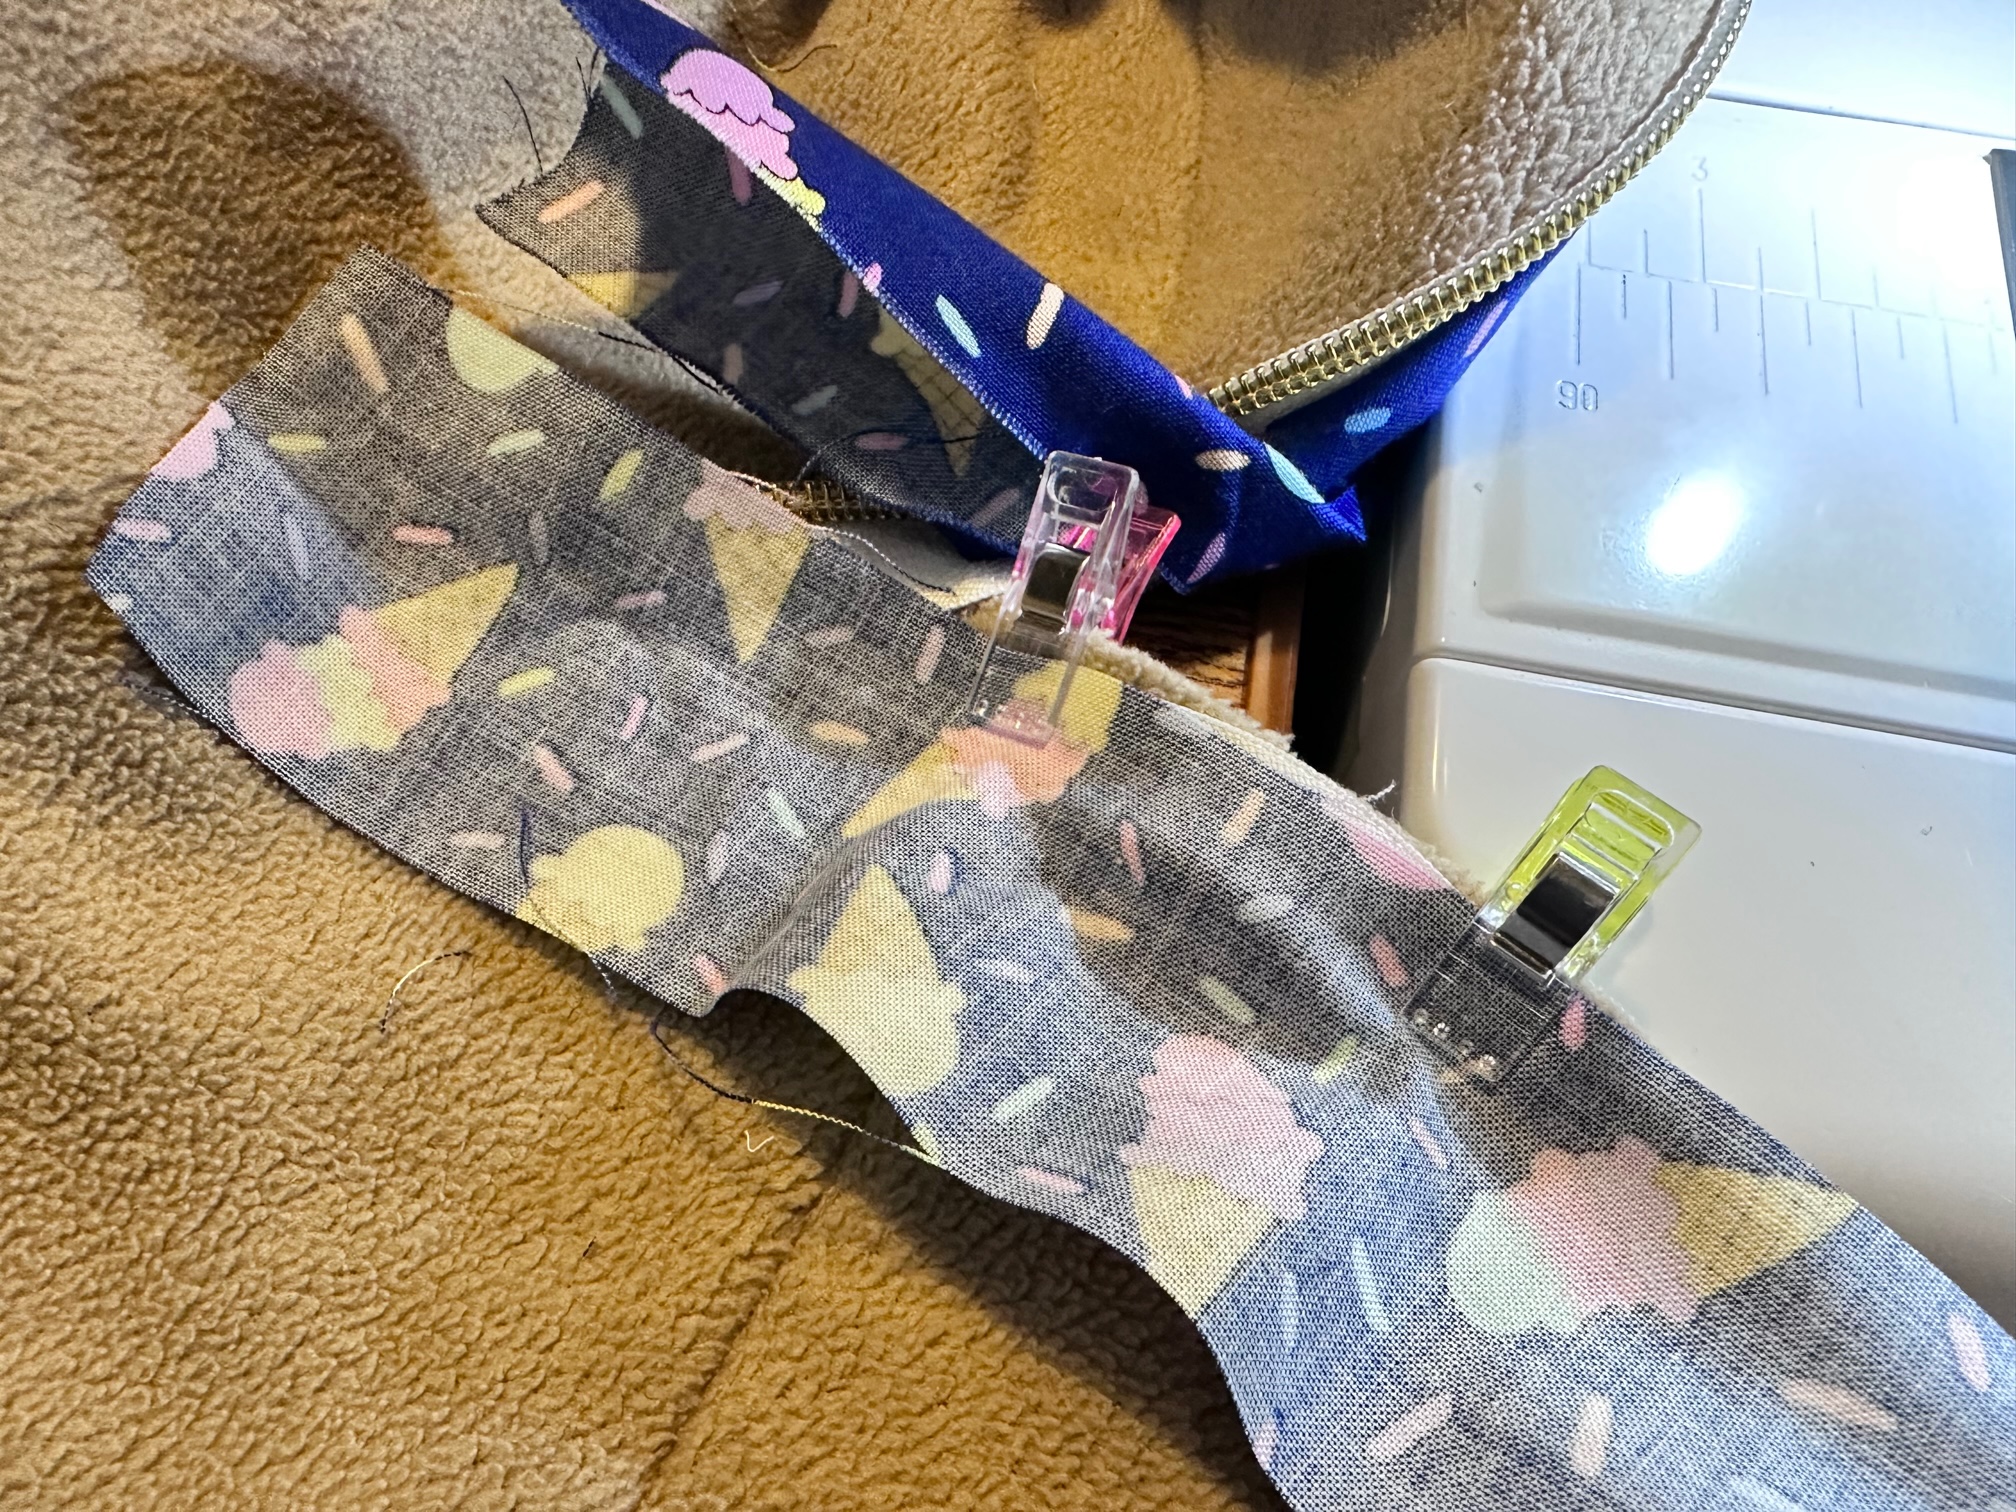
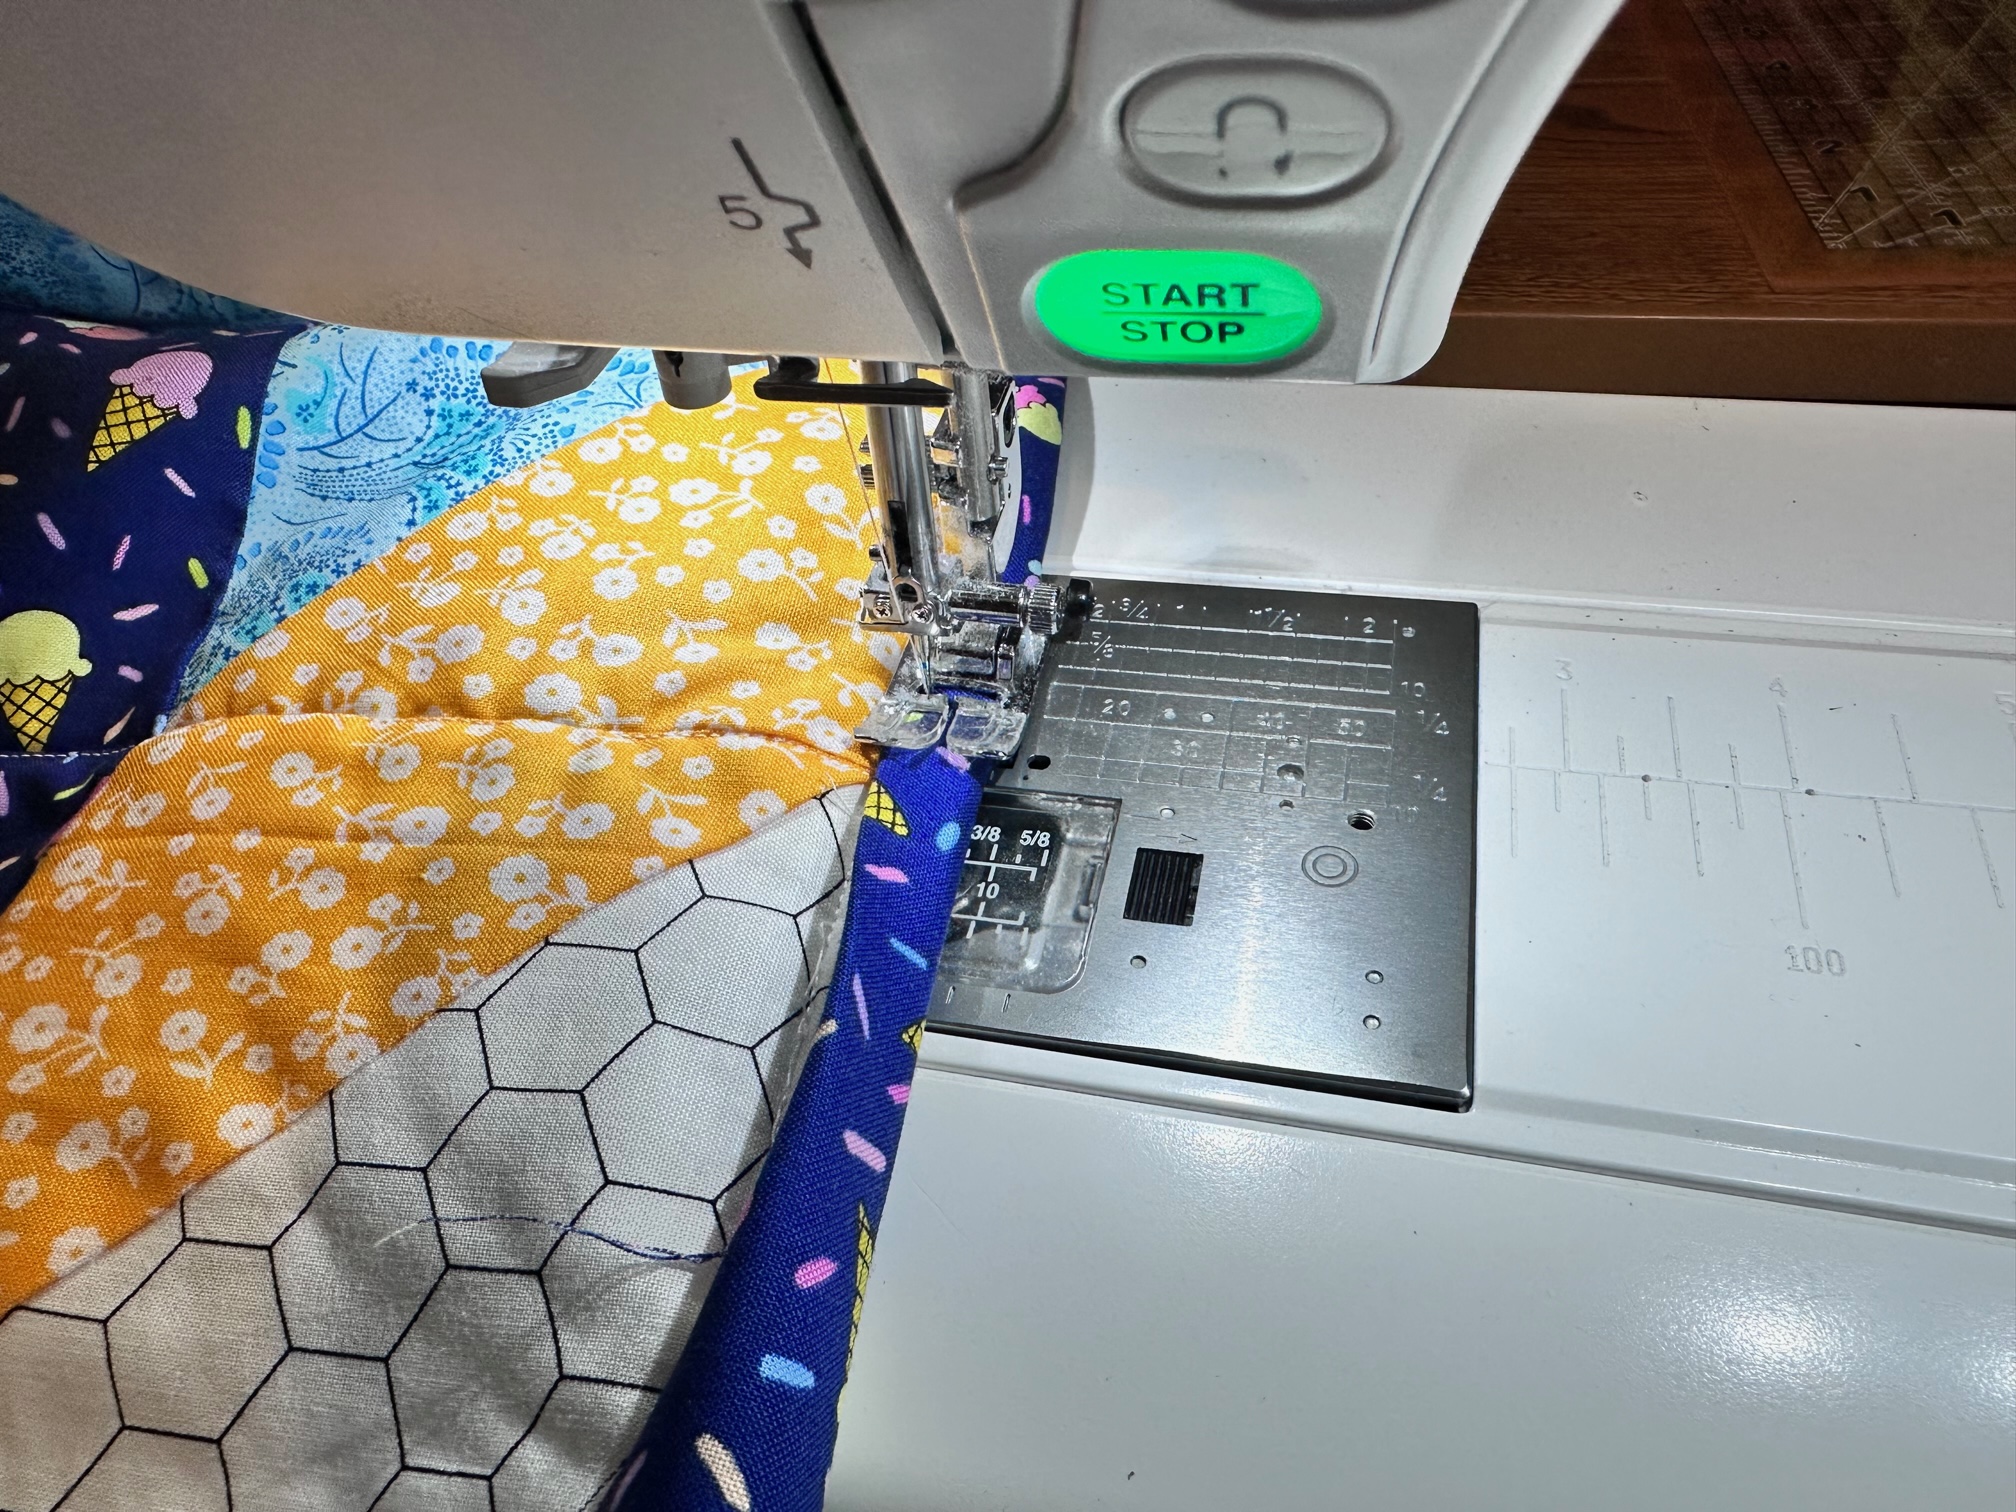
Fold over the binding and either machine or hand stitch. You will be hand sewing in the curved corner so begin as far in as your machine will allow. Stop once you have reached the other side.
Finally…
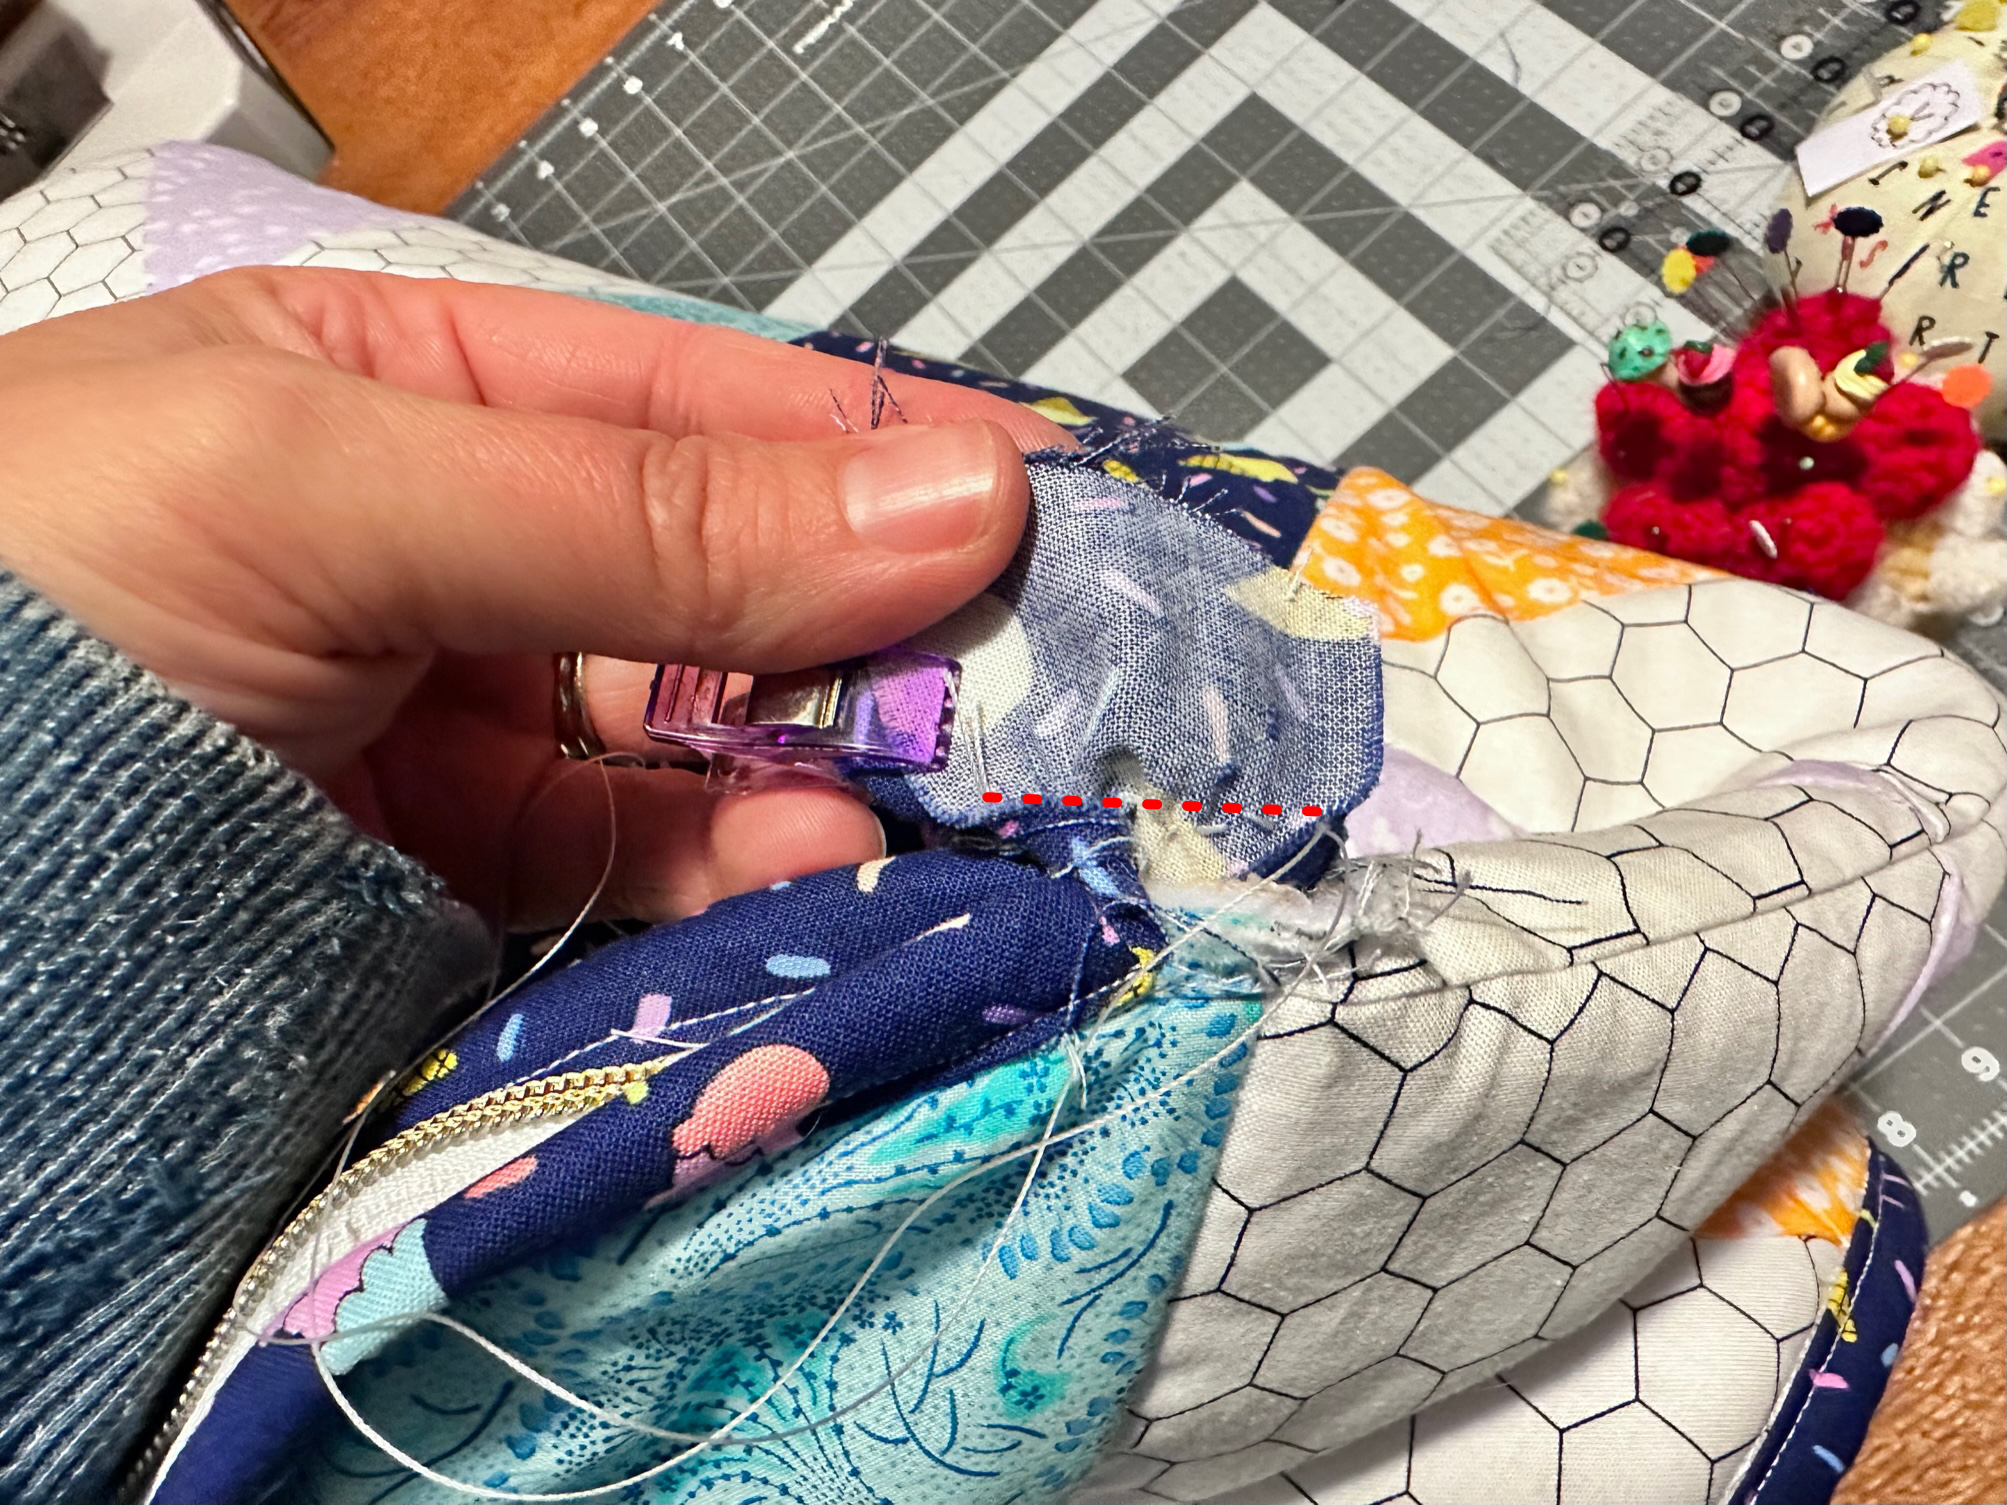
The last thing we need to do is hand stitch the curved folded corner. Flatten out your binding strips right sides together. Hand stitch across about 1/2″ up from the quilt. Trim above your stitch to 1/4″. Carefully fold the binding over and hand stitch using an invisible or ladder stitch. I use upholstery thread because of the possible stress in the corner. It is harder to break. I love upholstery thread!
To make the ties, sew the 3 fabric pieces together. Then, sew them into a long tube. Cut the tube in half and turn them right side out. Press. Next, fold under the end of the tubes and stitch closed.
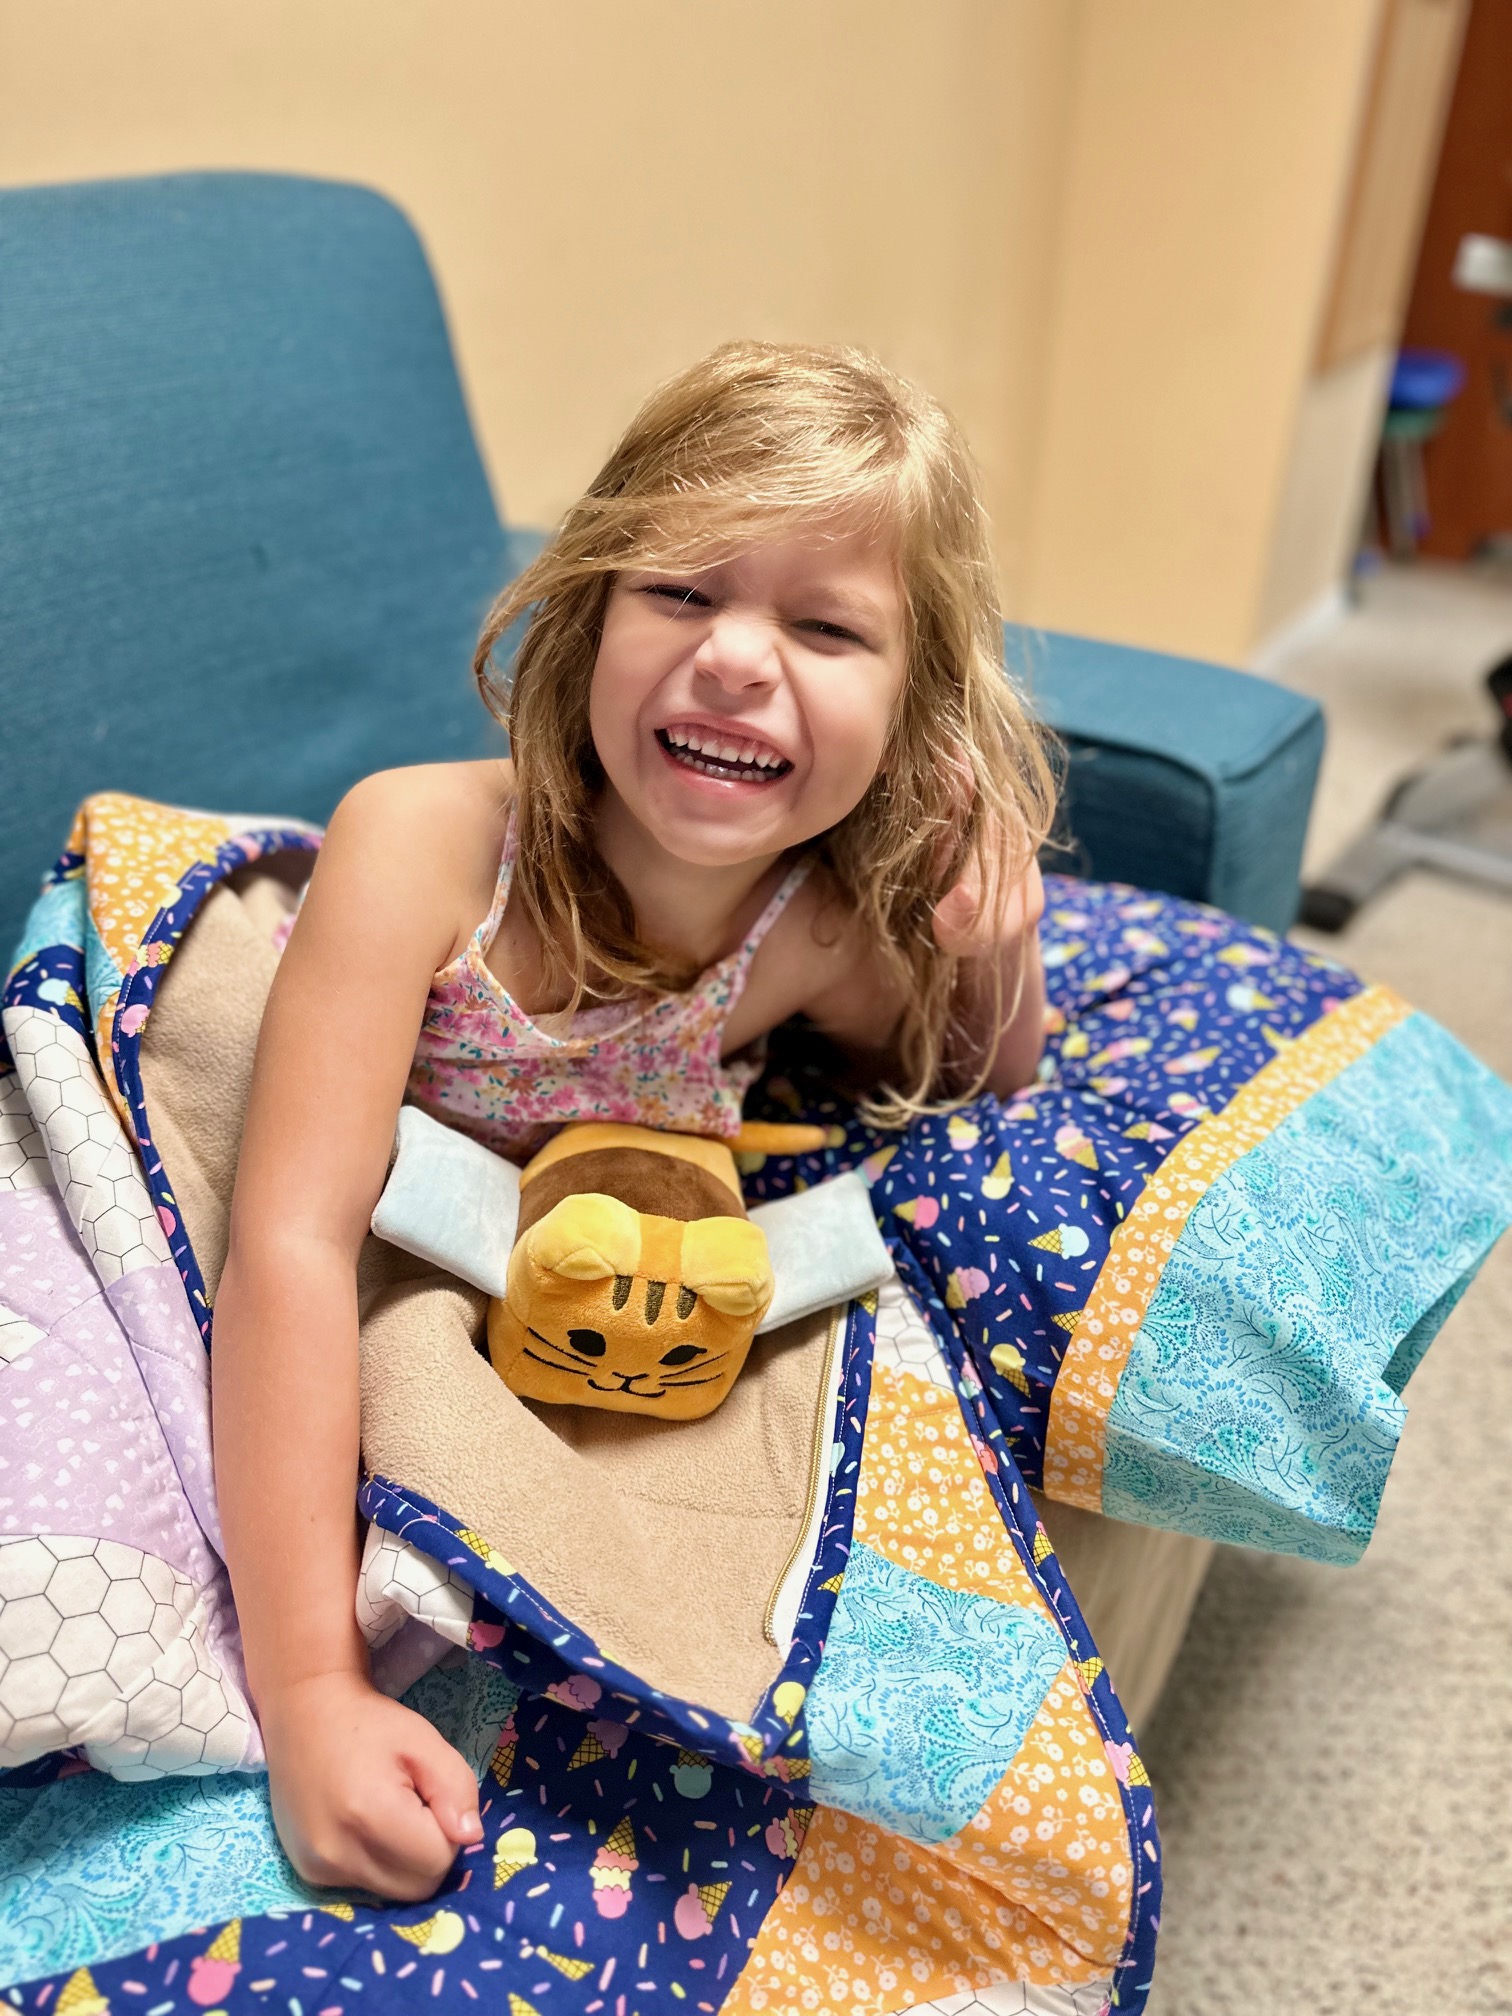
Finished!
BONUS Pillow Case:
This pillow case is super EASY!! It is only 3 seams. Begin by, folding the 2 1/2″ strip in half and press. Next, with the right side facing up, place the cuff fabric down on your workspace. align the raw edge of the strip you just pressed with the cuff as well as the raw edge of the pillow. Pin or clip.
Then, roll up the bottom of the main pillow fabric to where you can see the cuff fabric. Fold the bottom raw edge of the cuff fabric up where it meets the top raw edge (your pillow and strip will be rolled up inside the cuff.) Pin the bottom of the cuff to the top. Sew down the 40″ of fabric using a 3/8″ to 1/2″ seam.
Next, pull the pillow fabric out of the cuff to turn right side out. Press the cuff.
We are going to do a French seam to finish the pillow. Fold your pillow in half with the right side facing out. Sew down and across the open sides of the pillow. Then, turn the pillow inside out and press. Finish by sewing a 1/2″ seam right next to the seam you just sewed. Now you have no raw edges in your pillow case!!!
Thank you for visiting today! Come back soon to see what else will be starting to bloom with Inflorescence Designs!
Starting to bloom by choosing JOY ~ Julia