


Hi, Friends! I’m Dawn Gehring, Creative Director here at Therm O Web. My job is marketing our products, doing lots of product testing and helping with new product development, and connecting with other brands in the industry to see how we can bring more creative fun to all of you. I also write our weekly newsletters for both Paper Crafting and Sewing & Quilting.
Deco Foil is one of my favorite creative materials, and I use it often, usually when creating things to photograph for our website. Anyone who has had to photograph foil knows it’s a challenge; no matter how good a photo looks, the real thing is always more impressive! I don’t often write tutorials because my cards tend to be fairly simple. I like that the foil takes center stage. I’m a huge fan of simple stamped sentiments and shiny details (and, sadly, I don’t have the patience to learn how to be an amazing colorist, I just don’t have those skills).
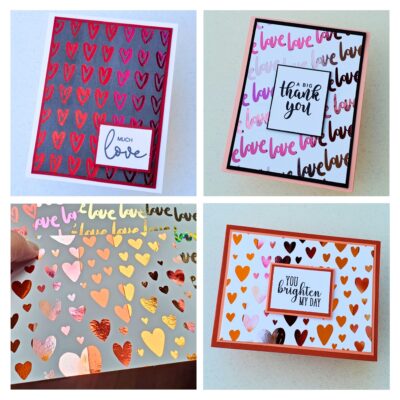
Color Harmony Shades of Red, Shades of Pink, Shades of Orange
So, while you probably don’t need instructions for these easy cards, I thought you might like to see the full spectrum of our NEW Deco Foil Color Harmony Packs in action. For some cards, I cut long strips of foil to create rows or columns of different colors. For others, I cut large scraps of foil and taped them down to my Deco Foil Toner Card Fronts with bits of Pixie Tape, being careful not to tape over any of the black toner. I always give credit for this multicolor foiling technique to Therm O Web Design Team member, Larissa Heskett, because she’s the one who introduced me to the absolute magic of this technique.
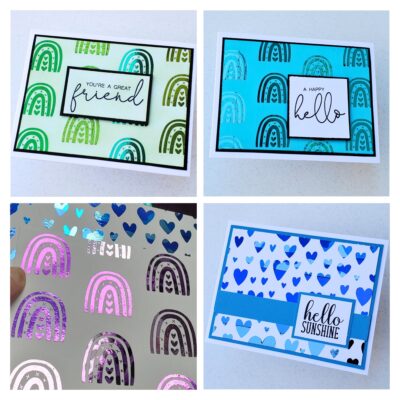
Color Harmony Shades of Green, Shades of Aqua, Shades of Blue, Shades of Purple
The Toner Card Front designs definitely influenced how I applied the foils. Each of the card fronts shown here were foiled with the full assortment contained in each Color Harmony pack, all four colors. They were a lot of fun to create, and my Fuse Foiling System and carrier sheet from Gina K. Designs made them so easy. I love, love, love that machine! It heats up so fast, and the results are so consistent. I like to set my Fuse to 4 for the Deco Foil Toner Card Fronts. I always wipe them first with a soft, lint-free cloth. I don’t wipe my foil, but I know some people like to do that, and that’s fine … do what works for you. I don’t find that I need to add a shim under my Toner Card Front to get good results, but if you like a shim, use one.
After foiling, you can ink blend over the card front, if you want to add some color. Buff away any excess ink from the foiled areas using a soft paper towel. Trim your card fronts and sentiments as desired, layer with black card stock or a complementary color, attach to your card with our XL Tape Runner and finally pop-up your sentiment with our fantastic 3D Jumbo Foam Tape Rolls. I really love the sepia tones of the Shades of Brown card below. Check out that fun woodgrain Deco Foil!
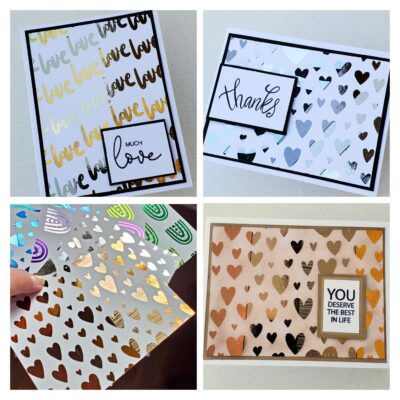
Color Harmony Shades of Gold, Shades of Silver, Shades of Brown
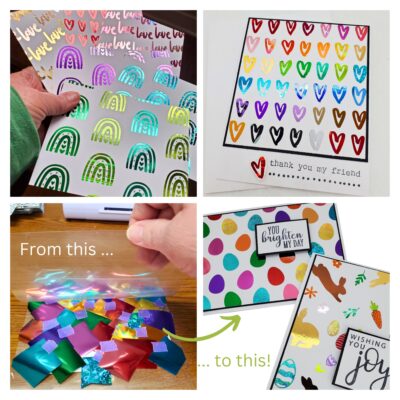
This final batch of cards was my grand experiment in just how much multicolor foiling I could fit onto a Deco Foil Toner Card Front. The “Thank You, My Friend” card features 43 total hearts that are foiled in ALL 40 of the Color Harmony Foils! I used the sparkly Crimson Shattered Glass for four of the hearts, and I only needed the tiniest scraps of foil … but LOTS of Pixie Tape. This card front is from our NEW Smitten Deco Foil Toner Card Front pack.
On the bottom is my masterpiece, that Easter egg card. How fun, right? If only you could scratch off the foil and find chocolate underneath! Both of these final card fronts are part of one of our two BRAND-NEW Deco Foil Toner Card Front Packs, Eggcellent Easter and Feeling Lucky. You can see more on our website under the NEW tab.
I hope you enjoyed seeing some simple cards that actually look pretty stunning with help from Deco Foil. If you do any multicolor foiling like I did, please share with us in the Therm O Web Craft Room, our private Facebook group, or tag us on your social media @thermoweb and #decofoil. We love to see what you’re creating with our products. After all, you’re the whole reason we make these products!
Happy Creating! Thank you for spending part of your day with us.