


Welcome back! I’ve got three shakers for you today. I’ve added foil to the acetate covers in a couple different ways and I think you’re gonna like it!
I used some Adhesive Transfers, Transfer Gel Duo along with Alcohol Ink and Gel Press panels.

For the first one, I added foil with these beautiful Adhesive Transfers from TOW and Unity. I just cut out the image I wanted to use, peeled the back off of the transfer and placed it onto a 5 1/2 x 4 1/4 acetate panel. I ran it through the die cut machine and then peeled the film back leaving just the adhesive.
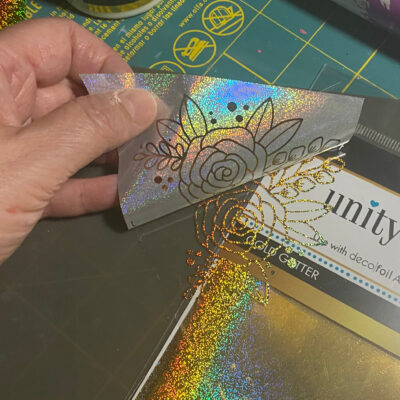
I placed some beautiful Gold Glitter Deco Foil over the adhesive and ran it through the die cutting machine again to transfer the foil onto the adhesive. I repeated this on the opposite corner of the acetate.
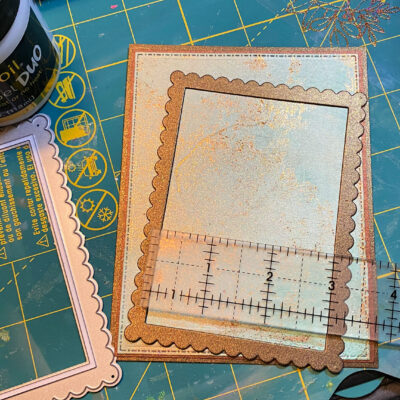
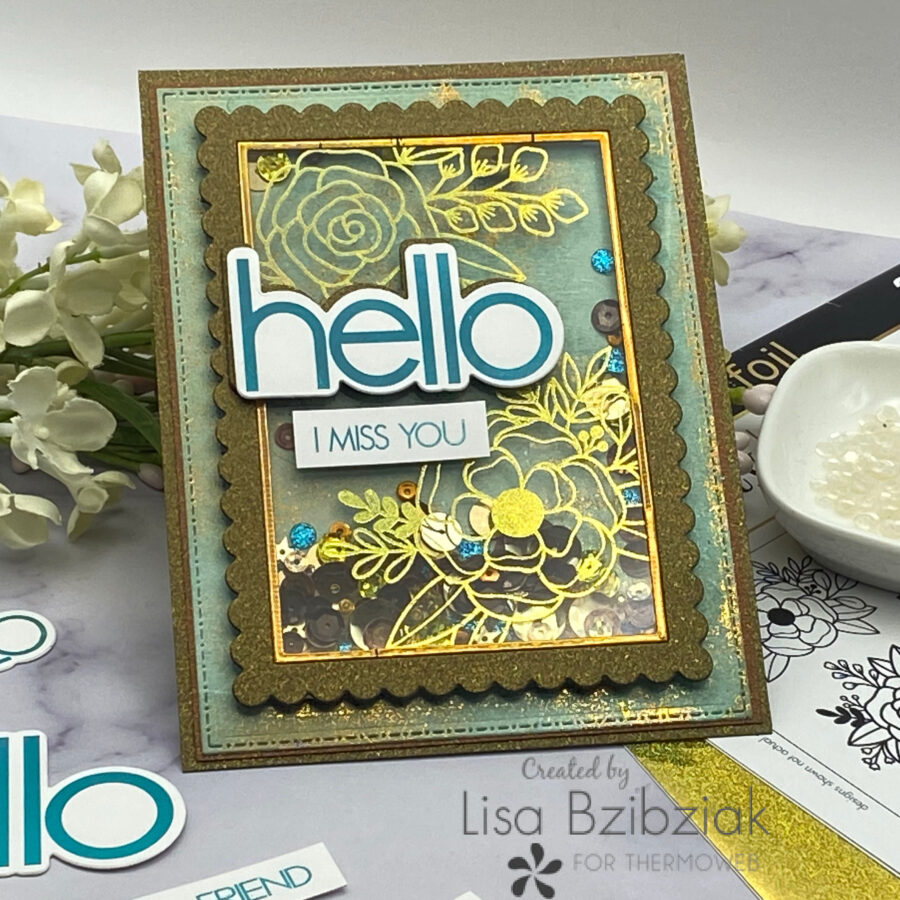
For this one, I used a foiled gel print and cut that pretty scalloped frame for the shaker window. I love that this die from Miss Ink has that little skinny inside frame that creates a nice accent. I measured the window and added enough space to adhere it to the inside of the frame and trimmed the acetate piece down. For this frame I cut the acetate to 3 1/4 x 4 1/2 and it was perfect!
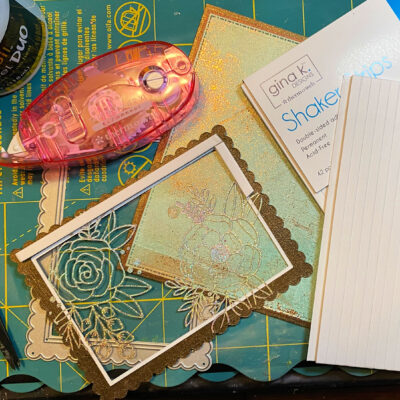
I adhered the acetate to the inside of the frame using the Memory Tape Runner XL and then added some Gina K Shaker strips to the back. These are perfect for shakers and the thickness gives you enough room to add lots of fillings to your shaker cards!
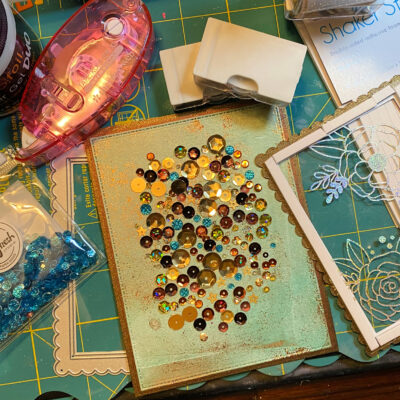
With this simple design it’s easy to just arrange your sequins on top of the base and then pop the shaker window over the top! I like to flip as many of my sequins right side up as I can.
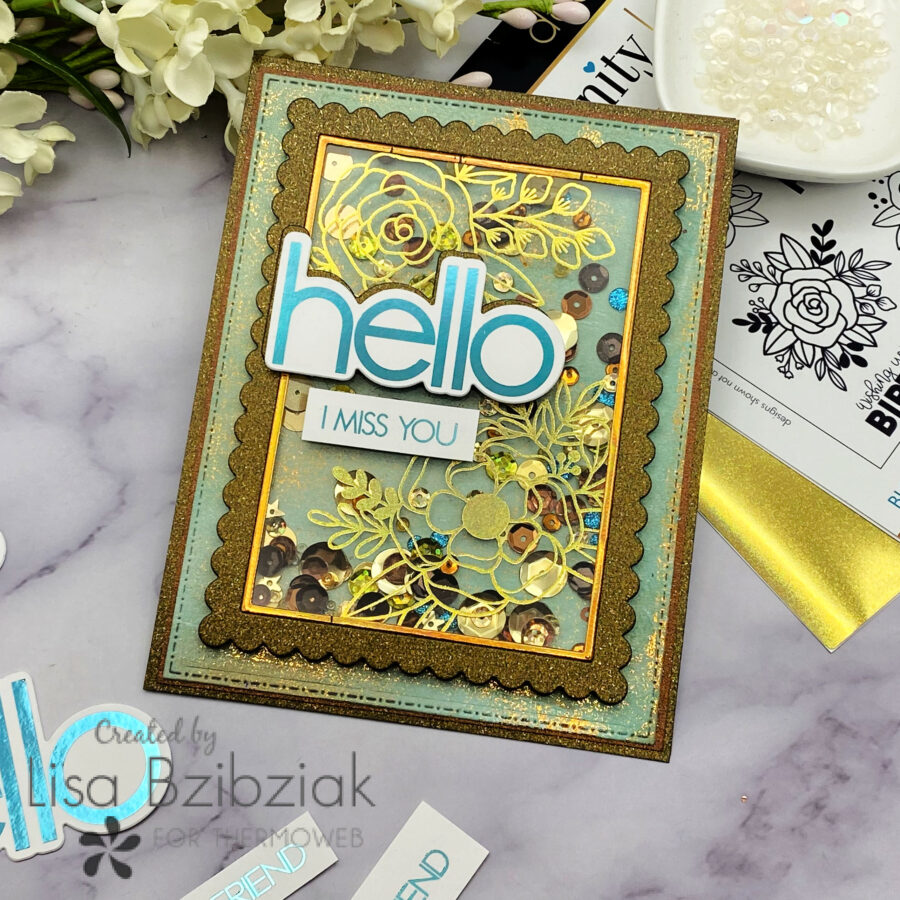
So fun! I used the Oh Hello Toner Card Fronts and coordinating dies for the sentiment on this one. I cut an extra hello die from the brown to add an offset label beneath it and popped them up with Foam Adhesive.
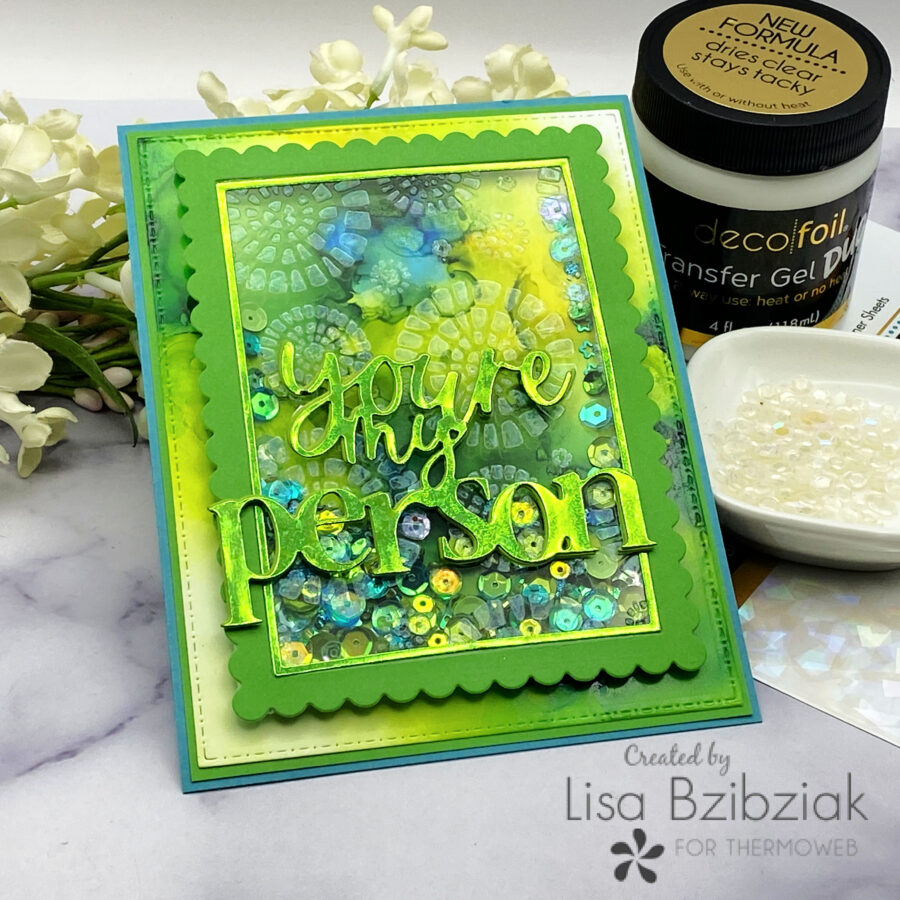
For this one I started with an alcohol inked base and chose some cardstock colors that matched it.
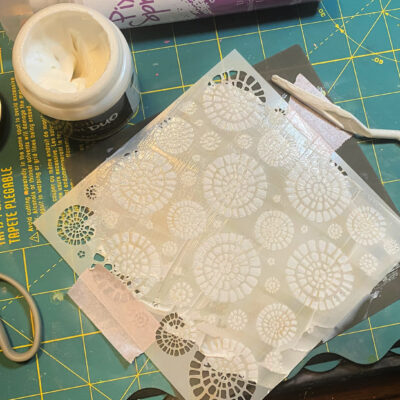
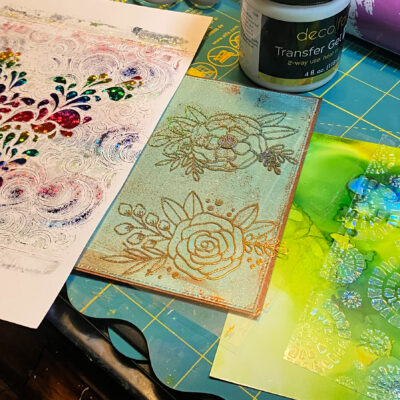
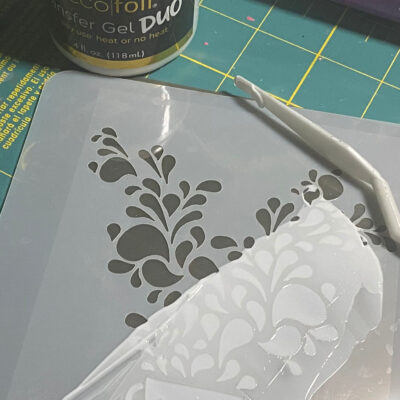
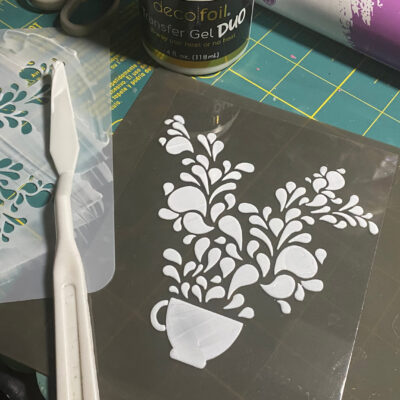
I applied Transfer Gel Duo through a stencil onto the acetate panel.
I set it aside to dry and gathered all of my pieces together… sequins, cardstock, foil…and once it was dry to tacky..
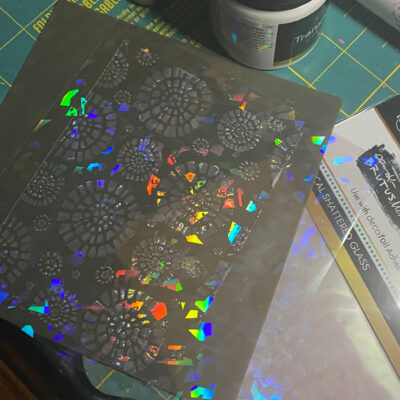
I applied some Magical Shattered Glass Deco File over the top and applied pressure with the Stencil Pal.
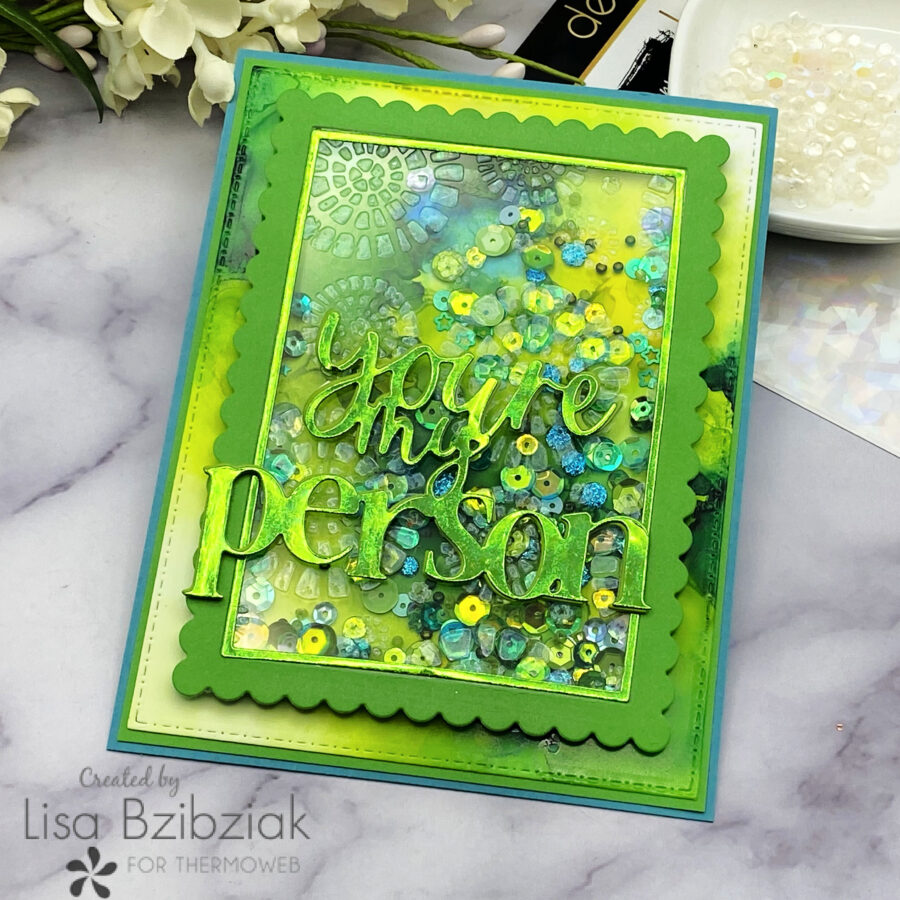
I love that it’s almost clear, but that little bit of dimension and sparkle really adds some interest! For this one, I used that Catherine Pooler sentiment die and adhered some green cardstock to a piece of Foam Adhesive and die cut the sentiment… easy peasy to peel off the back and add it to the front of the shaker! I die cut the sentiment from some foiled toner paper too and adhered that.. offset just a bit… to the foam backed cardstock.
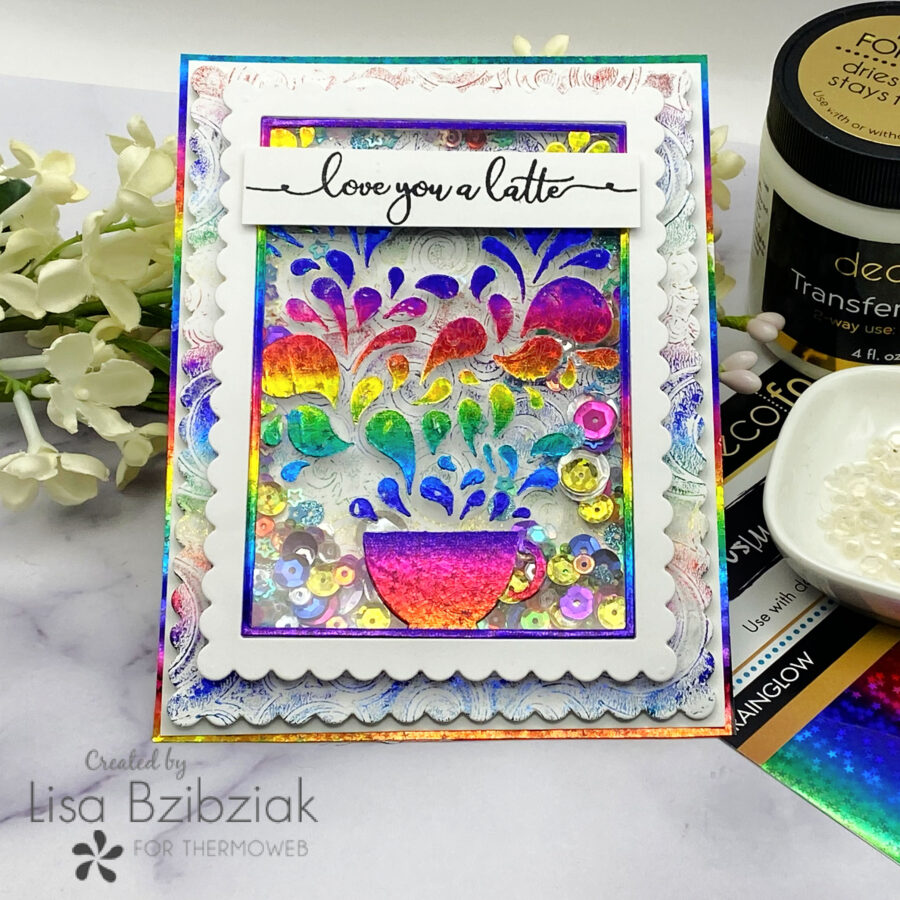
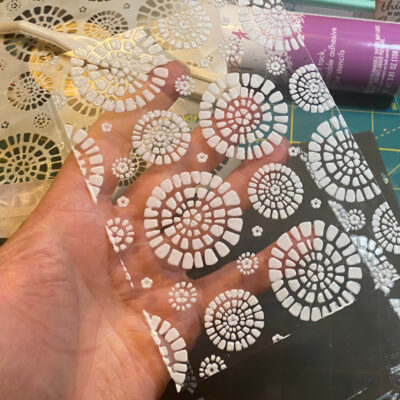
For this one, I used a foiled gel print as a base. When you foil a gel print made with acrylic paint using a laminator the results are not reliable… “You never know what you gonna get”…lol! I was so pleasantly surprised with this one and how the stencil shape that I used for the print really picked up the foil in a cool way.
Like the green one, I added Transfer Gel Duo to an acetate panel.
I love it just like this! But that Duo Gel dries clear and of course I love it even better with foil… so when it was tacky… took maybe an hour (and I always test a small section)…
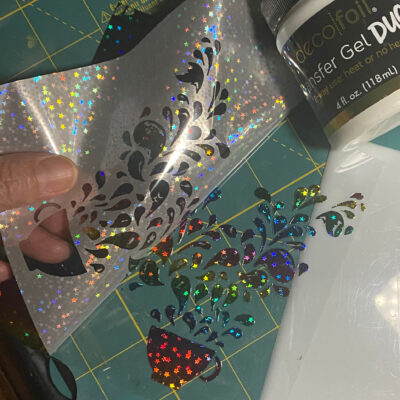
Just pressure with my stencil pal and the foil transferred quite nicely!
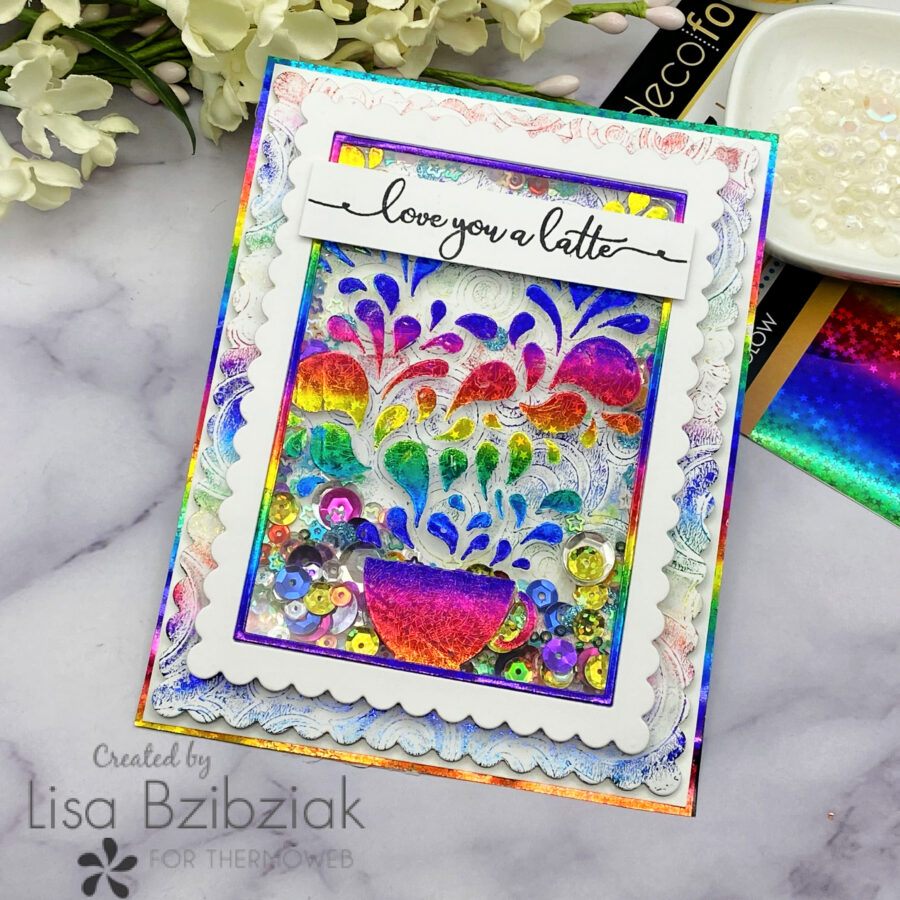
This one I added a sentiment from an Ink On 3 stamp set and some foiled toner paper for the base and that inside window piece… I just love rainbows don’t you??
That’s me for today! I hope you had fun and if you’ve never made a shaker, this is a fun, simple and cool design to start with! I’ve included links below to the products I used today. Thanks for stopping! Come again soon!
https://linkdeli.com/widget.js?id=f5e8378456858c916708