
NEW HeatnBond Liquid Vinyl
 We’re making a BIG SPLASH today… with our New HeatnBond Liquid Vinyl!!
Make your favorite fabrics stain-resistant, water-resistant, and even waterproof with the new HeatnBond Liquid Vinyl from Therm O Web. Simply paint on a thin layer, let dry, and then iron to create a smooth, protective finish.
Create different effects, including a semi-gloss oilcloth look, by applying multiple layers of Liquid Vinyl. Fabrics treated with HeatnBond Liquid Vinyl maintain a very soft hand, perfect for any project from apparel to home décor. Don’t limit your creativity to store-bought laminated fabrics. Instead, make your own with the new HeatnBond Liquid Vinyl!
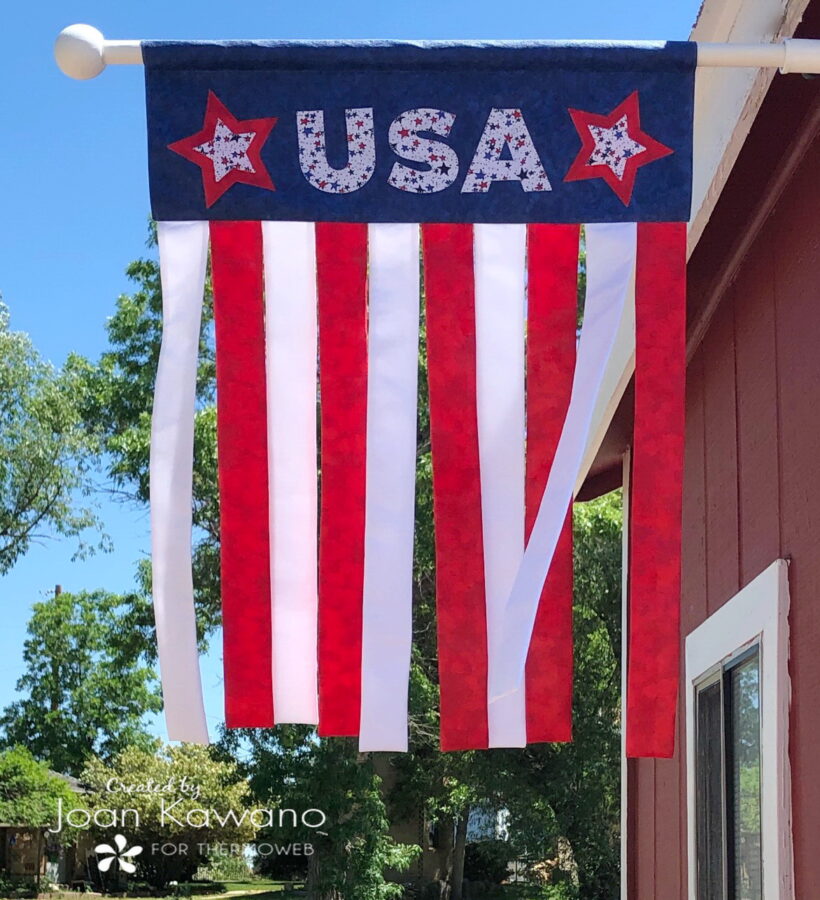
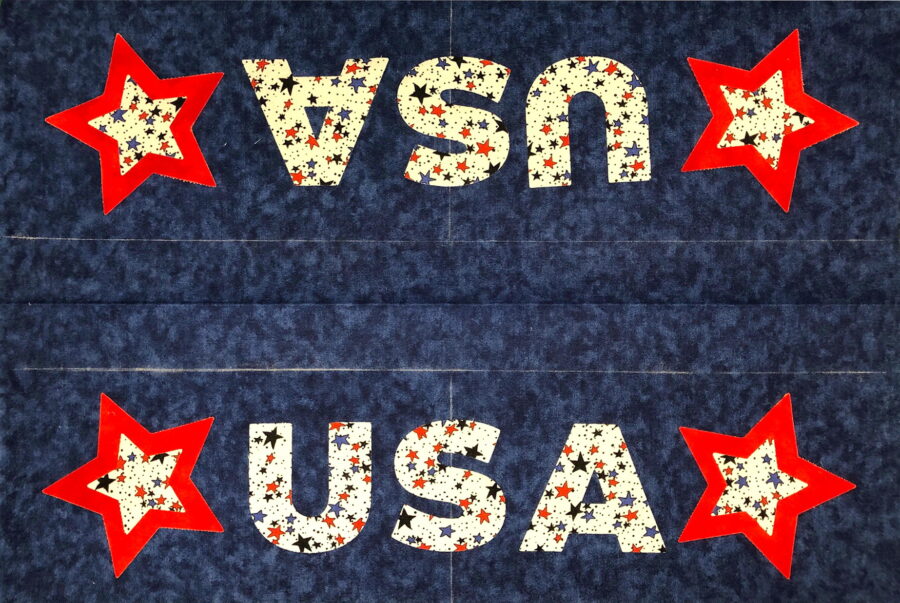
This flag from Joan Kawano is made with the incredible NEW Liquid Vinyl product from HeatNBond.
You can turn your fabric into water-resistant/proof fabric with ease. What better way, to turn up your outdoor decorating a notch!
To make this reversible flag, start by downloading this free pattern
**Read through the entire pattern before starting*
Reversible Patriotic Windsock Flag
Supplies
5/8 – yard red solid fabric
1/2 – yard white solid fabric
1/2 – yard blue solid fabric
1/8 yard or a fat quarter of white print fabric
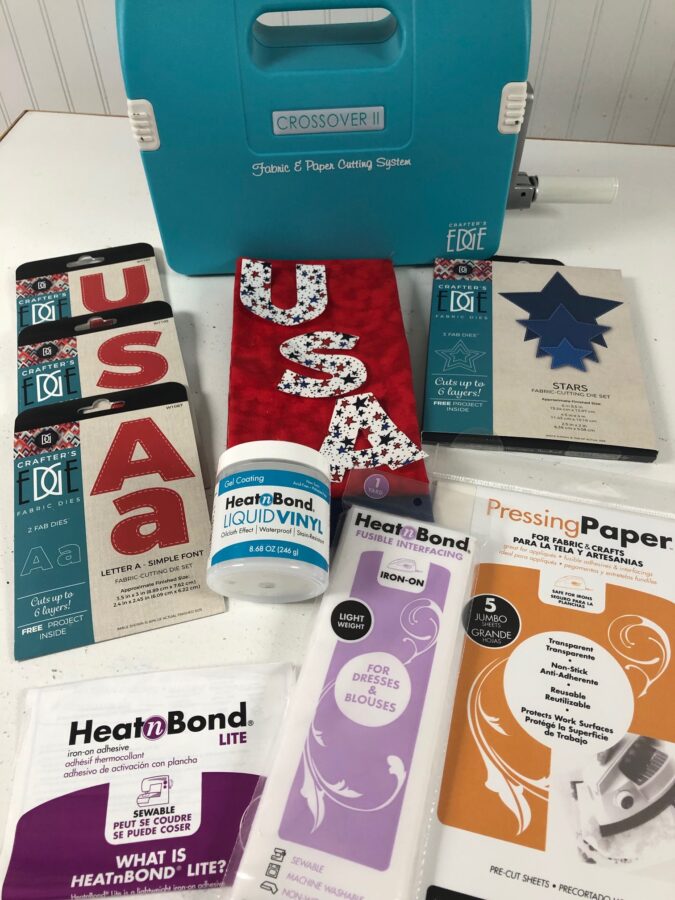
1 package of HeatNBond® Light-Weight Fusible interfacing
1/8 – yd HeatNBond® Light Fusible Web
1” dowel rod
2” ball with a flat side for the end of the flagpole
Teflon foot for a sewing machine, chalk marker, fabric clips, thread to match
Crafters Edge – Star die set and alphabet letters U, S and A
Cutting Instructions
**prewash all fabrics**
Cut 1 – 15” x 21 1/2″ piece from a blue solid fabric
Cut 1 – 15” x 21” piece of HeatNBond®Light-Weight Fusible Interfacing
Cut 1 – 13 1/2″ x WOF (Width of Fabric) from red and white solid fabric
Cut 2 – 5” x 10 3/4” strips from a red solid fabric and HeatNBond®Lite fusible web
for large stars
Cut 2 – 4” x 10 1/2″ strips of white print fabric and HeatNBond®Lite fusible web for letters
Cut 2 – 3 1/2″ x 6” strips of white print fabric and HeatNBond®Lite fusible web
for small stars
Liquid Vinyl Fabric Flag Construction
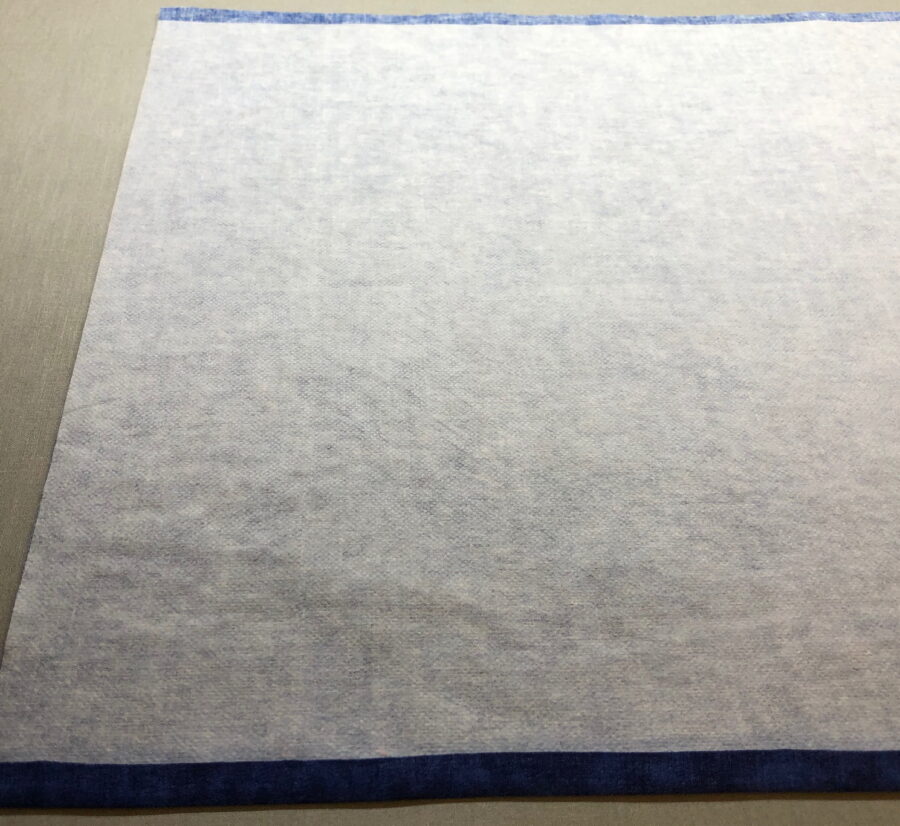
Following manufacturer’s instructions, fuse the fusible web to the backside of all fabrics and fusible interfacing to the reverse side of the blue solid fabric, centering it to allow 1/4” fabric, on each of the longest sides. Press under 1/4” on the long side of one end of blue fabric.
Cut out stars and letters with die cutting machine.
Fold solid blue fabric rights sides out, bringing the end with the fold, 1/4” from the bottom. It is easy to see since it is where the interfacing ends. Press.
Using a chalk mark draw a line 1 1/2” down from fold and 10 3/4″ in from the side, as shown in the photo below.
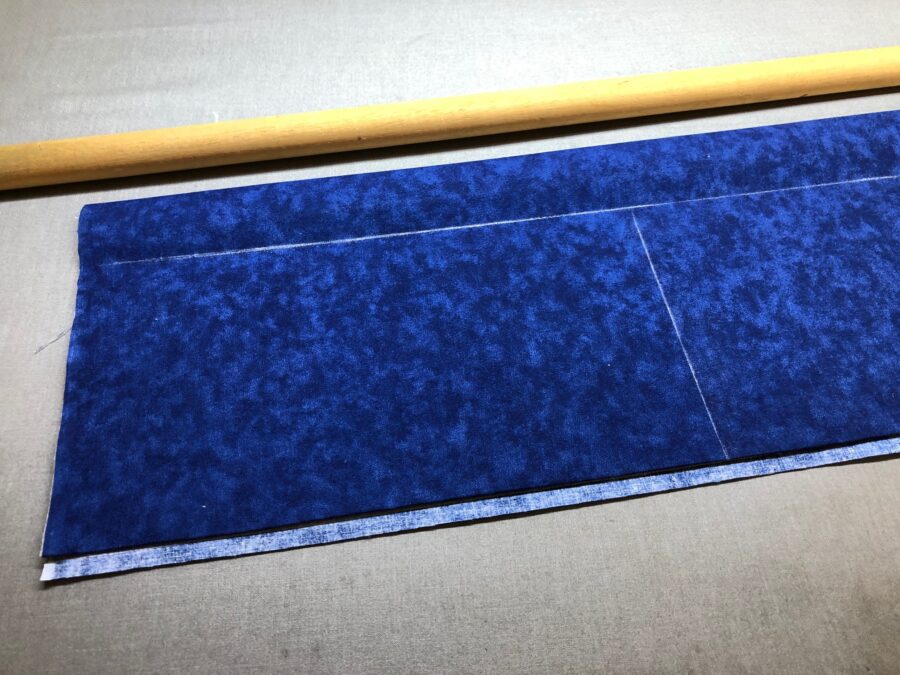
Use these lines for a placement guide for your lettering and stars.
Do the same on the reverse side. Fuse and applique in place.
Press all fabrics without starch. Brush chalk marks off blue fabric before applying vinyl.
Using manufacturer’s instructions, lay your red fabric, white fabric, and blue appliqued fabrics on protective paper. (I used freezer paper) Paint them with a thin layer of Liquid Vinyl, using a soft bristle or foam brush. When it dries it has an oilcloth type finish on it, and the fabric remains pliable.
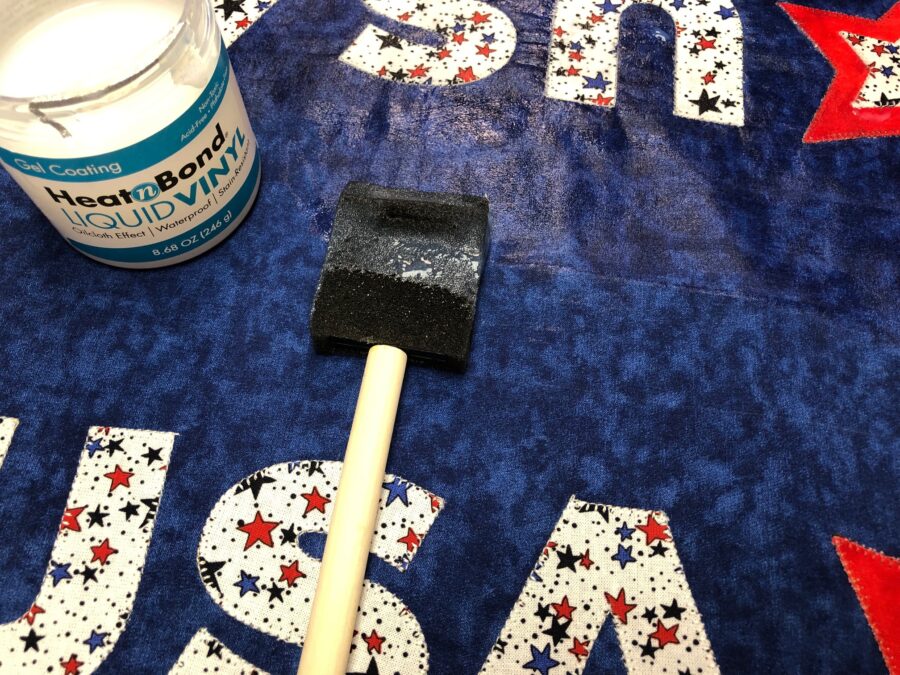
Allow to dry for 45 minutes.
Preheat iron on medium heat, with no steam. Move your fabrics and protective paper to a hard surface (not an ironing board) and cover with a HeatNBond Pressing Paper.
Press for 45 seconds, moving iron slightly, until the entire piece is pressed. Remove pressing paper and let cool.
Cut 5 -2 1/2” strips from the red and white solid fabrics that have been painted with the vinyl. Fold each strip in half short ends, and vinyl side together. Sew 10 tubes leaving tops open, to make separate stripes. Turn right side out. Vinyl-coated fabric will now be on the outside.
On the blue top portion of the flag, fold under short sides 1/2”. Re-chalk the line 1 1/2″ down from the top fold, on front and back. Topstitch the 3” opening between the chalked lines, to allow an opening for the pole.
Lay your stripe tubes out and trim all to the same length if necessary. Clip the raw edges of the stripes, to the right side of the blue topper that does not have a fold, rotating colors. Do not use pins with vinyl, as it will cause holes.
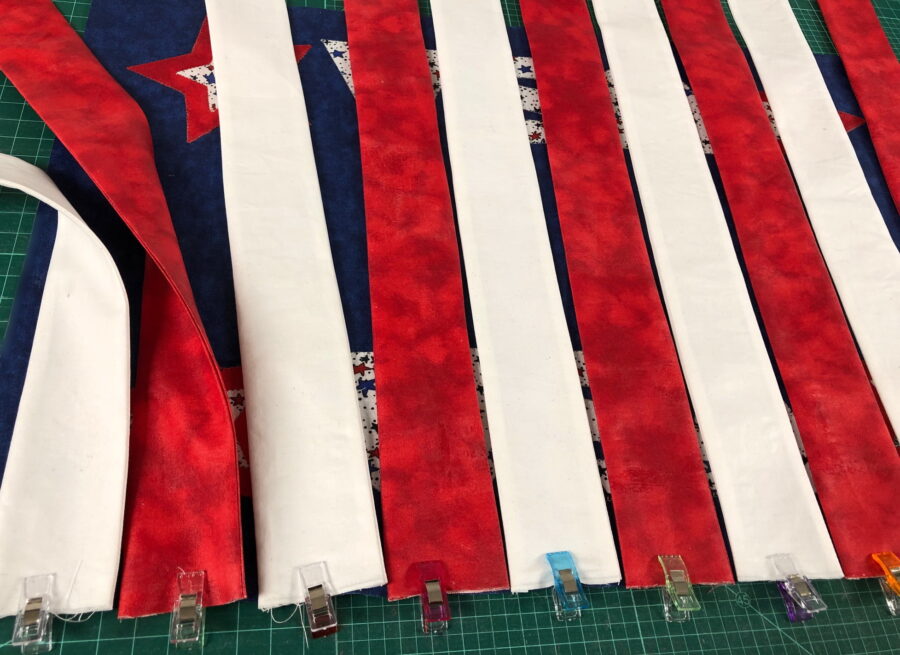
Using a Teflon foot, stitch stripes to topper using a 1/4” seam.
It is easier to stitch with the stripes on top if you are using a Teflon foot.
If you do not have one, you can flip your flag over and stitch it from the backside.
You will need to adjust each stripe as you sew. Use the interfacing as your stitching line.

With the protective paper underneath and a HeatNBond Pressing Paper on top, press the stripes seam towards the blue topper. Fold the blue topper in half, meeting the folded edge to the stripe seam line, wrong sides together. This will encase the stripes. Using a Teflon foot, topstitch across the bottom and up the 2 sides to the chalk line.
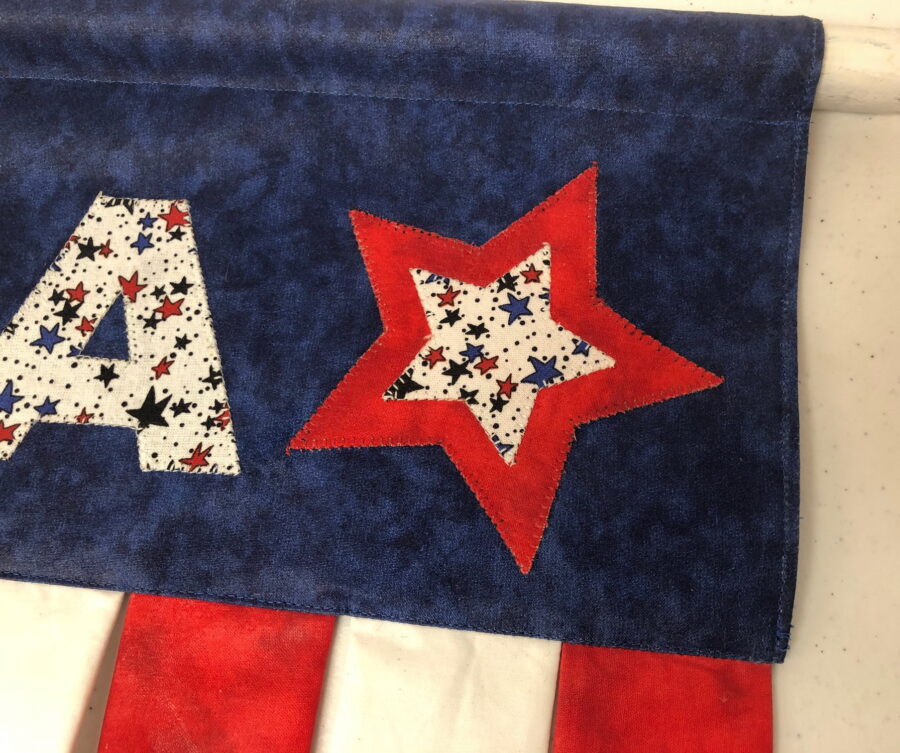
Stitch across the top of the flag on the chalk line to form a pocket.
Brush off all chalk marks. Insert pole and hang in your favorite spot!
Tip: If you do not have a Teflon foot for your machine, you can place a piece of painter’s tape on the underside of the foot you are using. Cut out all the holes and stitch. Remove tape when your project is complete!
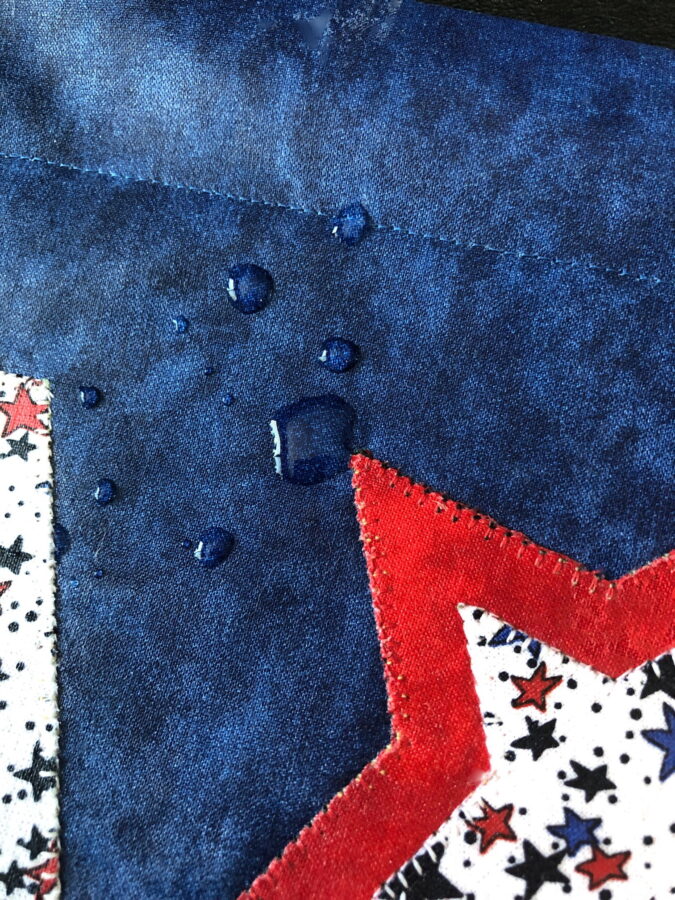
I love seeing the water bead right upon it.
“Sew” what is on your outdoor decorating list now?
Enjoy!