


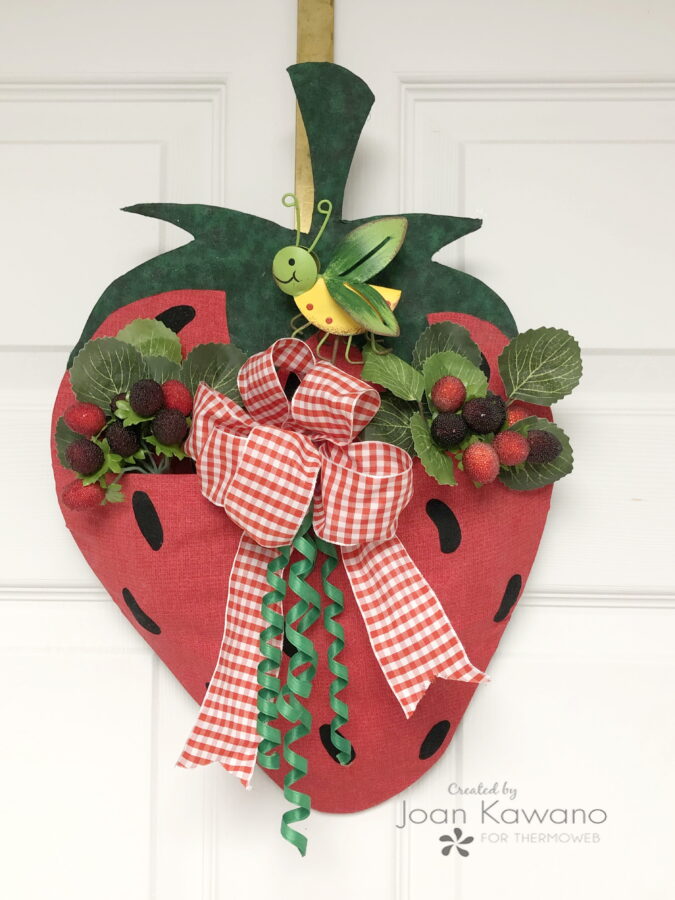
Door pockets are a fun way to welcome our guests. This one is as sweet as the fruit and delicious to look at. It is also a “No-Sew” project, so put your sewing machines away and prepare to dazzle your guests.
Fabric Strawberry Door Pocket with SpraynBond

Strawberry Door Hanger Free Pattern
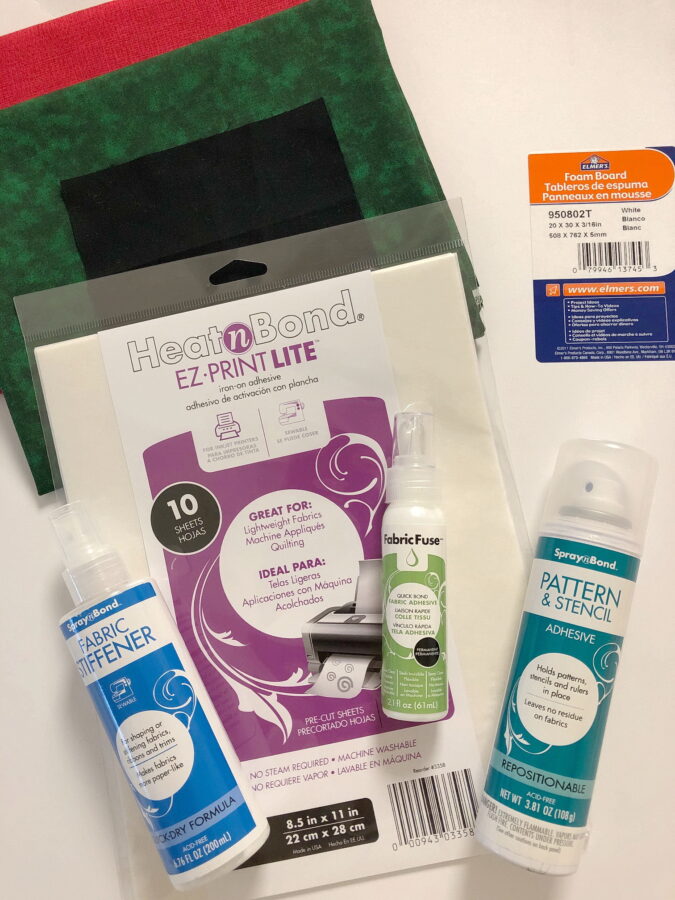
Supplies
1/2 yard – red fabric
1/2 yard – green fabric
3/8 yard – green felt
Scrap of black fabric
1 sheet – Foam Core Board
Spray N Bond Pattern – Stencil Adhesive
iCraft Fabric Fuse Liquid Adhesive
X-Acto Knife
Sharpie Marker
Floral foam and wire
Assorted greenery, ribbons and decorations
Strawberry Door Pocket Cutting Instructions
Start by downloading the free pattern.
Cut and tape 4 pages of the strawberry pattern together. Following the manufacturer’s instructions, spray back of the pattern with “Spray N Bond Pattern – Stencil Adhesive”. Lay pattern on top of foam core board and trace around it.
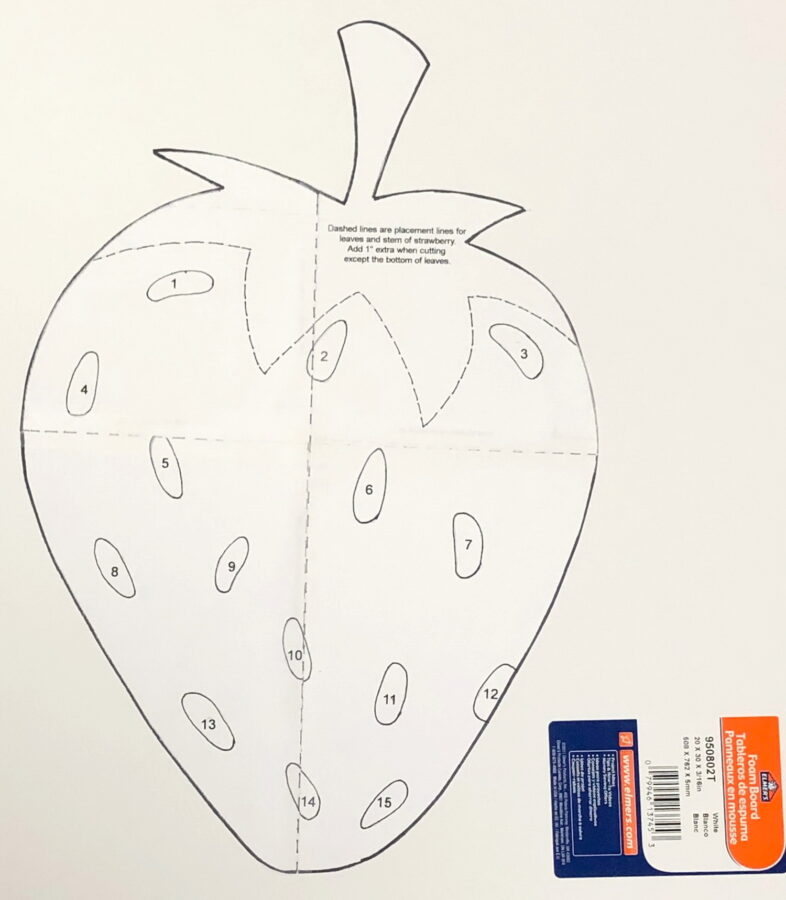
Remove pattern and set aside. Using an X-Acto knife, cut out foam core board. Set aside. Take the pattern and lay it on top of a piece of green felt. I find that I can move and place things multiple times, using just 1 application of pattern spray. Re-spray as needed. Using a Sharpie marker, trace around the outer edges of the pattern onto felt. Remove pattern and cut out felt just inside the drawn line. Set aside.
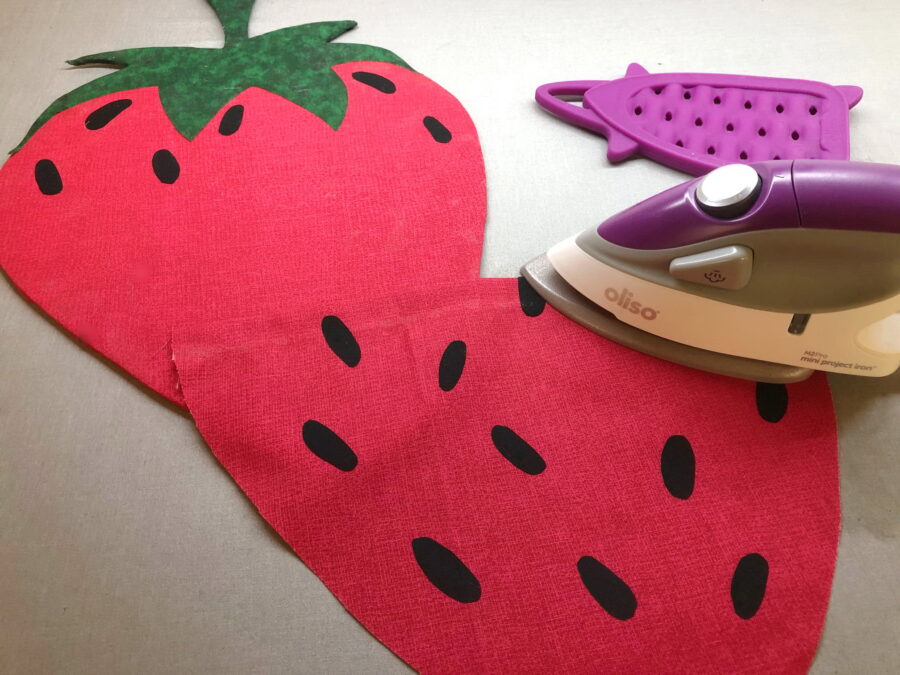
Lay the pattern on top of a piece of red fabric. As shown in the photo below, carefully fold down the top along faint dashed lines near the top of the pattern.

This will allow plenty of fabric underneath the leaves. Cut out the strawberry background, allowing 1” extra along the sides and bottom, but not the top. Remove pattern and fold again about 10 1/2” up from the bottom as shown.
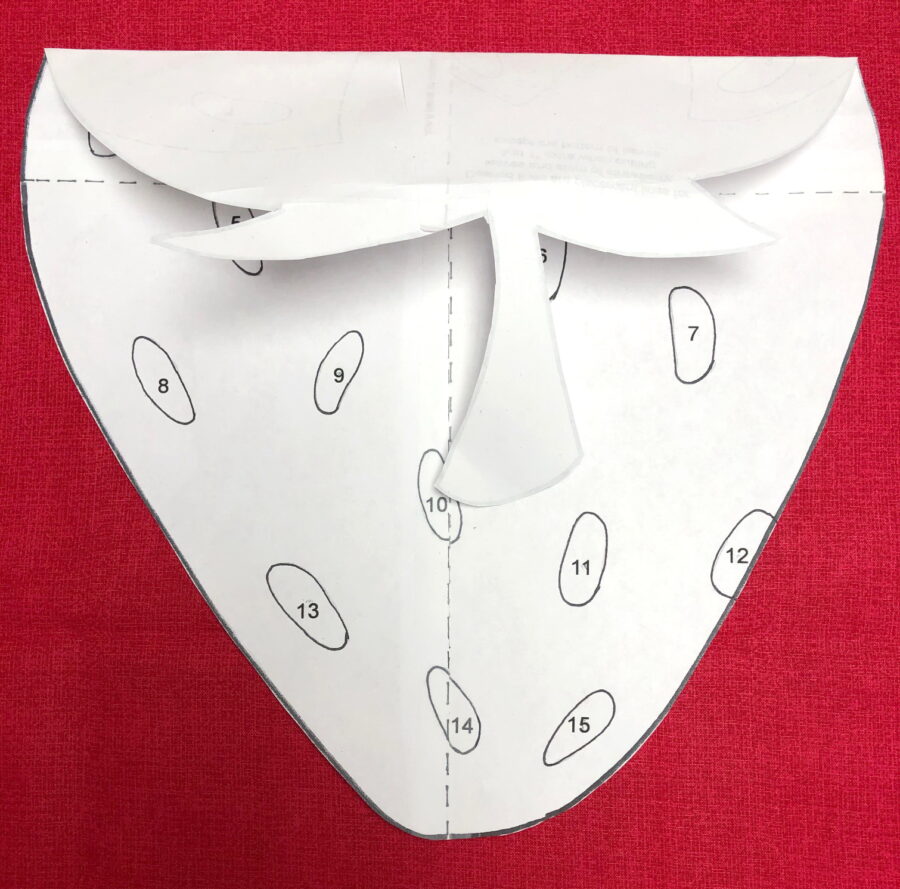
Cut out pattern allowing 1” extra on sides and bottom but not the top. This will create the pocket.
Take your pattern and carefully cut the top stem and leave a portion on the dashed lines. Lay this part of the pattern on a green piece of fabric, re-spraying if necessary and cut out, allowing 1” extra on the top and side portions of the pattern, but not the bottom of the leaves.
Construction
Since this is a “No-Sew” project, all the pieces will be applied to the foam core board using “I Craft Fabric Fuse Liquid Adhesive.
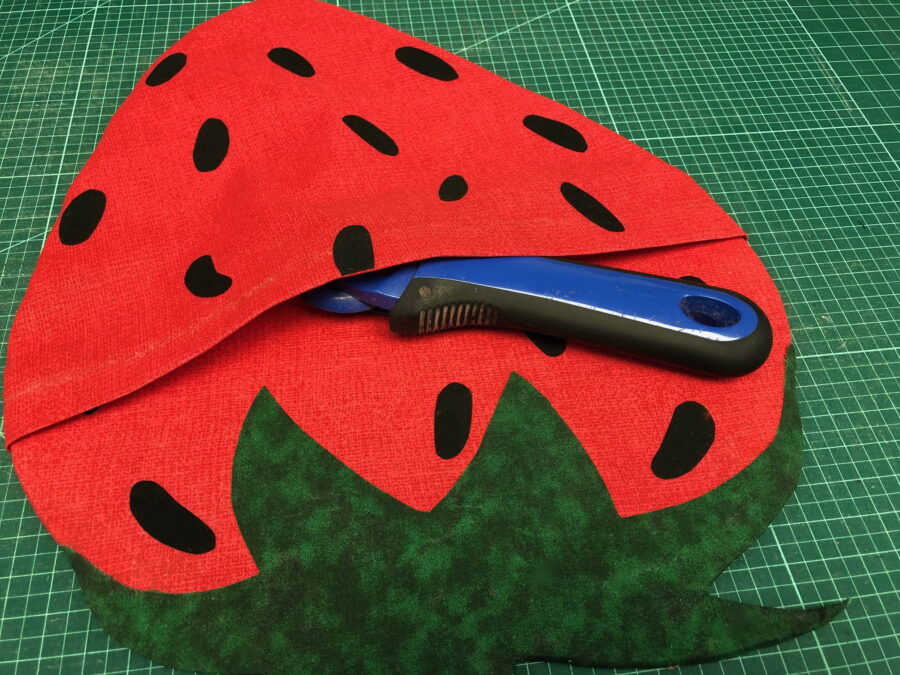
When attaching fabrics to the front of the foam core board, I find it easiest to remove the top from the Fabric Fuse bottom. Cover the entire front of the foam core strawberry and place the largest strawberry piece on top, allowing 1” extra fabric to extend past the sides and bottom. Smooth out and let sit for a few minutes. Replace the tip on the bottle of Fabric Fuse. Use the tip to run a bead of Fabric Fuse along the sides of the foam core strawberry. Carefully start to fold and roll the excess fabric to the back of the board. Run another bead of Fabric Fuse on the back. Continue to roll and smooth your fabric as you go. Set aside for a few minutes. Following the same steps, place your green stem and leaves on board, making sure the leaves cover the top of the strawberry. When rolling the leaves to the back, you will need to clip at corners and trim in places. While allowing this to dry, take the pocket piece of the strawberry and fold approximately 1” to the back. Run a tiny bead of Fabric Fuse and let dry.
Print the last page of the pattern on a sheet of “HeatNBond EZ Print Lite”. Fuse to the reverse side of a scrap of black fabric and cut out. These are the strawberry seeds. Fuse to the front of the 2 strawberry pieces
Lay the pocket on top of the strawberry allowing 1” on the sides and bottom. Again run a small bead of Fabric Fuse to the sides and back as before. When rolling the pocket to the back, the bottom will be rolled tightly. As you work your way up the sides, do not pull tight, that way it creates the space to fill your pocket on the front.
When completely dry, cover the back of the strawberry with Fabric Fuse and place the backing felt on top. Felt is very forgiving, so you can tug it a bit to cover the edges. Once dry, trim any felt that shows on the front.
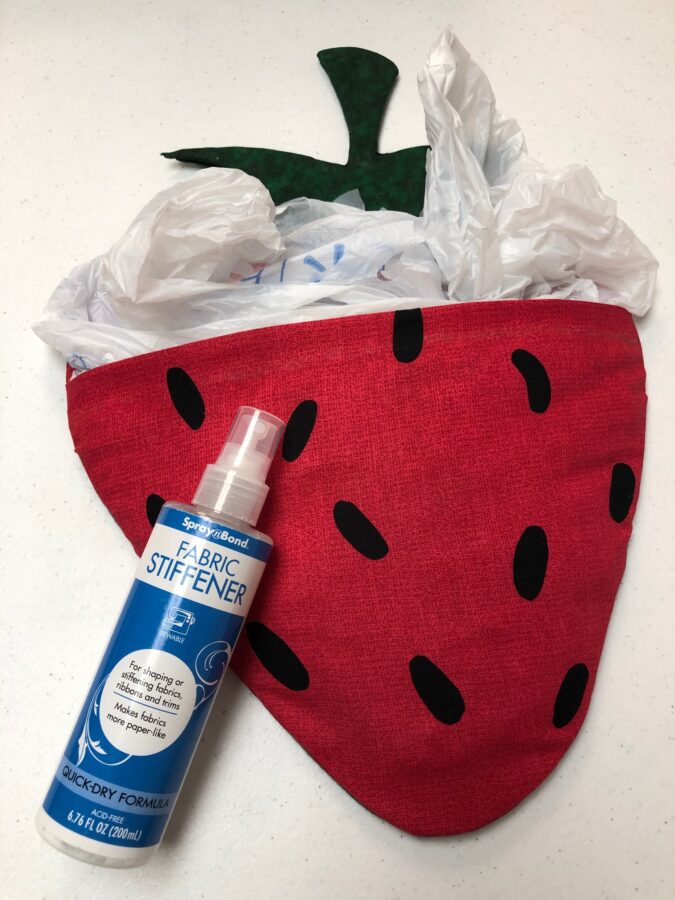
Fill basket pocket with plastic bags and arrange to give it a nice shape.
Using the manufacturer’s recommendations, saturate the pocket with “Spray N Bond Fabric Stiffener”. Allow to completely dry before removing the bags. I love this stiffener. I created the curls in the green ribbon by rolling a long piece of craft ribbon on a dowel rod, saturating, and allowing it to dry.
Cut a piece of wire to make a hanger. Attach it to the back, by pushing the tip of a sharp pair of scissors from the back to the front. Push the wire through to the front and using a pair of needle-nose pliers roll the wire into a ball and push flat. Place it where your decorations will cover them.
Slide a piece of floral foam into the pocket and decorate as desired.
This post contains affiliate links. For more information, see our disclosure HERE.