


Pumpkin Spice Fabric Coffee Cup Wraps
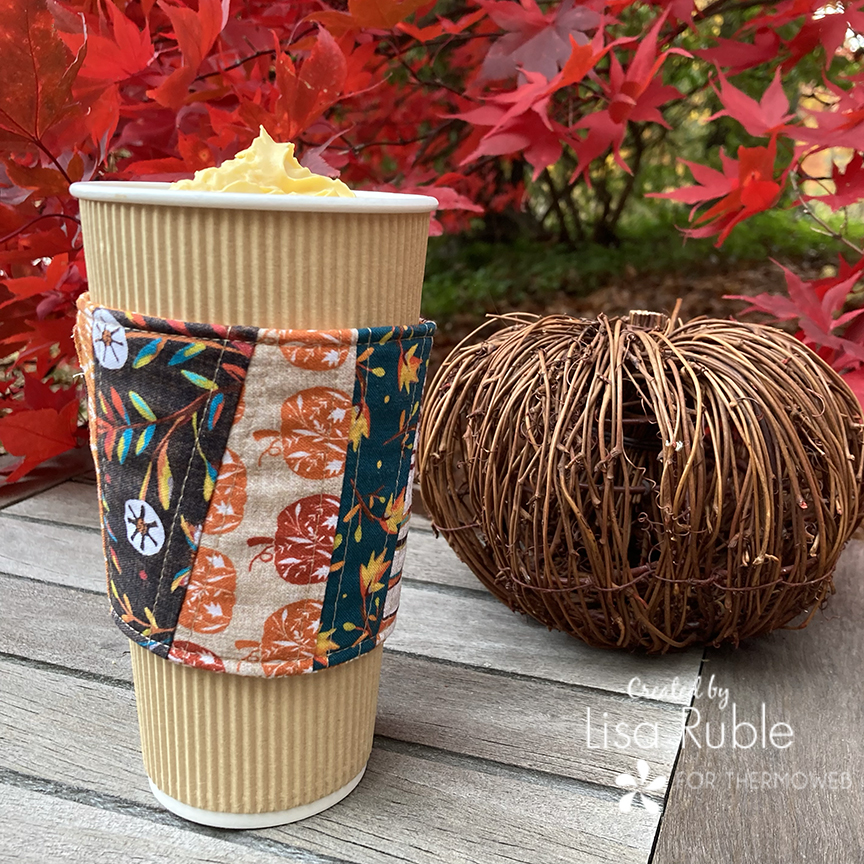
What could be better for Pumpkin Spice week than themed coffee cup wraps?
I’m more of a chai tea or cider girl myself, but these wraps are cute and cozy enough for any warm fall drink.
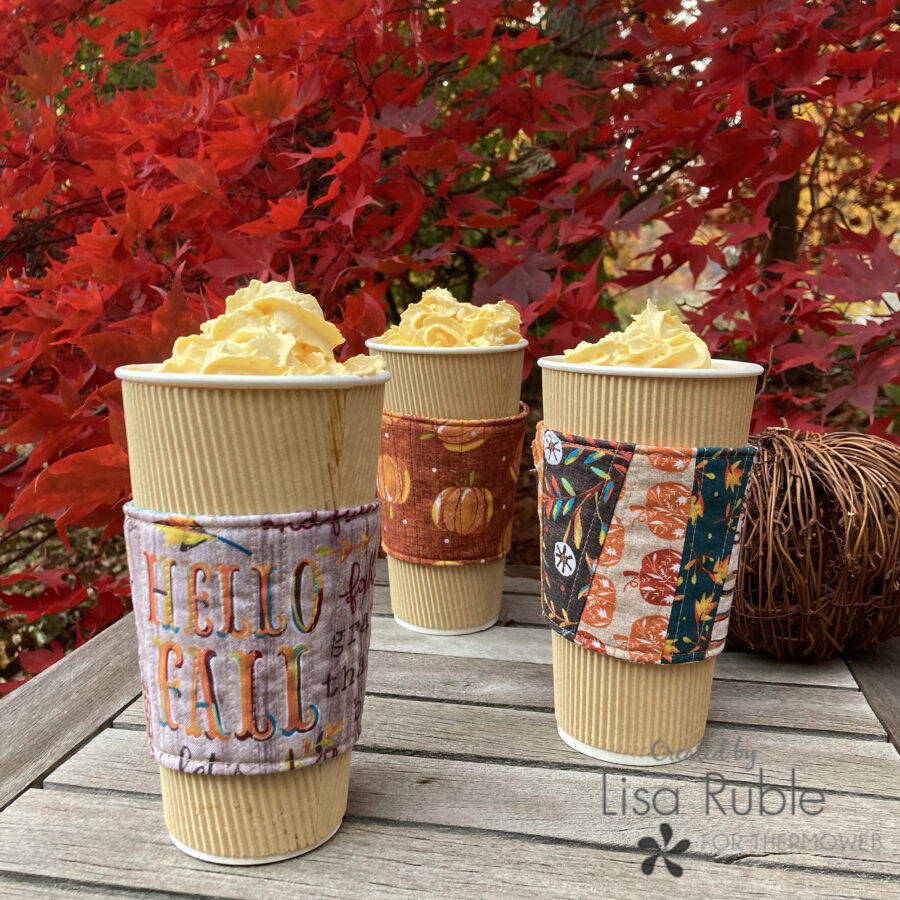
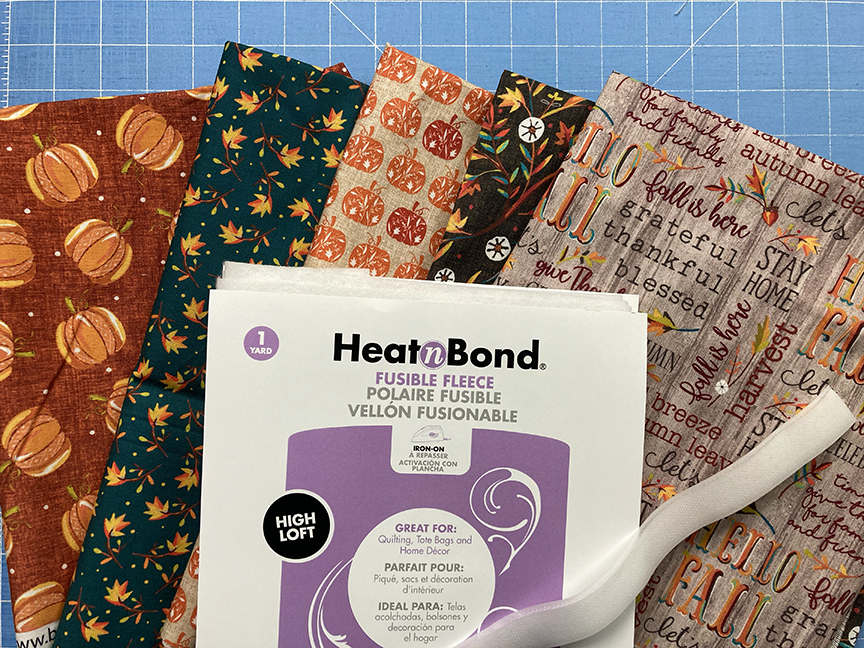
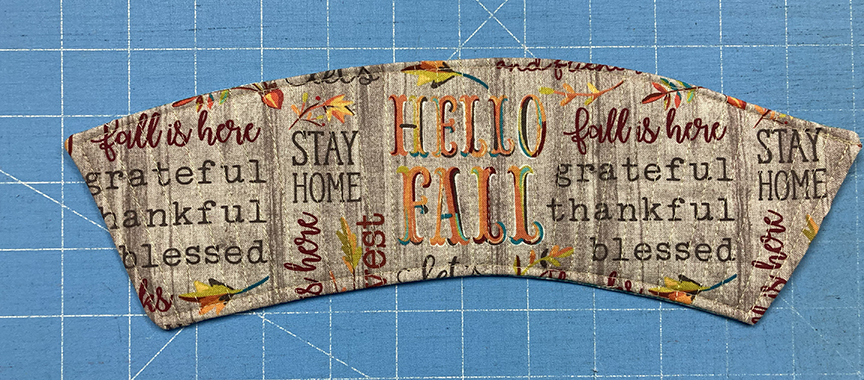
I used the Hello Fall collection by Jessica Flick for Benartex Fabrics, and I am in love with the fun autumn prints in this line! I chose a few to use on their own, and then made a pieced version as well, combining some of my favorite smaller prints. A layer of Fusible Fleece protects your hands from heat and creates a comfortable grip for your cup. And don’t forget a little Velcro to help your wrap hug the cup!
You’ll Need (to make one wrap):
(2) 6″ x 13″ pieces (for wrap front and back)
(1) 6″ x 13″ piece HeatnBond Fusible Fleece
2″ of 1″-wide velcro
Download the wrap template here.
How to Make the Fabric Coffee Cup Wrap
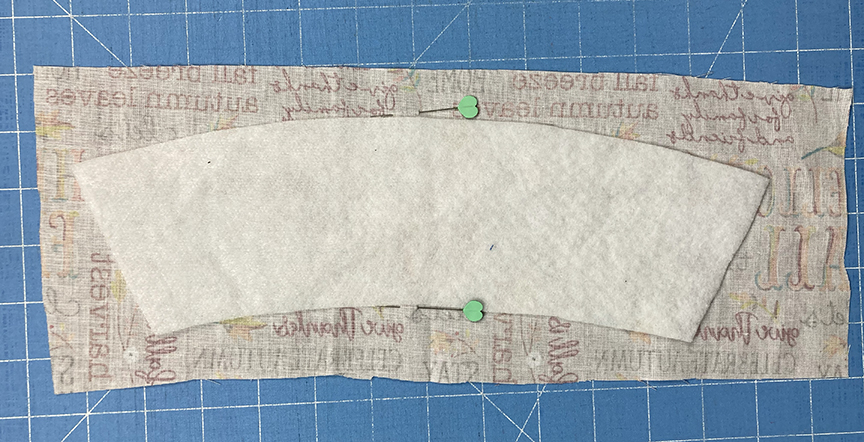
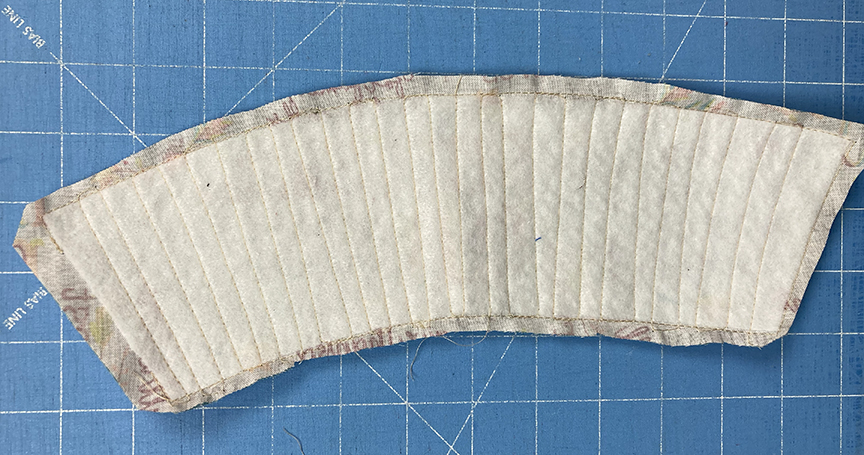
Step 1 Cut out the wrap template. Fold the 6″ x 13″ Fusible Fleece piece in half and position the template on the folded edge as indicated. Pin in place. Cut out the template shape from the Fleece.

Step 2 Position the fleece sleeve shape on the wrong side of the front 6″ x 13″ fabric piece. Note: If you’re trying to center a design (like my Hello Fall wrap), use a lightbox or a window to check the placement of the fleece on the fabric. You can also use pins to mark placement.
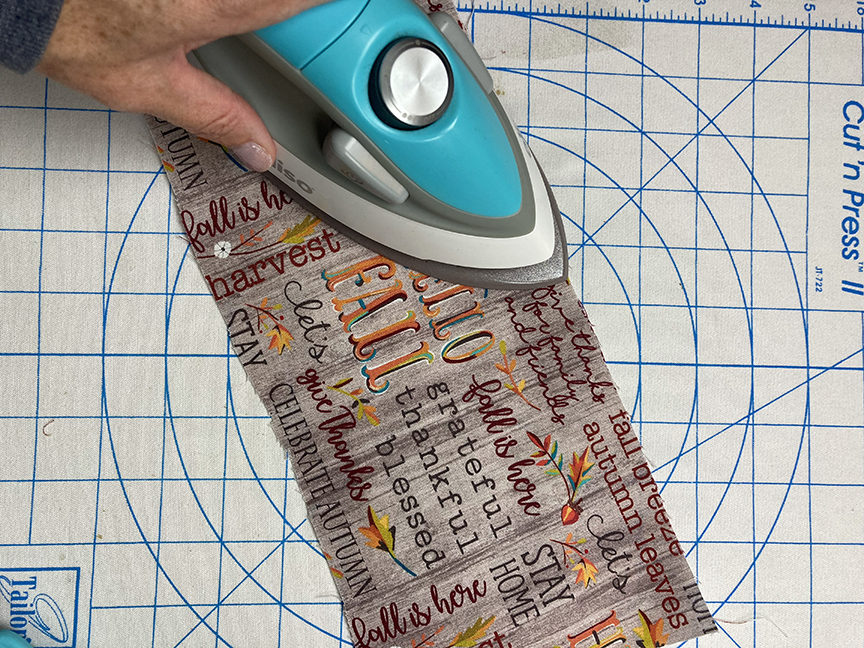
Step 3 Fuse the Fleece to the fabric, pressing from the fabric side.
Step 4 Quilt the fabric/fleece unit as desired, extending the quilting lines about 1/4″ past the fleece. Note: I quilted vertical lines, approximately 1/4″ to 1/2″ apart. Layer the quilted front right sides together on the 6″ x 13″ back piece and pin in place.

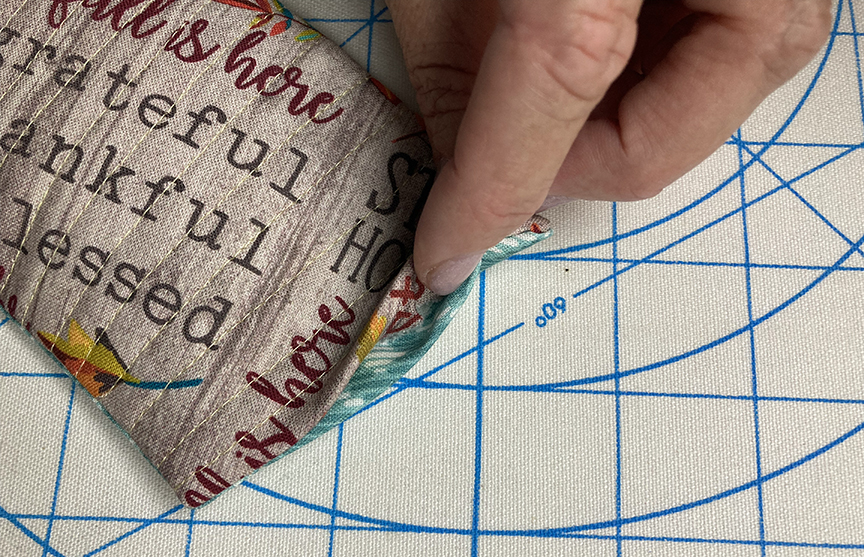
Step 5 Stitch along the outer edge of the fleece all the way around, leaving an opening along one short edge. Trim seam allowance to 1/4″ past the fleece edge. Tip: Leave a 3/8″ seam allowance along the opening – it’ll be easier to sew it closed in the next step.
Step 6 Turn wrap right side out, poking out corners and sides as needed with a turning tool. Press the wrap, and then press the raw edges of the opening in. Topstitch around the entire wrap, closing up the opening along the short edge.
Step 7 Separate the velcro pieces. Sew one to the back side of the wrap and one to the opposite front side. Stitch around all sides of the velcro to secure.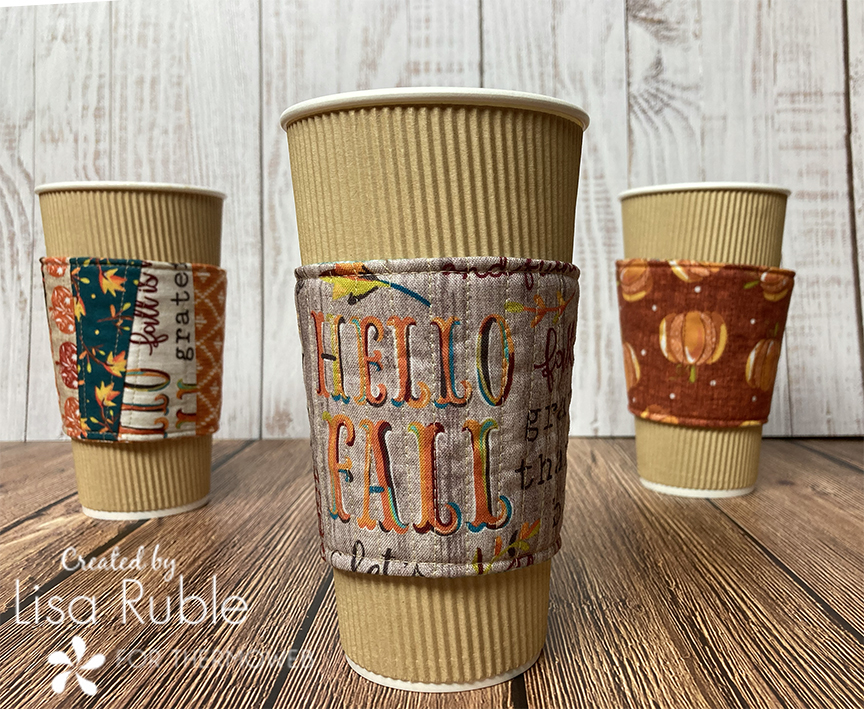
Enjoy!
**************************************************************************************
Pieced Wrap Option
To make a pieced wrap, you’ll need:
2″ x 12″ strips of 6-7 fabrics,
(1) 6″ x 13″ piece for backing
(1) 6″ x 13″ muslin piece
Watch the video below for a tutorial on how to piece the wrap front; follow steps 4-7 to finish the wrap. Visit my blog post for step by step photos to augment the video.