 Mixed Media Spring Garden Folio
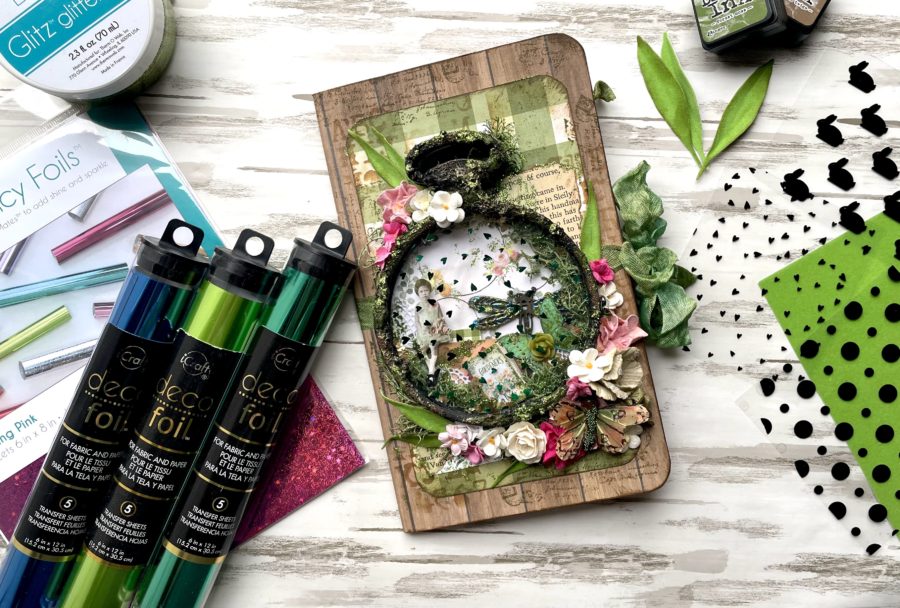
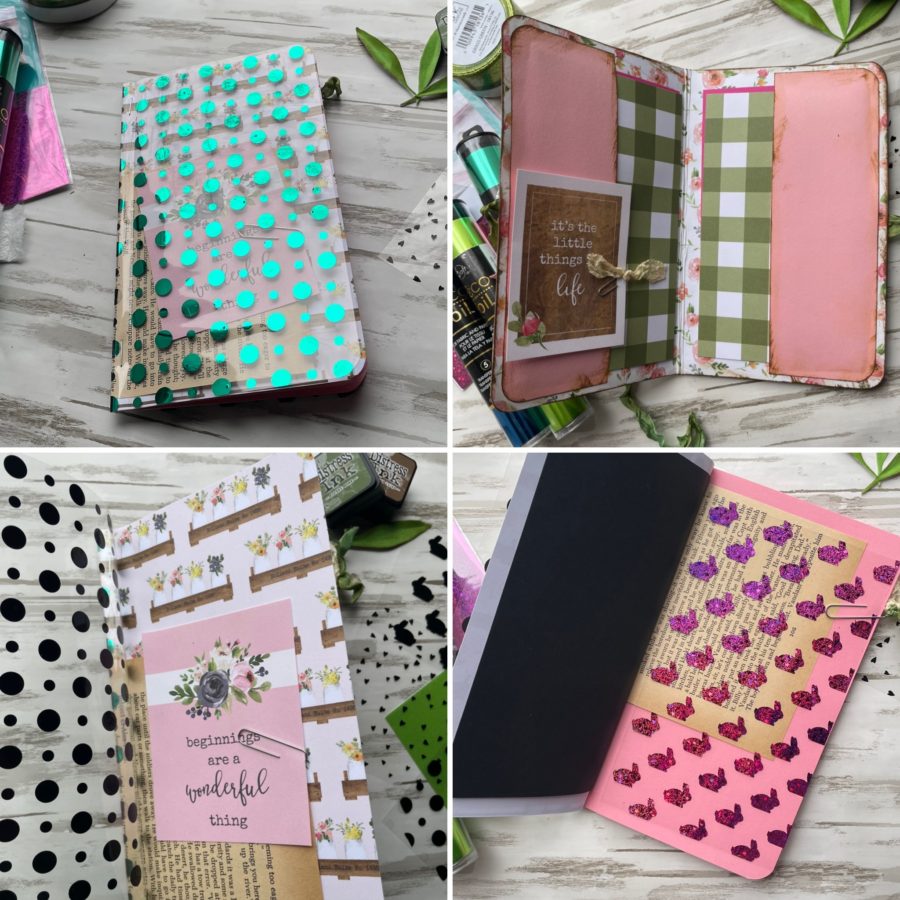
Hello crafty friends and Happy Spring! Today I am here to share my Mixed Media Spring Garden Folio or mini-album, highlighting the Deco Foil Clear Designer Toner Sheets, which I absolutely love! These can be used in so many ways and here I have added them to create a window for my focal point as well as to embellish the inside pages.
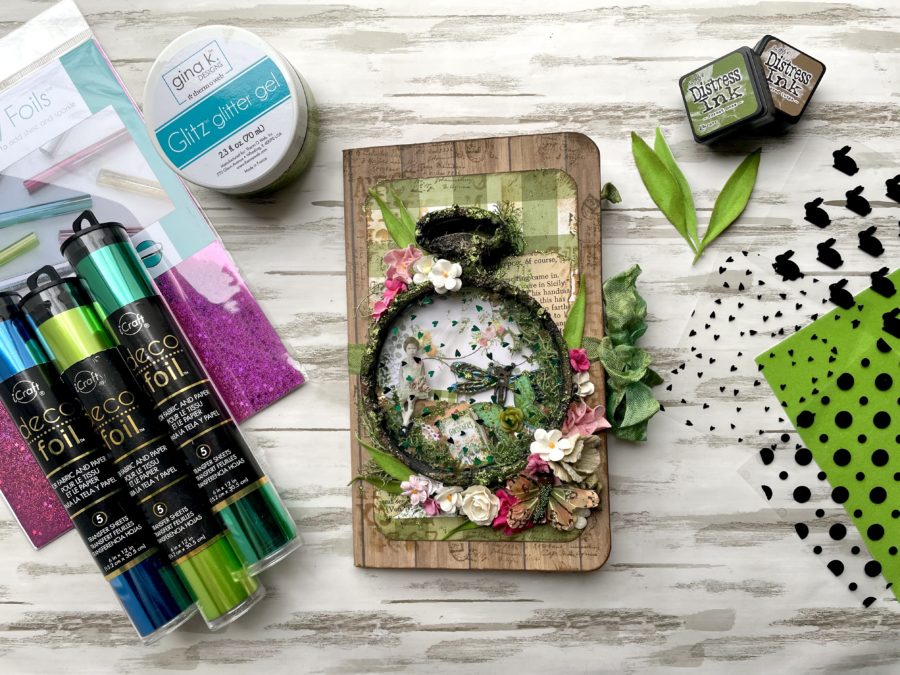
Folio Supplies:
Deco Foil Clear Designer Toner Sheets
Deco Foil Flock Transfer Sheets – Green Envy
Gina K. Designs Fancy Transfer Foil – Twinkling Pink
iCraft Deco Foil Transfer Sheets – Ocean Blue, Jade and Lily Pad
iCraft Ultra Bond Liquid Adhesive
Gina K. Designs Glitz Glitter Gel – Grass
Gina K. Designs Double-Sided Adhesive Foam Tape
iCraft Super-Tape Adhesive Roll
Other Supplies: Tim Holtz Pocket Watch Frame Die (older die from stash), matboard, paint, texture or modeling paste, sand, spatula, embossing powders, microbeads, mica flakes, heat gun, spring patterned papers, embellishments, moss, brad, elastic string, lightweight chipboard, ribbon, Distress Inks, stamps and/or stencils, old book pages, stapler, paper flowers, leaf die, and paintbrush.
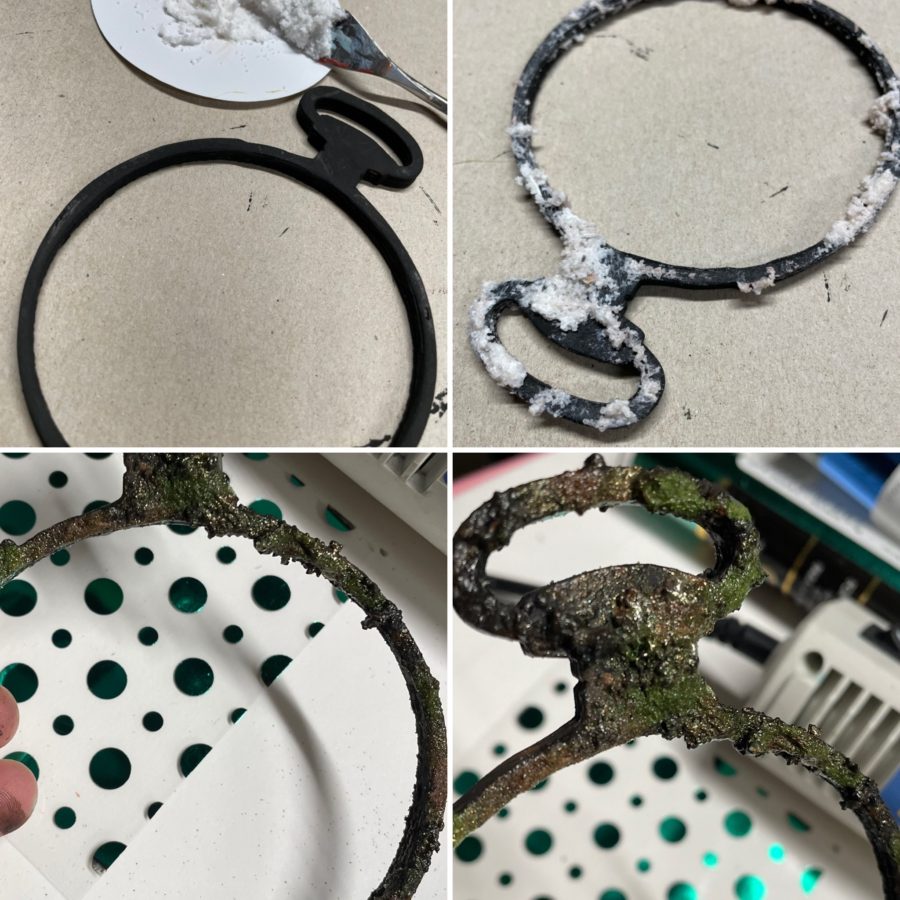
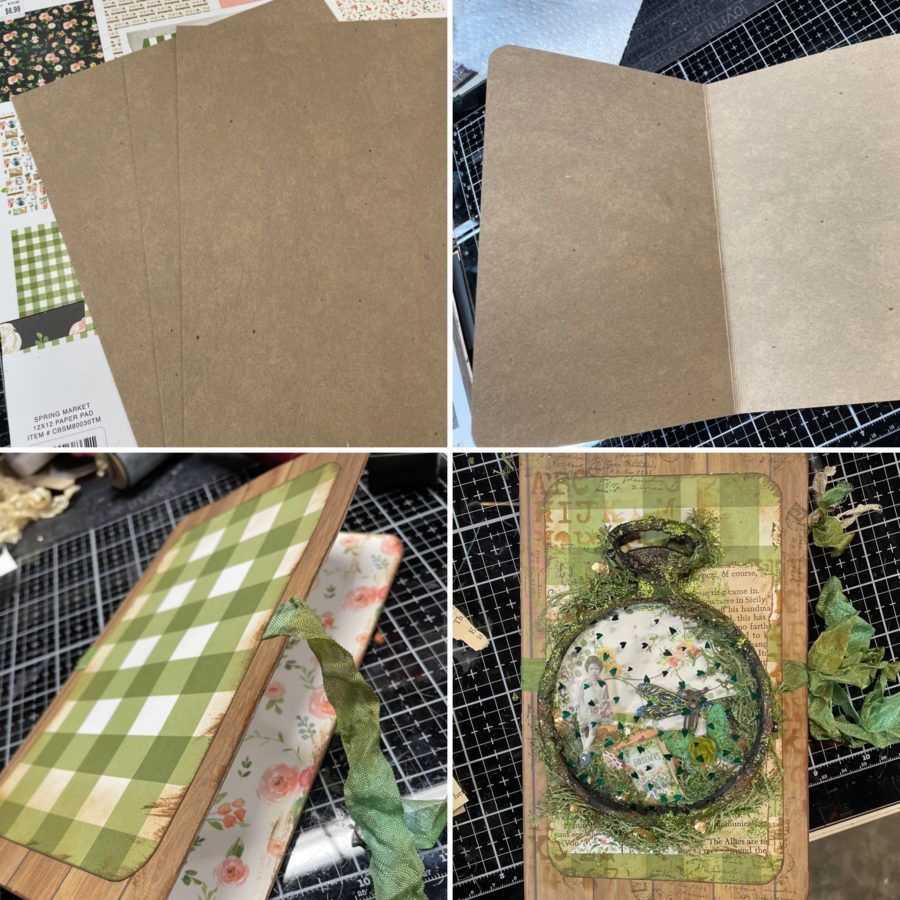
Mixed Media Garden Photo Step One
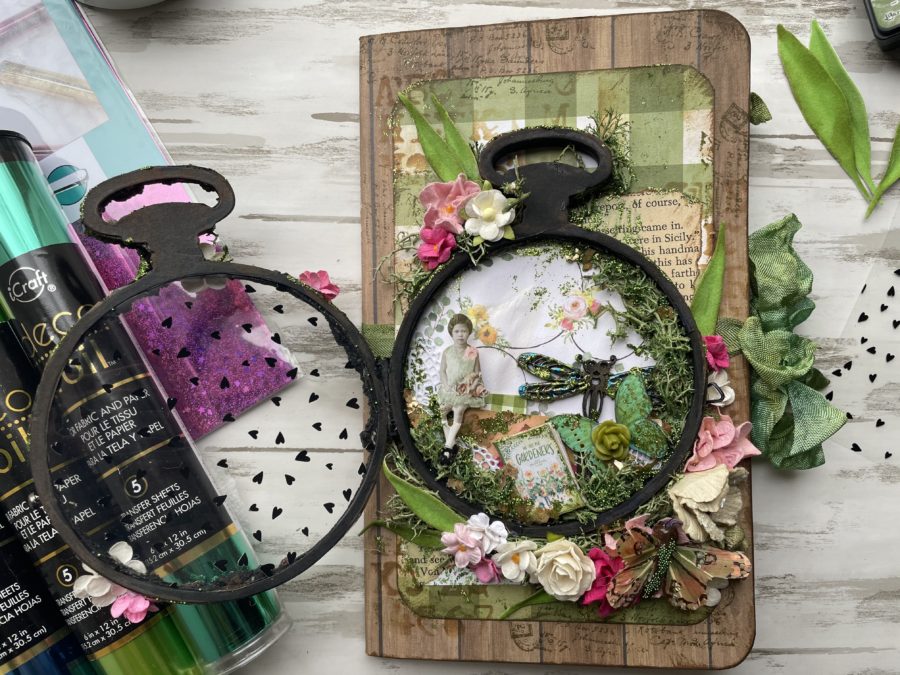
Begin by die-cutting your frame six times from matboard and glue two sets of three together. Mix together modeling paste with a bit of sand to create a chunky mixture. Next, apply the mixture to the top frame only and allow it to dry. Once dry, paint the frame, layering black with brown dry brushing over top. Then, using a paintbrush, apply a bit of Ultra Bond Liquid Adhesive here and there. Finish by sprinkling green and gold embossing powders over the adhesive and heat to emboss.
Hint #1: If you do not have modeling paste and sand you can use any color of Glitz Glitter Gel and paint over it to achieve the same texture. I just love mine so much I couldn’t bear to paint over it.
Hint #2: Any steel rule frame die would work for this project . . . use what you have!
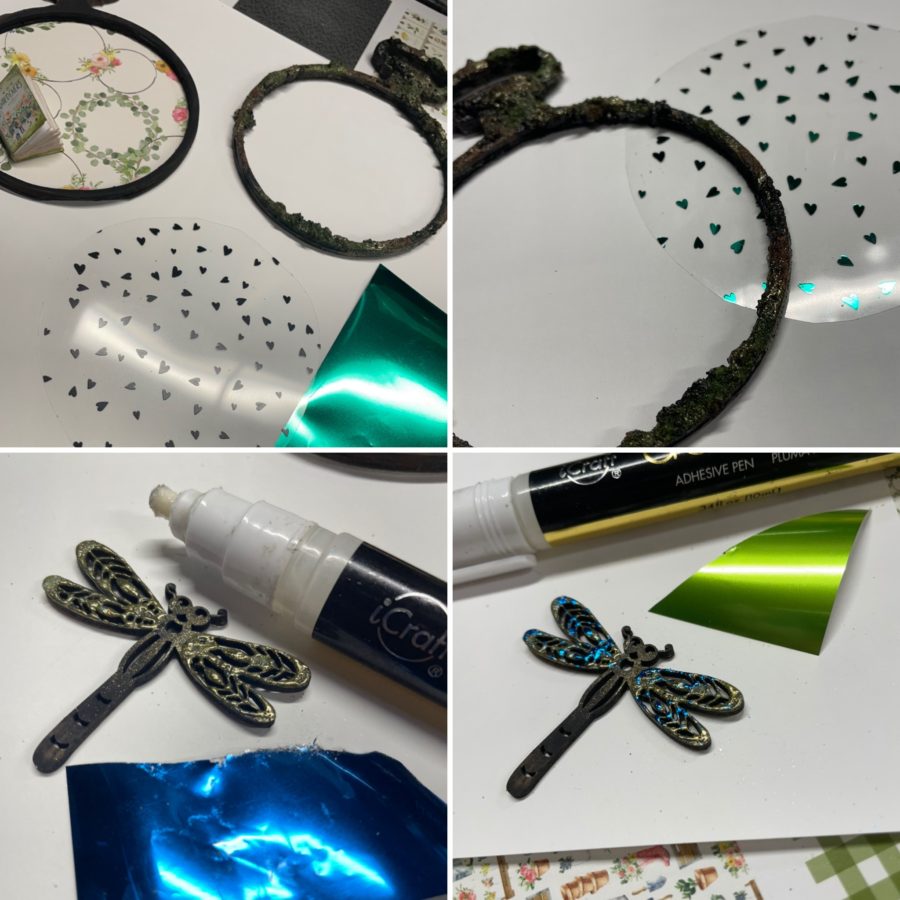
Mixed Media Garden Foil Step Two
To the bottom pocket watch frame, adhere a piece of spring or garden-themed scrapbook paper from underneath to create your base. Next, add small embellishments inside the bottom frame. I used a wooden dragonfly from a local dollar store, adding paint and then foil in Jade, Lily Pad, and Ocean Blue. Just add a bit of iCraft Deco Foil Glue Pen, wait a few seconds (or hit it with a quick heat gun blast), and then tap the dull side of your foils against the tacky adhesive to transfer the foil to the dragonfly.
Foil a piece of Clear Designer Toner Sheet (Dainty Hearts) with Jade foil. The dull side of the Foil Transfer Sheet should be placed against the raised heart side of the Toner Sheet. Place the Toner Sheet and Foil into a carrier or folded copy paper and run through your foiling machine or laminator. Adhere the Dainty Hearts Toner Sheet to the underside of the top pocket watch frame with the foiled side showing from the top using 1/8″ Super Tape.
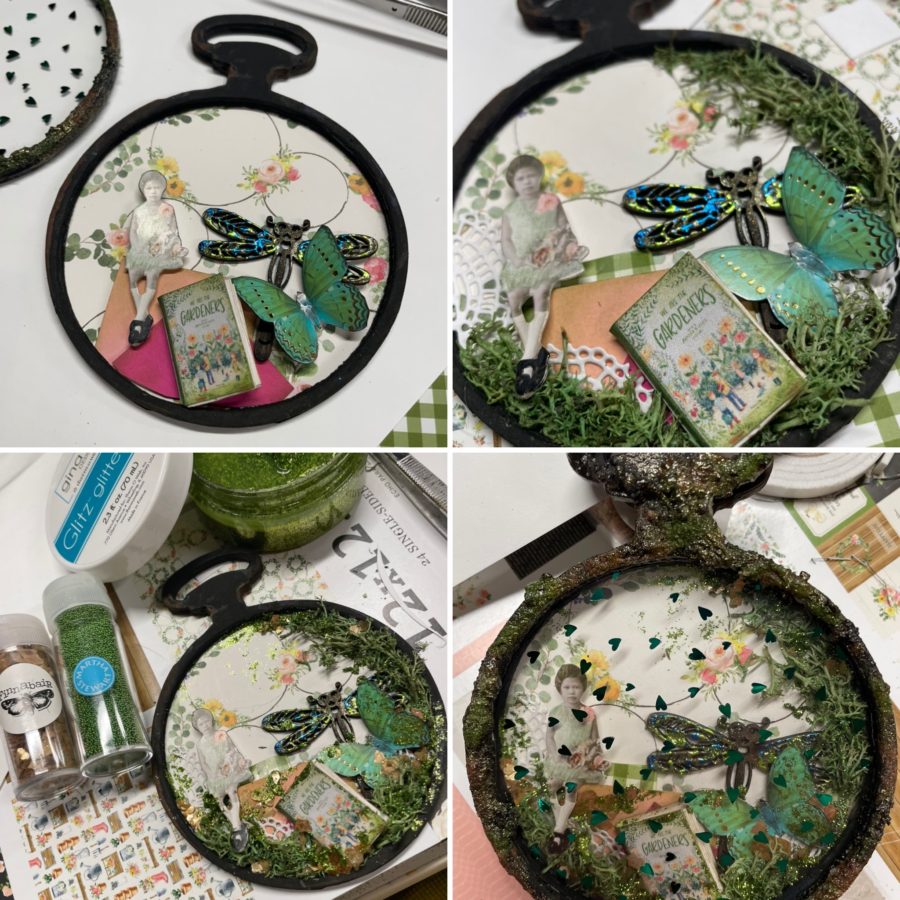
Mixed Media Garden Folio Step Three
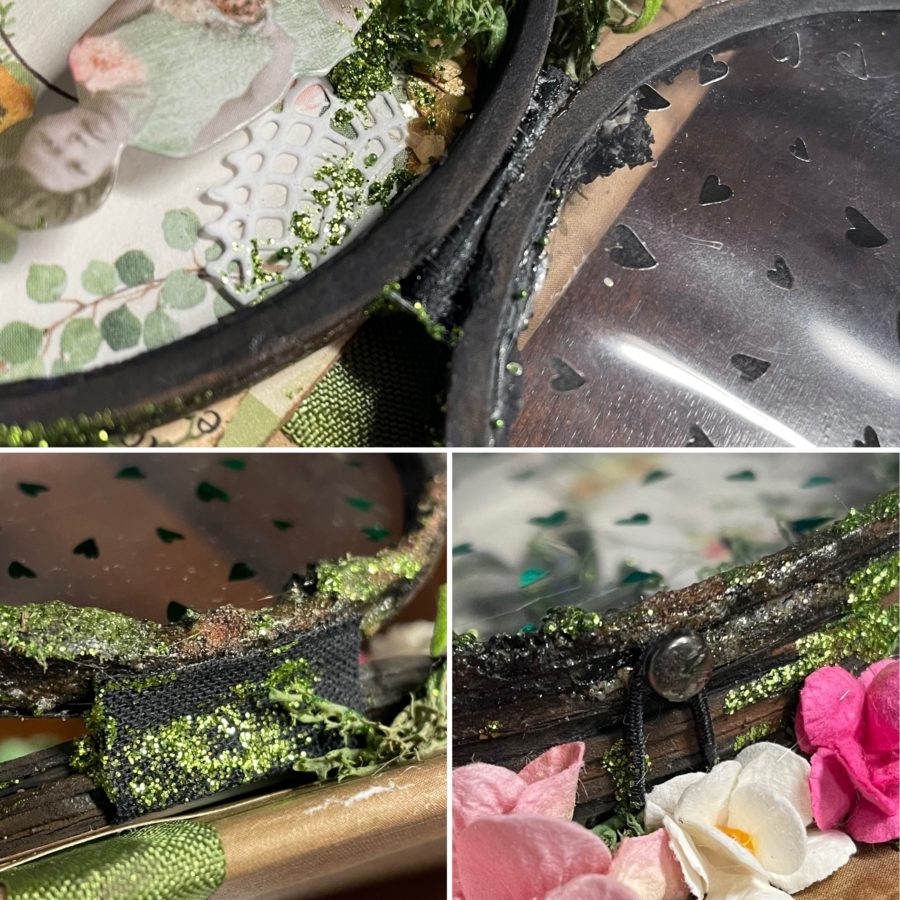
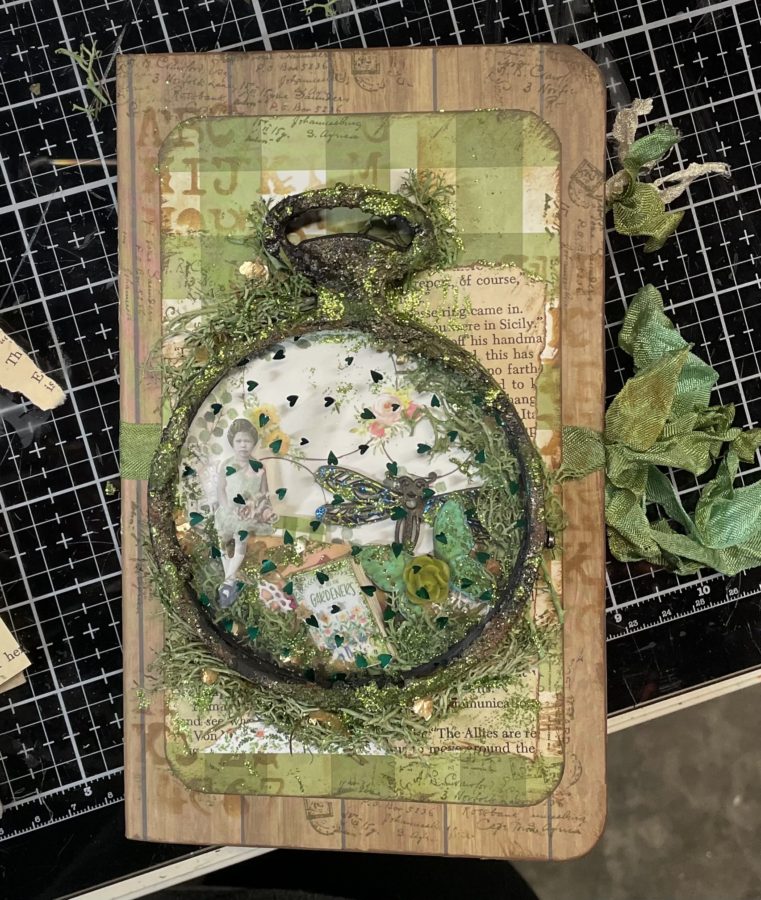
Arrange your made and found embellishments into the base piece of your pocket watch frame. I used various die-cuts, an Ideology Paper Doll, a homemade tiny book, microbeads, mica flakes, a resin flower, some Glitz Glitter Gel, and bits of moss. Attach the top frame to the bottom frame by creating a tiny hinge from cardstock and adhering it to the left, outside of the stacked frames (see image below).
Hint: Create a closure for your frame window by adhering a tiny loop of elastic twine from underneath and adding a small brad to catch the loop on the top frame (see image below).
Mixed Media Garden Foil Step Four
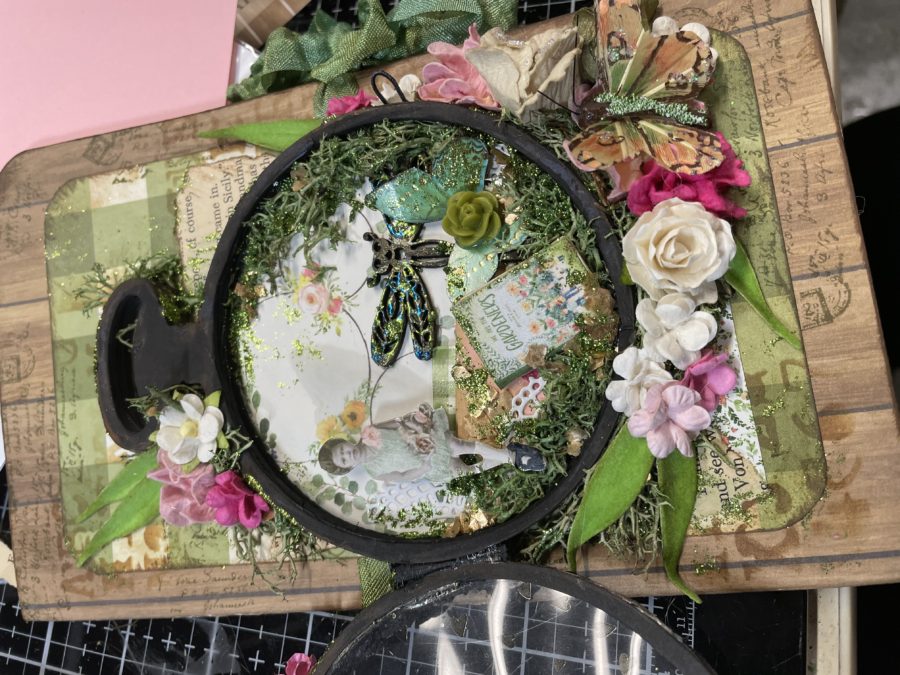
Lastly, create a folio by folding a piece of lightweight chipboard and rounding the corners. Cover the folio with scrapbook paper and old book paper and add some stamping and stenciling for visual interest. Finish the front by attaching your pocket watch to the front of the folio and embellish by adding moss and paper flowers.
My pocket watch looked unfinished after I got the flowers on. Then I remembered these Flock Transfer Sheet, die-cut leaves I had leftover from another project. They were just what it needed for extra texture and a finishing touch!
Hint #1: Before adding scrapbook paper, wrap a ribbon around the folio to use as a closure.
Hint #2: Rather than keeping every color of ribbon in your stash, keep some cream and some white and dye it as you need it.
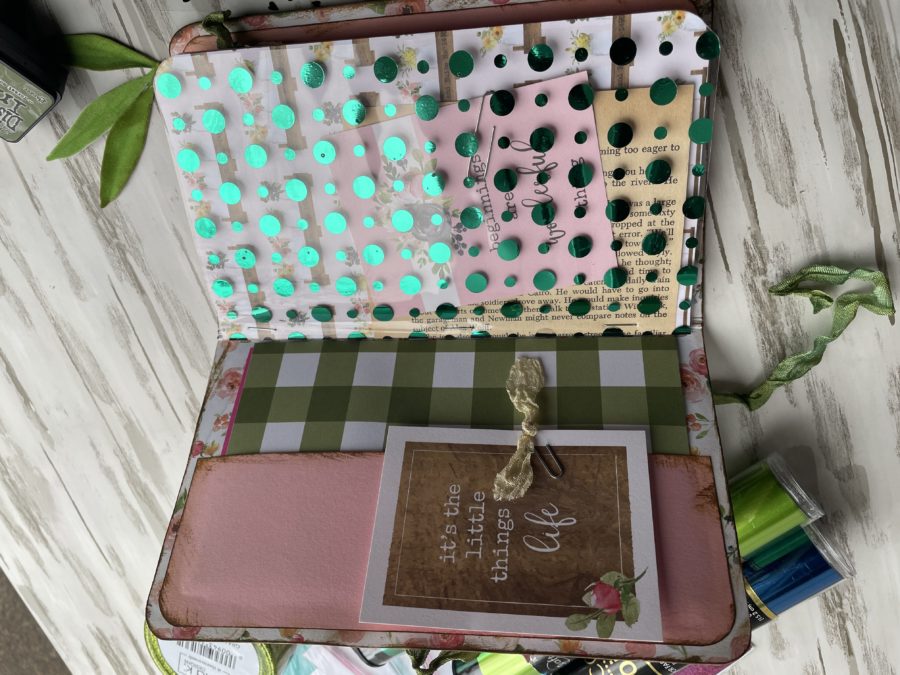
STEP FIVE:
For this last step, create an insert for your folio and staple it together. Mine has more of the Clear Designer Toner Sheets for interest and shine. I also added a pocket on either side of the folio to insert extra pages.
I hope you enjoyed this tutorial and will create and share your ideas for the Deco Foil Clear Designer Toner Sheets.