


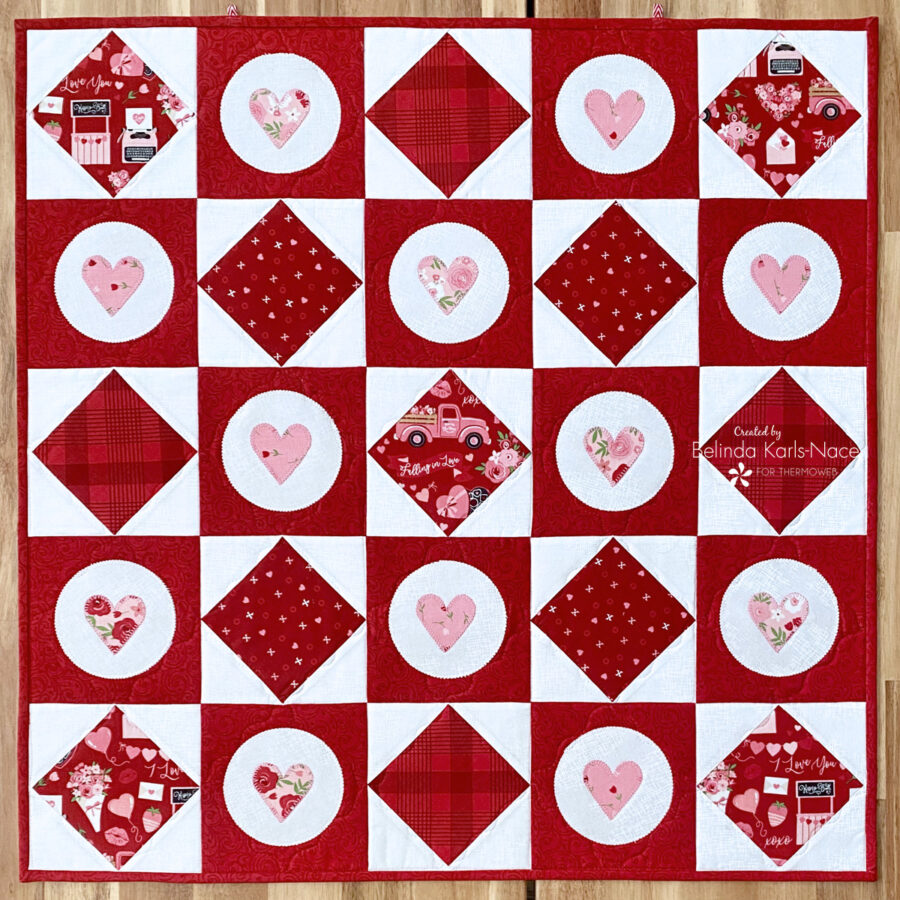
Love on Point Small Quilt featuring HeatnBond
Greetings friends! It’s Belinda Karls-Nace from Blue Ribbon Designs, here today with a brand new project tutorial featuring an assortment of my favorite Therm O Web products. Today, I am excited to share my “Love on Point” small quilt with you.
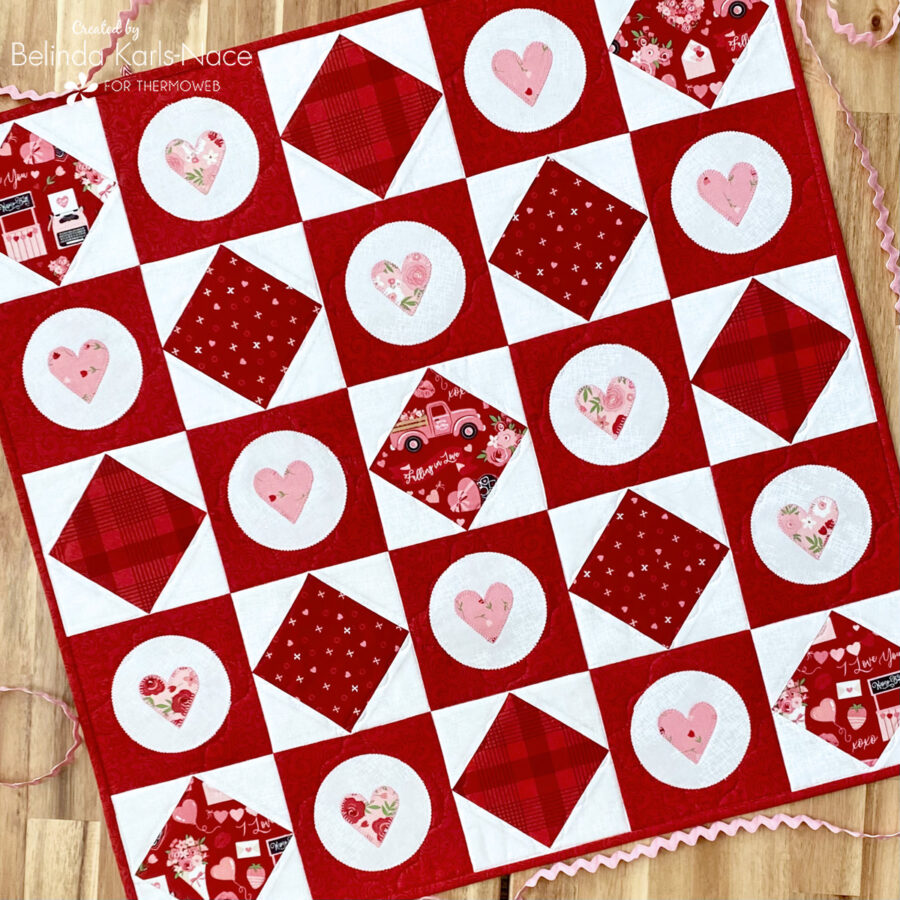 With the start of a new year, I always clean my sewing studio and look for ways to use up scraps of fabric. This is an easy project, perfect for using up small pieces of leftover fabric. This small quilt can be as scrappy as you please or planned out – and the number of blocks can easily be adjusted to make it a size you prefer. It works well as a wall hanging or a table topper…or simply add/adjust the layout/number of blocks to create a table runner or larger quilt. These simple, step-by-step instructions will have you using up all sorts of scraps in no time…and with Valentine’s Day right around the corner it’s a timely project for seasonal décor.
Let’s get creative! Simply gather the materials/supplies listed below, then download the pattern with PDF templates and foundation block layout.
*NOTE*: This tutorial requires basic quilting knowledge and foundation piecing knowledge. If you need additional assistance to piece your quilt, search/visit the Internet, or look at a basic quilting book to learn the fundamentals of quilting and foundation piecing.
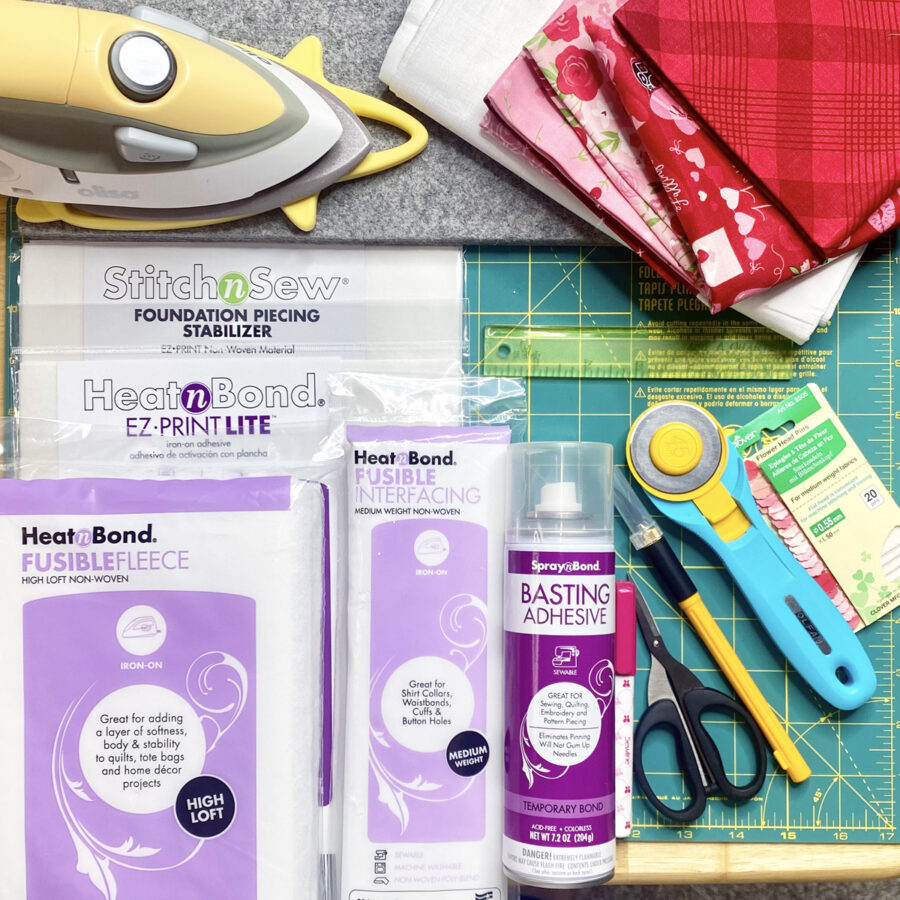
What you need:
- HeatnBond Lite EZ-Print Iron-On Adhesive Sheet, 8.5 in x 11 in
- 4 sheets
- HeatnBond Fusible Fleece
- 1 – 26” x 26”
- StitchnSew EZ Print Quilt Block Sheets, Transparent
- 13 sheets
- SpraynBond Basting Adhesive Fabric Spray
- Optional: HeatnBond Medium Weight Non-Woven Fusible Interfacing (if using white fabric for circle appliqué)
- 12 – 4” squares
- Cotton Fabrics: model uses Falling in Love by Dani Mogstad for Riley Blake Designs, but this project is perfect for scraps and small pieces fabrics you have on hand) – I encourage you to use fabric in your stash or scrap bin.
- 12 – 5½” squares of red fabric (background for heart appliqué blocks)
- 12 – 4” squares of white fabric (appliqué circles)
- 12 – 2¼” squares of pink print fabrics (heart appliqués)
- 13 – 5 ½” (or larger) squares of red print fabrics (for diamond in square foundation block centers)
- 26 – 4” (or larger) squares of white fabrics, each cut on the diagonal to create two triangles (for the four corners on each foundation block)
- 1 – 28” x 28” piece of backing fabric
- 3 – 2½” WOF strips for binding
- Optional, if Hanging: Twill Tape or Ribbon
- 2 – 2” pieces (hanging tabs)
- Optional, if Hanging: Quilt Hanger (model used a wrought iron flag hanger)
- Add-A-Quarter Ruler (optional, but extremely helpful)
- Flathead Pins
- Fabric Glue Stick/Pen
- Postcard or Piece of Cardstock
- Oliso Iron
- Olfa Cutting Tools (cutting mat, rotary cutter)
- Sewing Machine
- Basic Sewing Supplies/Tools (small sharp scissors, rulers, sewing thread, pencil, light pad, etc.)
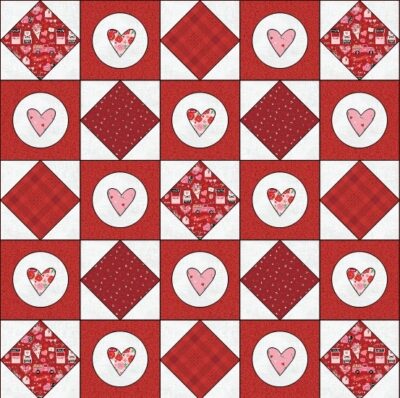
How to Make a Love on Point Small Quilt (25” W x 25” H)
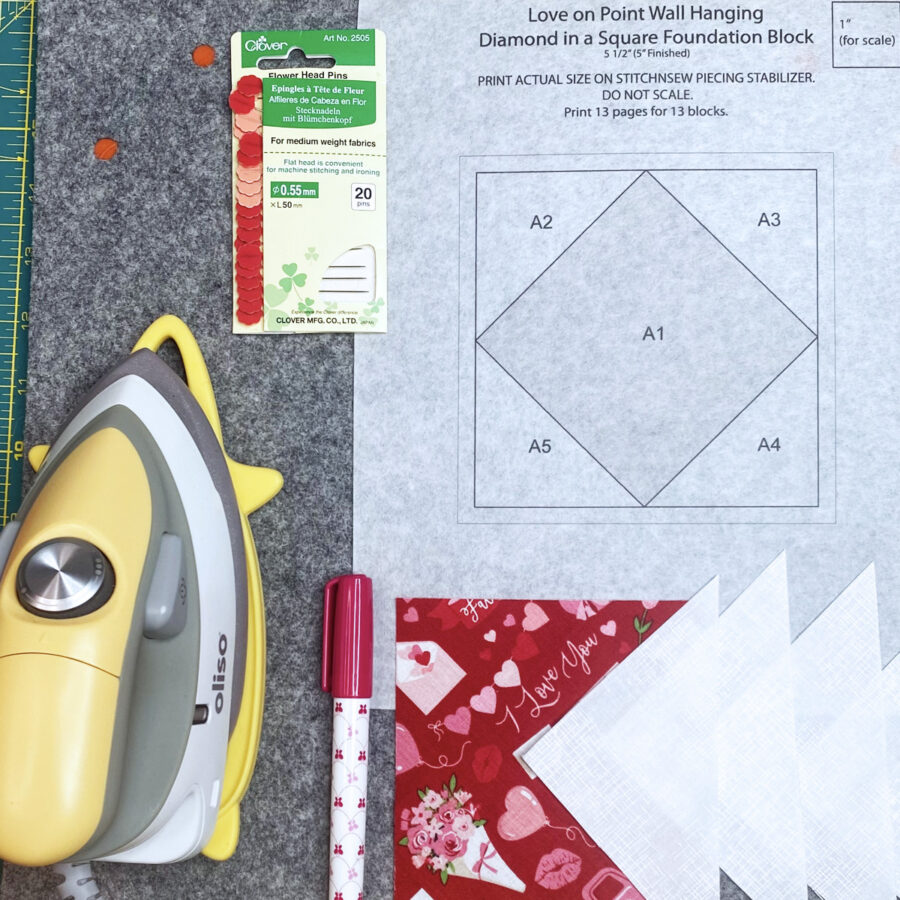
1. Download and print the 2-in-1 Love on Point Small Quilt PDF.
Love on Point – A Project for the Therm O Web Blog
Print actual size – do NOT “fit to page” or “shrink to fit.”
- Print page 1 (cover/quilt layout) on regular printer paper.
- Print page 2 (heart appliqués) on one sheet of HeatnBond Lite EZ-Print Iron-On Adhesive.
- Print page 3 (circle appliqués) on HeatnBond Lite EZ-Print Iron-On Adhesive – you will need to print three total pages of circles.
- Print page 4 (Diamond in a Square foundation block) on StitchnSew EZ Print Quilt Block Sheets – you will need to print 13 total pages of this block.
2. Create appliqué blocks.
- If you are using white fabric for the appliqué circles, apply HeatnBond Medium Weight Non-Woven Fusible Interfacing to the wrong side of fabric following package instructions. This will keep your base fabric from showing through the white fabric and keep your circles bright white. Fuse a 4” square piece of HeatnBond Medium Weight Non-Woven Fusible Interfacing to the wrong side of each 4” square of white fabric.
- Pre-heat iron to high heat, no steam
- Place rough side of the Fusible Interfacing onto the back (wrong side) of the fabric.
- Cover with a lightweight, dry pressing cloth. Press and hold iron with medium pressure for 10 – 15 seconds. Repeat by lifting iron to a new area and pressing, slightly overlapping previous area until entire surface is bonded.
- Allow to cool then check for proper adhesion. Iron again if needed.
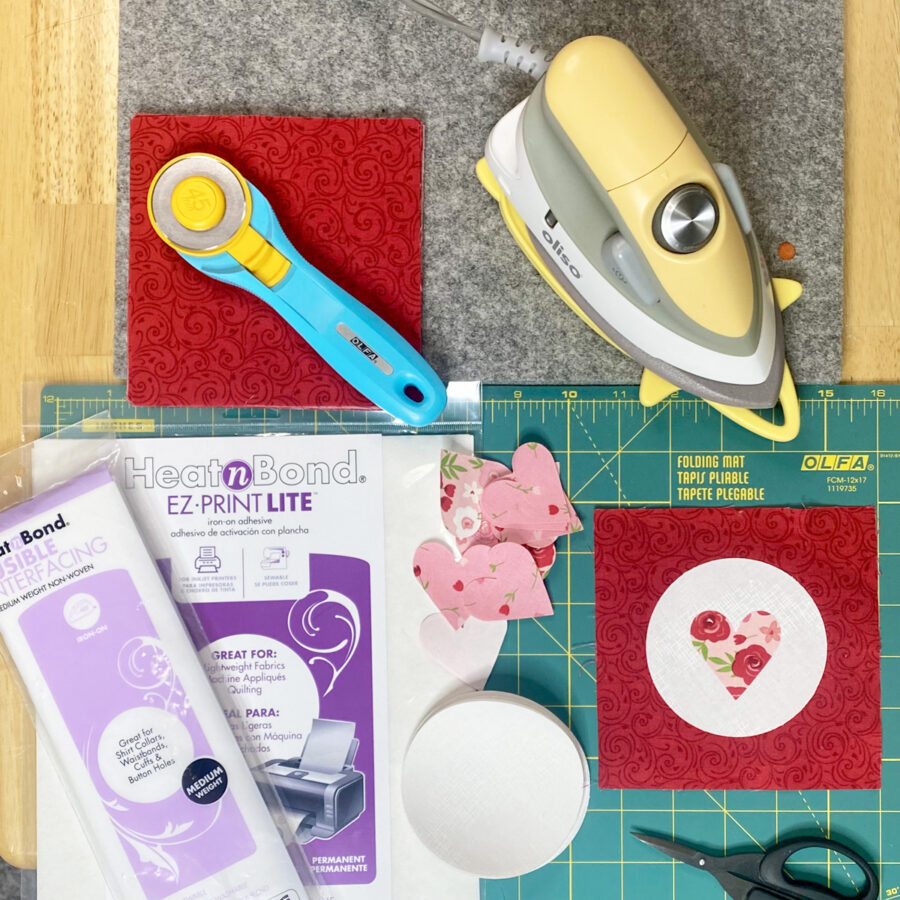
- Loosely cut out the appliqué template(s) printed on HeatnBond Lite EZ-Print Iron-On Adhesive and apply to the back of coordinating fabrics following the package instructions.
- Loosely cut out all shapes, leaving the paper in place.
- Pre-heat iron to medium heat, no steam.
- Place loosely cut apart template(s) on the wrong side of fabrics (printed paper, smooth side, should be face up).
- Place and hold the iron on the paper for 2-3 seconds. Repeat, overlapping slightly, until entire surface is bonded.
- Allow it to cool.
- Cut or trim the piece(s) on the solid lines printed on the paper to create the desired shape. Leave paper in place until ready to fuse in place.
- Center and fuse one circle and one heart into place on each 5½” red fabric square following the package instructions.
- Pre-heat iron to medium heat, no steam.
- Peel off paper.
- Center one fabric circle, adhesive side down on top of the 5 ½” fabric square. Center one heart on top of the circle.
- Press and hold iron for 6 seconds on each section, overlapping slightly, until the pieces are bonded.
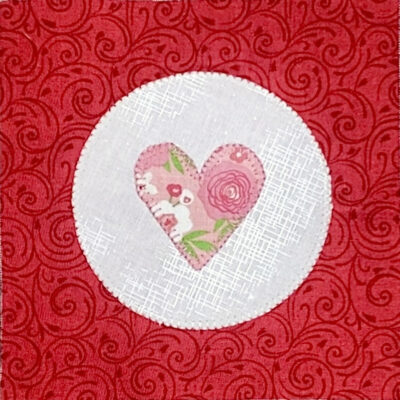
- Create 12 – 5½” (5″ finished) blocks.
- Using your favorite appliqué stitch (machine or hand) and coordinating sewing thread, sew the pieces in place. I chose to use a machine blanket stitch. Repeat this step for all 12 blocks. Set these completed blocks aside.
3. Create Diamond in a Square Foundation Blocks.
- Gather printed block foundations (13), fabric pieces, flathead pins, Add-A-Quarter Ruler (or ruler with a ¼” line), rotary cutter, cutting mat, postcard or cardstock, light pad (a window will work) and an iron.
- Place Section A1
- Place the fabric for section A1 over section A1 of the template, so the wrong side of the fabric touches the wrong side of the template (back of foundation paper) – a light pad will help with this (or hold up to window or light). Make sure your fabric is larger than the section 1 outlines and seam allowance. Pin with flathead pin or secure the fabric using a fabric glue pen.
*PRO TIP: Using a fabric glue pen for this step will hold the piece securely and help with keeping a pin out of the way for the next step.
- Place the fabric for section A1 over section A1 of the template, so the wrong side of the fabric touches the wrong side of the template (back of foundation paper) – a light pad will help with this (or hold up to window or light). Make sure your fabric is larger than the section 1 outlines and seam allowance. Pin with flathead pin or secure the fabric using a fabric glue pen.
- Trim the Excess Fabric
- Fold the paper along the line between A1 and A2.
*PRO TIP: Use a postcard or piece of cardstock to help fold a precise line. (Image Step 2 and 3) - Measure ¼” from the fold and trim the excess fabric – an Add-A-Quarter Ruler is quite helpful for this step. The Add-A-Quarter Ruler has a slight lip at the ¼” and it will line up perfectly with the postcard/cardstock. (Image Step 4)
- Fold the paper along the line between A1 and A2.
- Place Fabric A2
- With the fabric side of your template facing you, place fabric A2 on top of section A1, right side down (the right sides of both fabrics should face each other). Check on the foundation paper side of your template to make sure one straight edge of the new fabric overlaps the line that separates sections A1 and A2, and that the fabric for section 2 covers the section and seam allowances entirely. Pin in place with a flathead pin being careful not to place the pin through your sewing line (a flathead pin is necessary to keep the foundation flat for sewing). (Image Step 5)
- Stitch the First Line
- Shorten your stitch length to 1.0 – 1.5. (This will make it easier to pull the foundation paper off your block later.) Stitch along the line between sections A1 and A2, beginning and ending a few stitches beyond the line. (Image Step 6)
*PRO TIP: When your stitch line ends at a seam allowance, continue sewing through the seam allowance to the outside of the block (this will be trimmed off later).
- Shorten your stitch length to 1.0 – 1.5. (This will make it easier to pull the foundation paper off your block later.) Stitch along the line between sections A1 and A2, beginning and ending a few stitches beyond the line. (Image Step 6)
- Press
- Flip the block over so the fabric is on top. With a dry, hot iron, press the second fabric into place. You may want to use a dab of glue to hold fabric A2 in place — as you work on section A3, you don’t want this fabric flapping around. (Image Step 7)
- Trim the Excess Fabric
- Fold the paper along the line you just stitched (folding away from the fabric).
*PRO TIP: Use a postcard or piece of cardstock to help fold a precise line.
Measure ¼” from the fold and trim the excess fabric – an Add-A-Quarter Ruler is quite helpful for this step. The Add-A-Quarter Ruler has a slight lip at the ¼” and it will line up perfectly with the postcard/cardstock. (Image Step 8)
- Fold the paper along the line you just stitched (folding away from the fabric).
- Repeat steps D – G to add all pieces in order until the block is complete.
- Trim the Block
- Use a rotary cutter to trim off the foundation paper and excess fabric along the seam allowance (outer square) on the pattern.
- Leave the StitchnSew EZ Print Quilt Block sheet in place on the back of the block until sewn into your project.
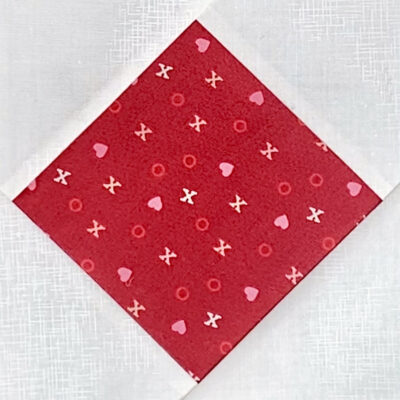
- Create 13 – 5½” (5″ finished) blocks.
- Place Section A1
 4. Create the quilt top.
- Lay out, pin, and sew the completed quilt blocks in five rows of five, alternating between appliqué blocks and foundation blocks. Press seams towards the appliqué blocks.
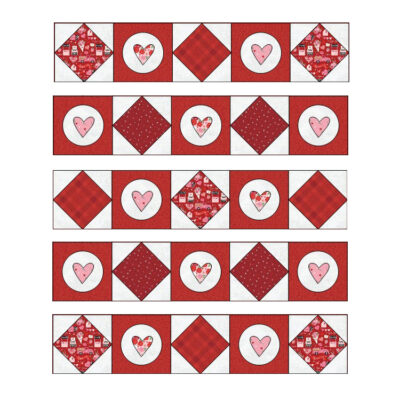
- Lay out, pin, and sew the five rows together to complete the quilt top. Press seams towards the added rows.
- Remove StitchnSew EZ Print Quilt Block Sheets.
- Center and fuse the 26” x 26” piece of HeatnBond Fusible Fleece to the wrong side of the 25 ½” x 25½” quilt top, following the package instructions.
- Pre-heat iron to a medium setting, no steam.
- Place the rough side of the Fusible Fleece on the wrong side of the quilt top unit.
- Cover with a lightweight, dry pressing cloth.
- Press and hold iron with medium pressure for 10-15 seconds. Repeat by lifting iron to new area, slightly overlapping previous area until the entire surface is bonded.
- Allow it to cool.
- Apply the backing fabric to the back of the quilt top unit using SpraynBond Basting Adhesive Fabric Spray
- Shake well. (Ensure that your work surface and project are protected.)
- Hold can upright, 12 inches from fusible fleece. Press nozzle and apply adhesive from the center outward in a sweeping motion.
- Wait 30 seconds, then place the quilt back on the fusible fleece and smooth. Reposition as needed.
- Quilt as desired.
- Add binding.
- If hanging, fold each 2” piece of twill tape/ribbon in half and baste into place on the top edge of the quilt BEFORE adding the binding. Match the raw edges of the twill tape/ribbon with the raw edge of the quilt. The binding will hold the tabs in place. After binding has been added, tack the tabs upward for hanging.
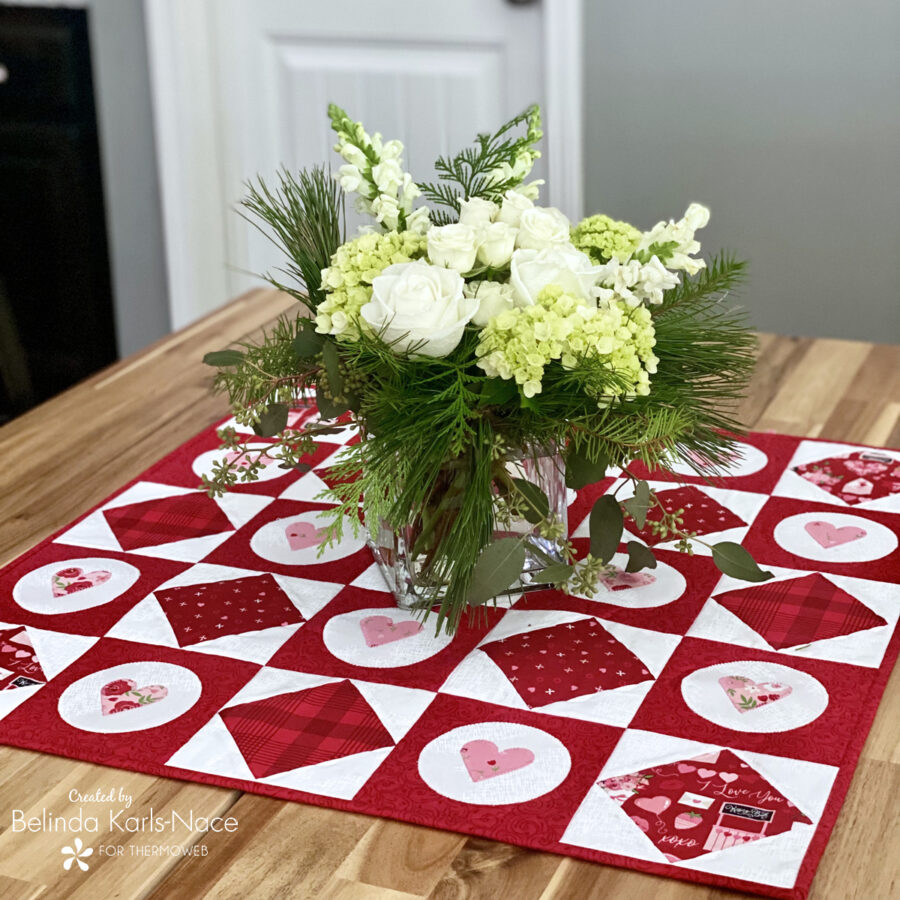
 Your Love on Point small quilt is complete. Wasn’t that fun and easy?! Place on a hanger to display or use as a table topper.
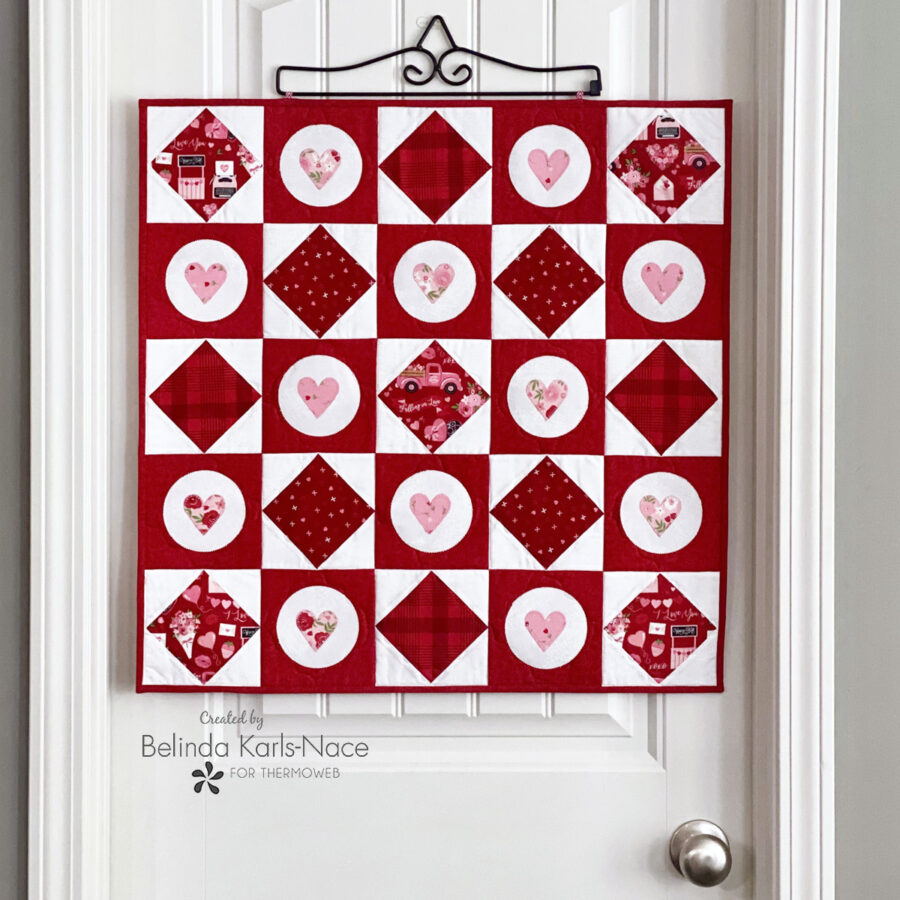
 Thank you for joining me today for my Therm O Web blog tutorial. I hope this post inspires you to create a Love on Point quilt, using scrap fabrics and materials you have on hand. To see more of my projects and patterns, stop by my blog, website, and/or Instagram – I would love to visit with you and see what you create!