


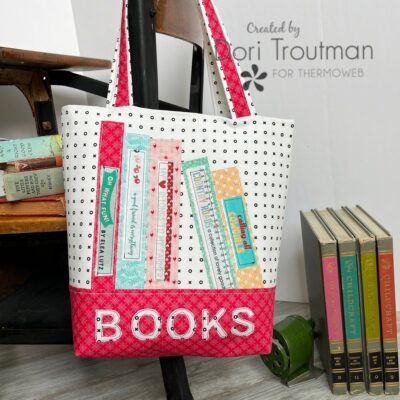
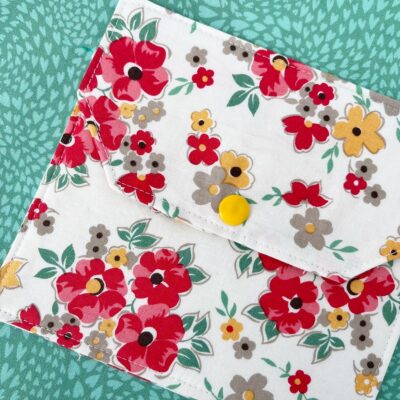
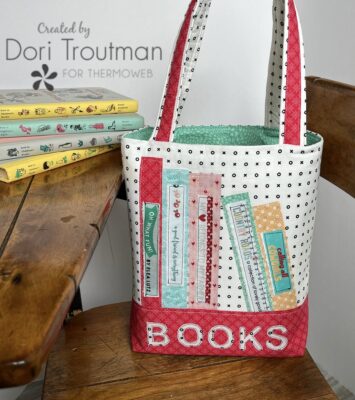
Hello friends! I can’t believe it is August and back to school time already! Summer is my favorite season and I always get sad when I see it fading away! But today I’ve got a project for you to make that will put a smile on someone’s face! I have little grand-girl who isn’t even two years old yet and she loves going to the library. So I thought I would make her a Library Tote that she (well, technically her Momma!) can use for her library books! It was such a fun, easy make and you can make one too!
Library Tote Supplies
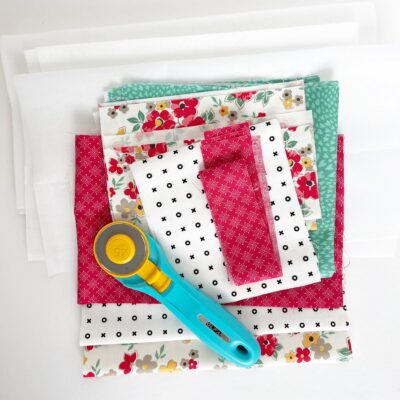
- Fabric for outer tote, main
- Fabric for outer tote, contrast
- Fabric for inner tote
- Fabric for pocket
- Fabric scraps for letters
- Fabric scraps and book spines (selvedge sayings are awesome for this)
- Fabric for handle accents
- Heat n Bond Fusible Fleece
- Heat n Bond Medium Weight Fusible Interfacing
- Heat n Bond FeatherLite EZ-Print Iron-On Adhesive Sheet
- Heat n Bond Ultra Hold Iron-On Tape

Step By Step Instructions
Step One: Cut fabric and interfacing to following measurements:
Fabric:
- 2) 14″ x 9.5″ for outer main
- 2) 14″ x 6″ for outer contrast
- 2) 14″ x 14.5″ for lining
- 2) 5″ x 22″ for handle
- 2) 1.5″ x 22″ for handle accent
- 1) 7′ X 10″ for pocket
- 1) 7″ x 7″ for pocket flap
Fusible Fleece:
- 2) 13″ x 13.5″ for outer tote
- 2) 2-3/8″ x 21″ for handle
- 1) 6″ x 4.5″ for pocket
- 1) 6″ x 3″ for pocket flap
Mid Weight Interfacing:
- 2) 13″ x 13.5″ for lining
- 2) 3/4″ x 21″ for handle accent
Ultra Hold Iron-On Tape
- 2) 5/8″ x 21″ for handle accent
Step Two: The first thing we are going to do is probably my most favorite part of the tote! We are going to build us a little book shelf! And here is how I did it:
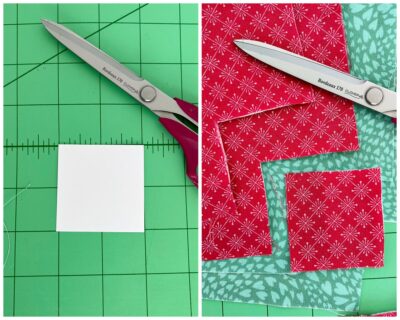
- Using a water erasable fabric pen mark a vertical line 3″ from each side of the outer 14″ x 9.5″ piece of fabric. Those 3 inches will be lost in the side of the tote and we want our books to be lined up on the front.
- It is up to you to determine how large you want each of your book spines to be. I built mine with different sizes. Basically what I did was start out with a scrap of fabric that looked right and just went from there. This part is all up to you to use your imagination. I love to save selvedge pieces that have fun words on them and I really enjoyed using them for this project.
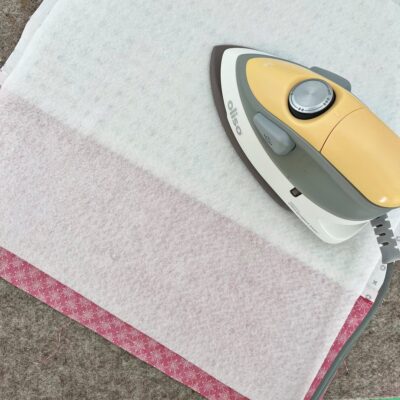
- Once I determined all my books and their sizes, I used a piece of Heat n Bond Ultra Hold tape and ironed it to the back of the words, then adhered to the book spine. I then sewed a simple straight stitch around the edge. (Don’t forget to remove the paper backing first!)
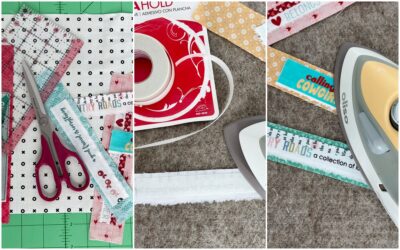
- Take a sheet of the EZ Print Iron-On adhesive, and lay your book binding fabric piece wrong side down onto the adhesive backing. Do this with all of them and then iron them to the adhesive sheet. (Place a pressing sheet on top to iron on, to keep any adhesive from getting on your iron.)
- Cut your book spines out, remove the paper backing and iron them to the desired spot on the outer fabric. I placed mine all the way to the bottom edge of the fabric. Sew them in place the same way you did with the words on the spines. I switched to white thread for this.
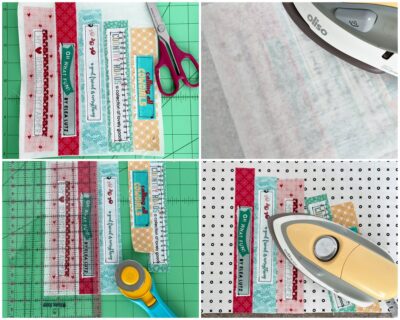
Step Three: Now we going to appliqué your letters to the lower contrasting piece of fabric. Here’s how:
- I have created a PDF file for you to use. You can access it by clicking here: BOOKS. This is the perfect letter size and is in mirror image. This is how we want it!!
- Print to the Heat n Bond EZ Print sheet. TIP: the letters are in gray to conserve ink!
- Iron fabric scrap to the adhesive side of the letters, making sure your fabric is wrong side to adhesive. Use a pressing sheet if necessary.
- Cut around each letter and remove the paper backing.
- Using your erasable fabric marking pen, make four lines on your contrasting fabric as follows: line one: 1″ from top of fabric; line two: 2.5″ from bottom of fabric; line three and line four: 3″ from both sides of fabric. This will create a “box” where you will place your word.
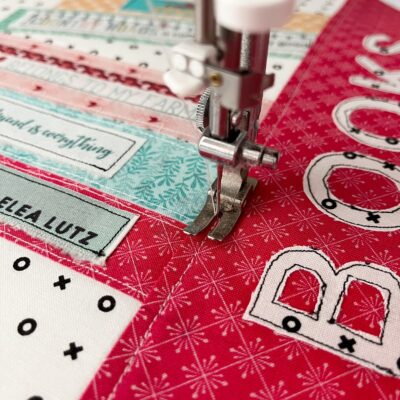
- Iron each letter to the 14″ x 6″ contrasting fabric. Sew around the letters. You can do a fancy stitch or just a simple straight stitch like I did.

So, lets take a little break here! You’ve done a great job!
I’d like to give credit to a tutorial online for the actual tote part of this bag! I have followed her tutorial from this point on (she did not have the books or the lettering); however I have changed up a few things. But I feel it is important to give credit!
So lets proceed with our Library Tote Bag!
Step Four: Sew the front outer main fabric (your book shelf piece!) to outer contrasting piece (your BOOKS piece), using 1/2″ seam allowance. Repeat on the back outer pieces. Press the seam flat.
Step Five: Iron fusible fleece to wrong side of both front and back outer fabric sections.
Step Six: Topstitch on lower seam edge that joins the main and contrasting fabrics. Repeat on second fabric piece.
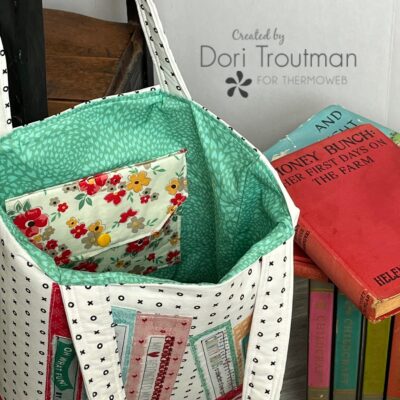
Step Seven: Now it’s time to make the interior pocket and flap.
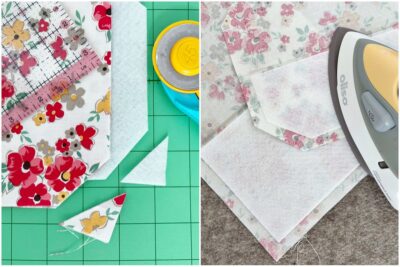
- Fold the flap in half lengthwise and mark the corners (NOT on the fold) 1.5″ and cut the corners at a diagonal from those marks. Do the same with the pocket flap fusible fleece (you do not need to fold it in half. Just cut the lower corners.).
- Fuse the fleece to both the pocket flap and the main pocket piece.
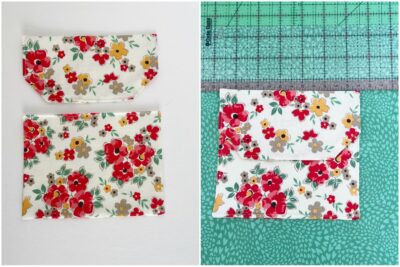
- Fold the flap in half, right sides together and sew, leaving an opening in the bottom of the flap for turning. Do the same with the pocket.
- Clip the corners, turn right sides out and press. Topstitch around the three sides of the flap (leaving the top with no topstitch). Topstitch along the top edge of the pocket.
- Attach the pocket to the right side of the lining fabric. Measure 4″ from top, and both sides and carefully pin your pocket to that spot. Pin and topstitch the pocket in place.
- Place the flap 3″ below the lining edge right above the pocket. Pin and topstitch along the top of the flap. Attach a snap if desired.
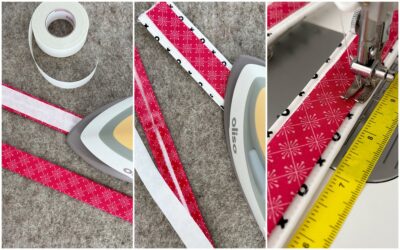
Step Eight: Making the handles
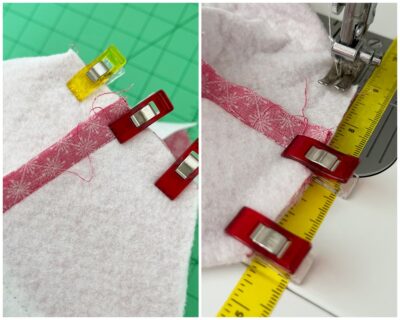
- Iron on fusible fleece to the wrong side of main handles and midweight interfacing to the wrong side of the handle accents.
- Fold the main handle edges towards the center of the fleece and iron in place. Then fold in half and iron again. Use clips to hold it in place. Topstitch 1/8″ along both long edges of the handles.
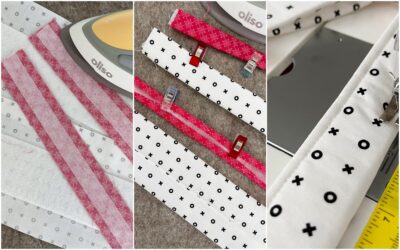
- Iron the edges of the handle accents towards the center. Then take the strip of Heat n Bond tape and iron that on the wrong side of the accent. Remove the paper strip and iron the accent piece to the main handle piece. Top stitch 1/8″ on both long edges.
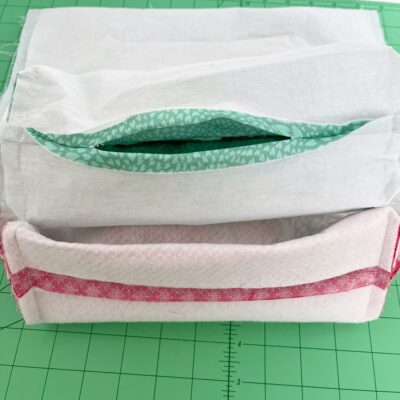
Step Nine: Tote Assembly
- Mark the top center of your outer piece (both front and back) and measure 2.5″ away on both sides of center. Attach the handle with clips to those marks and baste in place. Repeat on the back outer piece.
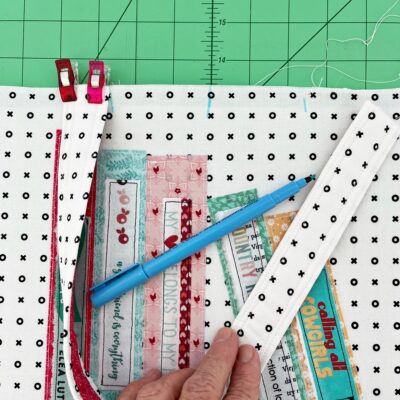
- Cut a piece of cardstock to a 2″ x 2″ square. Use this as your template to cut all four lower corners of your front and back tote pieces. This is what will create your boxy corners when sewn together.
- Lay a lining piece on top of a main outer piece and sew the top edges together with a 1/2″ seam allowance. (Your handles will be sandwiched in between.)
- Lay the outer and lining open and press that seam. Sew an understitch on that top edge of the lining side of the tote, securing it so that it will lay flat after sewn together.
- Lay both outer/lining pieces right sides together. Carefully match all seams and pin in place. I used a lot of pins so that nothing would slip. Sew 1/2″ all the way around, leaving a 4″ opening at the bottom of the lining pieces. DO NOT SEW THE CUT OUT CORNERS!!
Step Ten: Box the corners.
- Open up each corner (right sides together), and match the seams. Use a clip to hold that edge in place.
- Sew 1/2″ inch along that edge. Repeat on all four corners.
- Turn the bag right side out by pushing it through the opening in the lining.
- Reach your hand inside and push the corners out.
- Sew the opening closed in the bottom of the lining. Iron your tote bag so the boxed corners are perfect!

You are FINISHED with the cutest Library Tote Bag ever! I hope you love it!
Happy “Back to School Sewing” my friends!