


 Hey everyone! Gail here from Sunflower Seams Pattern Co. Today I am sharing with you a simple, but SUPER cute rainbow applique tutorial.
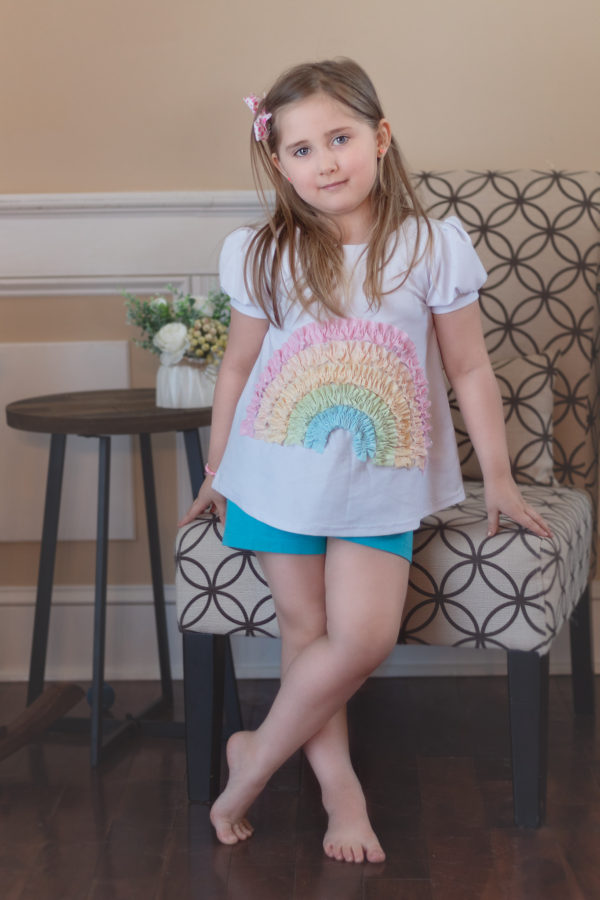
Rainbows are very special to me as they are a symbol for my rainbow baby, so I often use them when I am making clothing for my children.
I hope you’ll enjoy making this as much as I did!
Rainbow T-Shirt Applique
Supplies Needed:
- A plain t-shirt or dress bodice, either store-bought or handmade.
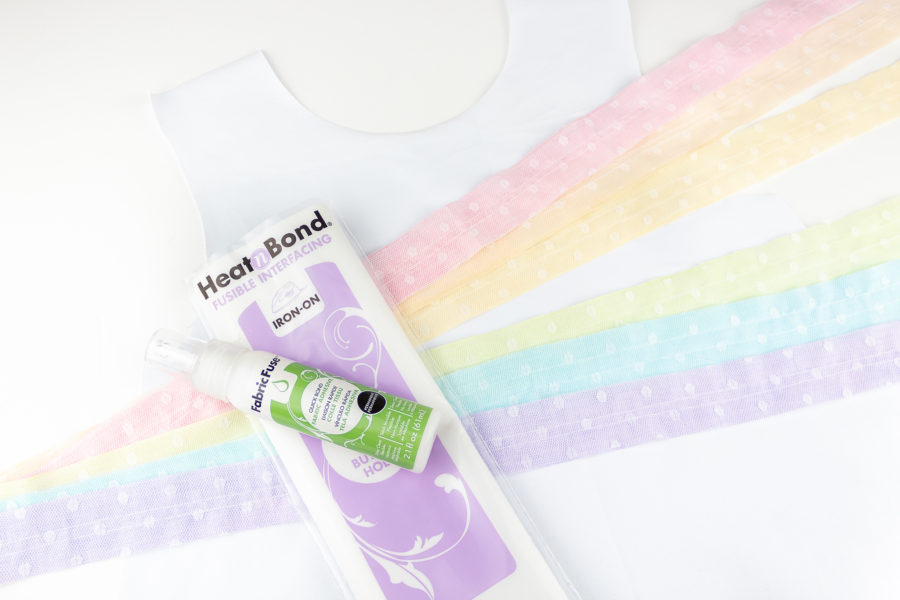
- Scraps of fabric in rainbow colors
- HeatnBond Fusible Interfacing (medium weight)
- Fabric Fuse Quick Bond Fabric Adhesive
- An iron
Rainbow Shirt Instructions
Please read through the instructions completely before sewing.
Step 1
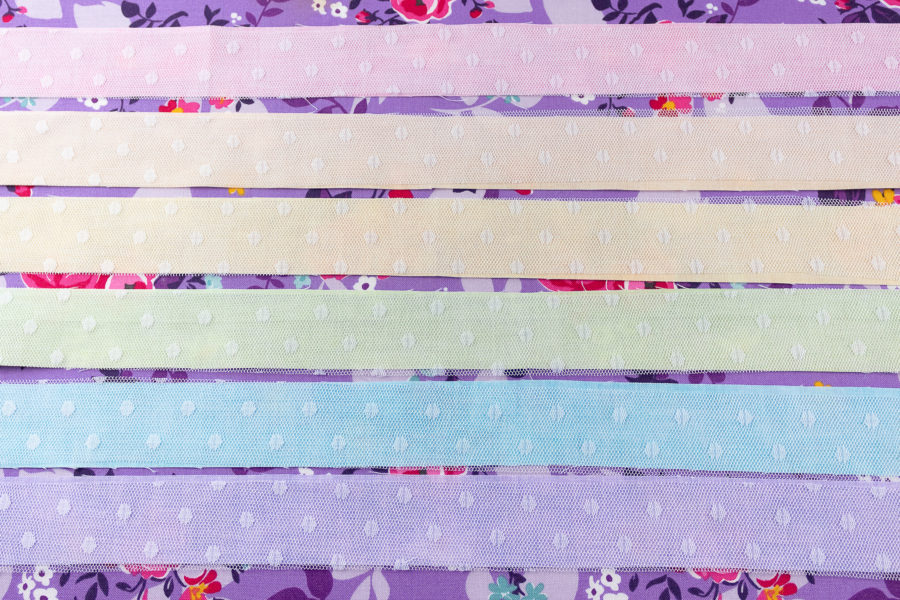
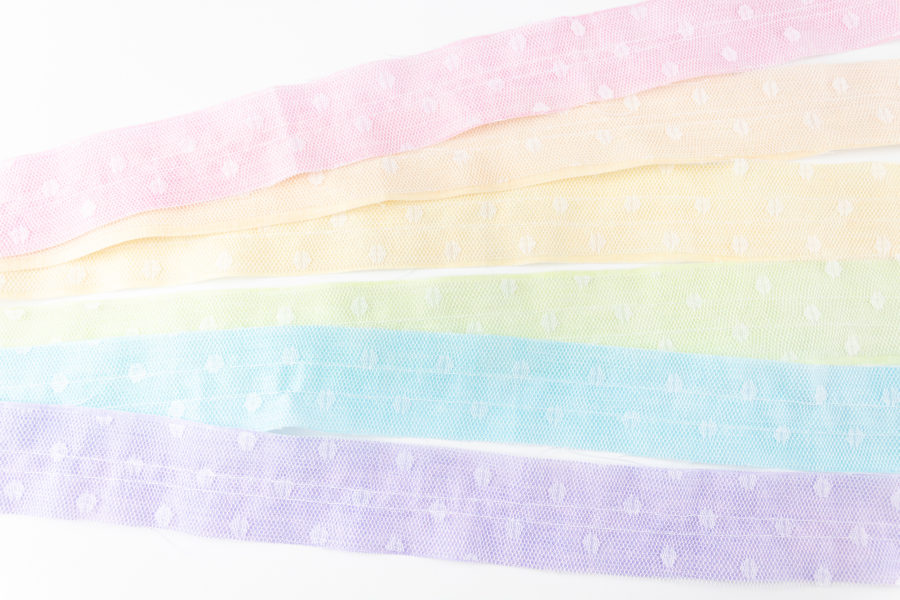
The very first thing you need to do is to cut your fabric into strips. I cut 6 1.25″ strips in varying lengths. My longest strip is pink at 30″ long. The outer rainbow strip needs to be the longest since it will cover the most area.
We will be gathering the strips so to determine length, you can measure how big you want your finished rainbow and multiply that by 2 (or more, depending on how gathered you want your strips to be).
Feel free to add some fun lace or trims to your rainbow strips as well! I added a sheer white lace overlay to my rainbow strips for a fun and feminine look.
Step 2
This step is optional, however, I cut strips of HeatnBond Medium Weight Fusible Interfacing and adhered it to the back of my rainbow strips. Because I am using scraps of woven fabric, the edges will fray if not finished. To stop my edges from fraying, and to give my ruffles some structure, I chose to add interfacing.
Step 3
Sew two rows of gathering stitches down the center of your rainbow strips, approximately 1/4″ (6mm) apart. I like to use two rows of gathering stitches because it helps make your gathers even.
Step 4
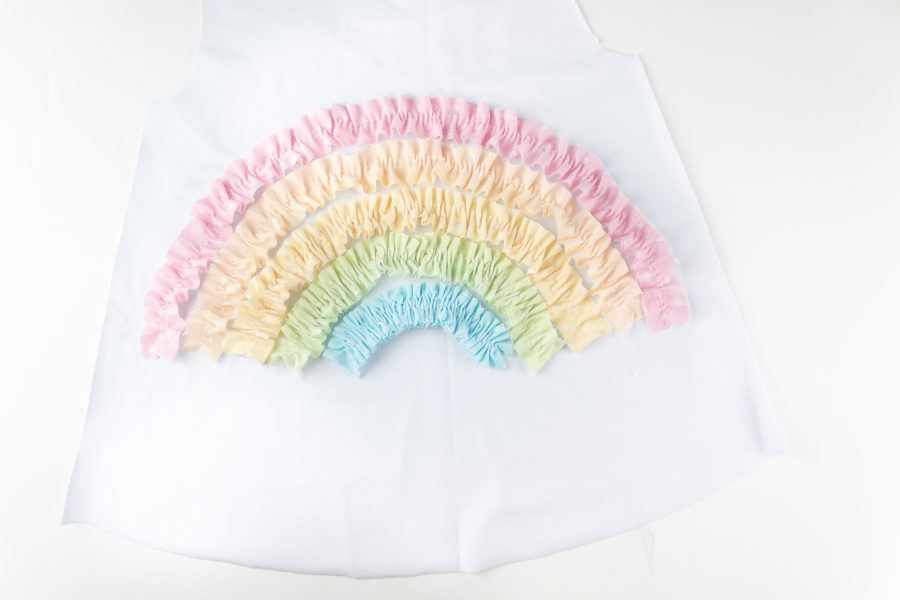
Gather your rainbow strips to your preferred length. This will depend on how big you’d like your rainbow. I roughly gathered my strips in half. Lie the rainbow strips on the garment to get an idea of placement before tying off your gathers this way you can determine whether a strip needs more or less gathering. Adjust as necessary.
As you can see, I started out with 6 strips and ended up with 5 on my shirt. Because of the width of my shirt, I couldn’t fit all 6 strips without the rainbow being too big for my taste. This is a personal preference.
Step 5
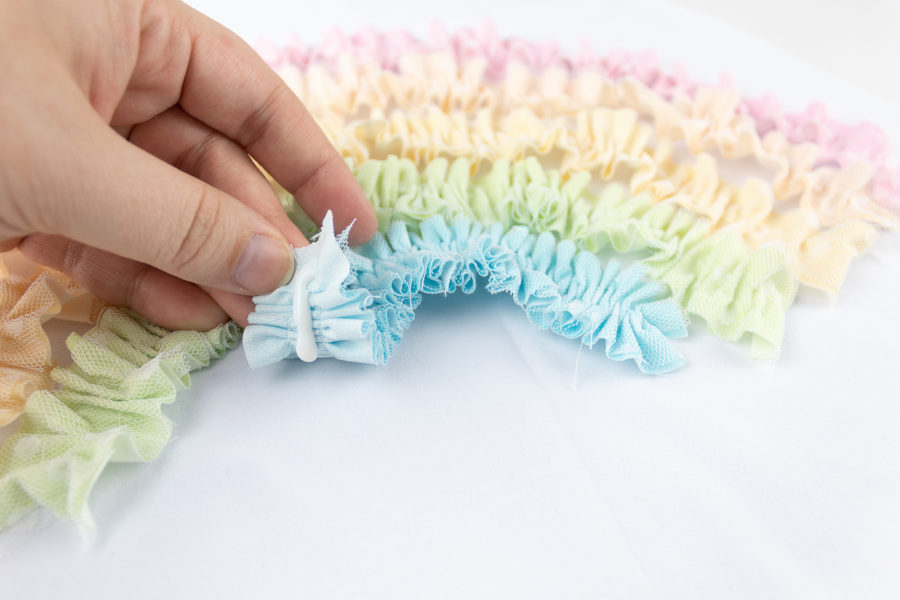
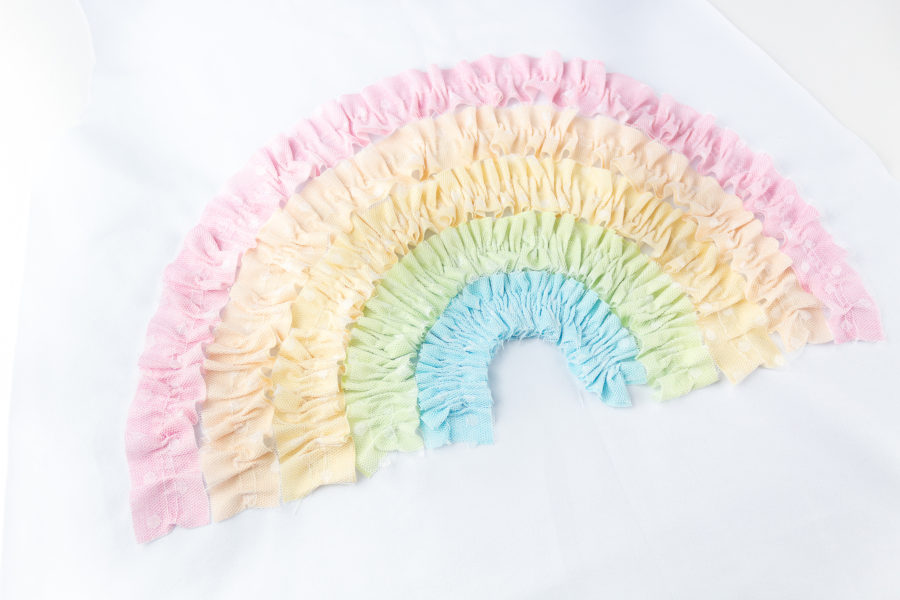
With your rainbow, all laid out on the garment, start adding the FabricFuse to the underside of the rainbow in sections and press down firmly. Doing this in sections with the rainbow already laid out exactly as you want helps to eliminate accidentally placing the ruffle where you do not want it. I found it easiest to start with the innermost strip and work outwards.
Fabric
Fuse is permanent and washable, while also maintaining flexibility, making it the perfect product for easy no-sew embellishment!
You are done! That was easy, wasn’t it? And now you have the CUTEST rainbow embellished garment whether it be just because, to celebrate your rainbow baby, or even for the upcoming St Patrick’s Day holiday!
Happy Sewing, xoxo Gail
HeatnBond
HeatnBond always plays a key role in our fabric projects. From our HeatnBond Fusible Adhesive to our printable EZ Print Sheets to our Interfacing and Fleece! Enter to win a collection of our HeatnBond Lite plus tape, HeatnBond Fusible Fleece, HeatnBond EZ Print Sheets, and our NEW EZ Tee Stabilizer in white! If you’re not familiar with it…it’s not only perfect for today’s upcycle project but also for all your t-shirt quilting! Transform your T-shirts into easy-to-sew quilts, pillows, and more! Lightweight, 100% cotton woven fusible interfacing adds just enough stability to knit T-shirts, sweatshirts, and jerseys to prevent curling and stretching without adding bulk. EZ -TEE keeps quilts as comfy as the shirts used to make them. This prize is worth $45!
https://kingsumo.com/js/embed.js