


 Hello everyone! I have an absolutely adorable slimline card to share with you featuring the Unity Stamp Co sentiment Adhesive Transfer Sheets. (which are back in stock!)
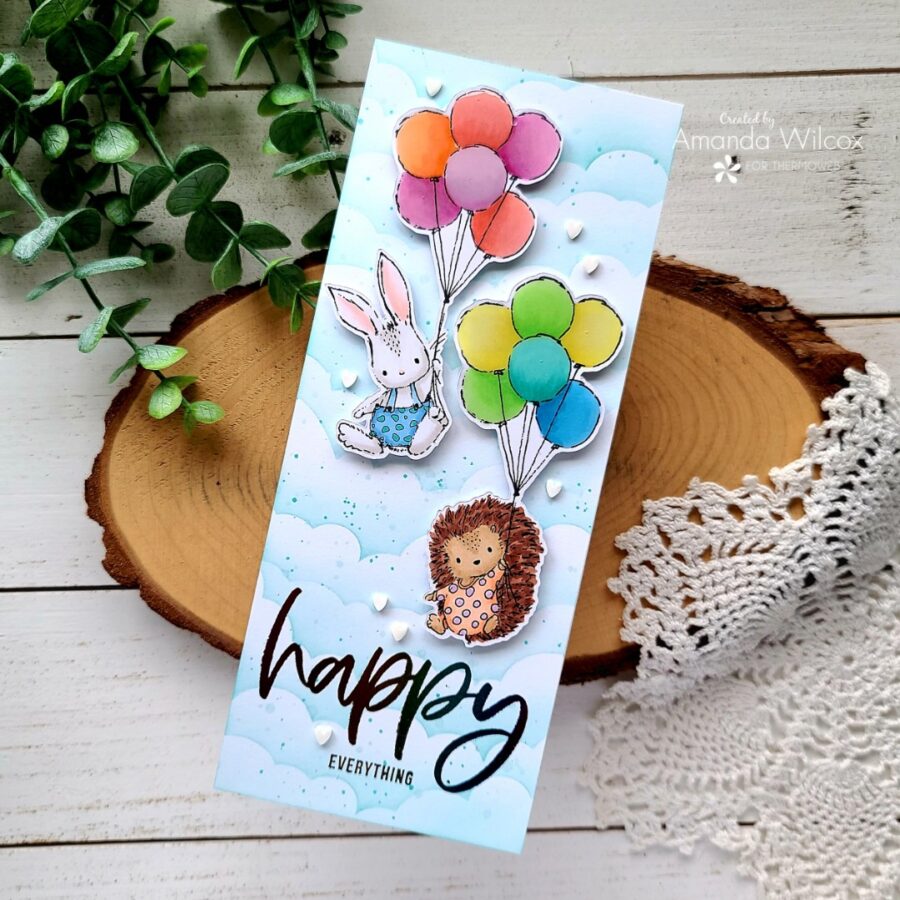
I just love the design of these sheets with the large brush sentiments pairing with the sans serif smaller ones. It’s just perfect for so many designs and occasions. This card is suitable for Birthdays, New Baby, New Job, Retirement, Promotions, getting out of the hospital…and so many more things to celebrate!
Happy Everything Card with Unity
Products used:
Unity Stamp Co Adhesive Transfer Sheets
Deco Foil – Mystic Rainbow
UltraBond Liquid Glue Pen
3D Foam squares
Craft & Carrier sheets
Unity Stamp Co Hoppy and Hedgie stamps
Trinity Stamps Puffy Cloud Layers stencil
Twiddler’s Nook Sweetheart embellishments
Blending brush
Lawn Fawn ink – mermaid and peacock
Copic markers
Glossy accents
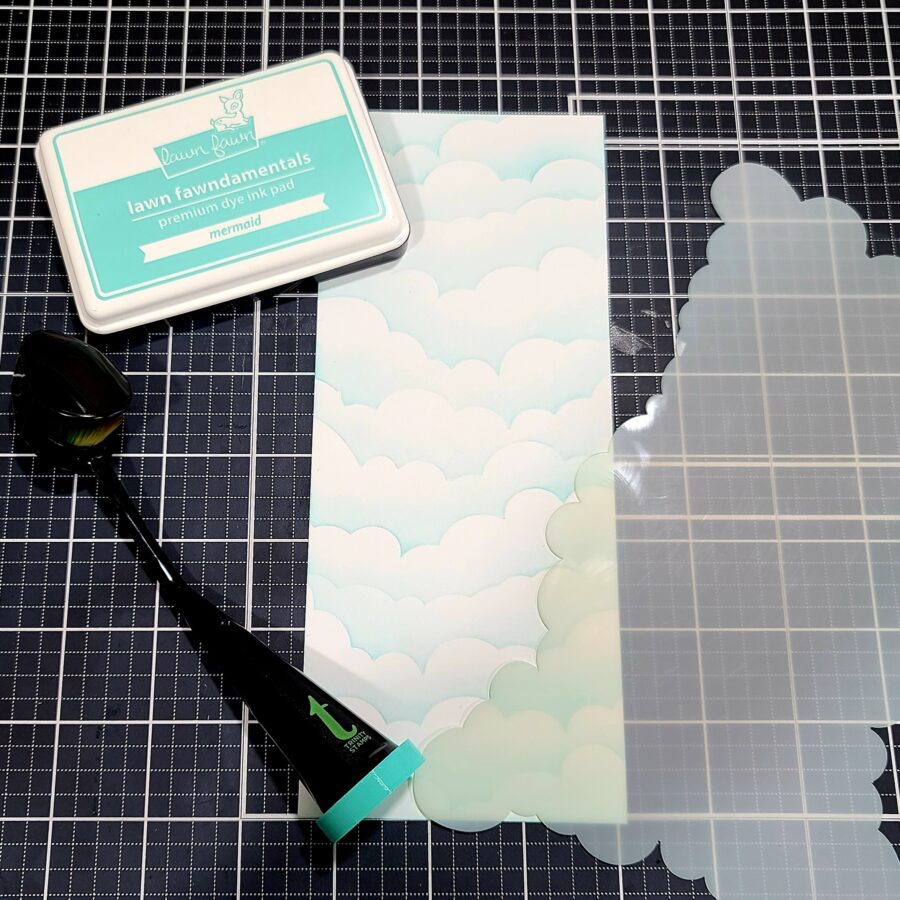
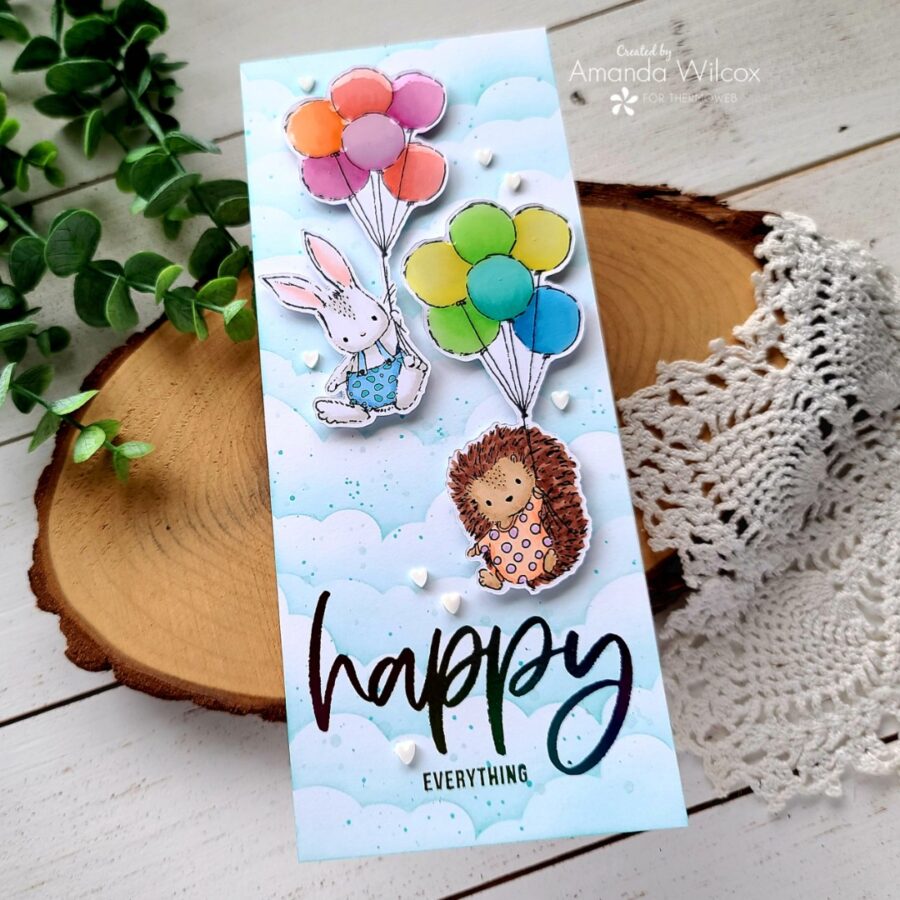
I started by taking a slimline panel and inking up the puffy cloud layers stencil down the length of it. Then I splattered it with watered-down ink of the same color but I wanted more contrast so I added some peacock splatters to it too. I set it aside to dry while I stamped and colored my Hoppy and Hedgie images with Copic markers.
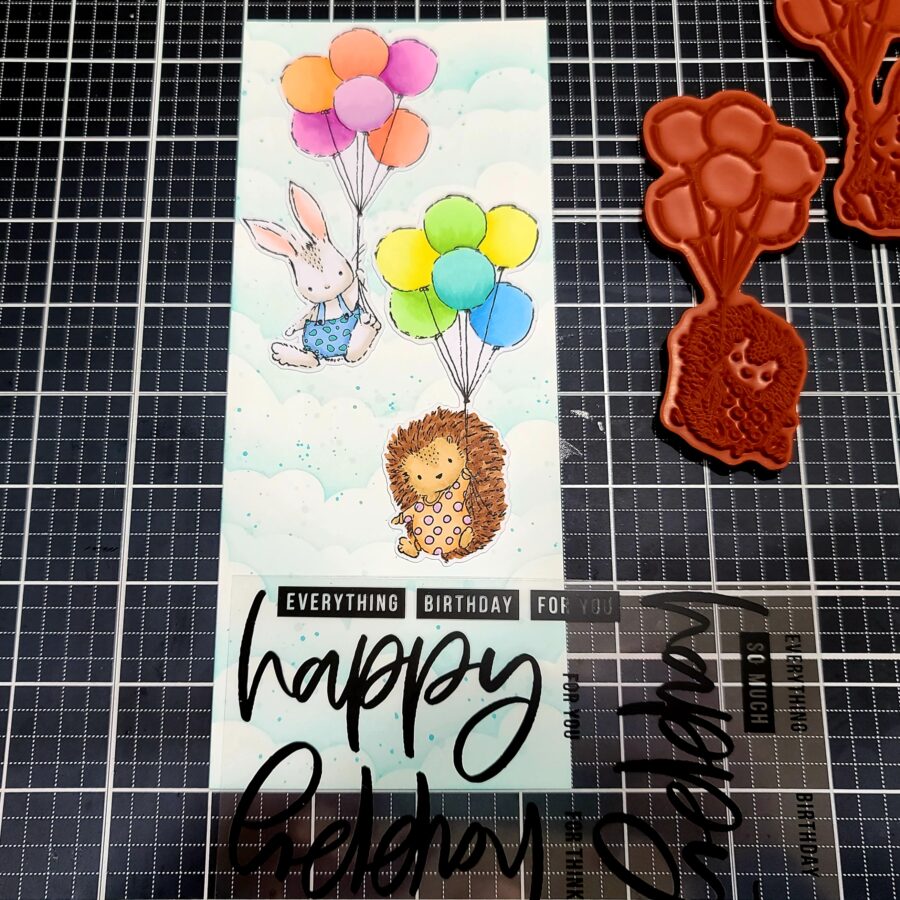
I carefully cut the images out and then used them as a guide while I decided final placement for my adhesive transfer sentiments. At first, I wanted the sentiment in the middle but these images are a bit too big so I waffled between top and bottom but settled on putting it at the bottom of the card design. I felt like this made the critters look like they were floating even higher in the sky and really liked that idea.
So here are the simple steps to using the adhesive transfers on your card:
- Cut the design out of the adhesive transfer sheet.
- Remove the backing liner. (This is clear.)
- Place the adhesive transfer on your cardstock where you want it to be and place it inside a craft & carrier transfer sheet.
- Run through your laminator or die-cut machine.
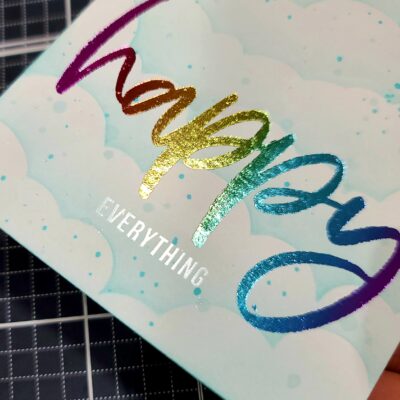
- Remove top liner. (This will remove the black image you have been looking at and leave you with a clear adhesive on your paper. See the “everything” in the photo above vs the already foiled “happy.”)
- Add foil over the adhesive, place in craft & carrier sheet and run through a laminator or die-cut machine one more time.
- Remove foil transfer sheet and VOILA! You did it!
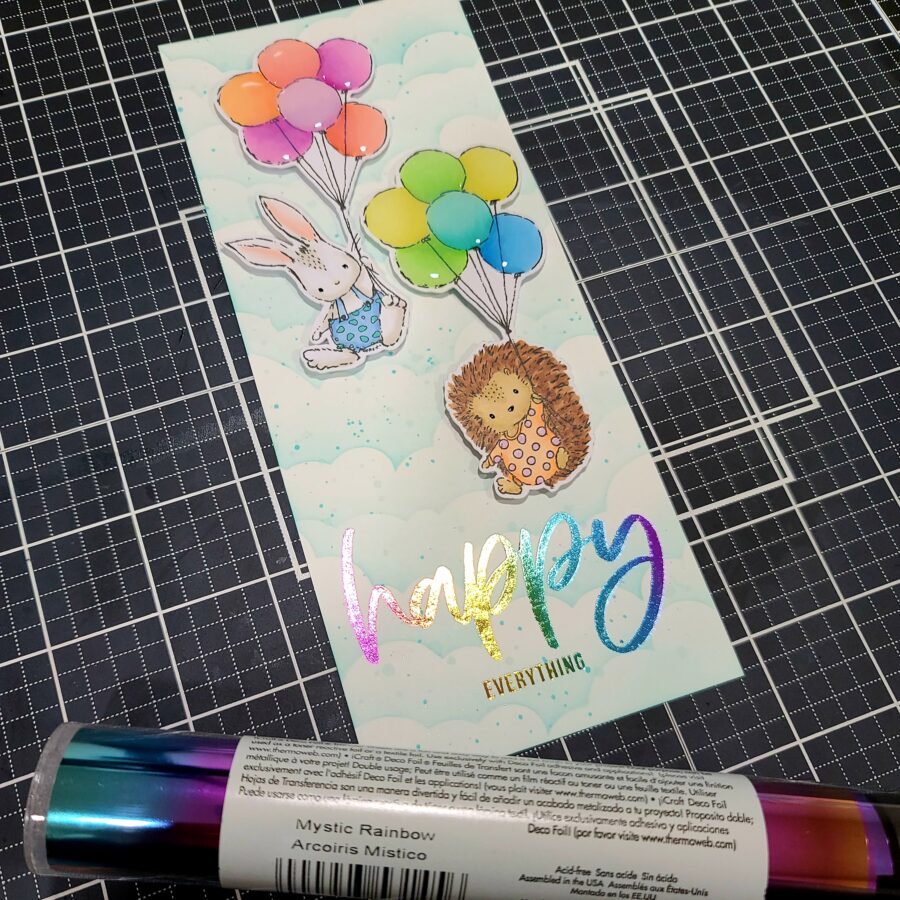
I foiled both sentiments with mystic rainbow deco foil to play on the rainbow colors I chose for the balloons above. Isn’t that a fun combo? With my sentiments foiled, I added my images with foam squares and moved on to finishing touches.
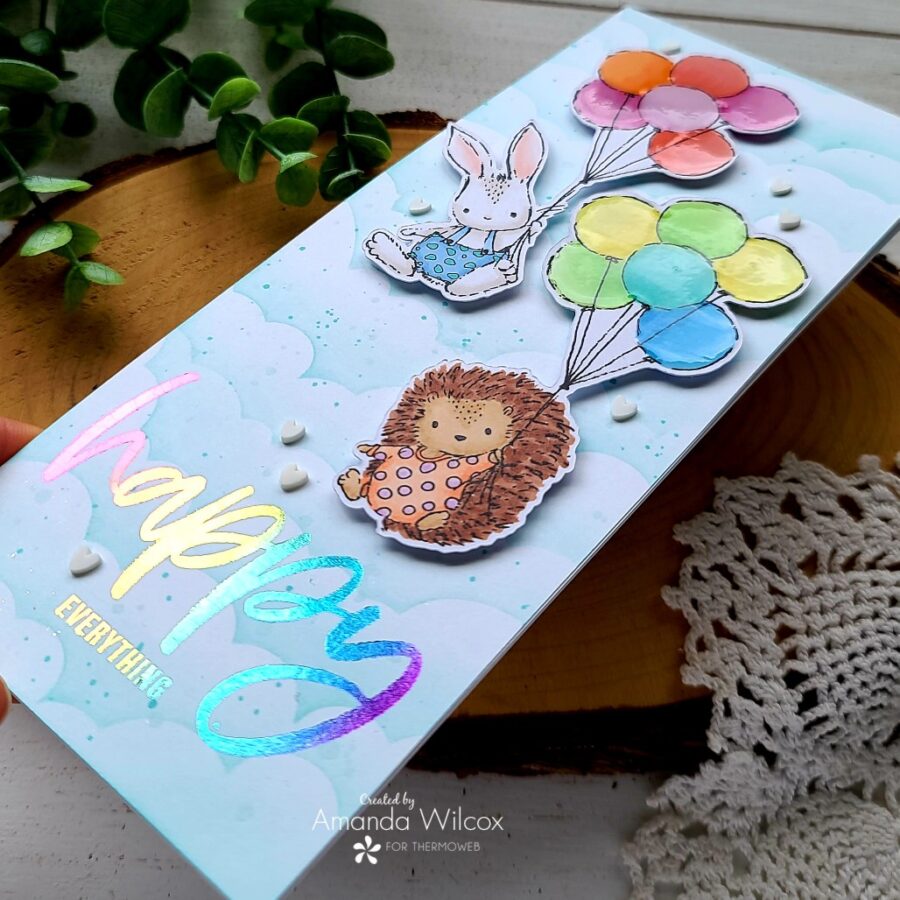
I added a scattering of white clay hearts from Twiddler’s Nook sweethearts embellishment mix across the whole design. Then I finished things off with a black glaze pen to the critter’s eyes and glossy accents on all of the balloons.
This card is just too cute for words! The fun foiled sentiments sure do make the whole thing that much more perfect! Rainbow and more rainbow is always a good thing!
I appreciate you sharing your time with me. Have a fabulous day!