


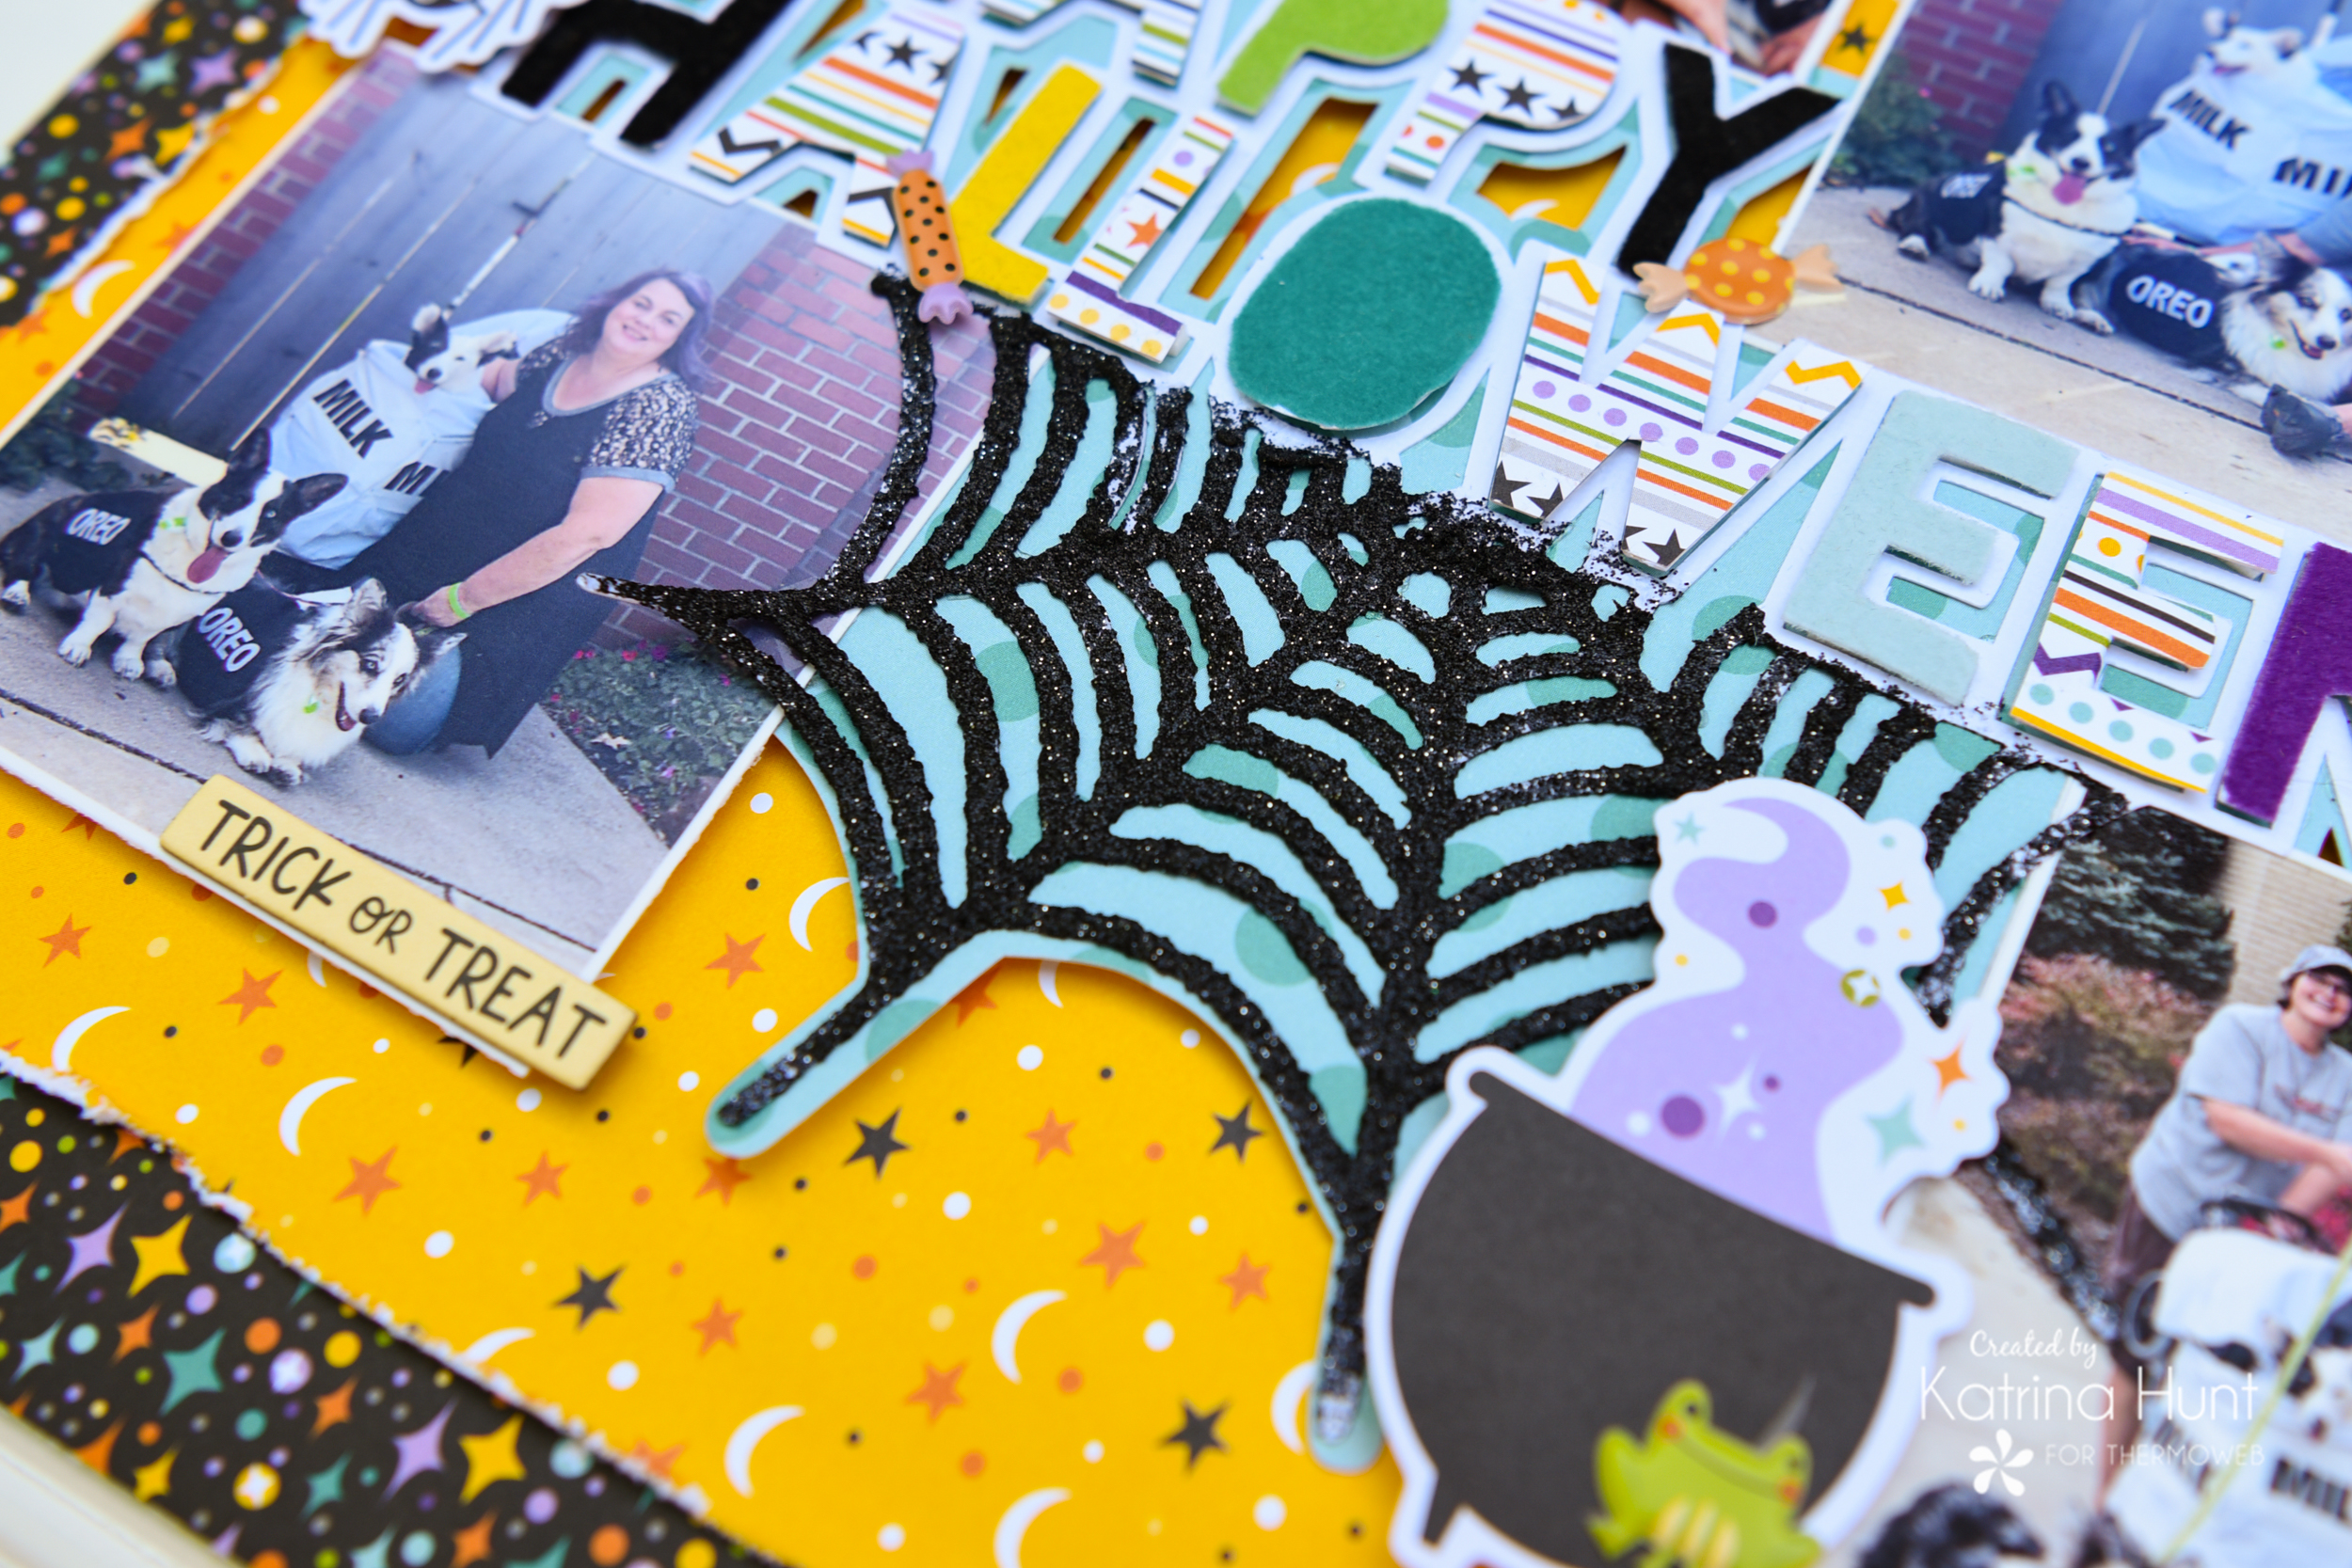
 Hey hi! It’s Katrina from Paper, Scissors, Glue and Hybrid Too here on the blog today! I am sharing a spooky layout with some fun Deco Foil Flock alpha accents and a Glitz Glitter Gel spiderweb. The pictures on this layout are from 2017 and are pretty special because these furry ones are no longer here. And if you cannot tell -Jetson and Sheldon were Oreos and Ella was a carton of milk in her stroller!
Corgi Happy Halloween Layout with Deco Foil Flock
Therm O Web Supplies Used
Deco Foil Flock Transfer Sheets-Green Envy
Deco Foil Flock Transfer Sheets-Teal Waters
Memory Runner XL
Memory Runner XL Refill
Deco Foil Flock Transfer Sheets-Black Velvet
Deco Foil Flock Transfer Sheets-Sunshine Yellow
iCraft Easy Cut Adhesive Sheets
Deco Foil Flock Transfer Sheets-Purple Punch
Deco Foil Flock Transfer Sheets-Orange Glow
NEW 3D FOAM TAPE ROLL 1/16
NEW 3D FOAM TAPE ROLL 1/8
Gina K Designs-Glitz Glitter Gel-Black
Ultra Bond Liquid Adhesive
Other Supplies Used
Bella Blvd-Spell On You Collection
White Cardstock
Silhouette Cameo
Cut To You Cut File-Happy Halloween
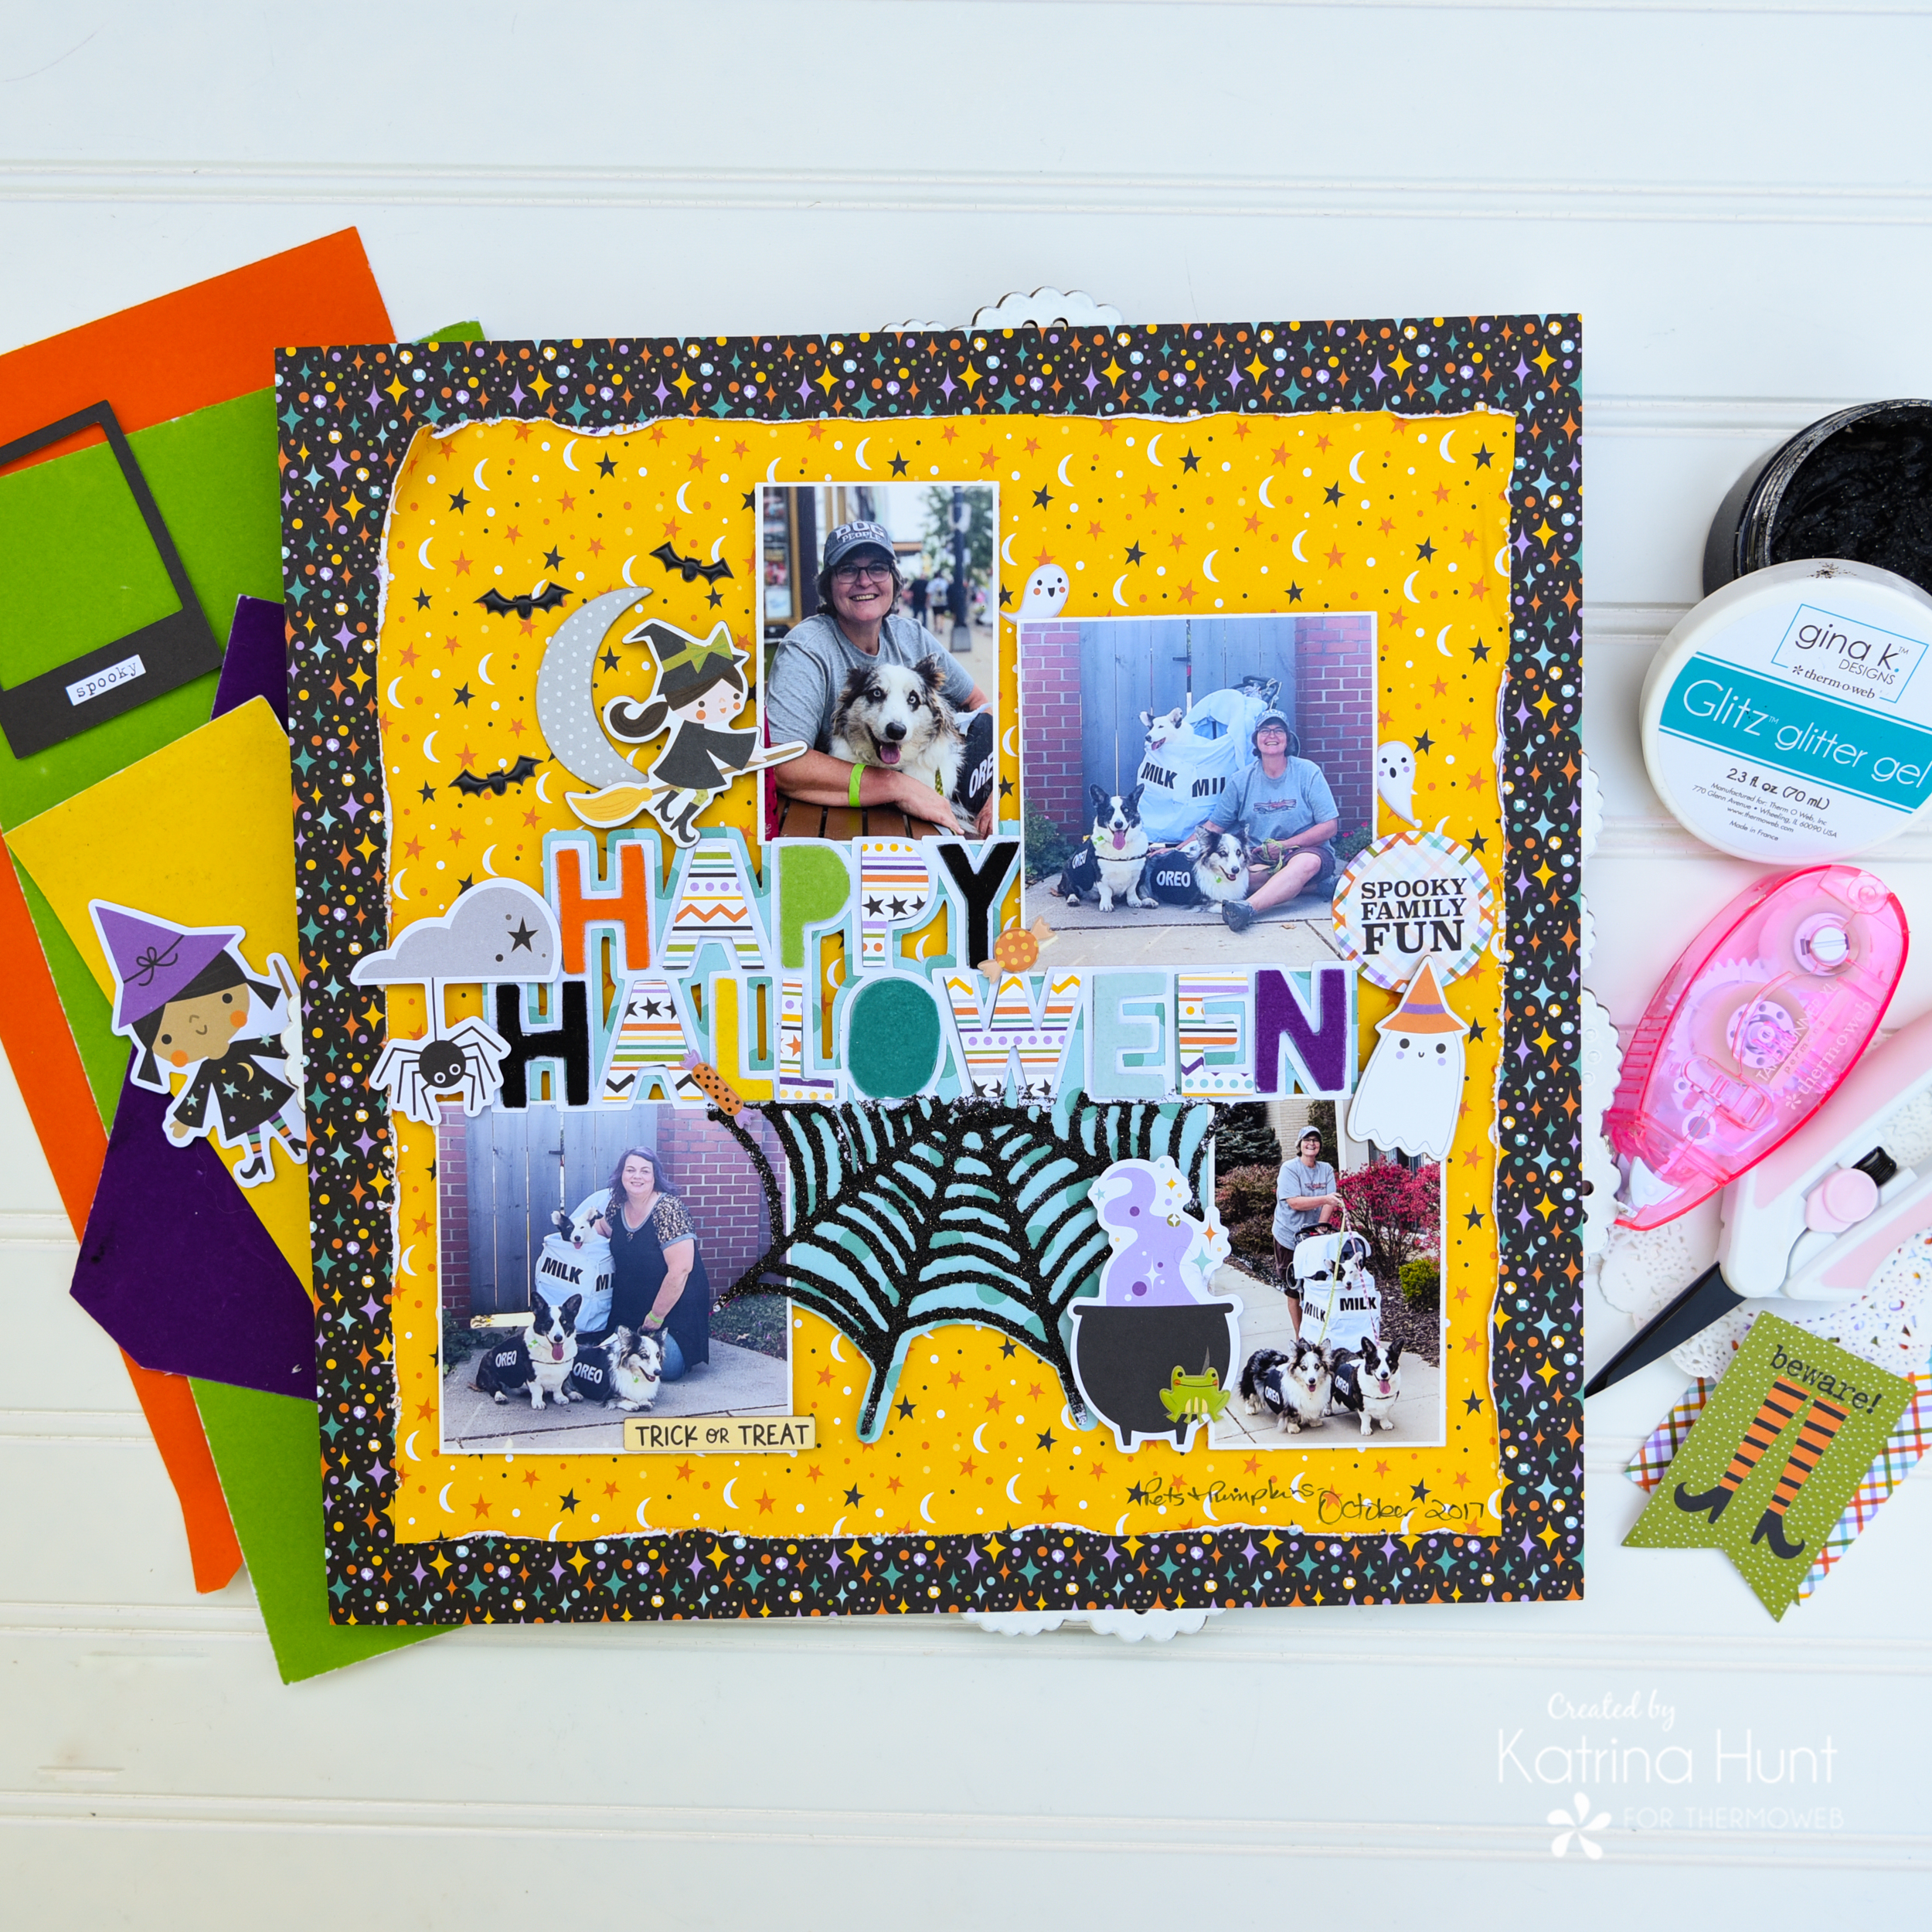
Happy Halloween Layout Details
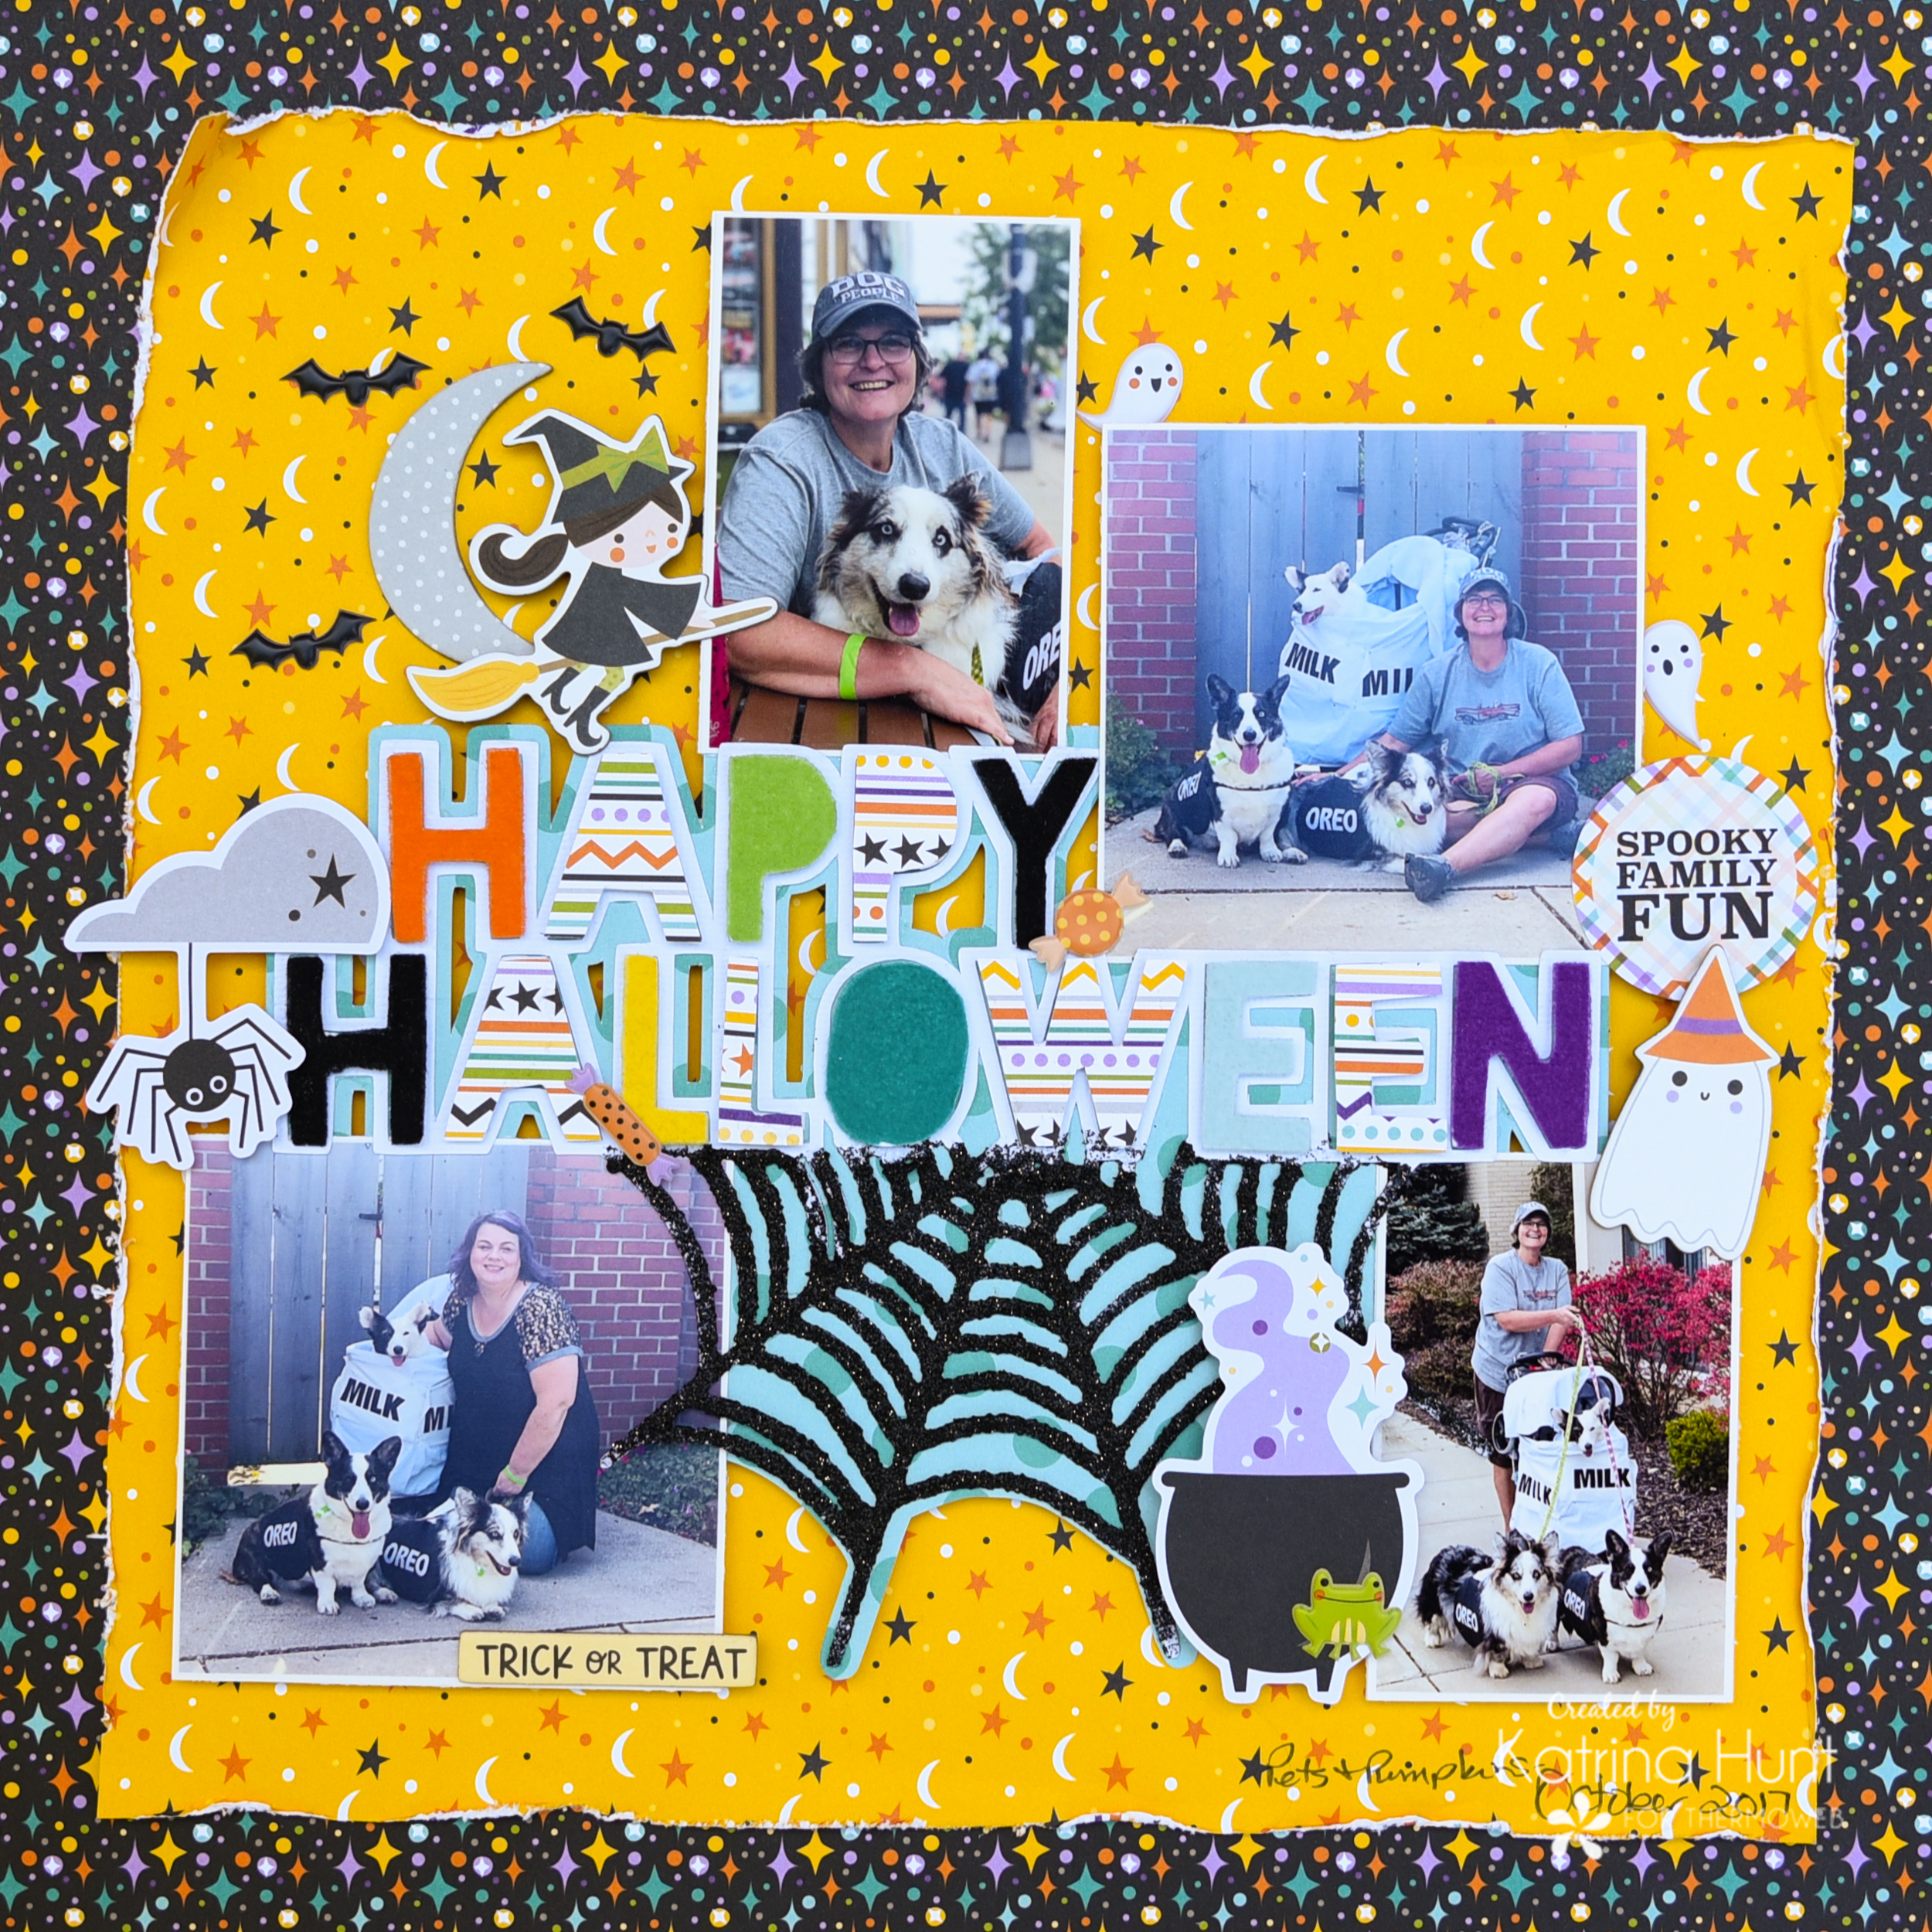
Do you want to hear something crazy? I only used three pieces of pattern paper and one piece of white cardstock for this layout! With the focus being on the cut file title, this was quick to put together. And you can do this with ANY cut file!
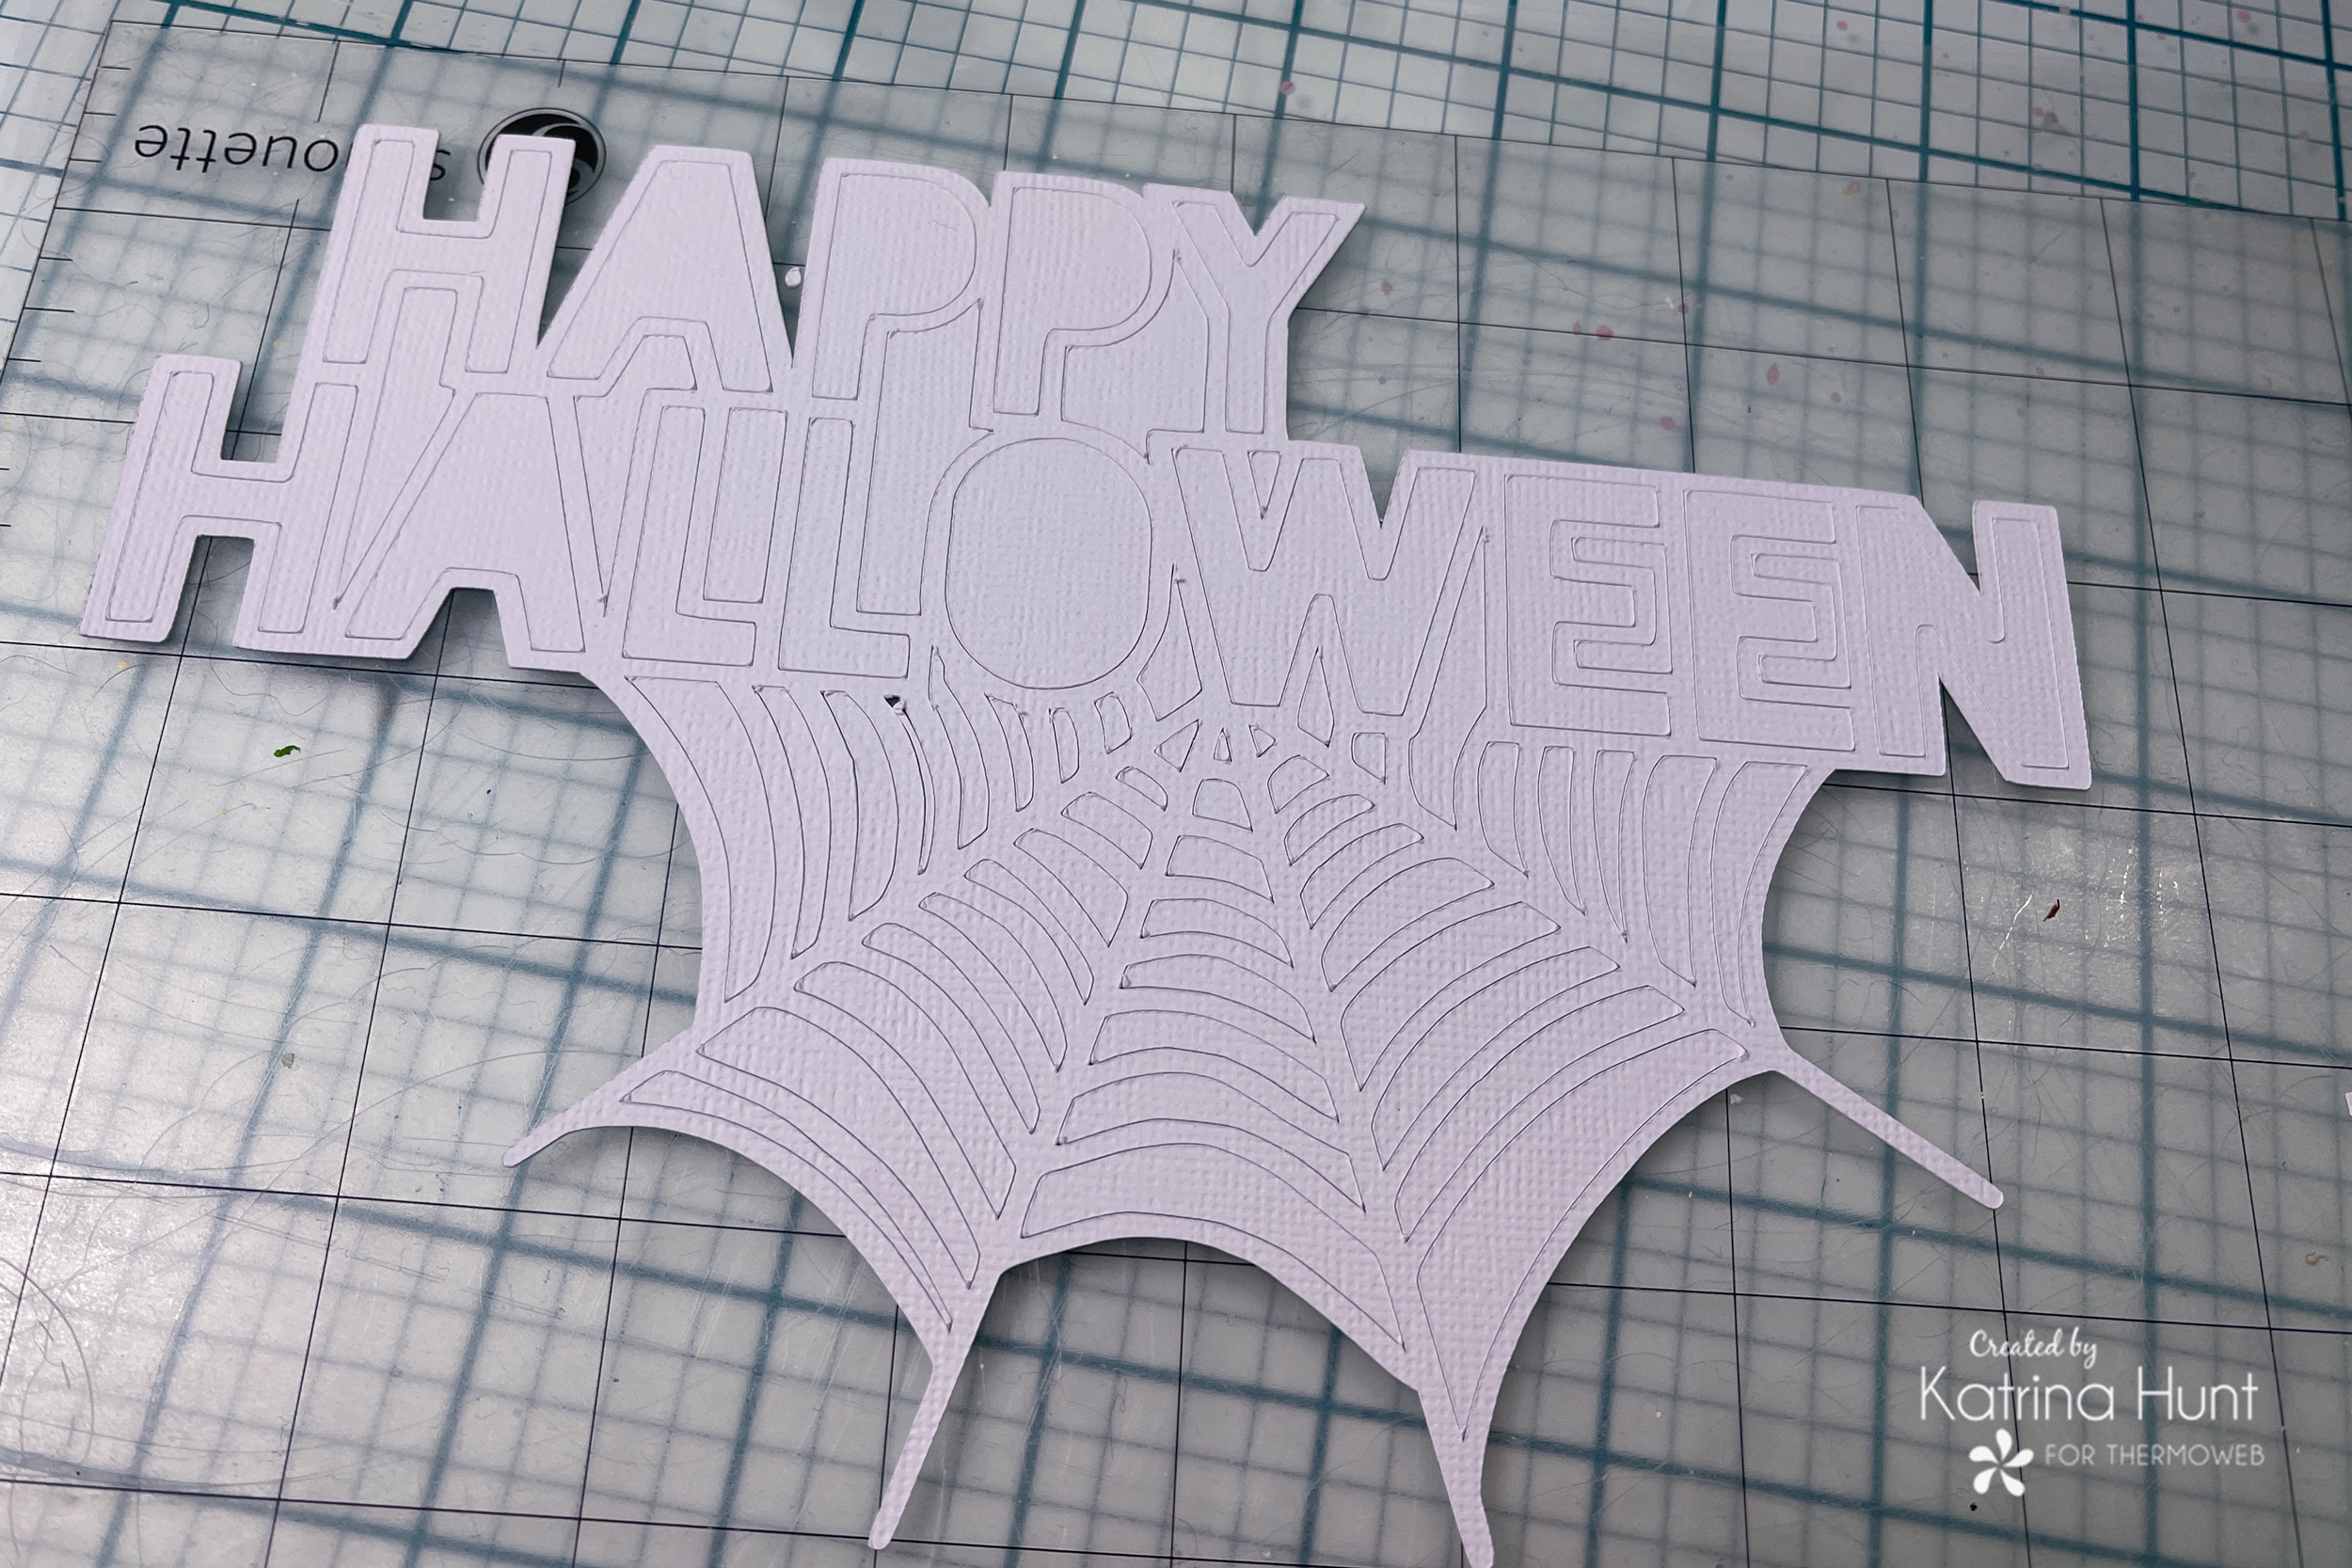
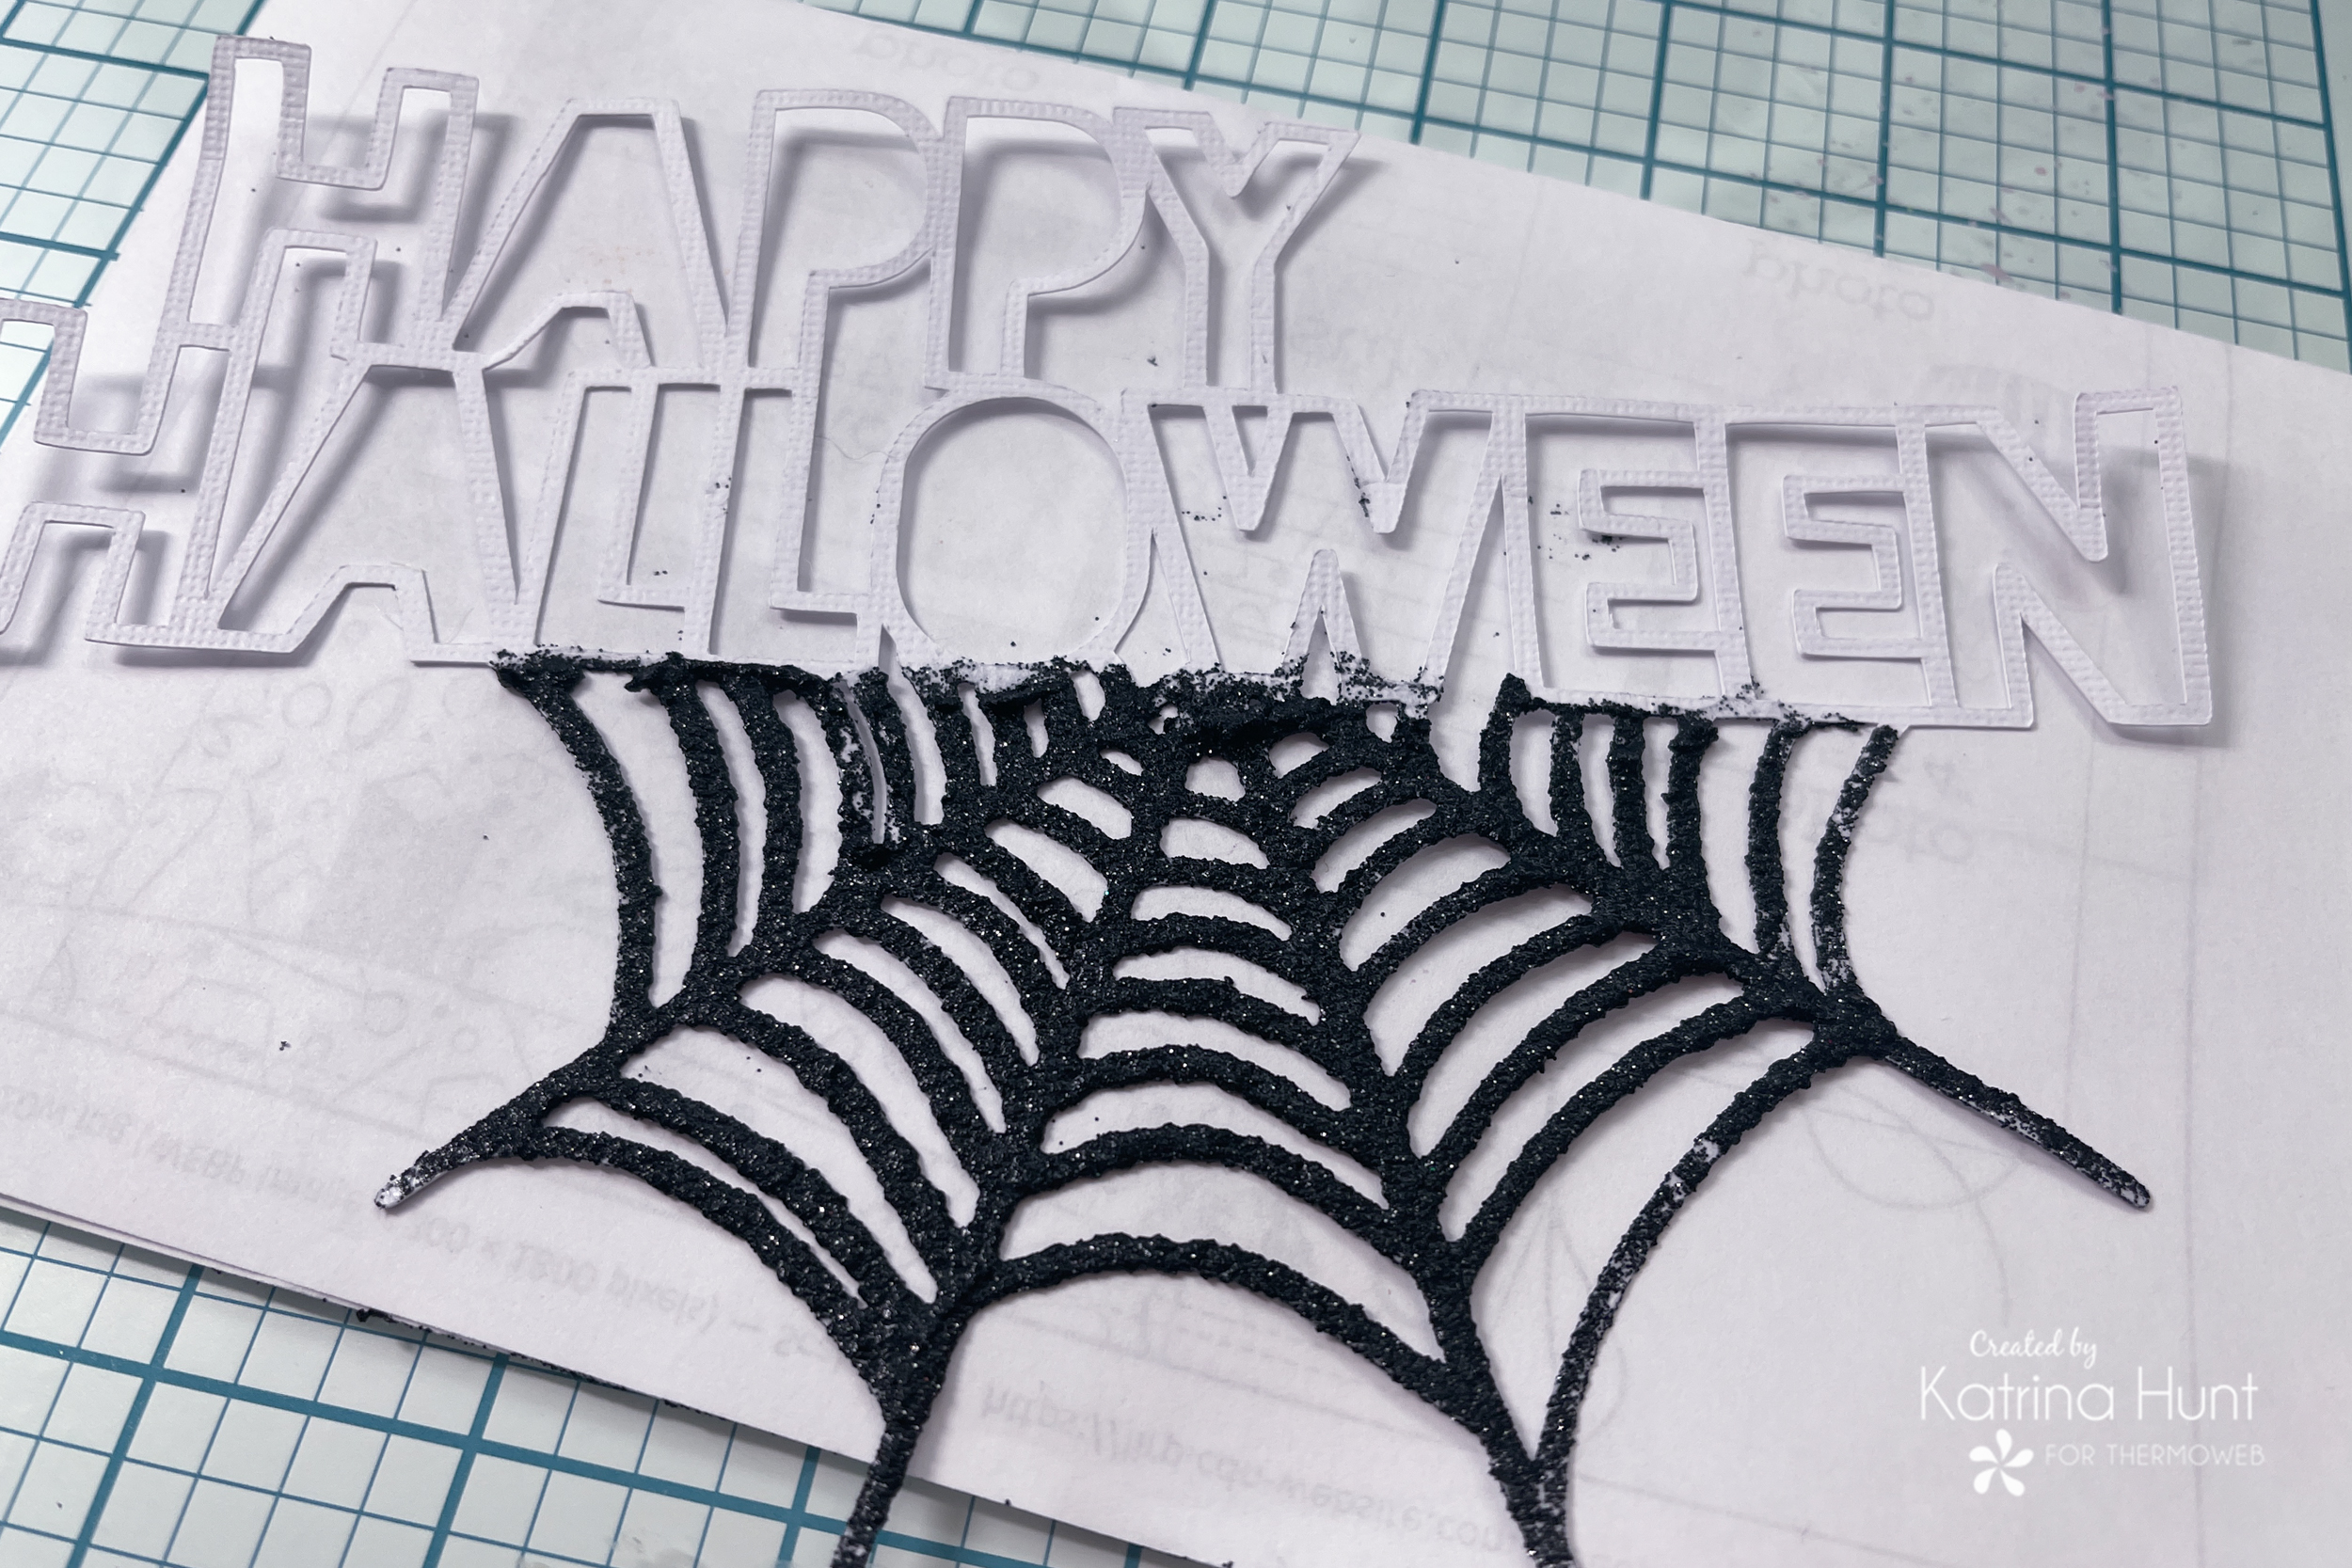
To begin my layout, I started by cutting out my cut file. After that, then I needed to decide on what I wanted to do to the cut file to alter it. So, I decided that I did not want to back the cut file, but pop up the letters that came out of the cut file. Since there were 14 letters, I decided to do half the letters flocked and then half the letters with pattern paper. But first, I needed to have some fun with the spiderweb at the bottom!
Altering cut files is part of the fun of using them right? Drag out all that mixed media stuff you don’t normally use and play with just areas of the cut file like I did above!
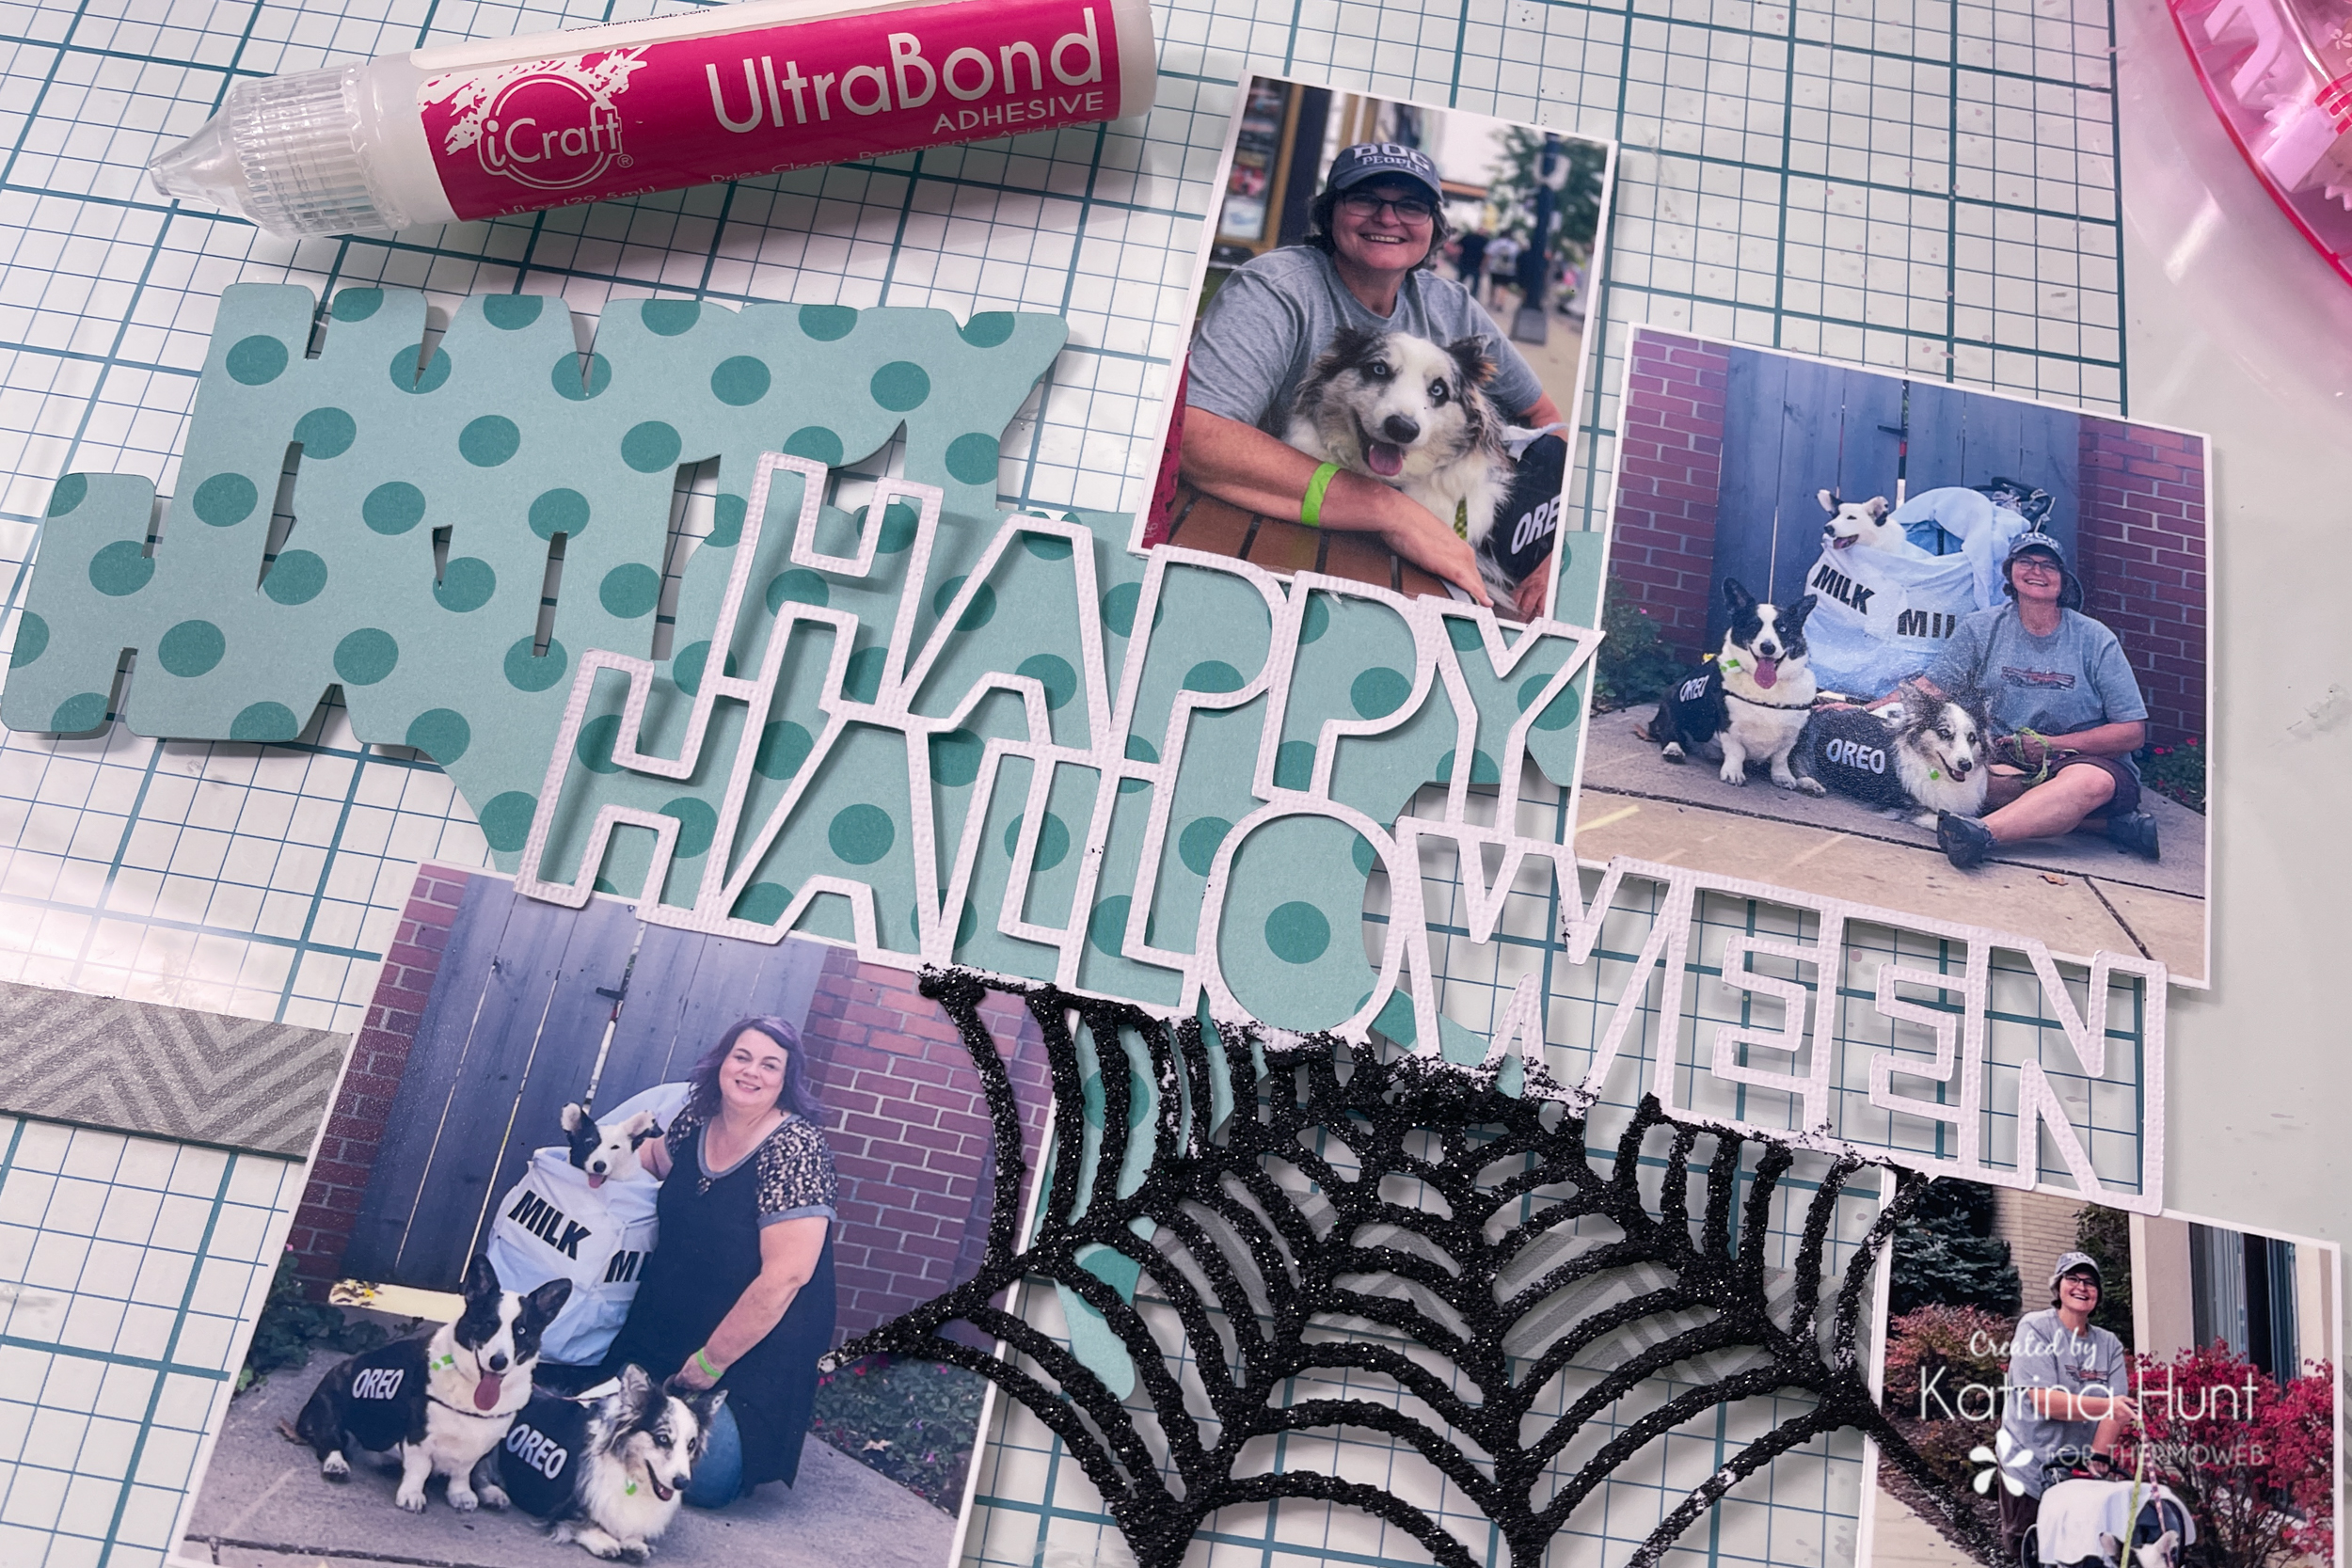
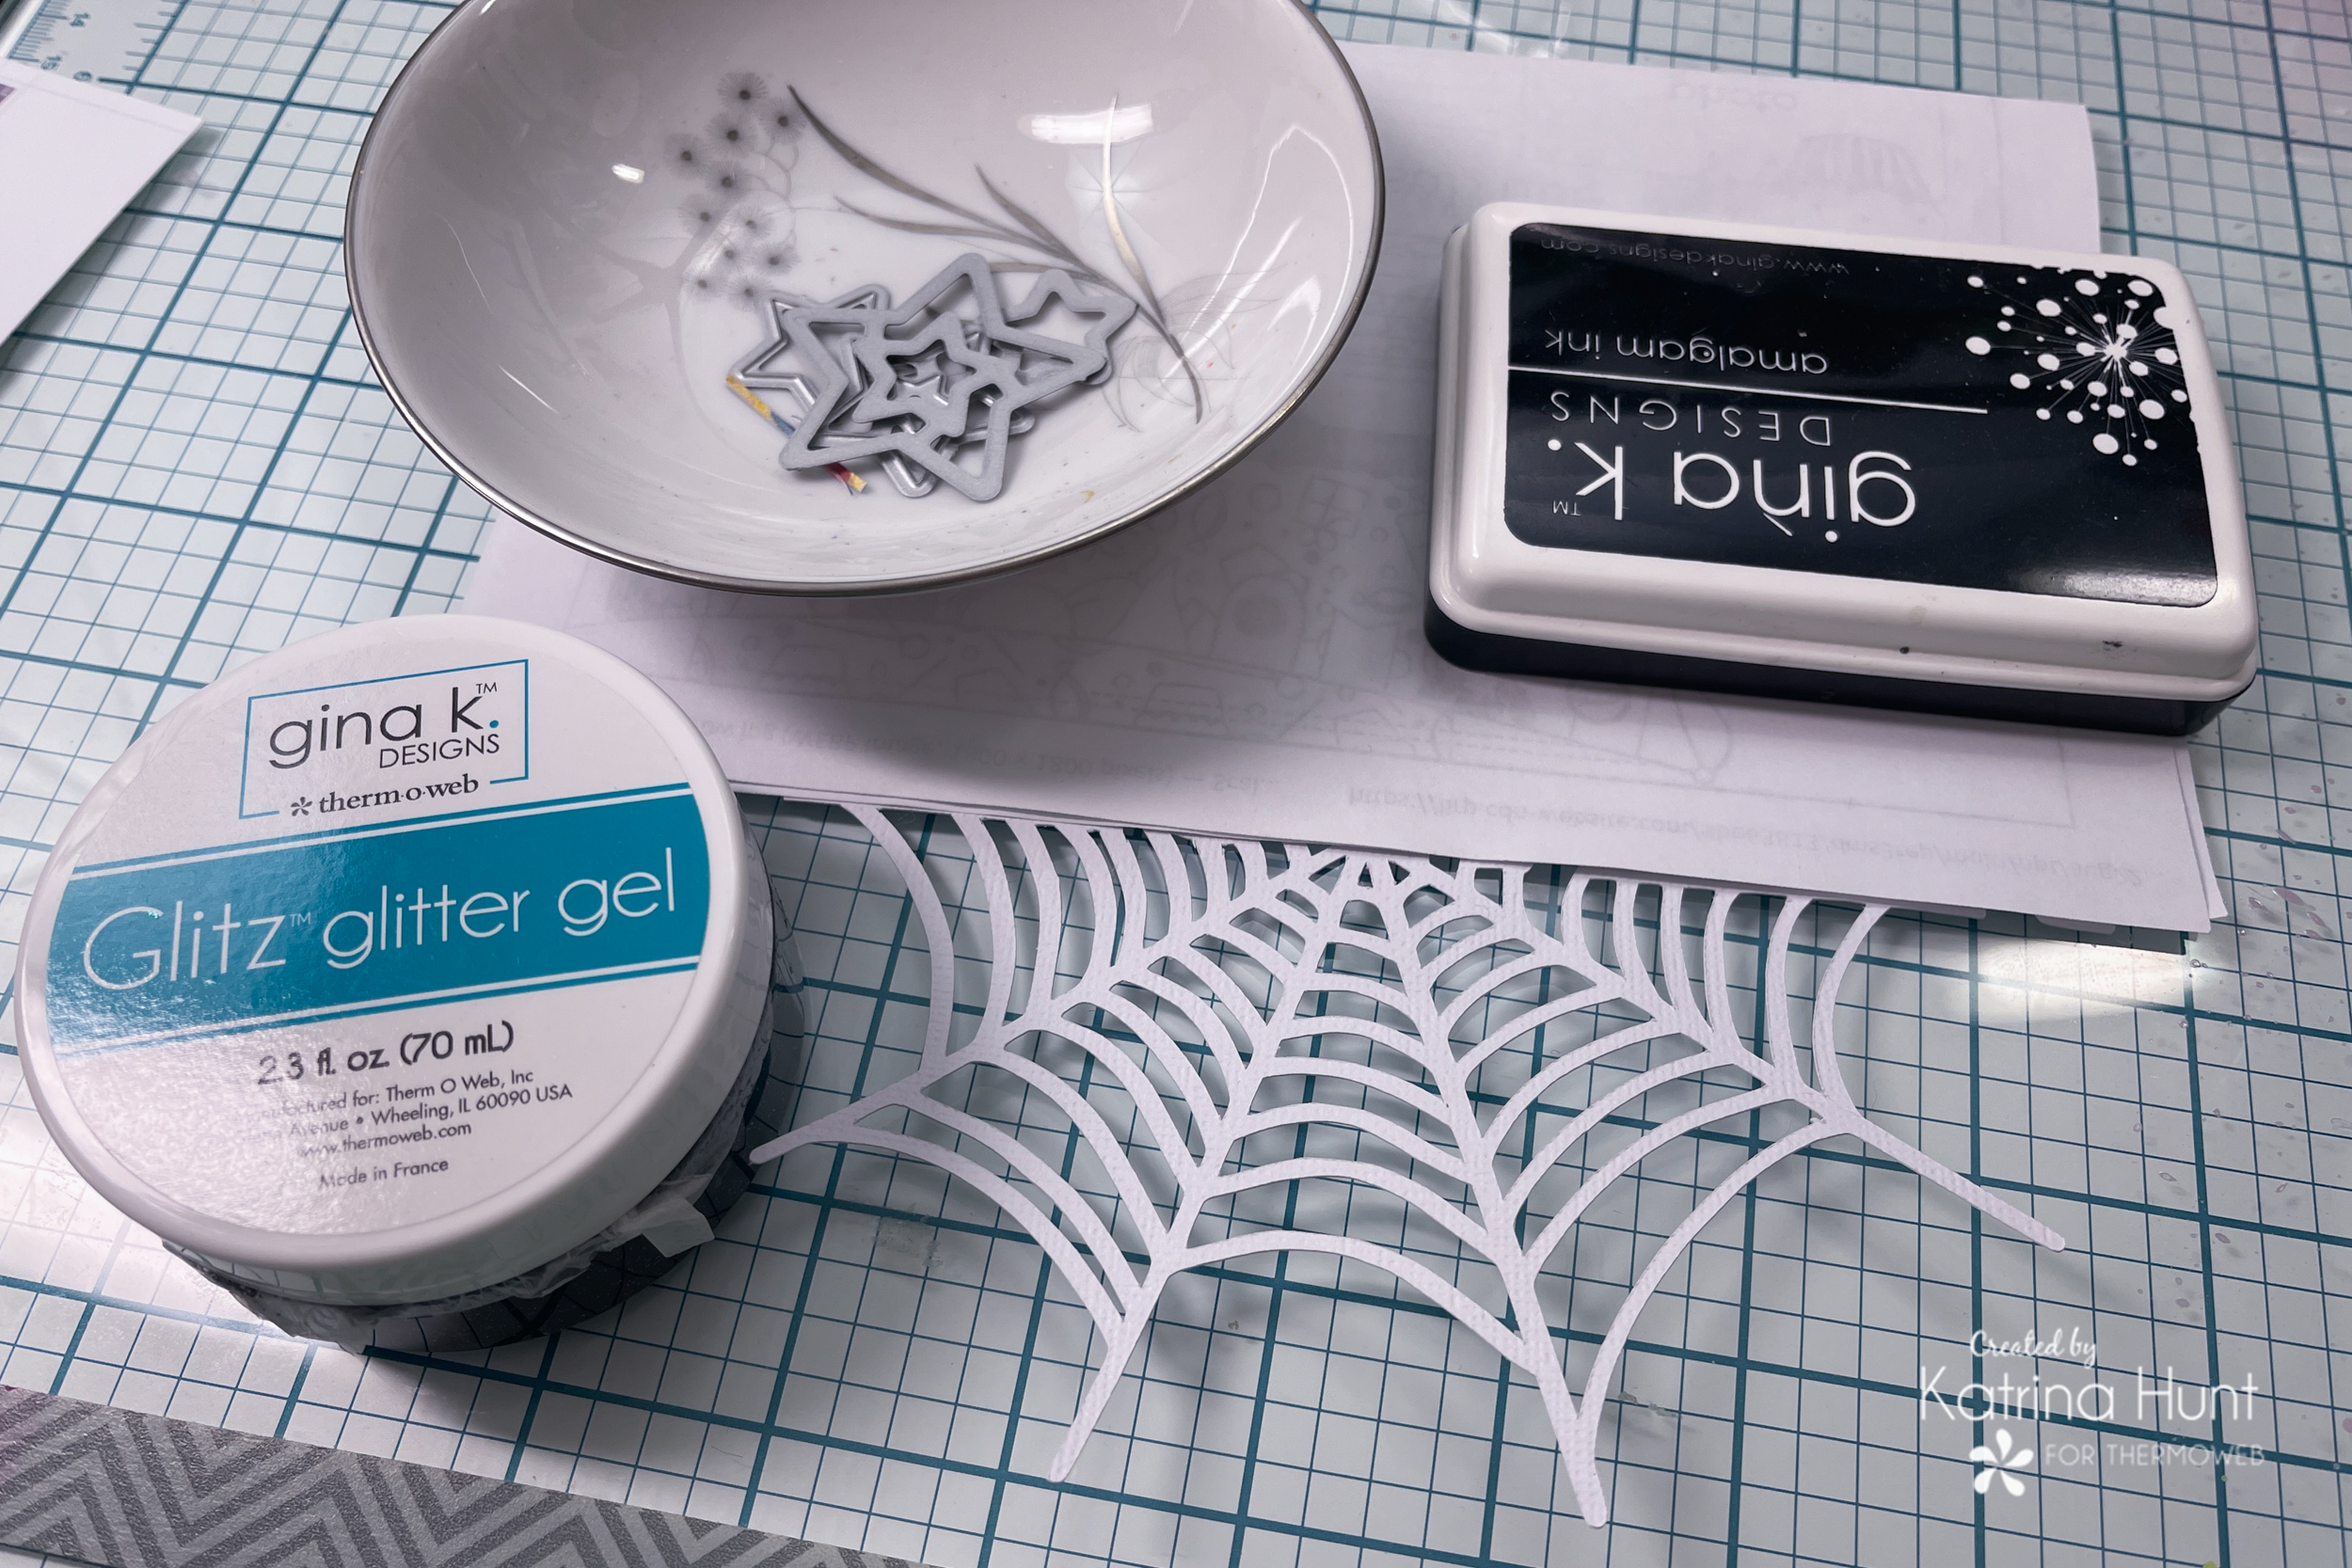 To begin, I masked off the title area with just a plain piece of paper that I held down with a couple of things. I took my Glitz Glitter Gel in Black and just smeared it over the web on my glass mat. I made sure that I could not see white showing thru the gel. Once I had good coverage, I carefully picked my cut file up and sat it aside to dry.
Title Work with Flock and Pattern Paper
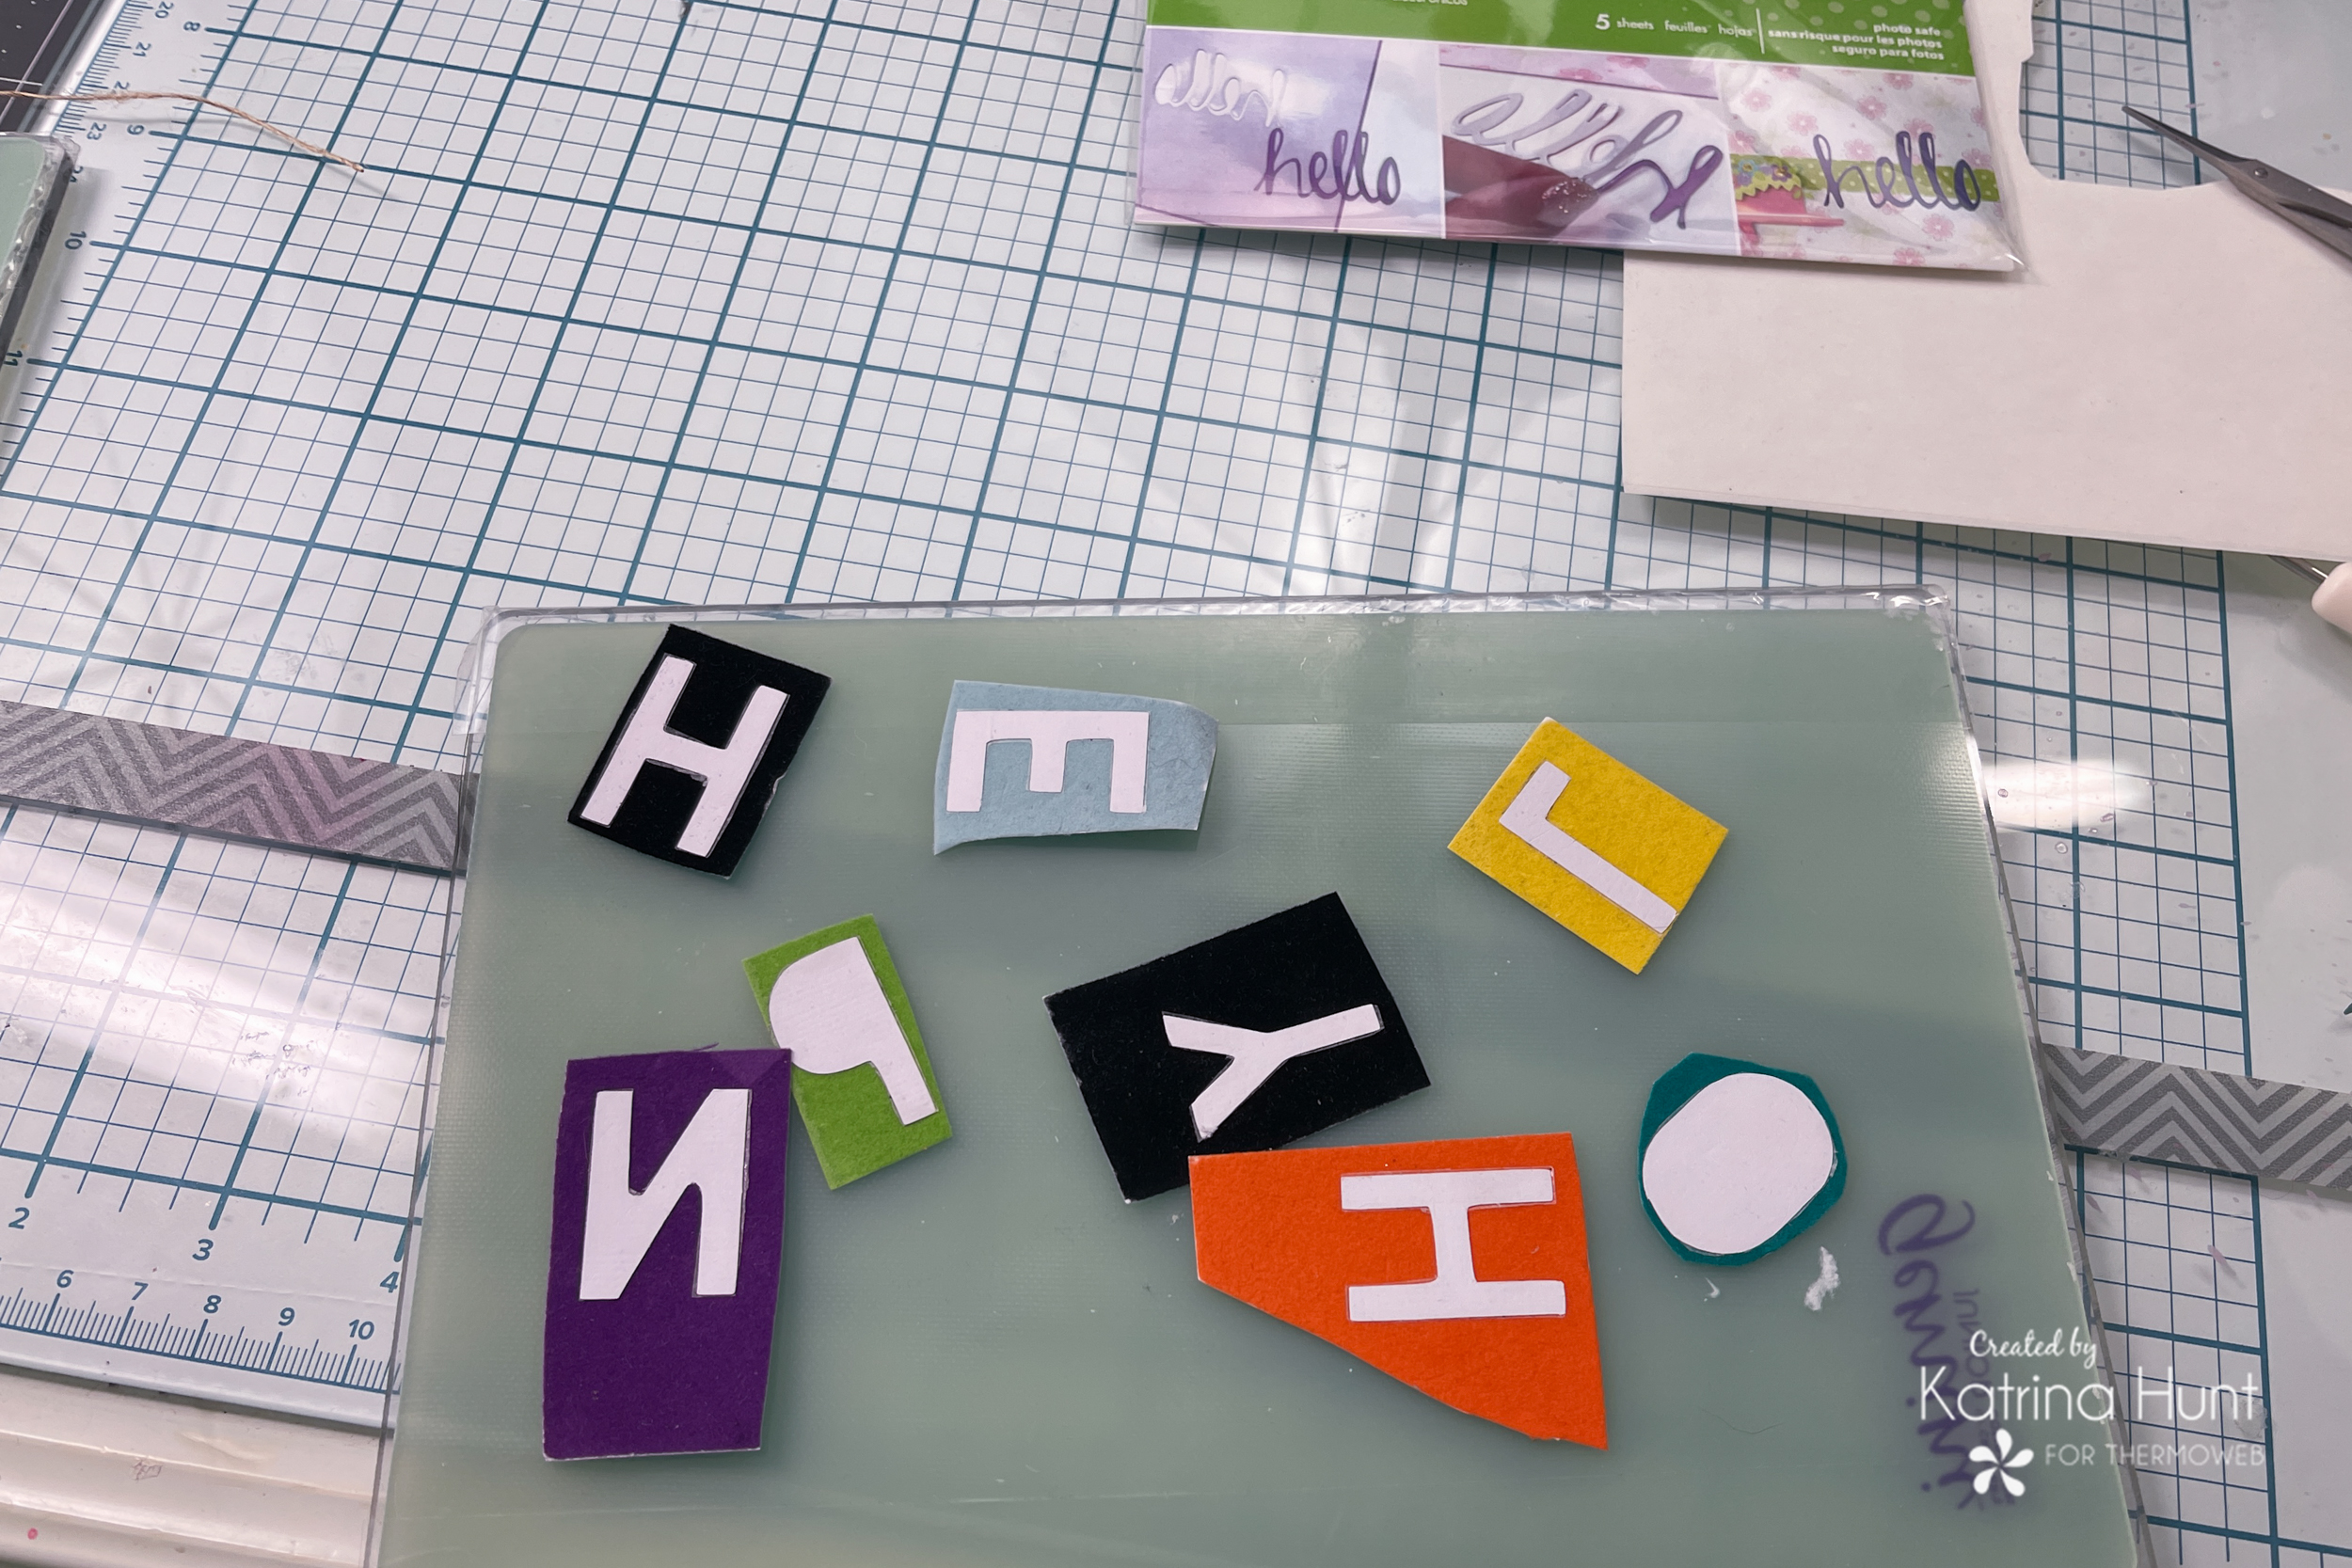
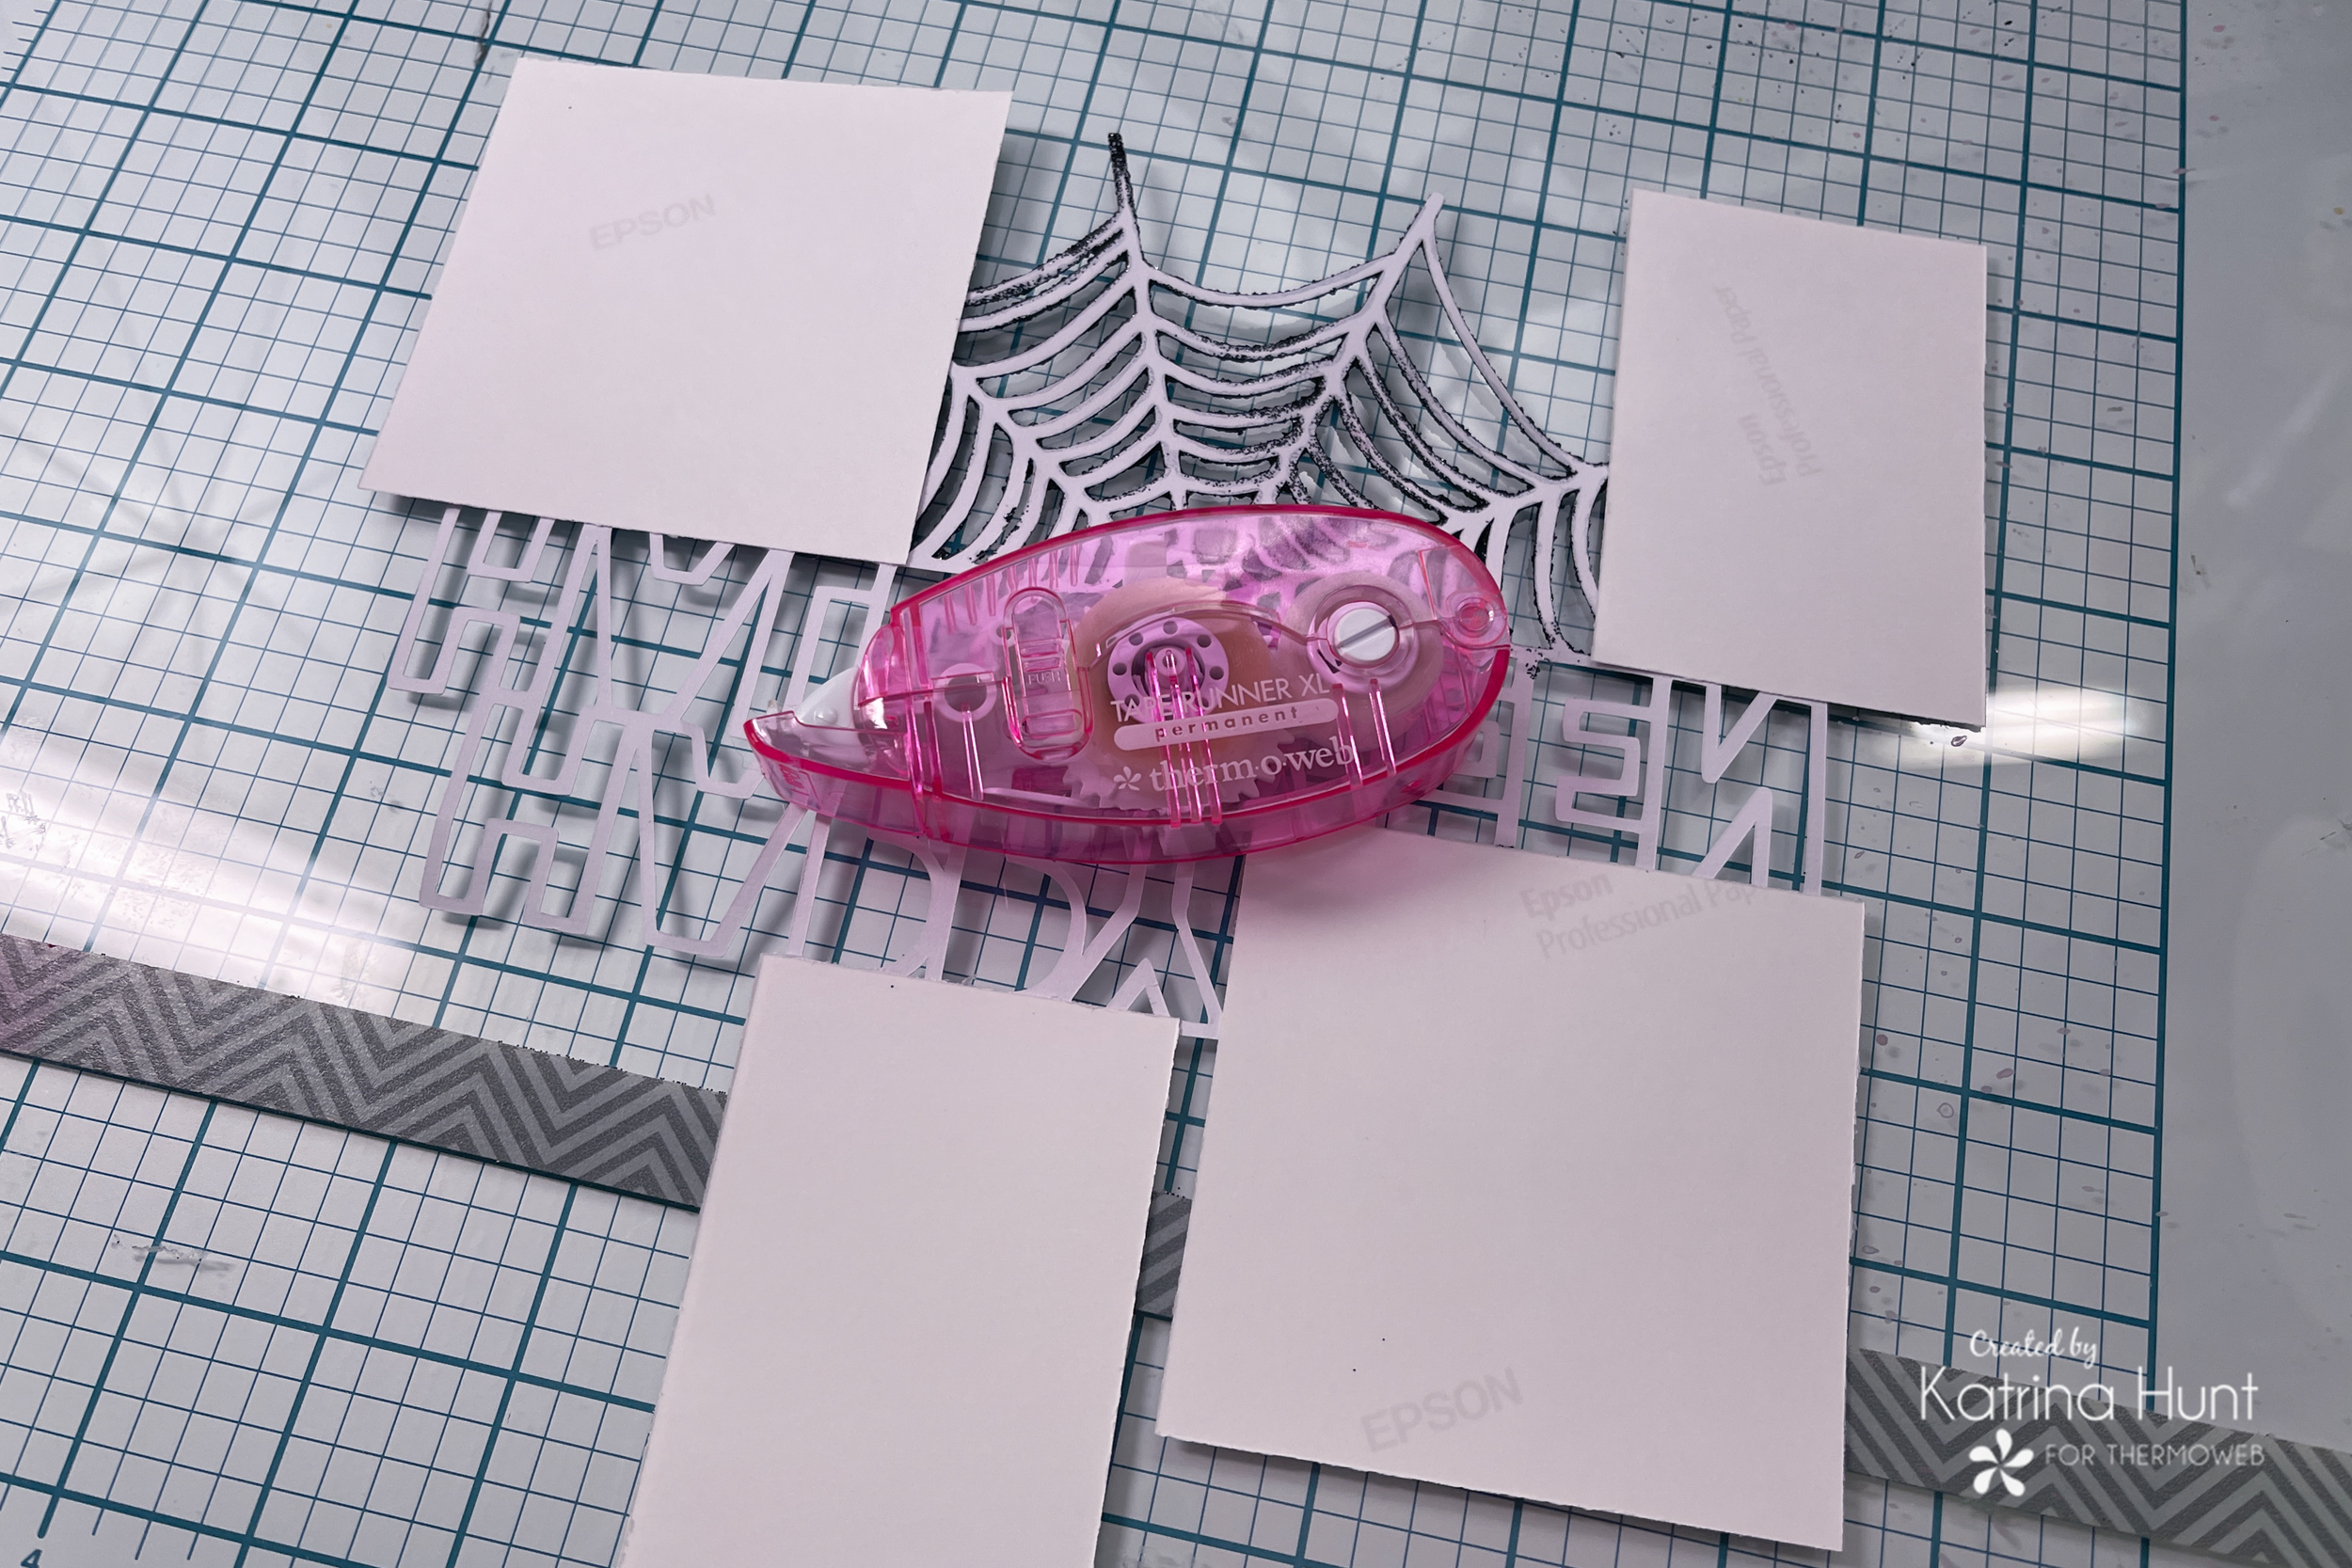
While the gel was drying, I started working on altering the letters for my title. To begin, for the pattern paper ones, I just used some tape runner and applied them onto the pattern paper I wanted to use and cut around them.
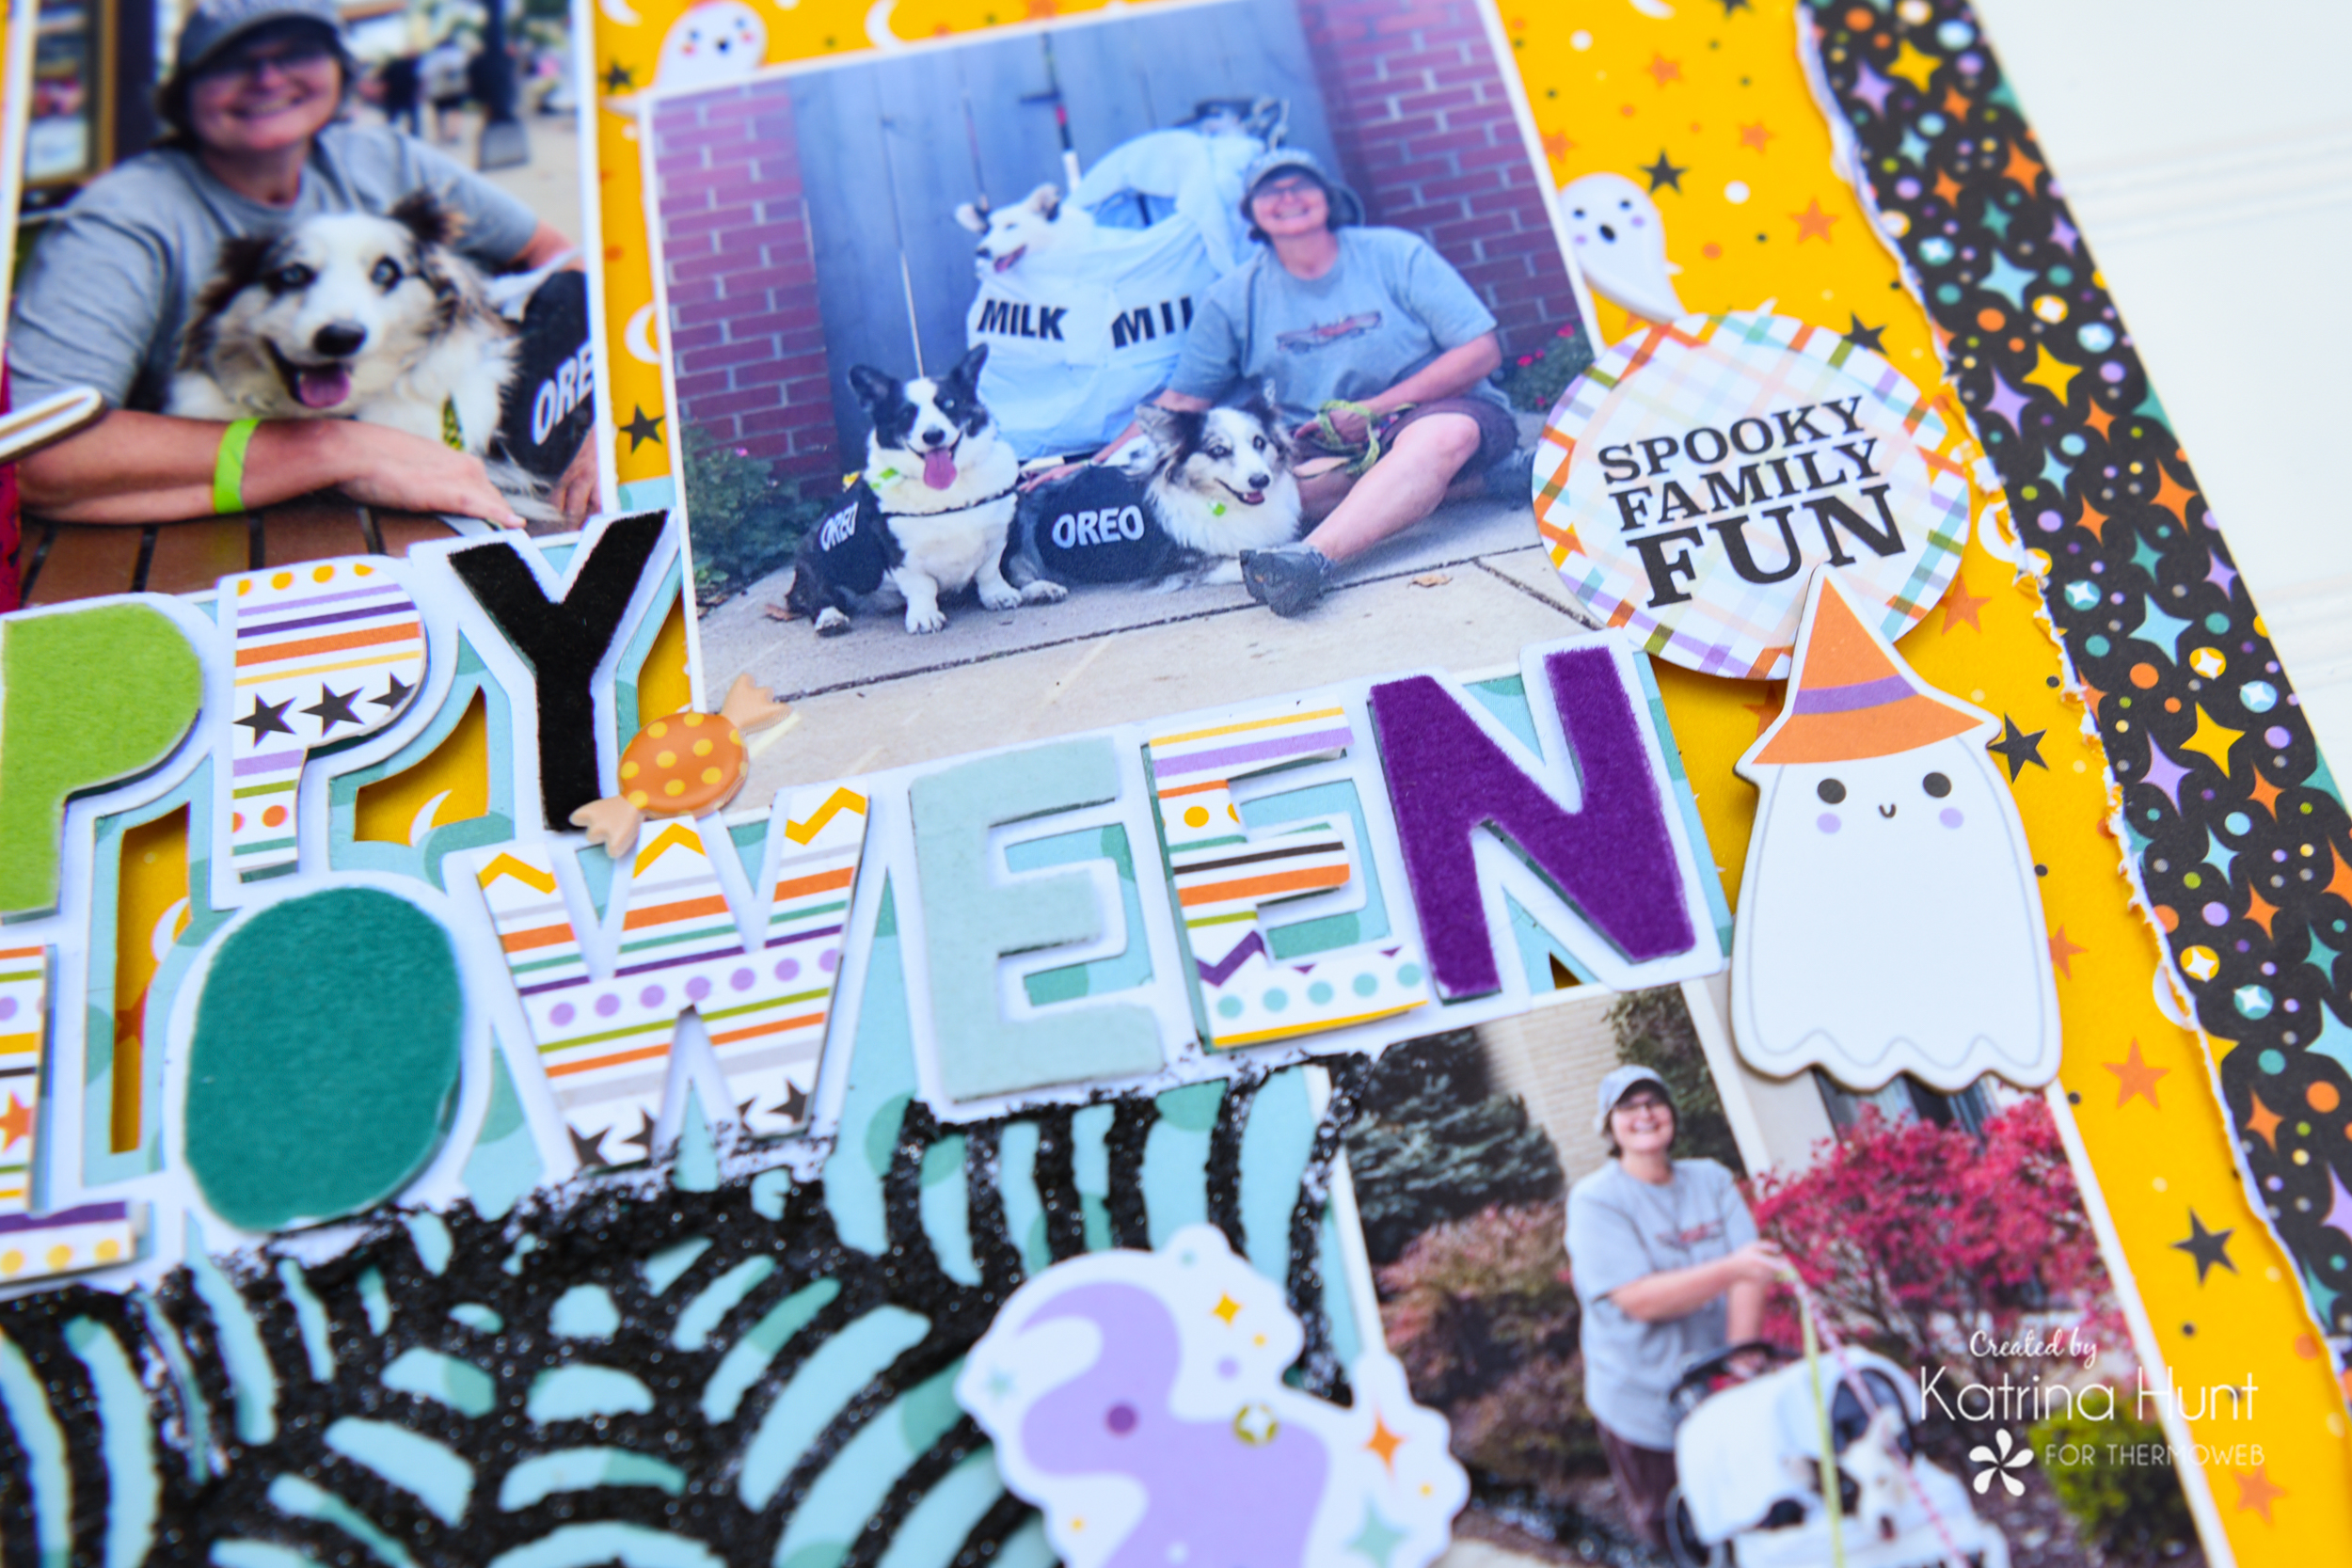
Next in the process was creating the flocked letters. Using a sheet of the iCraft Easy Cut Adhesive, I peeled the protective covering back just enough to lay down my letters on the exposed sticky sheet. Then, I replaced the covering back over and rubbed really well to make sure the adhesive would stick to the letters. Using a brayer for this process helps a lot! Once, I felt the adhesive had transferred, I trimmed the letters out.
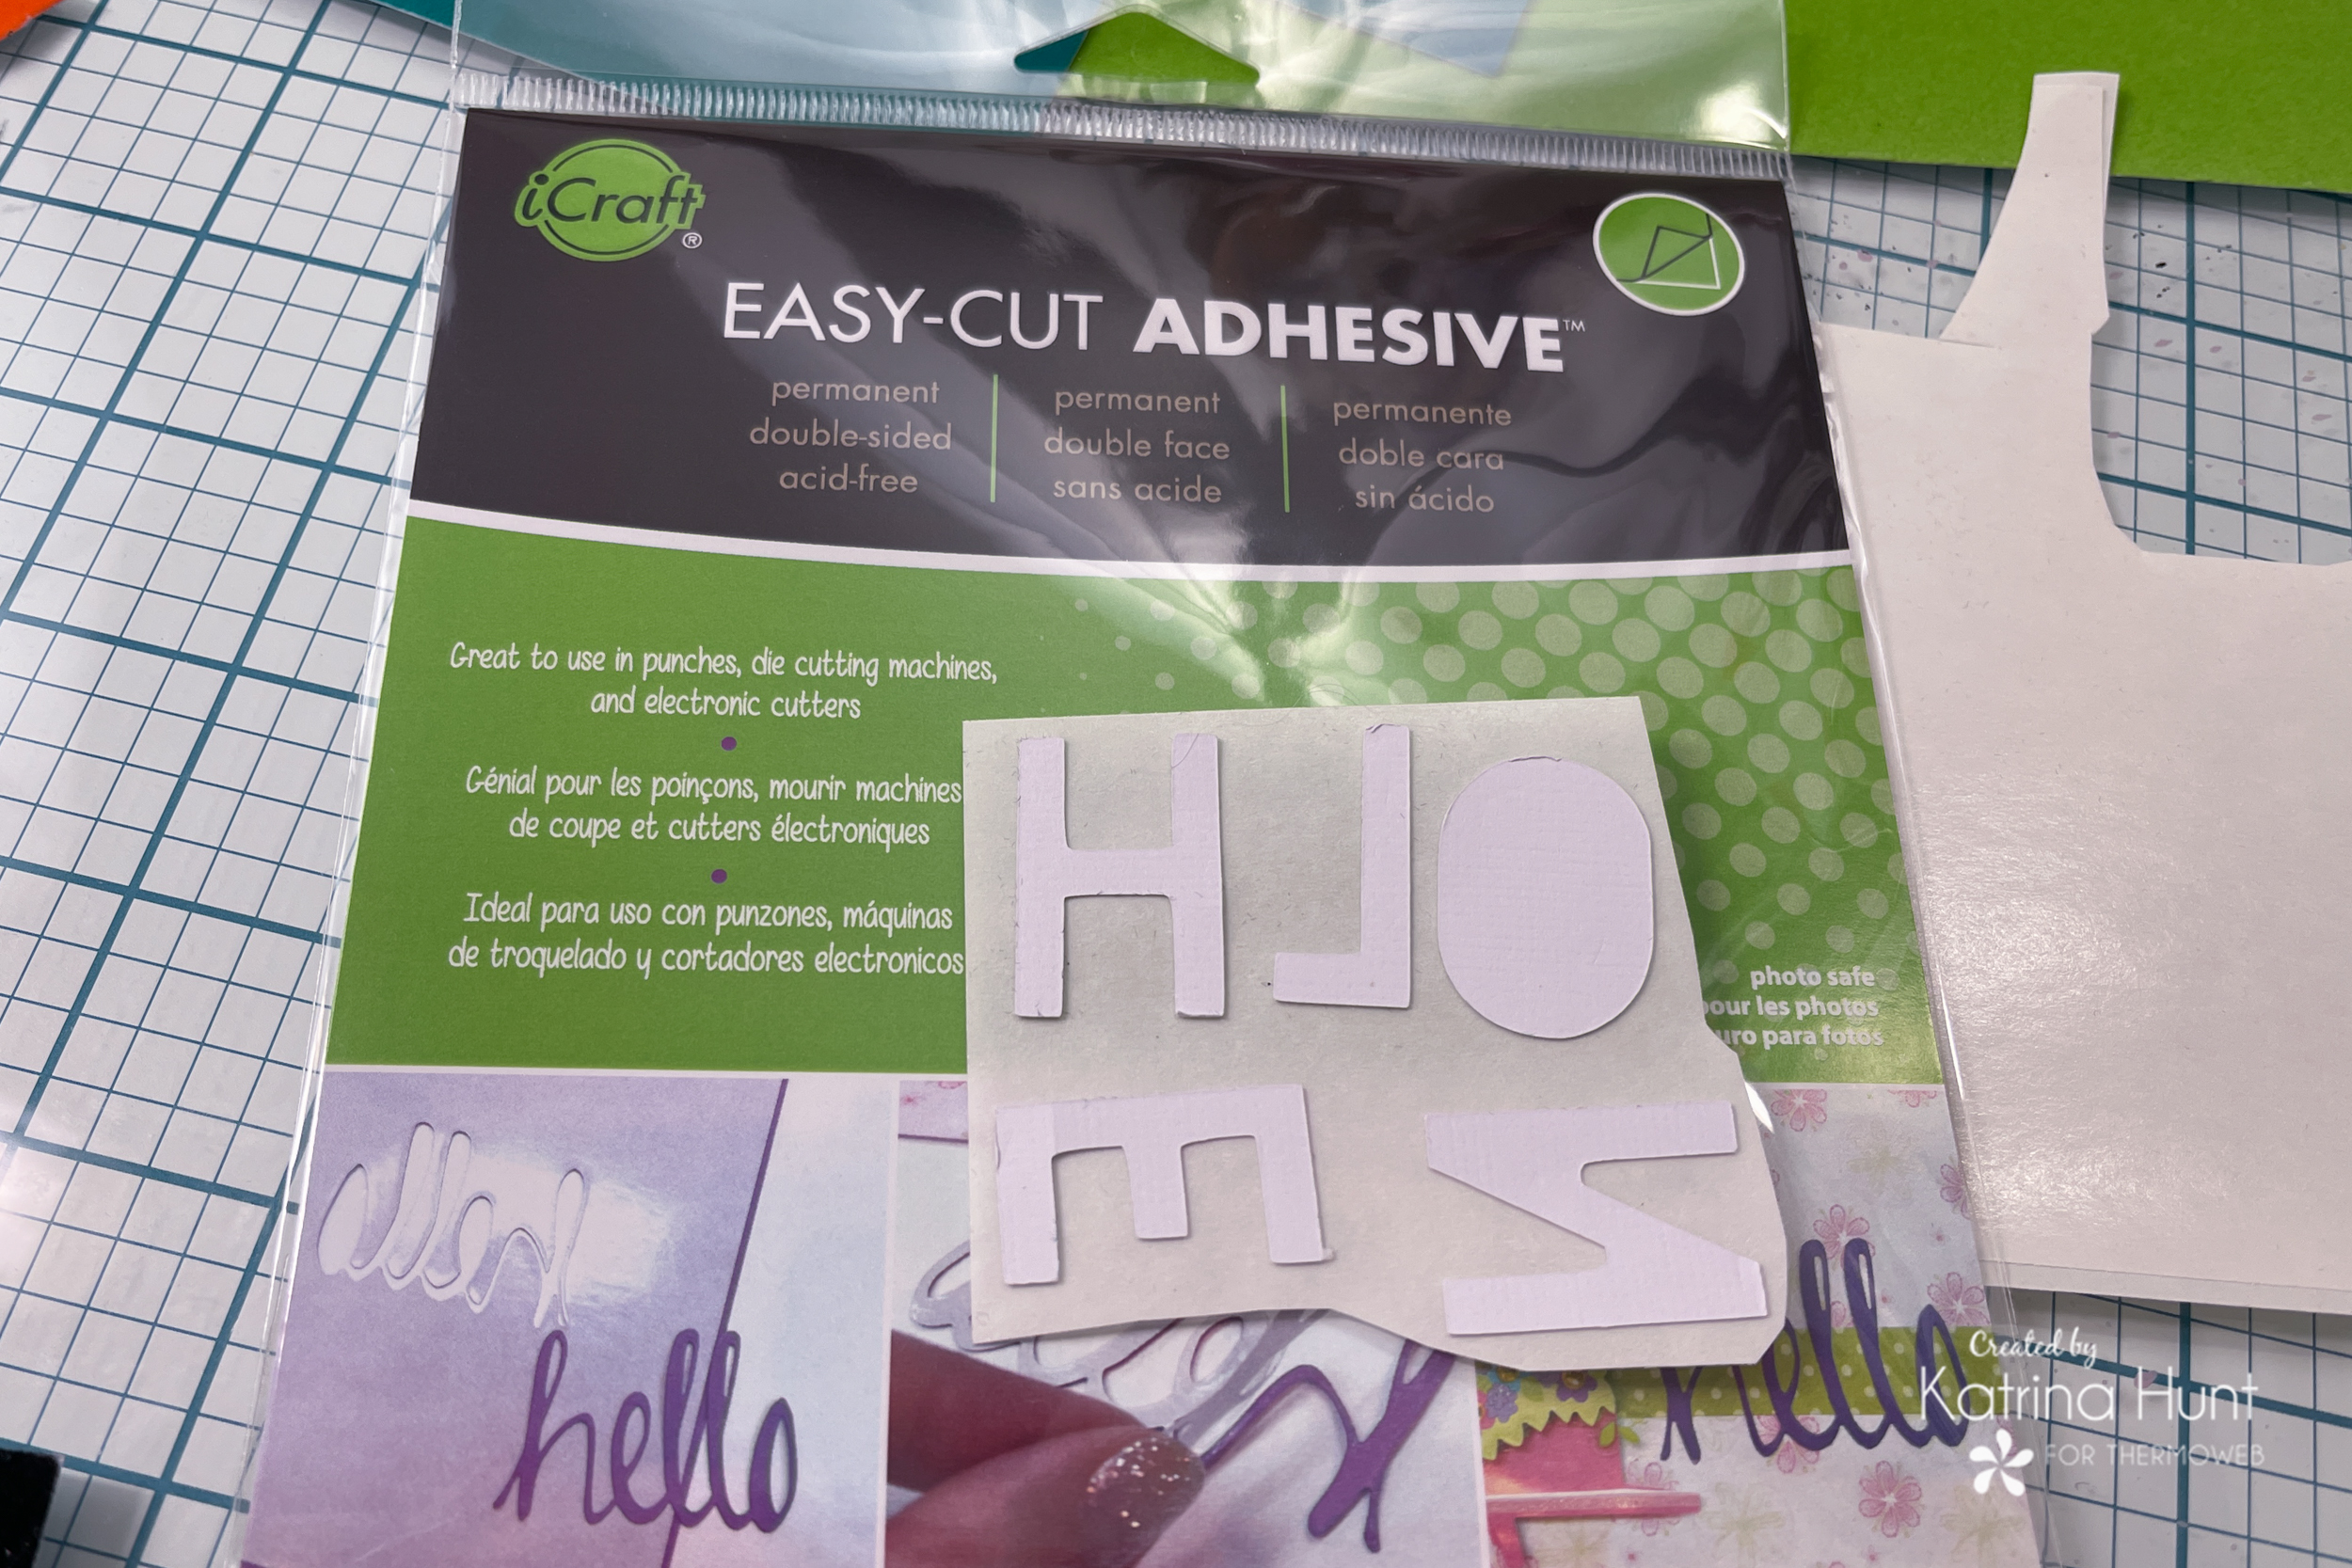
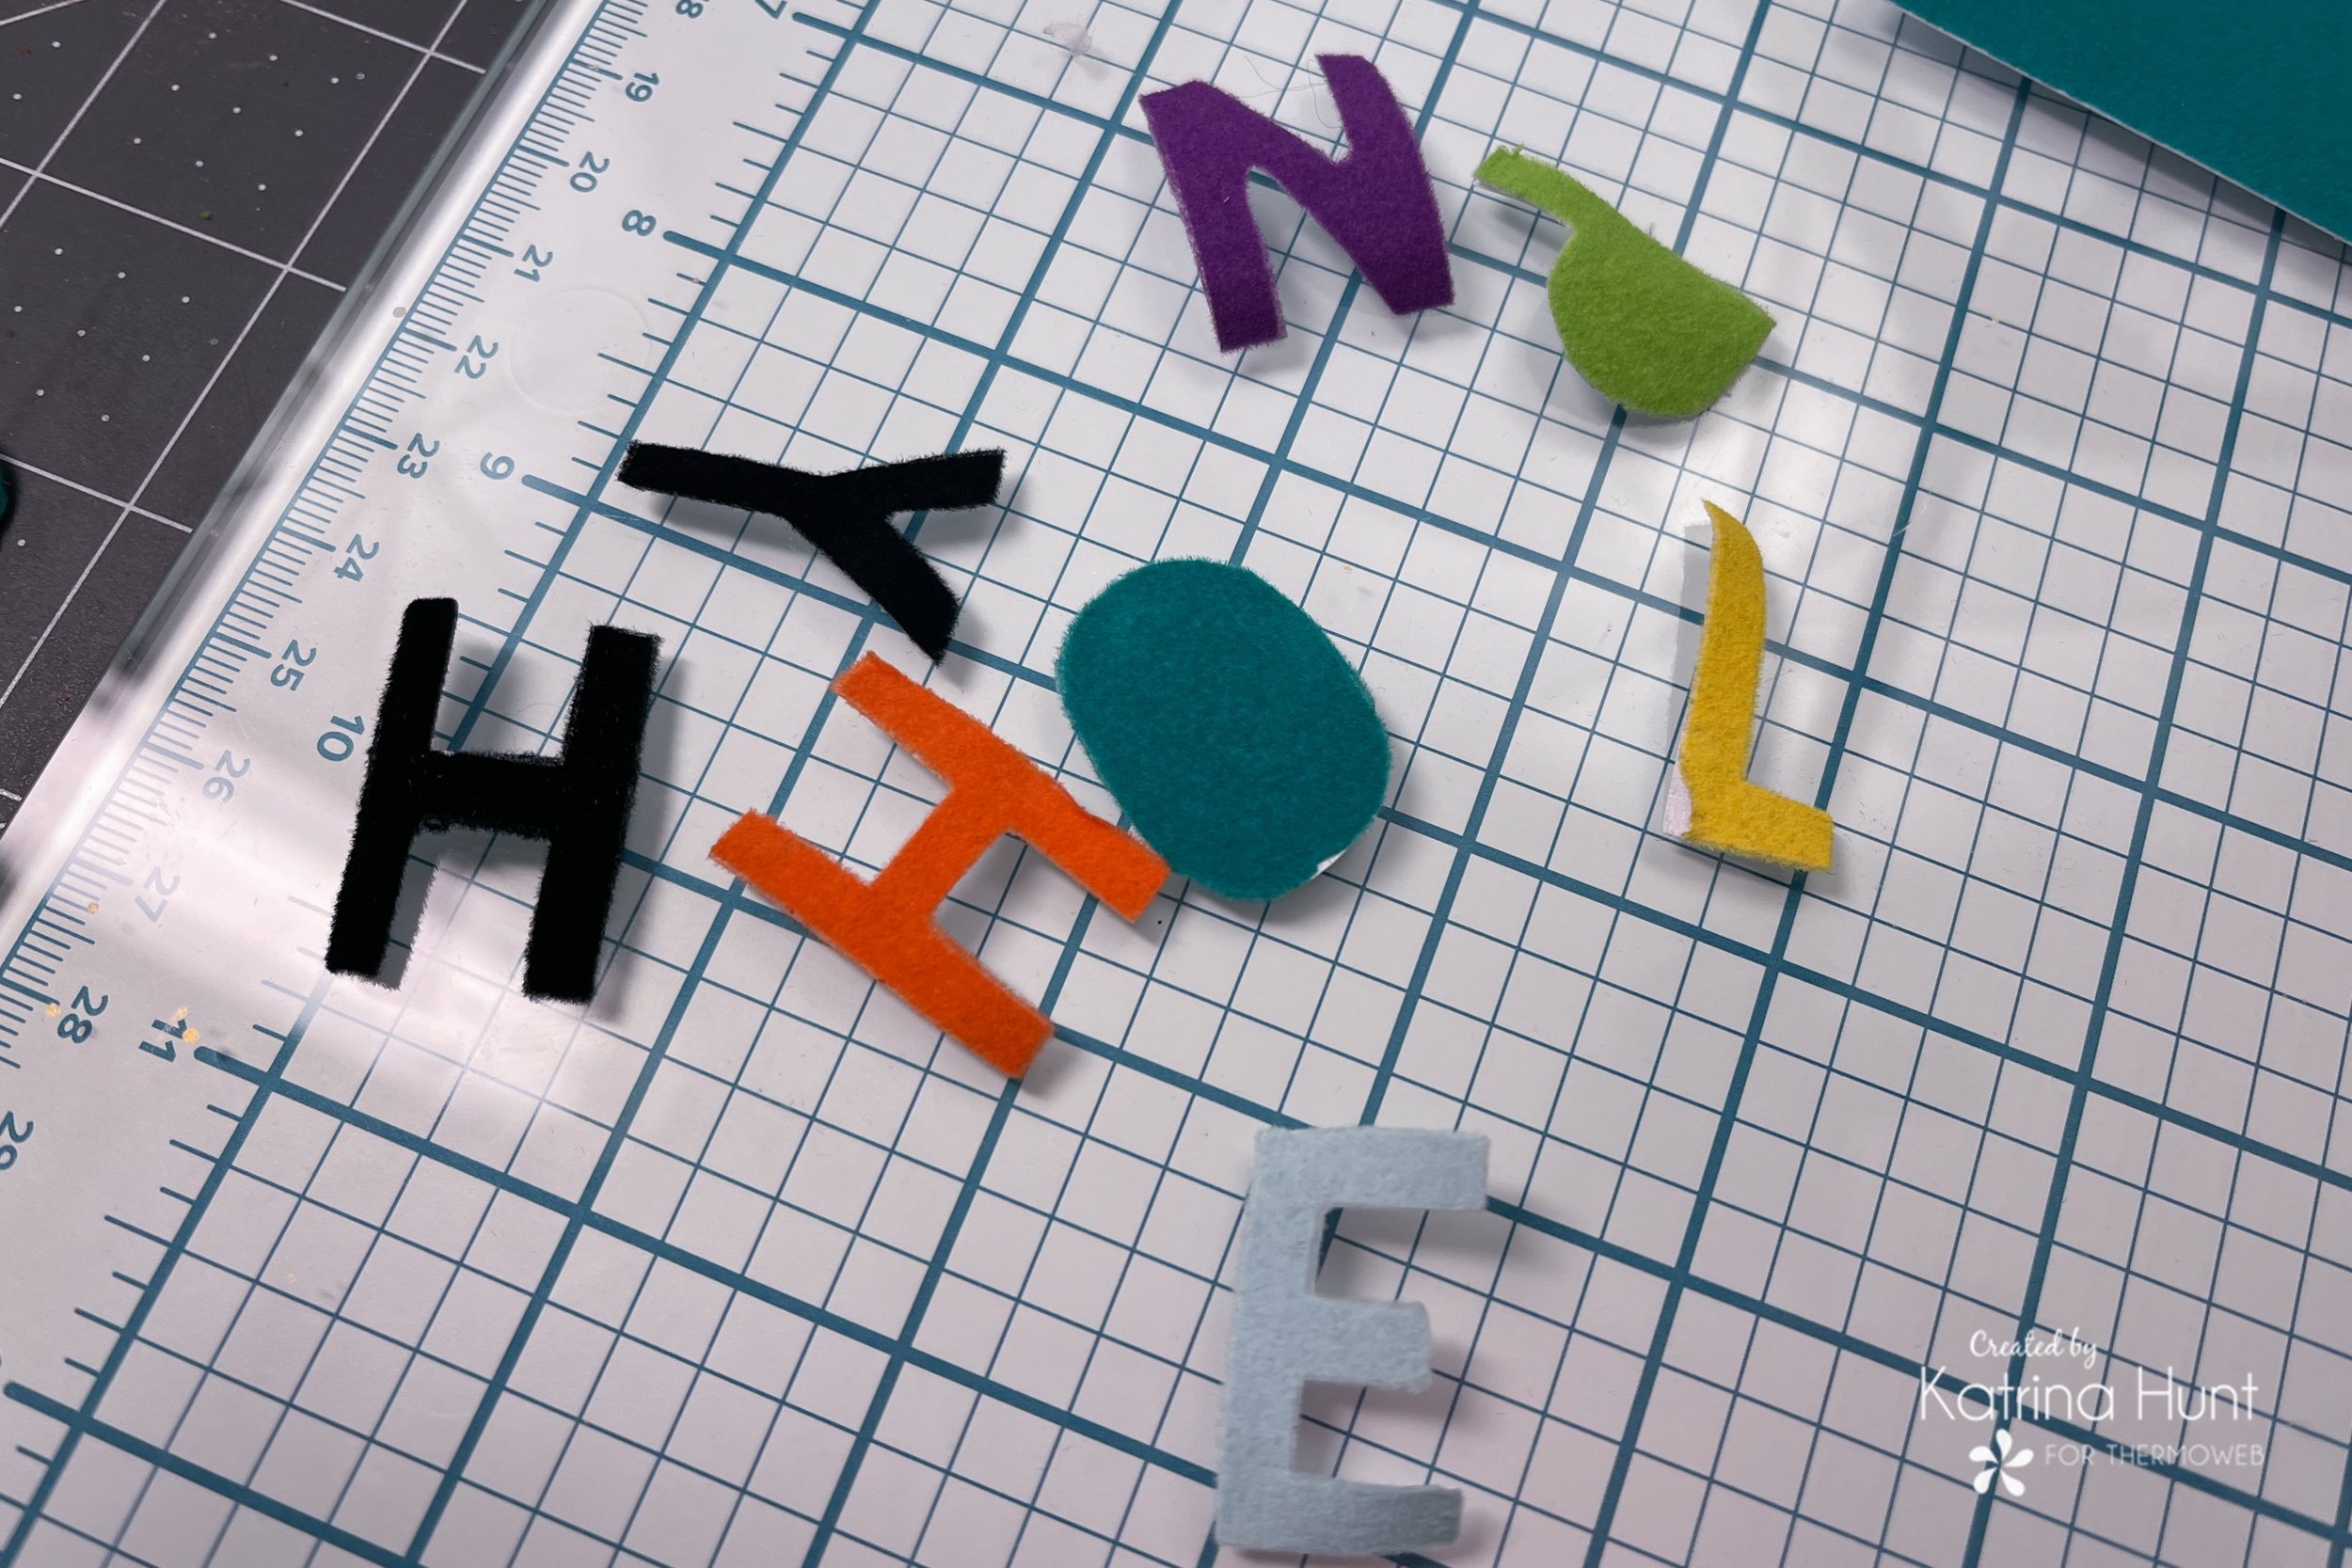
After trimming them, I removed the protective covering and laid the sticky side down on top of the color side of the flock transfer sheet. Once I had all the letters done, I ran thru my die-cutting machine to apply pressure to transfer the flock. After that was done, I carefully peeled the letters from the flocked sheet.
Putting It All Together
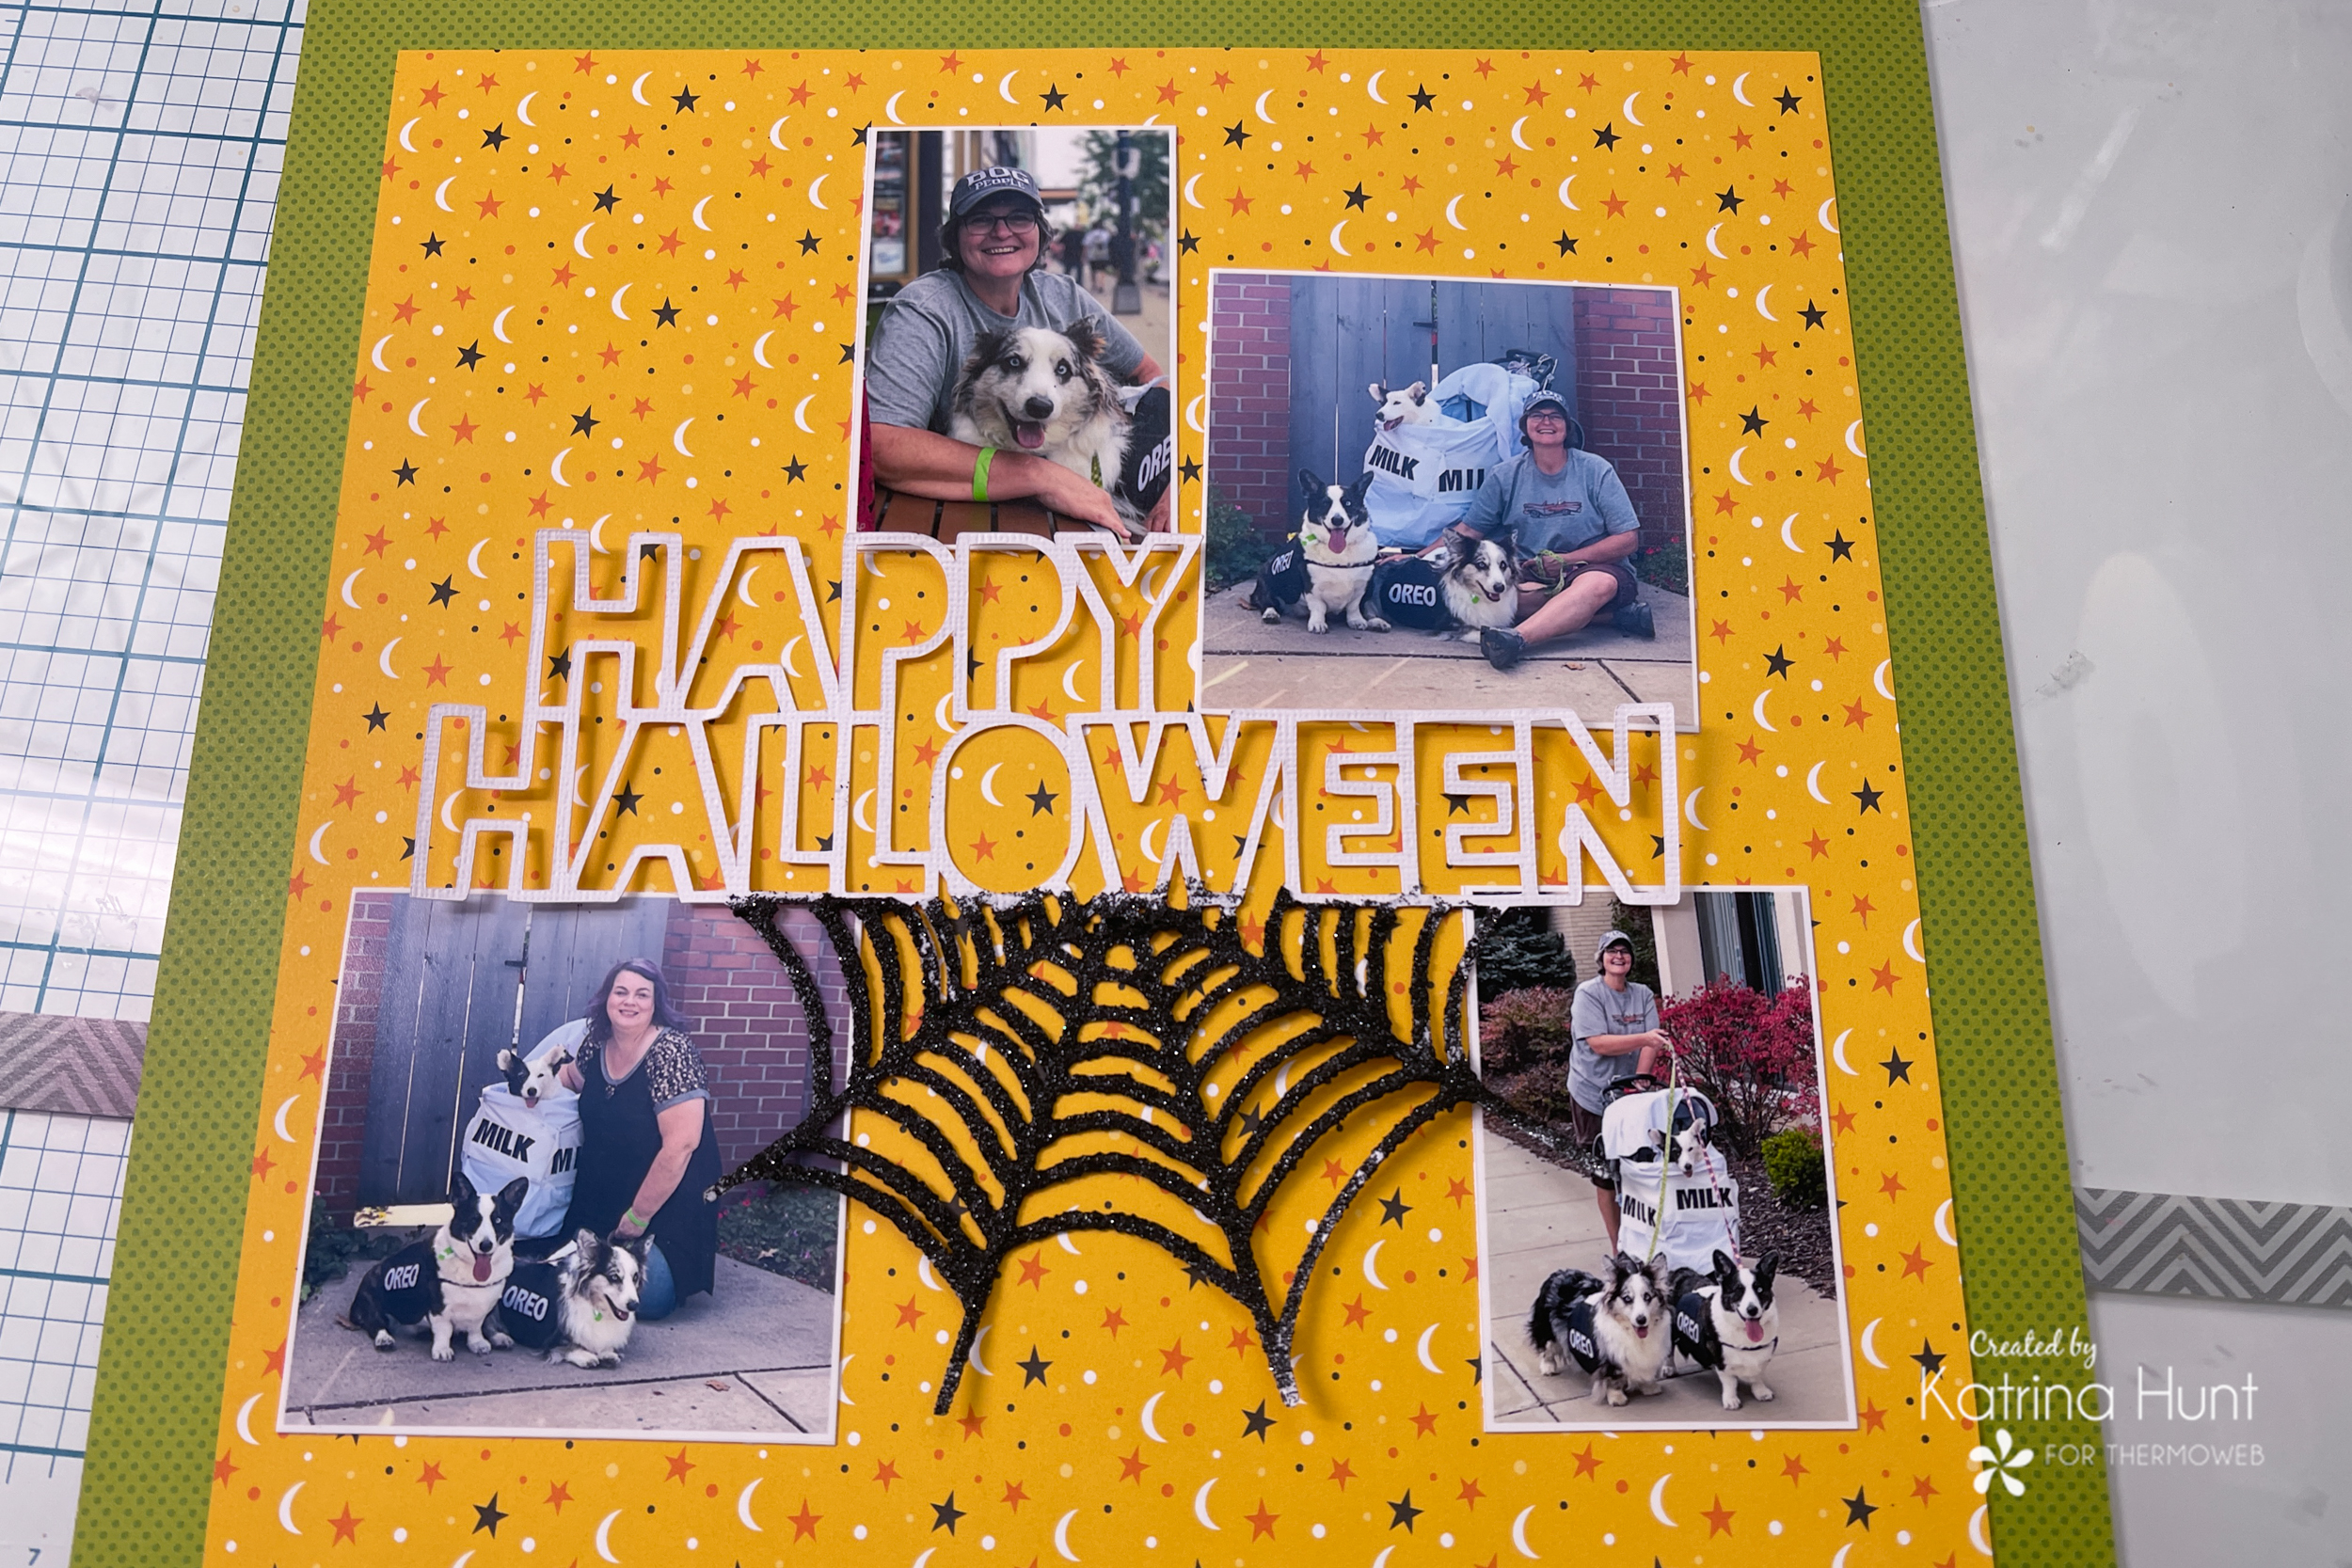
Once the gel was dry, it was time to start putting the layout together! I figured out my picture placement with the cut file and knew that I wanted those pictures to attach to the file. I used my Memory Runner XL and ran a line of adhesive in the areas the pictures were going to come together with the cut file.
When I cut my cut file, I also cut an offset to create a background for it. I adhered the offset to the cut file/picture combo with the Ultra Bond pen.
I wanted the entire section to pop up, so I used the 3D Foam Tape in the 1/8th inch thickness and layered my center section on the back with it.
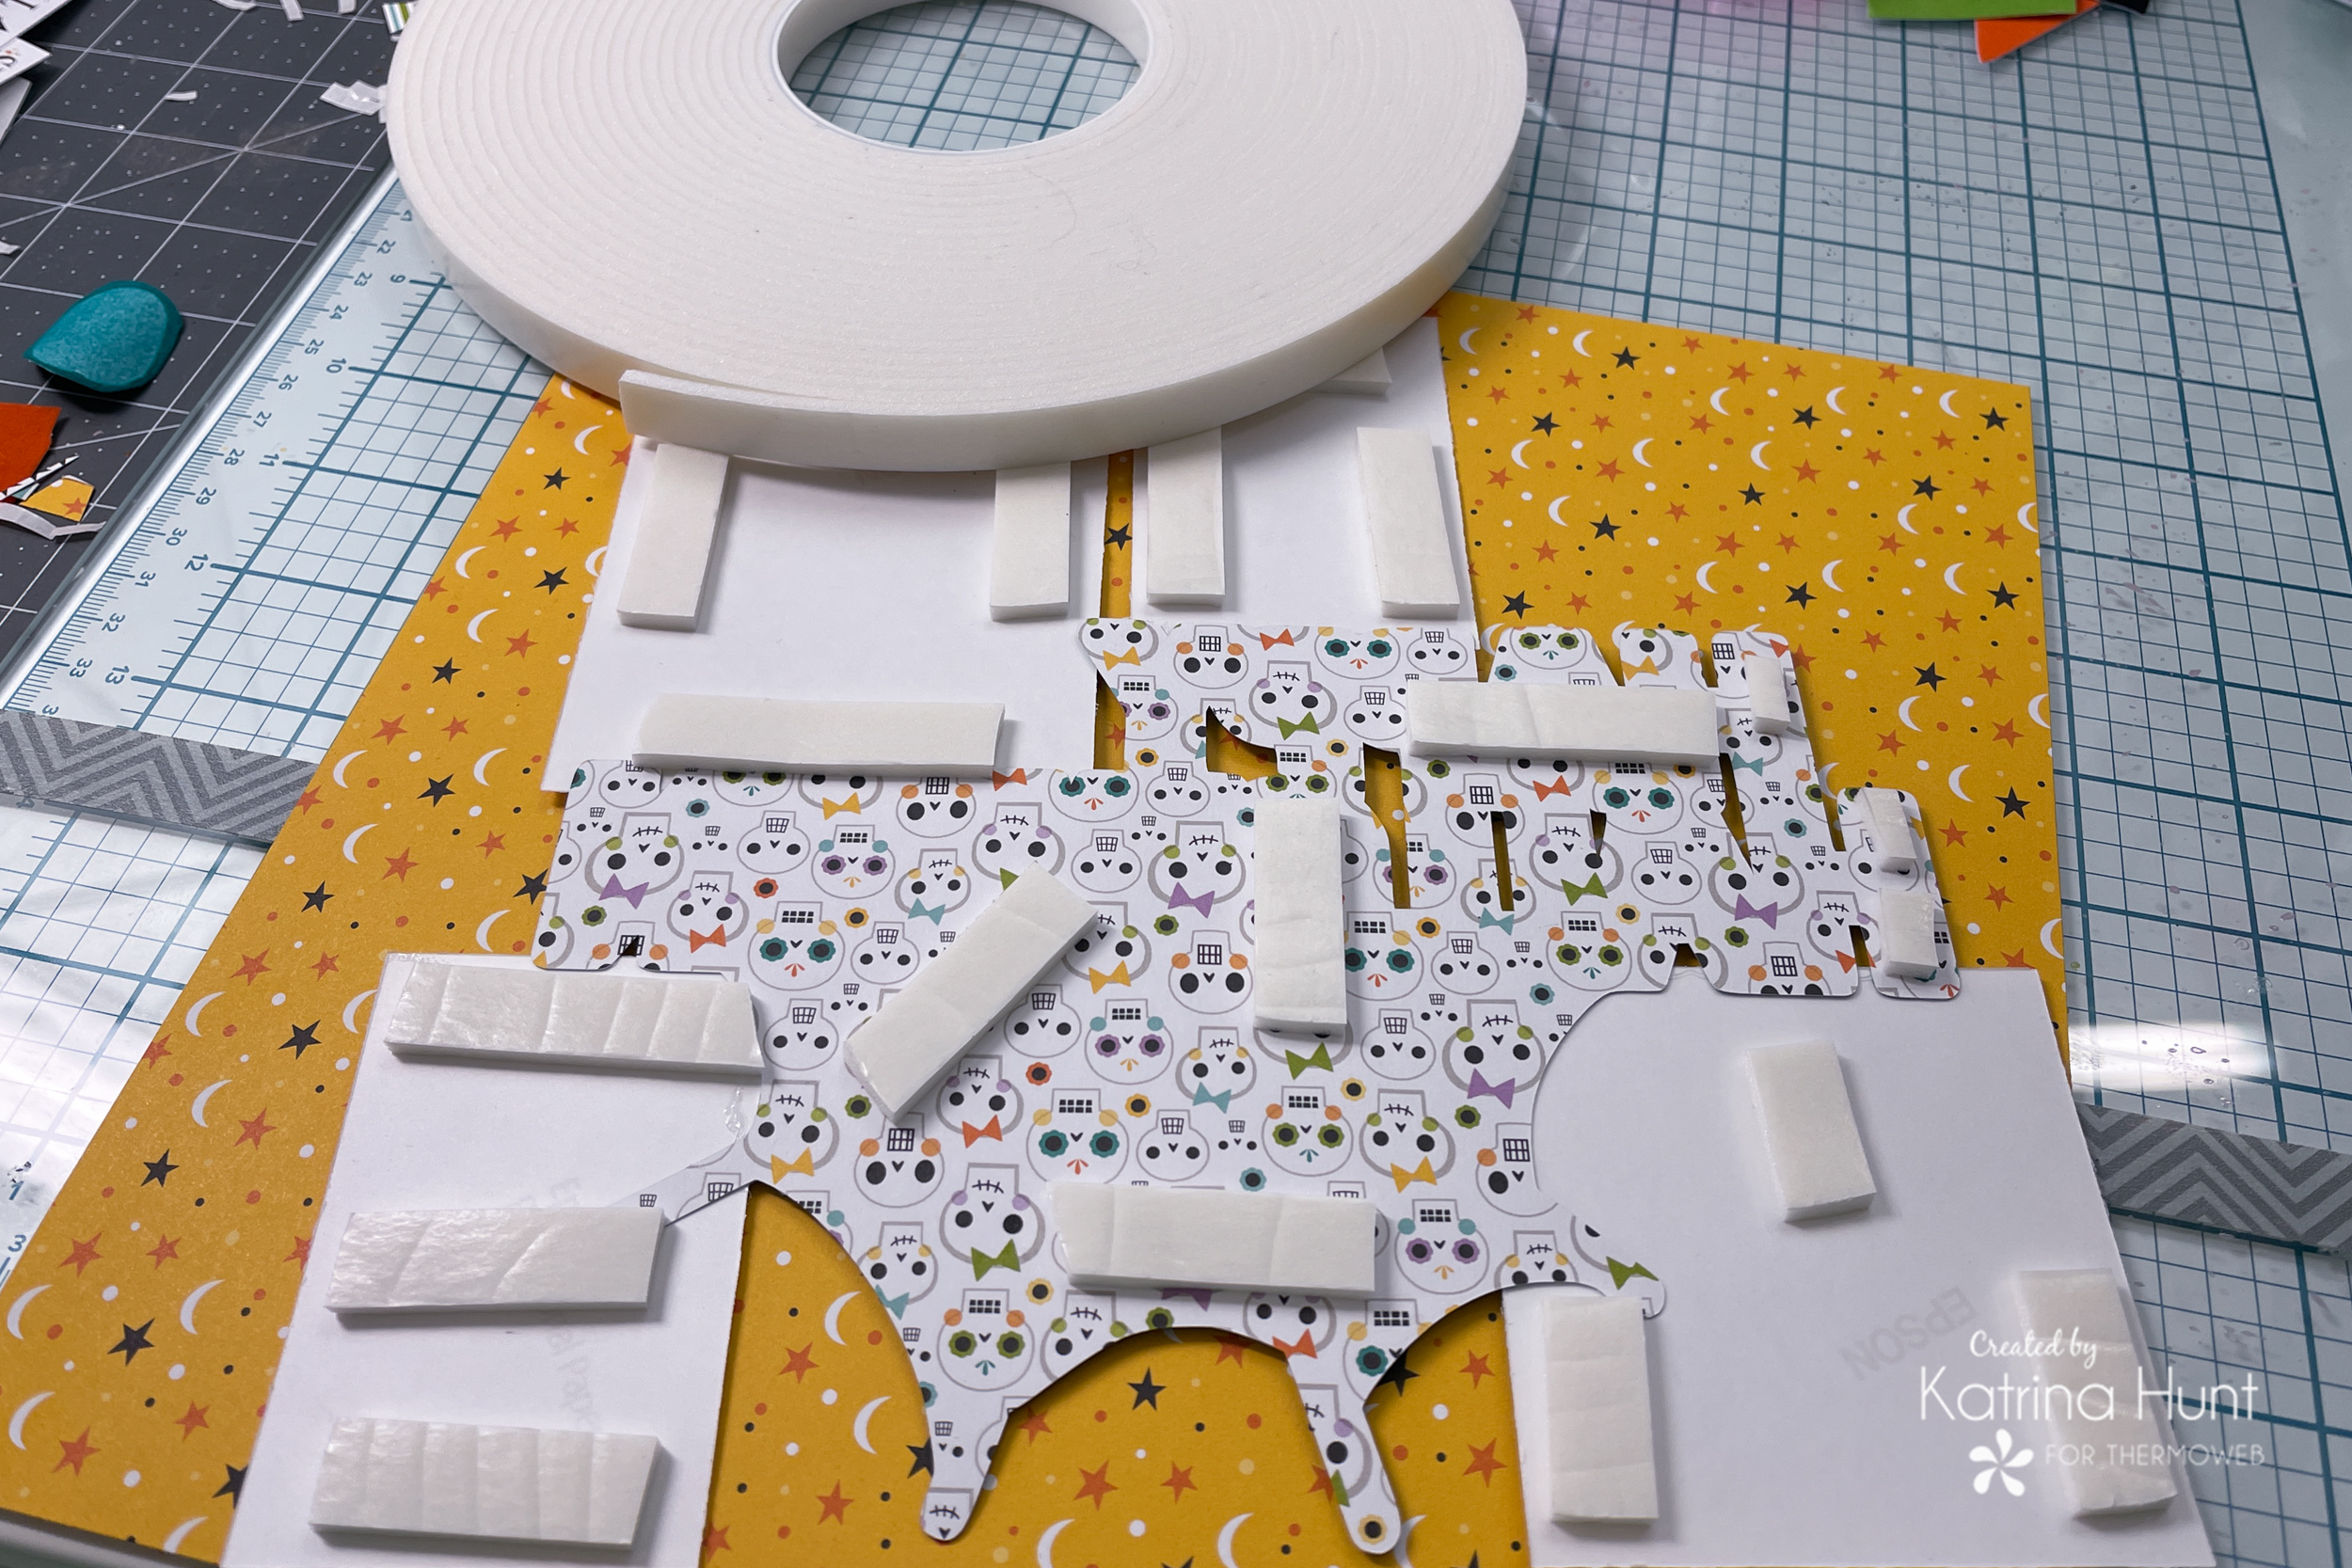
After adhering the center title section to my yellow center paper, I started adding the letters to to the cut file by using the 3D Foam Tape in 1/16th inch. This was great because I could easily trim the tape to the size I needed to fit the letters.
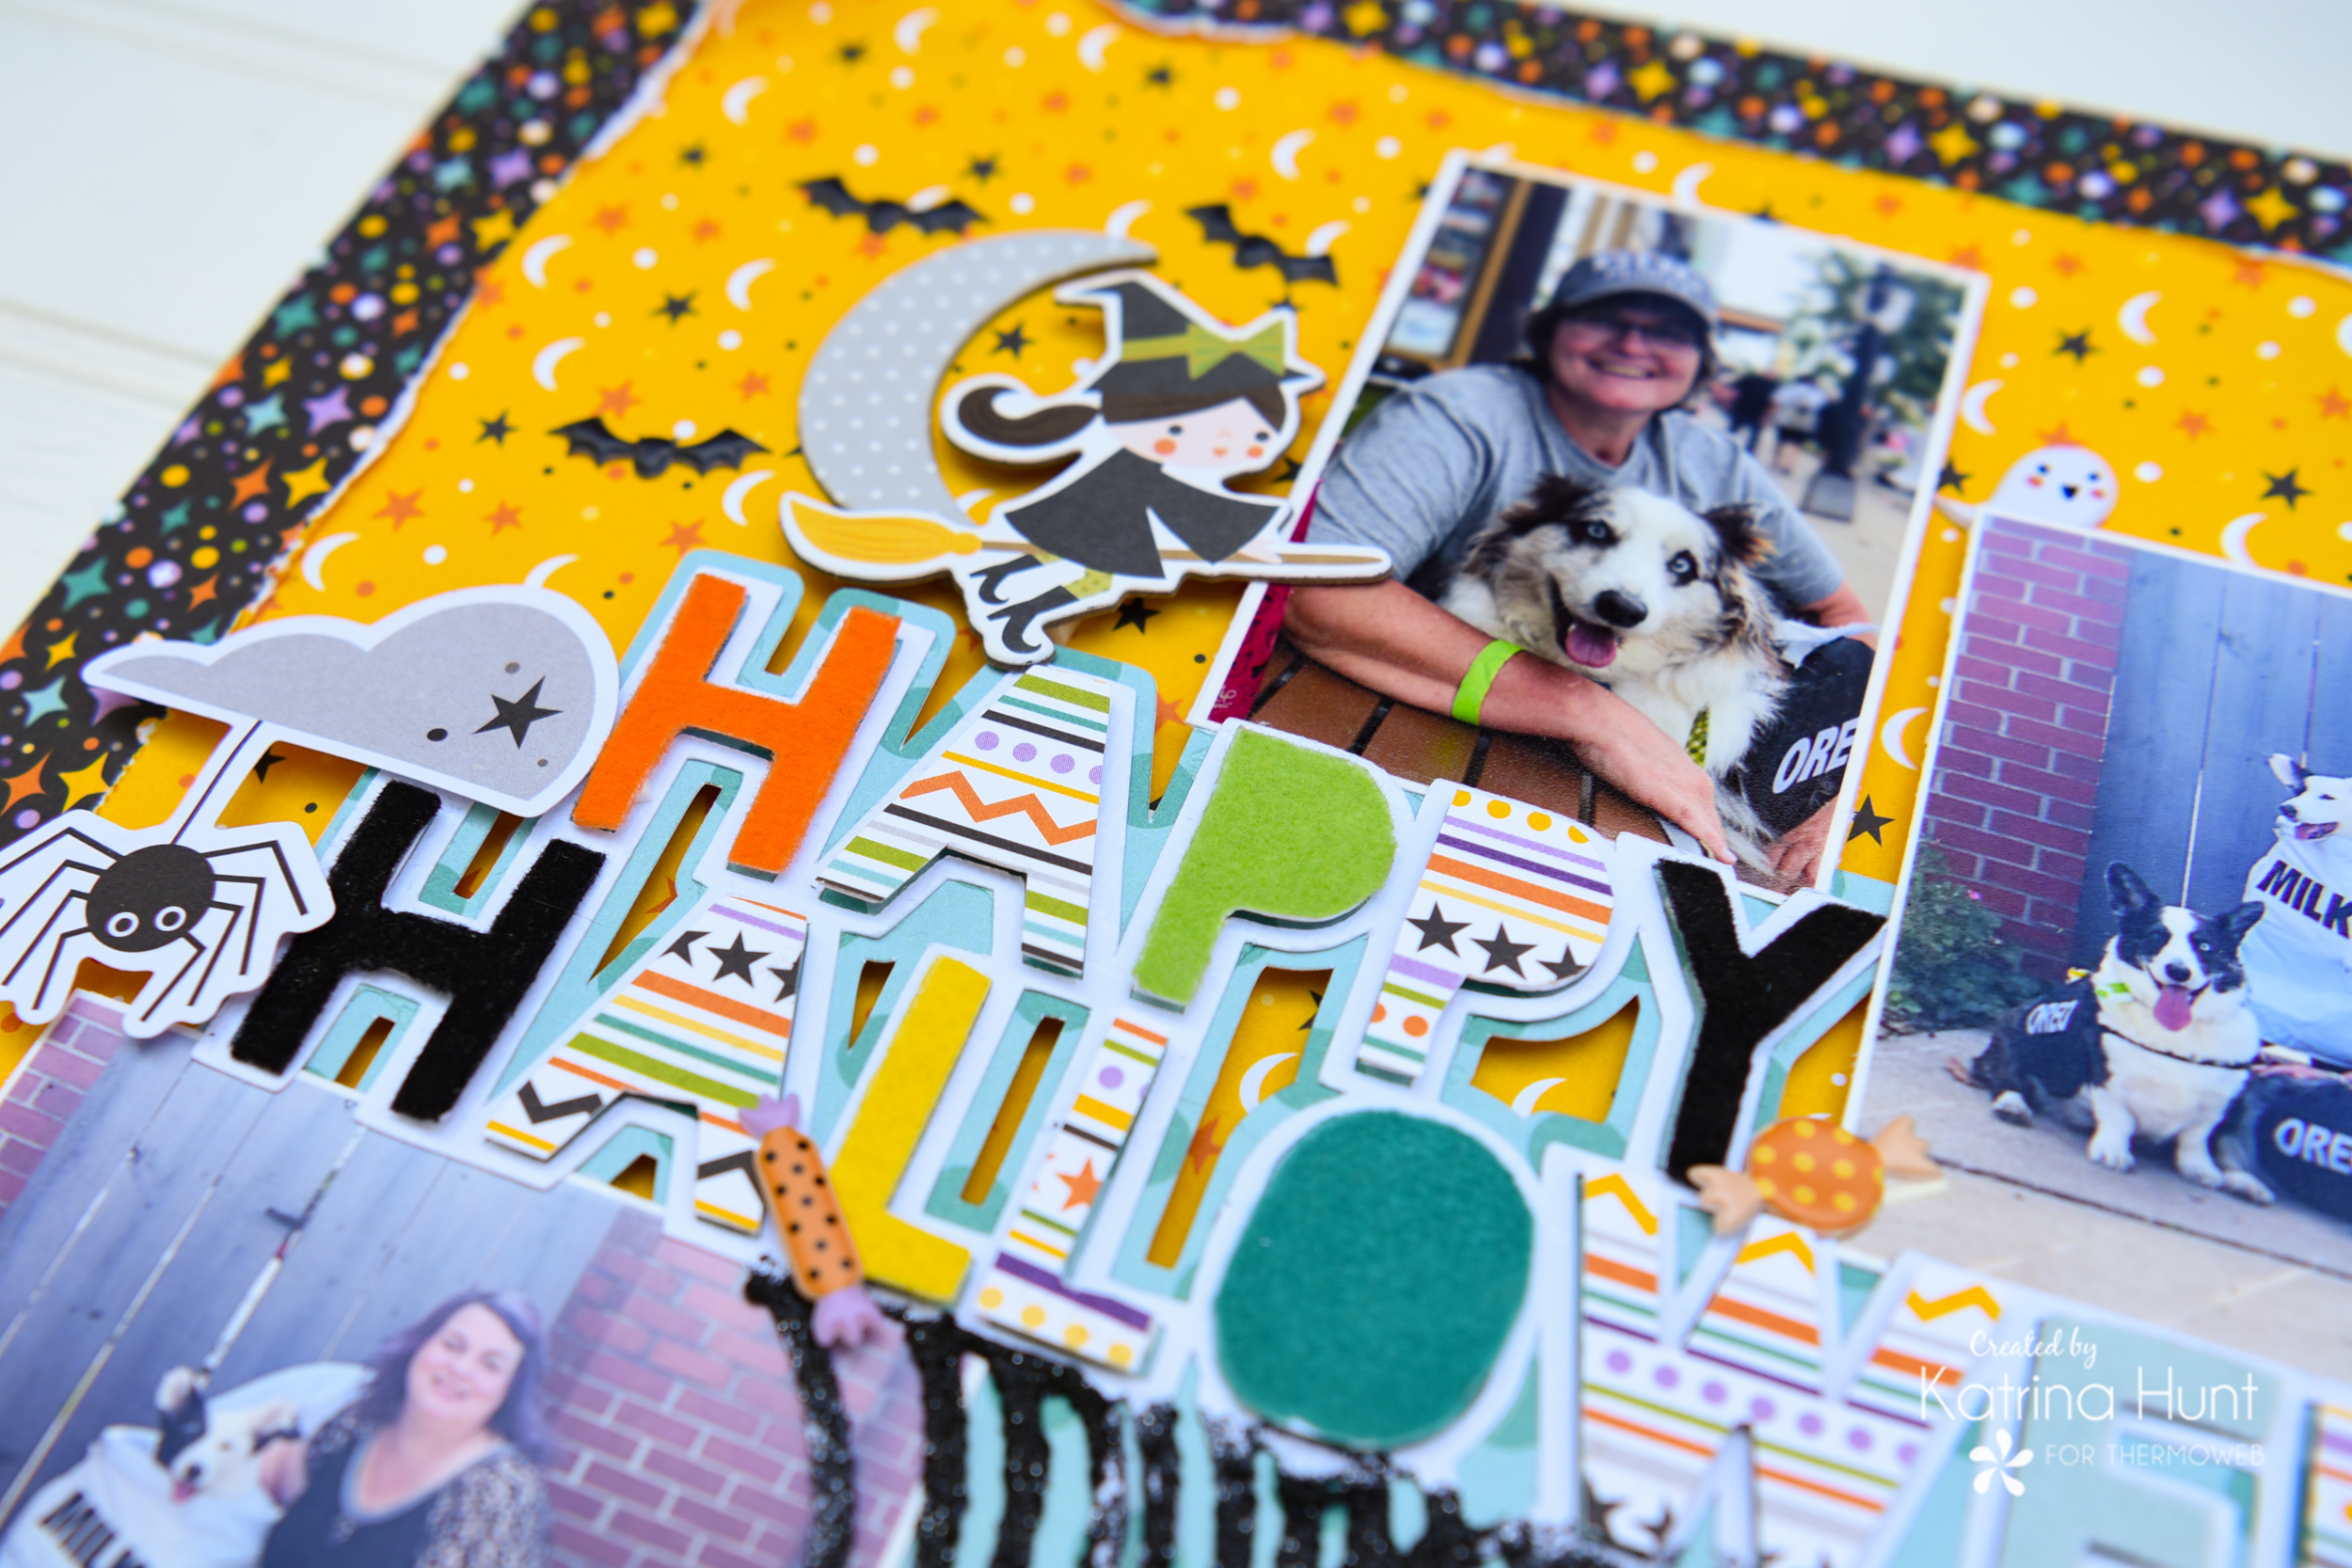
I added a few embellishments and was done in a jiffy with my layout! Honestly with the help for the glitter gel and the flock, I think this layout came together quicker than me finding the pictures and cutting out the cut file!
So have a spooky October and get those Halloween pictures scrapped! Therm O Web has great products to help you get that done with a little something extra!
[…] Visit the Therm O Web blog for all the details. […]
[…] Visit the Therm O Web blog for all the details. […]