
Hello and welcome!
It’s Julia from Inflorescence Designs! I’m so joyful you are visiting today. This week we are turning it down a few degrees and allowing it to snow!
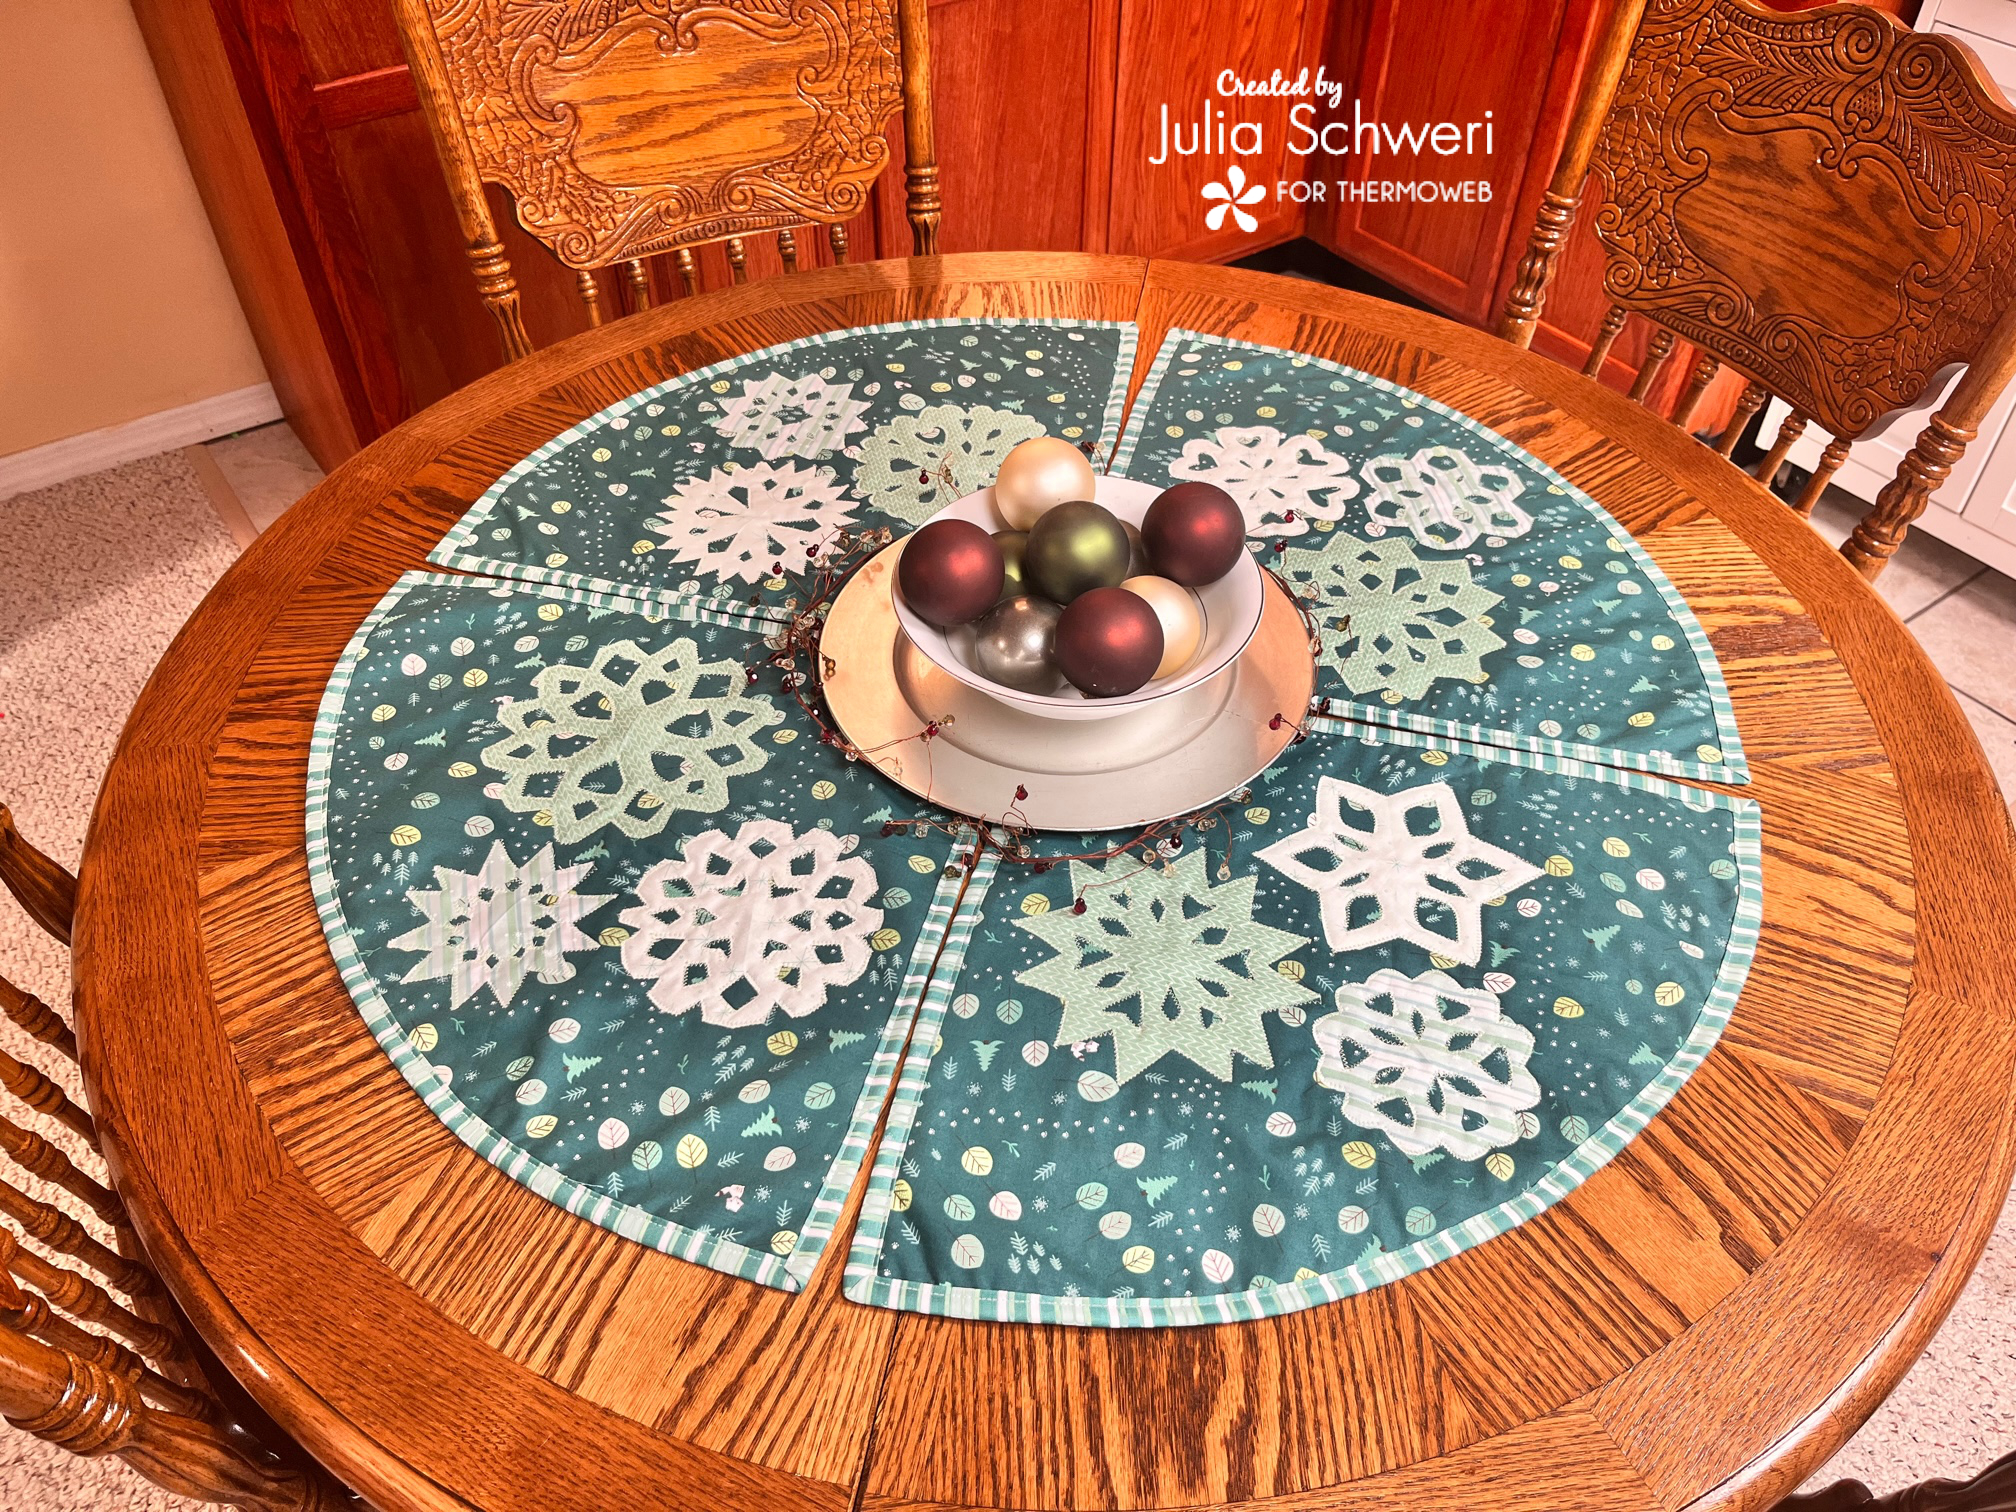
I am excited to share this project with you. As a child, it was always fun to cut out paper snowflakes in the winter to decorate the house with. Well today, I am sharing with you how you can take that same concept and use it with fabric!
I have included a YouTube video tutorial on how to fold and cut your fabric. This video tutorial is the best way to understand the folding process and therefore there are no other photos showing it. I hope you enjoy it!
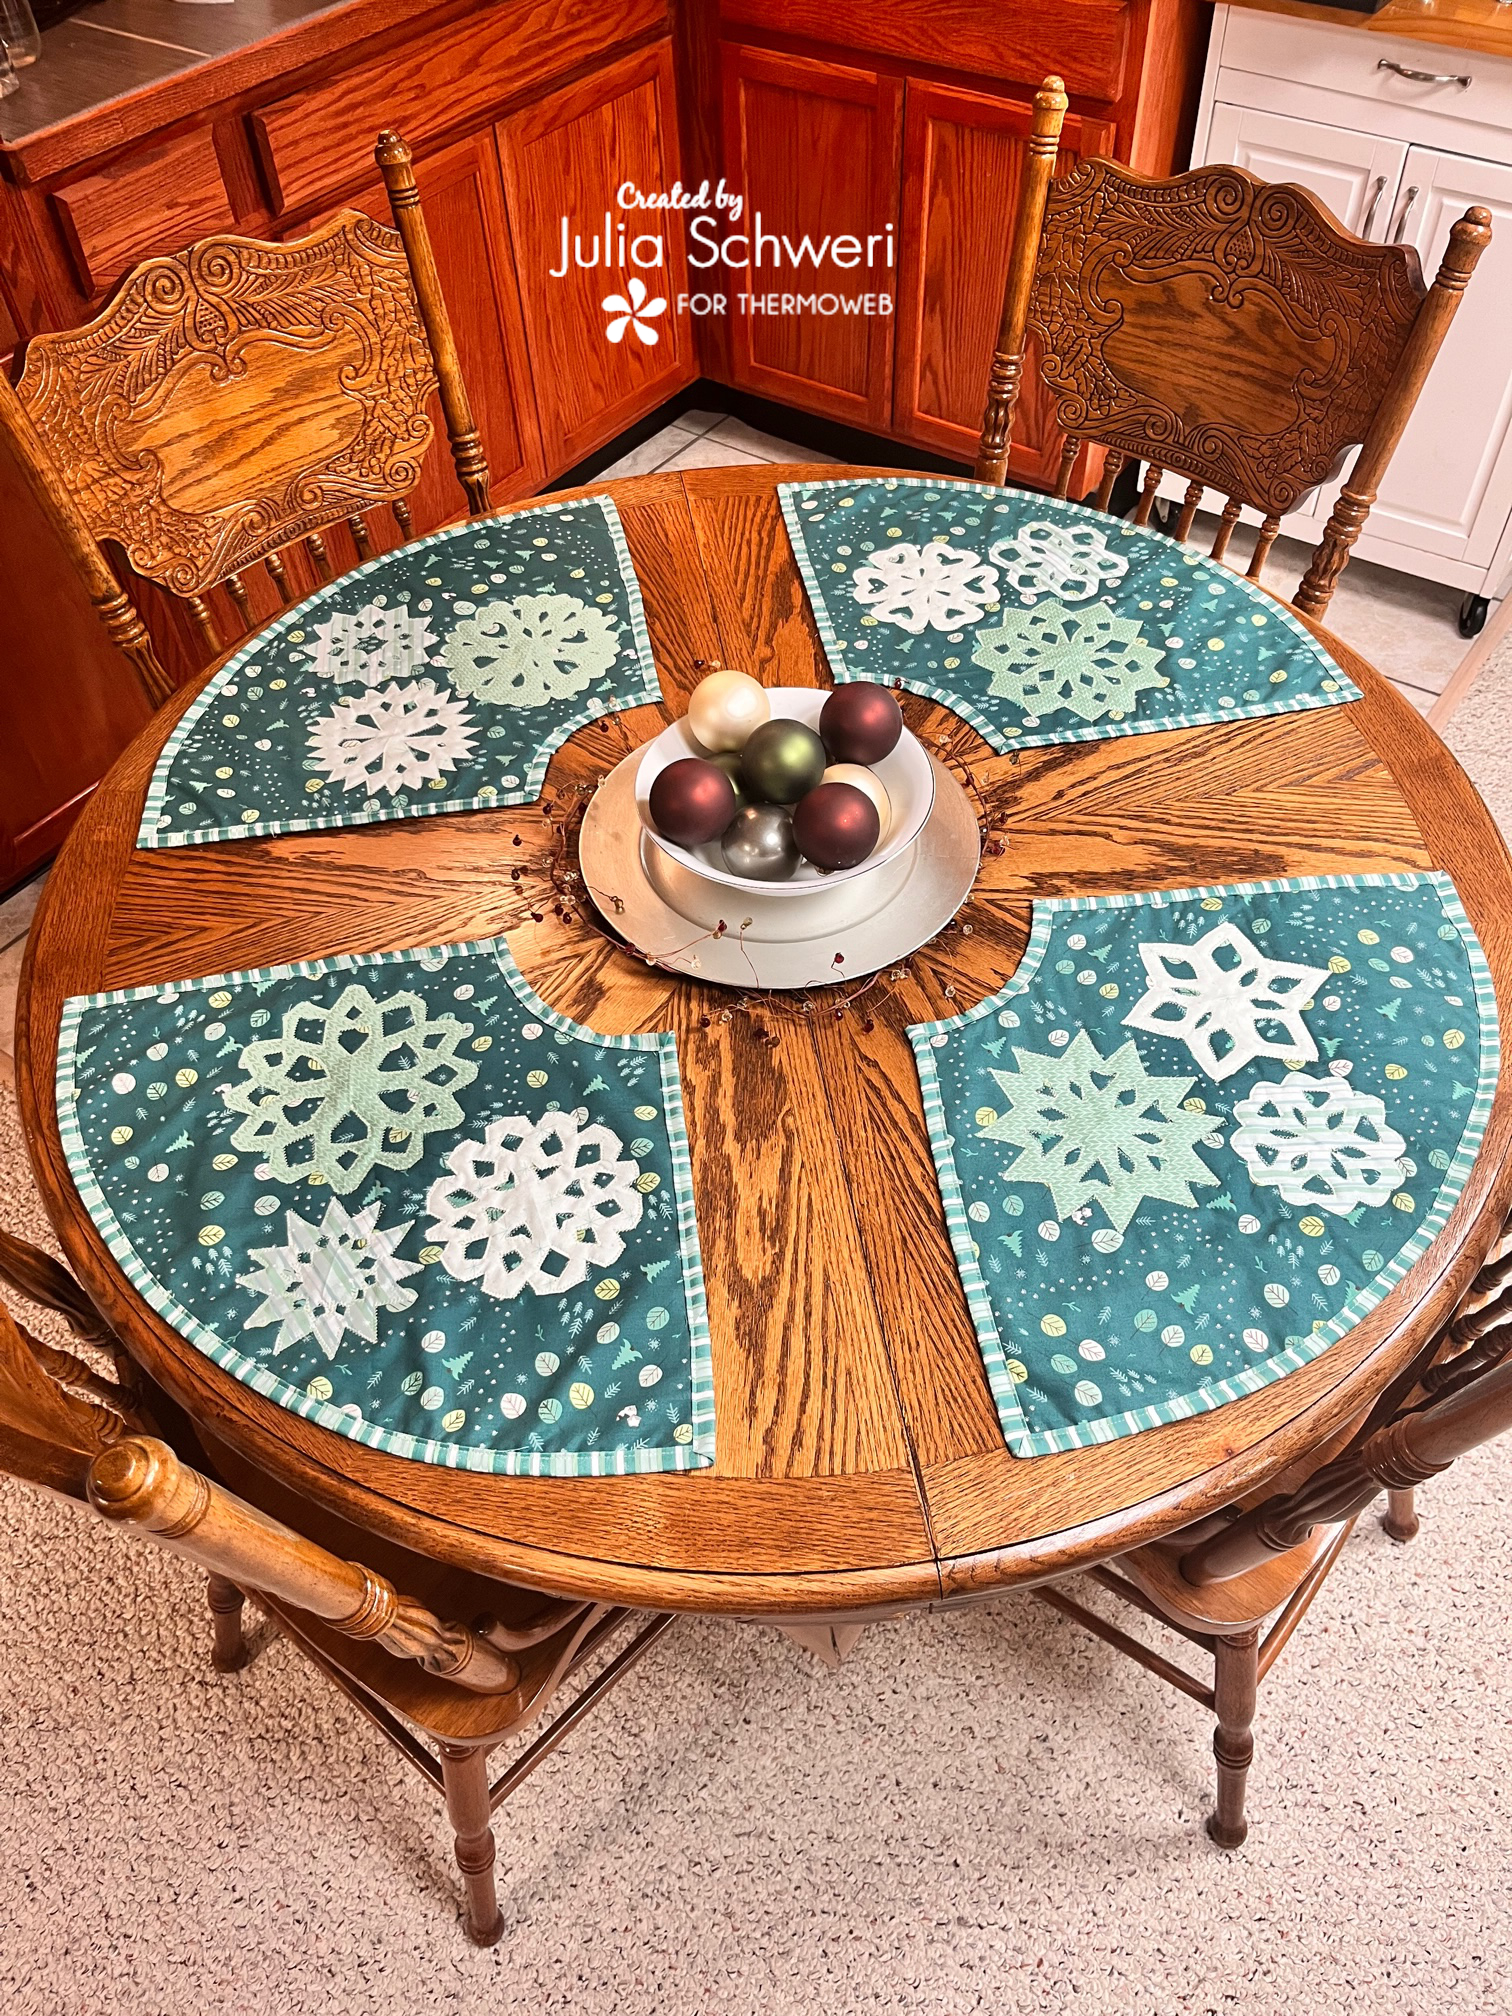
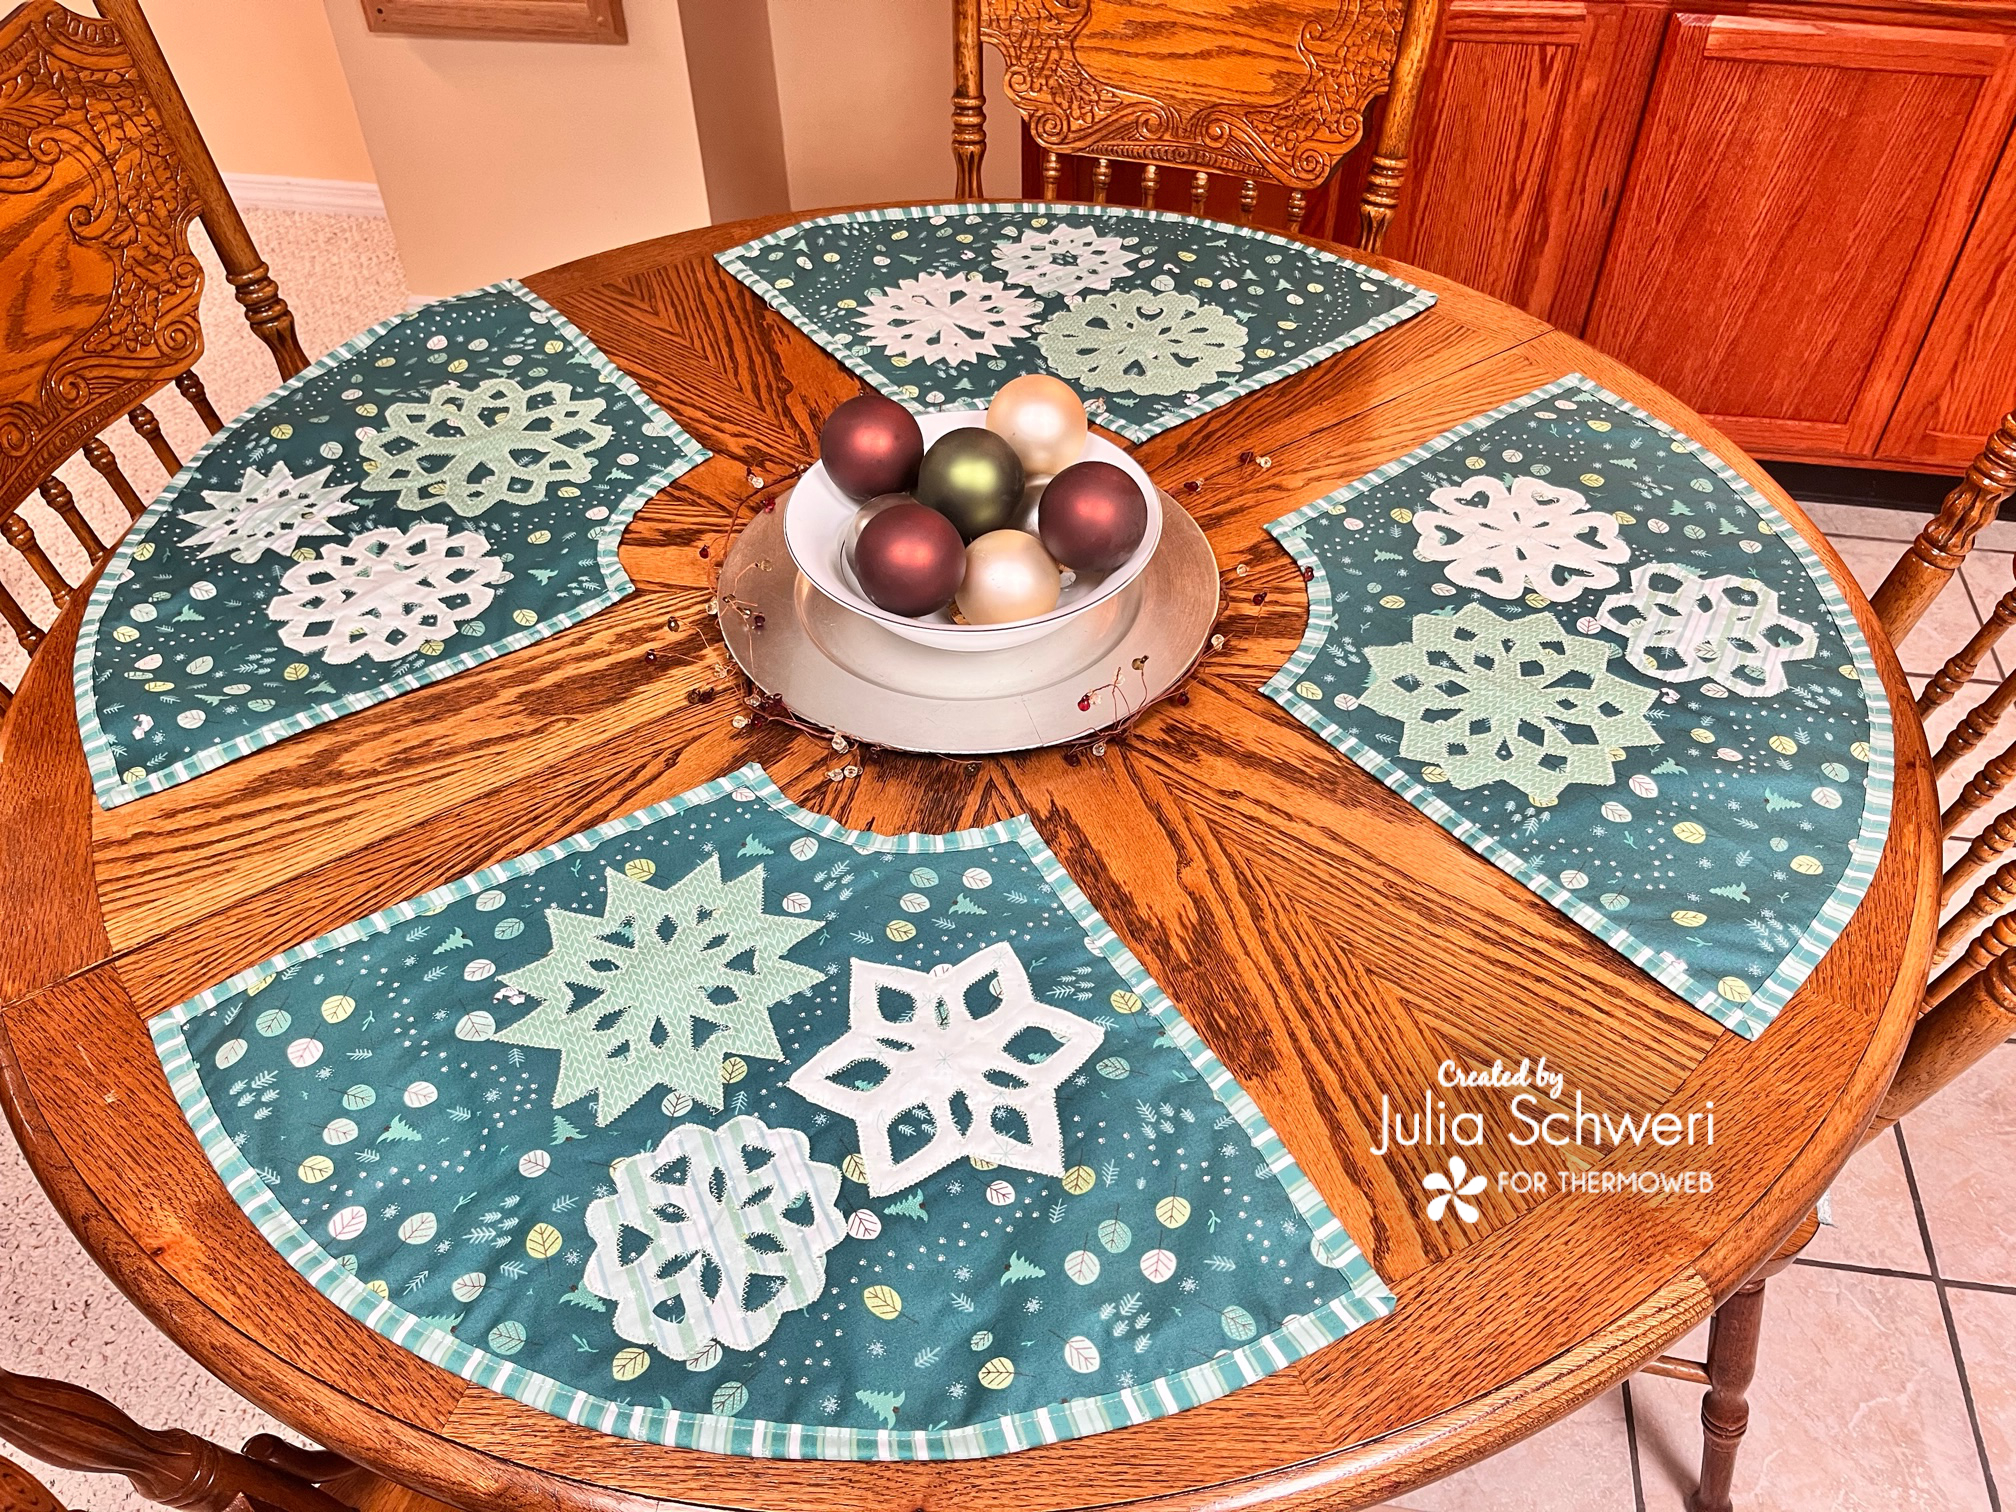
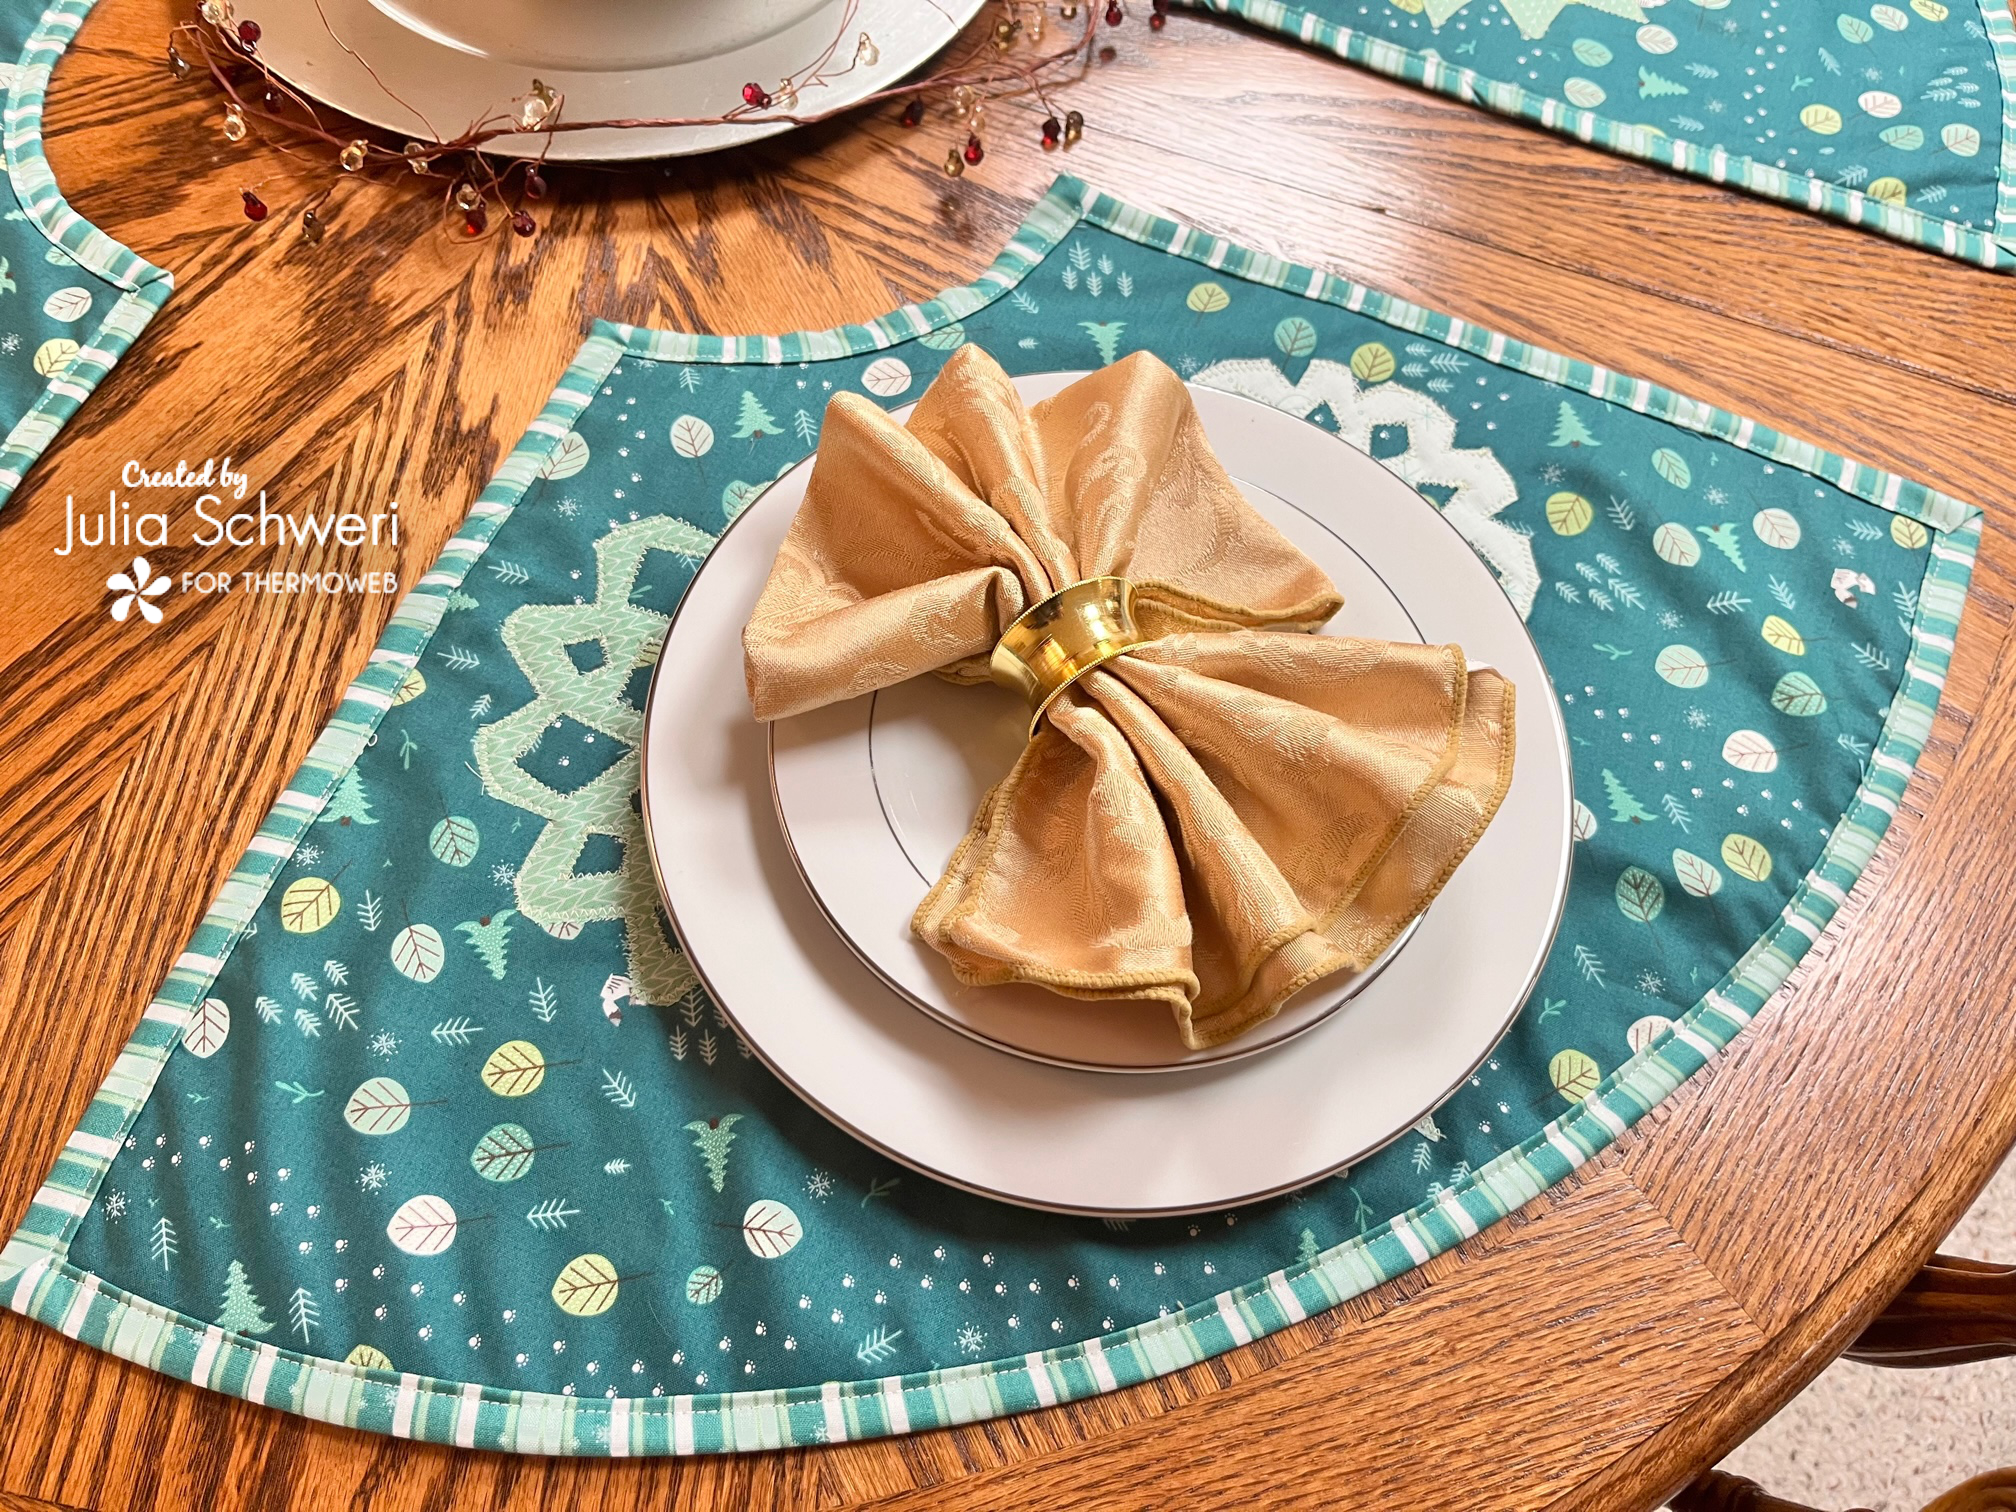
Festive Flurries Round Table Placemats
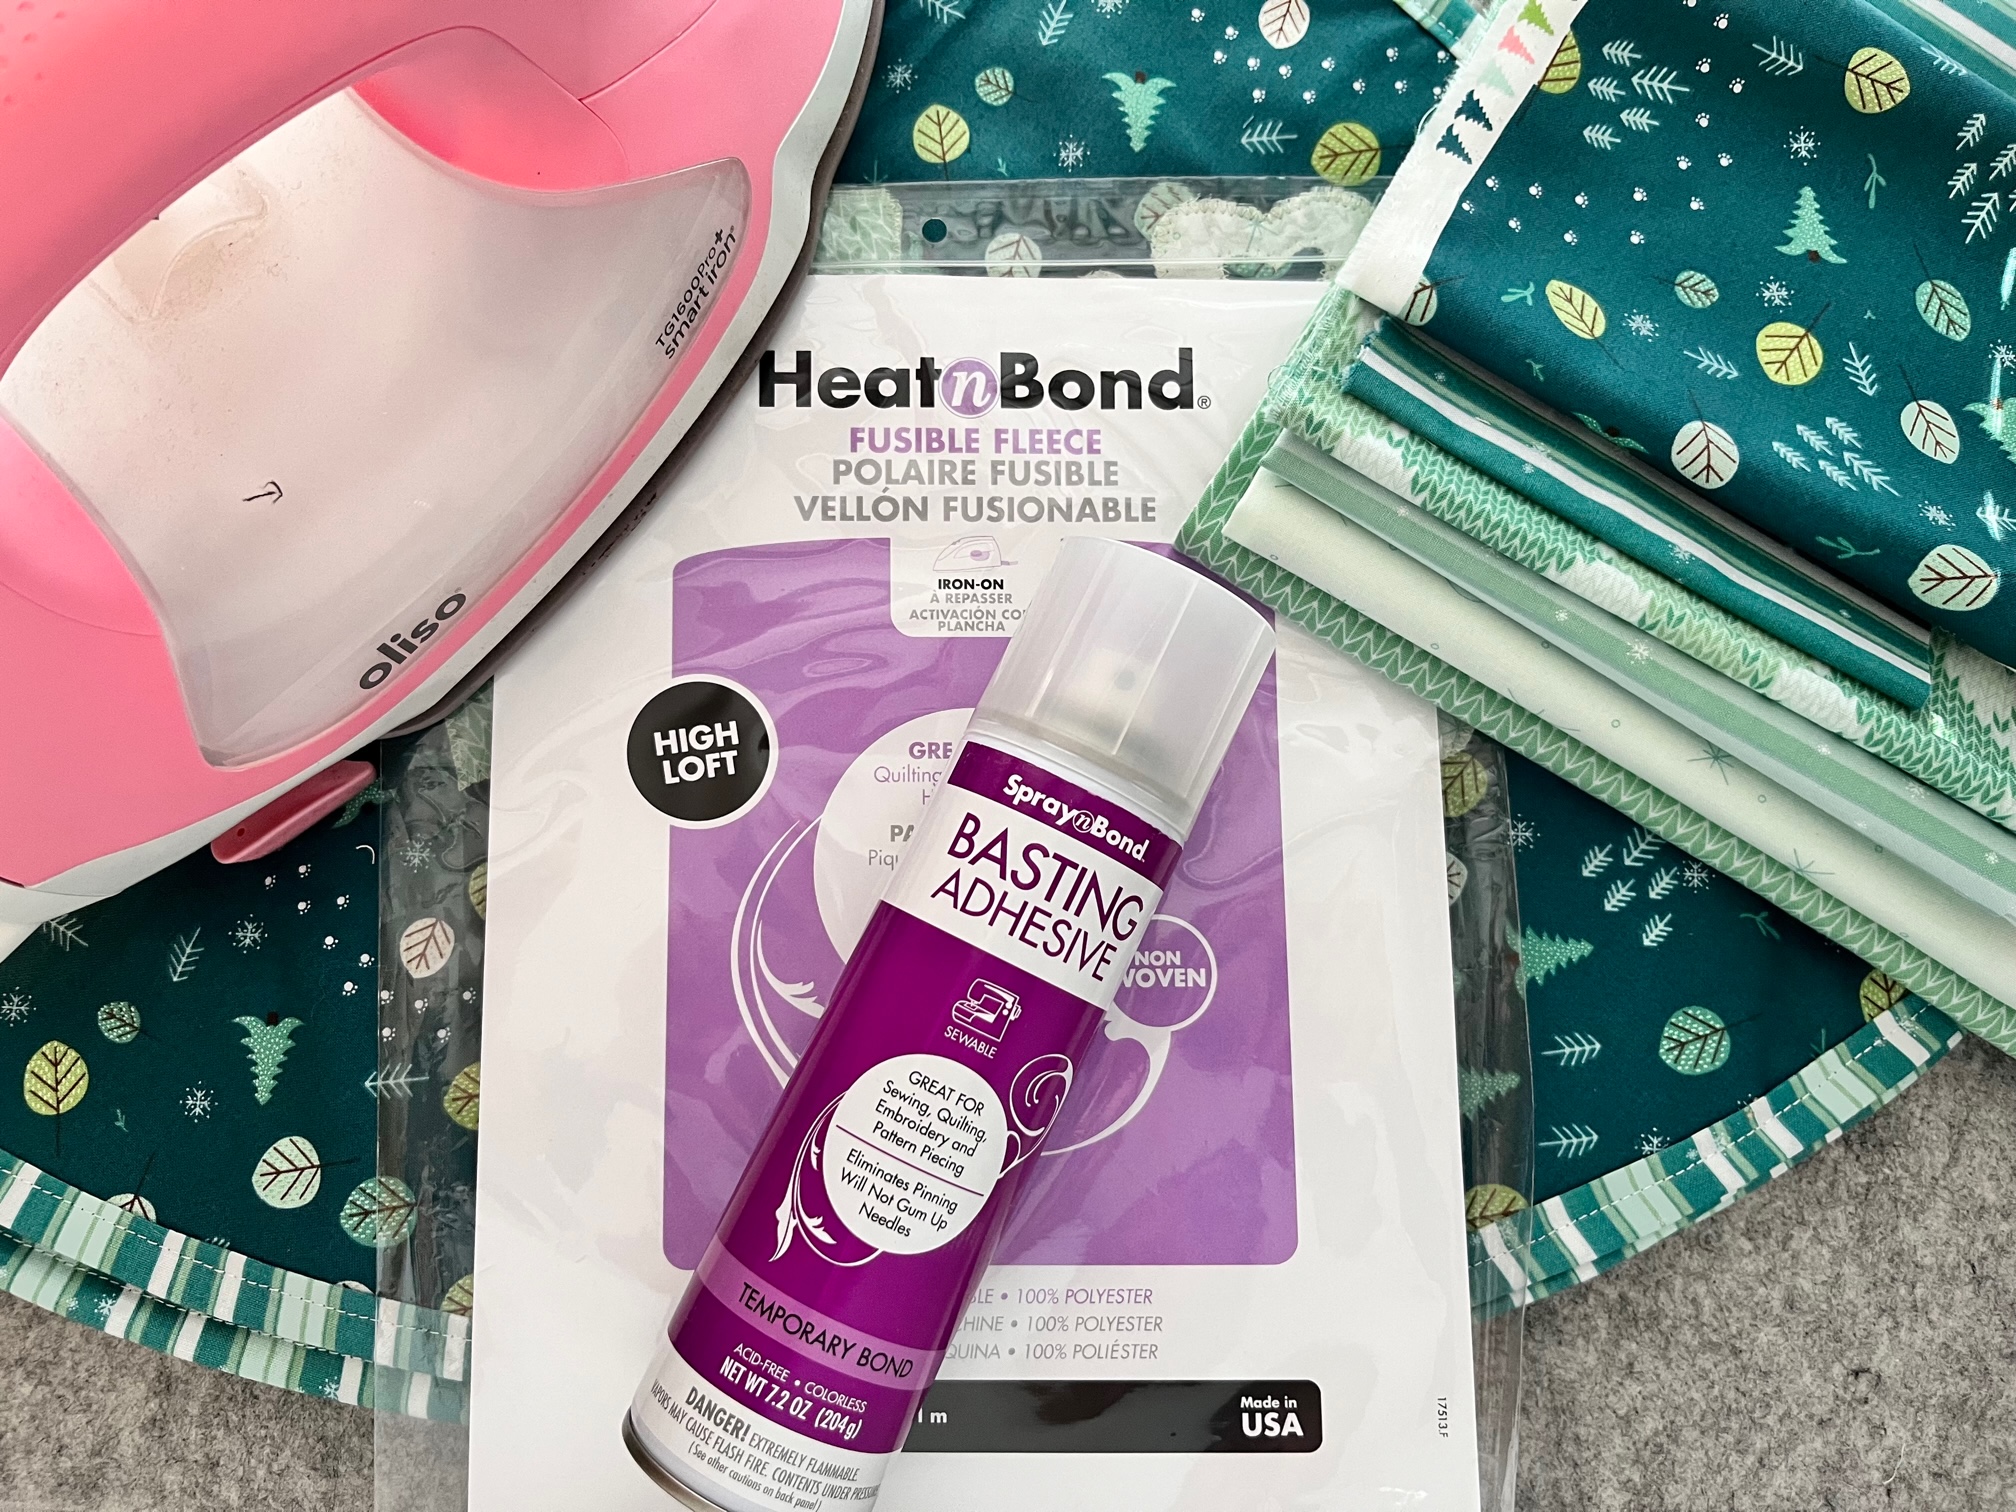
Supplies:
- HeatnBond Fusible Fleece: 1 yard x 45″ (I used the larger 45″ fleece. If using the smaller packaging, you will need 2 packs because they are only 20″ wide)
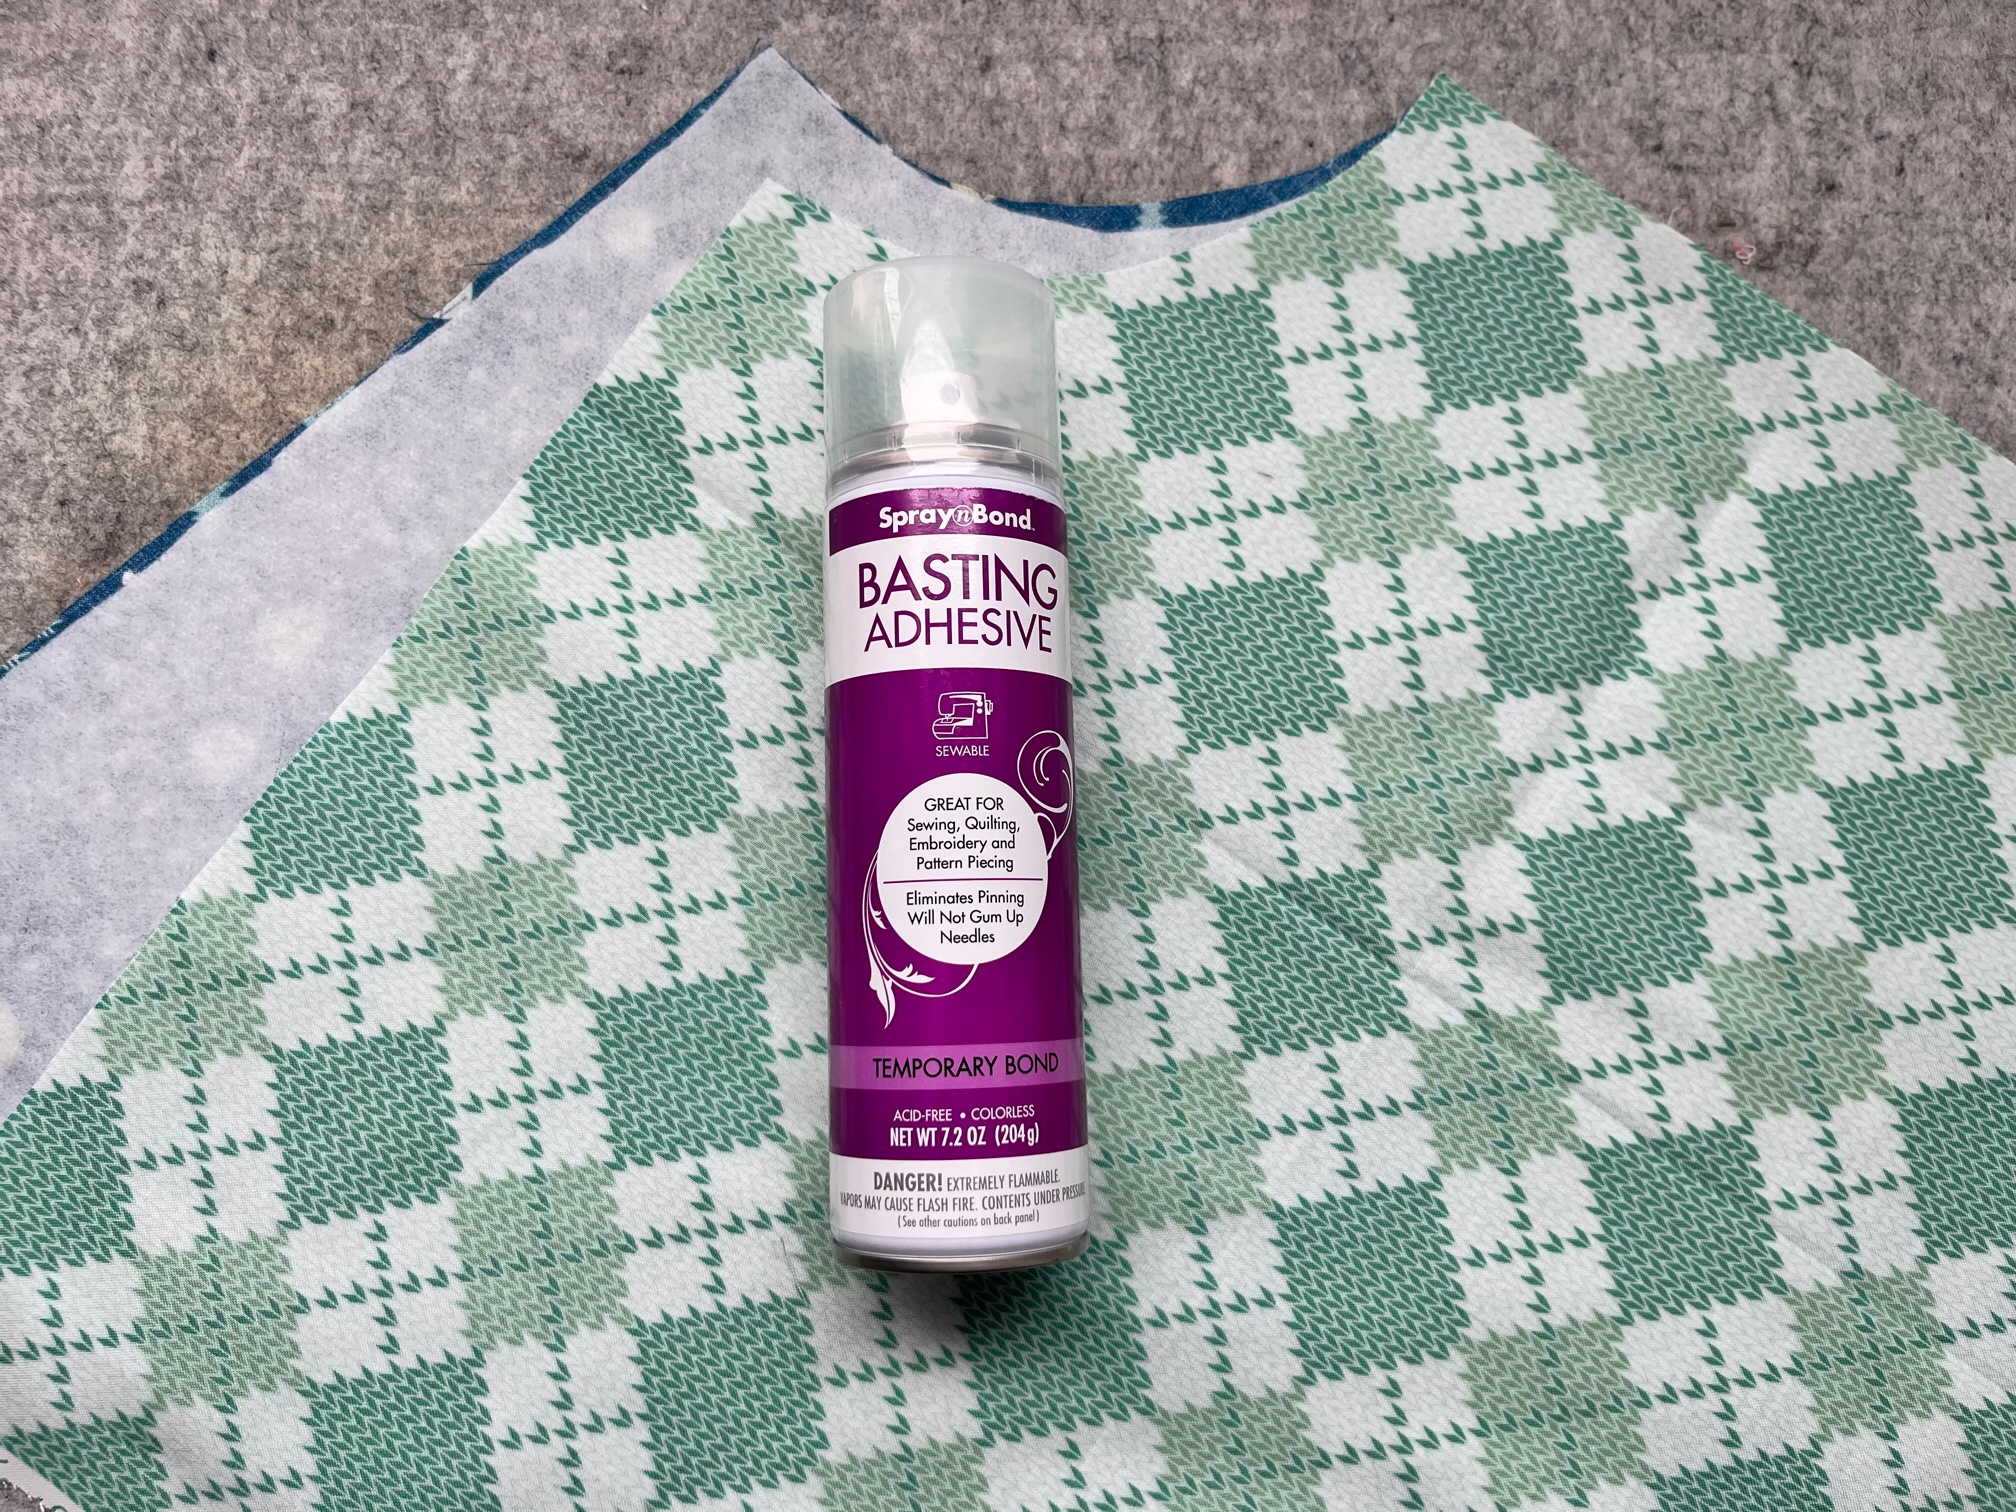
- SpraynBond Basting Spray
- Basic sewing notions
- Matching thread for applique
- Oliso Iron
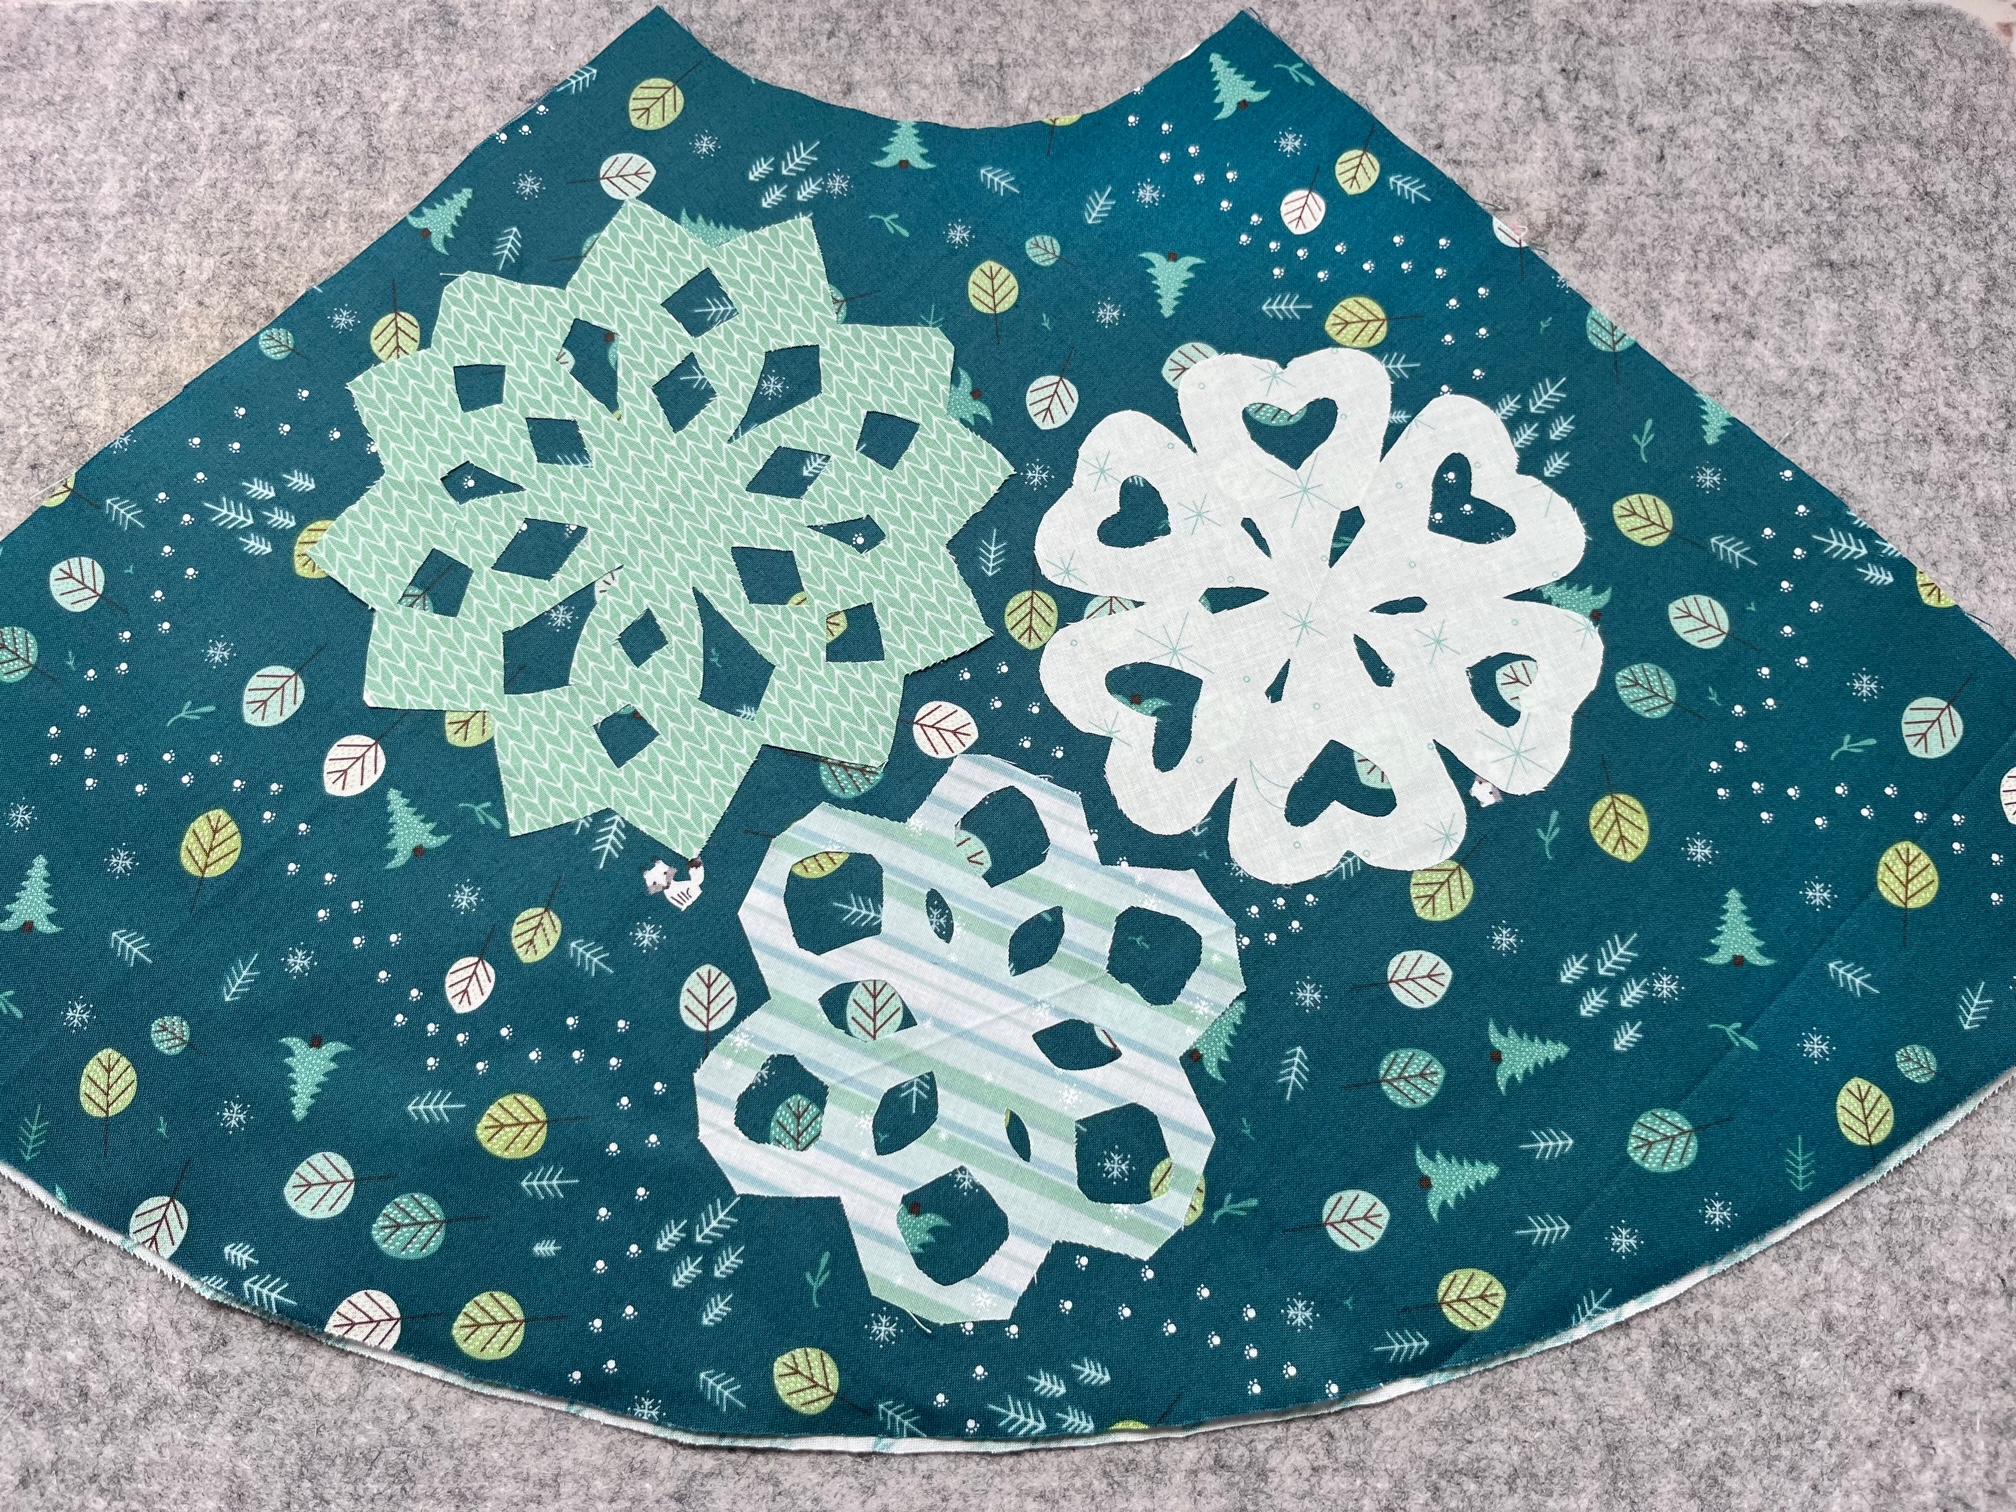
- Fabric: I used Riley Blake’s Forest Friends Fabric line by Jennifer Long.
- 1 yard for the front of the placemats: Tracks Teal cut into a 36″ square
- 1 yard for the back of the placemats: Argyle Frost cut into a 36″ square
- 7″ x wof (width of fabric) for the large snowflake fabric: Knitted Frost cut into (4) 7″ squares.
- 6″ x wof for the medium snowflake fabric: Sky Gazing Mist cut into (4) 6″ squares.
- 5″ x wof for the small snowflake fabric: Stripe Ice cut into (4) 5″ squares.
- Binding: 3/4 yard Stripe Frost
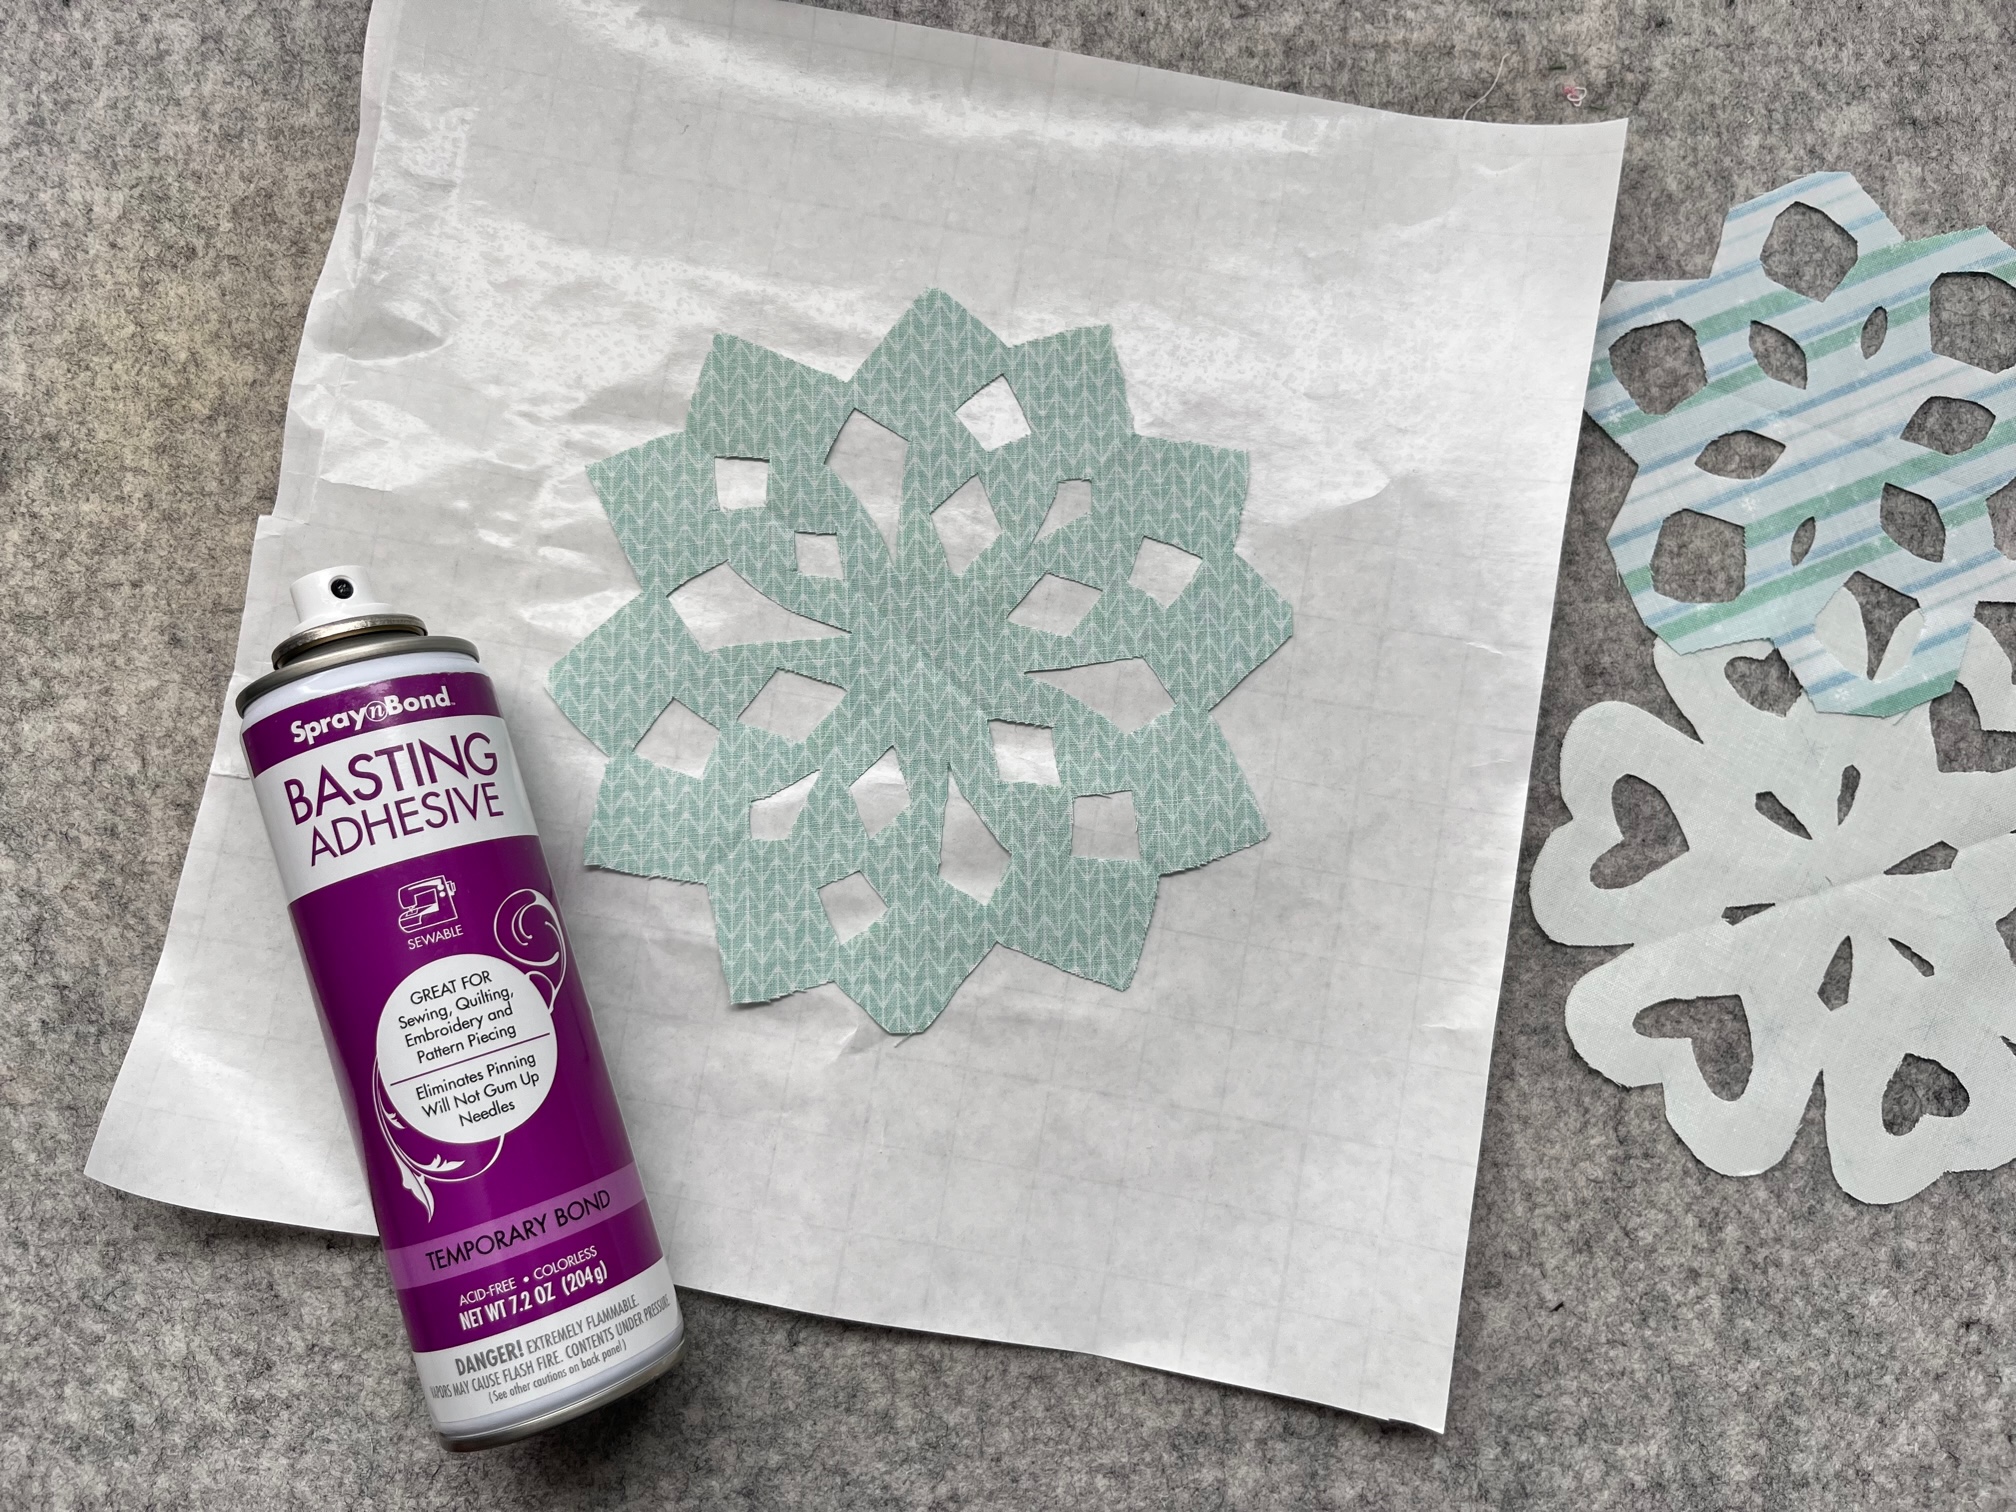
- Parchment or scrap paper
Cutting the Snowflakes:
Please watch the YouTube video for snowflake-cutting instructions.
Placemat Instructions:
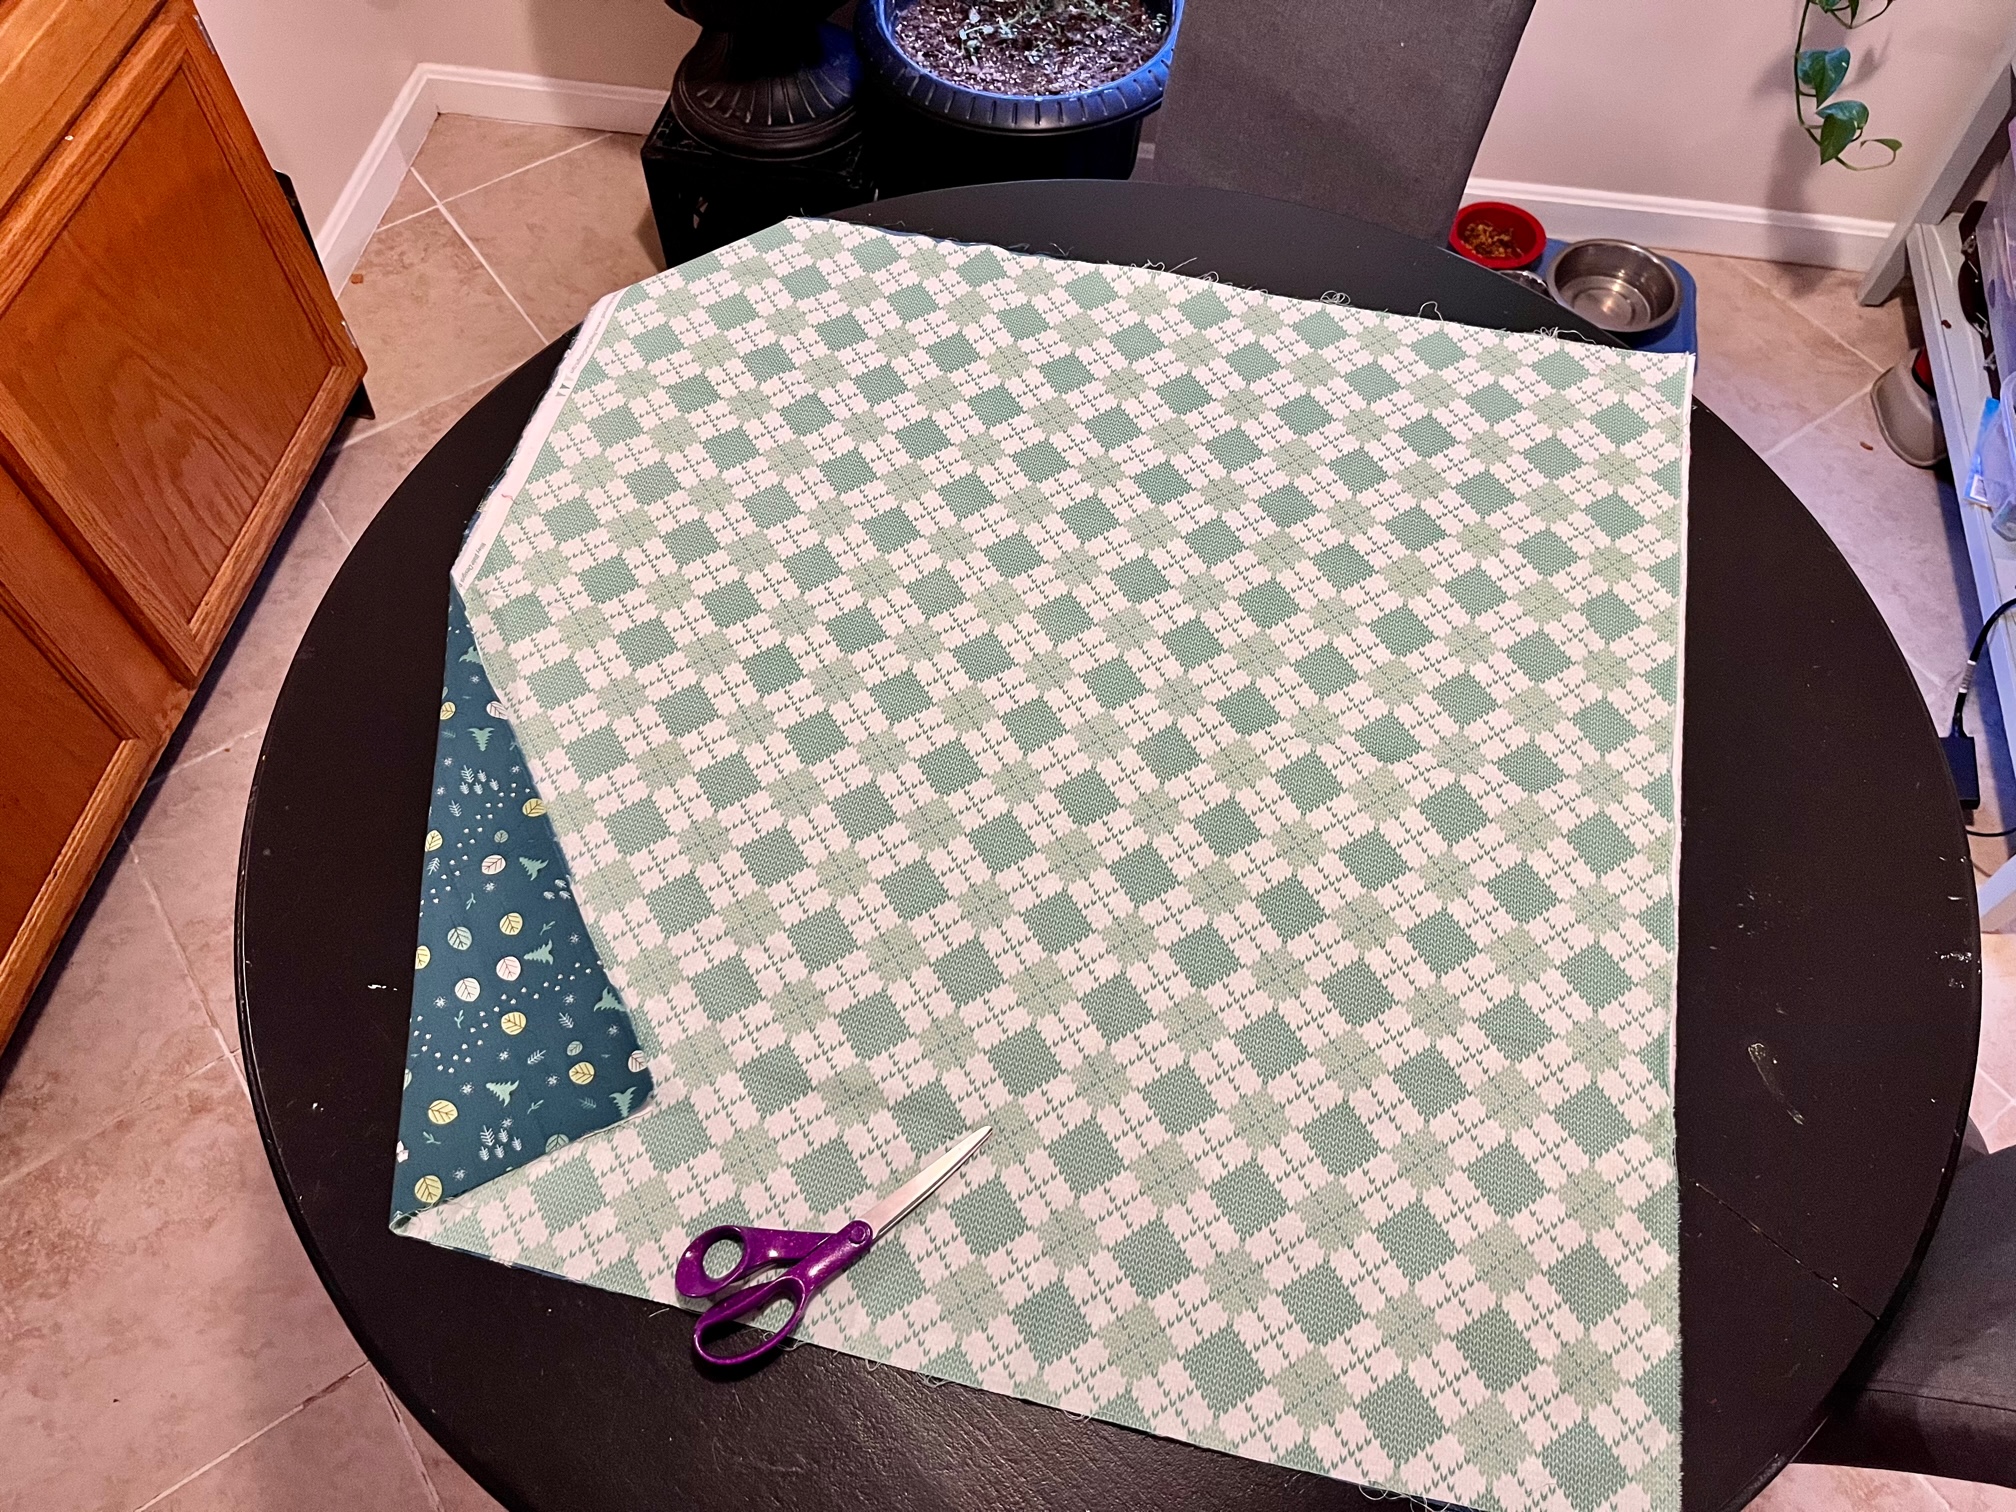
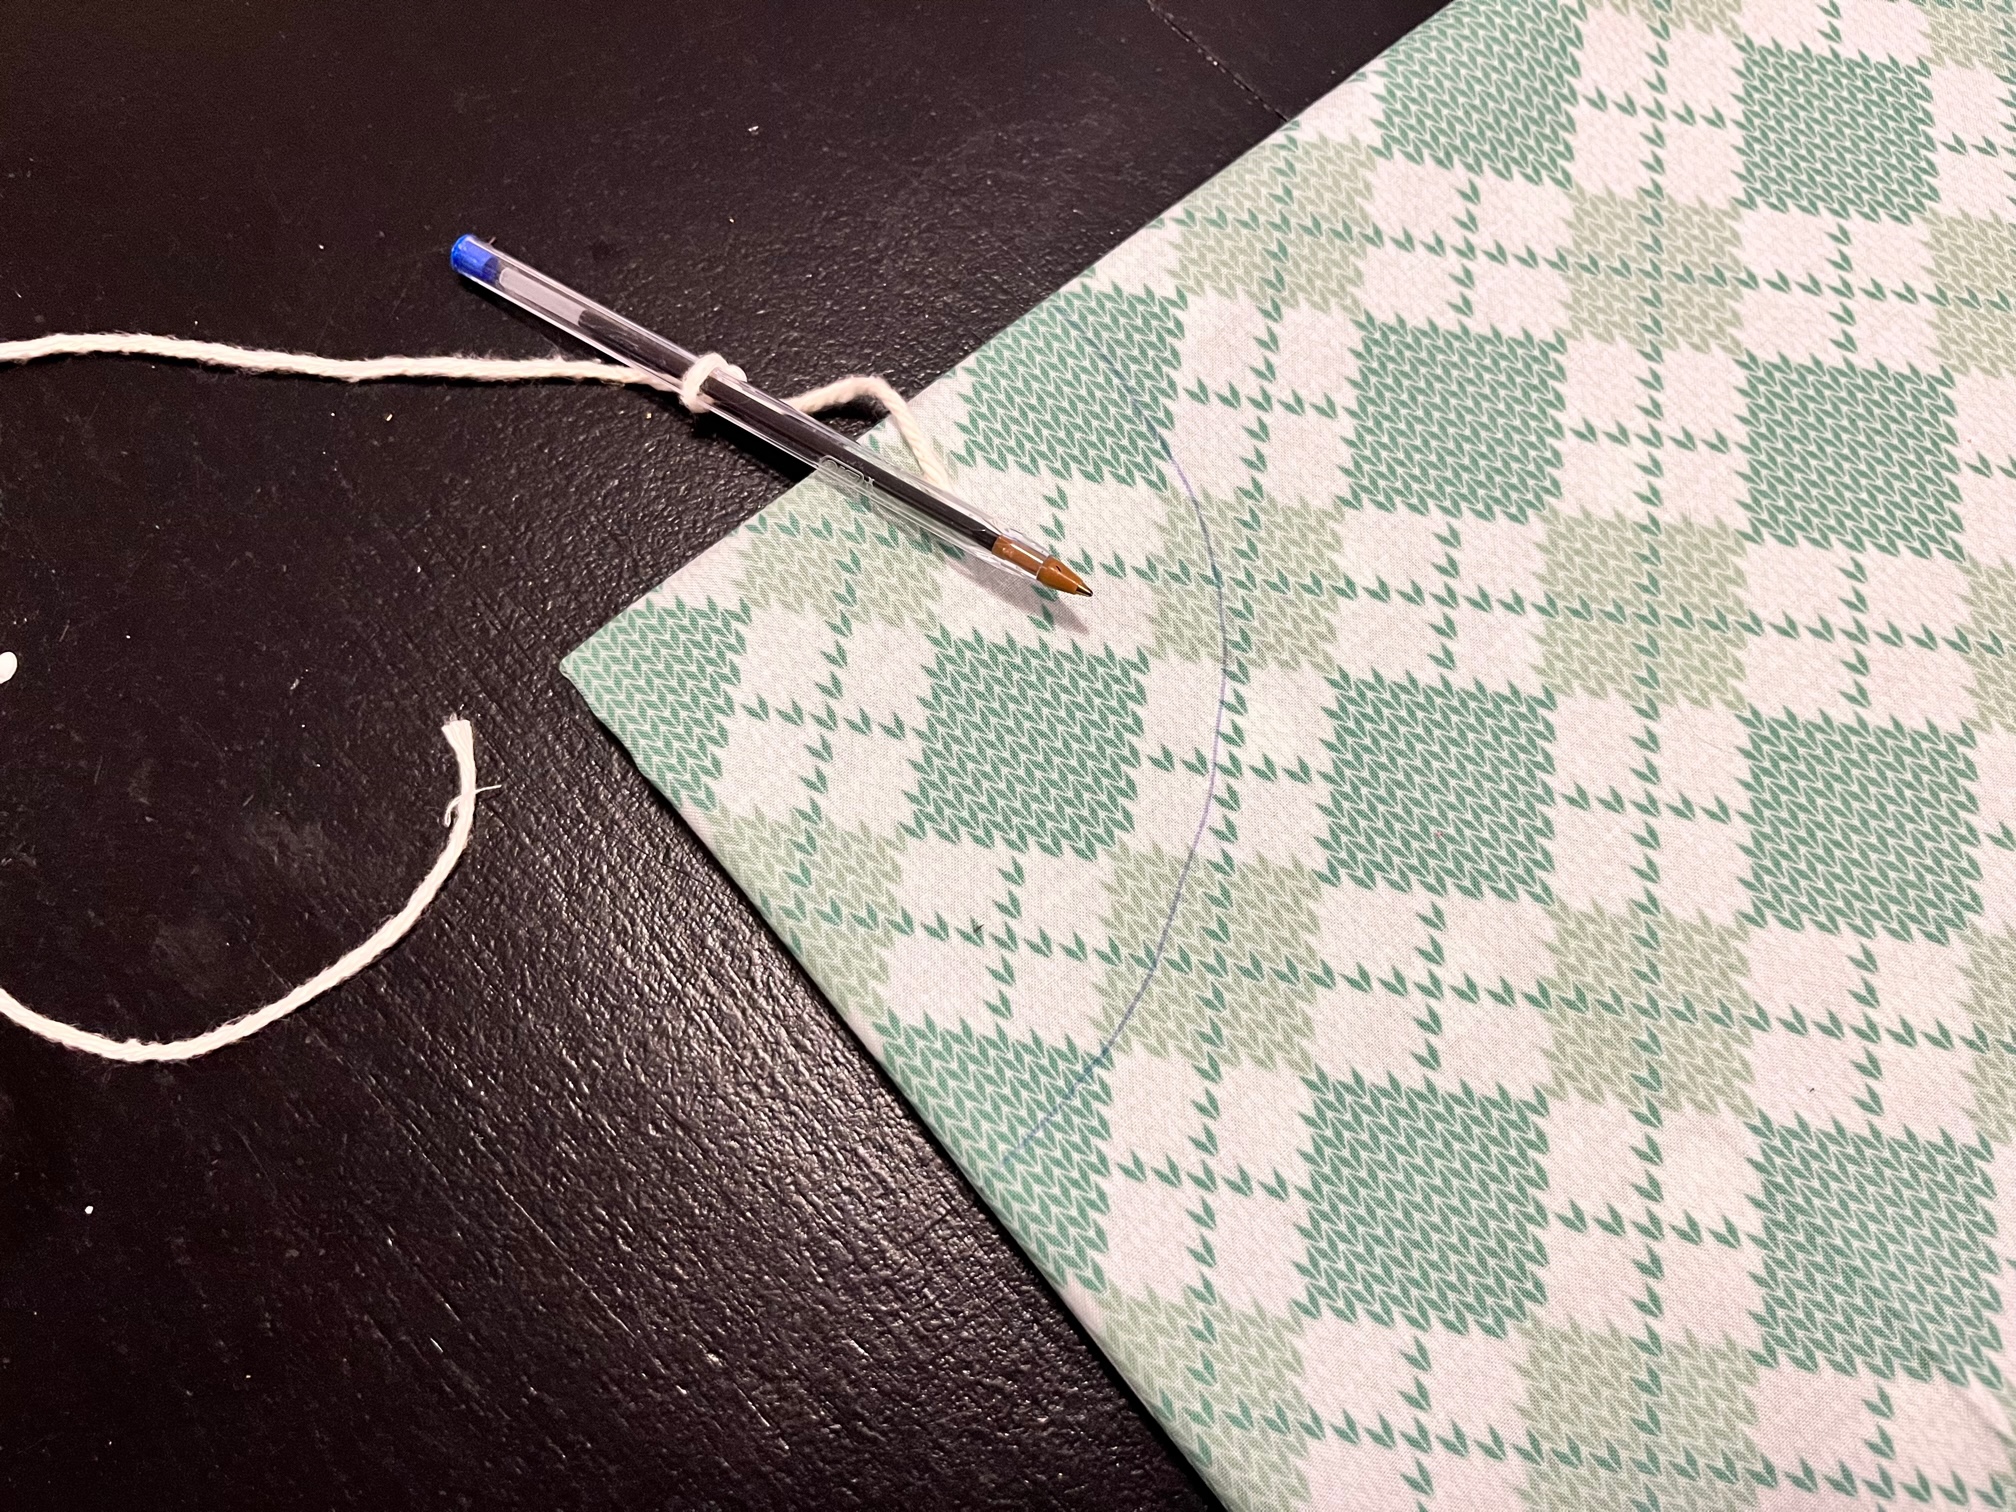
Begin by taking the 36″ front and back squares and sandwiching them together wrong sides facing. Align the edges and fold over 2 times. You definitely need a large space to do this. I used my kitchen table (you can see my kids like to paint and do other crafty things without a table covering with all the paint marks.)
Next…
You will need to cut your fabric into a circle. To get a really good circle, you can take a pen or pencil and attach a string to it. The string should be the length of one side. Holding the end of the string at the folded corner, fully extend the string and gently mark your fabric. You are holding the pivot point, which will help draw a quarter circle around your fabric. If you need more help watch the video below.
Then…
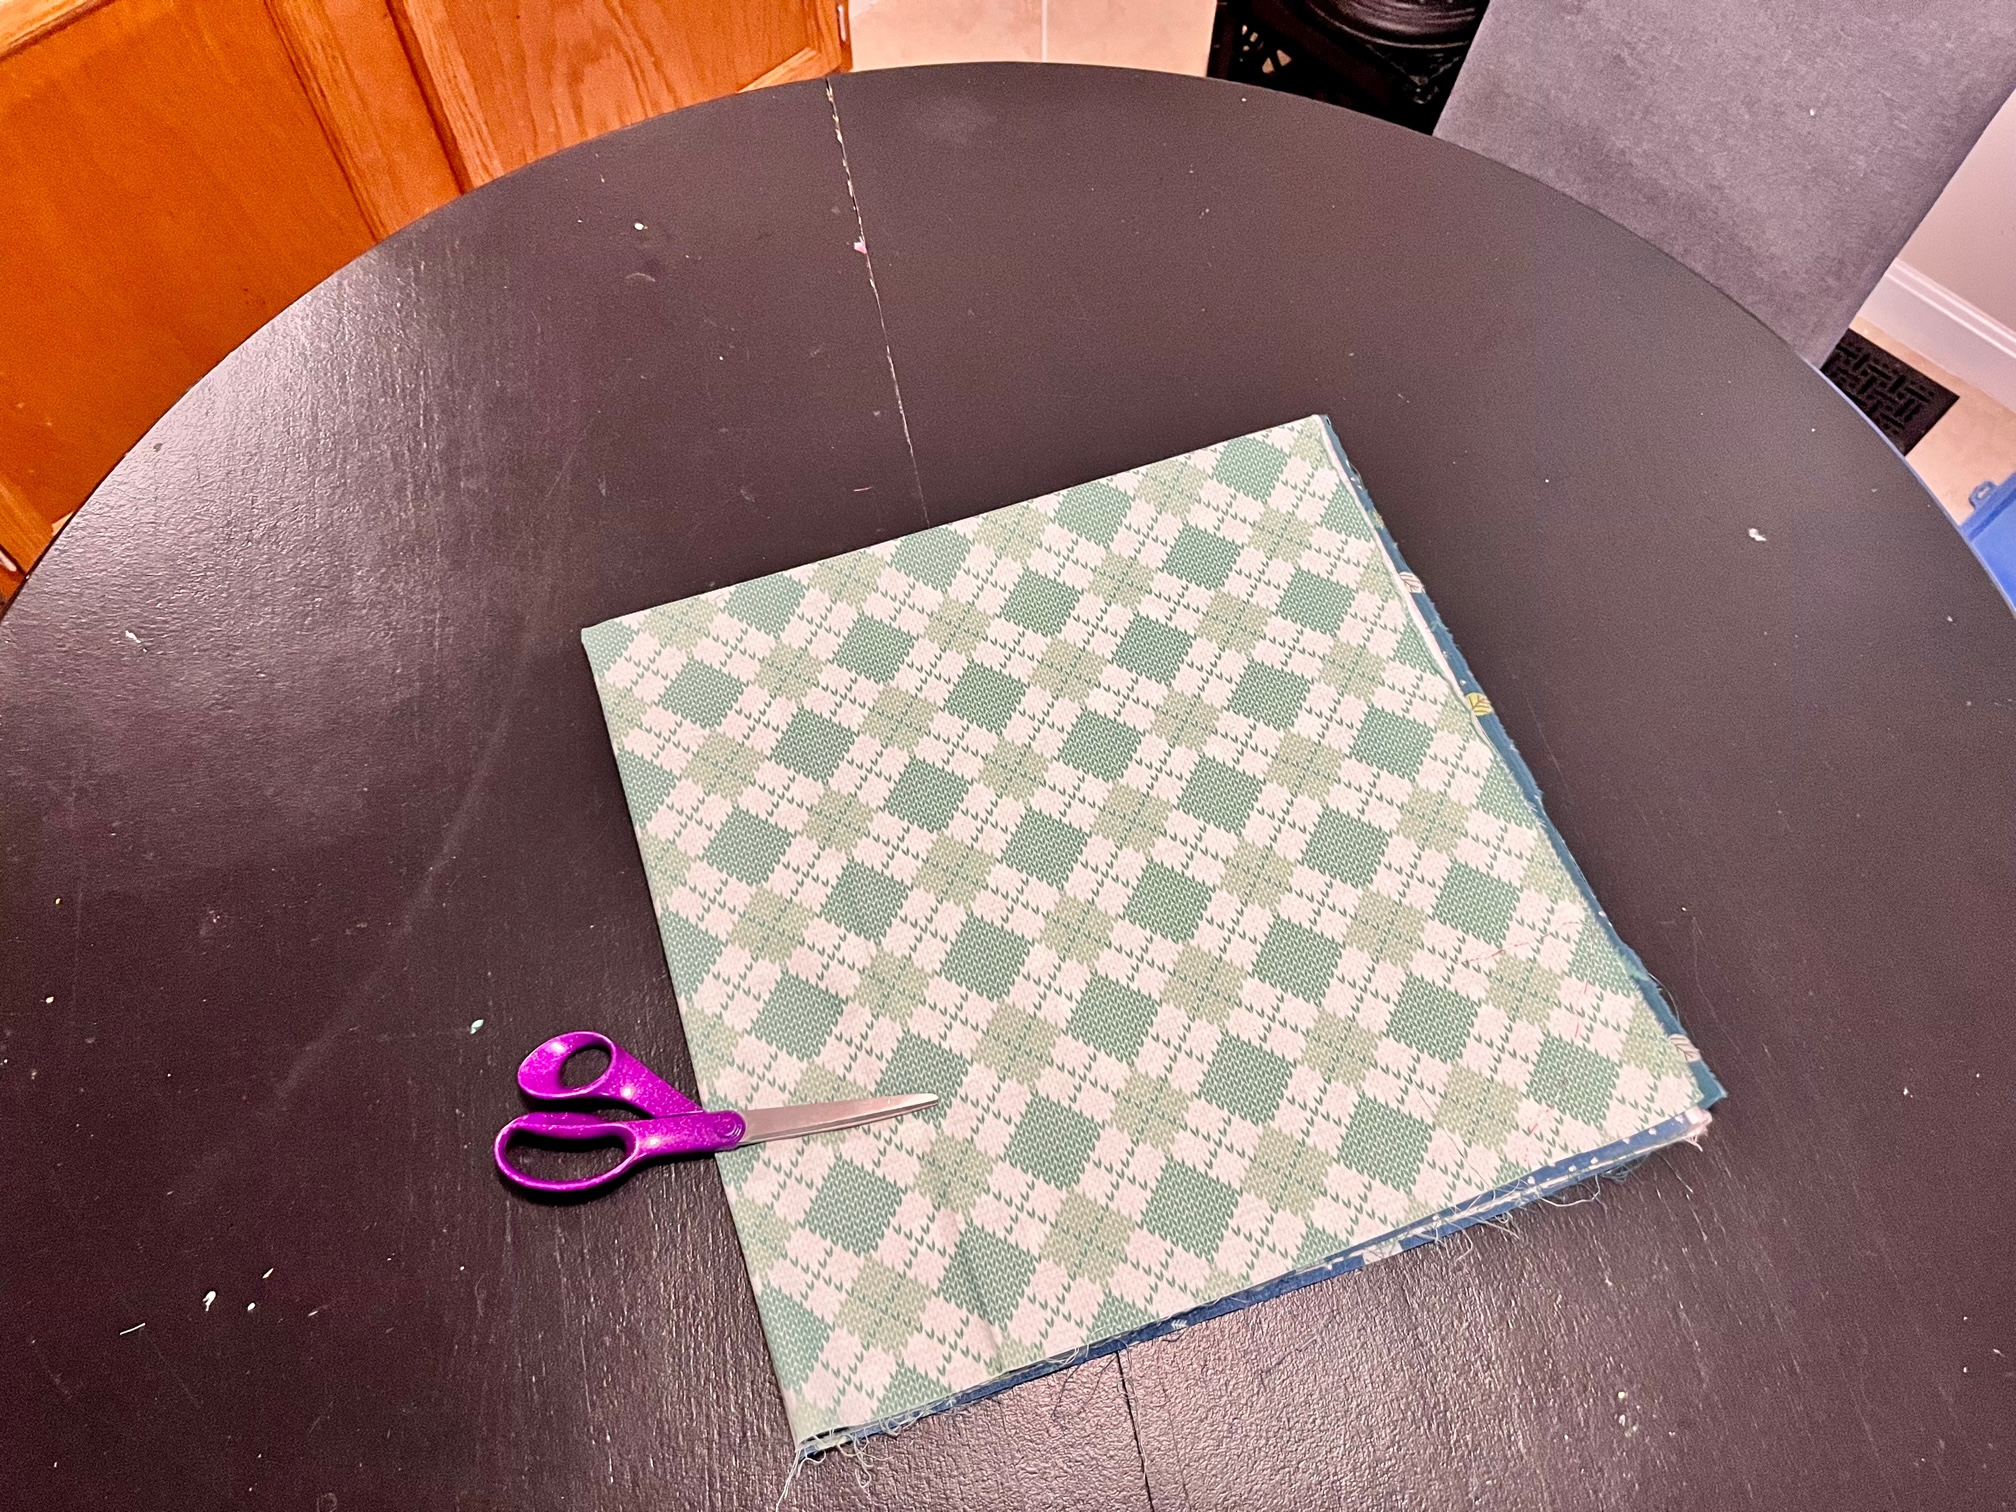
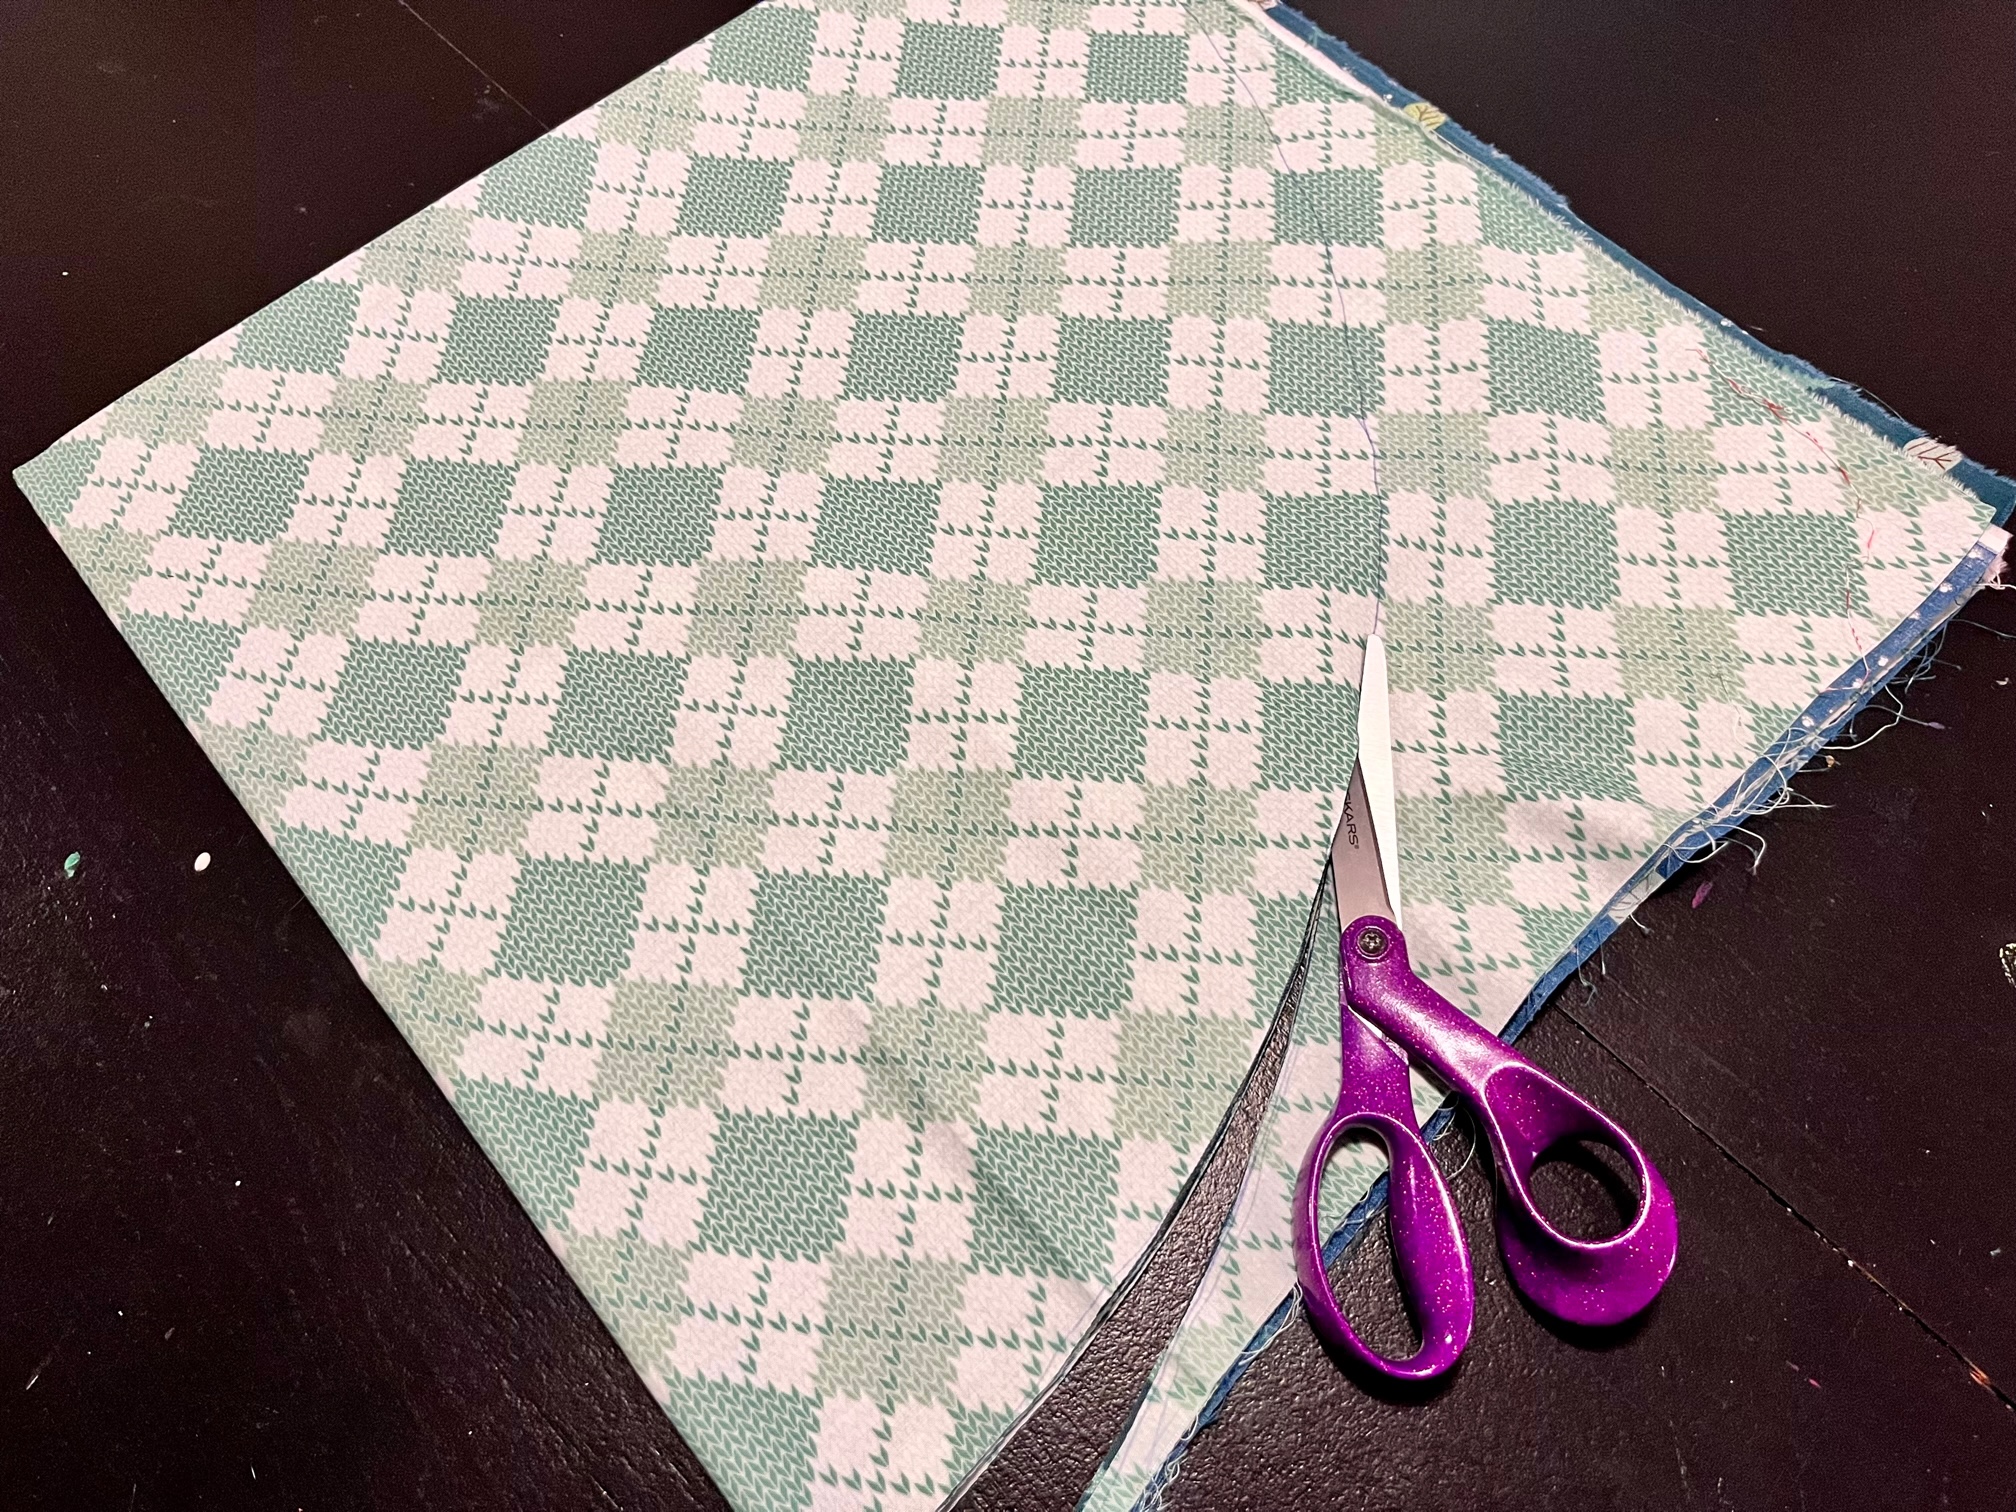
Once your large circle is drawn, do the same thing except make a smaller quarter circle closer to the pivot point.
Cut on the lines drawn. Keep your fabric folded, do not open it up just yet.
Next…
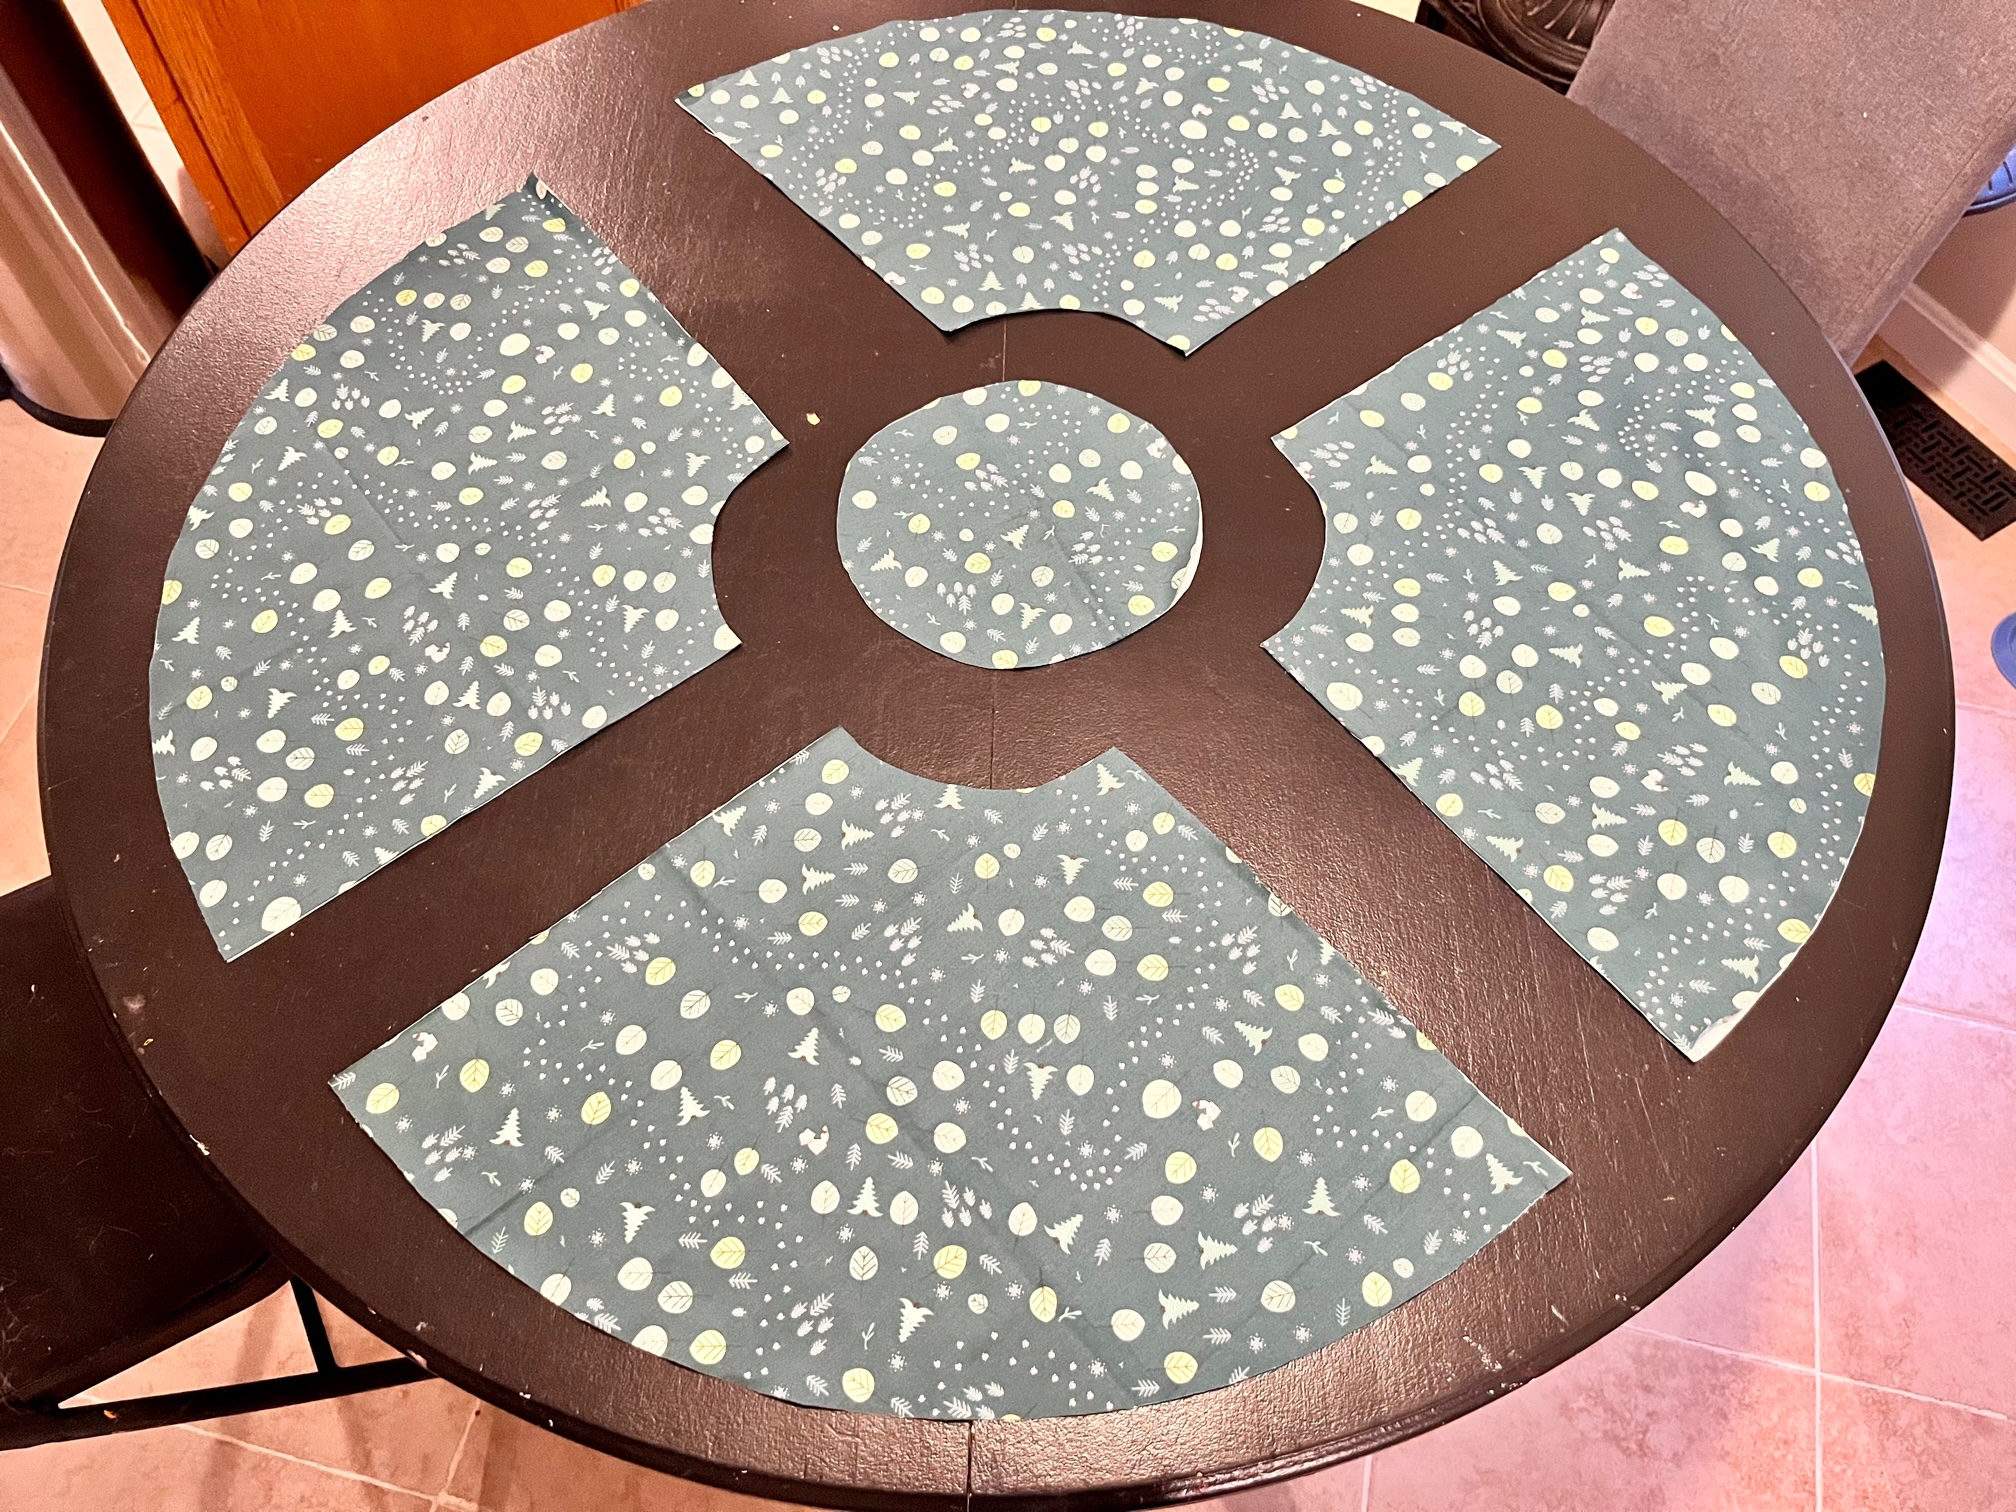
Using the folds as a guide cut along the fabric folds to create 4 placemats.

Continue by…
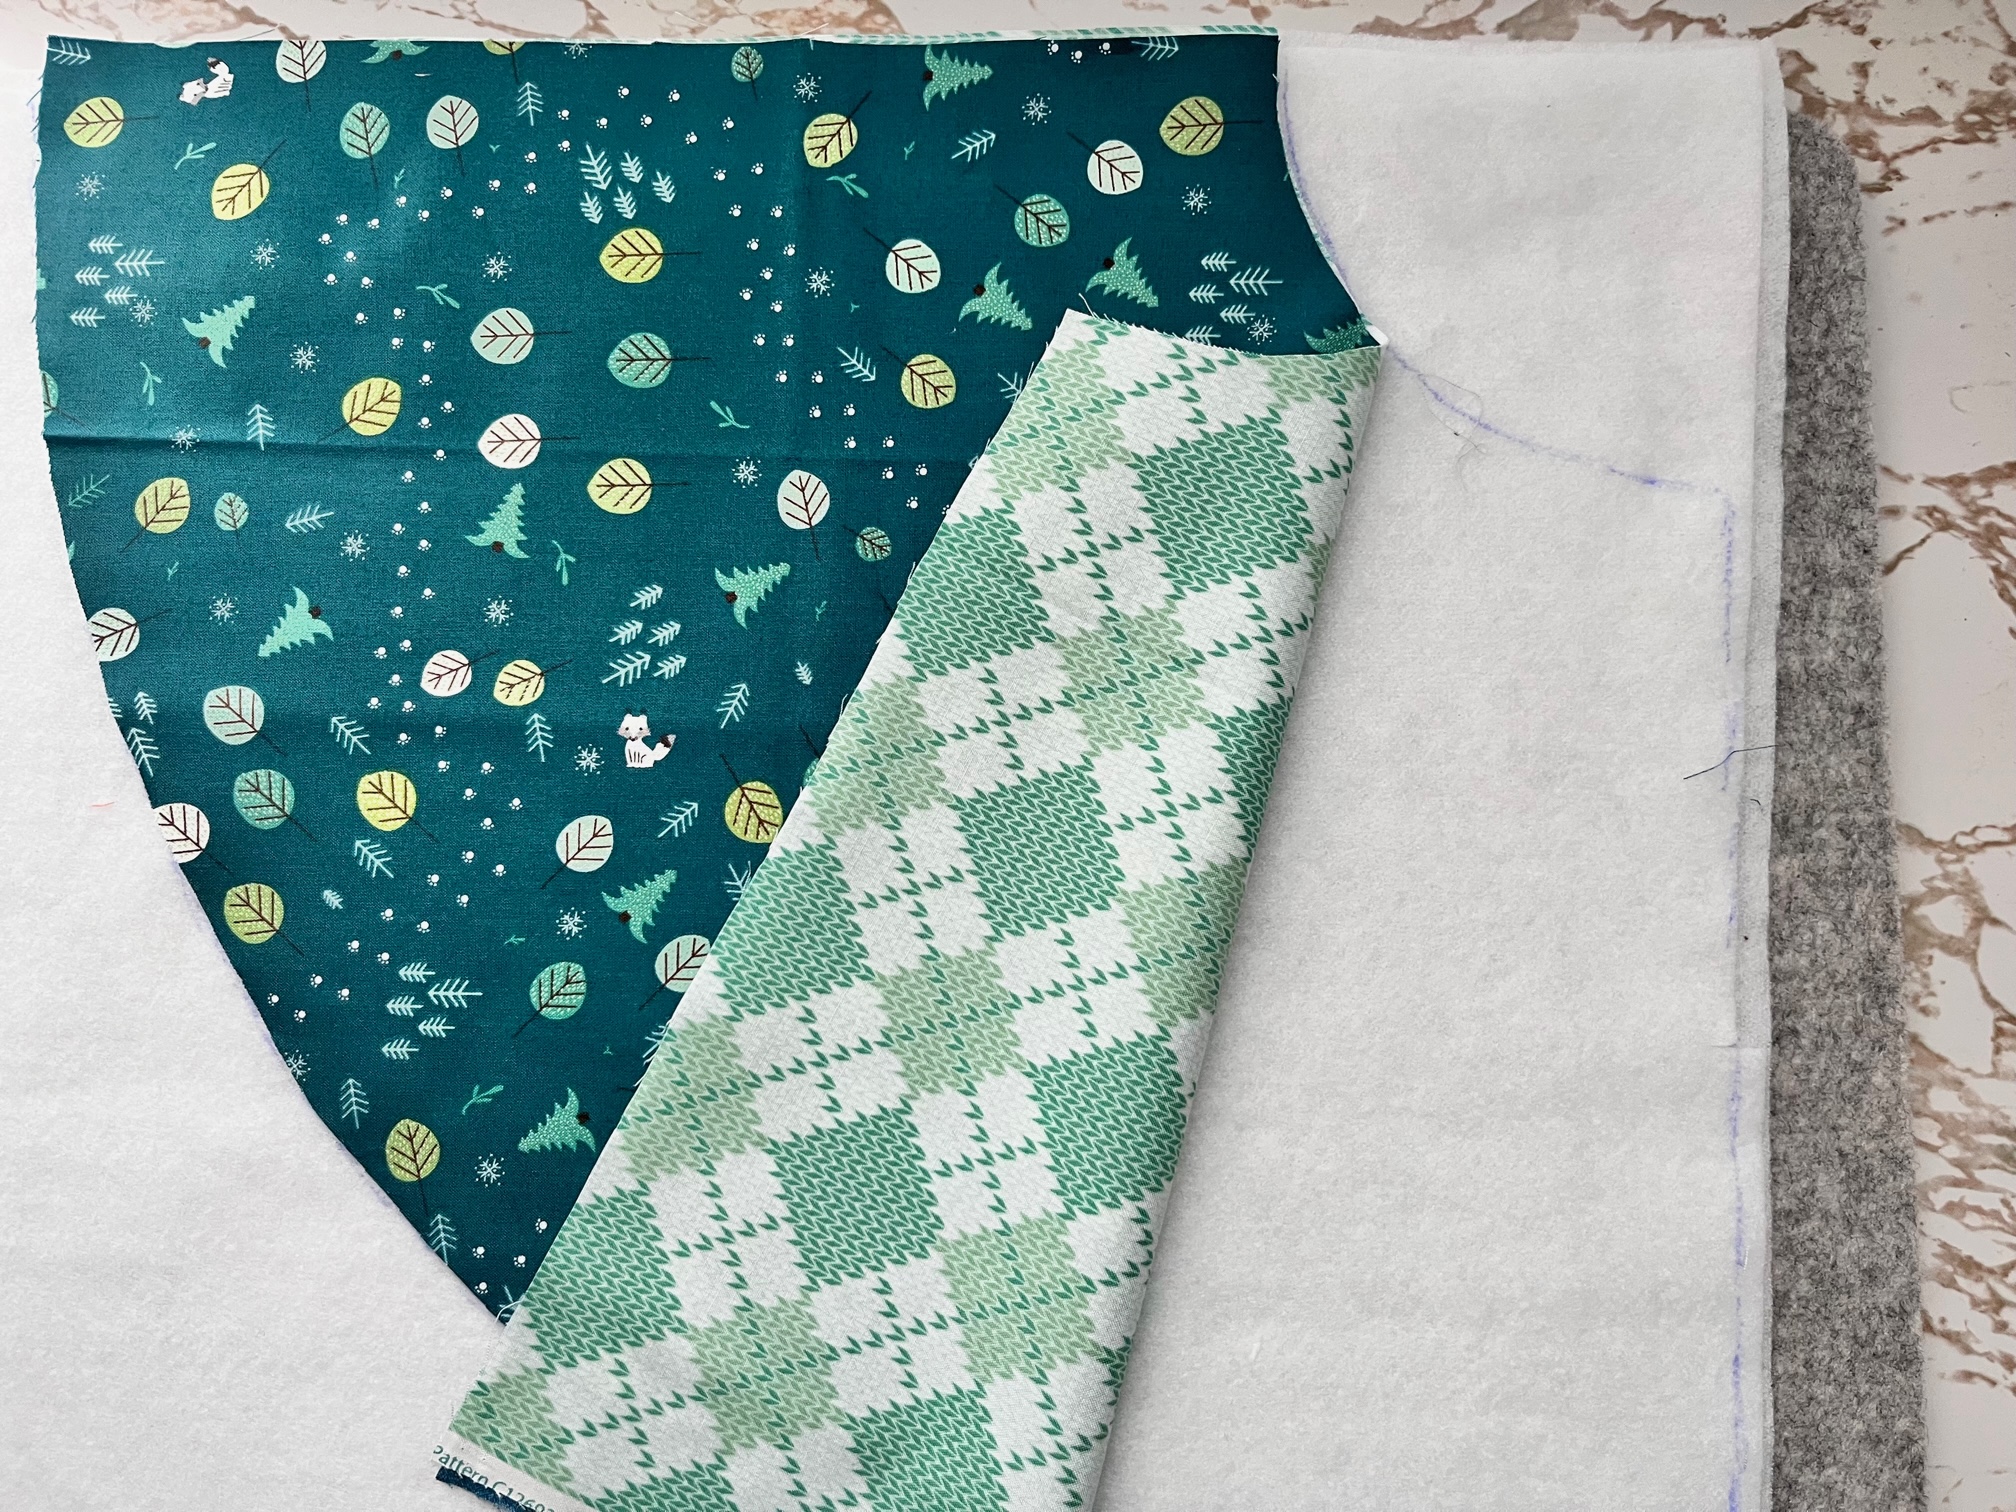
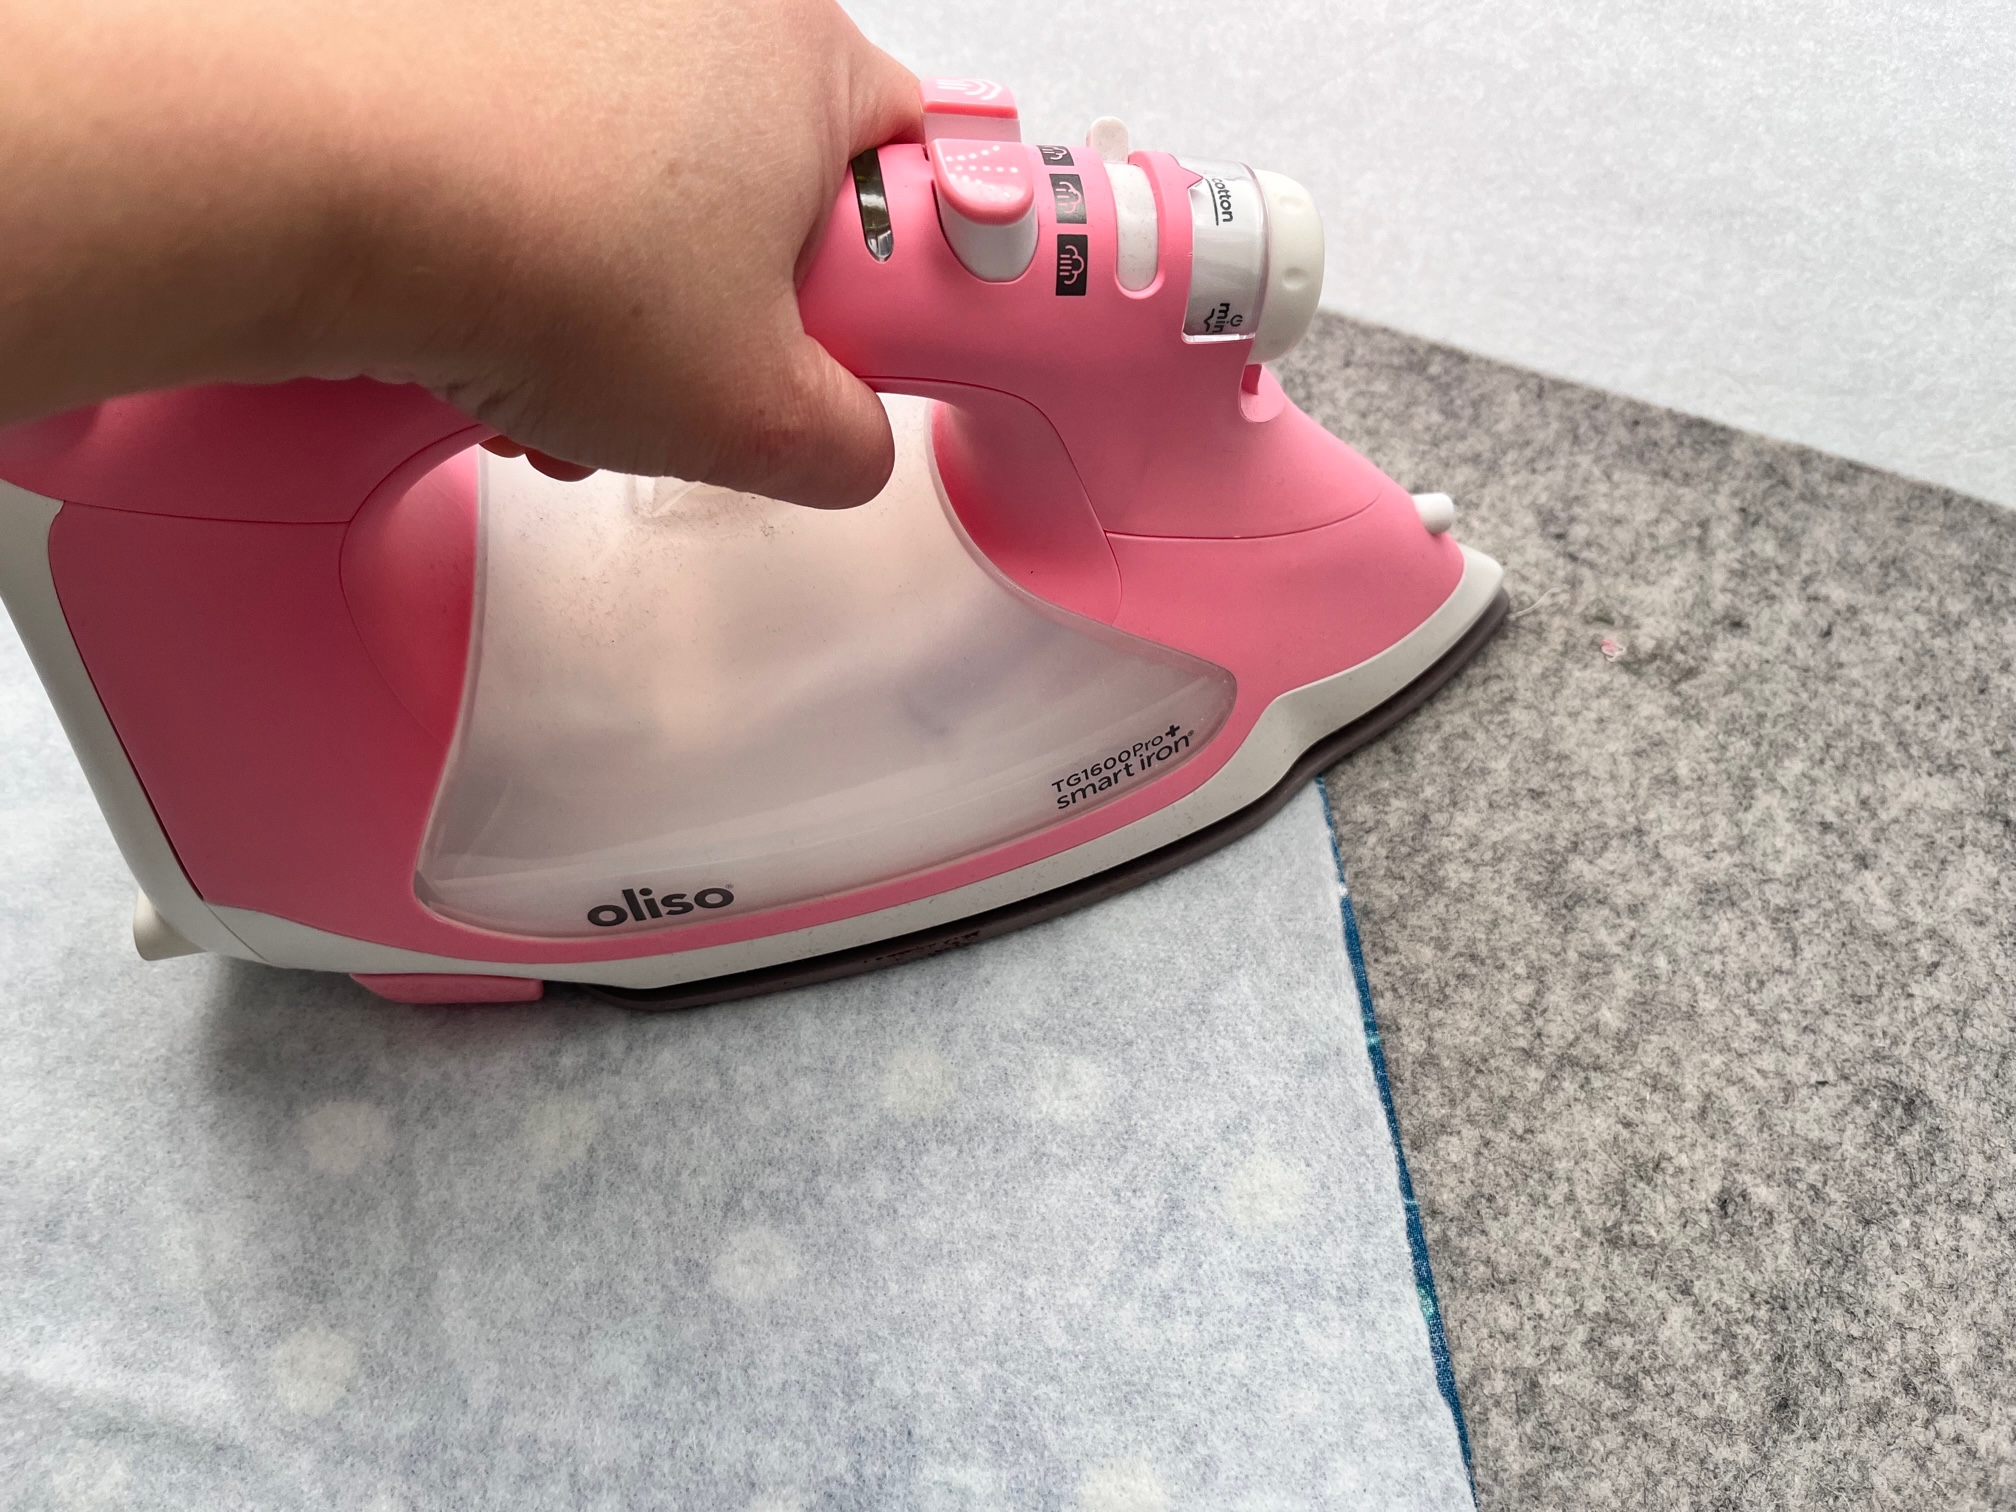
Take your fusible fleece and place one placemat on top. Trace around the perimeter. Cut out the fusible fleece 1/8 to 1/4 inch inside the drawn line.
Important Note: Cutting just inside the line will make it easier to align the fusible to your fabric as well as make sure not to overhang the edges and potentially hit your iron when fusing.
Next…
Adhere the fusible fleece to the wrong side of the placemat front. Using SpraynBond Basting spray, baste the backing fabric to the fleece.
Next…
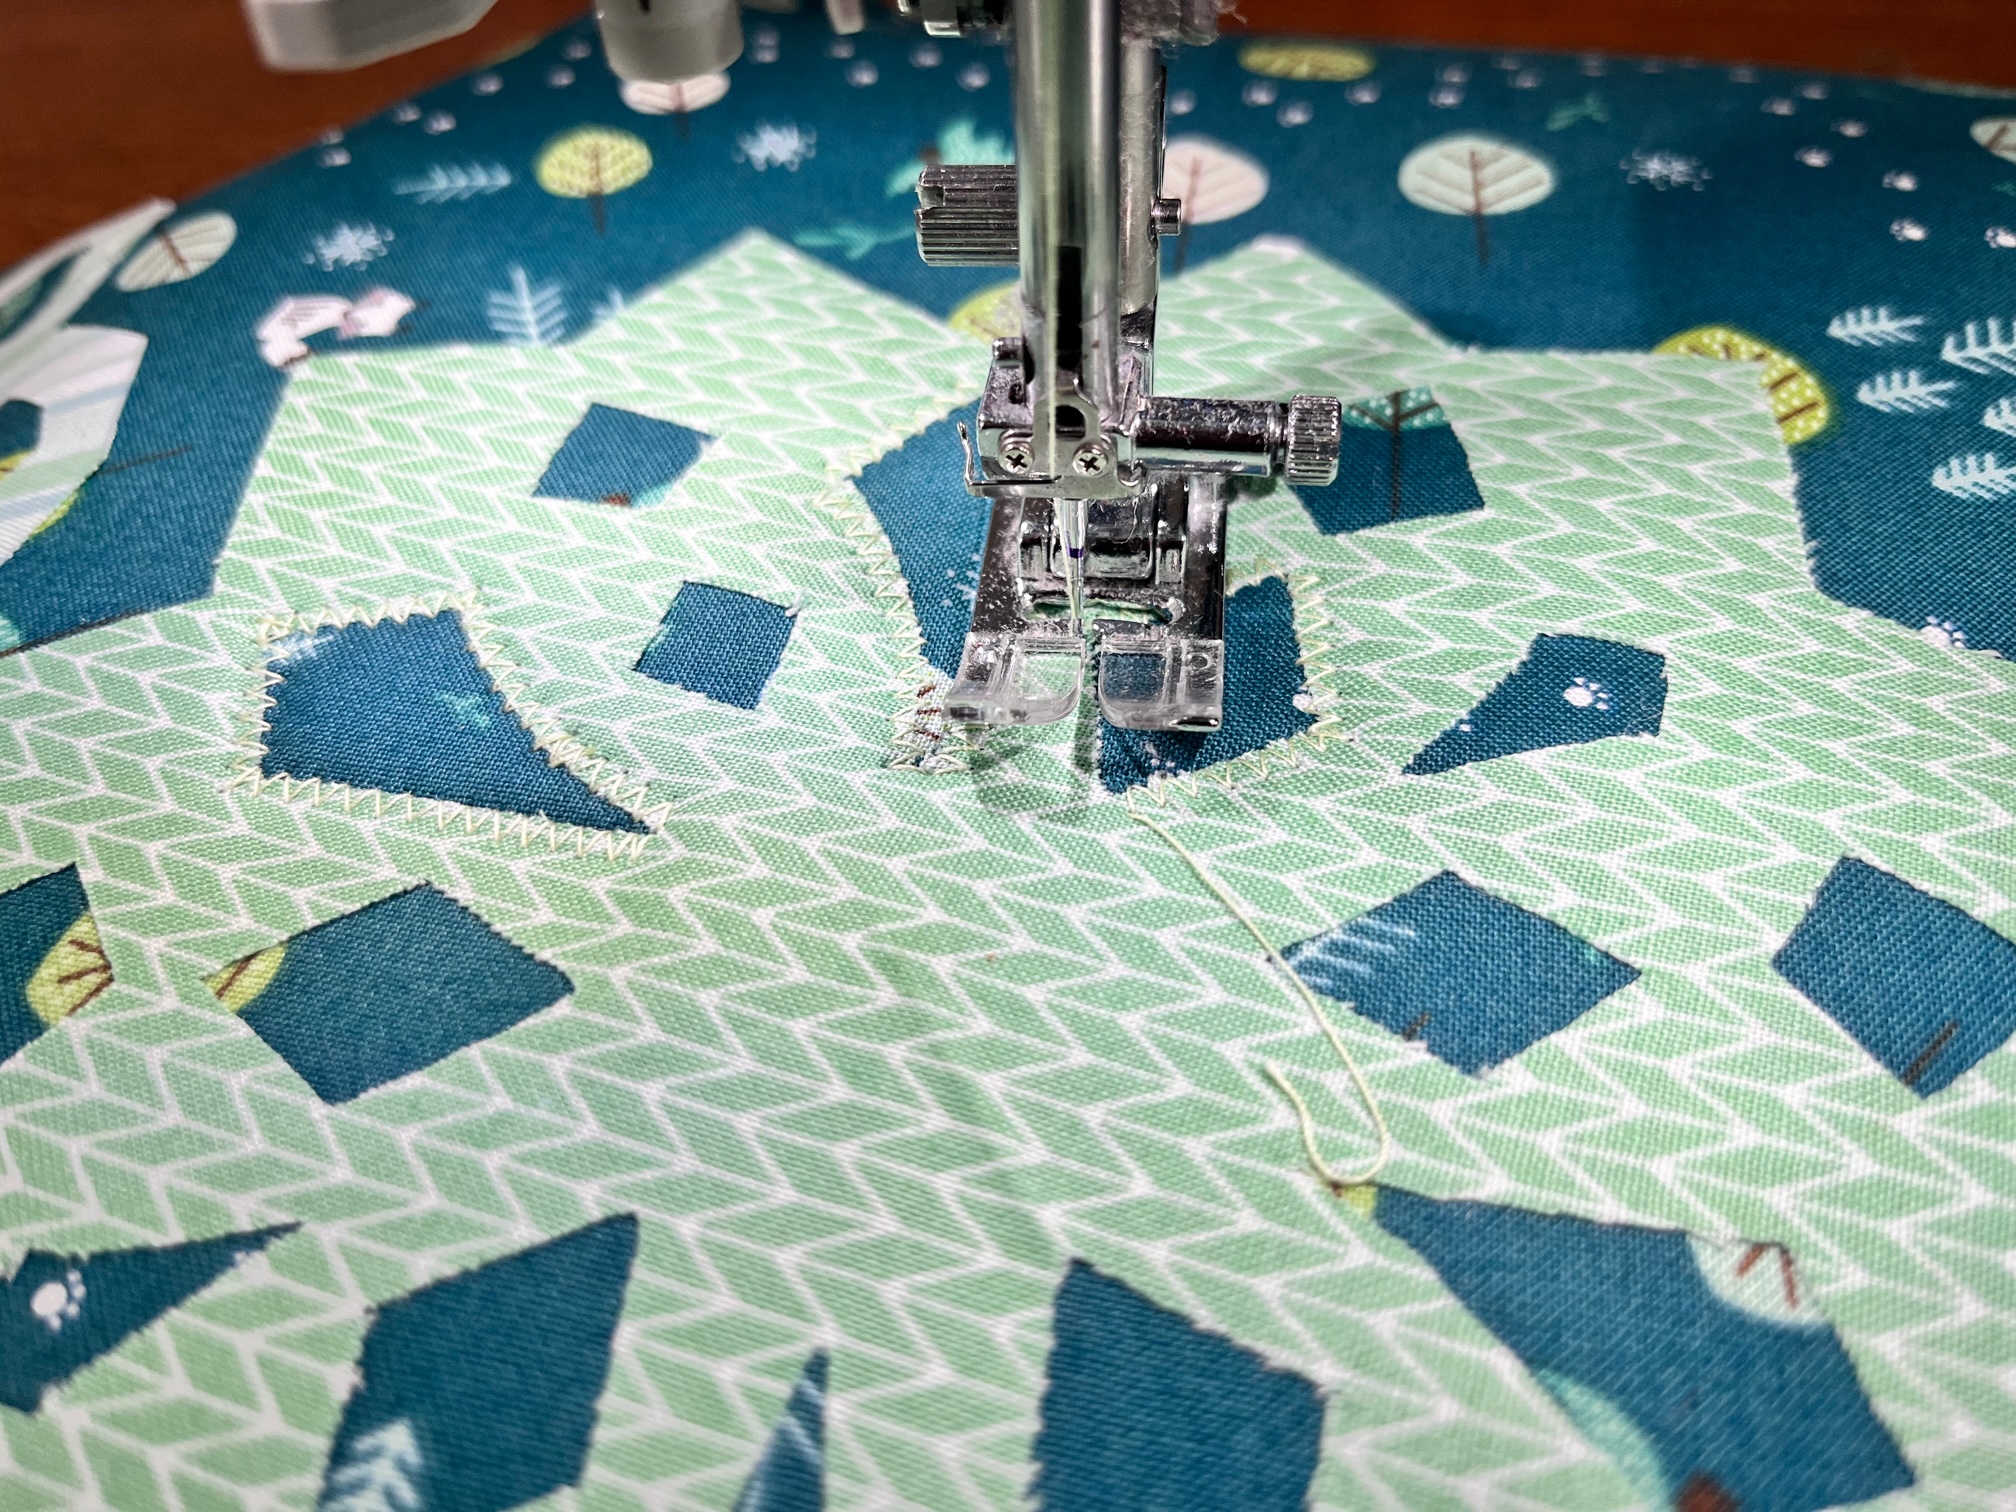
Grab a piece of parchment paper or scrap paper larger enough to fit the 7″ snowflake. Turn the snowflake over so you are looking at the wrong side of the fabric. Using SpraynBond Basting Spray, spray the back of the snowflake. Carefully pick the snowflake and place it on the front of the placemat. Repeat this step for the remaining snowflakes.
Then…
Once your snowflakes are basted, applique them using your preferred method. I did a small zigzag stitch. I tested several methods including a blanket stitch as well as strait scribble stitching and the zigzag stitch is what I decided to use.
Finally…
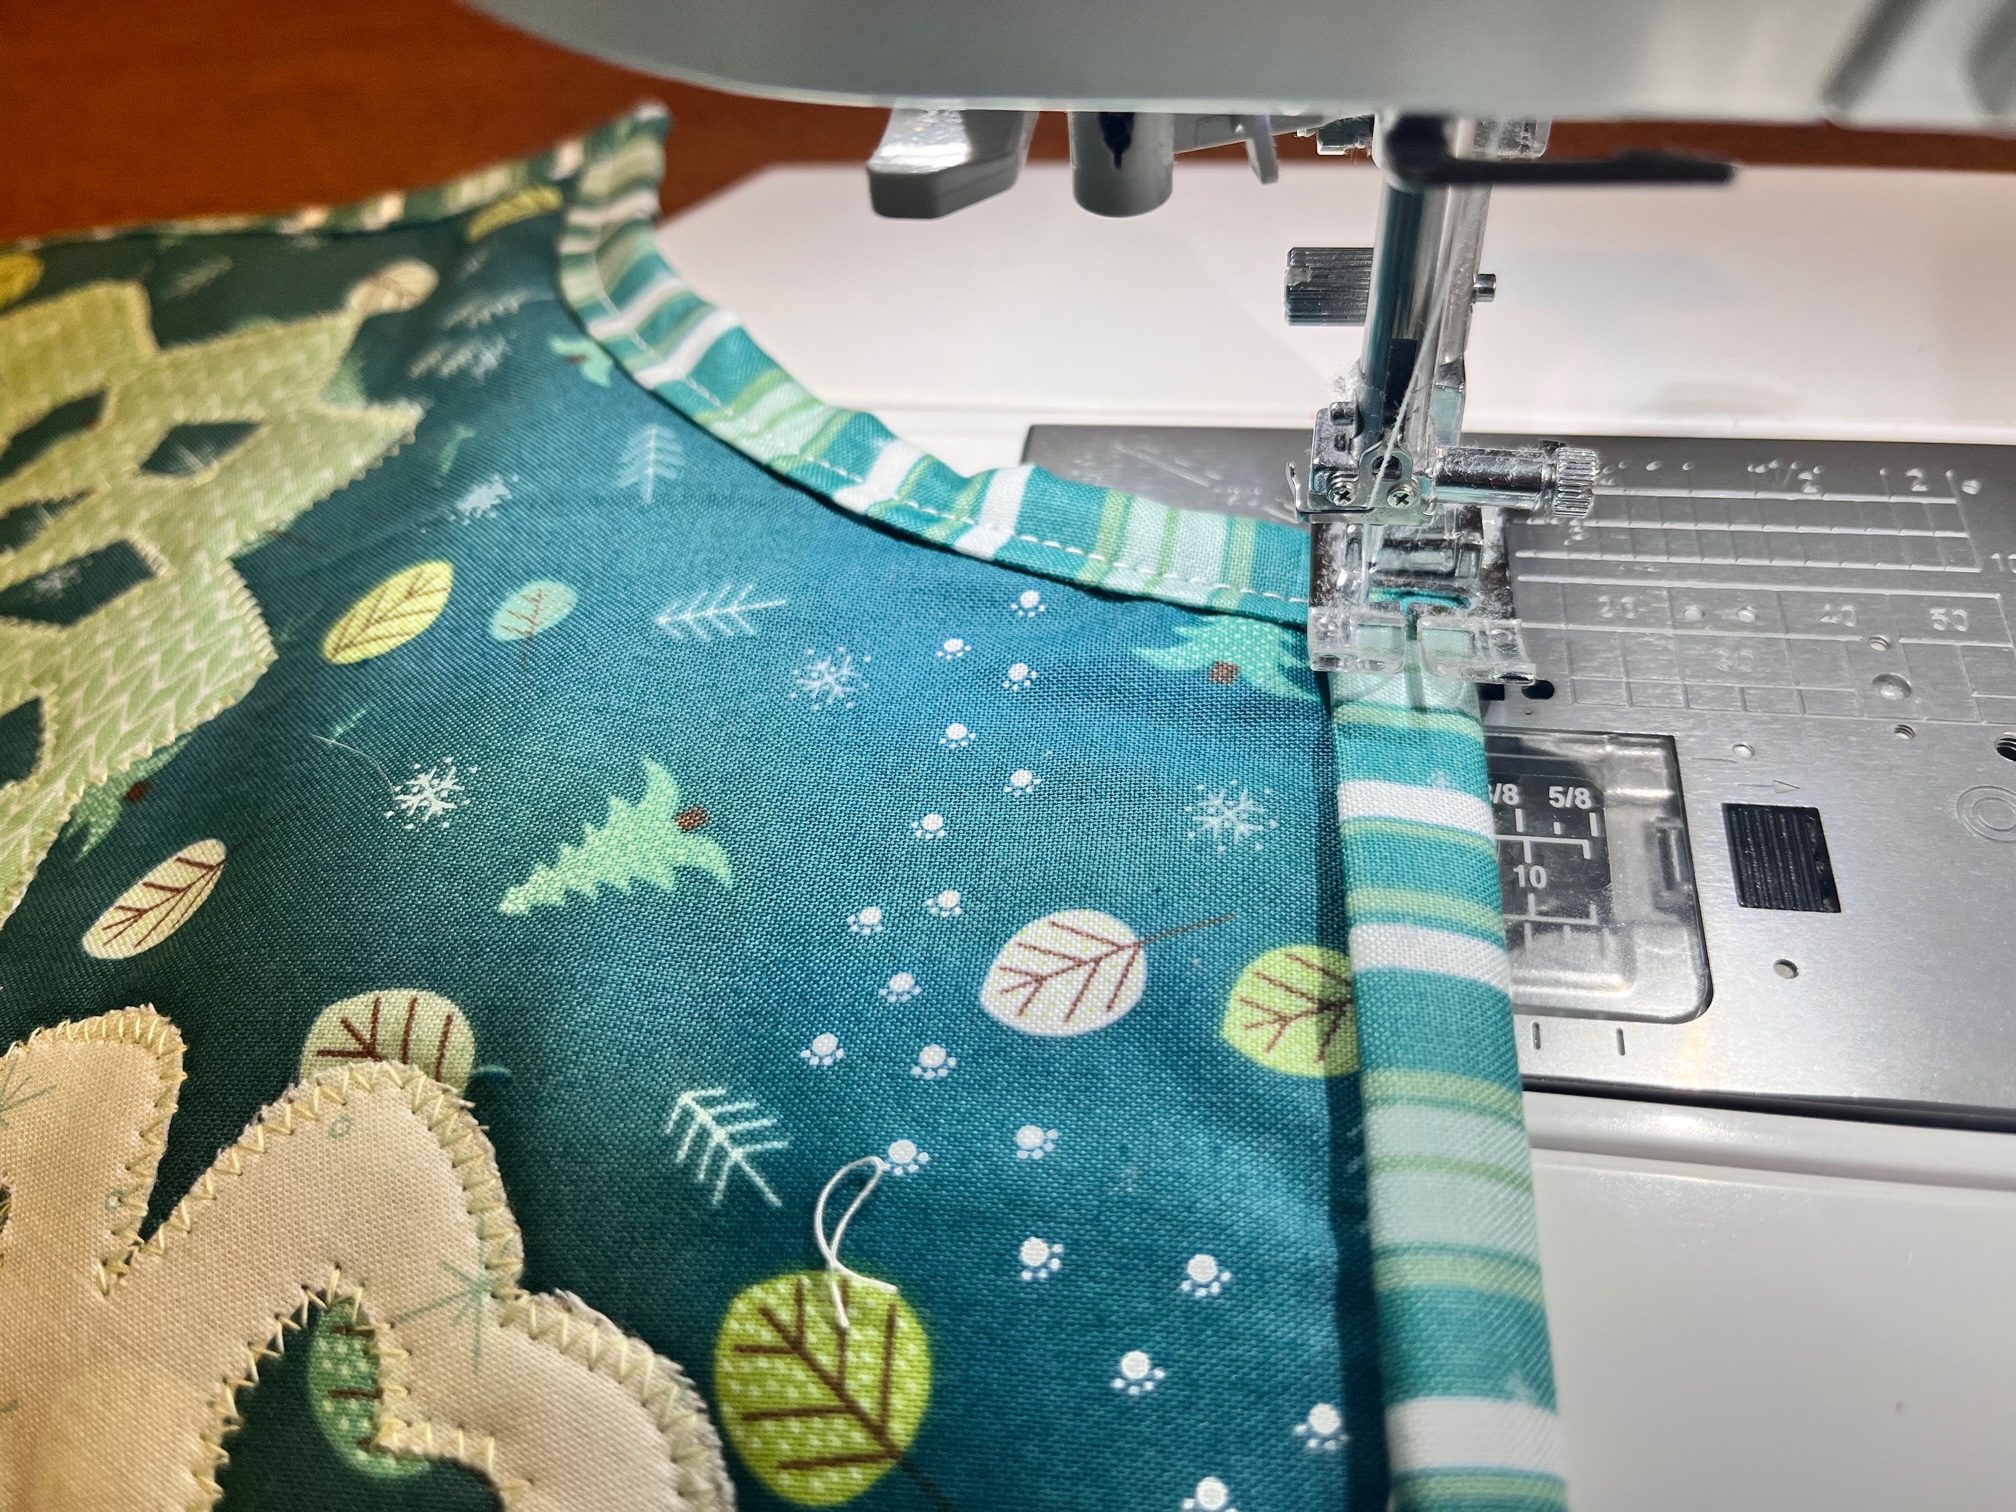
Add some binding using your preferred method.
Finished!
Thank you for visiting today! Come back soon to see what else will be starting to bloom with Inflorescence Designs!
Starting to bloom by choosing JOY ~ Julia