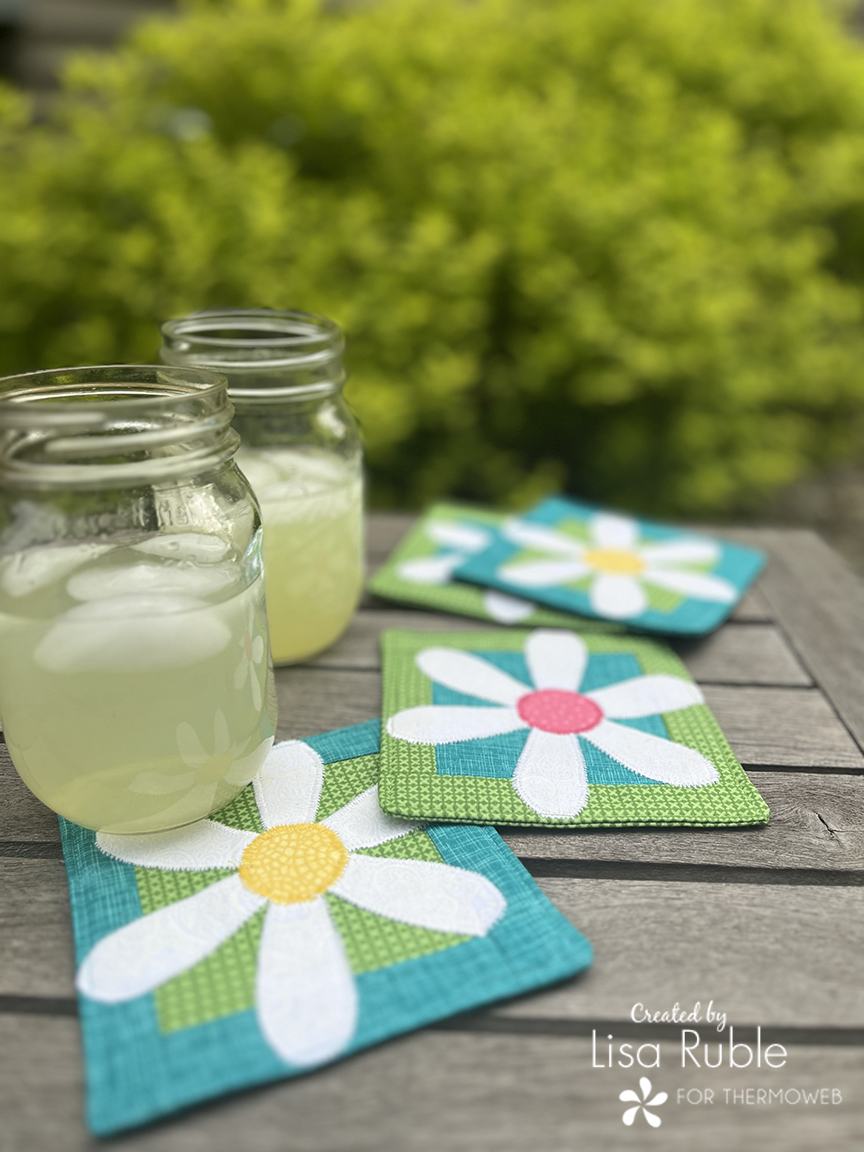
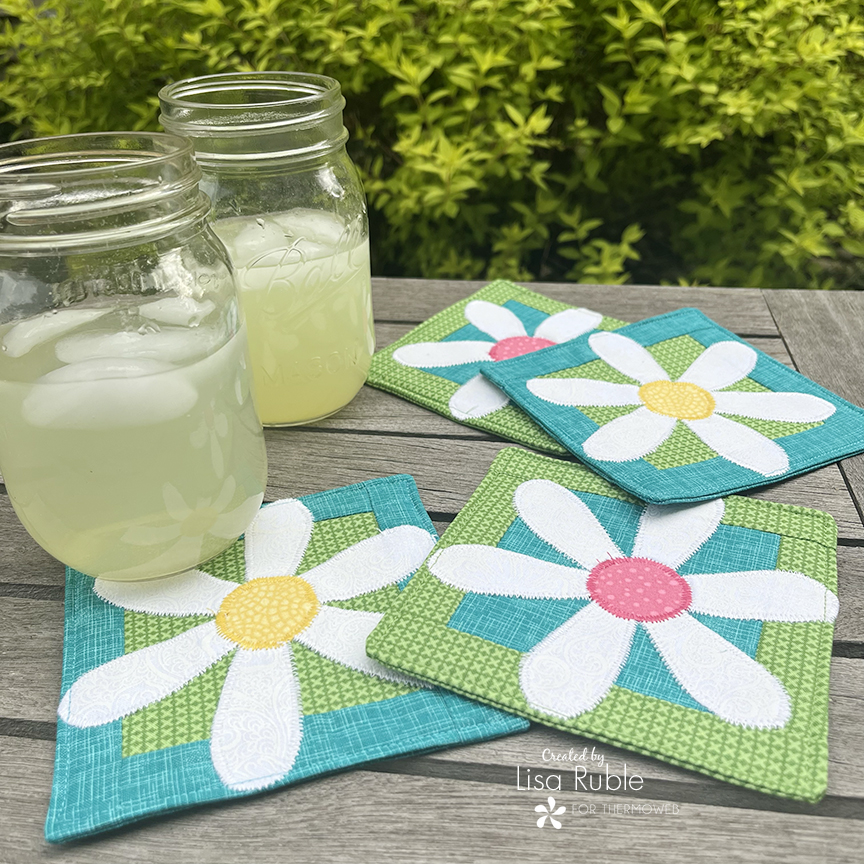
Hi! I’m Lisa Ruble from Quilty Zest and today I’m going to show you how to make these adorable daisy coasters. Don’t they just shout “springtime?!”
Let me tell you the secret to these daisies. White-on-white fabric is tricky for applique because the background fabric can show through. I used a layer of Fusible Interfacing on the back of the white fabric, and it worked perfectly – nothing shows through the white! Snowy white daisies, every time.
You’ll Need (to make 4 coasters):
Fat quarter each teal print, green print, and white-on-white tonal print
Scraps of yellow and pink prints
HeatnBond Fusible Fleece
HeatnBond Fusible Interfacing
HeatnBond Lite Iron-on Adhesive
Pressing Paper
Coordinating thread

Let’s get started!
Cutting
From each of the teal and green prints:
(2) 5-1/2″ squares for backing
(2) 4″ squares
(2) 1-1/2″ x 6″ pieces
(2) 1-1/2″ x 4″ pieces
From the white-on-white print:
(4) 6-1/2″ squares
From the Fusible Interfacing:
(4) 6-1/2″ squares
From the Fusible Fleece
(4) 6″ squares
Download the templates here.
Making the Coasters
Step 1 Trace (4) daisy shapes and (4) daisy centers onto the paper side of Fusible Lite Iron-on Adhesive. Cut out each shape 1/4” past the drawn lines.
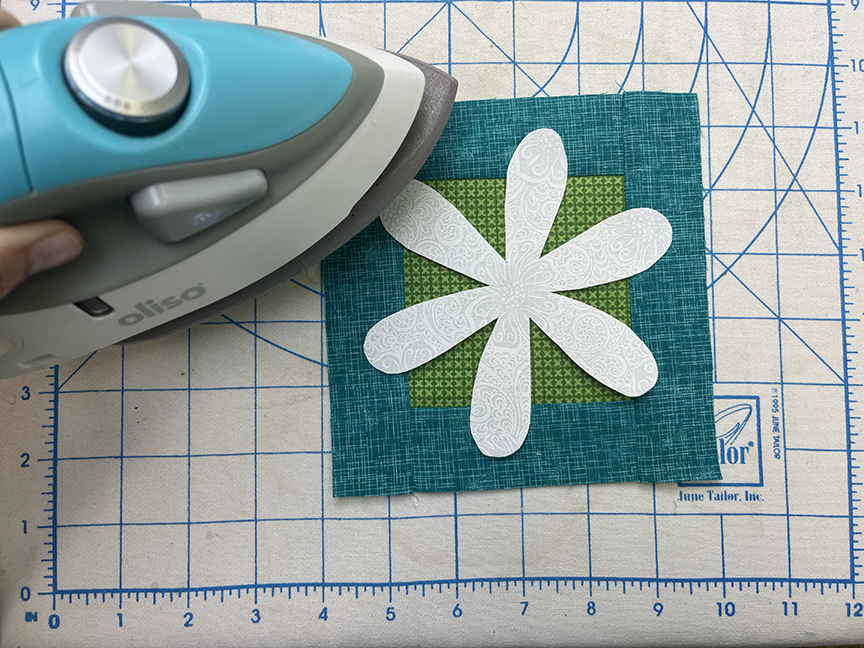
Step 2 Fuse (1) 6-1/2” Fusible Interfacing square to the wrong side of (1) 6-1/2” white-on-white square. 
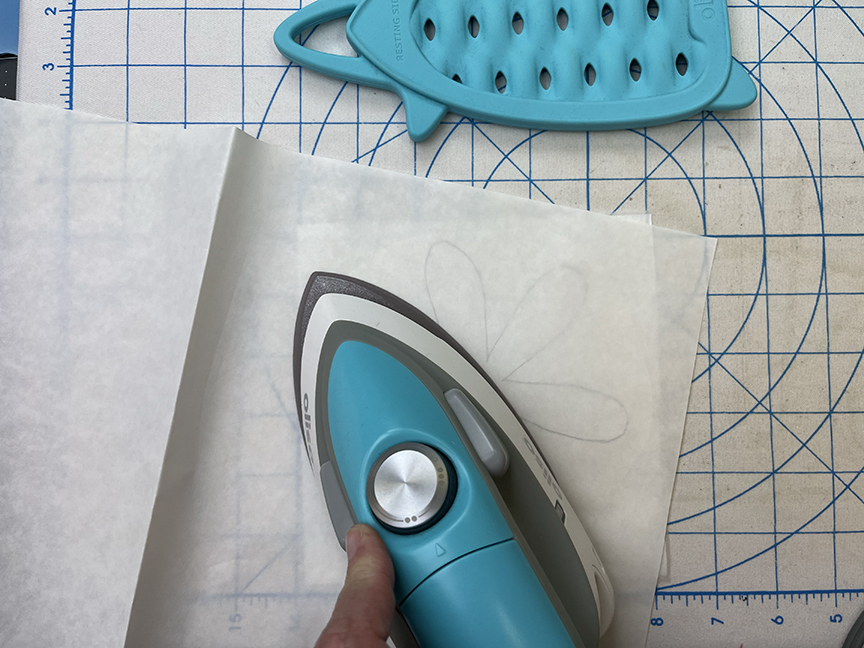
Step 3 Fuse a daisy shape to the interfacing side from step 2. Use Pressing Paper to protect your iron. Fuse a daisy center to the wrong side of the yellow scrap.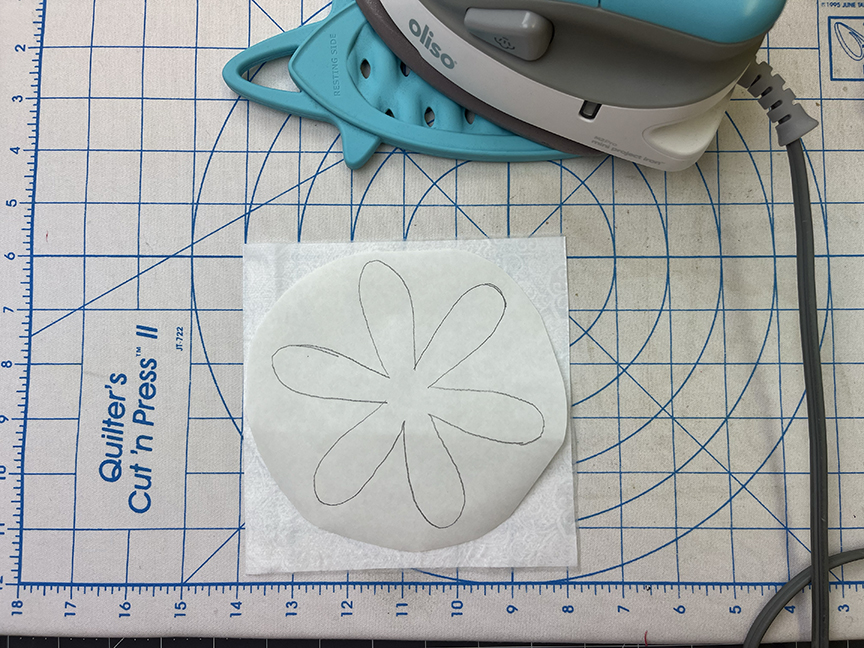
Step 5 Sew 1-1/2” x 4” teal pieces to opposite sides of (1) 4” green square. Sew 1-1/2” x 6” teal pieces to the top and bottom to complete the coaster background. 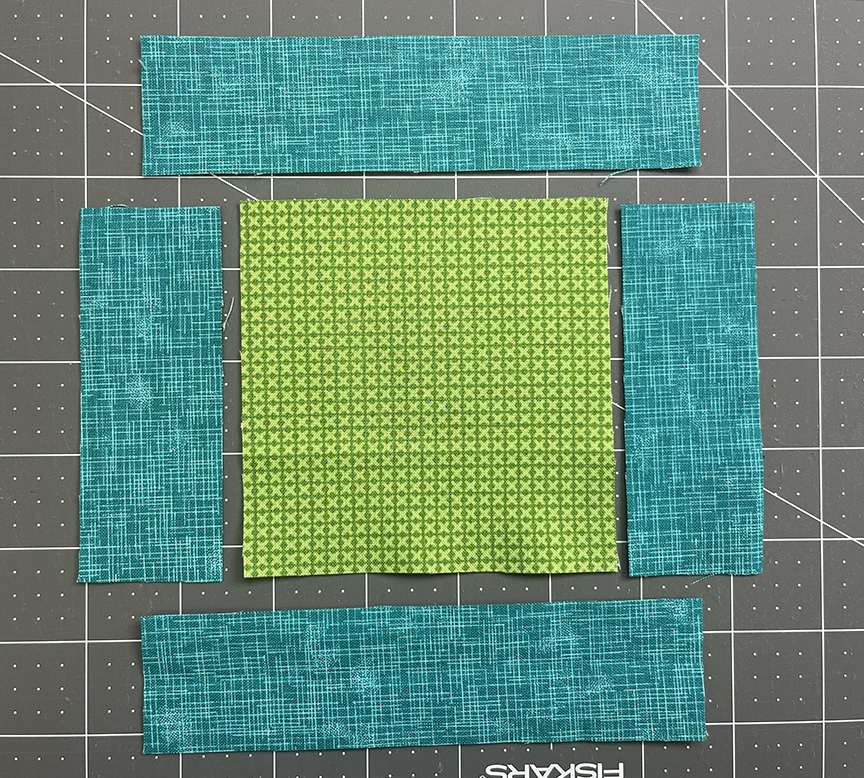
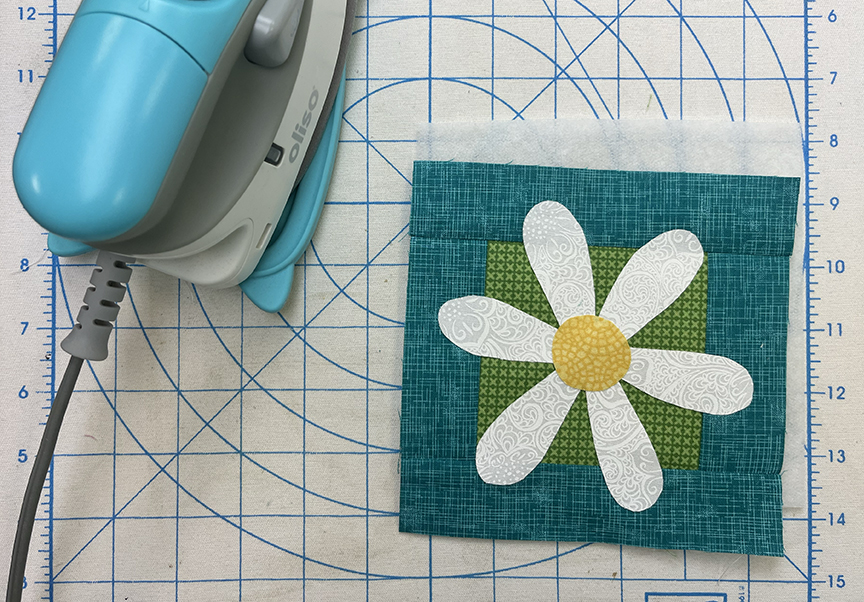
Step 8 Using coordinating thread, zig zag stitch around the white daisy petals. Add the yellow zig zag around the daisy center, covering the edges of the white zig zag stitch. 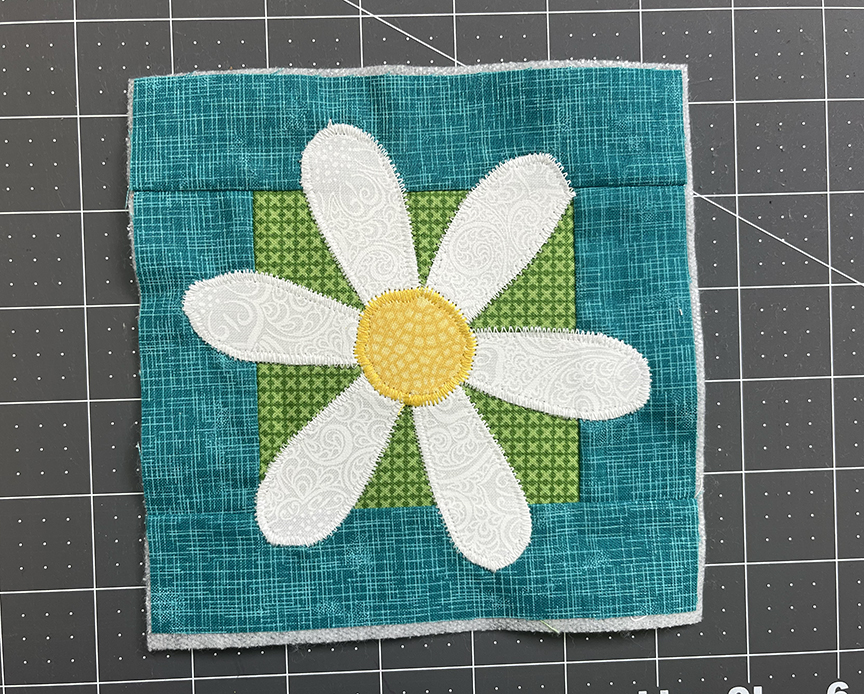

Step 11 Clip the corners and turn coaster right side out. Press the open edges in and topstitch around the entire coaster edge to close opening and finish the coaster. 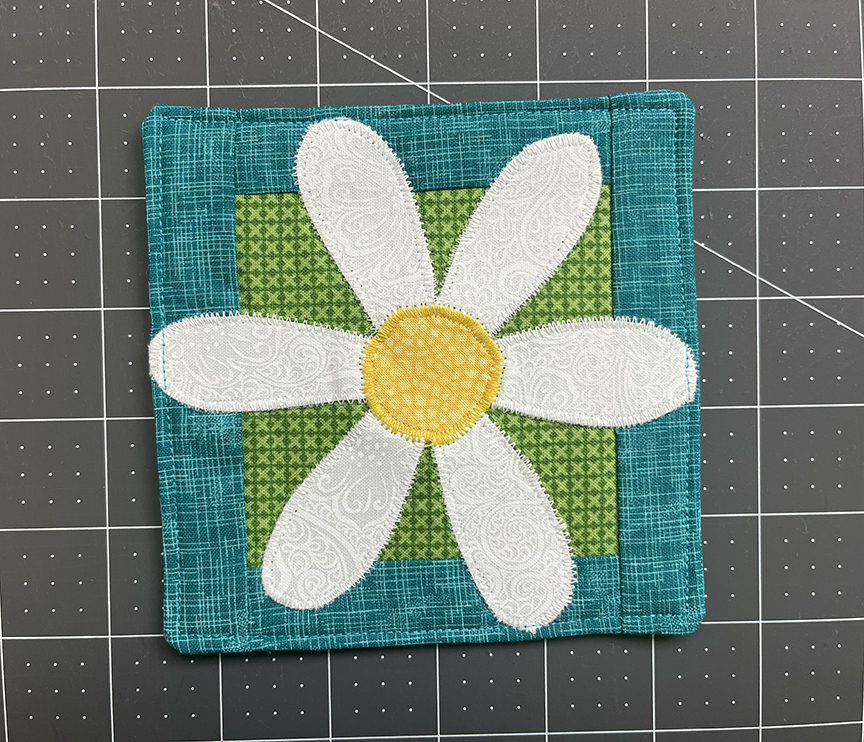
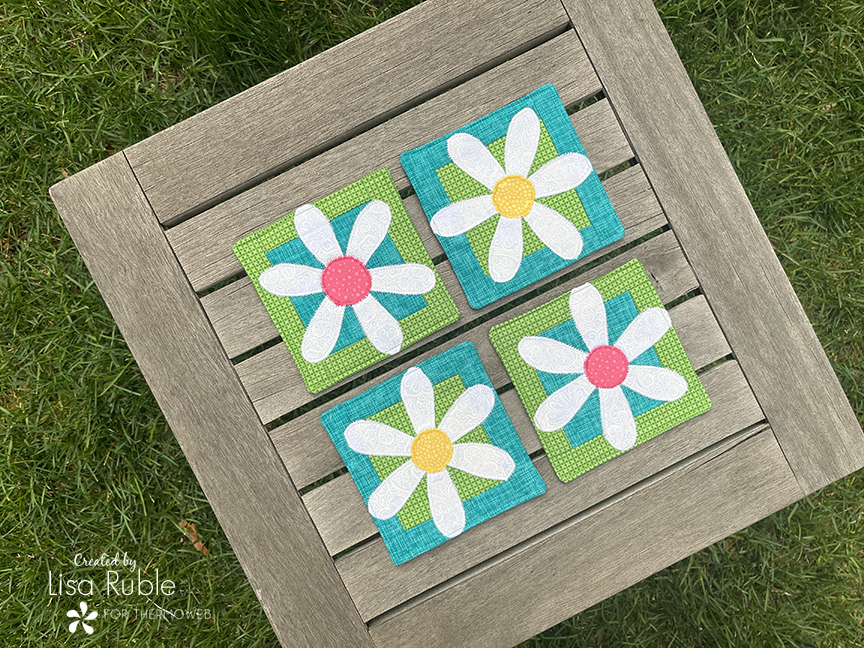
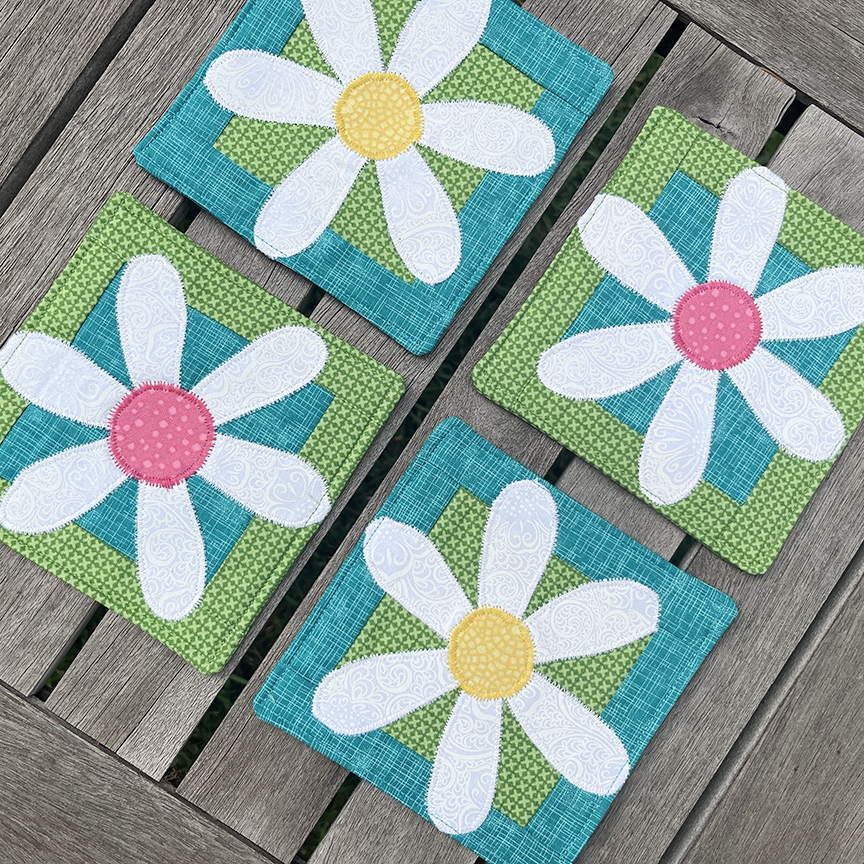
Step 12 Repeat steps 2-11 to make a total of (4) coasters. Note that (2) coasters have teal centers and green borders with a pink daisy center. 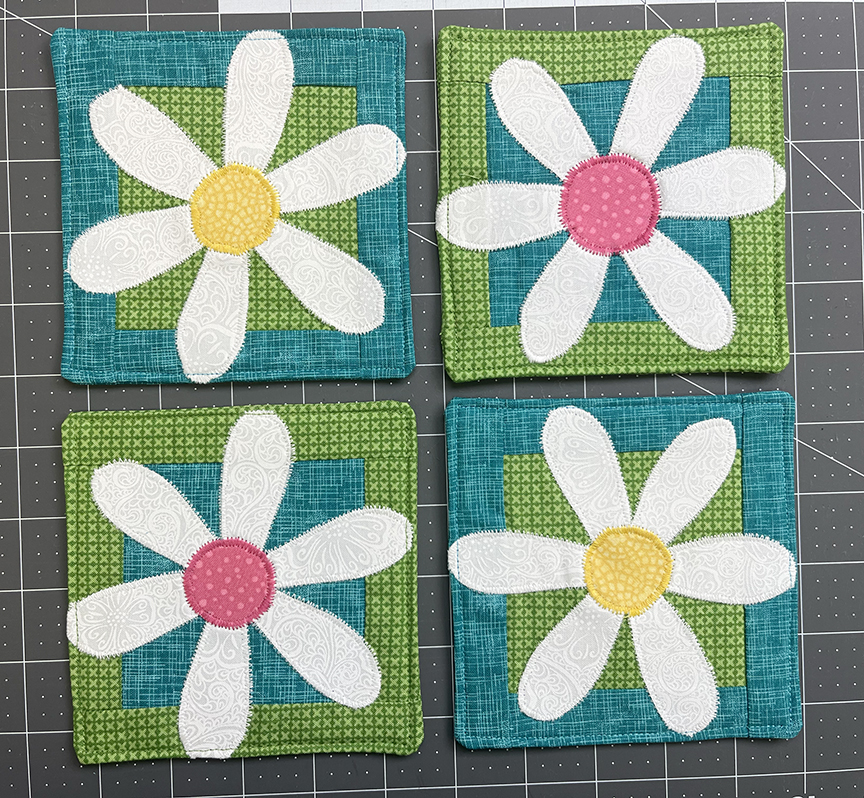
These coasters would be a great hostess gift – or make two sets and keep one for your own table! You can change the look of the coasters by choosing different color backgrounds and flower centers.