 Hey hey!!! It’s Katrina from Paper, Scissors and Glue today here on the blog. Since a lot of people may not have a laminator, I wanted to show a way to use the Unity Card Fronts without foiling. And I wanted to show how you can incorporate a little or a lot of the Rina K neon in your projects!
Create a Colorful Scrapbook Page with Unity Card Fronts & Neon Glitz
In addition, I am using some of the newer adhesives that Therm O Web has come out with! And I am excited about these, let me tell you!
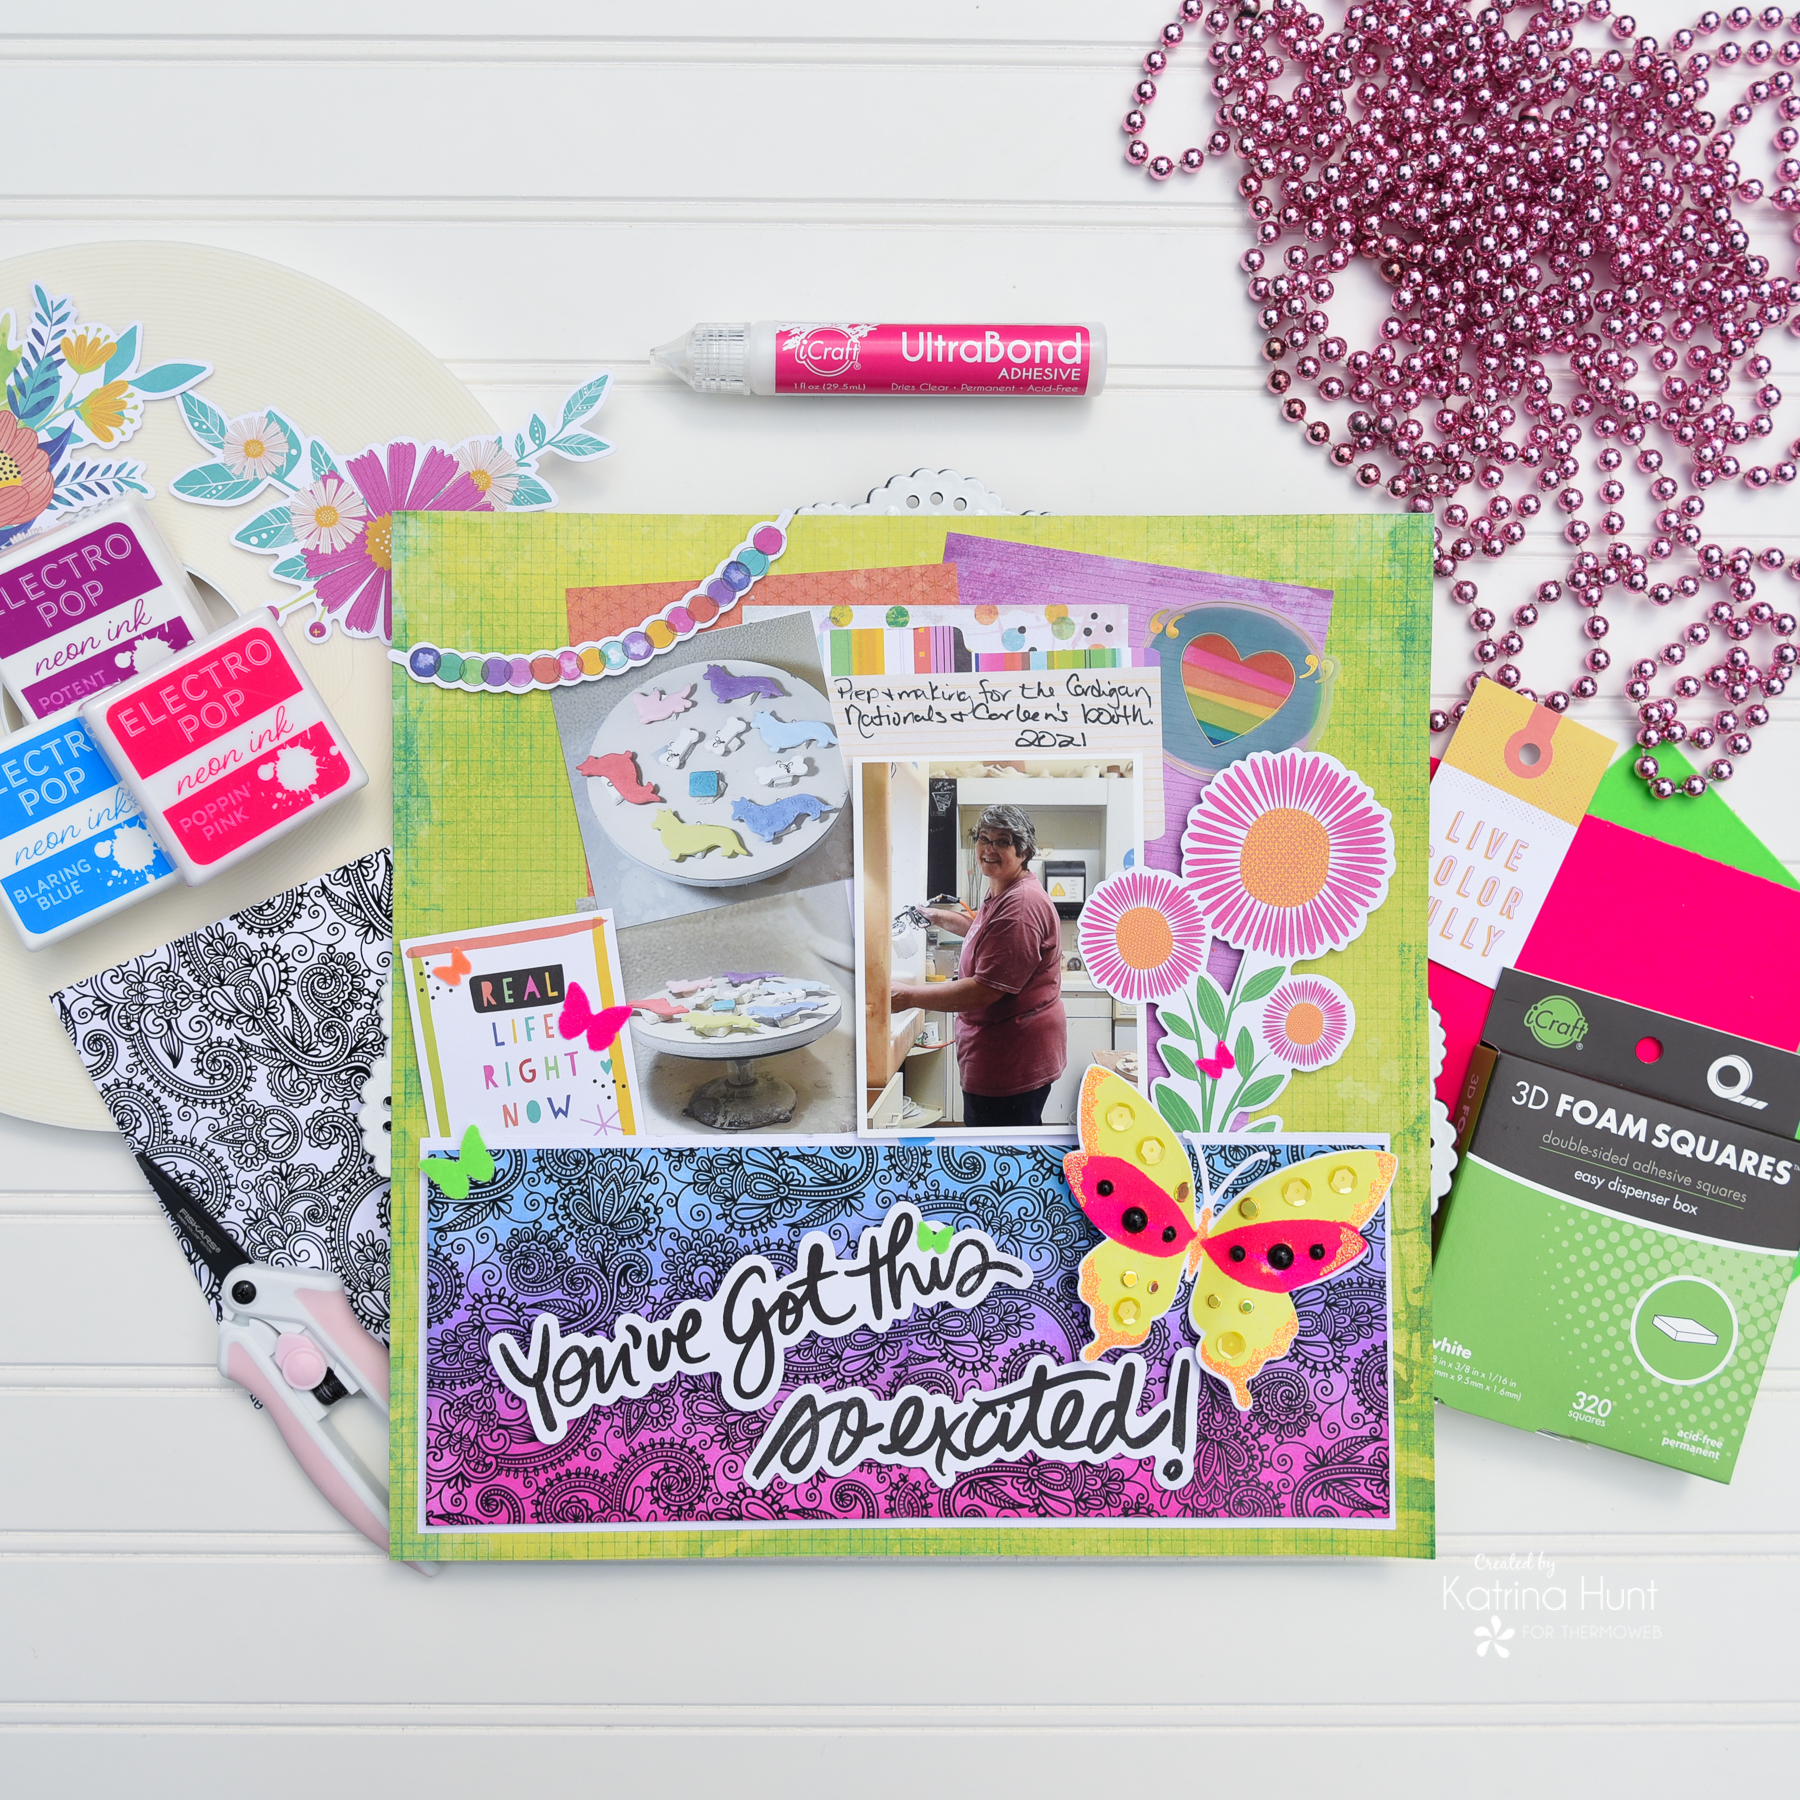
Therm O Web Supplies Used
Memory Runner XL
Memory Runner XL Refill
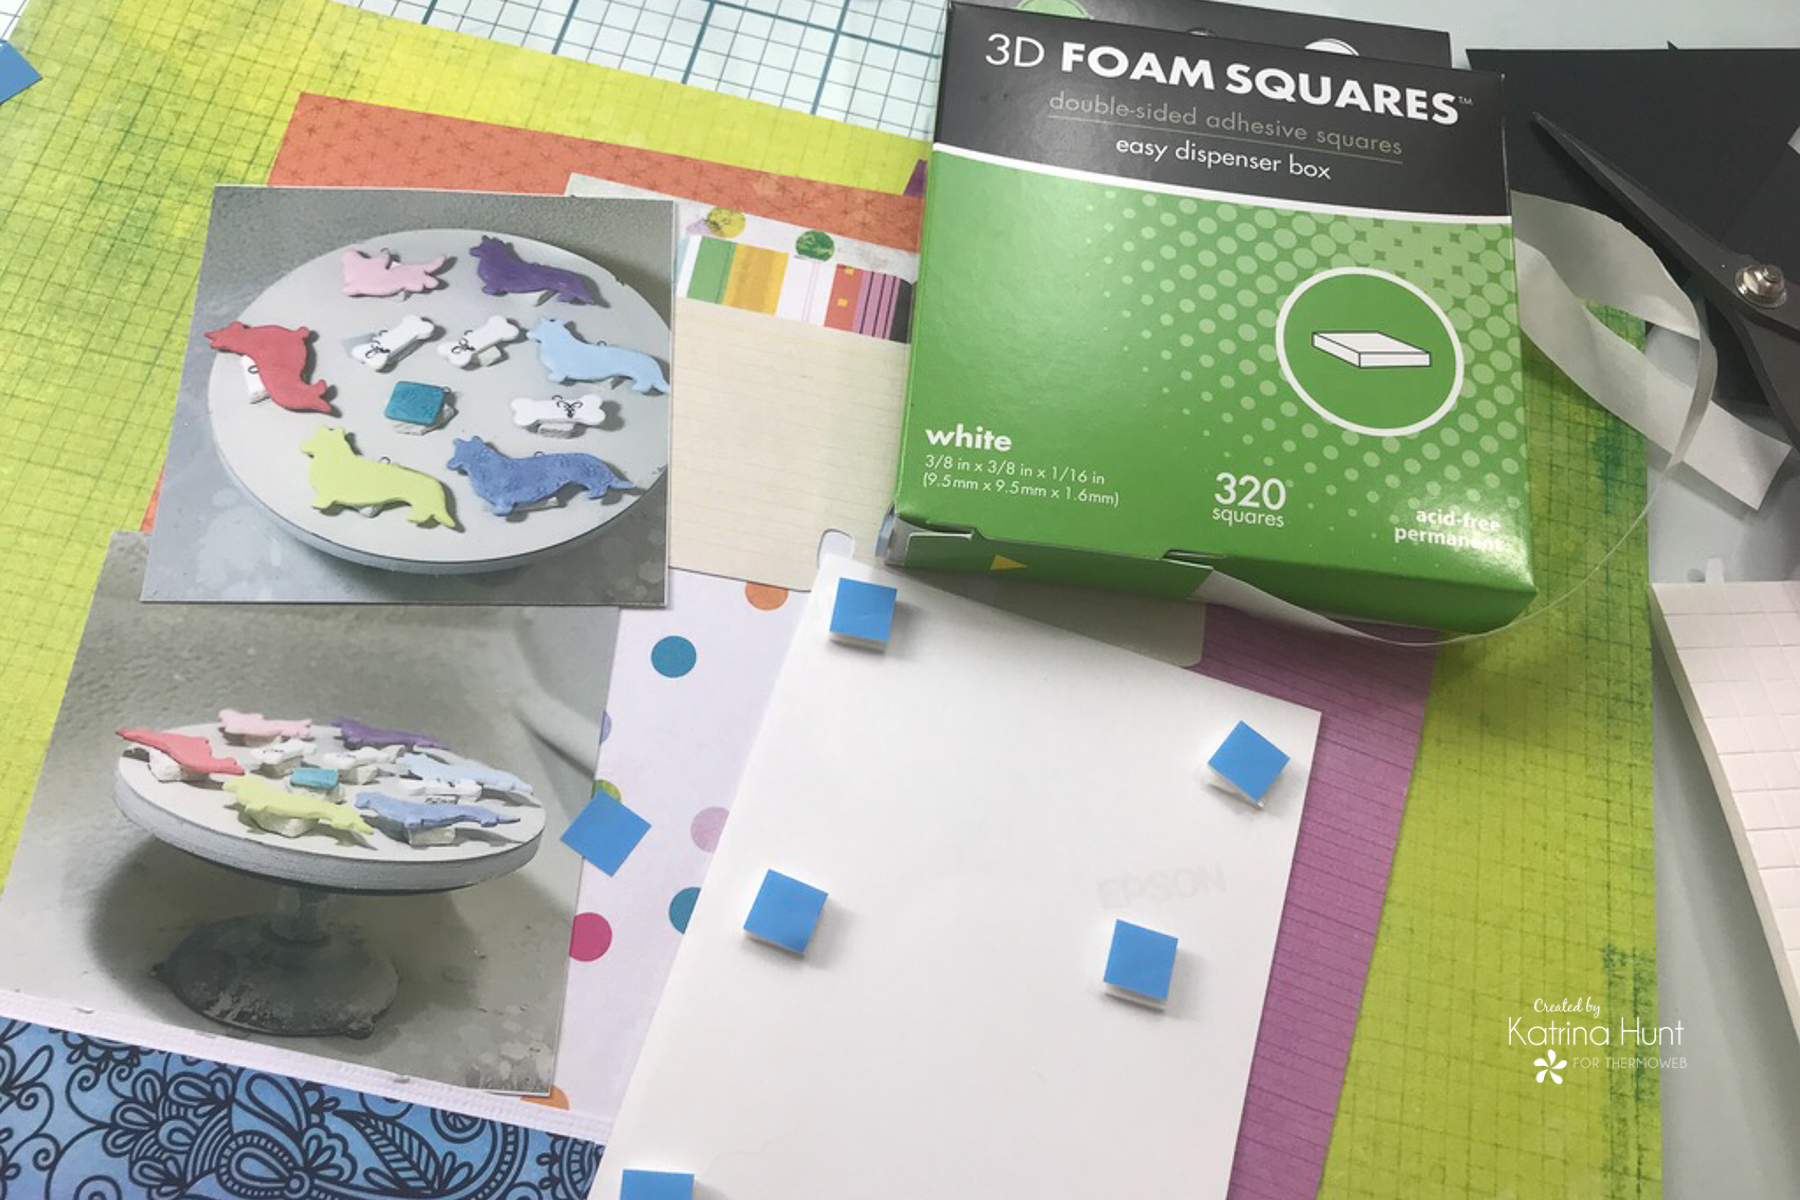
3D Foam Squares – Combo Pack
3D FOAM SQUARES BOX
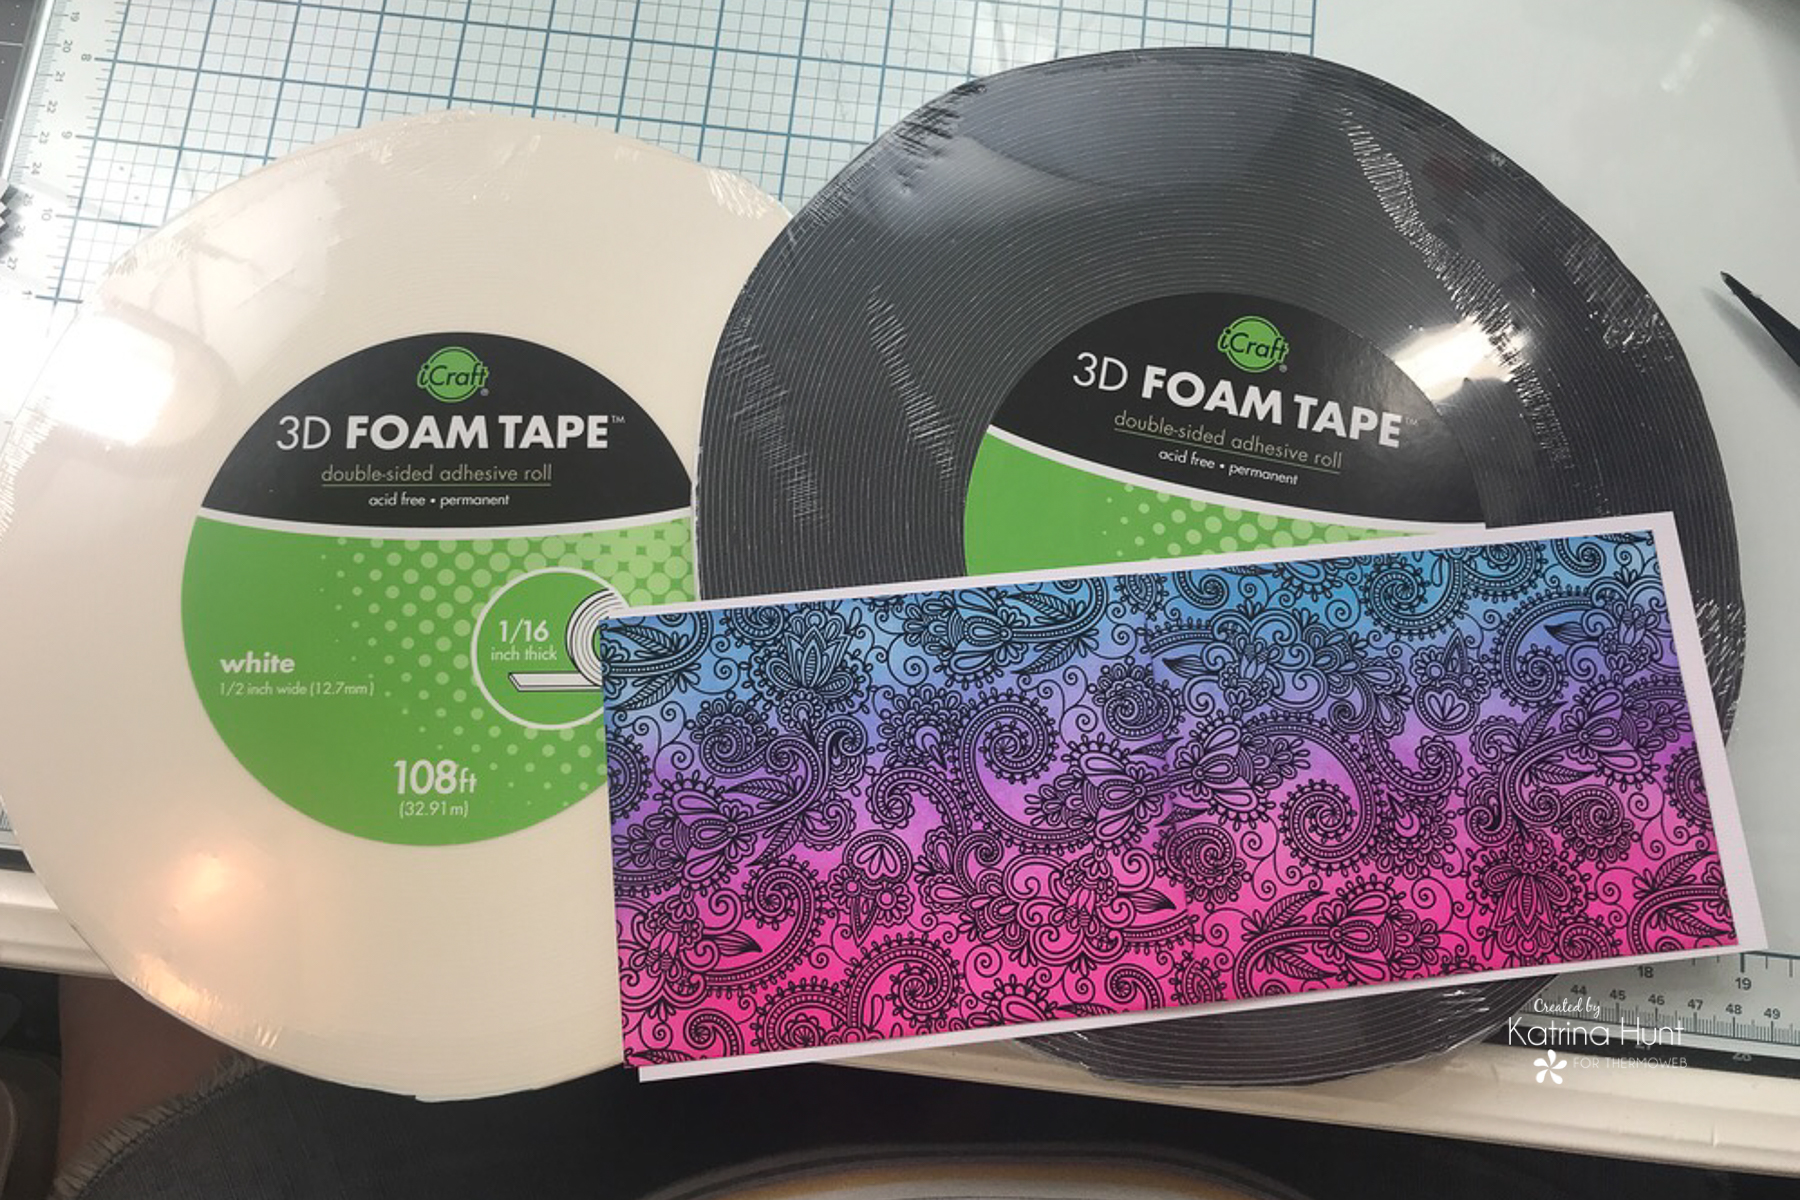
3D FOAM TAPE ROLL 1/16
UNITY CARD FRONT RELEASE
UNITY CARD FRONT PAISLEY DREAMS
ULTRA BOND LIQUID ADHESIVE PEN
Deco Foil Transfer Gel DUO
Rina K Designs Neon Flock Transfer Sheets – Poppin’ Pink
Rina K Designs Neon Flock Transfers Sheets – Orange Glow
Rina K Designs Neon Flock Transfer Sheets – Screamin’ Green
Rina K Designs Neon Glitz Glitter Gel- Orange Glow
Rina K Designs Electro Pop Ink – Poppin’ PInk
Rina K Designs Electro Pop Ink – Potent Purple
Rina K Designs Electro Pop Ink – Blaring Blue
Rina K Designs Electro Pop Ink – Hello Yellow
Pixie Tape
Pixie Spray
iCraft Easy-Cut Adhesive Sheets
Other Supplies Used
Vicki Boutin Color Study Collection
PinkFresh Layering Stencil Butterflies
PinkFresh Die-Butterflies
Gems
Cardstock
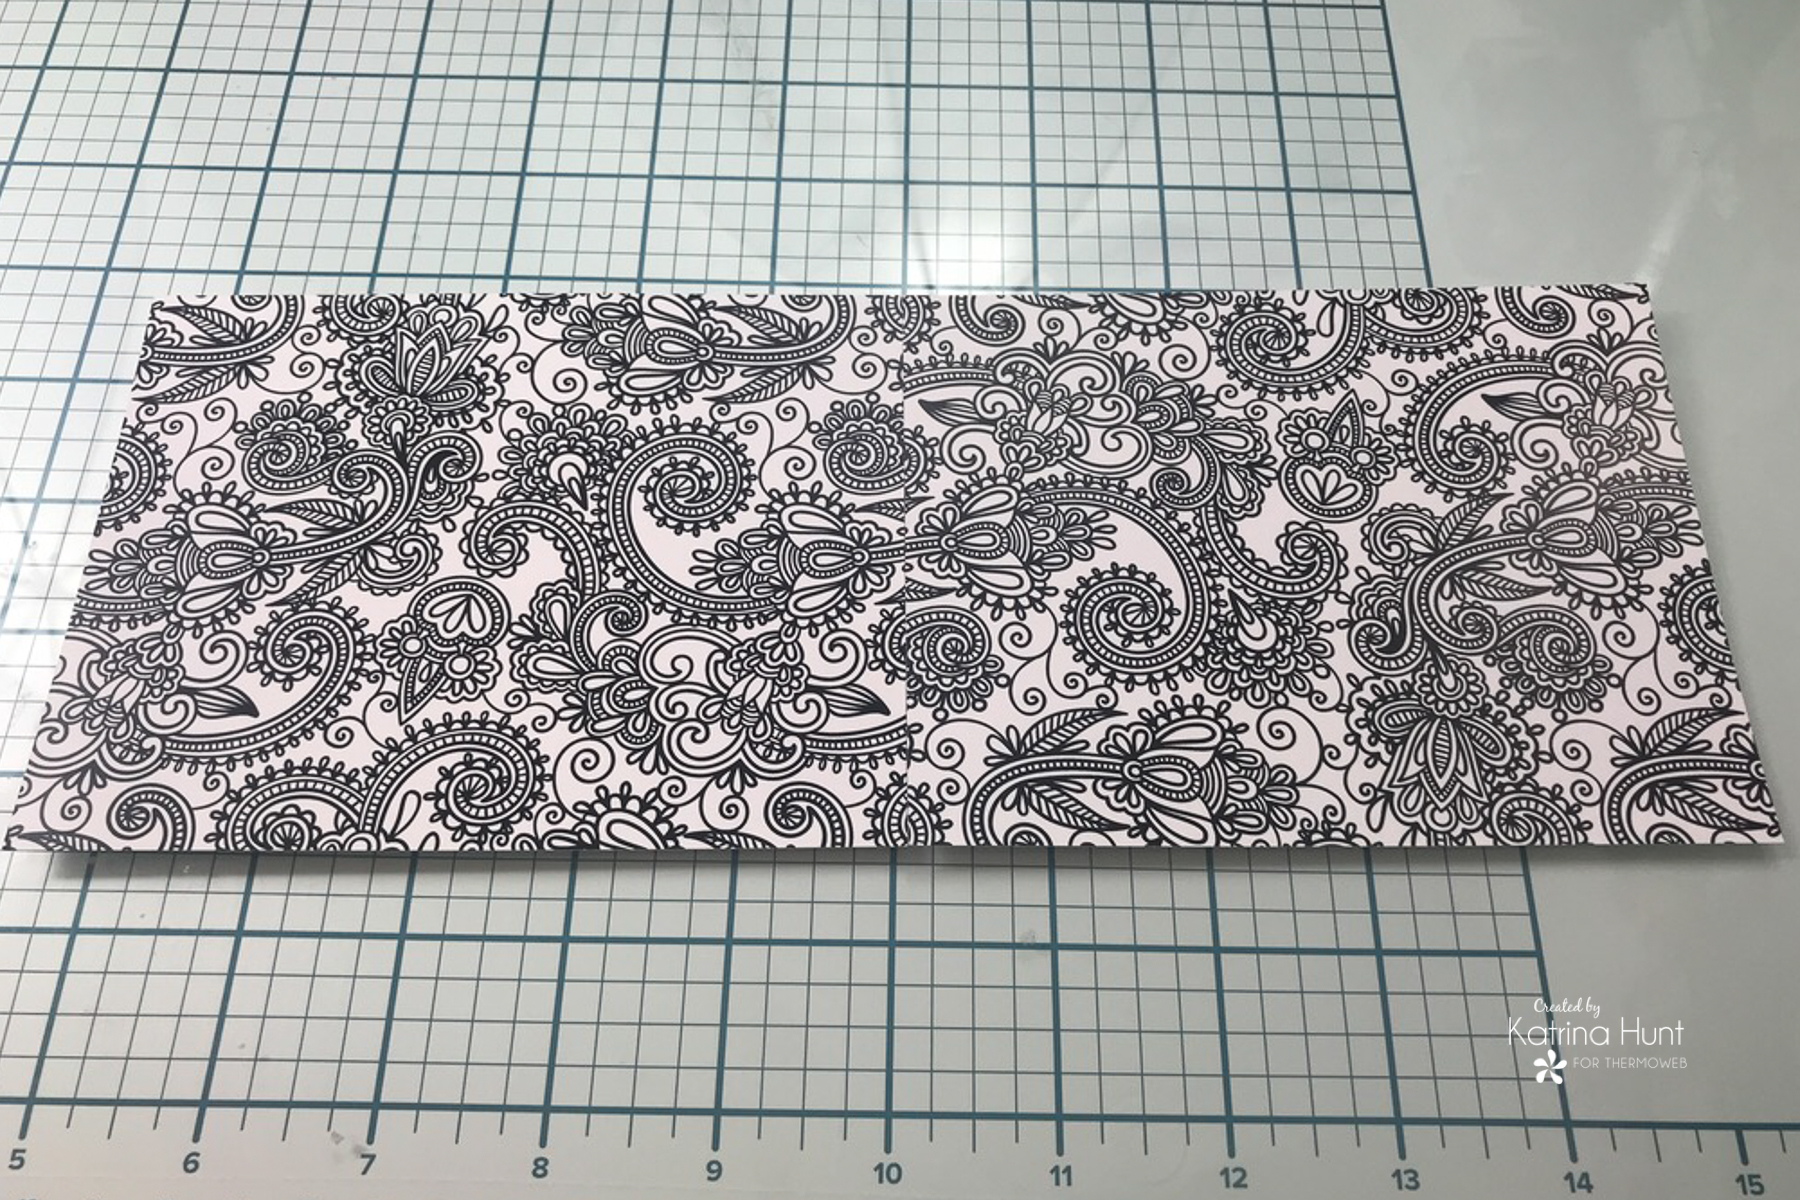
LAYOUT DETAILS-INKING CARD FRONTS
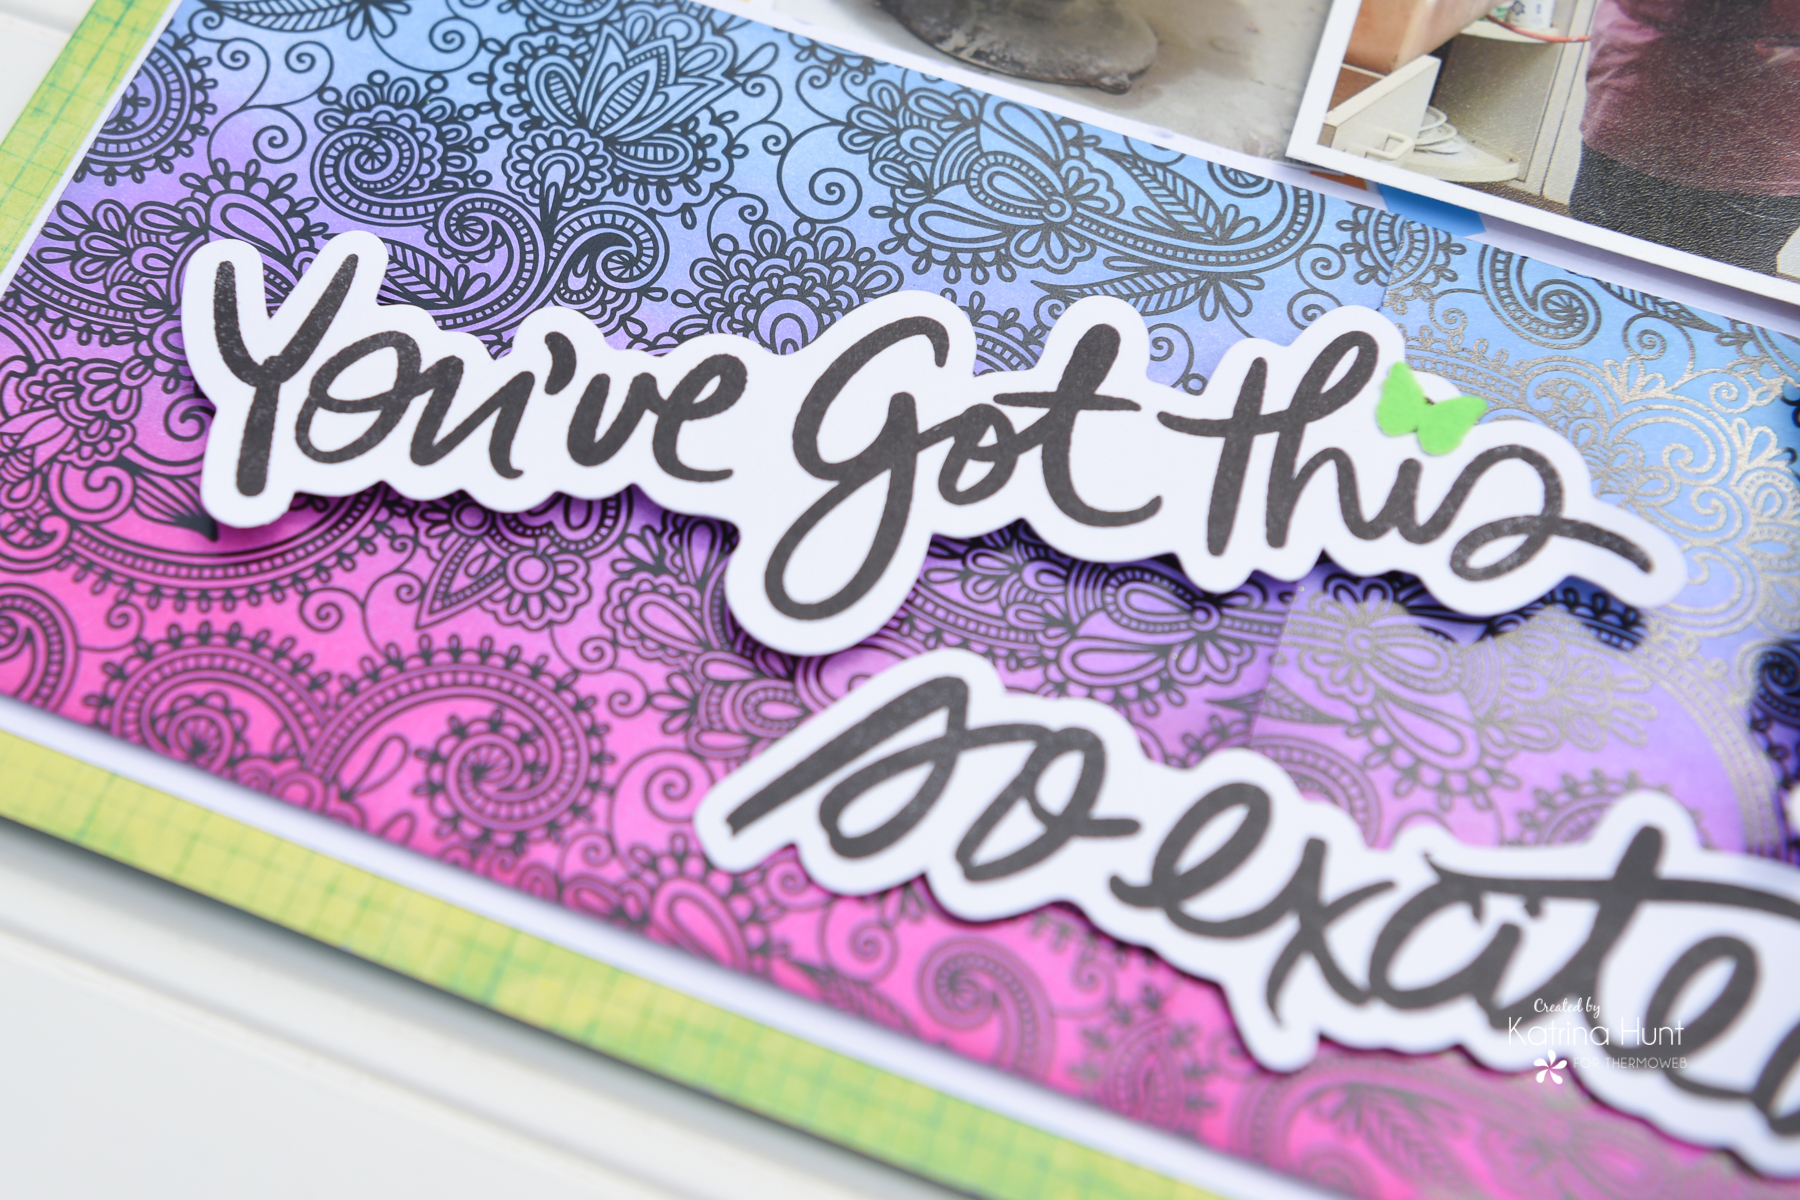
Start by taping two of the Unity Toner Card Fronts (or DecoFoil Fronts) to each other on the backside using NEW Pixie Tape. Match the front side designs closely to hide the seam where the toner sheets join.
Using the Rina K Electro Pop Ink in Poppin’ Pink, ink blend the bottom edge of the toner sheets about 1/3 to 1/2 way up the sheet. Next, flip the sheets around and blend with the Rina K Electro Pop Ink in Blaring Blue until you meet the edge of the pink ink blending.
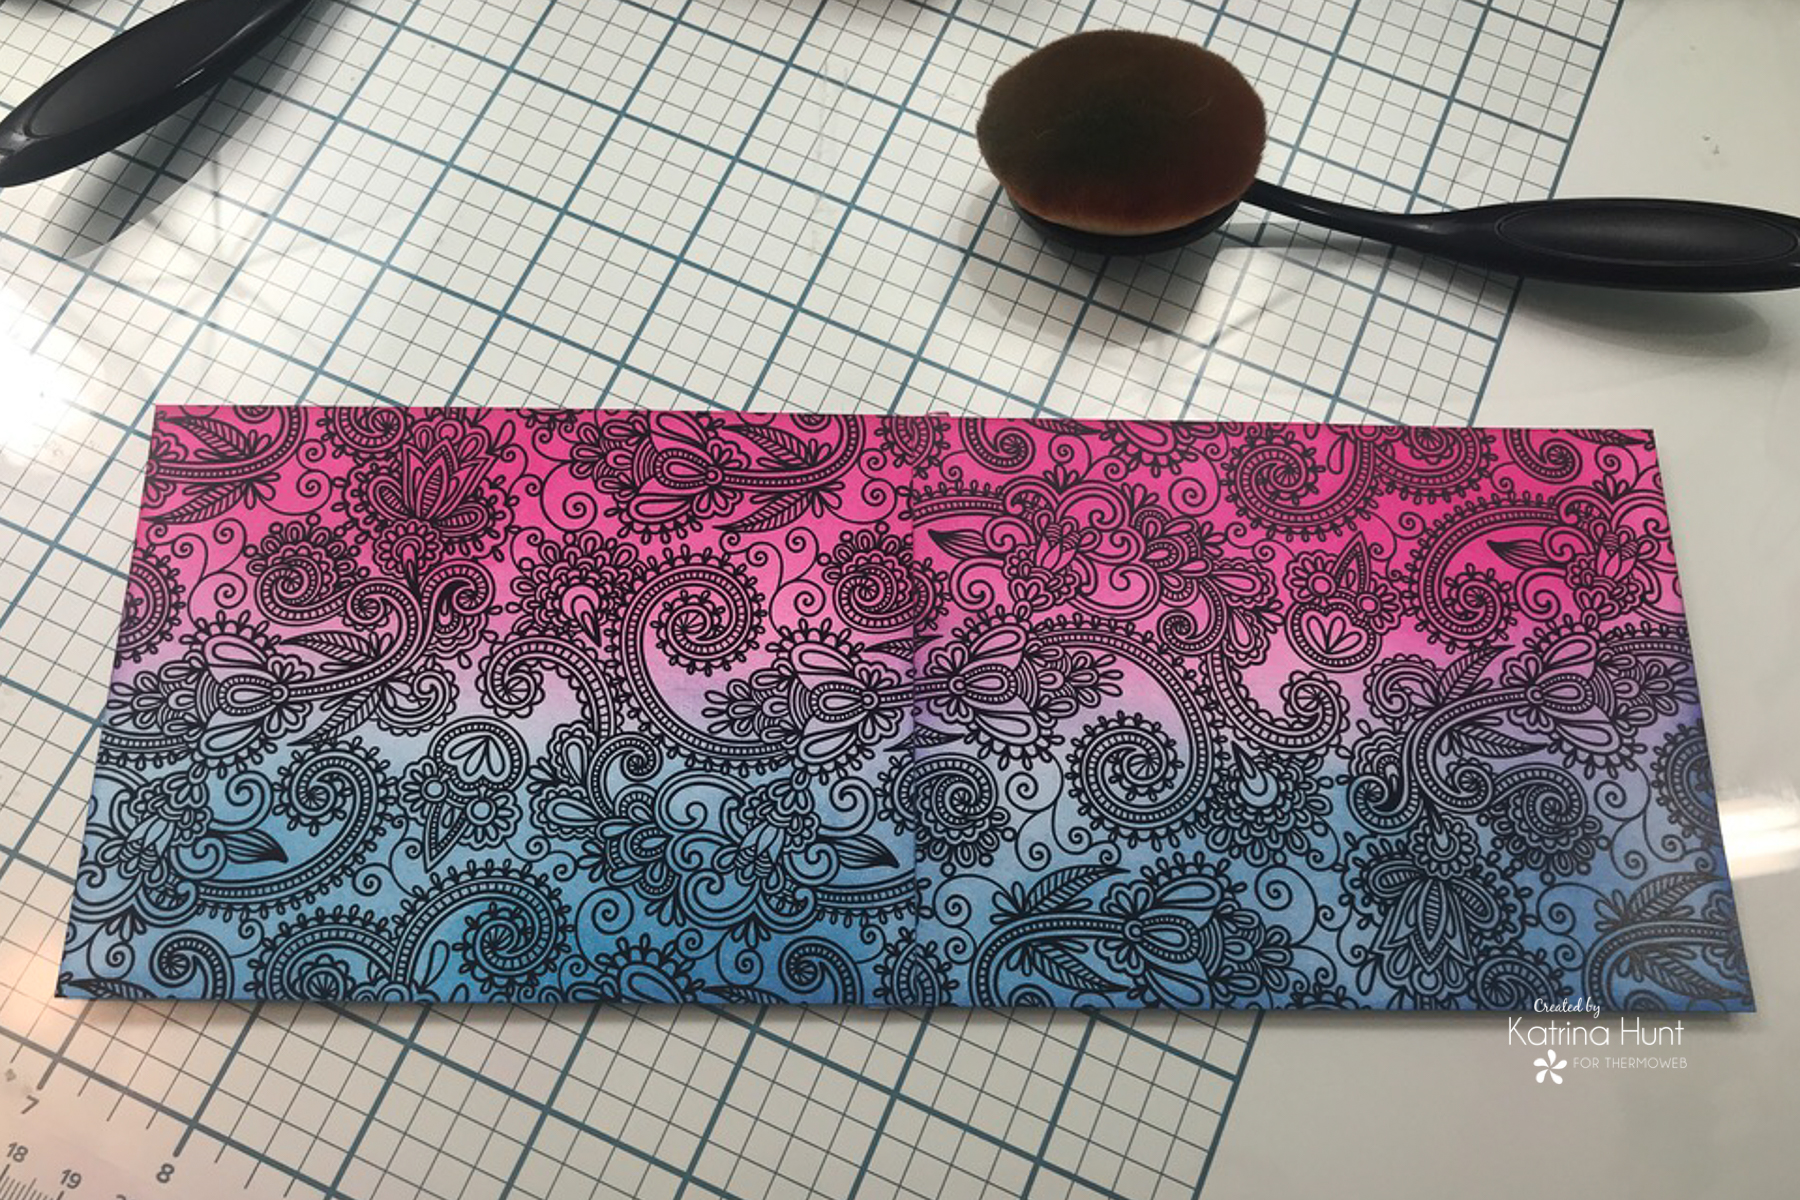
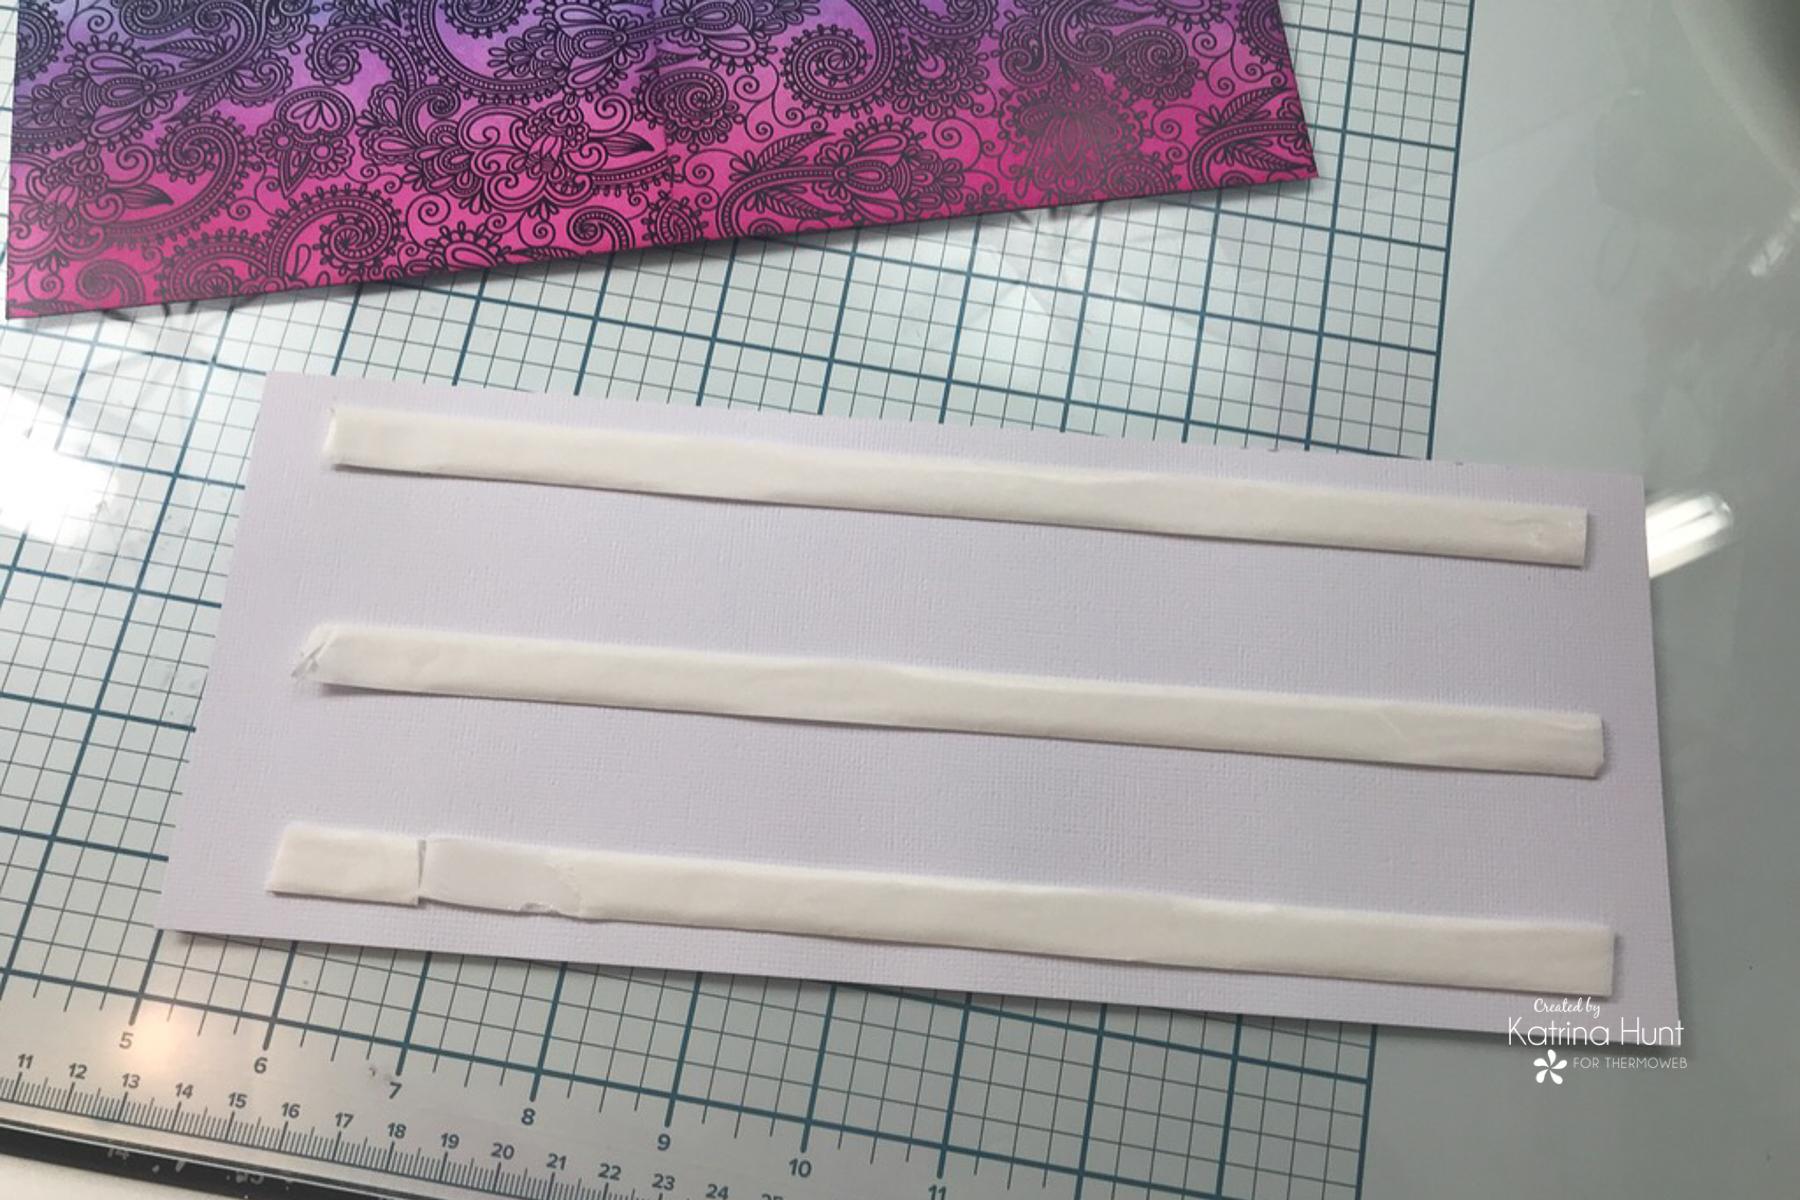
I wanted more purple where the two colors met, so I used the Rina K Electro Pop Ink in Potent Purple to make the center more vibrant. NOTE: I am not foiling these at all, just ink blending on them!!! Once I had my panels ink blended, I attached them to a layer of cardstock with a 1/4 inch border all the way around the toner sheets using the NEW Foam Tape Roll in White!
Creating The Inked and Flocked Butterfly
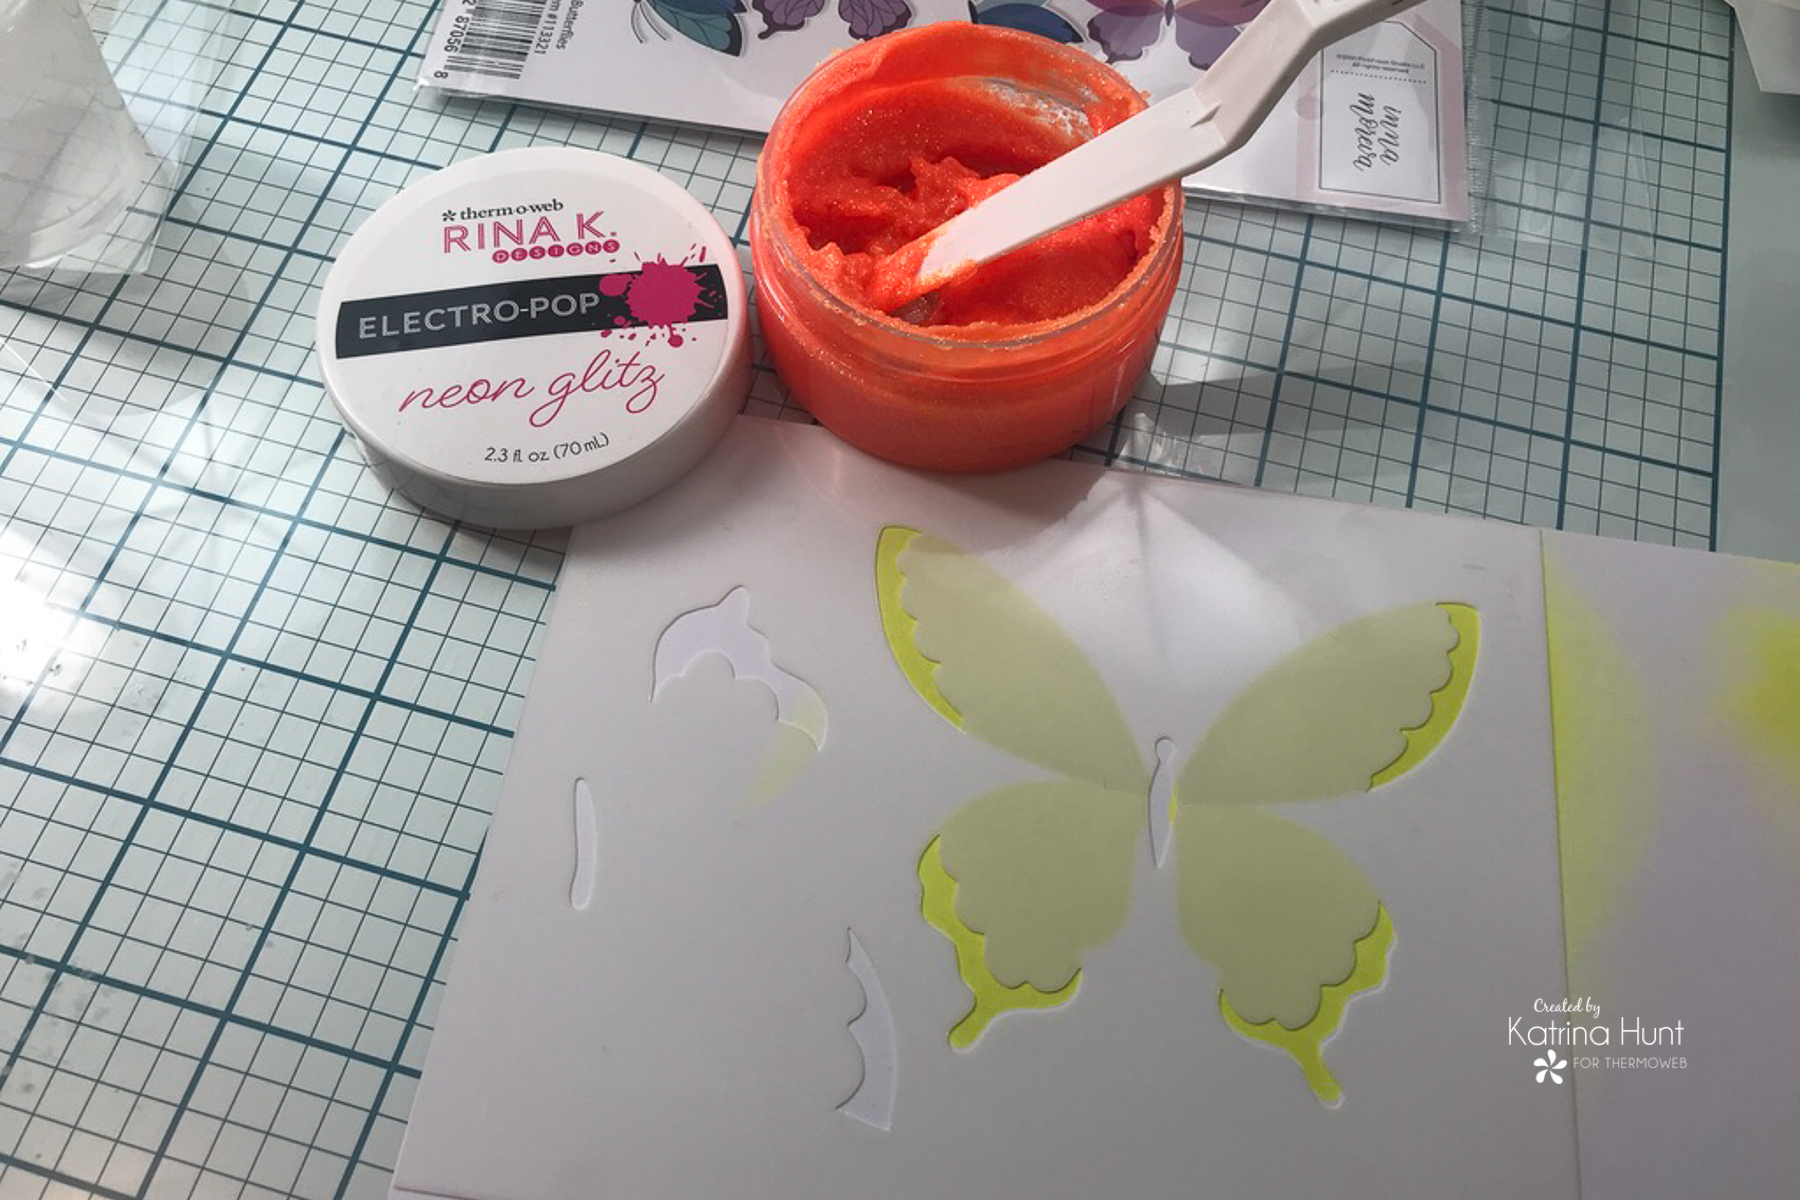
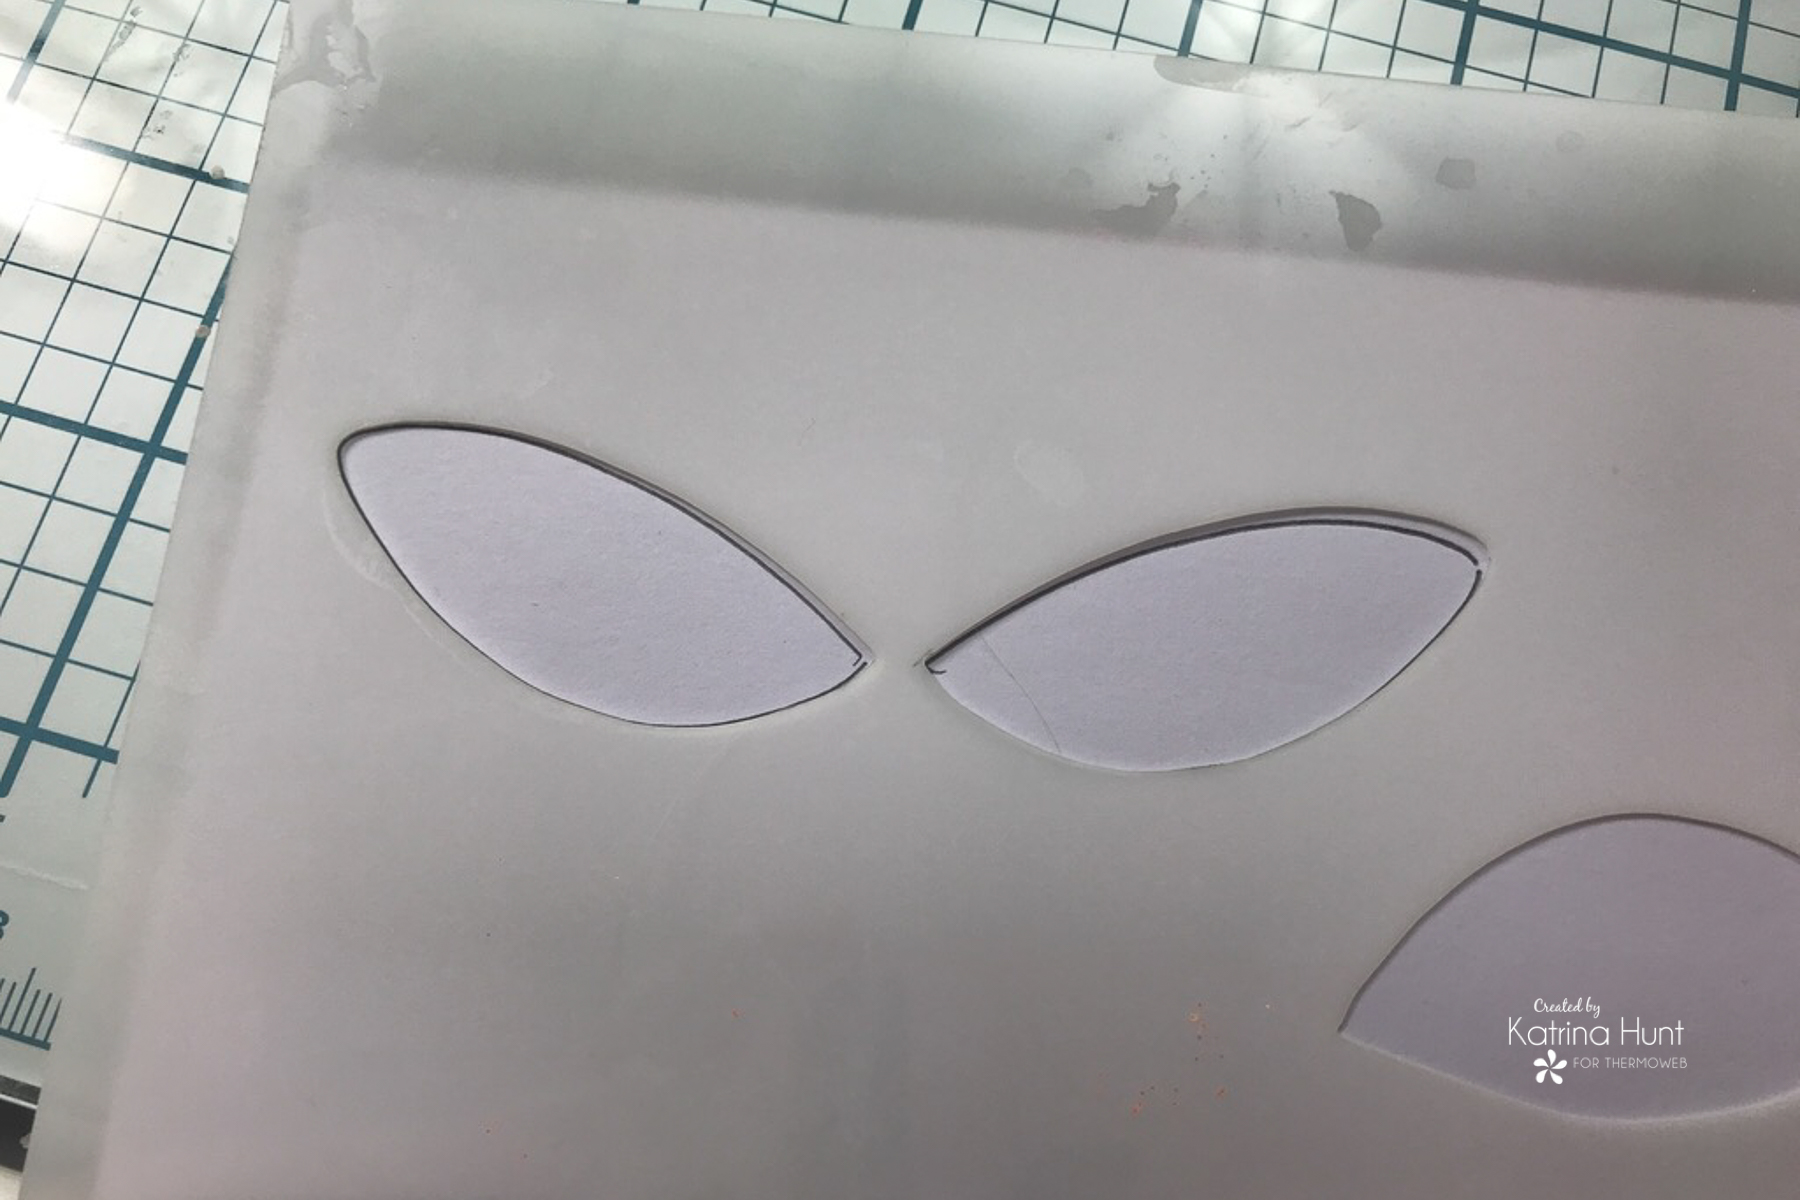
Layering stencils are all the rage right now, and I wanted to see if I could ink and flock one of these types of stencils. Guess what turns out you can!!! I used the new PinkFresh Layering Stencil-Butterflies with Rina K Electro Pop Ink in Hello Yellow, Neon Glitz Gel in Orange Glow and Neon Flock in Poppin’ Pink.
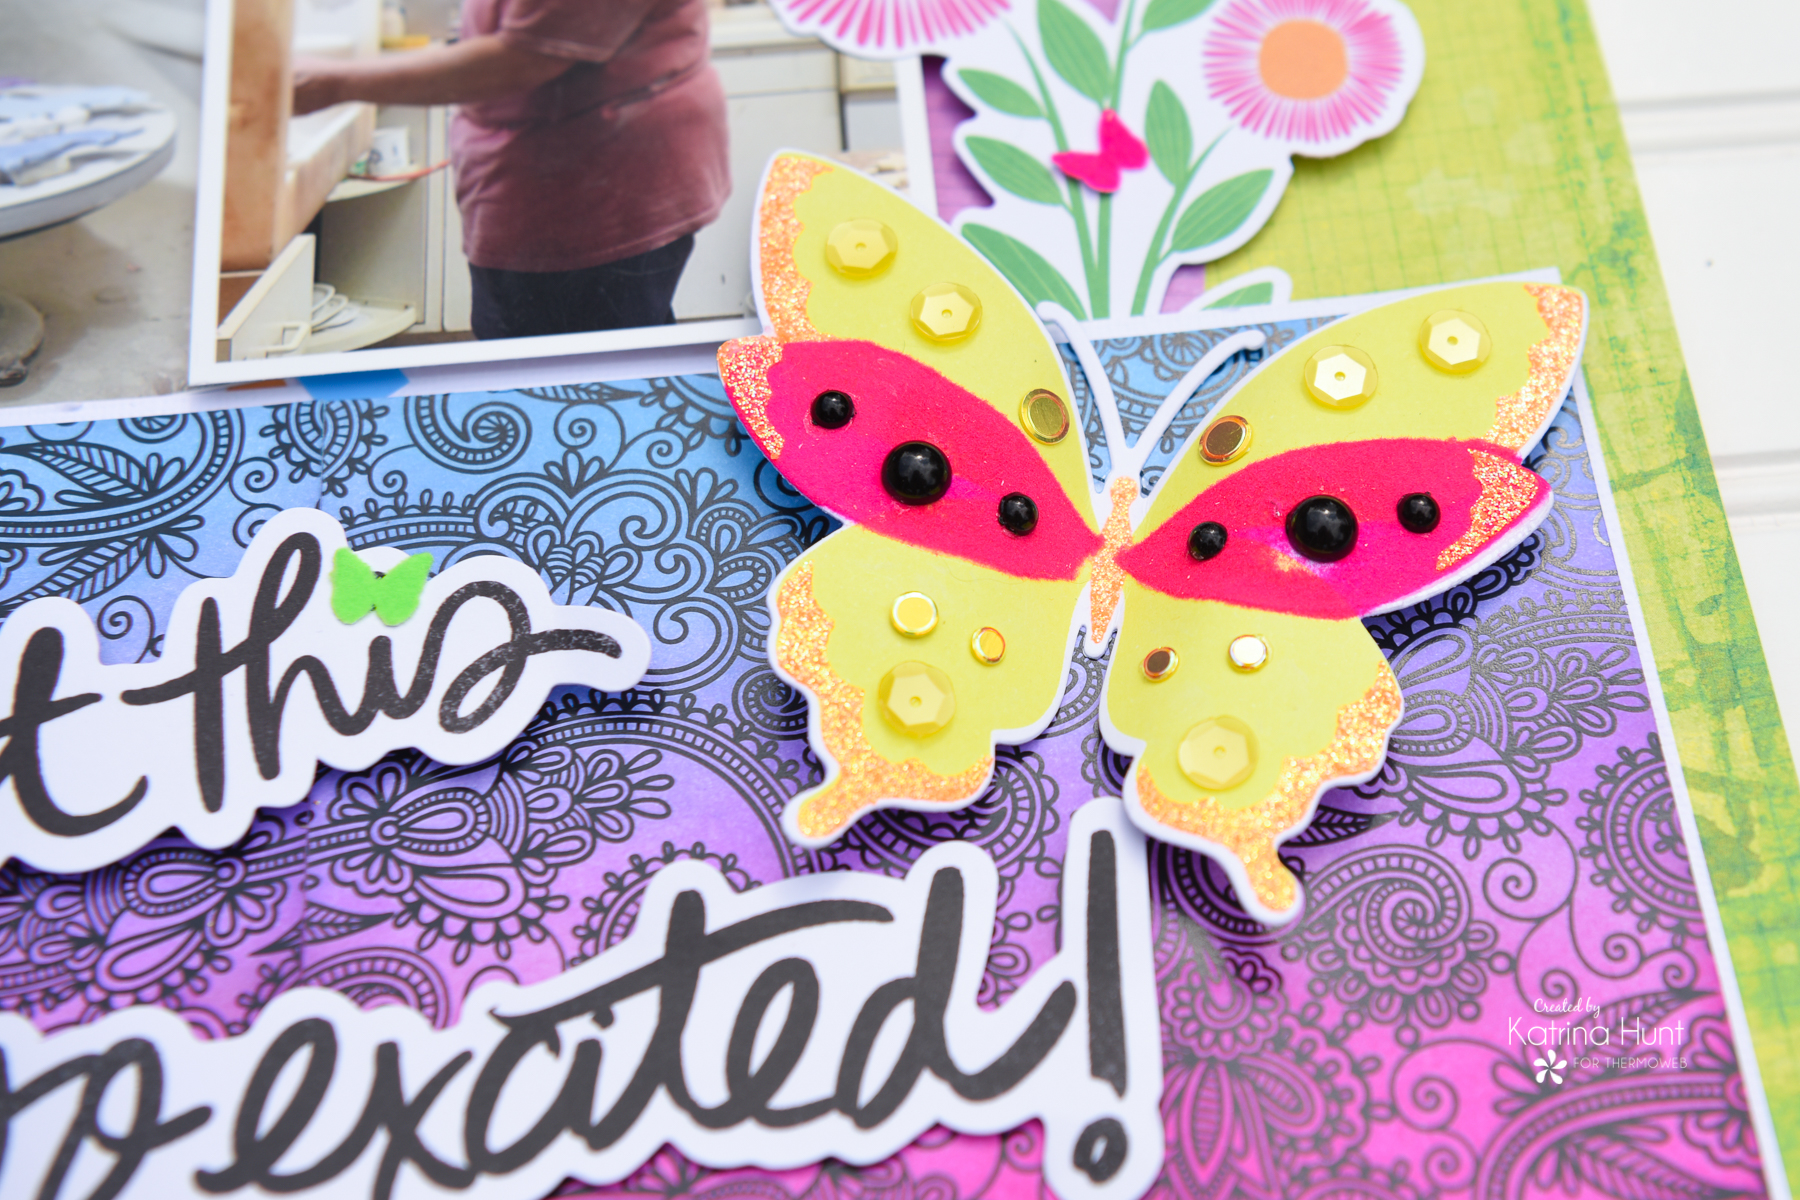
I started by using Pixie Spray to hold each of the stencils in place when doing my layers. The first and second layers were inked in the Hello Yellow ink. Next, the third layer is the Neon Glitz Glitter Gel in Orange Glow.
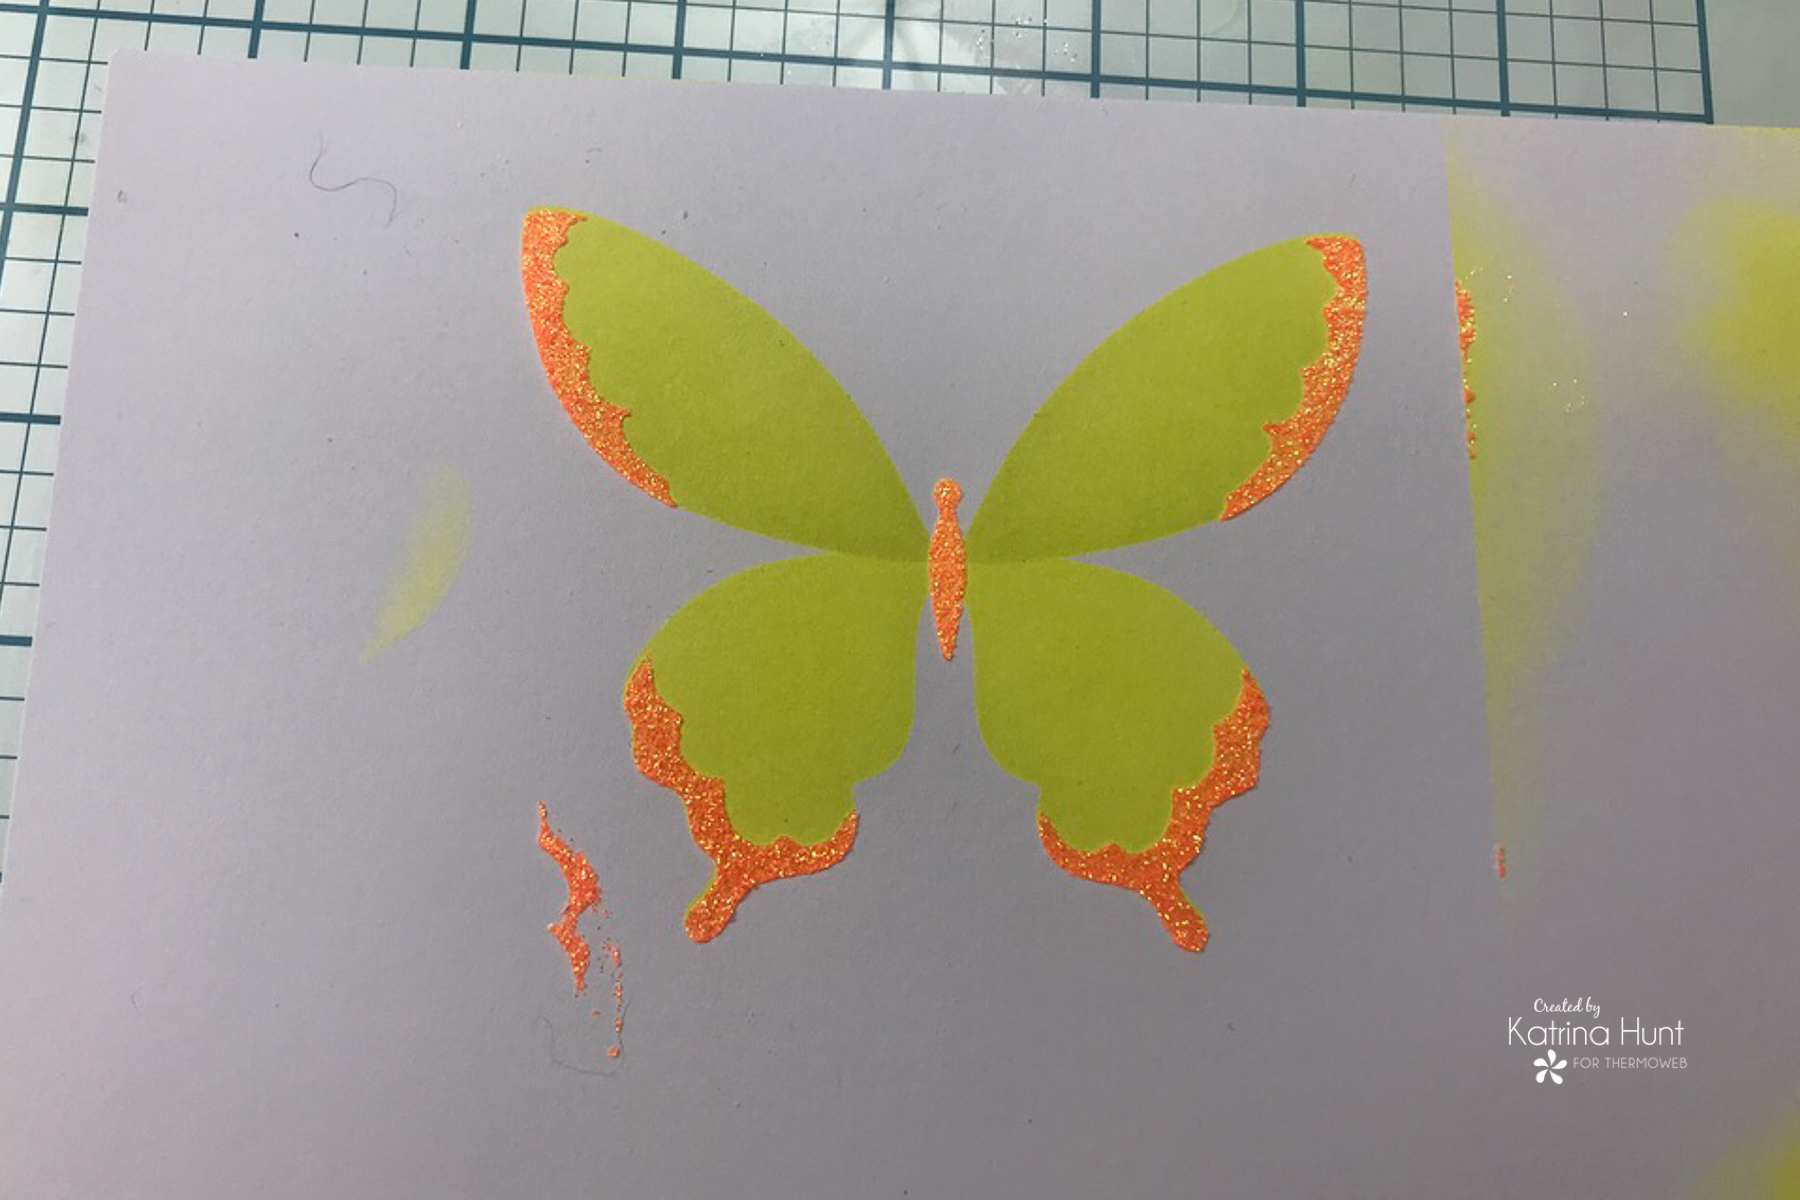
After allowing the glitter gel to completely dry, the fourth layer was done in the DecoFoil Transfer Gel Duo. I made sure to get a good thick coverage layer for this as you can see in the picture.
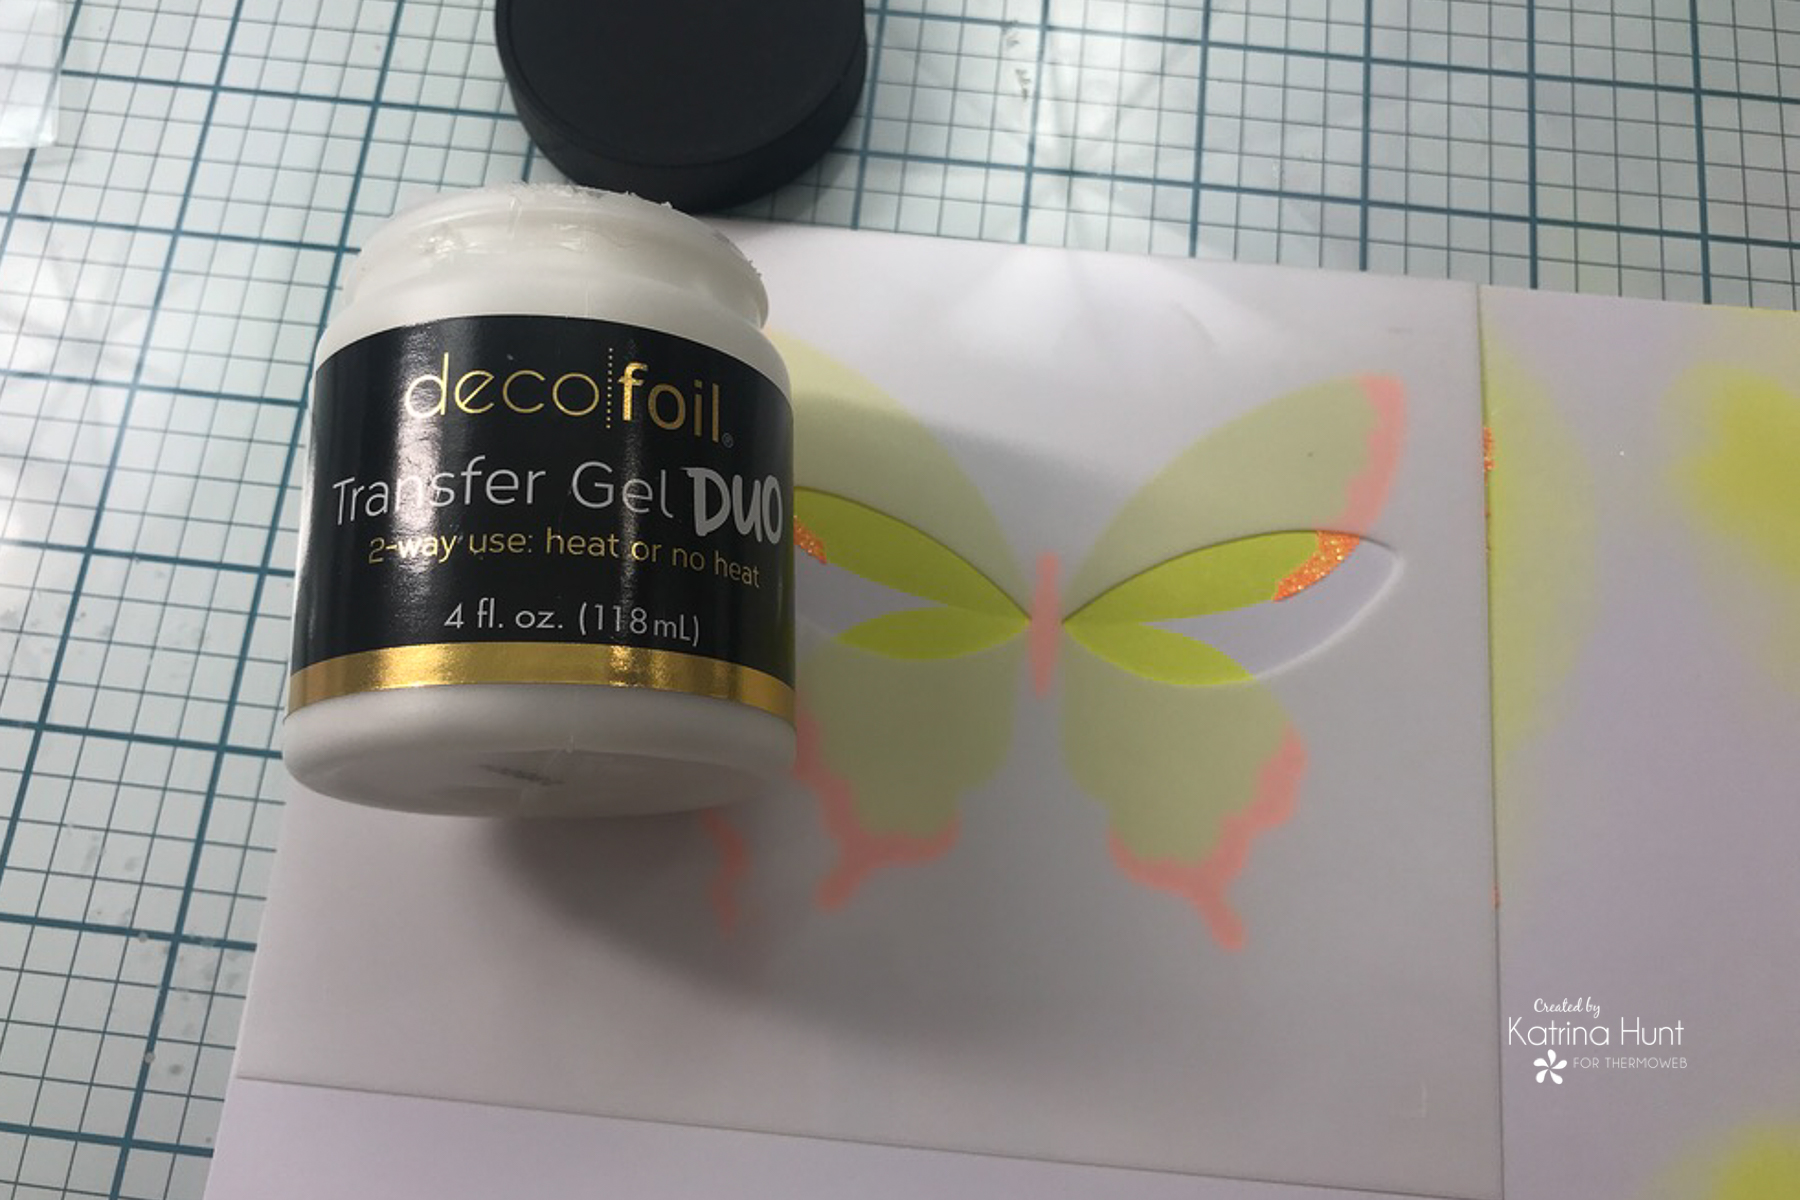
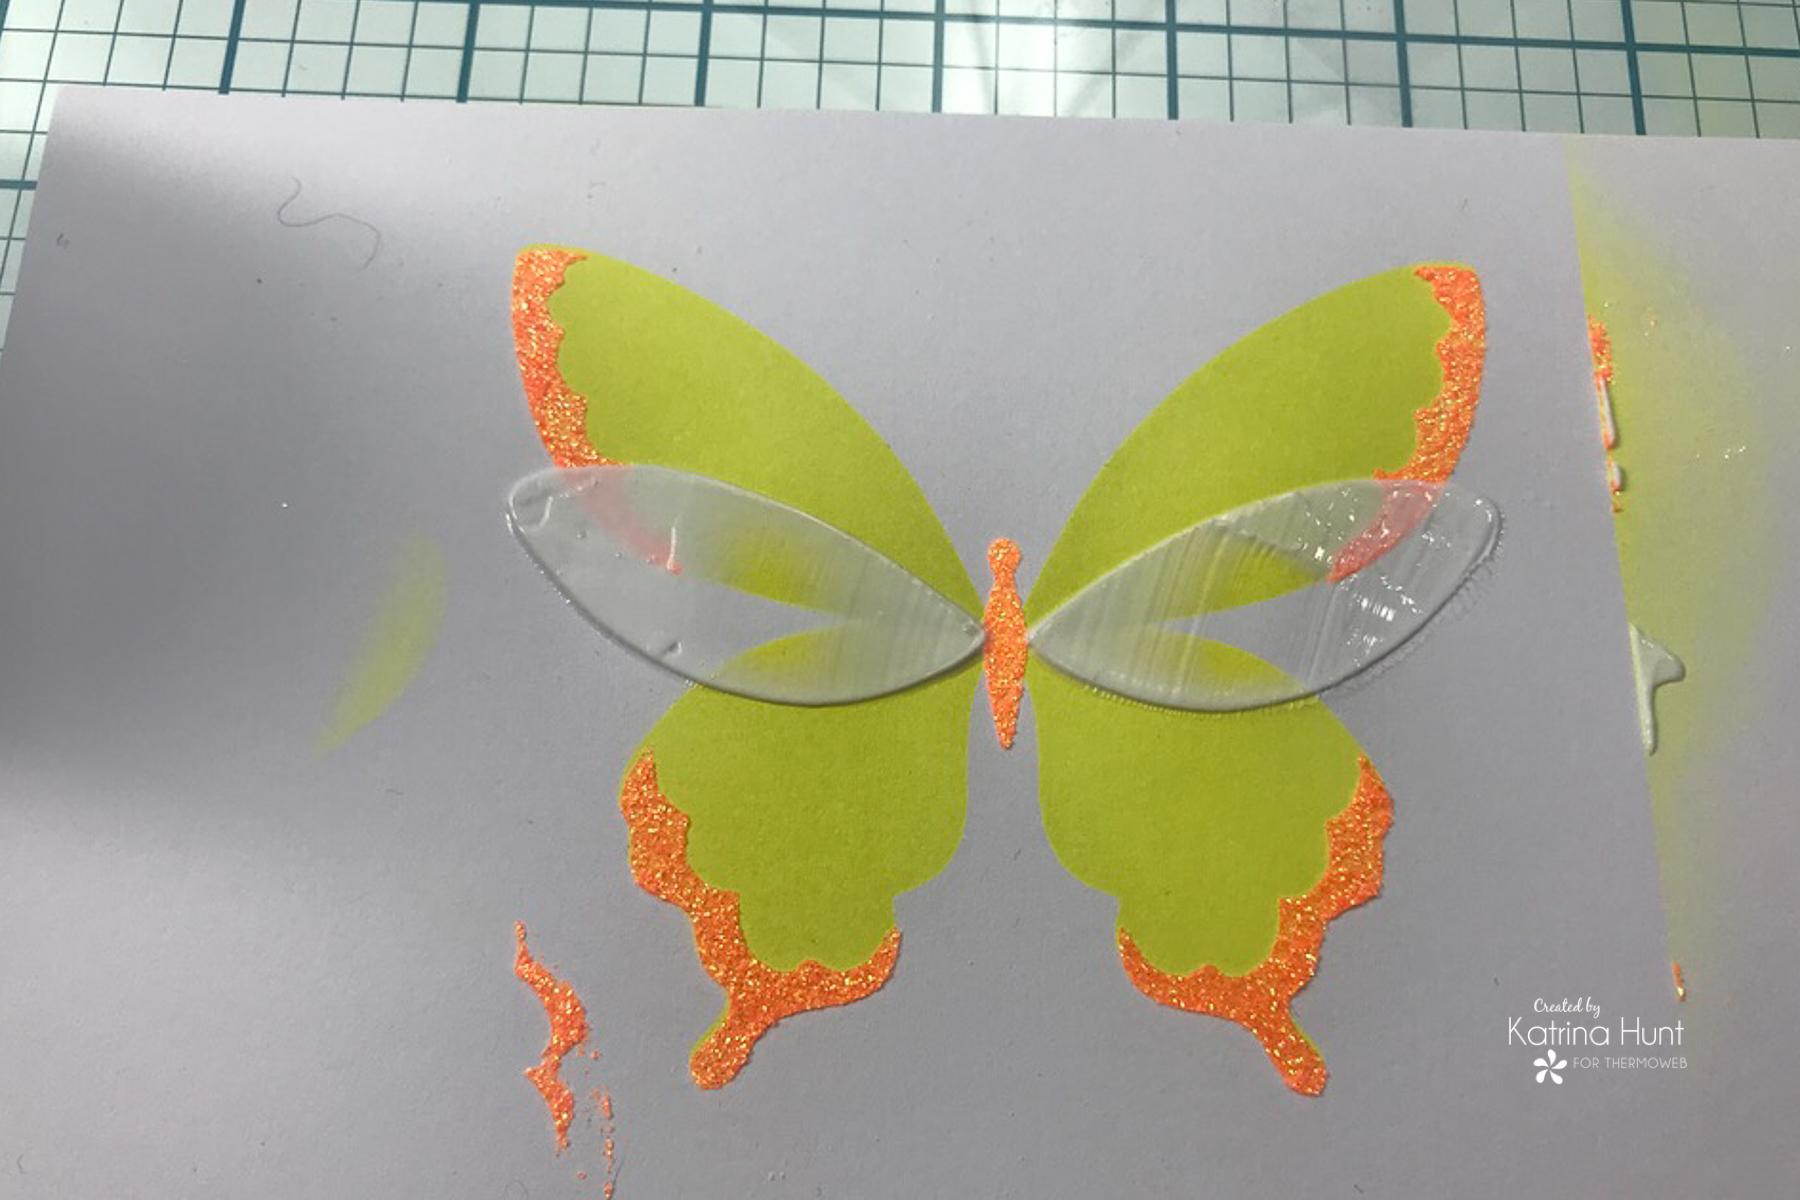
While this layer was drying, I traced the fourth layer stencil onto the back of a piece of Poppin’ Pink Neon Flock. Once traced, I trimmed out a little from the penciled area. I wasn’t sure if the flock was going to transfer onto the glitter gel, so better to be safe than sorry and only use what I needed to cover the transfer gel.
Creating Additional Embellishments To Use
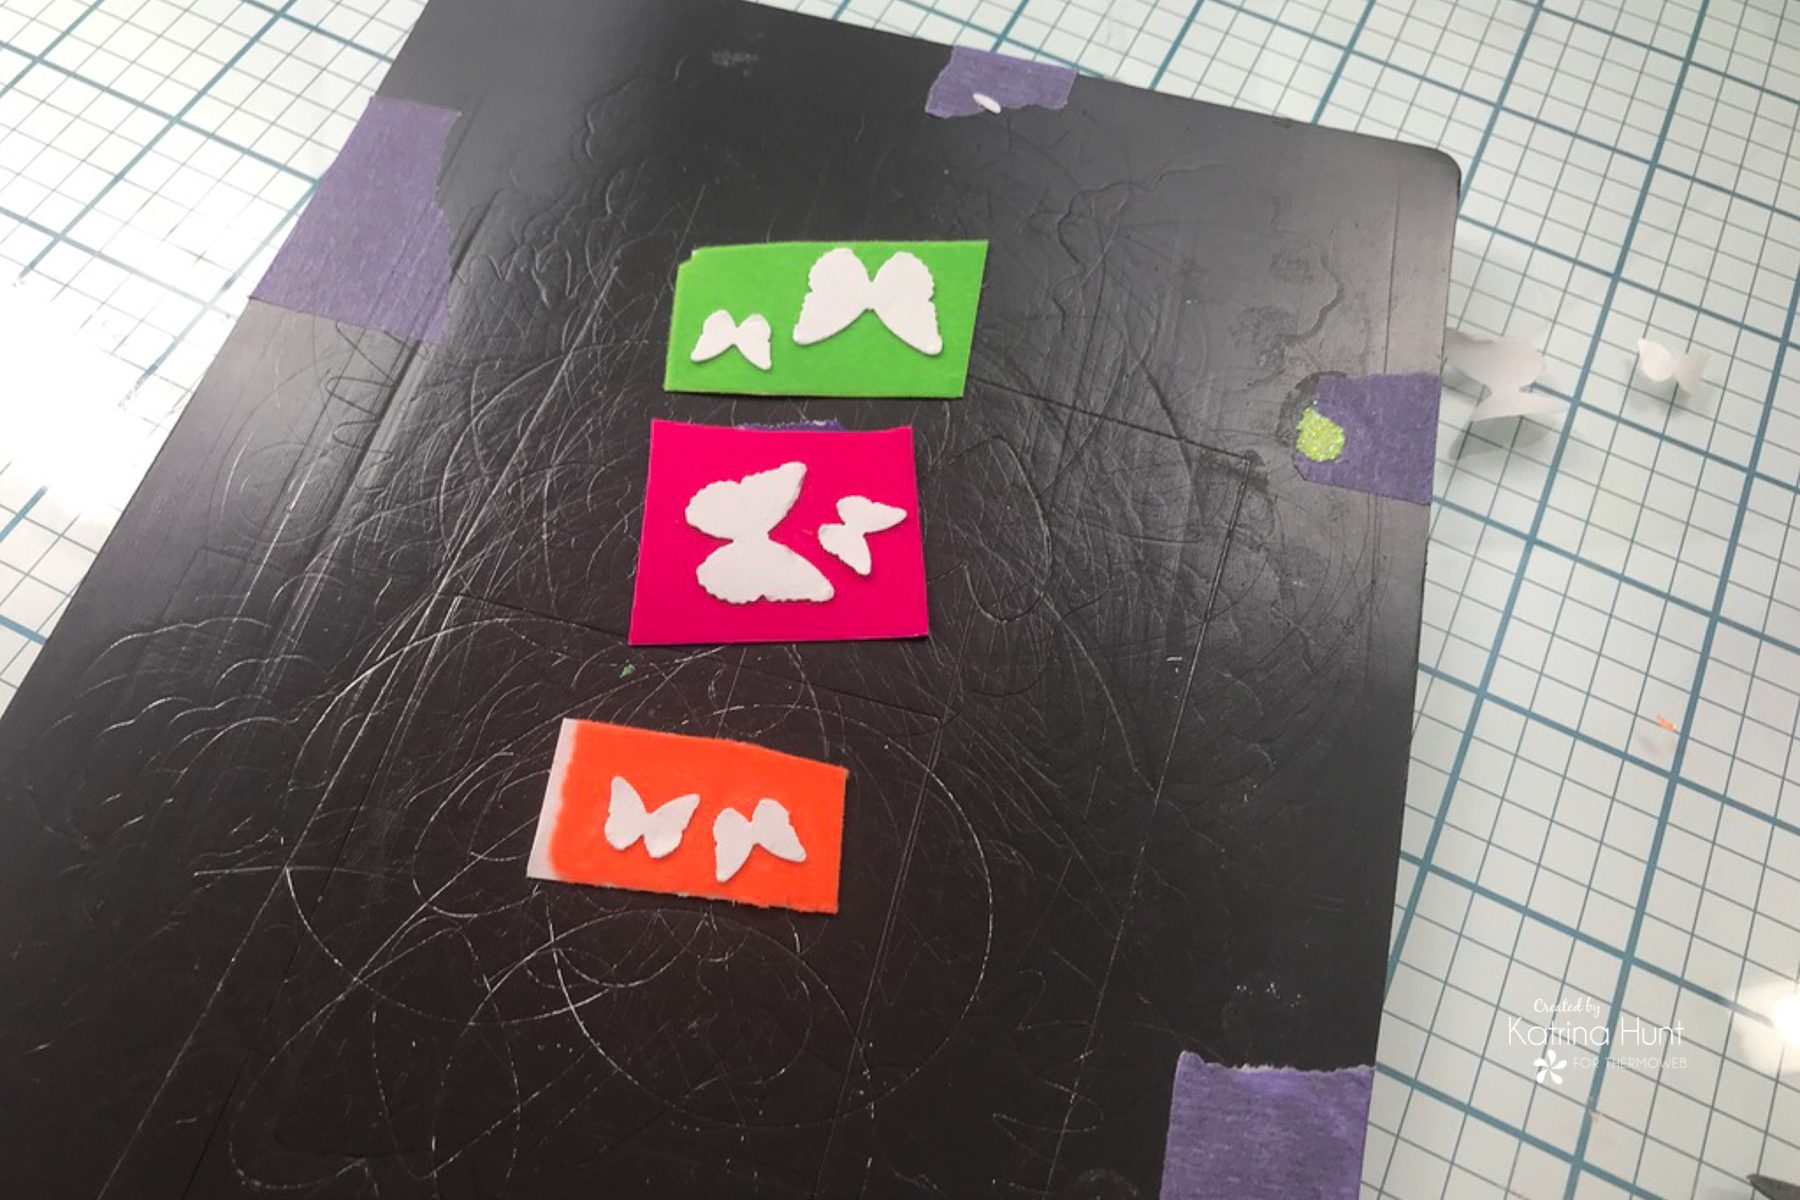
I also went ahead and made some punched butterflies as accents using cardstock, Easy Cut Adhesive Sheets and the Neon Flock in Screamin’ Green, Orange Glow and Poppin’ Pink and just ran them thru my die cutting machine to transfer the flock In case you are wondering about the punch it’s an old Martha Stewart punch that I don’t think you can find anymore.
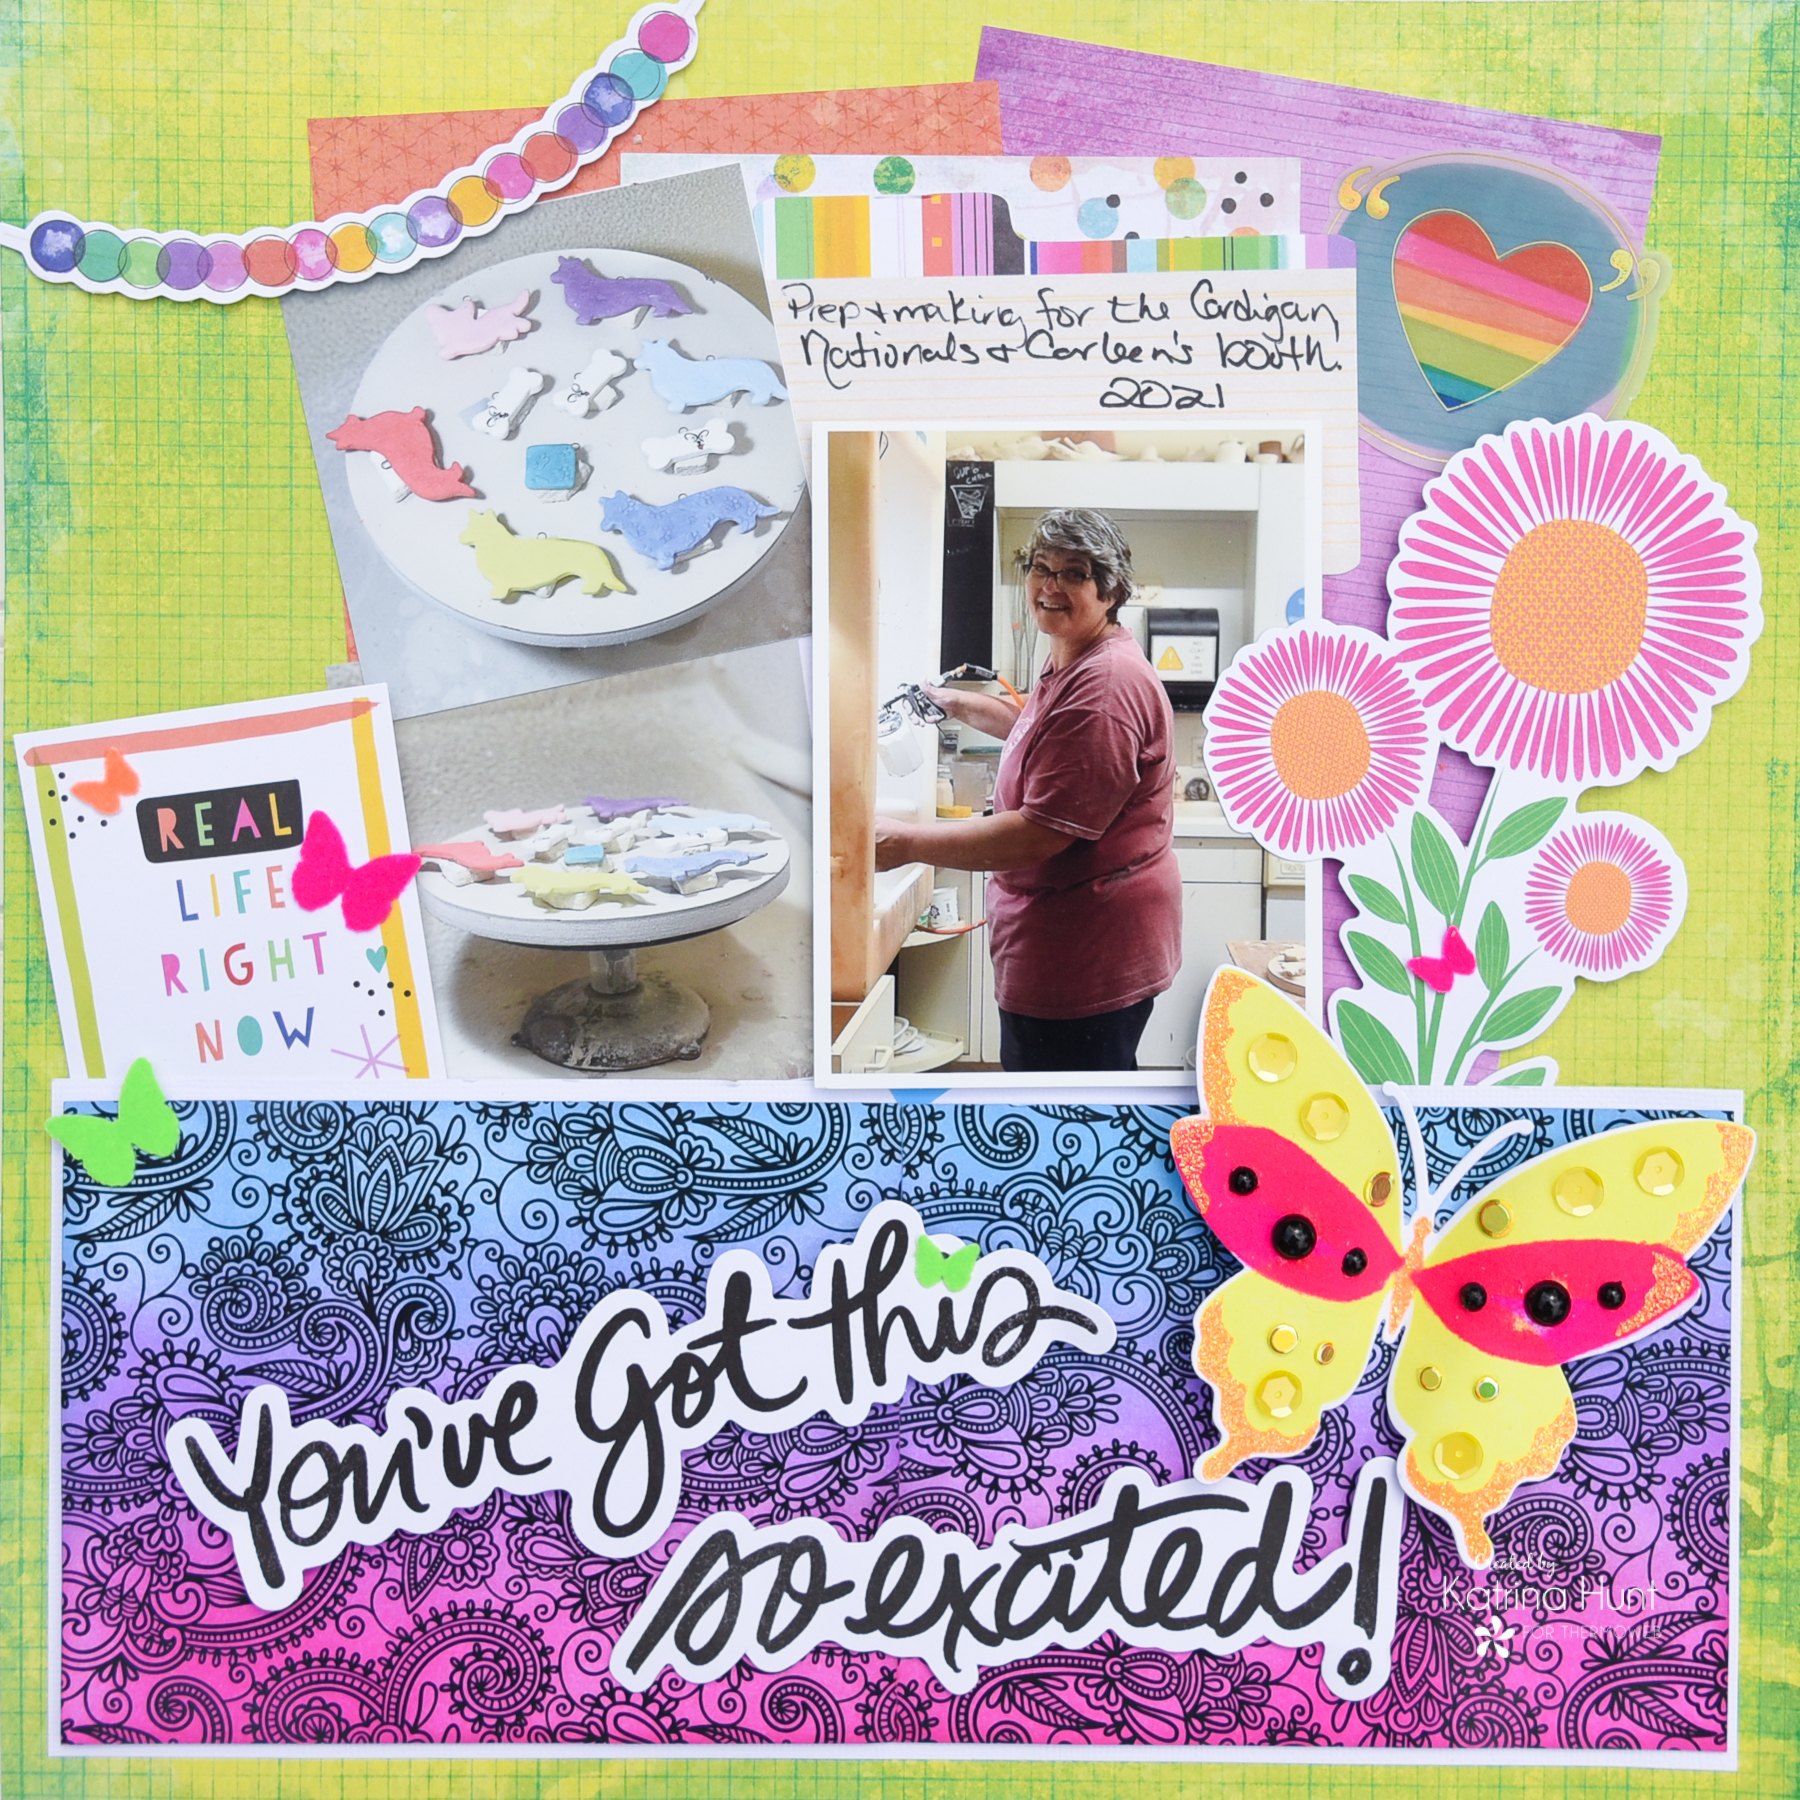
After getting some of these things completed and still waiting on the layer to dry, I went ahead and worked on putting together the rest of the layout. I started by doing the layers behind my pictures, using the Memory Runner XL to adhere them to my background paper. After I had the layers completely, I worked on the picture area. I used the NEW 3D Foam Squares in the Easy Dispenser Box. These things are FAB!!! The blue backing peels off super easy!
Once I found my layer on the butterfly was dry, I transferred the flock to the layer with my die cutting machine. After I completed that step, I then used the matching die to die cut the butterfly out using Pixie Tape to hold the die in place.
Using the NEW Ultra Bond Liquid Adhesive Pen (GRAB THIS!!!) I attached some gems and sequins to bling up my butterfly! There was also one more layering stencil that I did over the flock on the tip of the pink wings with the Orange Glow Glitz Glitter Gel that I forgot to mention.
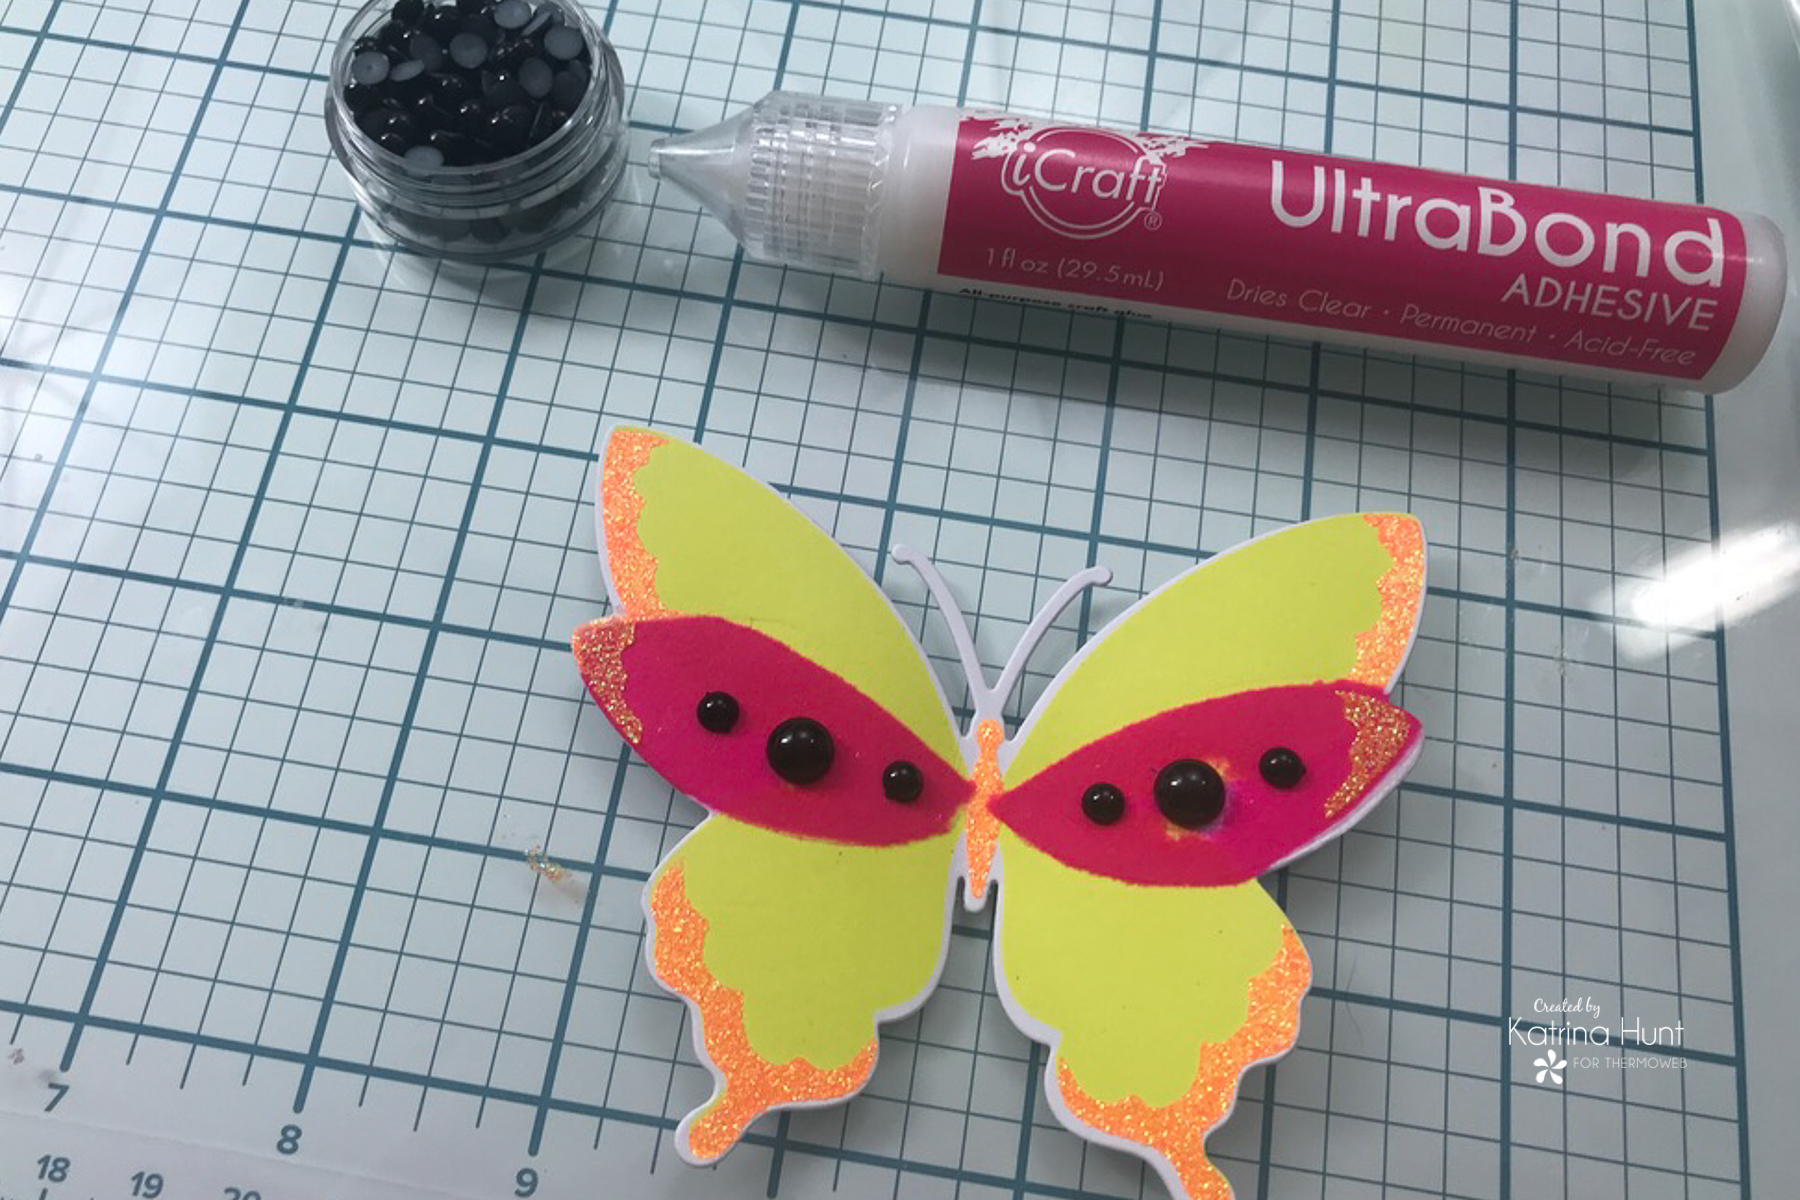
Once the butterfly was done, it pretty much completed my layout! A few of those punch butterflies place randomly around, a little journaling and I was done! One more for the books!
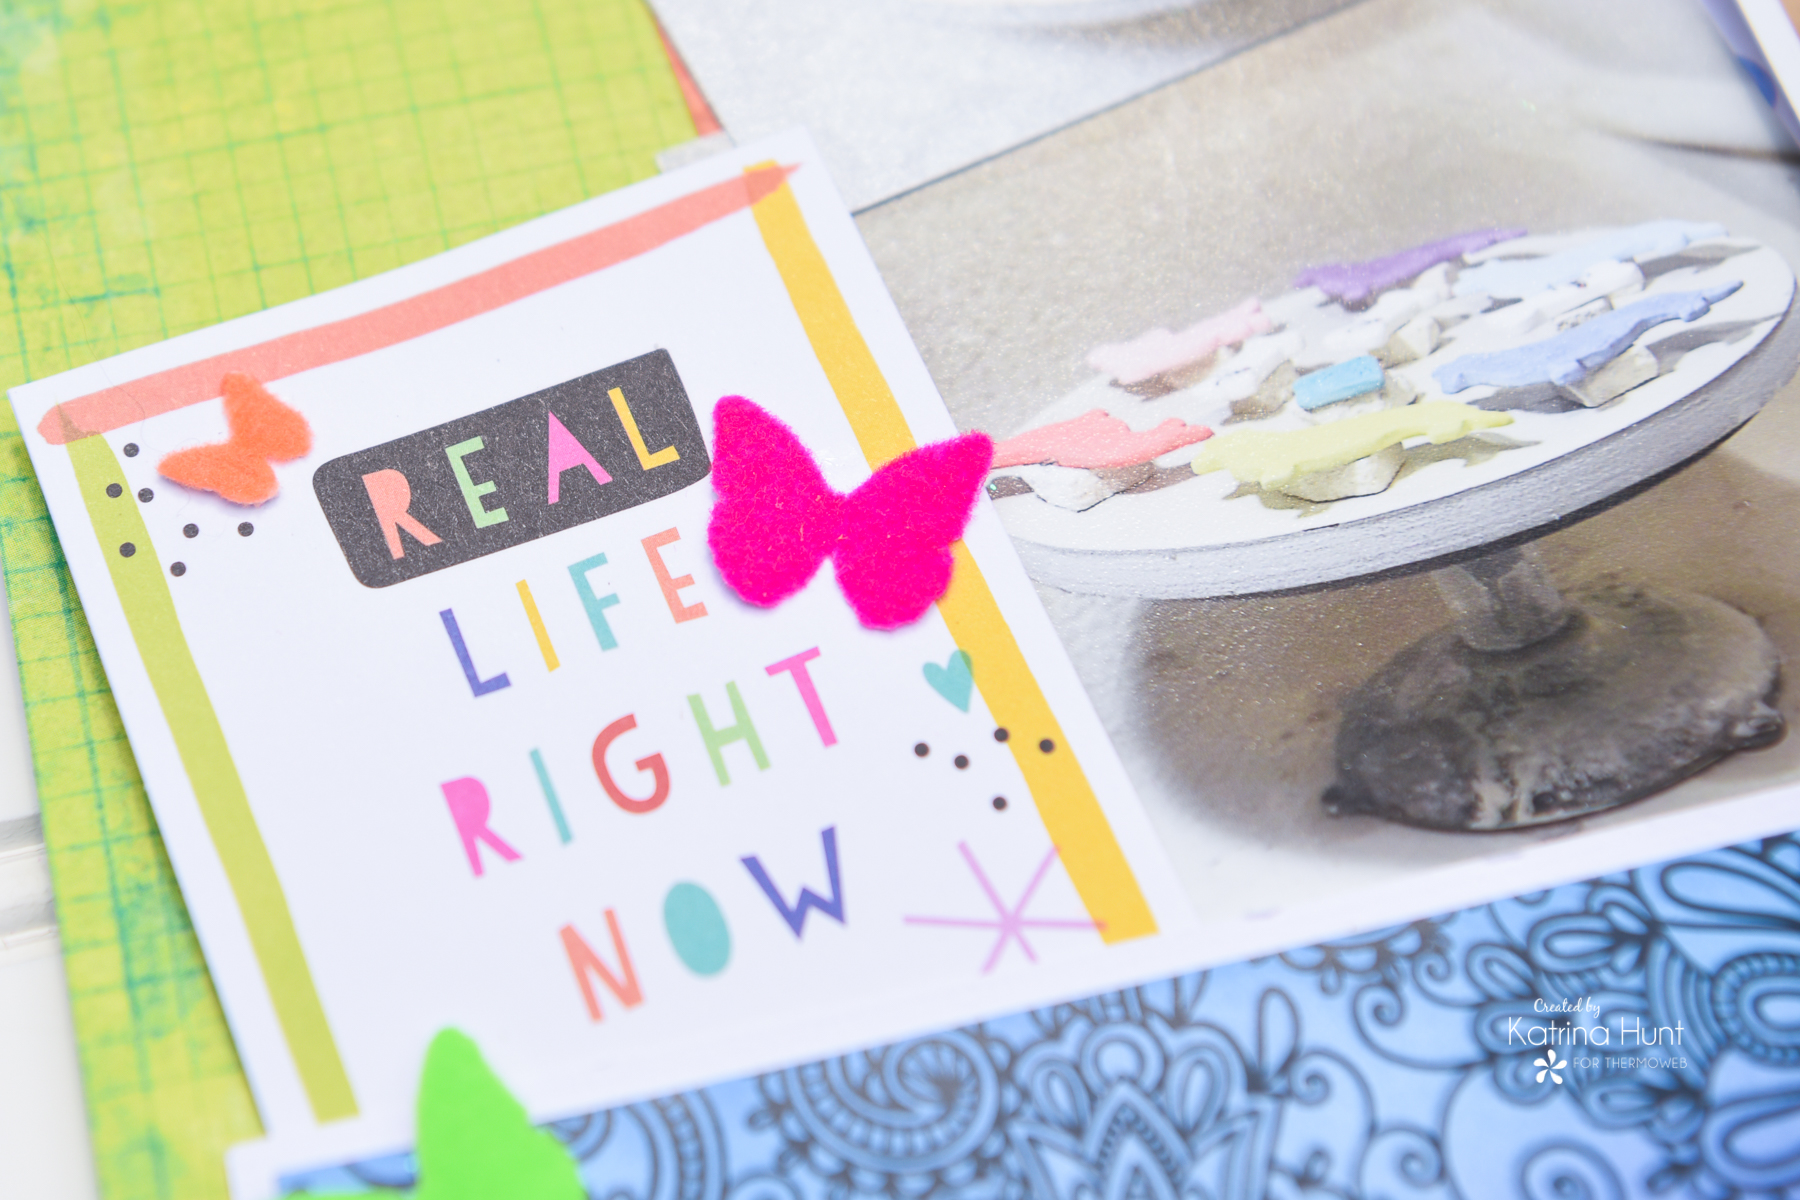
And in case you are trying to figure out what those are…they are pottery pieces that are being glazed for their final kiln firing! Not cookies, on a cake stand!
Thanks for stopping by the blog today!!! Have a wonderful week!!!!